The WDS connects directly to a Remote Collector (RC), enabling both WMI and WinRM discovery. By integrating WDS with the Discovery, you can initiate and manage scans of Windows devices directly from the user interface. This service streamlines asset identification and ensures that your CMDB remains updated with accurate Windows device data.
Note: Available only for new signups after the 31 March, 2026 release. If you signed up earlier, refer to the existing ITAM documentation.
TABLE OF CONTENTS
- Prerequisite
- Installation steps
- Secure the WDS implementation
- Create a new Windows Discovery Job
- Updating your WDS Installation
Prerequisite
You need the following before the installation:
Ensure you have administrator privileges in Freshservice.
The Windows machine must have .NET runtimes installed to run the .NET service. Generate the Remote Collector OTP
When you are running the installer, you must generate a one-time password (OTP) to link the WDS to your Remote Collector. Follow these steps:
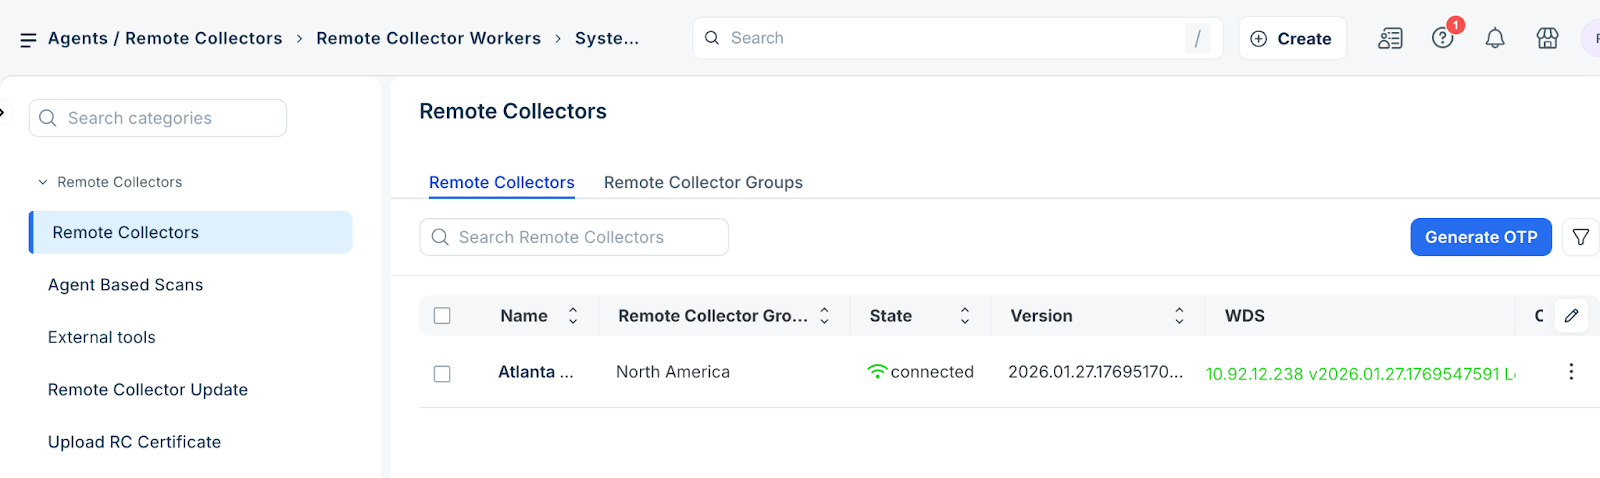
Go to Admin > Asset Management > Discovery Hub.
Select Remote Collectors and Agents and click the Remote Collector tab.
Click Generate OTP and copy the code for later use.
Note: You can use the same OTP for WDSs that was used for RCs.
Installation steps
To install and link the WDS, follow these steps:
Go to Admin > Asset Management > Discovery Hub.
Select Remote Collectors and Agents > External tools.
In the Window Discovery Services section, click Download.
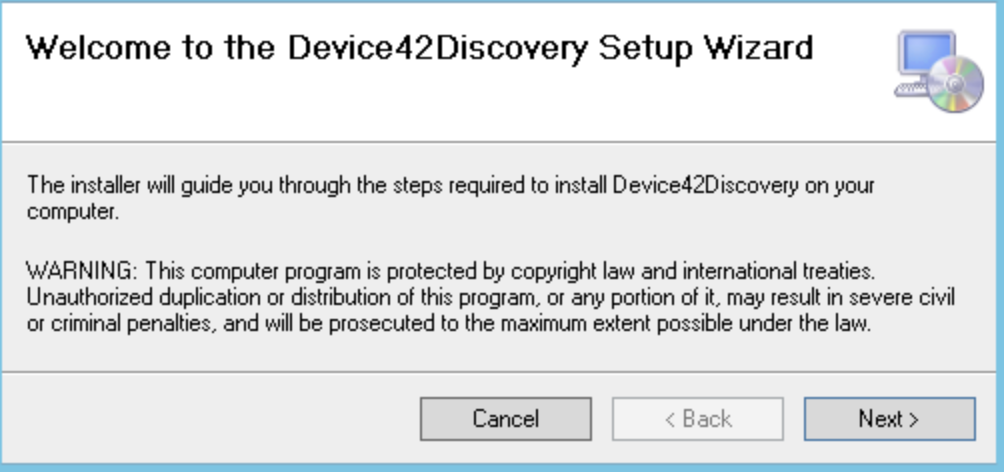
Run the downloaded Device42Discovery.msi installer.
Click Next and follow the prompts.
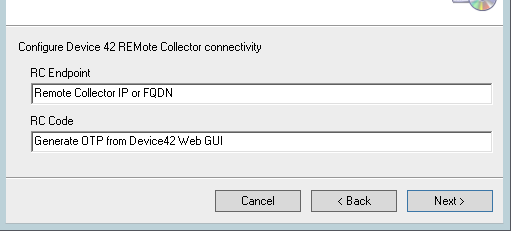
In the RC Link Setup window, configure the following:
RC Endpoint: Enter the Remote Collector IP address or FQDN.
RC Code: Enter the OTP generated in the previous procedure.
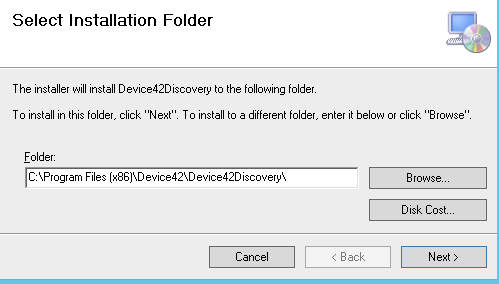
Select the installation folder. You can accept the default directory or specify a custom path.
Click Next to confirm and start the installation.
You can verify the successful installation by checking the Remote Controller page to ensure that WDS indicator icon has turned green.
Secure the WDS implementation
To ensure secure communication, install a valid certificate on the Remote Collector and update the WDS configuration.
Install a valid SSL certificate on your Remote Collector.
Open the WDS runtime configuration file in a text editor.
Locate the <appSettings> section.
Change the IgnoreSSLErrors value to false: <add key="IgnoreSSLErrors" value="false"/>
Save the file.
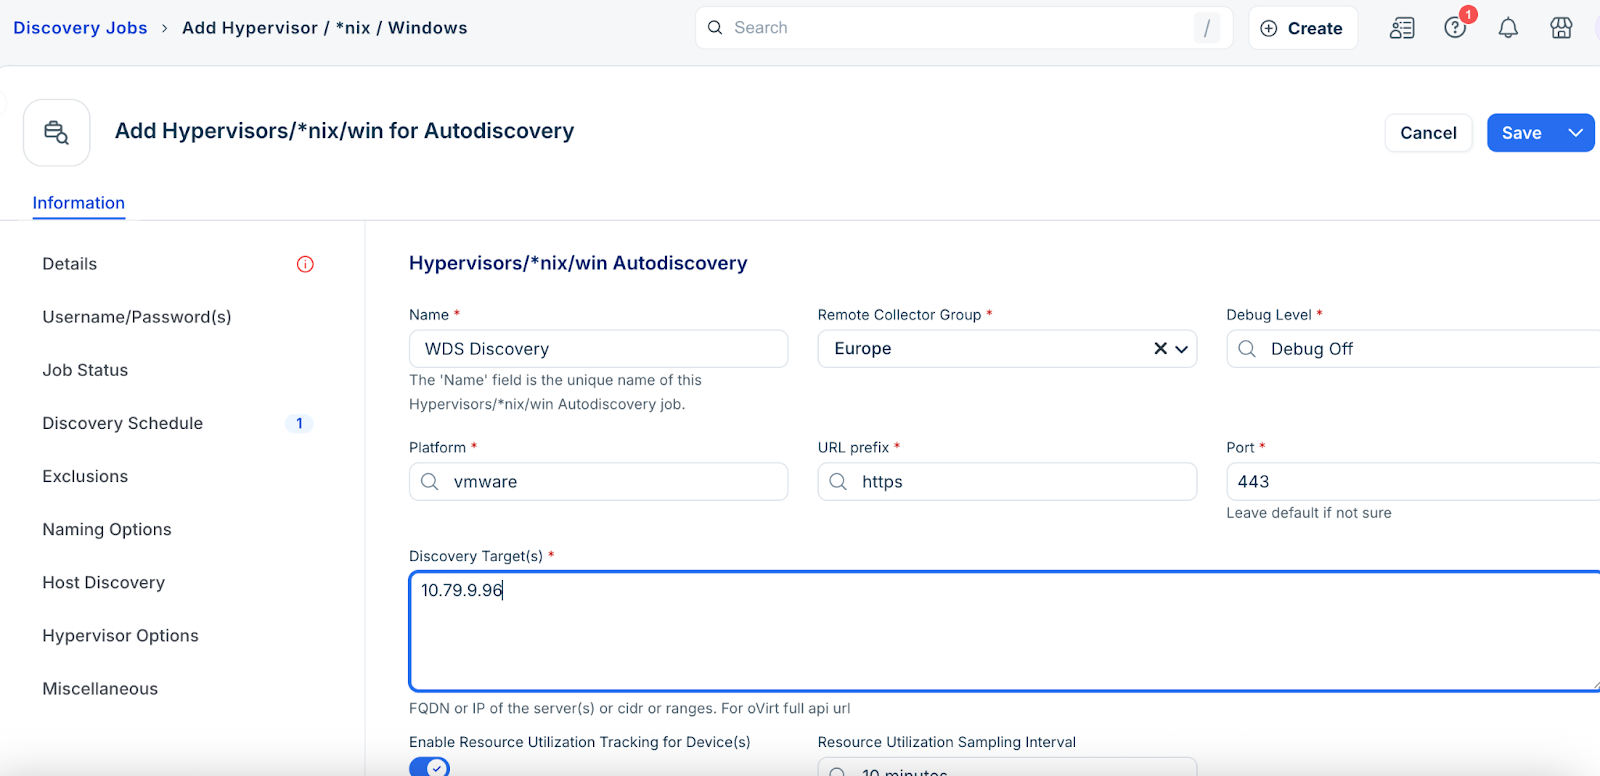
Create a new Windows Discovery Job
Once the WDS is connected, you can run discoveries for Windows devices.
Go to Admin > Asset Management > Discovery Hub.
Select Scan and Discovery > Discovery Jobs.
Select Hypervisors/nix/win for Autodiscovery and click Add new.
Select the WDS that is connected to your Remote Collector.
Click Save.
For more detailed information on how to create a Windows discovery, refer to Windows and Hyper-V Autodiscovery.
Caution: Do not use critical production account credentials for autodiscovery scans. Create a dedicated discovery account, if you use an admin account and it fails on targets, you risk locking the account.
As a best practice creating a dedicated account that has read only access to the targets is better than domain admin.
Updating your WDS Installation
Updates to the WDS service are automatically pushed out in the same way as updates to remote collectors. You do not need to update your WDS installation separately.