 Community
 Video Library
 Agent Training
 Freshservice
 Freshdesk
 Freshchat
 Freshcaller
 Freshsales
 Freshteam
 Freshworks Neo
 Freshsurvey
 Freshservice for MSP
TABLE OF CONTENTS
- Overview
- Prerequisites and plan availability
- The modernized permissions framework
- Create a custom admin role with granular permissions
- Create a custom agent role with granular permissions
Overview
Granular Role-Based Access Control (GRBAC) provides Freshservice administrators with fine-grained control over user permissions across service desk operations and administrative configurations. By shifting from broad access bundles to itemized privileges, organizations can enforce least-privilege governance across multi-department service desks.
Prerequisites and plan availability
You must be an Account Admin or hold an administrative role with necessary permissions enabled.
The modernized permissions framework
Freshservice organizes all role permissions in an interactive tabular grid layout, replacing the legacy tree structure.
Two distinct permission types: Entity vs. Allow
Permissions are structured into distinct columns:
Standard entity permissions (View, Create, Edit, Delete): Applied to core records and configuration entities (such as Roles, Departments, and Workflow Automator). For agent and requester accounts, the delete action is labeled Deactivate.
Allow permissions: Applied to operational or procedural actions that do not follow standard record modification rules. Examples include Allow reordering of tasks, Clone Workflow, Export Audit Log, Convert Requester To Agents, and Switch availability mode (manual or work schedule).
New granular framework
Under the legacy permissions framework, multiple operational functions were combined under a single umbrella permission, forcing administrators into all-or-nothing access assignments. The GRBAC model unbundles these capabilities across key administrative and agent areas, including the following examples:
Automated dependency management
The system automatically selects minimum dependent permissions when specific actions are dependent on other permissions:
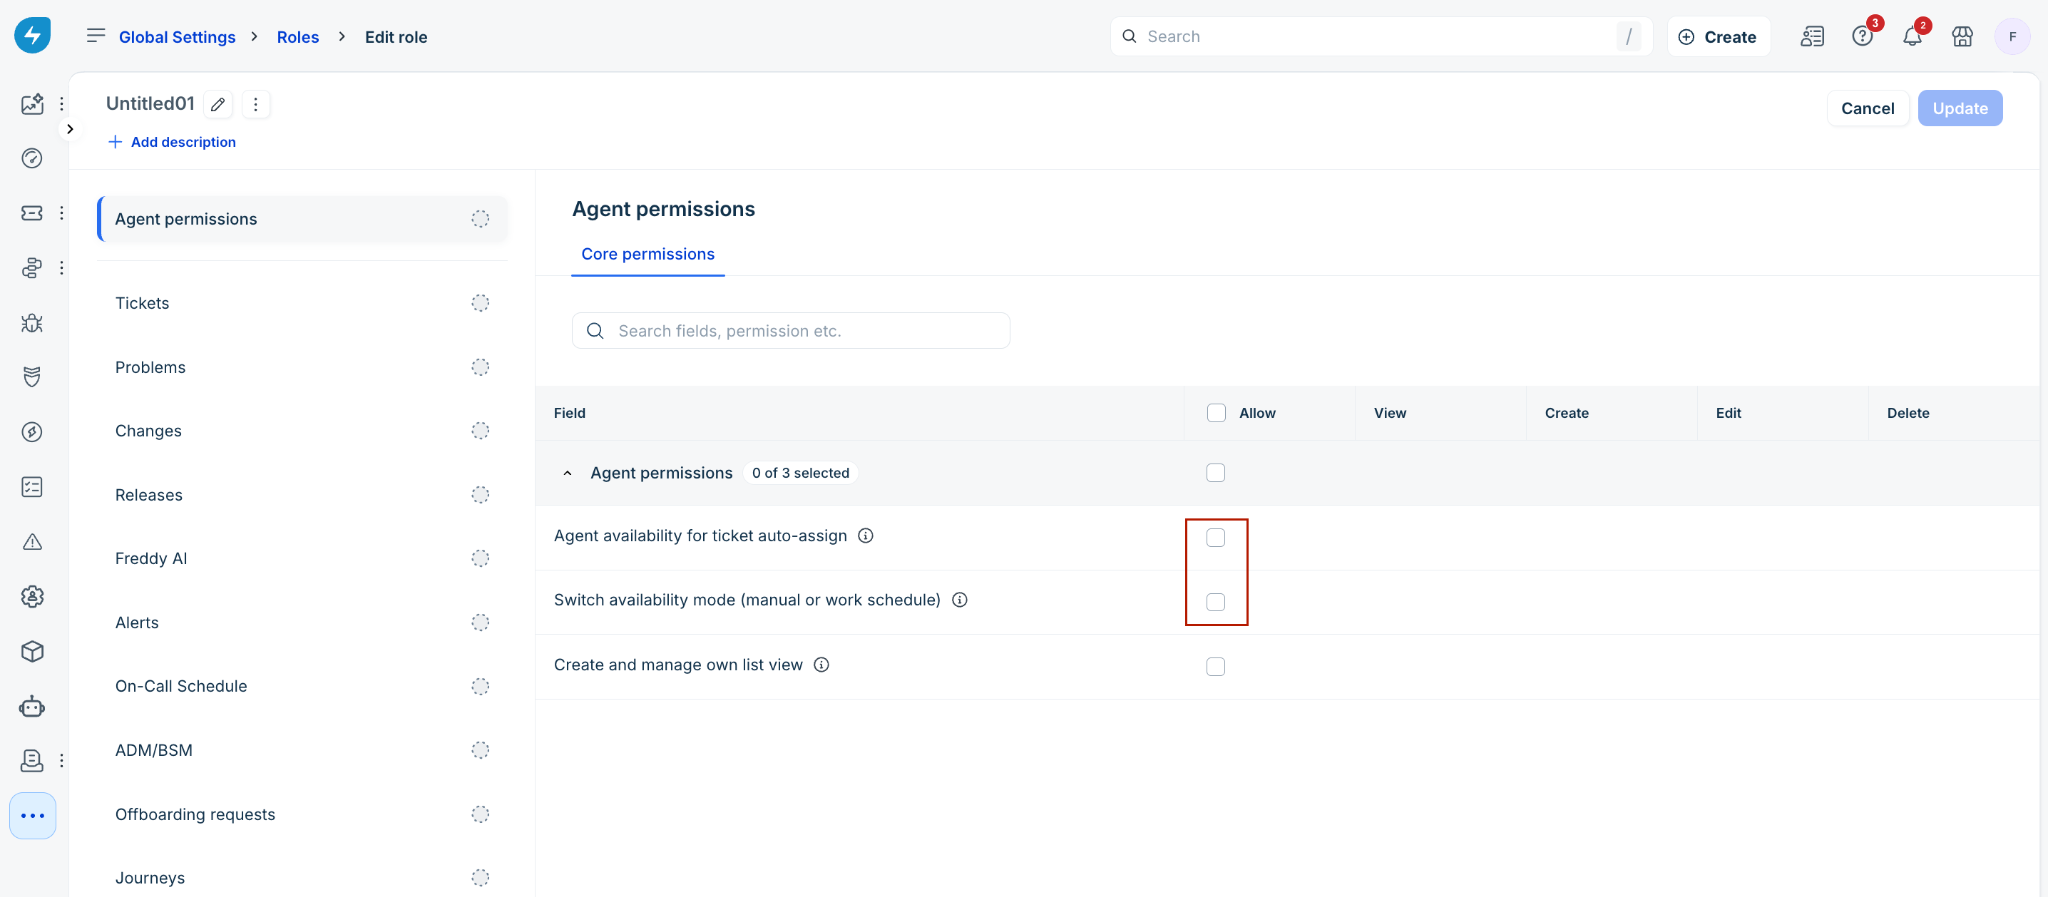
When you select an action that requires prerequisite access, the Enable dependent permissions slider opens automatically on the right side of the screen (see ‘Create a custom agent role with granular permissions’ section for more details).
The slider lists every prerequisite permission required by your selection.
Select Enable: The system automatically selects all dependent check boxes in the grid and updates the module's visual progress indicator.
If you clear a baseline permission that higher-level actions depend on, the system prompts you with a Remove dependent permissions slider to ensure your role does not contain broken access paths.
Key permission dependencies: Examples
The following examples outline target permissions alongside their necessary prerequisite access rules:
Create a custom admin role with granular permissions
Log in to your Freshservice account.
Go to Admin > Global Settings > User Management > Roles.
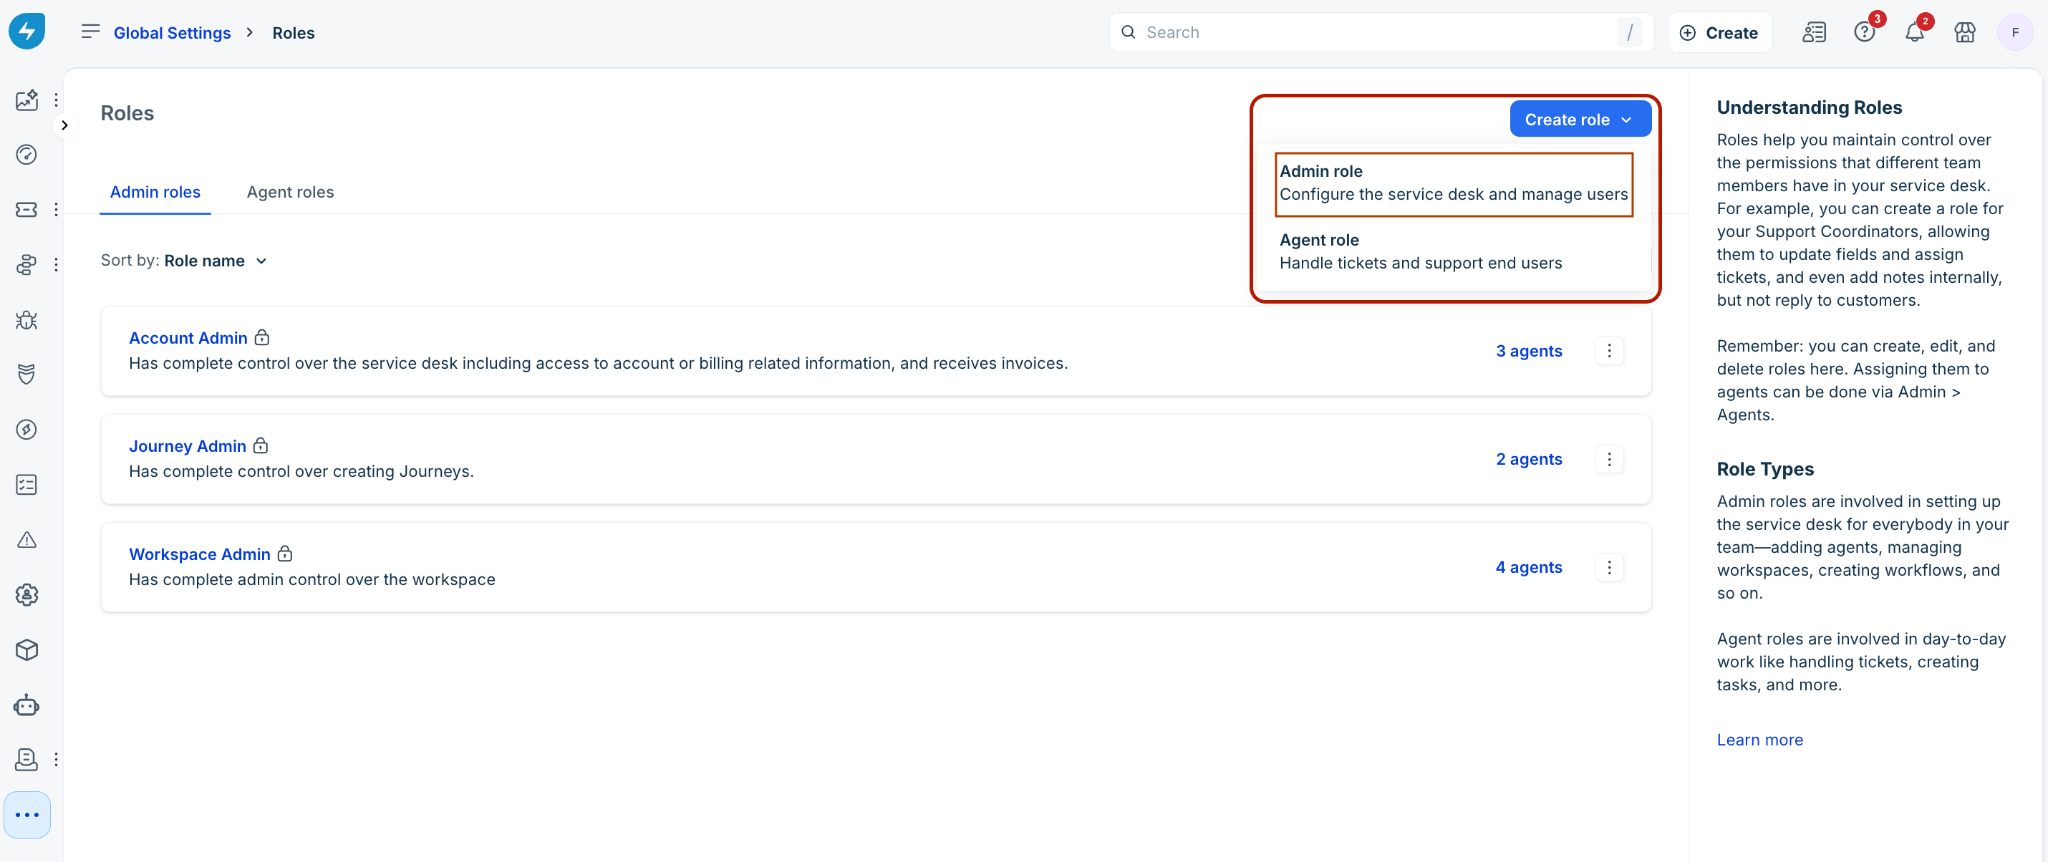
On the Roles page, select the Create role dropdown menu in the upper-right corner and choose Admin role.
On the Create role page, enter a Role Name (replace "Untitled") and an optional Description.
In the left navigation pane, choose the administrative module you want to configure (for example, Account Settings, User Management, or Service Management).
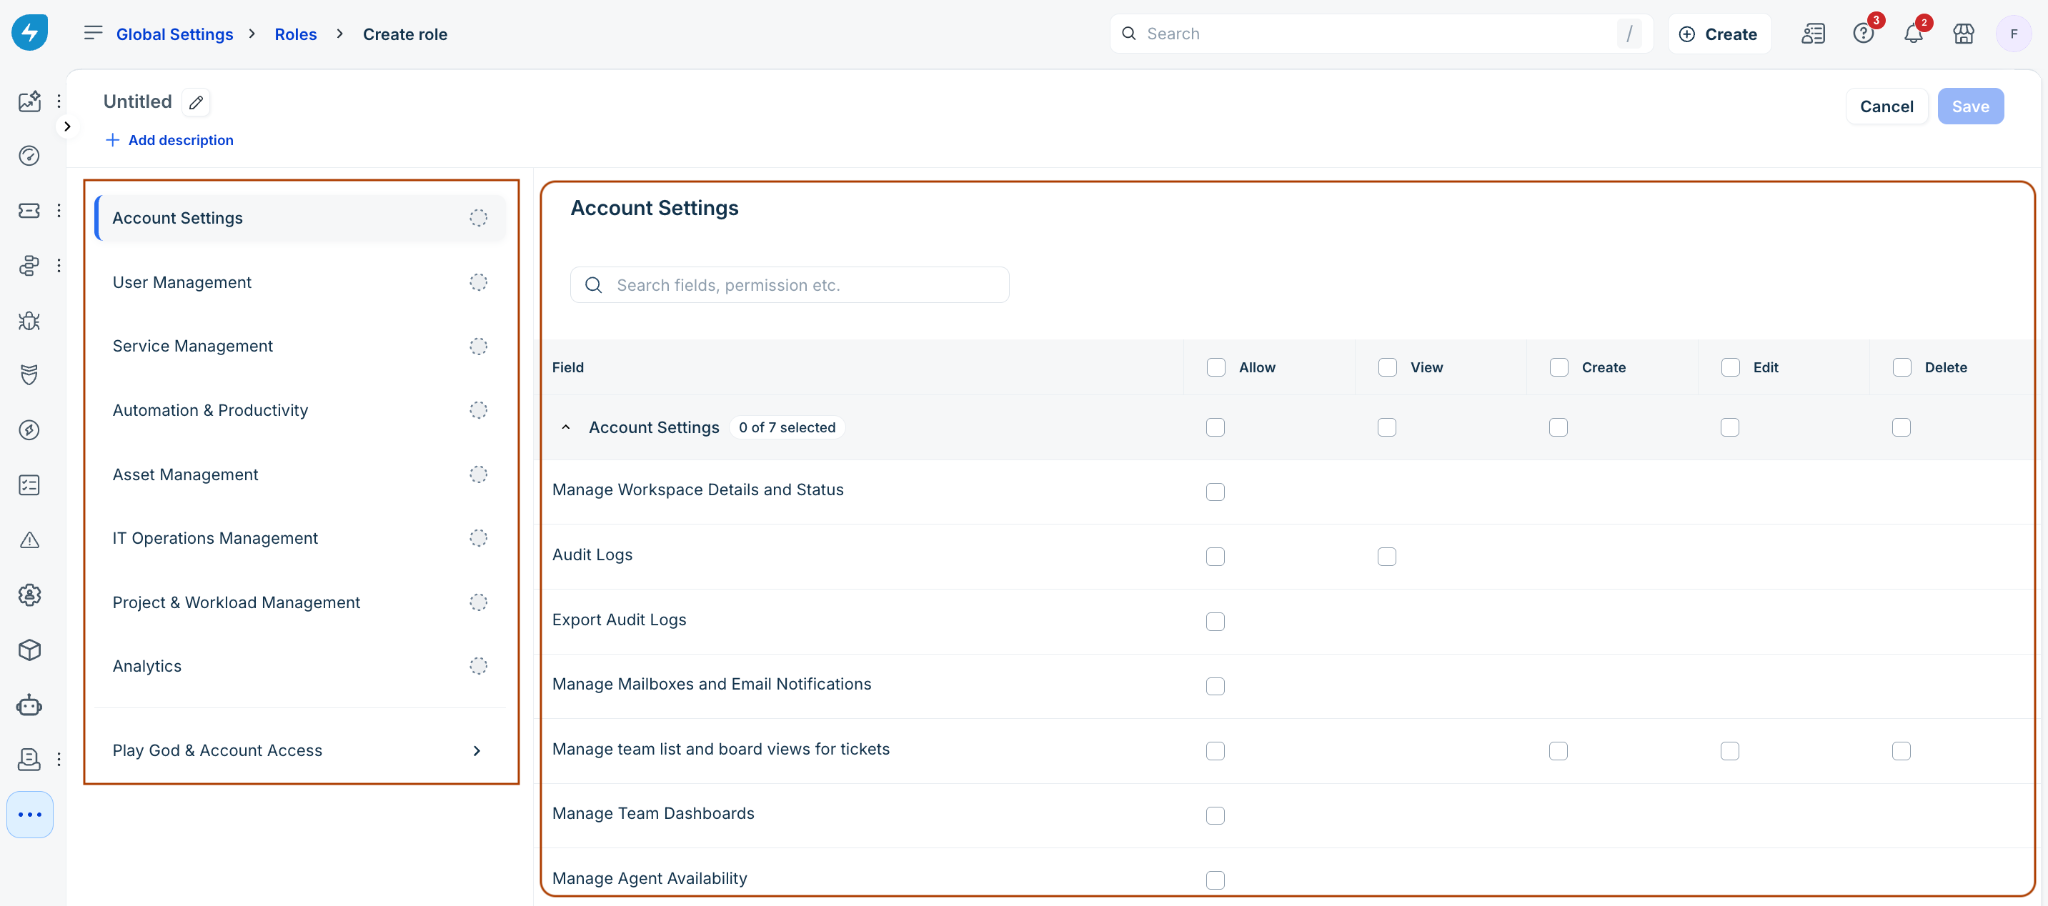
Select the check boxes under Allow, View, Create, Edit, or Delete corresponding to the exact privileges required:
To select all permissions across a column, select the column header check box.
To select all permissions for an entity row, select the entity check box.
Review the visual status progress indicators in the left pane to verify module configuration status (empty circle, half-filled circle, or full circle).
Select Save in the upper-right corner to activate the role.
Create a custom agent role with granular permissions
Go to Admin > Global Settings > User Management > Roles.
Select the Create role dropdown menu in the upper-right corner and choose Agent role.
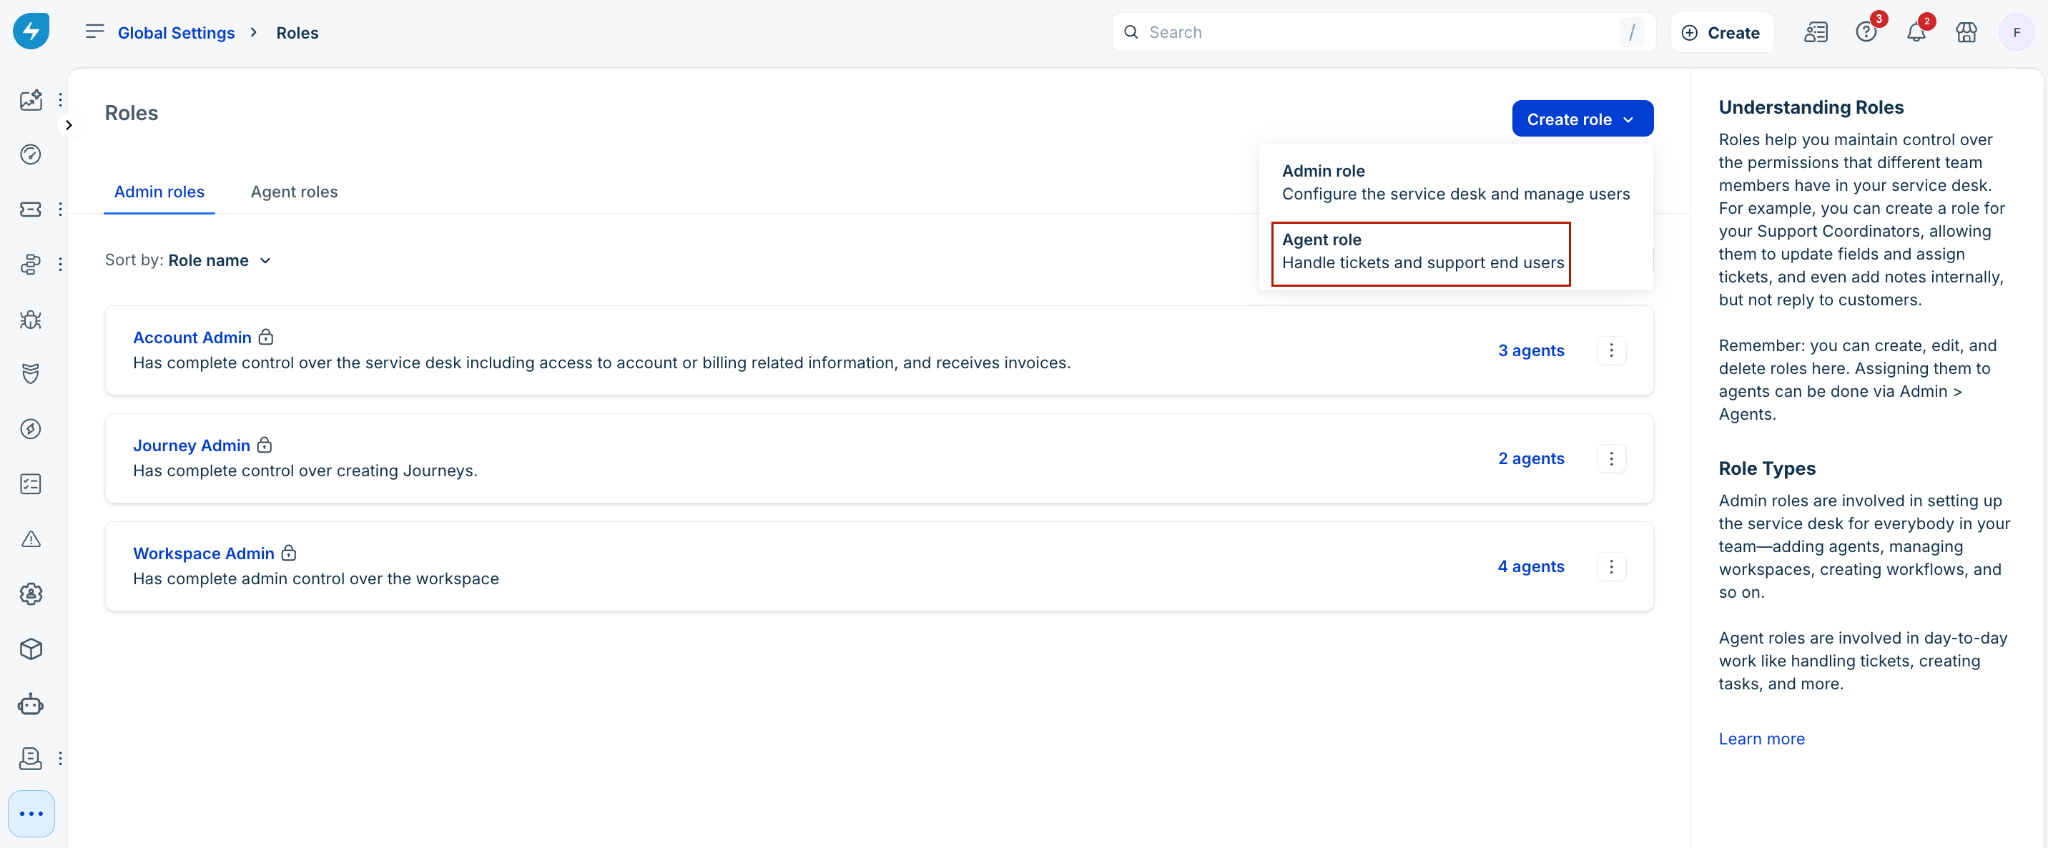
Enter a descriptive Role Name and Description.
In the left navigation pane, select Agent permissions to view core operational privileges.
In the permissions grid, select the appropriate operational check boxes under Allow (for example, Agent availability for ticket auto-assign, Switch availability mode, or Create and manage own list view).
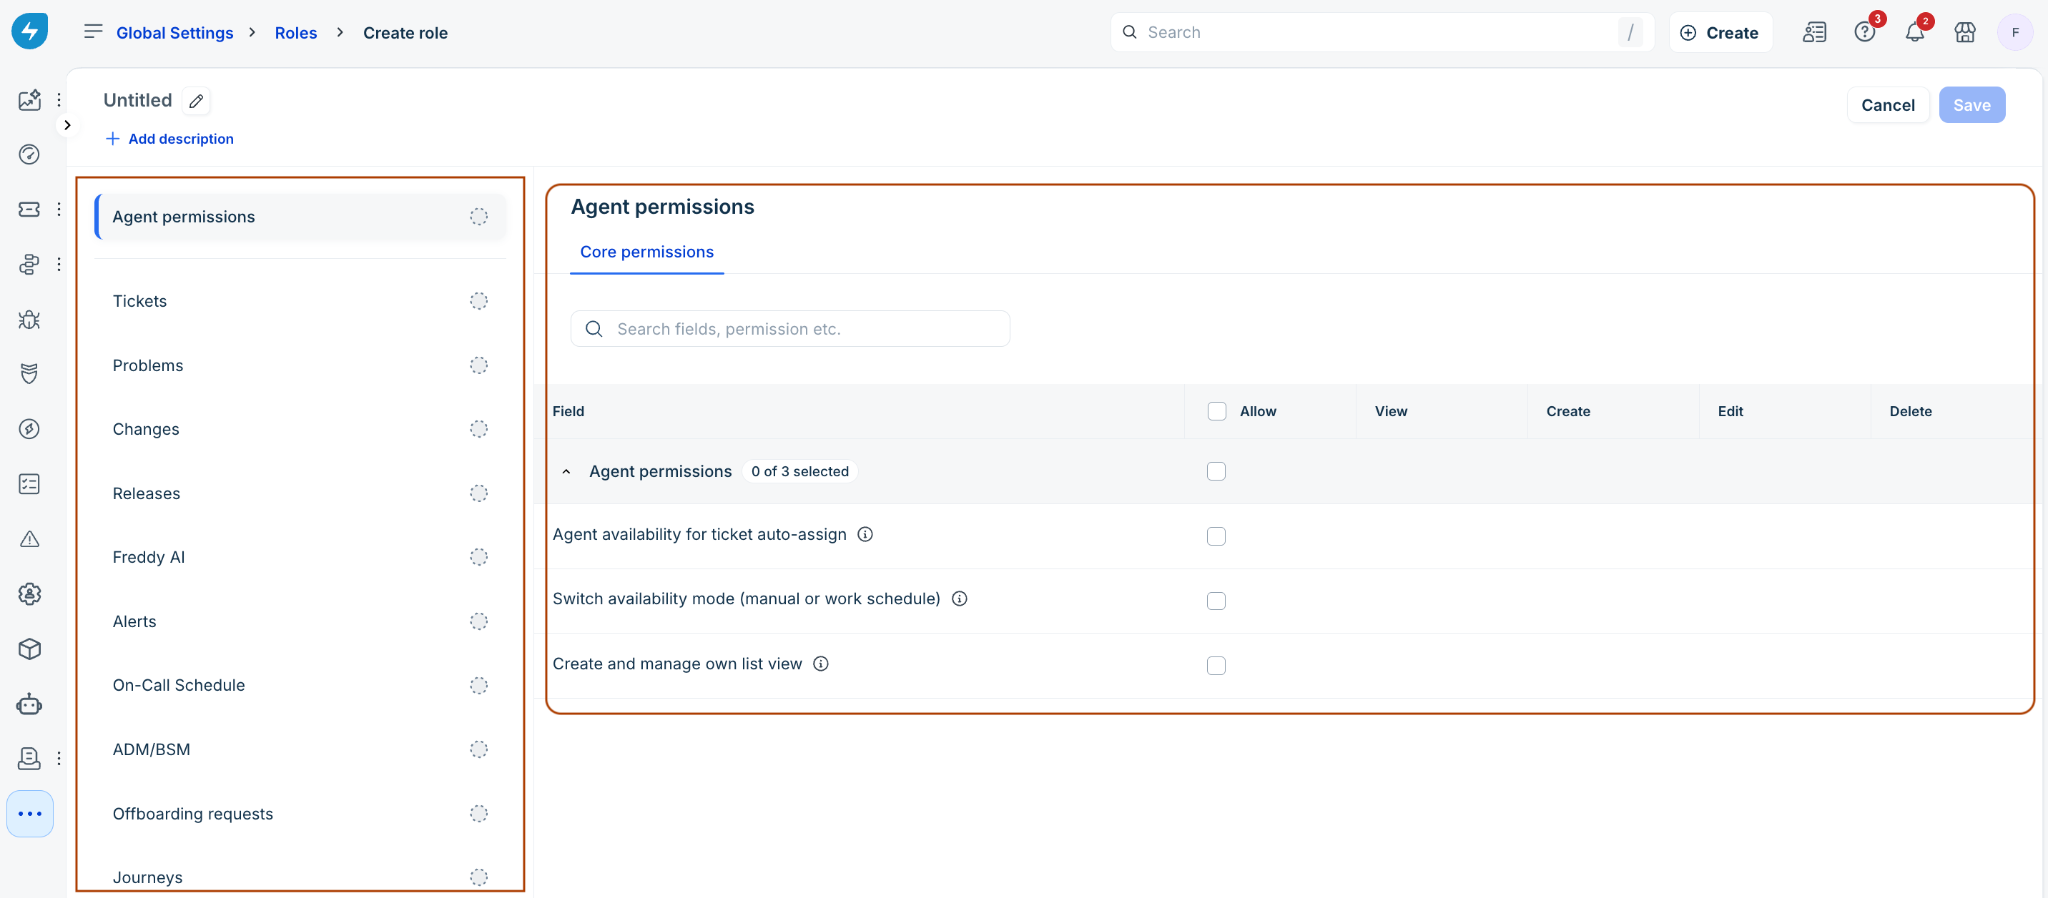
Select Tickets in the left menu to configure agent ticketing privileges (View, Create, Edit, Delete, Ticket attachments, Encrypted ticket fields, Export tickets, etc.).
Select Save to activate the agent role.
Handle prerequisite permissions (via the dependency slider)
On the role creation screen, select an operational action that requires baseline access (for example, selecting Allow for Switch availability mode (manual or work schedule)).
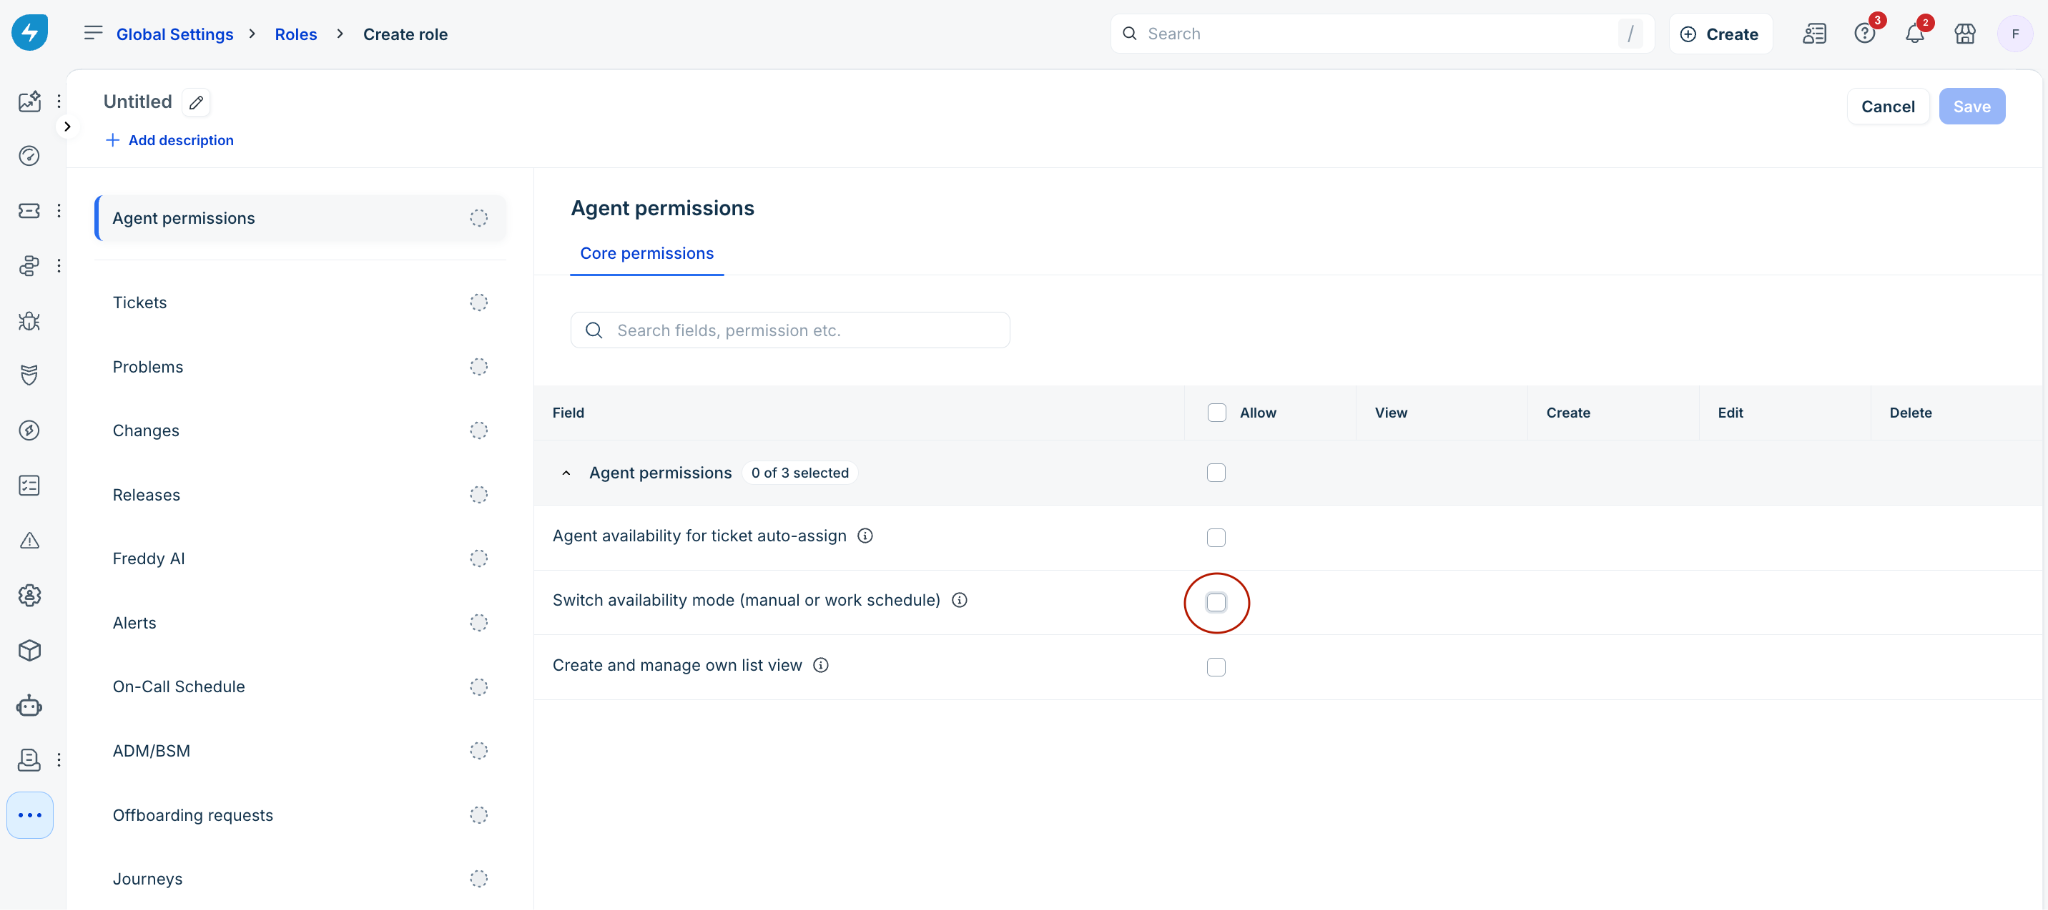
The Enable dependent permissions slider automatically opens on the right side of the screen, listing all required prerequisite privileges.
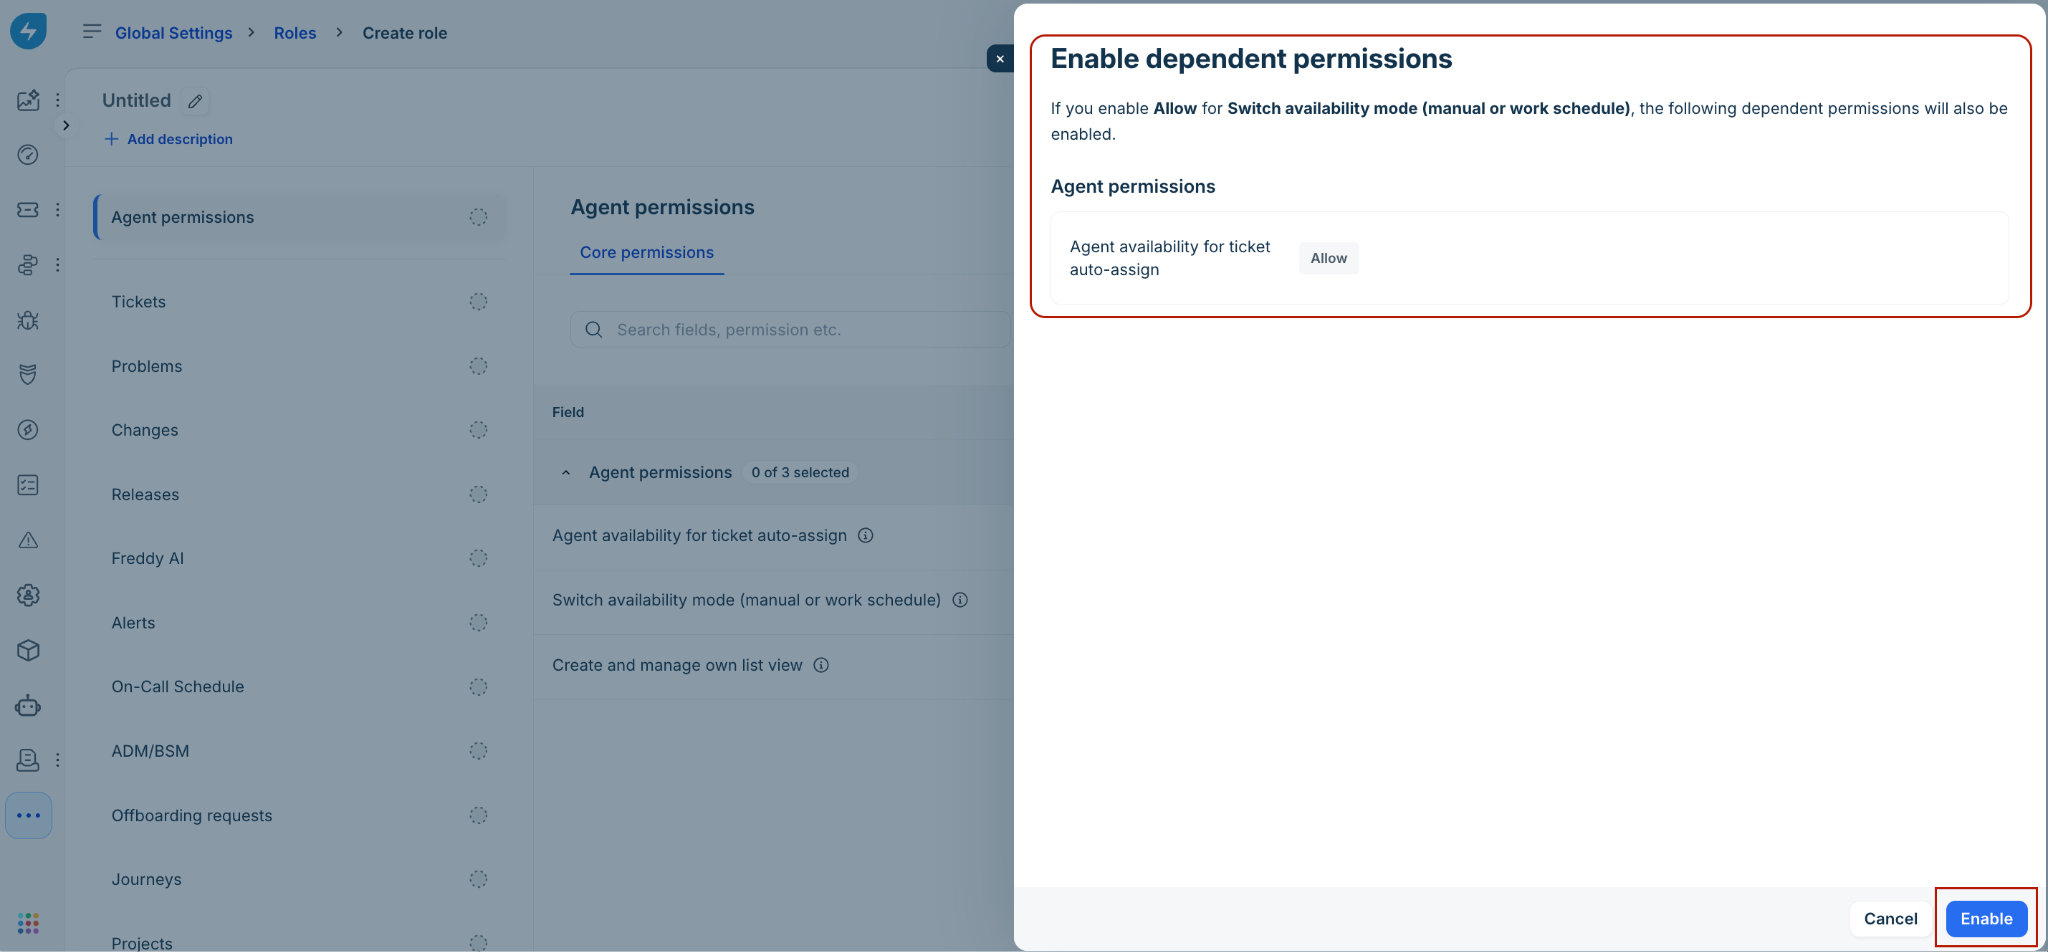
Select Enable at the bottom of the slider.
The system automatically selects both the target permission and all prerequisite check boxes in the grid, while updating the module's visual progress indicator in the left menu.
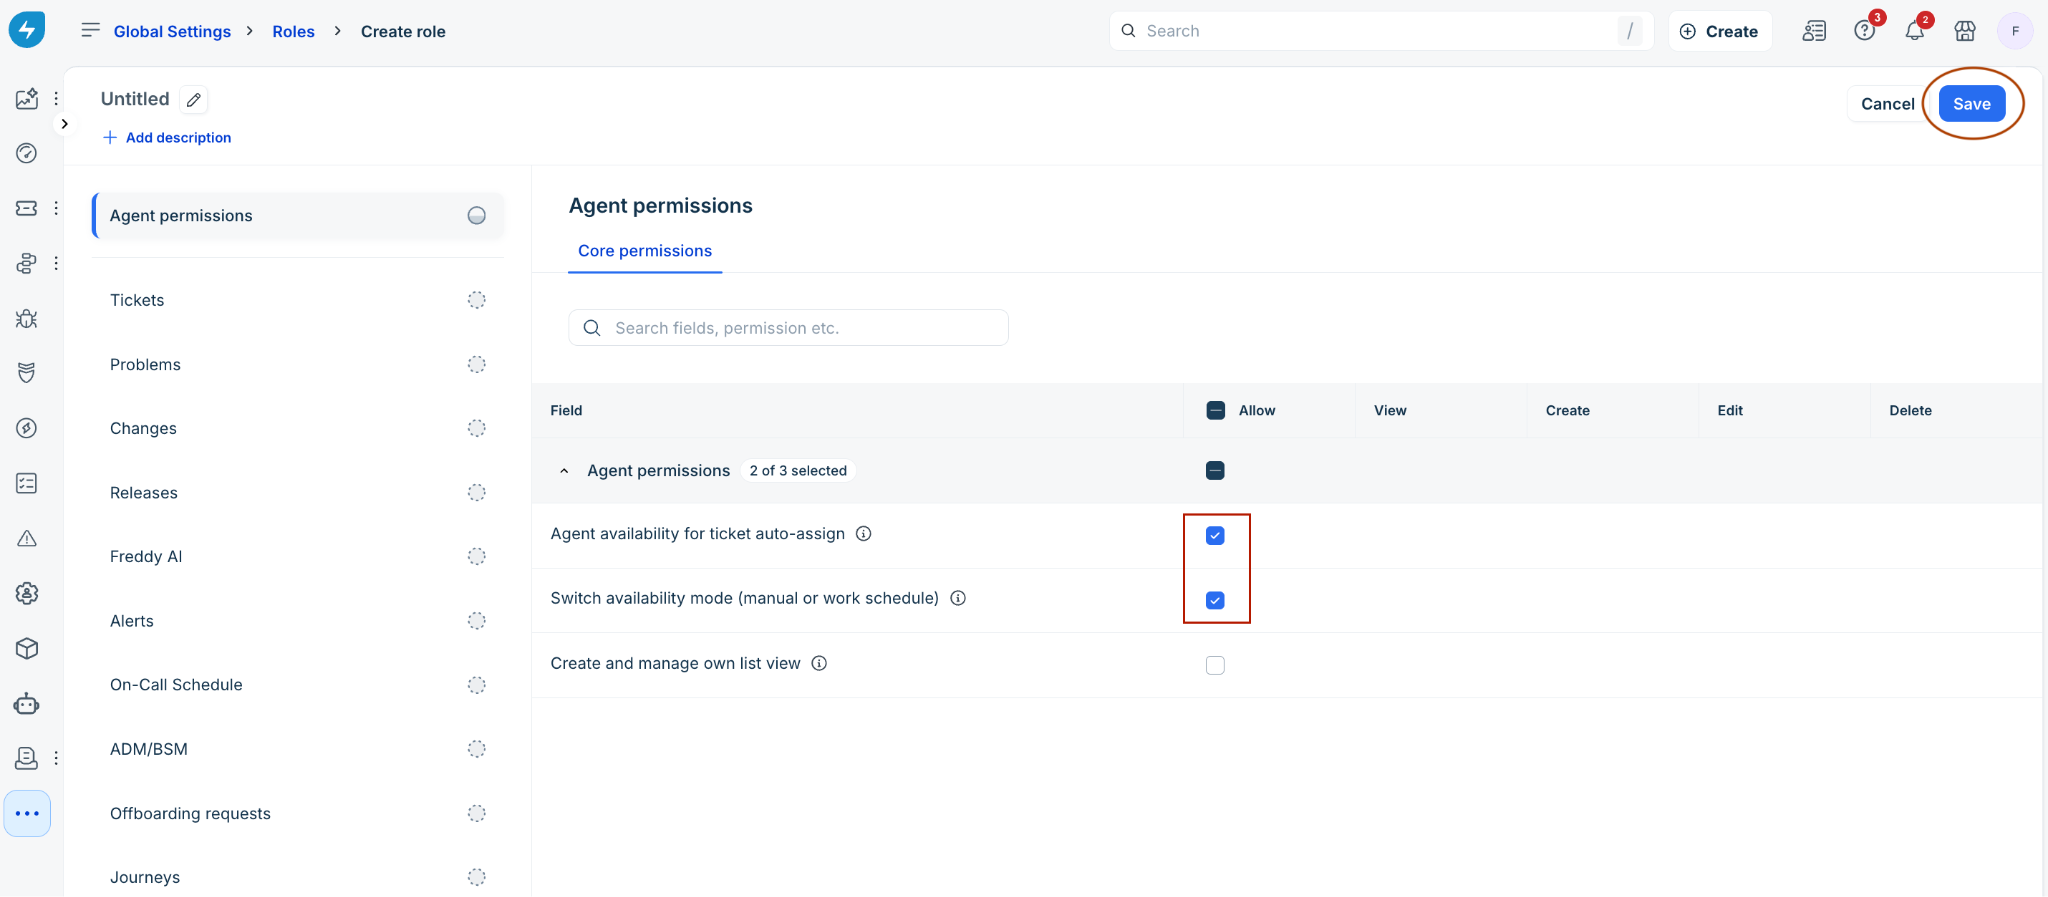
Select Save.
The Review changes slider automatically opens on the right side of the screen.
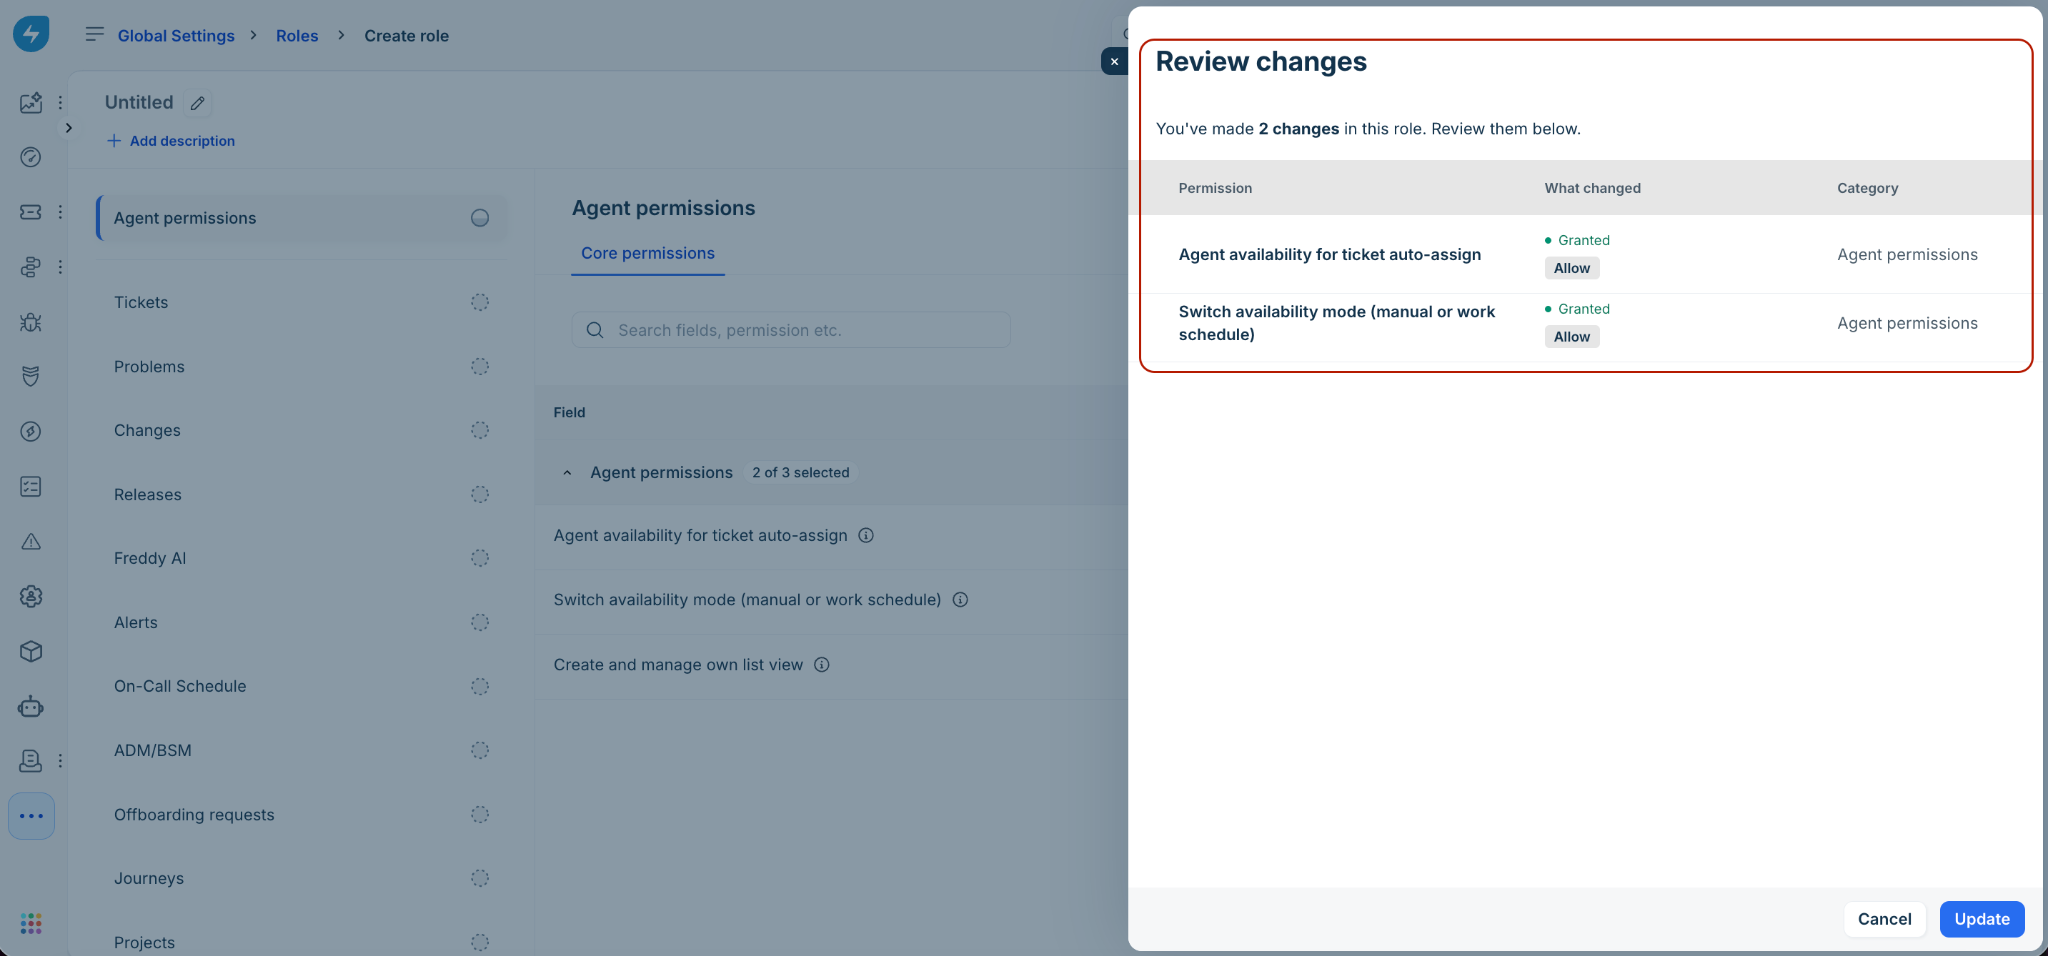
Select Update. The selected permissions are updated.
(To remove dependent permissions) Uncheck the relevant dependent permission.
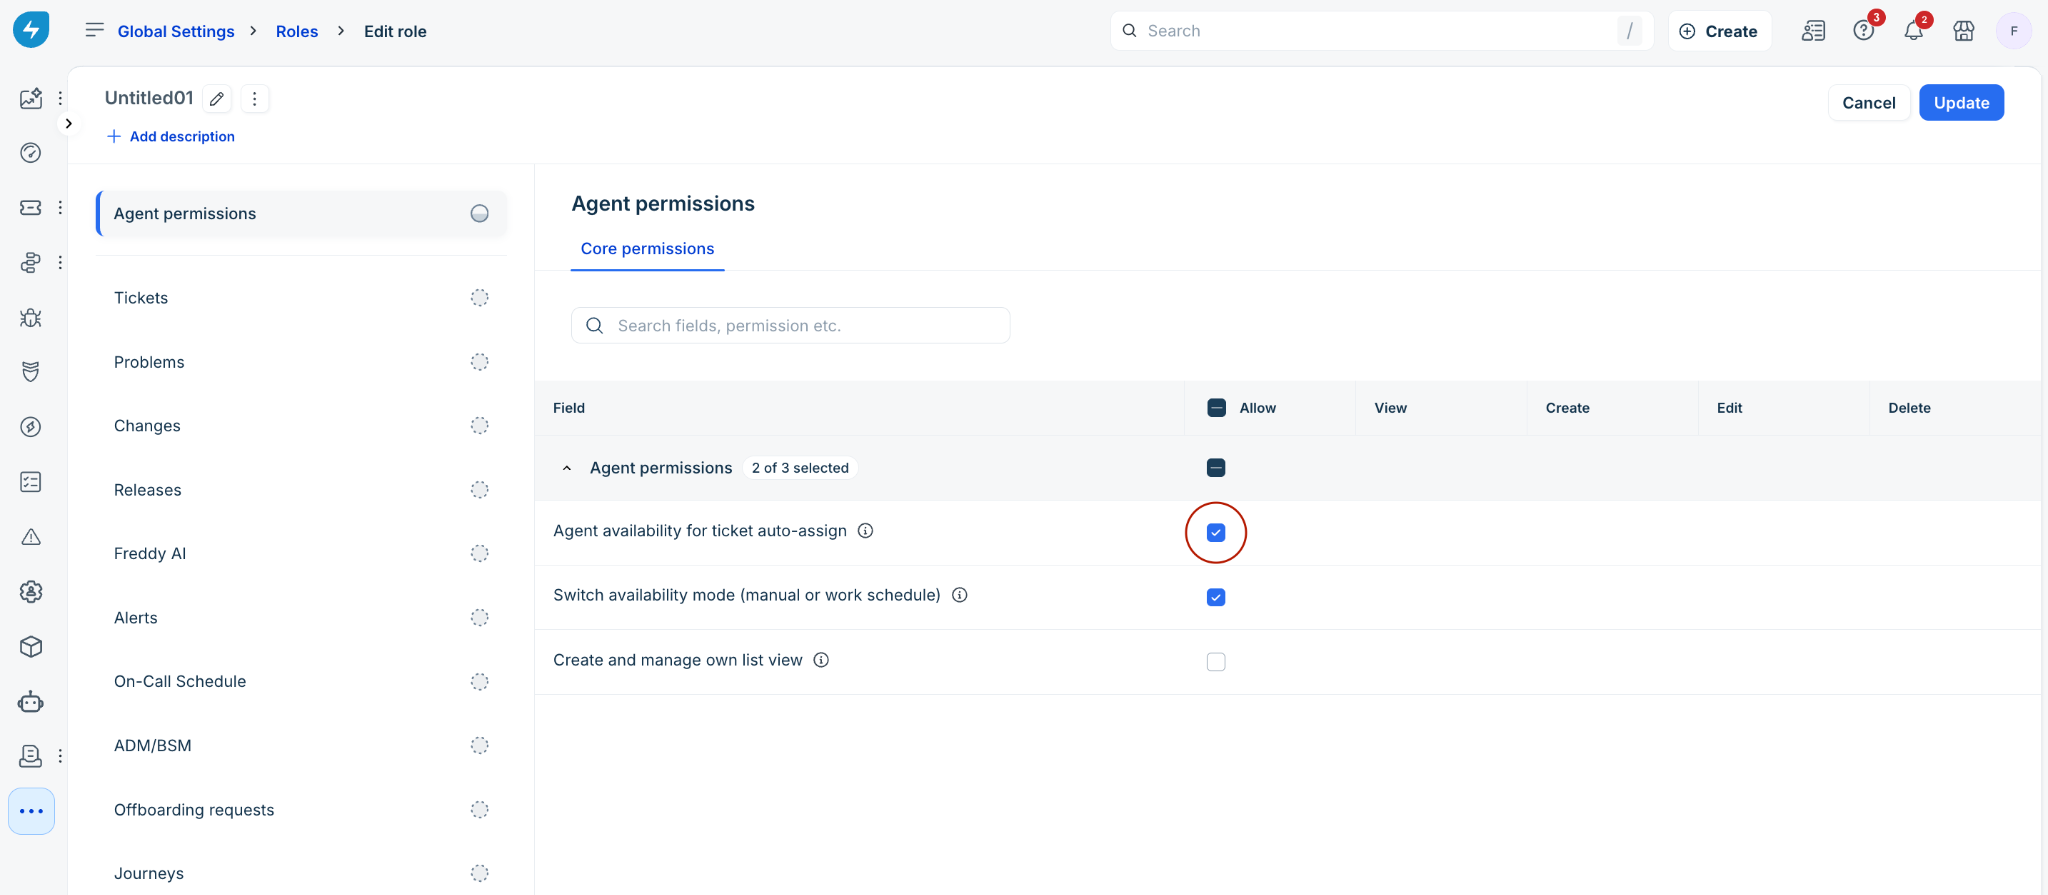
The Remove dependent permissions slider automatically opens on the right side of the screen.
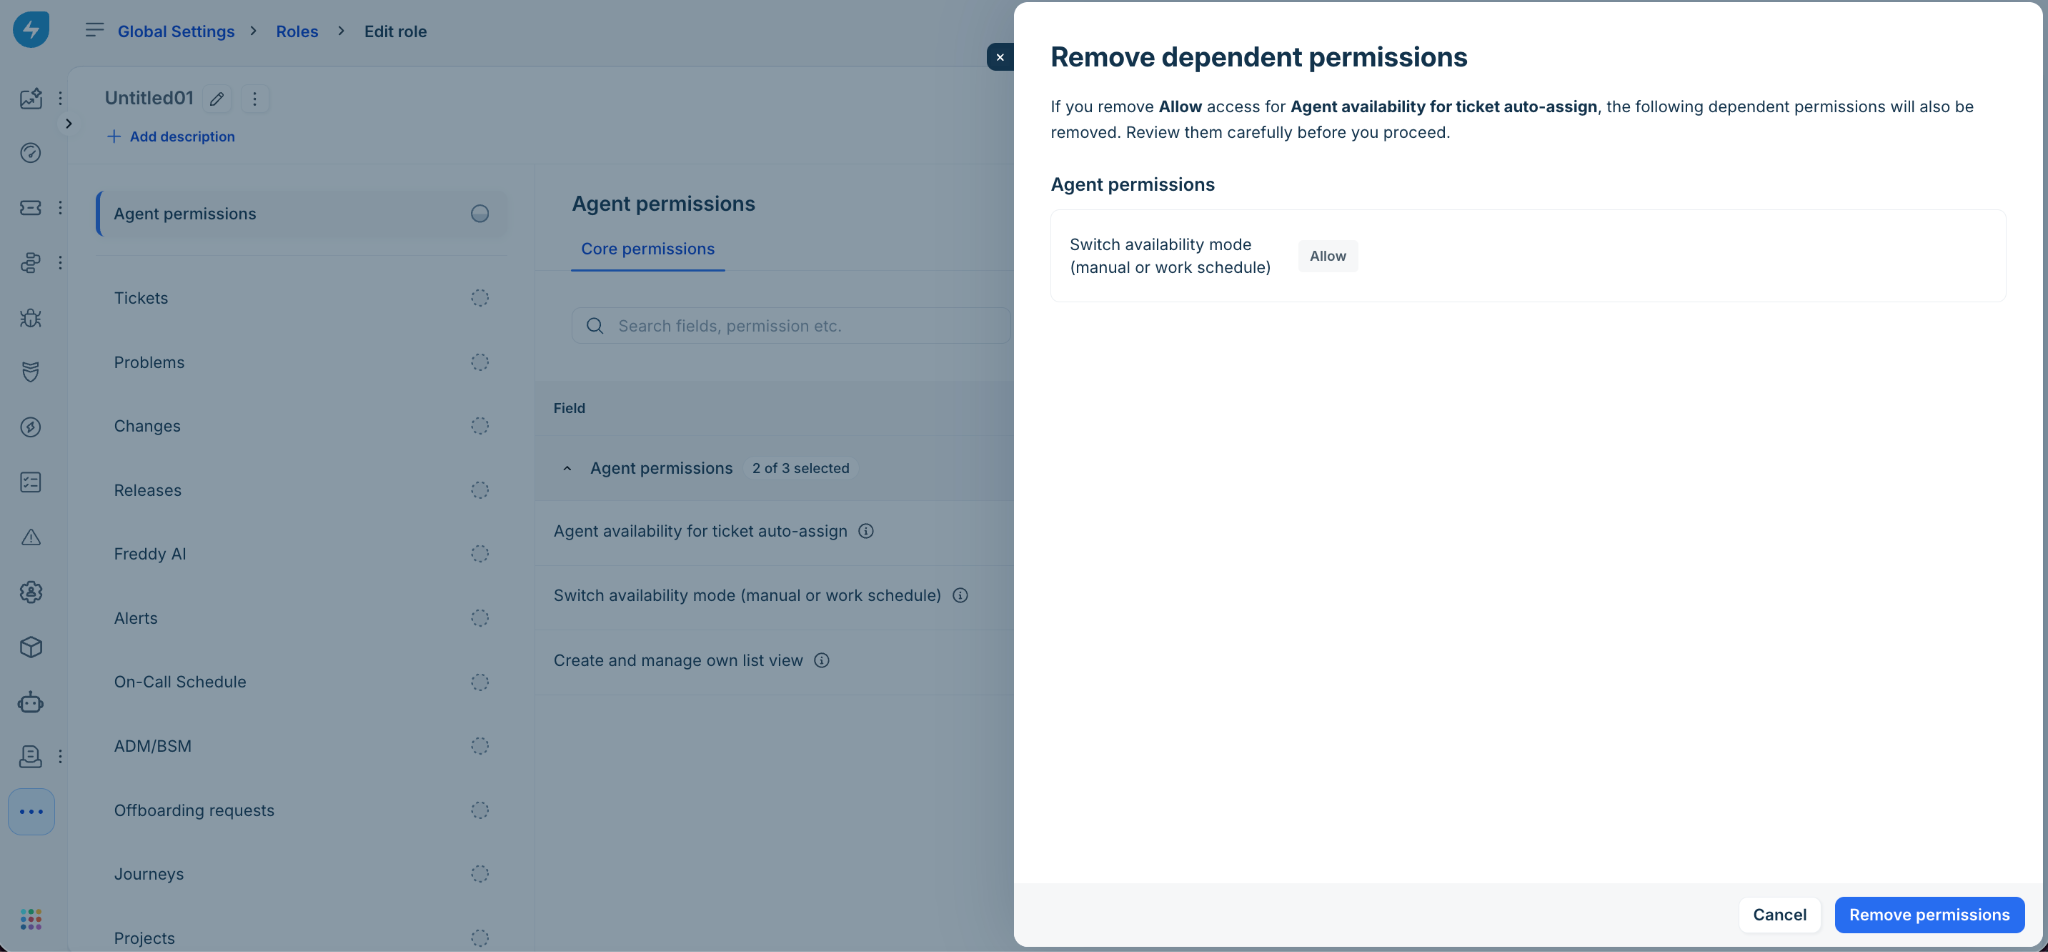
Select Remove permissions. The system automatically removes both the target and dependent permissions.