
 Community
 Video Library
 Agent Training
 Freshservice
 Freshdesk
 Freshchat
 Freshcaller
 Freshsales
 Freshteam
 Freshworks Neo
 Freshsurvey
 Freshservice for MSP
 Freshservice lets you track the physical location of devices and assets by assigning them to racks within rooms. This article covers how to create and manage racks, add devices and assets to racks, visualize rack layouts, and perform bulk operations.
TABLE OF CONTENTS
- Prerequisites
- View racks
- Add a new rack
- Edit a rack
- Delete a rack
- Add devices to a rack
- Add assets to a rack
- Add power unit to a rack
- Perform bulk actions on racks
- Clone racks
- Export racks
Prerequisites
You need the following before managing racks:
Configure Asset Management permission in your administrator role in Freshservice.
An active IT Asset Management (ITAM) add-on to access the Racks module.
View racks
To view racks, go to Admin > Infrastructure > Racks to view the Racks list page.
On the Racks list page, you can:
Review the rack list.
Use filters, search, and sorting to locate racks.
Check the Available Us column to evaluate available capacity.
View the existing rack’s layout by clicking on the Show link in the Layout column.
Add a new rack
To add a new rack, follow these steps:
Go to the Racks list, and then select Add new. The Add Rack page opens.
Enter the required details:
Name: Enter a name for the rack.
Workspace: Select the workspace to associate with the rack.
Note: In multi-workspace accounts, you can choose from available workspaces. In single-workspace accounts, the default workspace is selected automatically.Size (Us): Enter the rack size. The default is 42.
Orientation: Select the rack orientation.
First number: Enter the starting unit number.
Notes:To start numbering from the top, turn off Numbering start from bottom.
To change number placement, toggle Number between U’s. By default, labels appear inside each unit slot. When enabled, labels appear on the boundaries of each slot.
Optionally, provide additional details:
Select a Room
Enter a Row
Select a Manufacturer
Add Tags and Notes
Add QR code and File Attachments
Add devices, assets, or power units
Click Save.
Edit a rack
To update a rack, follow these steps:
Go to the Racks list and click on the name of the rack you want to update.
Click Edit.
Update the required fields.
Click Update.
Delete a rack
To delete a rack, follow the steps:
Go to the Racks list and click on the name of the rack you want to delete.
Click the More options (three vertical dots) menu and select Delete.
In the confirmation dialog, select Delete.
Add devices to a rack
You can add devices to a rack either from the rack page or by using the visual layout view.
Add devices from the rack page
To add devices by using the rack form, follow these steps:
Go to the rack record, then click Edit.
In Devices in this rack section, click Add.
Provide the following details:
Device: Select a device.
Note: Only devices with a Rackable subtype can be mounted on rack shelves. Devices that are not rackable can be placed only around the rack (Top, Bottom, Left, or Right).Start at: Enter the starting unit.
Tip: Click Find Next Slot to automatically place the device.Where: Select the device position (Left, Right, Top, Bottom, Rack Mounted, Shelf).
Note: To be rack-mounted, a device must have a hardware model with a defined size.Orientation: select the orientation of the device.
Reversed: Enable this toggle to reverse the placement of the device.
Add any other details and click Update to save your changes.
Note: You can also add rack placement details for rackable devices from the device detail page.
Add devices using the layout view
To add devices visually, follow these steps:
Go to the rack record, then open the Rack layout tab.
Click Edit layout.
In the Configure rack section, under Select an object, select Device. Then choose the device and its location.
The Drag items to move their position on the rack section displays a movable image of the device.Drag the device onto the rack layout.
Click Save.
Add assets to a rack
You can add assets to a rack either from the rack form or by using the visual layout view.
Add assets from the rack page
To add assets using the rack form, follow these steps:
Go to the rack record, then click Edit.
In Assets in this rack section, click Add.
From the Assets drop-down menu, select an asset.
Provide the following details:
Size: Enter the size of the asset in U
Note: Asset sizes can include decimal values.Depth: Select the Depth of the asset (Full Depth or Half Depth)
Start at: Enter the starting position of the asset on the rack
Where: Select the asset position (Left, Right, Top, Bottom, Rack Mounted, Shelf)
Orientation: Select the orientation of the asset.
Reversed: Enable this toggle to reverse the placement of the asset.
Add any other details and click Update to save your changes.
Add assets using the layout view
To add assets visually, follow these steps:
Go to the rack record, then open the Rack layout tab.
Click Edit layout.
In the Configure rack section, under Select an object, select Asset. Then choose the asset and its location.
The Drag items to move their position on the rack section displays a movable image of the asset.Drag the asset onto the rack layout.
Click Save.
Add power unit to a rack
You can add Power Units to a rack either from the rack form or by using the visual layout view.
Add power unit from the rack page
To add using the rack form, follow these steps:
Go to the rack record, then click Edit.
In the Power Units in this rack section, click Add.
From the Power unit drop-down menu, select a power unit.
Provide the following details:
Where: Select the asset position (Left, Right, Top, Bottom, Rack Mounted, Shelf)
Position: Enter value between 0 to 2520. 0 is closest to the rack.
Start at: Enter the starting position of the power unit on the rack
Orientation: Select the orientation of the power unit.
Reversed: Enable this toggle to reverse the placement of power unit
Add any other details and click Update to save your changes.
Add power unit using the layout view
To add assets visually, follow these steps:
Go to the rack record, then open the Rack layout tab.
Click Edit layout.
In the Configure rack section, under Select an object, select Power unit
Choose the power unit and its location.
Note: The Rack Mounted location requires the PDU to have a power unit model attached.
The Drag items to move their position on the rack section displays a movable image of the asset.Drag the power unit onto the rack layout.
Click Save.
Perform bulk actions on racks
To perform bulk actions on rack records:
Go to the Racks list page.
Select one or more racks.
Choose an action from the actions bar. To view additional actions, click More options (three vertical dots).
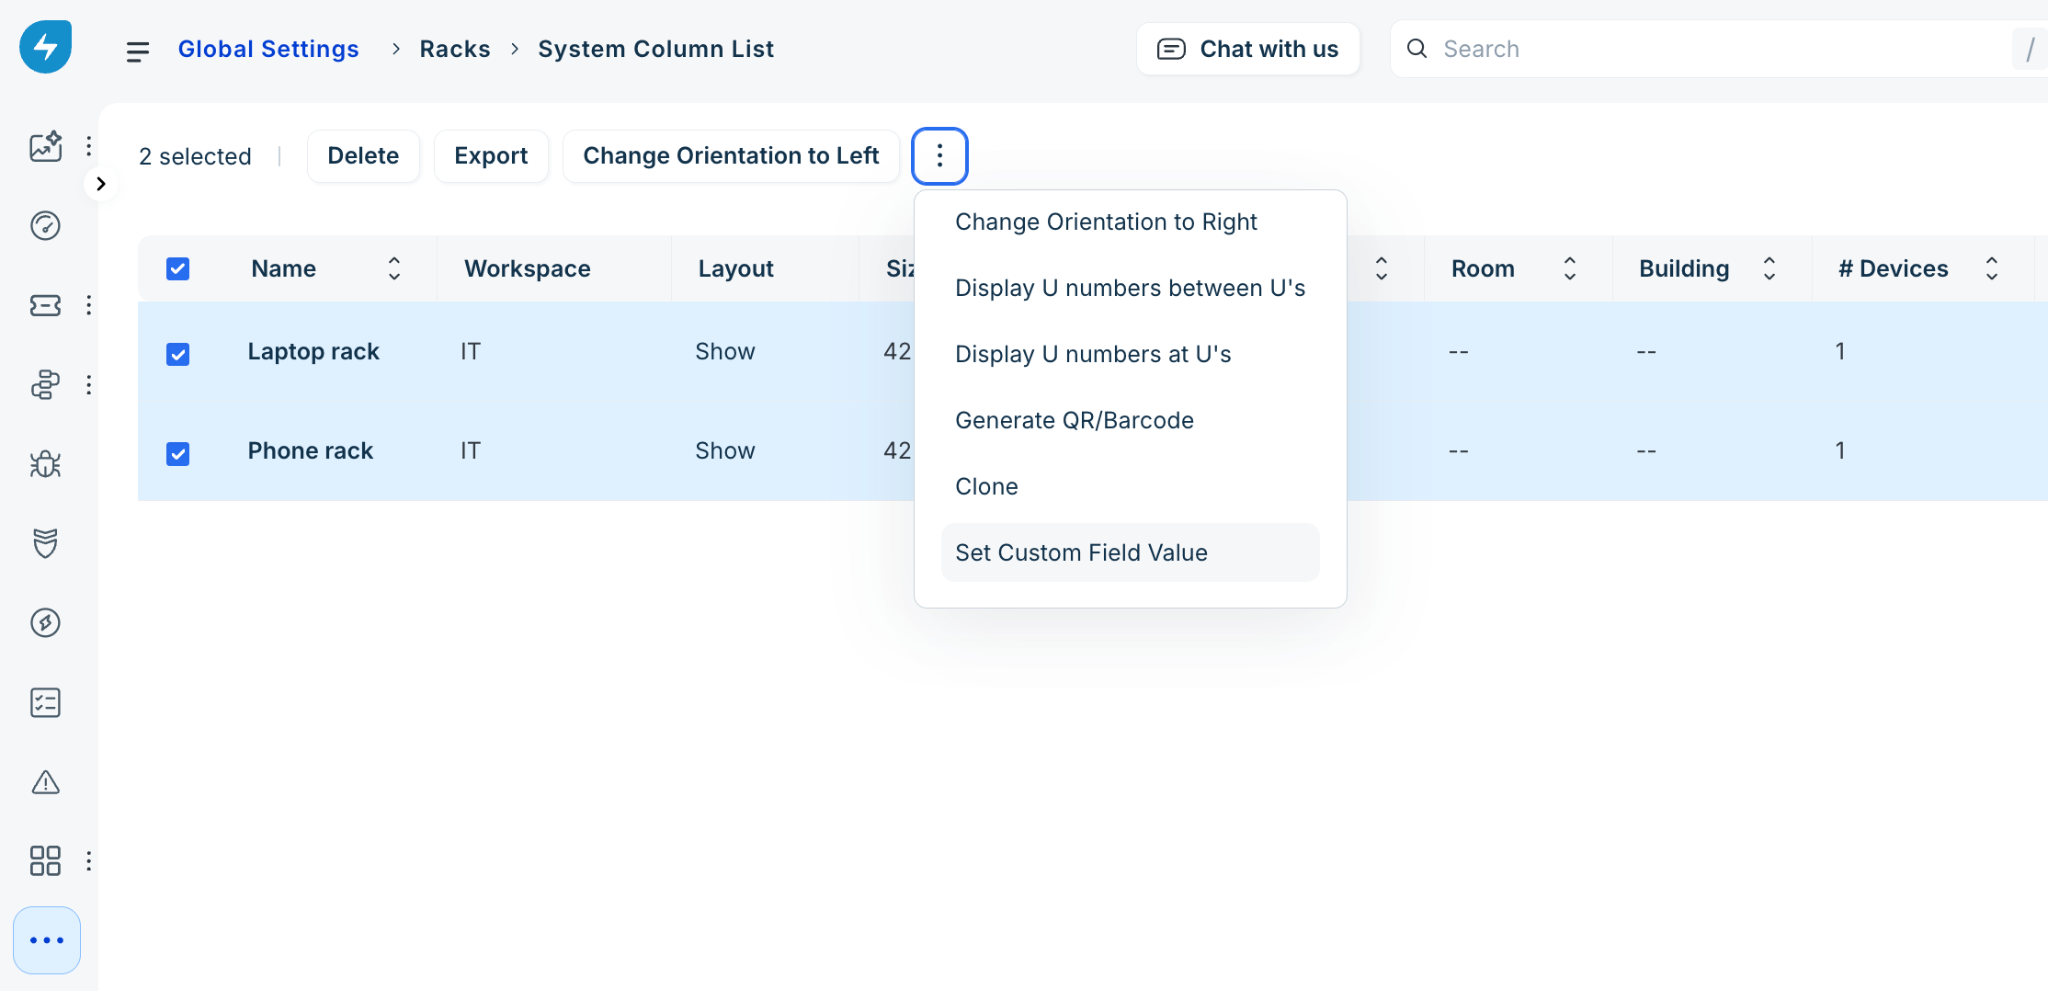
The following table describes the options and its description.
Clone racks
To clone one or more racks, follow these steps:
Go to the Racks list page and select rack(s) from the list.
Click More options (three vertical dots) and select Clone.
The Clone selected Racks modal appears. Provide details to the following fields:
Click Clone.
Export racks
To clone one or more racks, follow these steps:
Go to the Racks list page and select rack(s) from the list.
Click Export.
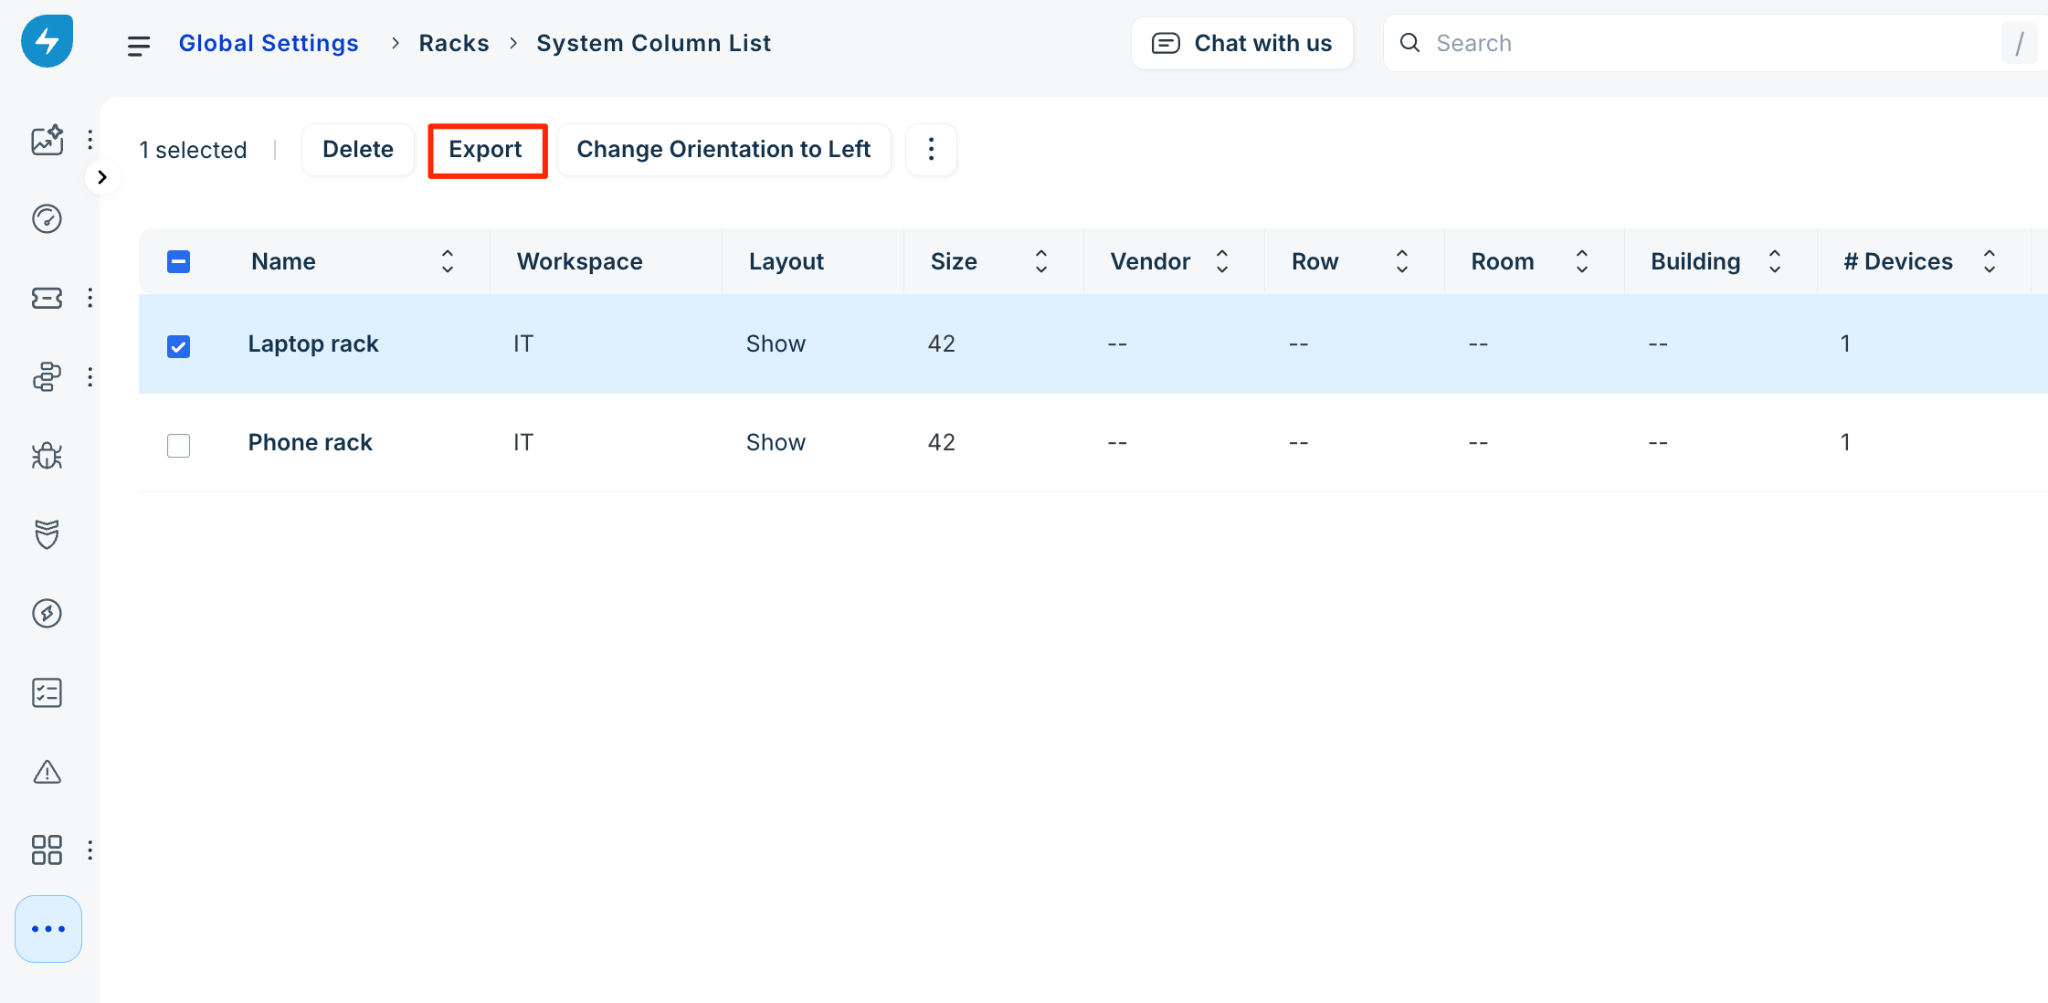
The Export Selected Items modal appears. Select the appropriate following options as per your requirements.
Click Export.