
 Community
 Video Library
 Agent Training
 Freshservice
 Freshdesk
 Freshchat
 Freshcaller
 Freshsales
 Freshteam
 Freshworks Neo
 Freshsurvey
 Freshservice for MSP
 Note: Available only for new signups after the 31 March, 2026 release. If you signed up earlier, refer to the existing ITAM documentation.This article provides instructions on how to bulk import inventory items (such as Devices, Parts, Physical Assets, Containers, etc.) into Freshservice using spreadsheets. This process is ideal for migrating data from legacy systems or performing large-scale updates to your inventory.
TABLE OF CONTENTS
- Prerequisites
- Step 1: Download the import template
- Step 2: Populate the spreadsheet
- Step 4: Verify imported data
Prerequisites
You need the following before importing inventory items:
Access to the IT Asset Management / Inventory module in your Freshservice instance.
Administrator privileges or specific permissions to import inventory records.
Step 1: Download the import template
To ensure your data maps correctly to system fields, always download the sample spreadsheet for the specific inventory category you are importing:
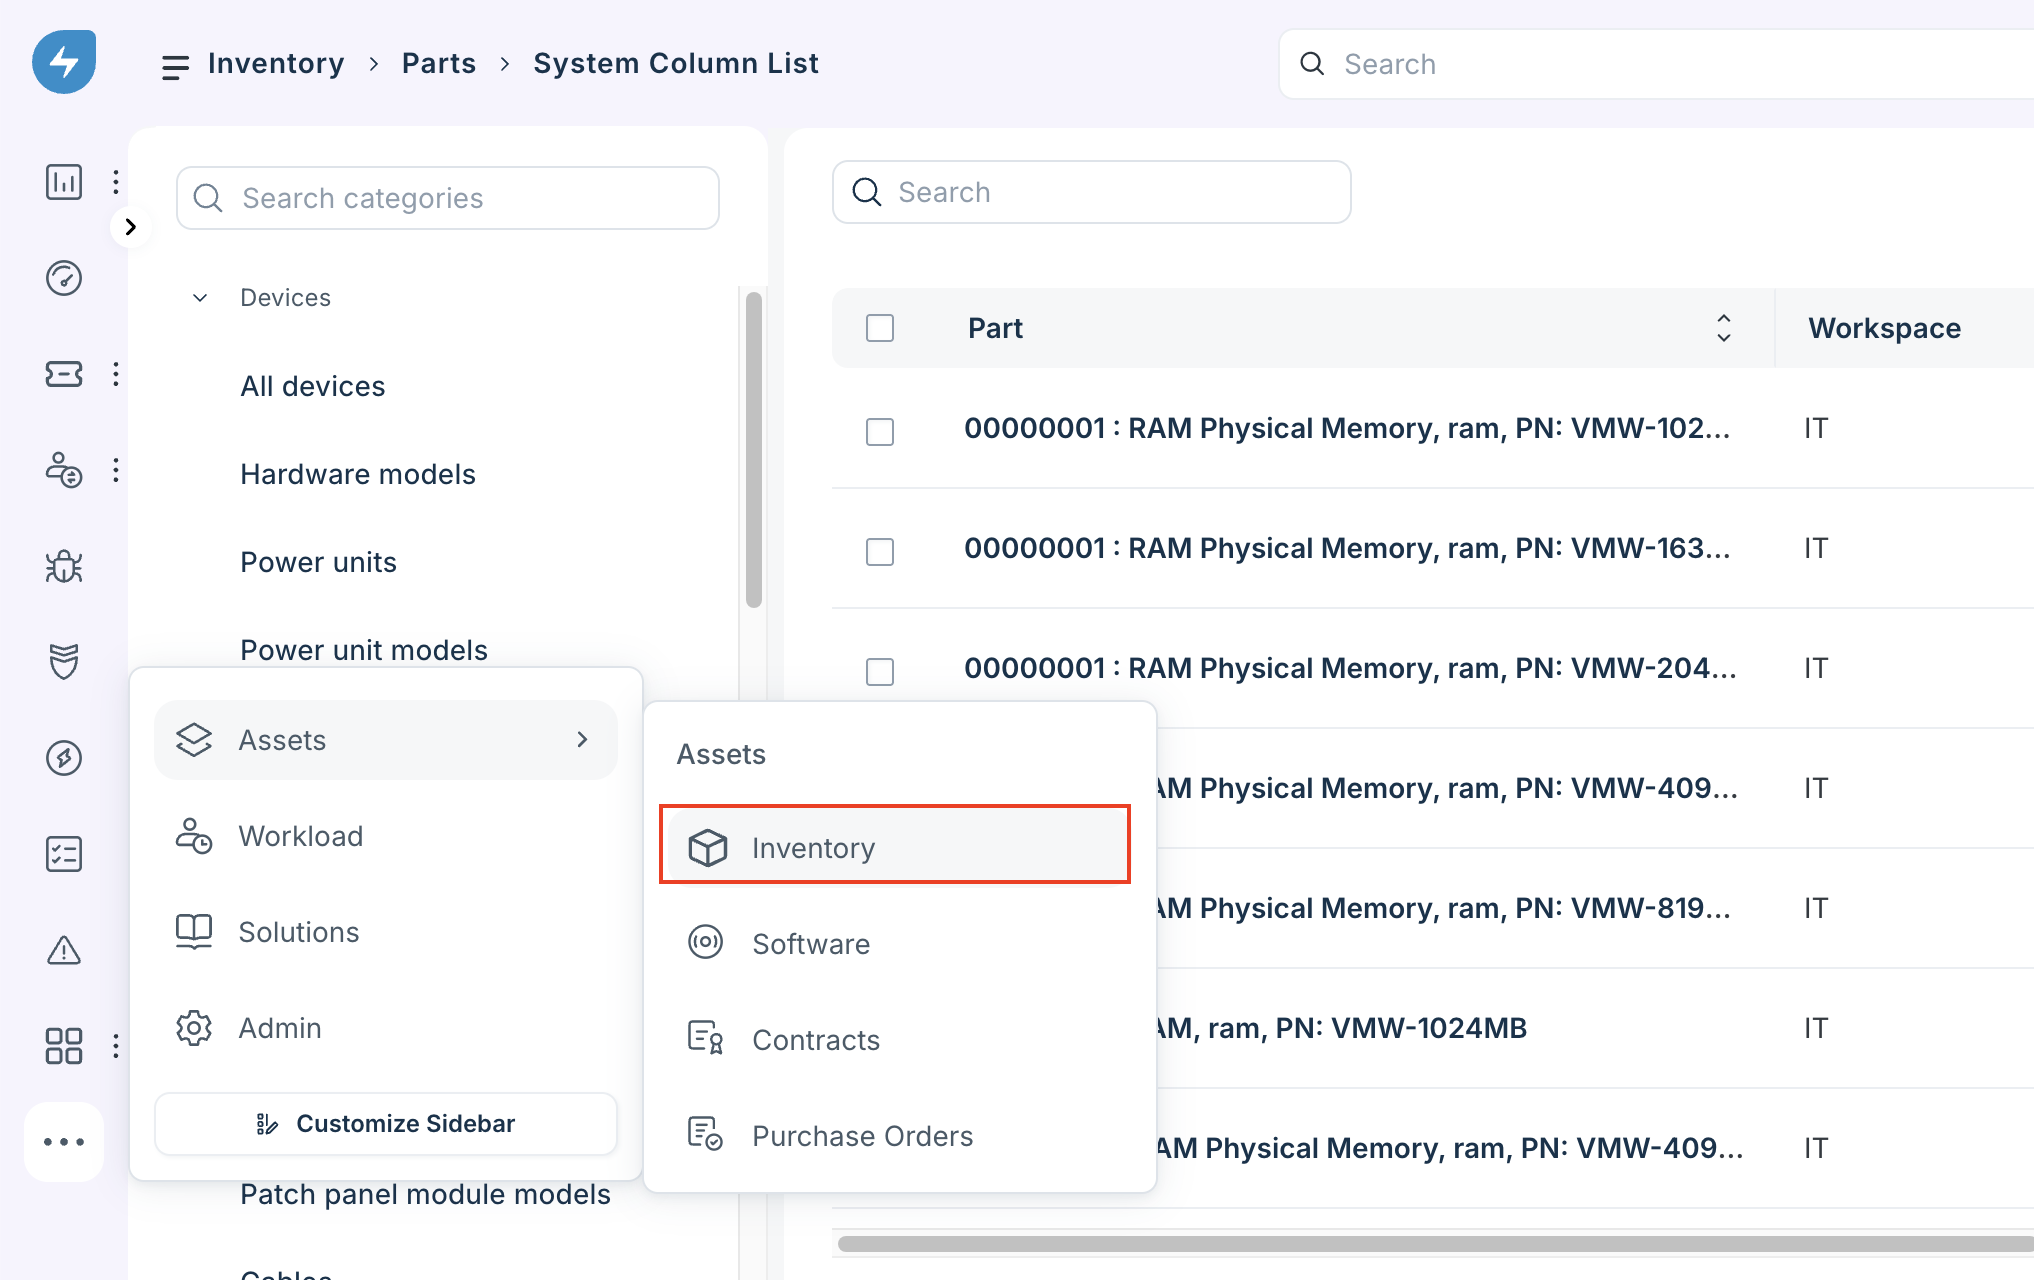
Go to Admin > Assets > Inventory (e.g., Inventory > Devices, Inventory > Parts, etc.).
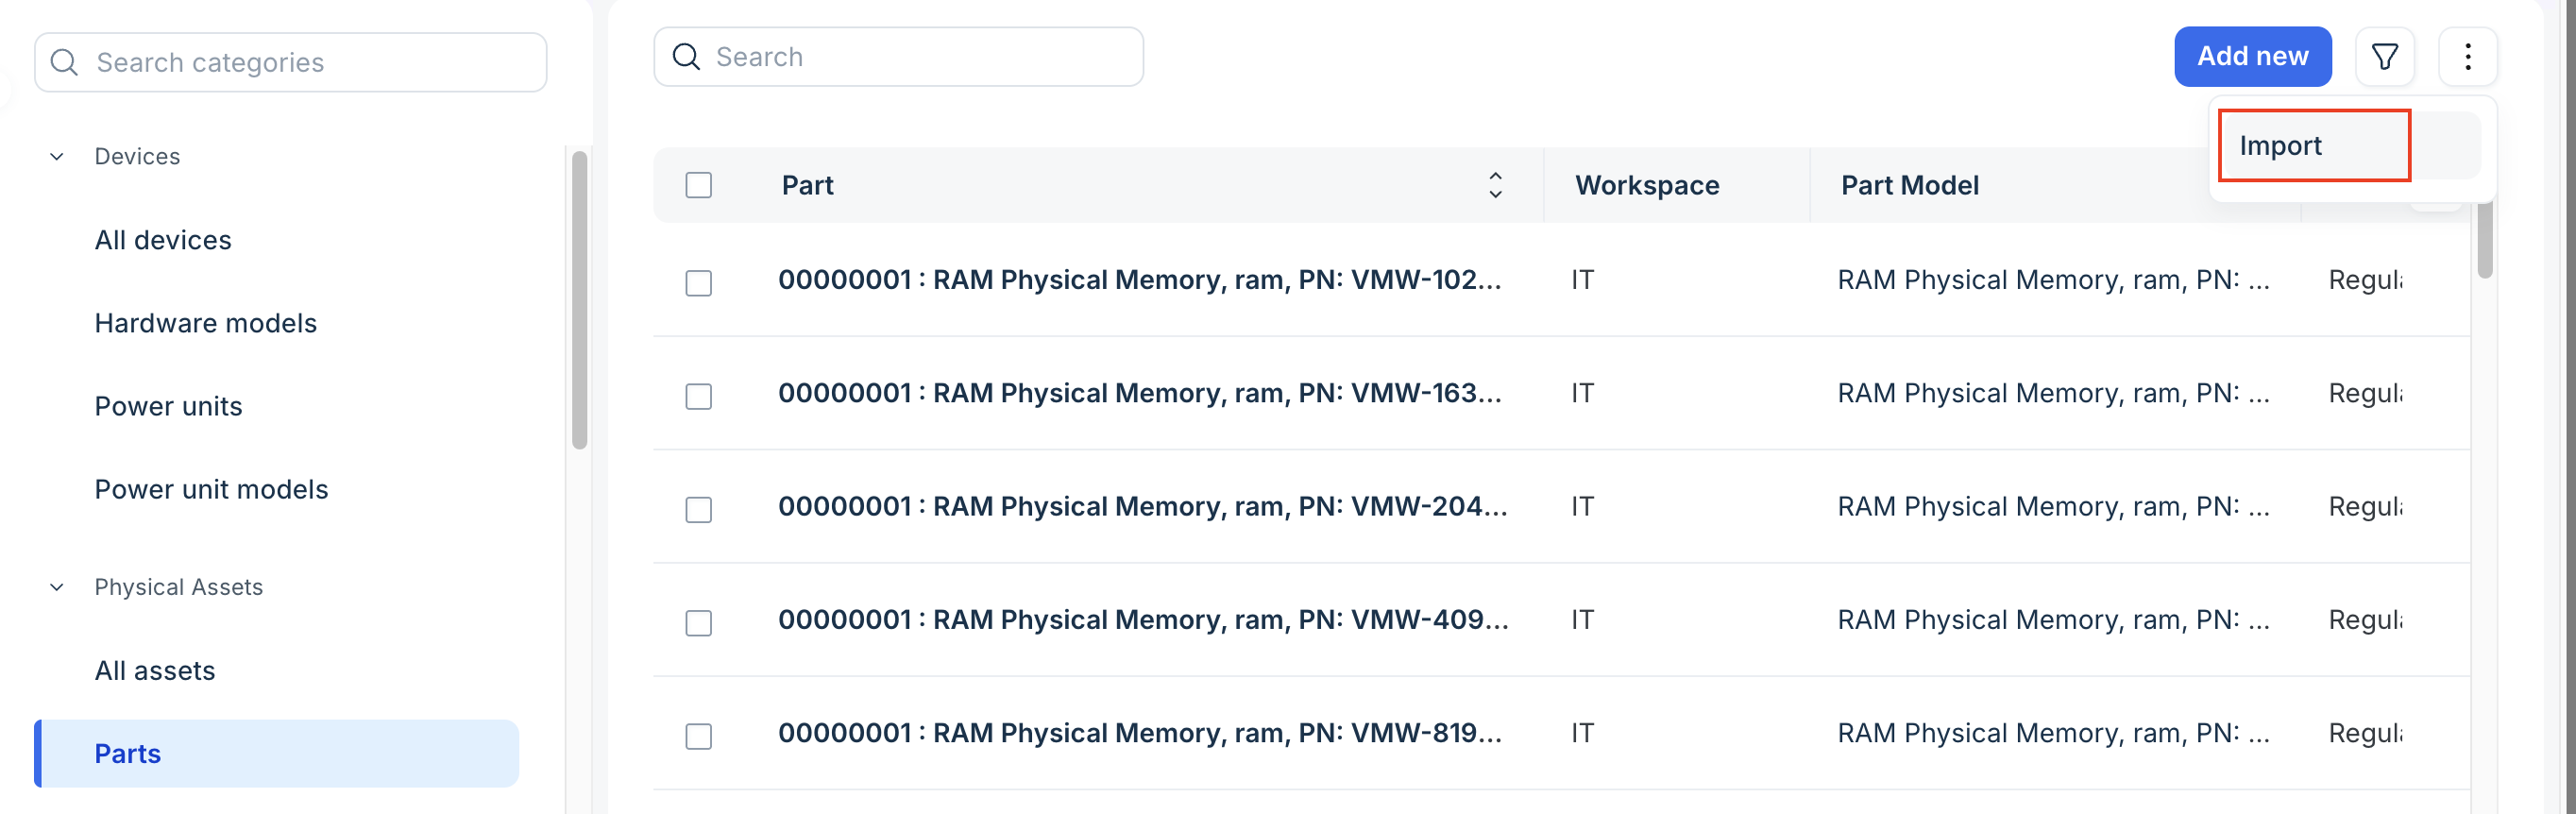
Click the More Options (three vertical dots) icon in the top-right corner and select Import.
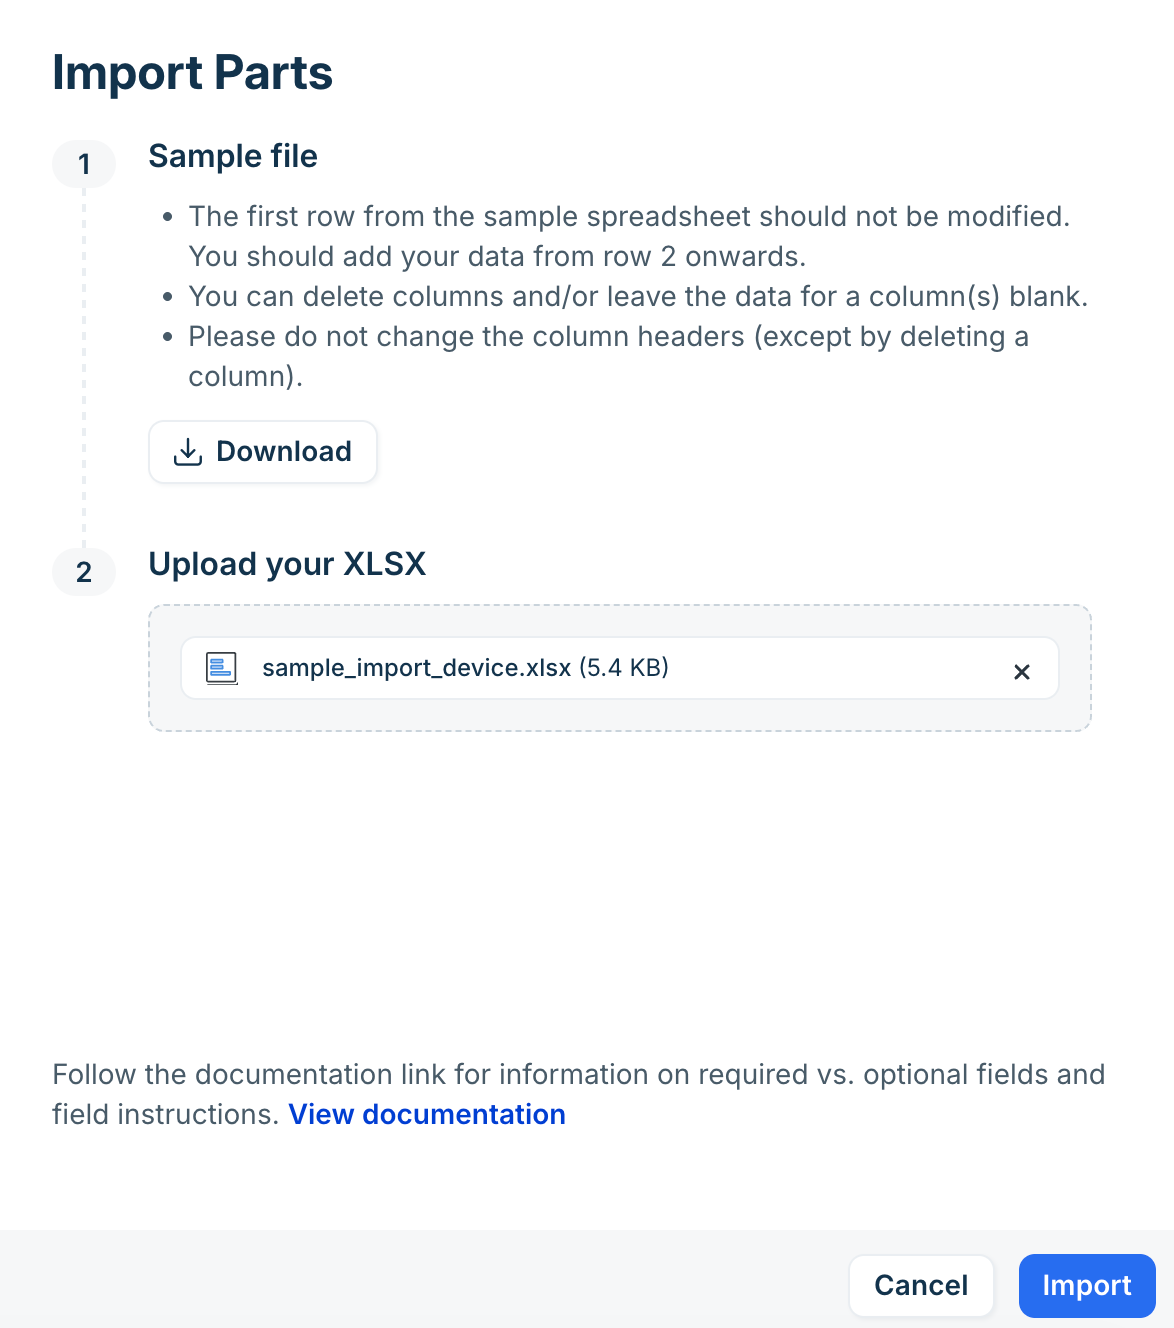
In the Import window, click Download under the Sample file step to save the template to your system.
Step 2: Populate the spreadsheet
Open the downloaded sample template and fill in your data according to your inventory type.
Notes:
The first row from the sample spreadsheet should not be modified. You should add your data from row 2 onwards.
You can delete columns and/or leave the data for a column(s) blank.
Please do not change the column headers (except by deleting a column).
Sample Import spreadsheets
Below are example spreadsheet templates illustrating how data should be formatted for different inventory types, such as Devices and Parts:
Device import template

Part import template

Step 3: Upload and Import
Save your completed spreadsheet in .xls or .xlsx (or .csv) format.
Return to the Import window in Freshservice.
Click Attach File / Upload to select your populated spreadsheet.
Click Import.
Step 4: Verify imported data
After the import completes, the system will display a confirmation message.
If successful: Navigate to the respective inventory page (e.g., Devices, Parts, Physical Assets) to review the newly created or updated items.
If errors occur: The system will report which rows failed and provide the reasons. For example, missing mandatory parameters or mismatched header fields.