TABLE OF CONTENTS
Overview
The Freshservice Workflow Automator module helps you configure various workflow automations. All the repetitive tasks and manual processes that are performed on a daily basis (such as assigning tickets to the right agent or team, or following up on approvals) can be automated with workflows using simple and quick drag-and-drop actions.
Prerequisites
Ensure you have administrator privileges to set up the Workflow Automator module.
Create workflows
A workflow is primarily made up of the following components:
Event: Defines when a workflow has to be triggered.
Condition: Defines the parameter(s) that need to be validated during the execution of a workflow.
Action: The outcome of the workflow.
Note: A single workflow can incorporate multiple conditions and actions.
Follow these steps to create a workflow:
Log in to your Freshservice account.
Go to Admin > Global Settings > Automation and Productivity > Workflow Automator.
Click the Create dropdown at the top-right corner, and select Workflow.
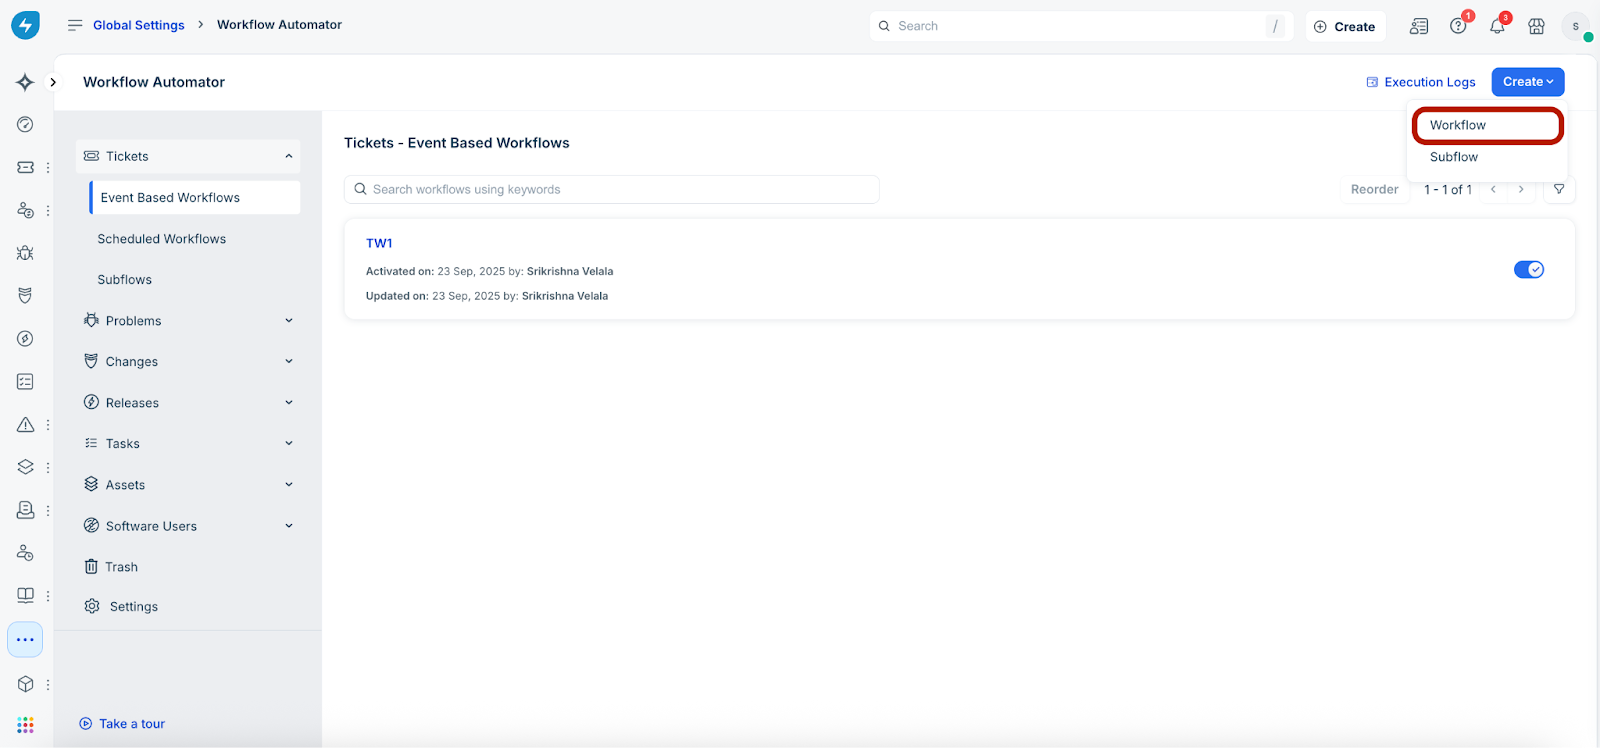
The Create Workflow slider opens.
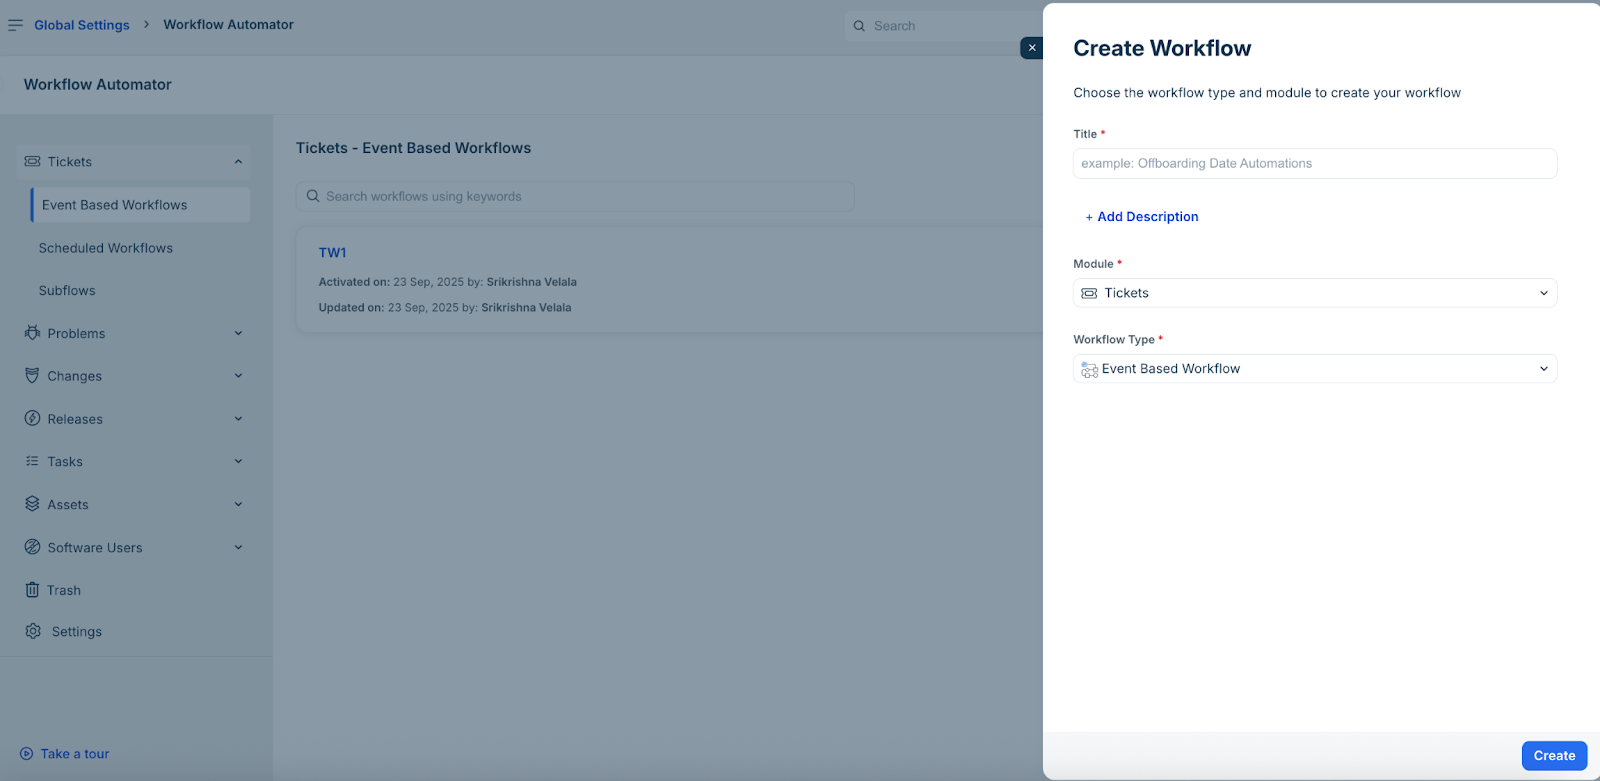
Add a title and description for the workflow.
Select a relevant module from the Module dropdown (for example, Tickets).
Select a relevant type from the Workflow Type dropdown (for example, Event Based).
Click Create.
The {workflow name} > Event slider opens.
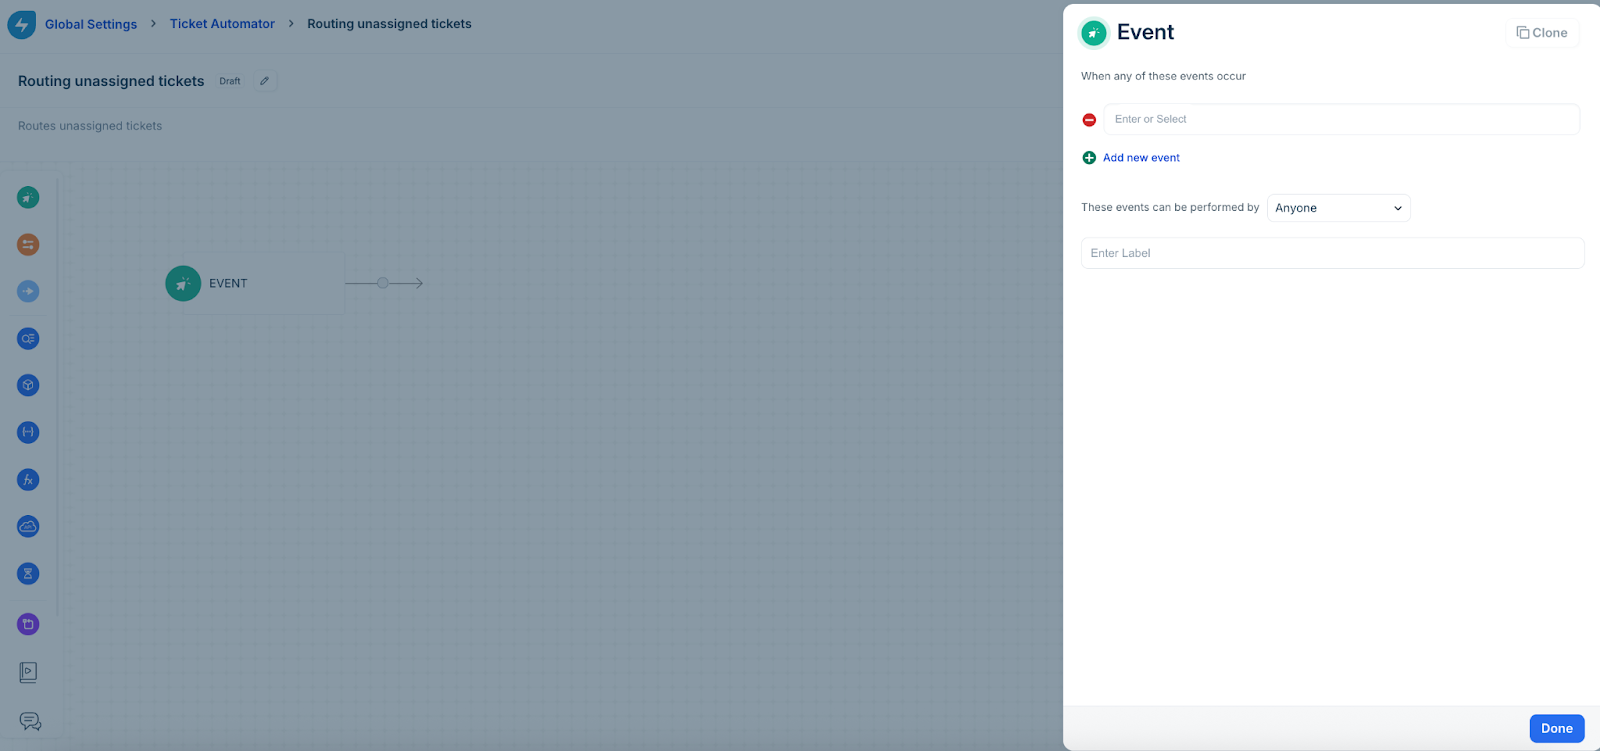
Define when the workflow should be triggered by adding relevant event(s).
Select the relevant These events can be performed by option, and click Done.
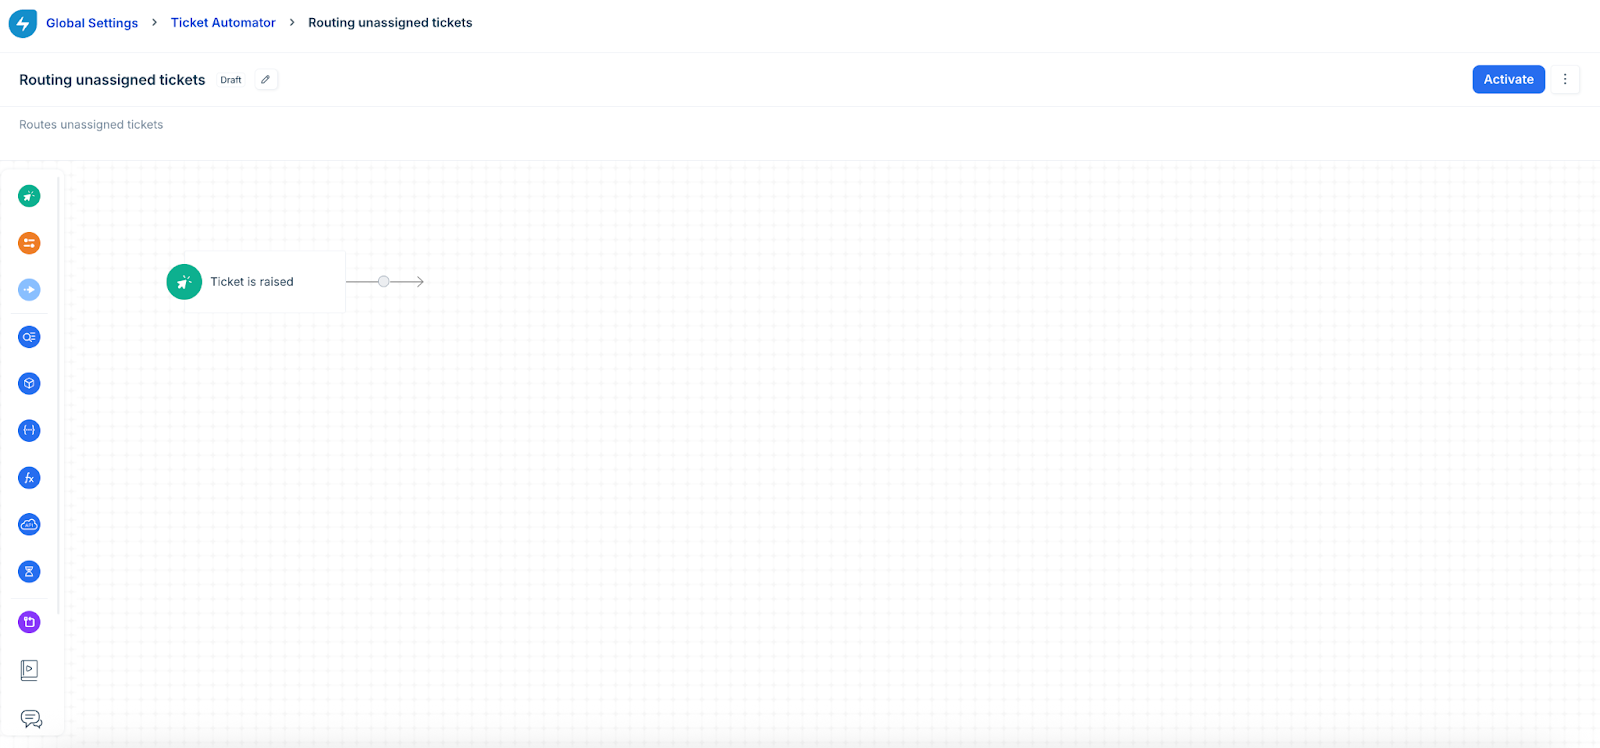
The event is saved successfully and displayed in a grid layout.
Hover over the side-menu, select Condition and drag it next to the Event on the grid layout. The {workflow name} > Condition slider opens.
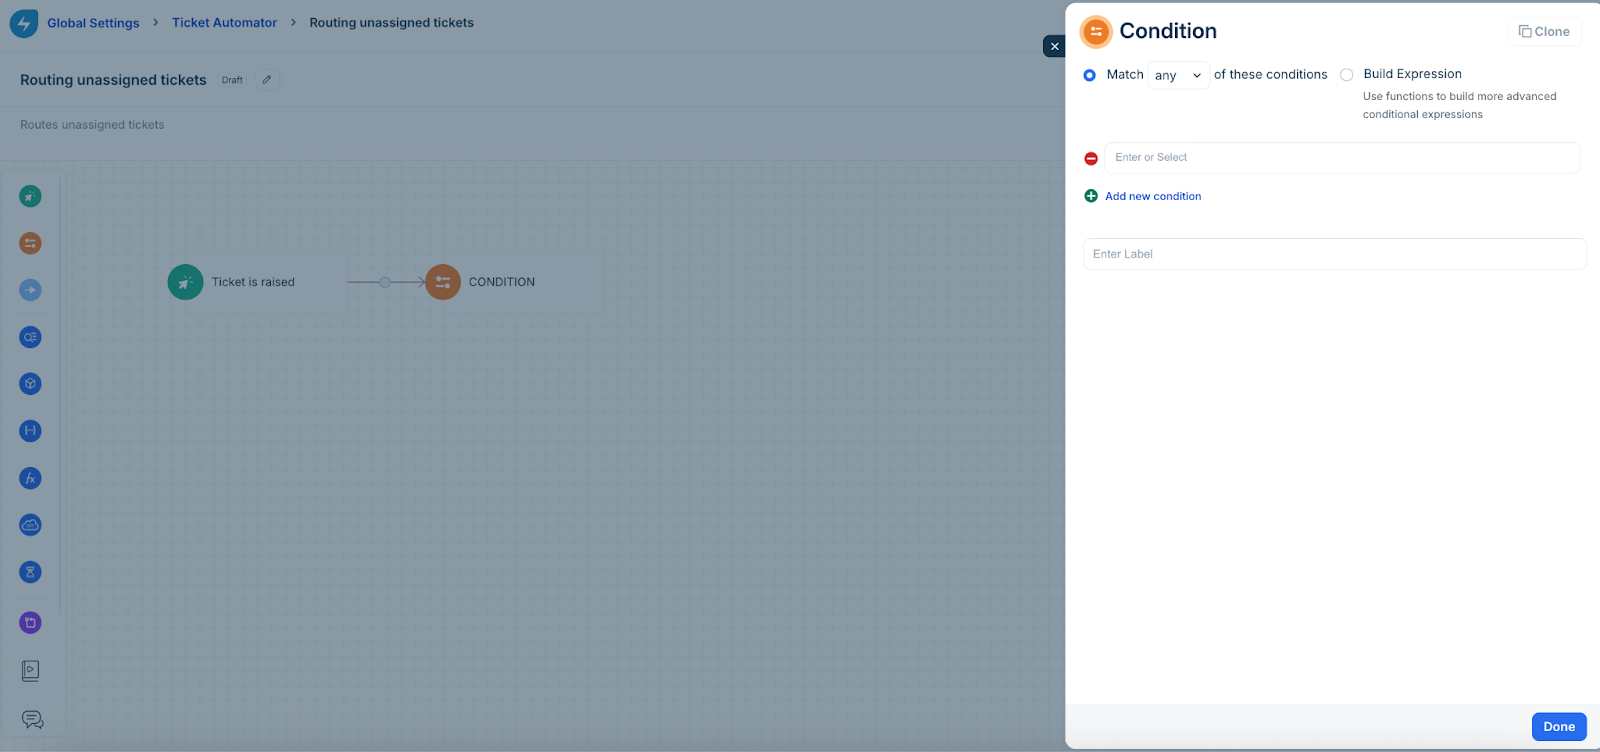
Select the relevant Condition option (for example, Match any/all of these conditions).
Note: Select the ‘Build Expression’ option if you want to use functions to build advanced conditional expressions (see Expression Builder Node for more information).
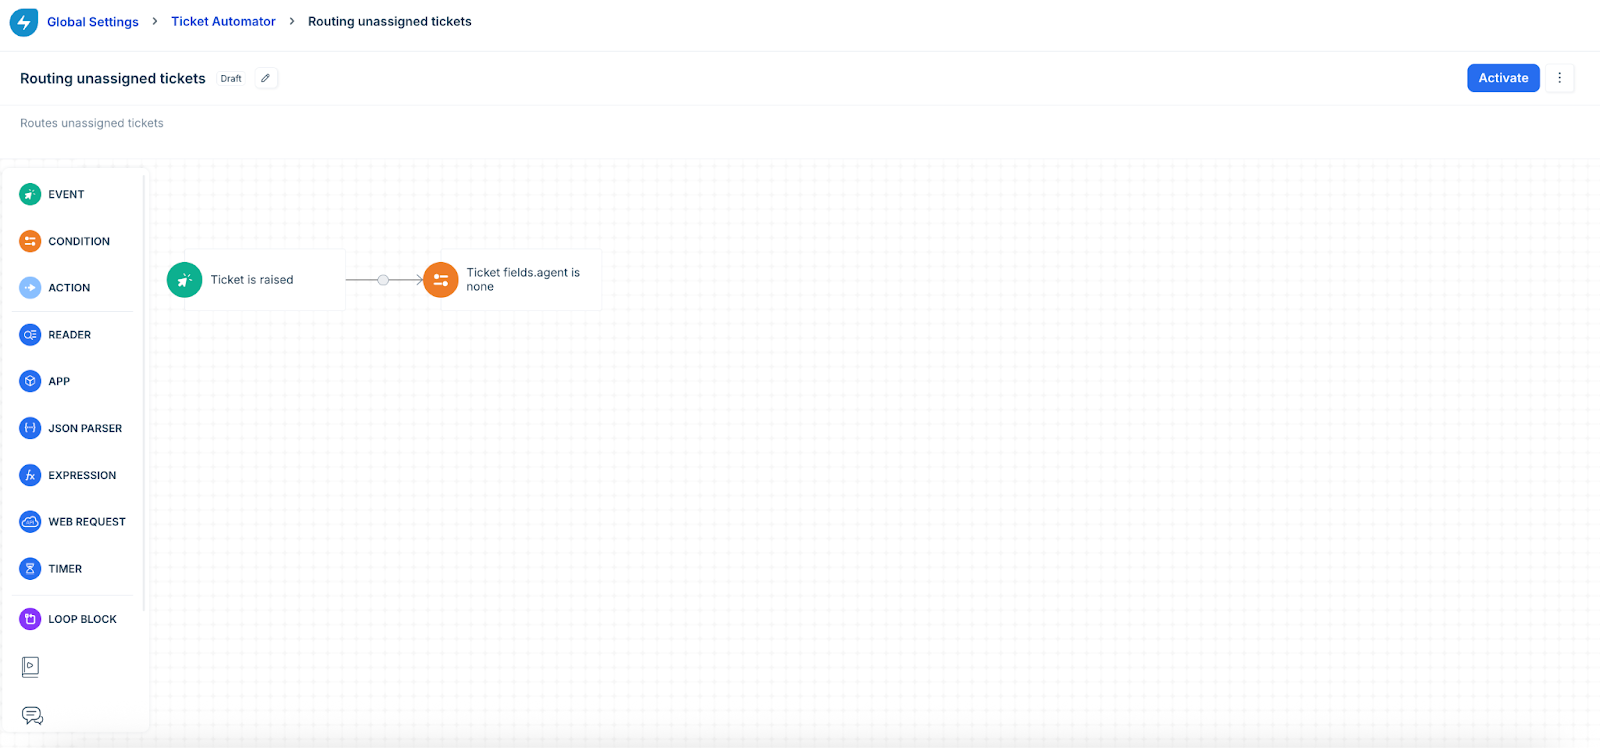
Define the conditions that should match the workflow by adding relevant condition(s), and click Done.
The condition is saved successfully and added to the workflow grid.
Hover over the side-menu, select Action and drag it next to the Condition on the grid layout. The {workflow name} > Action slider opens.
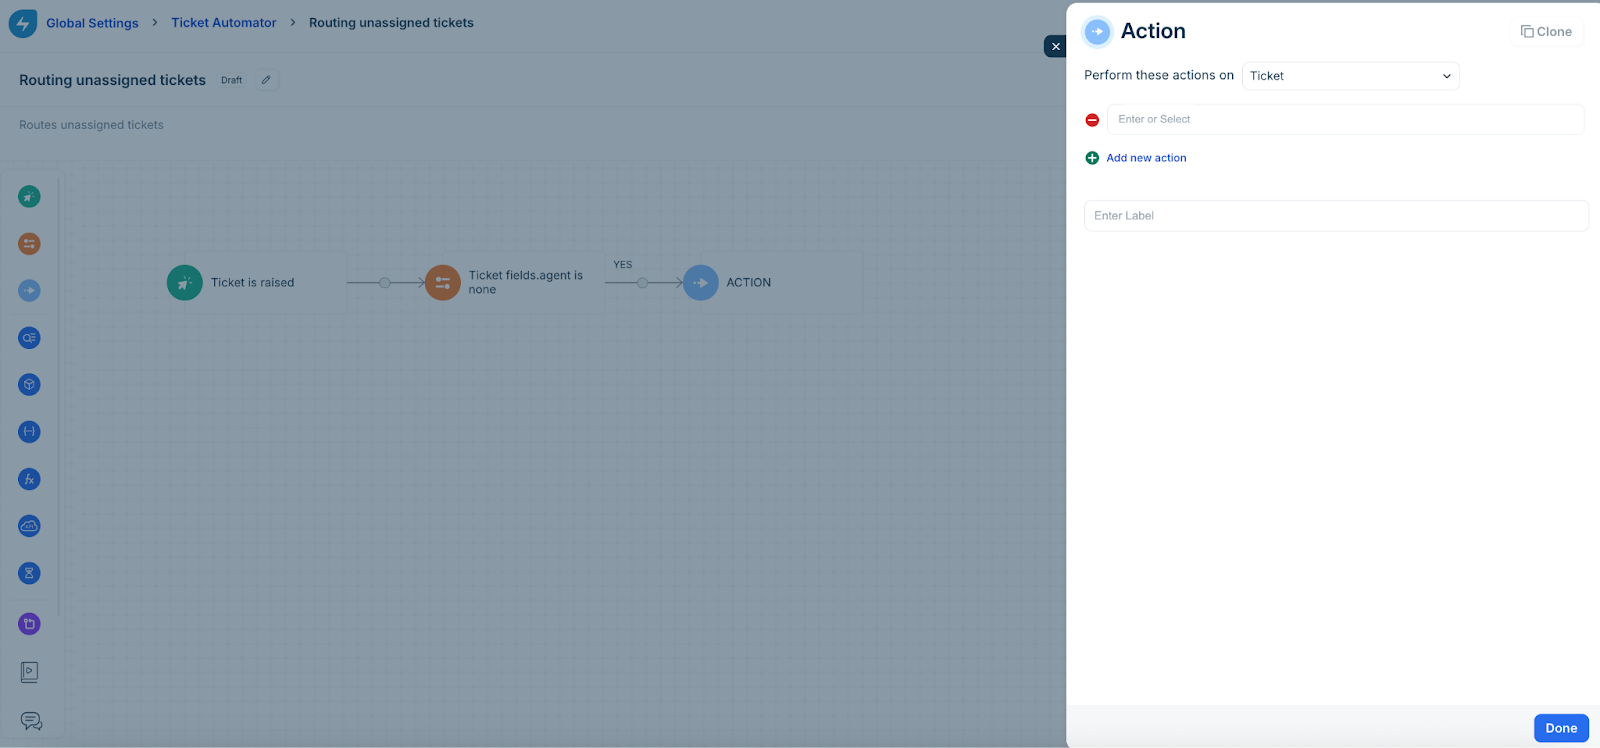
Select the relevant Perform these actions on option (for example, Ticket).
Define what actions the workflow should perform by adding relevant actions, and click Done.
The action is saved successfully and added to the workflow grid.

Note: While adding a new workflow event, condition, and action, these configurations are saved as draft.
Click Activate to activate the workflow.
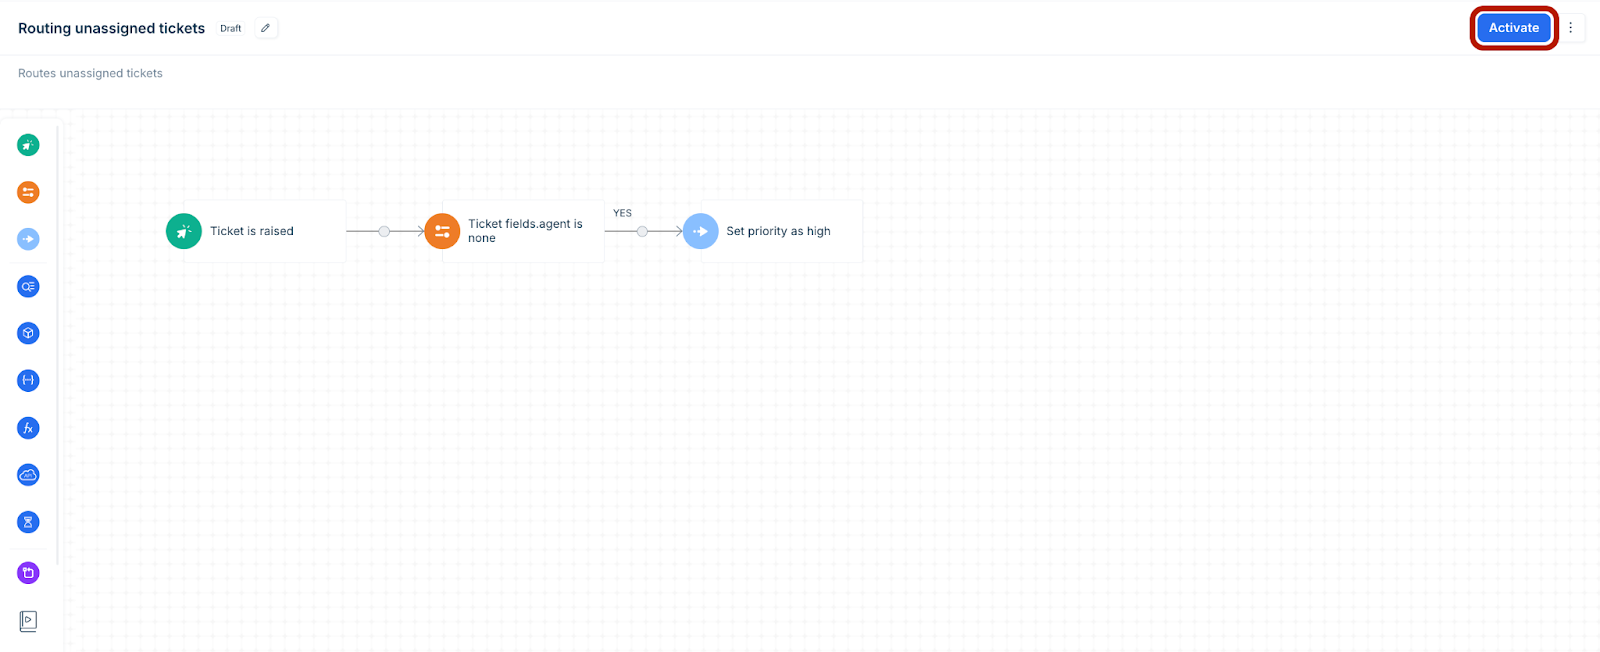
Note: To clone or delete a saved workflow, click the ellipses icon next to Activate, and select the relevant option.
The steps mentioned above help you create a basic workflow. See Workflow Automation Scenarios for more information on specific workflows.
Manage workflows
Follow these steps to manage workflows:
Log in to your Freshservice account.
Go to Admin > Global Settings > Automation and Productivity > Workflow Automator.
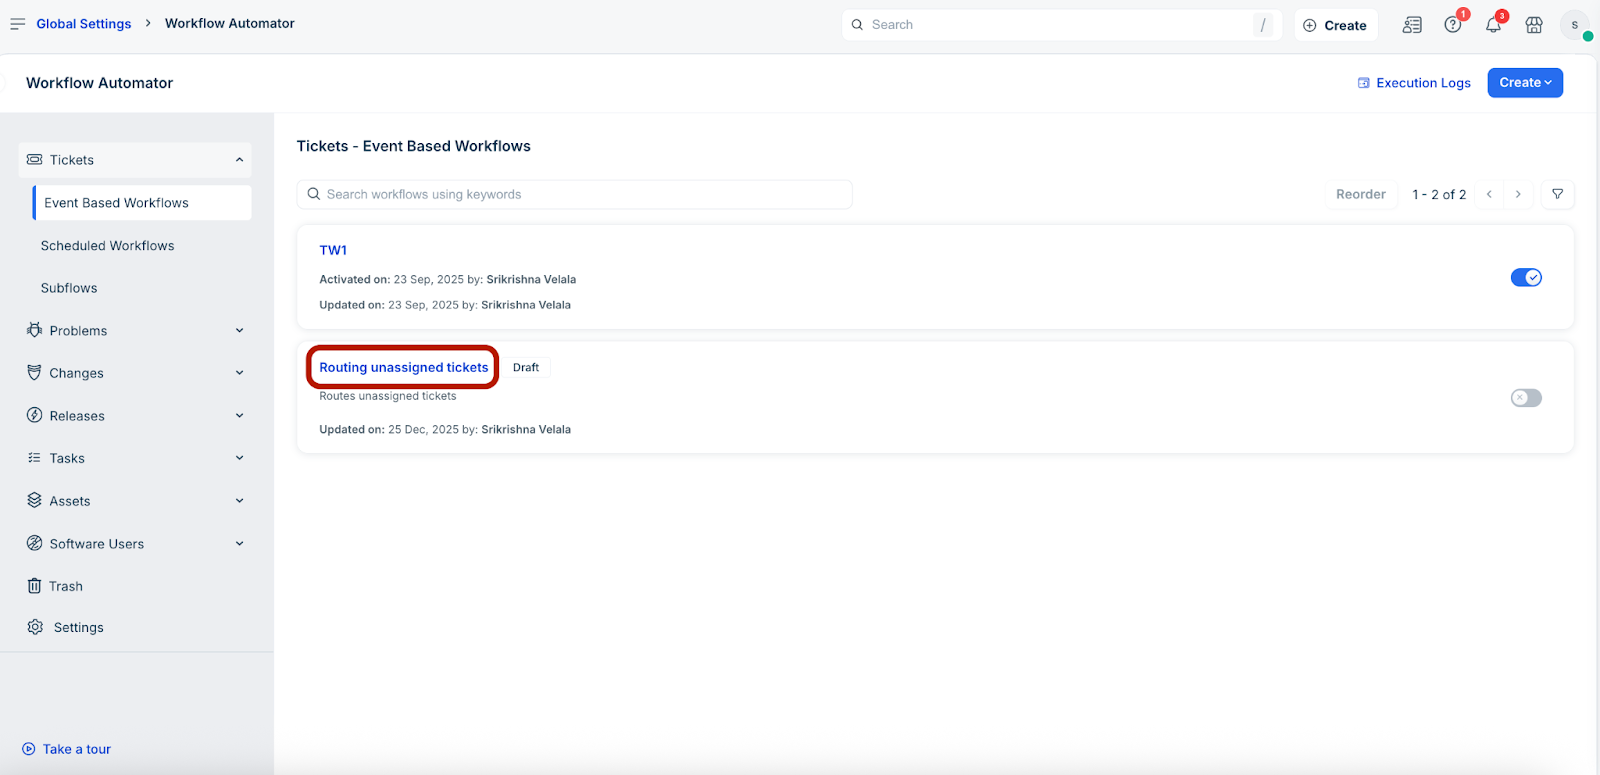
Select the relevant workflow module and type on the left pane (for example, Tickets > Event Based Workflows). The list of event based workflows for the Tickets module is displayed.
Click the workflow name you want to edit or modify.
Note: If you want to clone the workflow, hover over the workflow name, and click Clone.
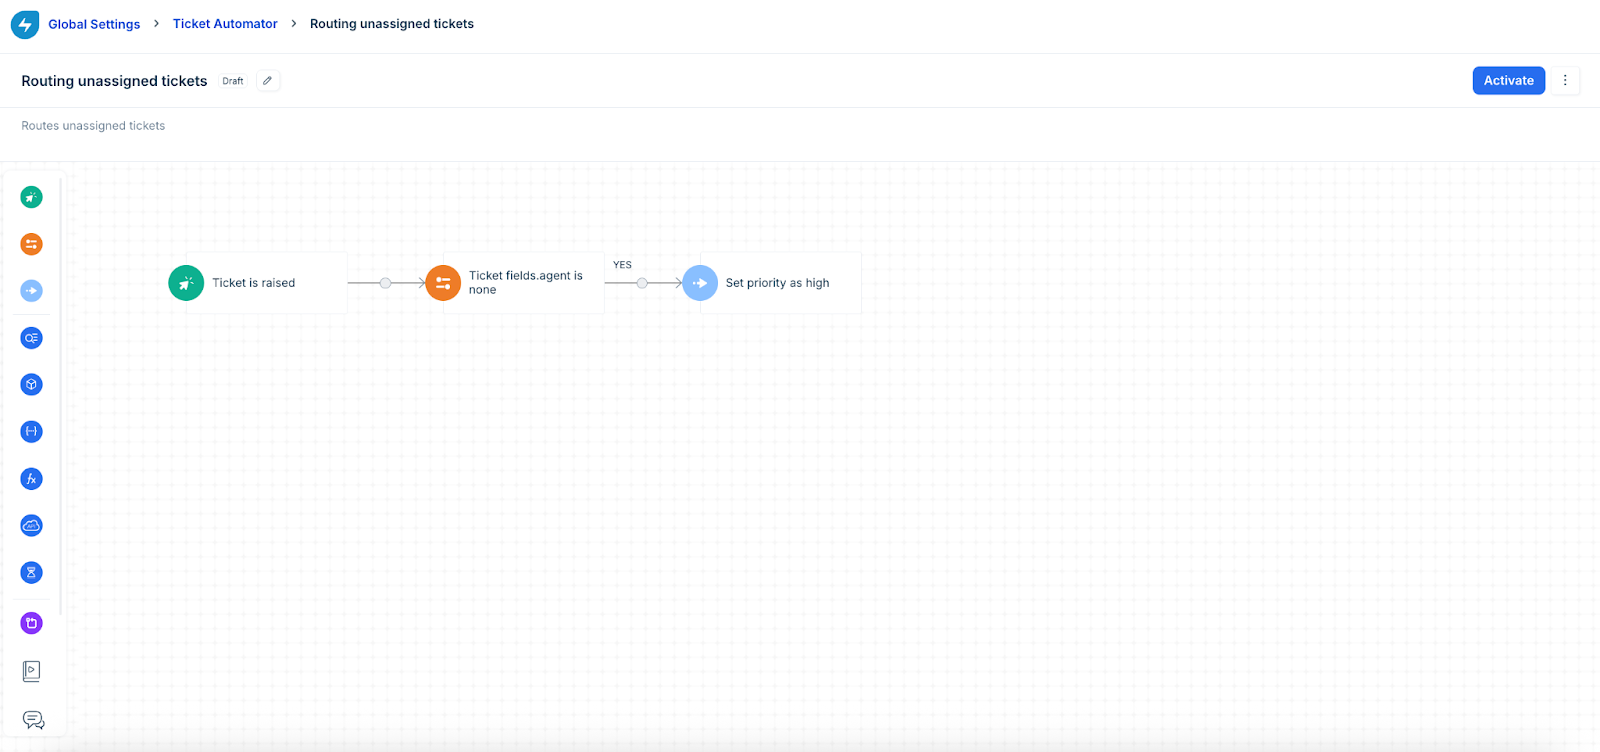
The selected workflow’s grid layout is shown.
(To edit workflow components) Click the workflow component you want to edit (for example, Condition). The Condition slider opens.
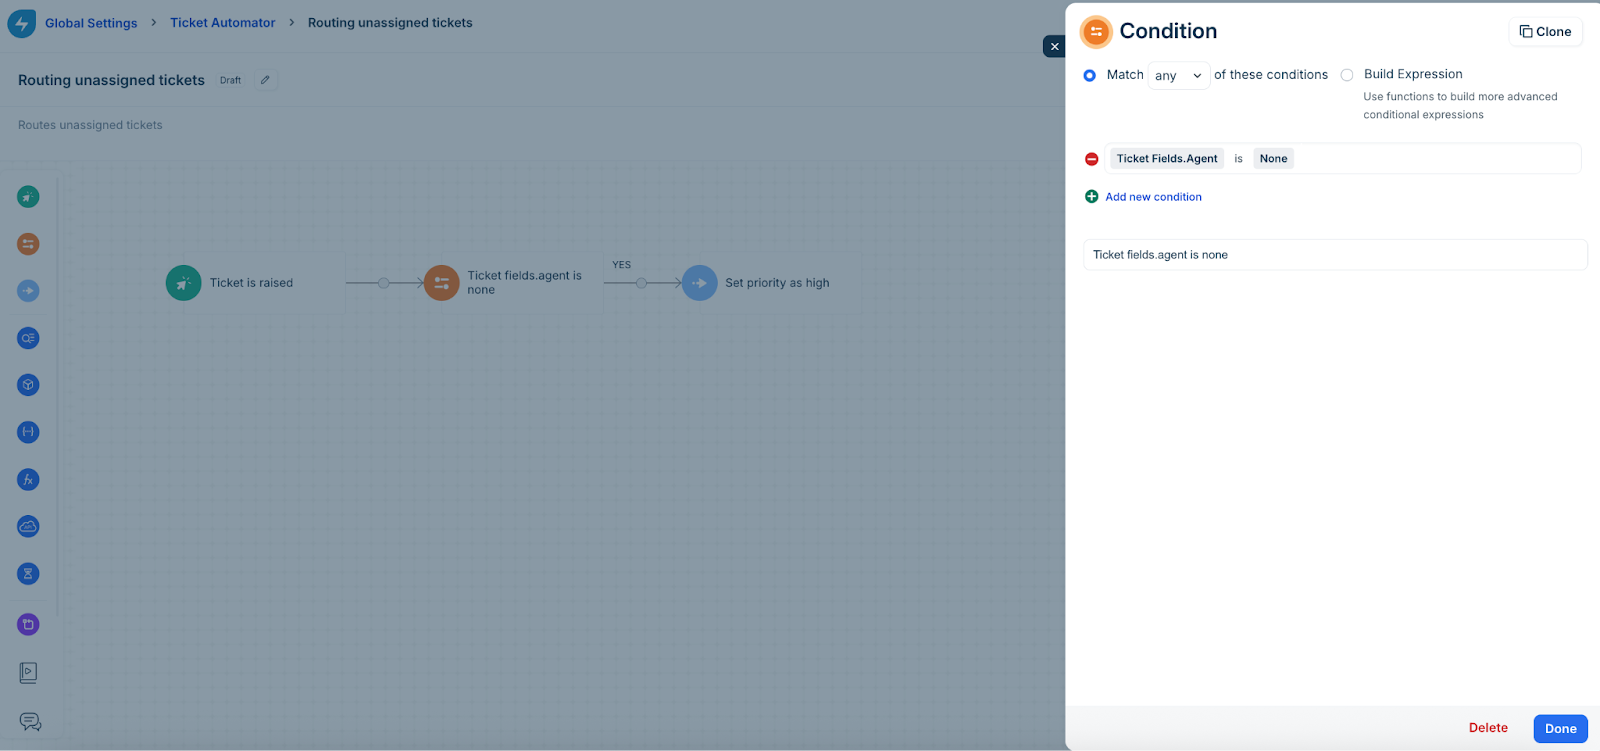
Make the necessary changes, and click Done.
Note: You can also clone or delete workflow components.
(To add workflow components) Hover over the side-menu, select the workflow component you want to add, and drag it next to an existing workflow component on the grid layout.

After all the updates are done, click Activate.
See the following topics for more information on other workflow components and nodes:
Frequently asked questions (FAQs)
Following are some FAQs on managing workflow automations.
Question | Answer |
Why is the workflow not being triggered in the tickets? | If any workflow is not being triggered in the tickets: Check the activities column within a ticket to confirm the execution of the workflow. If not, check if the workflow conditions and events have matched the ticket. Workflows can only be executed for manual actions. System-triggered actions or another workflow cannot trigger the workflow execution. A workflow is triggered only after the previous workflow execution on a ticket has ended. If you have web requests or any app actions, the subsequent workflows will not be triggered until a workflow ends. It is recommended to re-order a workflow and have basic automations (without any web request or app actions) at the top followed by advanced automations. If approvals are part of the process, consider re-arranging the workflows and testing by initiating a new workflow. If there's no prior workflow executed, clone the existing one, then reorder the cloned workflow to the top of the list. Disable the original workflow and test the cloned version.
|
Workflow is not working when being triggered by another workflow, how to resolve this issue? | Workflows can only be executed for manual actions. System-triggered actions cannot trigger the workflow execution at the moment. |
Can two workflow automations run at the same time or why is one automation being triggered and not others? | No, two workflow automations cannot run simultaneously. Only one workflow automation can be executed at a time, but multiple workflows can execute on the ticket in sequential order. The execution is based on the set order. |
Is it possible to recover a deleted workflow? | No, it is not possible to recover a deleted workflow. Once a workflow is deleted, it cannot be restored. |
How to send surveys using workflow automation? | Currently, the workflow automation system lacks a direct placeholder for surveys, but this requirement is being actively addressed. In the interim, you can utilize the placeholder {{ticket.satisfaction_survey}} as a workaround. Note that this placeholder is currently only accessible in Email Notifications (by default). |
How to create workflow automation for a service catalog item? | Go to the respective workflow. In the workflow condition, add the requested item to the respective catalog item. |
Is it possible to add more than one event in automation and also restrict the event performer? | You can include multiple events within a workflow automation and also add the respective event performer for whom those should trigger. |
How do I set the event and/or the condition to filter on a new onboarding ticket? | In the workflow condition, designate the source as either "Employee Onboarding" or "Employee Offboarding." This will exclusively activate tickets with these specified source values. |
How do I set up a workflow, to only trigger a Ticket if it's from a specific domain and no others? | You have the option to configure the condition to include the "From" email address containing the relevant domain, thereby limiting the activation of the workflow. |
How do I get Ticket notes included into an email with Workflow Automator using Placeholders? | Currently, you can only incorporate the last public comment into emails using the placeholder feature. Private notes cannot be included at the moment. |
Is there a way to clone a workflow from one workspace to another? | Copying workflows from one workspace to another isn't feasible due to the variations in configurations within each workspace. |
Is there an option to change the description of a ticket using a workflow? | Go to the relevant workflow and add the necessary event and condition nodes. Then, drag and drop the web request node and use the following API call:
https://api.freshservice.com/v2/#update_ticket_priority
Set the authentication type to Basic Auth. Use the admin API key, which you can find under Profile Settings in your Freshservice account. For password, use a single letter such as 'a' or 'x'. |
How to skip new ticket/ticket creation email notification? | Go to Admin > Workspace settings > Workflow Automator. Add necessary conditions based on your use case, set the event to "Ticket is Created" and in the action node, select "Skip New Ticket Email Notifications." |
How to create child tickets/related tickets from workflow automation? | In the workflow automator, use the web-request node ‘Post’ call to perform the action. Refer the following API documentation to create child tickets: https://api.freshservice.com/v2/#create_child_ticket
Set the authentication type to Basic Auth. Use the admin API key, which you can find under Profile Settings in your Freshservice account. For password, use a single letter such as 'a' or 'x'. |
Can offboarding or onboarding requests be set up to include a list of tasks instead of multiple tickets? | Create workflows to add tasks to onboarding or offboarding request tickets. Select the event based on your use case and set the condition source to "employee off-boarding" or "employee onboarding." Then, in the action node, add the tasks. |
How to change the priority status of default tickets coming in via email? | Create a new automation rule with the event "ticket is created" and set the condition "if source is email." In the action node, set the priority as needed. |
How to automatically assign tickets to a group if the ticket is not assigned when it is created? | Create a new automation rule with the event "ticket is created." Set the condition to "if the group is null" and in the action, assign it to the respective group. |
Can I configure workflows for requesters to perform actions? | Admins can now configure a workflow action "Set Requester As" for Tickets (incidents and service requests) and Changes. For Tickets, this also applies to the associated child and successor tickets, in which case all the associated child and successor tickets will also have the same requester.
Admins can also configure a workflow action "Set Request For As" for Tickets. Audit and activity logs are captured for these workflow actions. Business Rules and Supervisor Rules will function similar to how they function when 'requester' and 'request for' fields are manually set up. |
Can I configure recipients to be CC'd in Ticket and Task workflow automations? | Yes, you can configure recipients to be CC'd in Ticket (including child, successor, and associated tickets) and Task (parent ticket) workflow automations. If the same user was added in “CC To” before a workflow was triggered, then the “CC To” action will not execute again as part of the workflow. The subsequent nodes in the workflow will be executed. |