Changes are inevitable in an organization. It’s critical to plan changes effectively to reduce their impact on the organization.
Freshservice provides a change management module that enables you to plan your change activities and request Change Advisory Board (CAB) approvals.
Add planning details
You can add planning details to Changes in your service desk. This is useful when you want to keep your plan documented, and share it within your team.
Note: When you decide to implement any change, it is important that you have a rollout plan. Similarly, a backout plan is critical for restoring services back to normal.
To add planning details:
Log in to your Freshservice account.
Click Changes on the left pane.
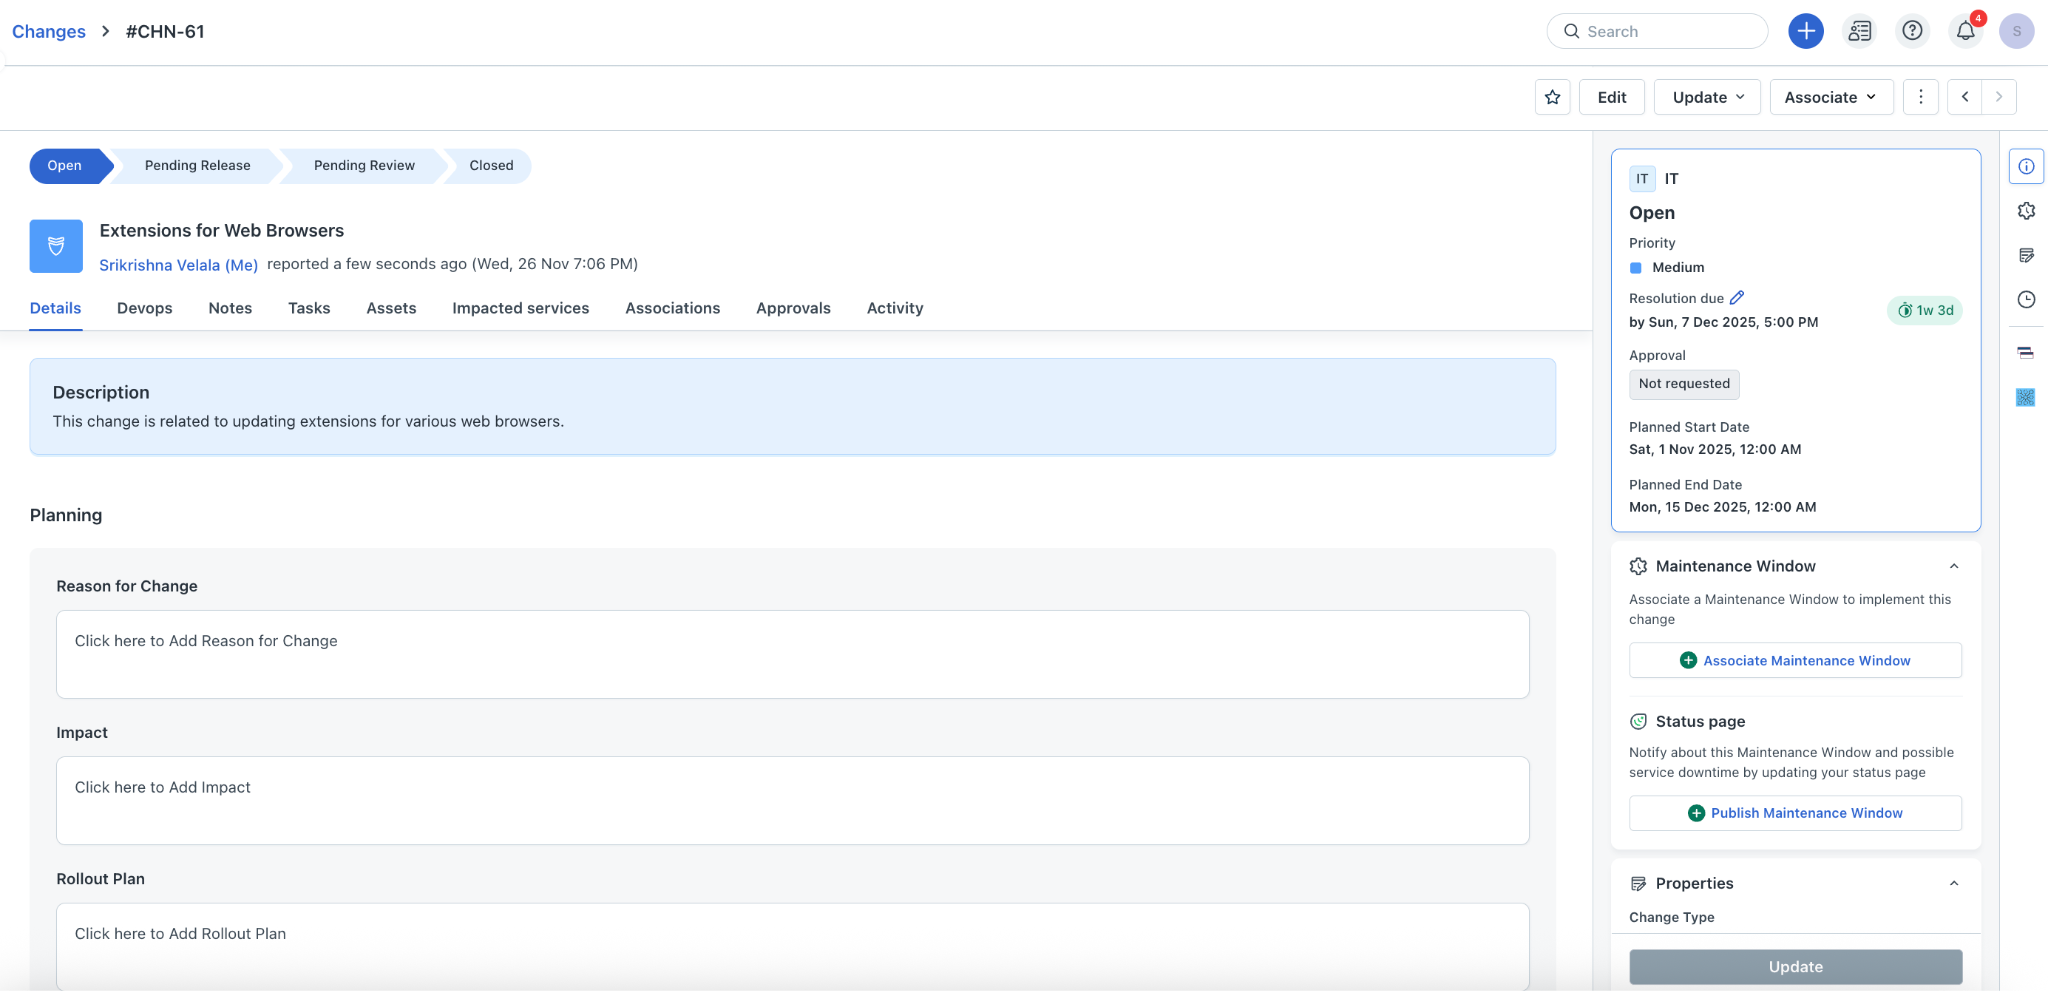
Click any Change Subject to view its details page.
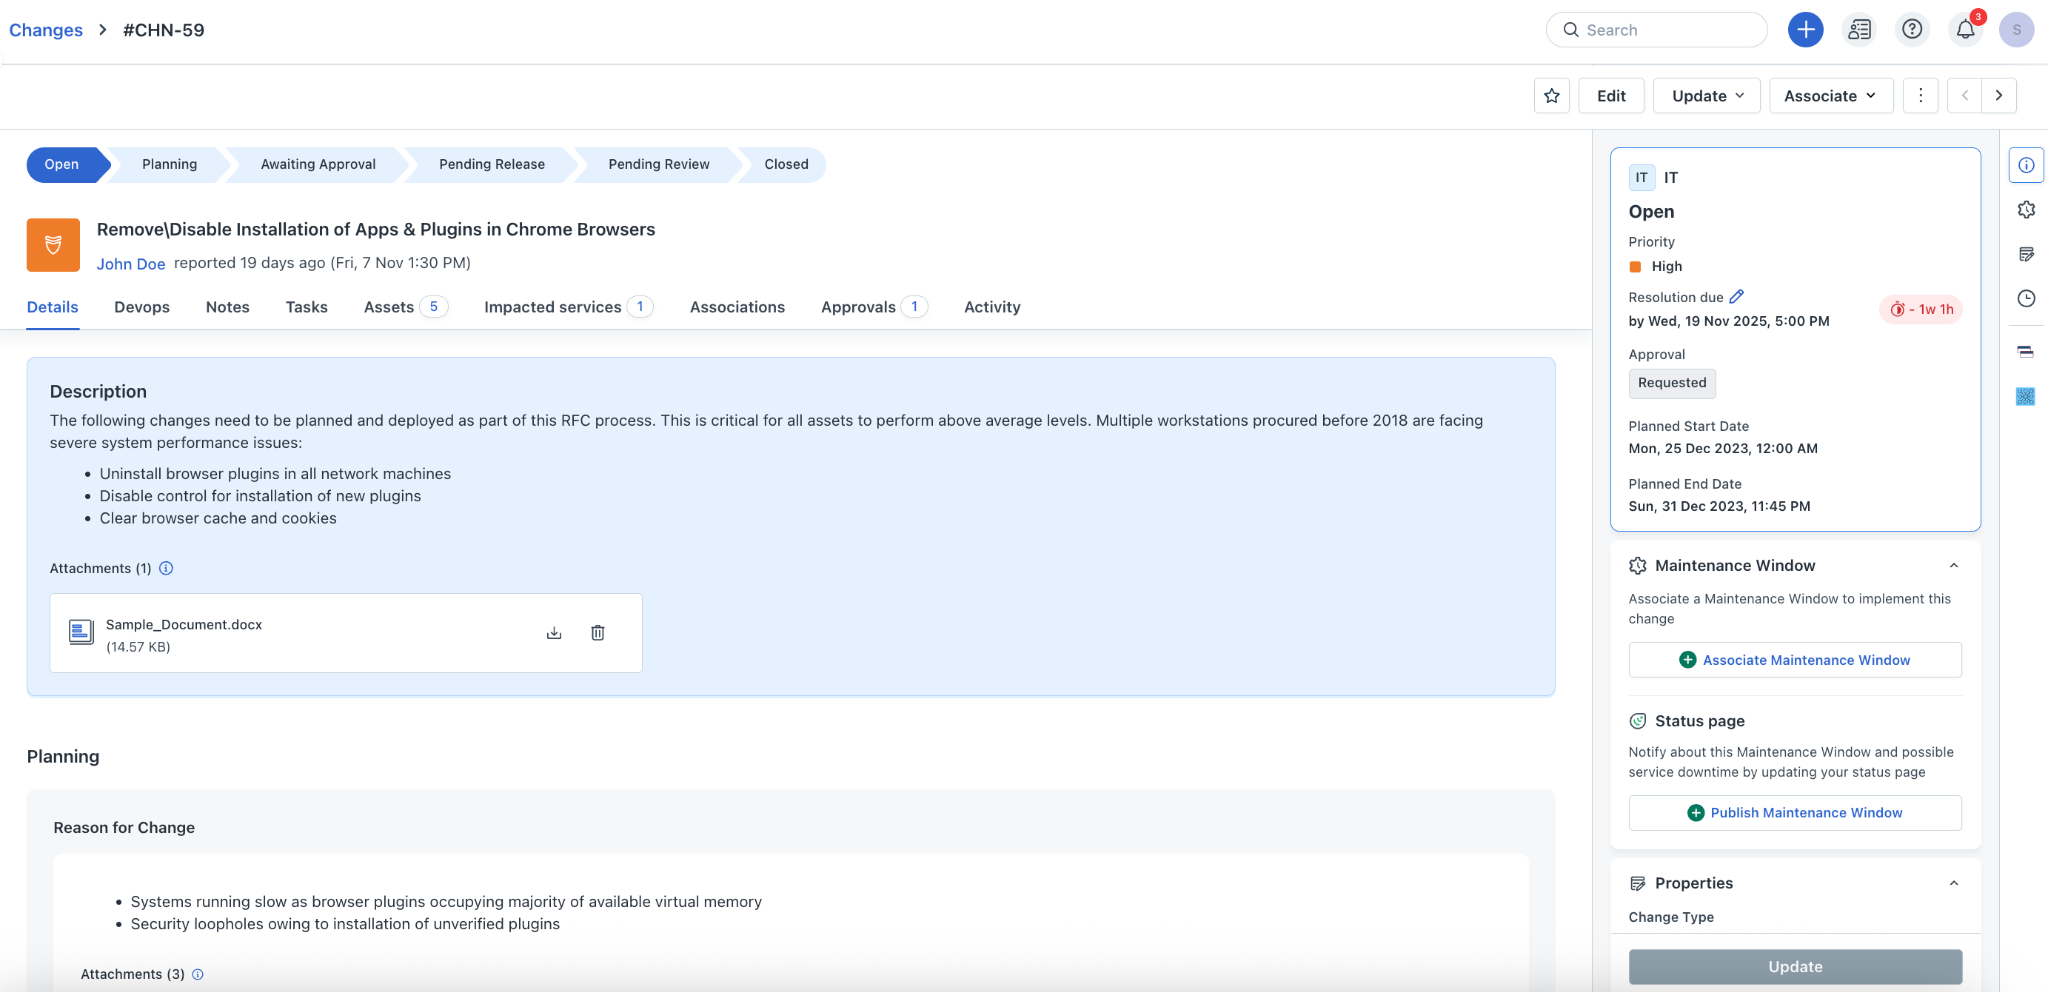
Under the Planning section, specify the reason, impact, rollout plan, and backout plan details.
After specifying relevant information in each of the Planning fields, click Save.
Note: You can add description, insert images and links, and attach files to supplement your report.
Configure planning fields
You can edit the Planning field names based on your organizational needs.
To configure planning fields:
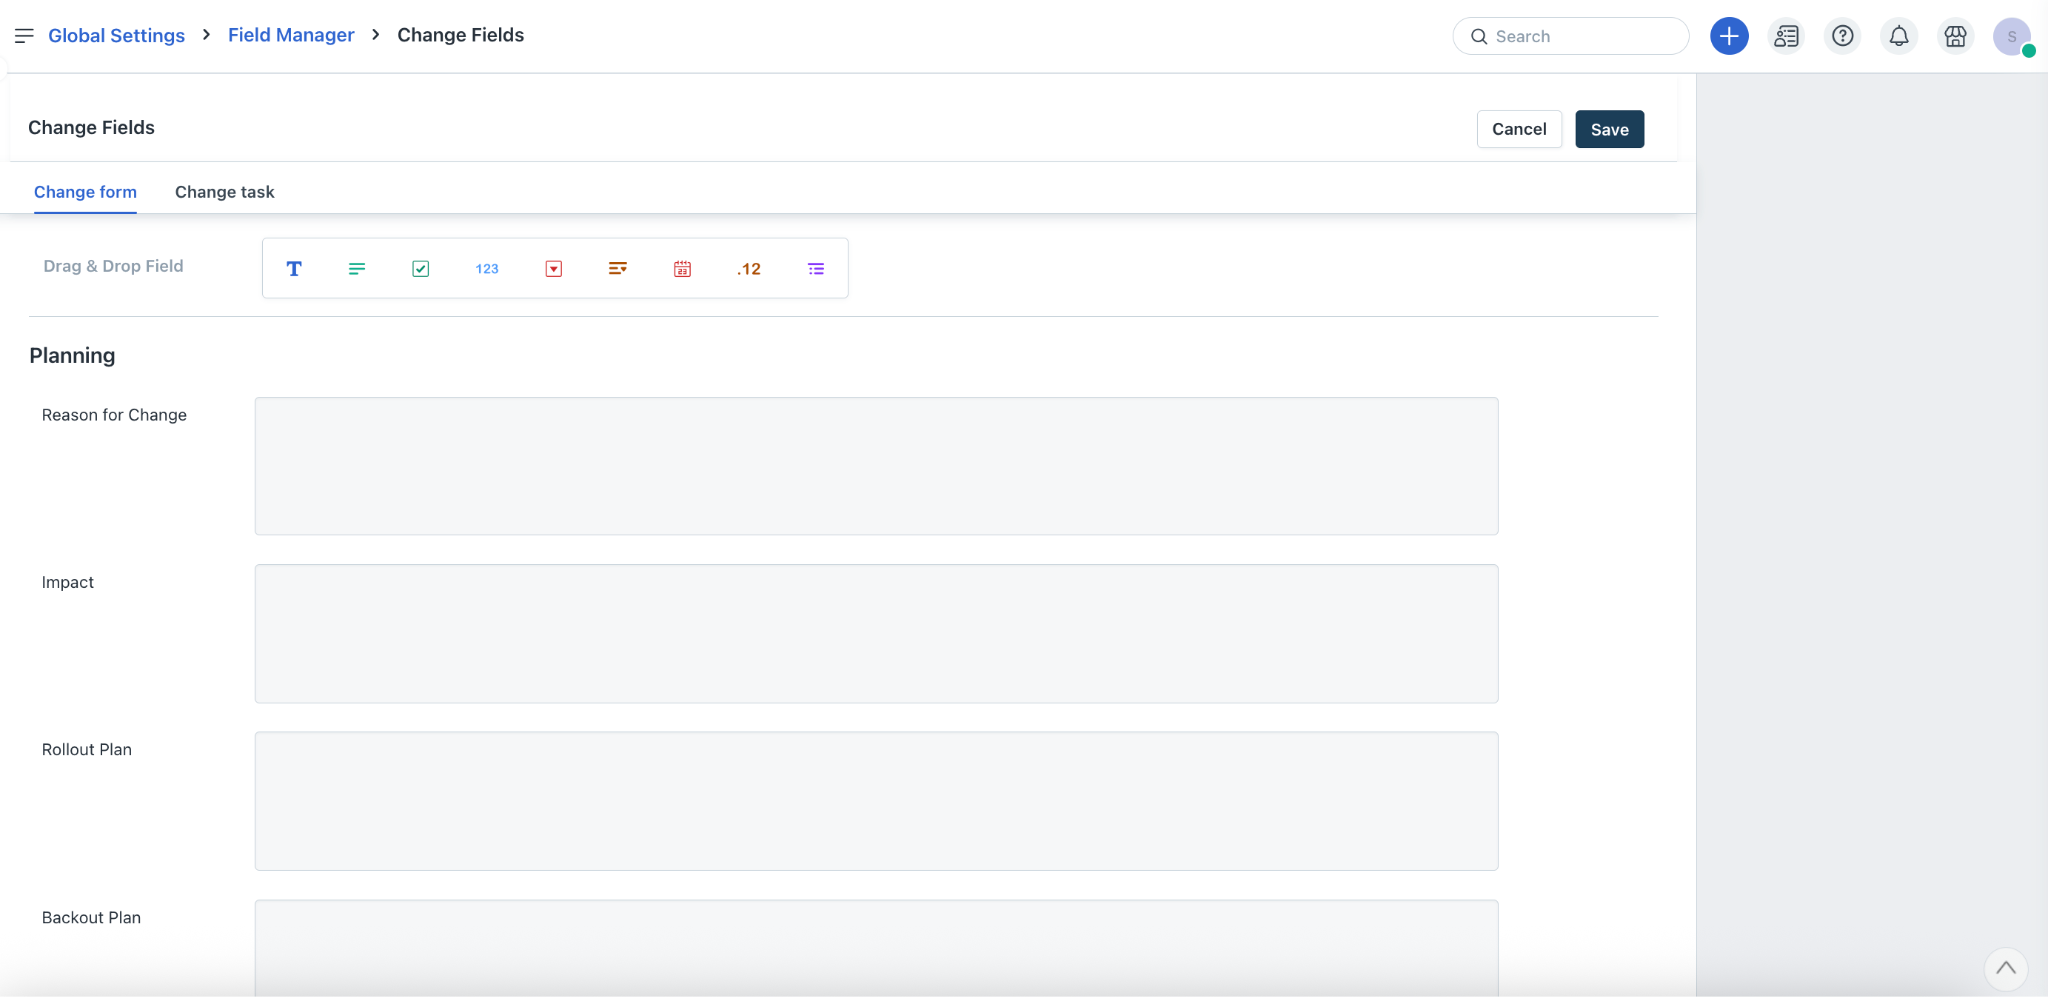
Go to Admin > Global Settings > Service Management > Service Desk Settings > Field Manager > Change Fields > Change form.
(If your account has more than one workspace) Go to Admin > {Workspace name} > Service Management > Service Desk Settings > Field Manager > Change Fields.
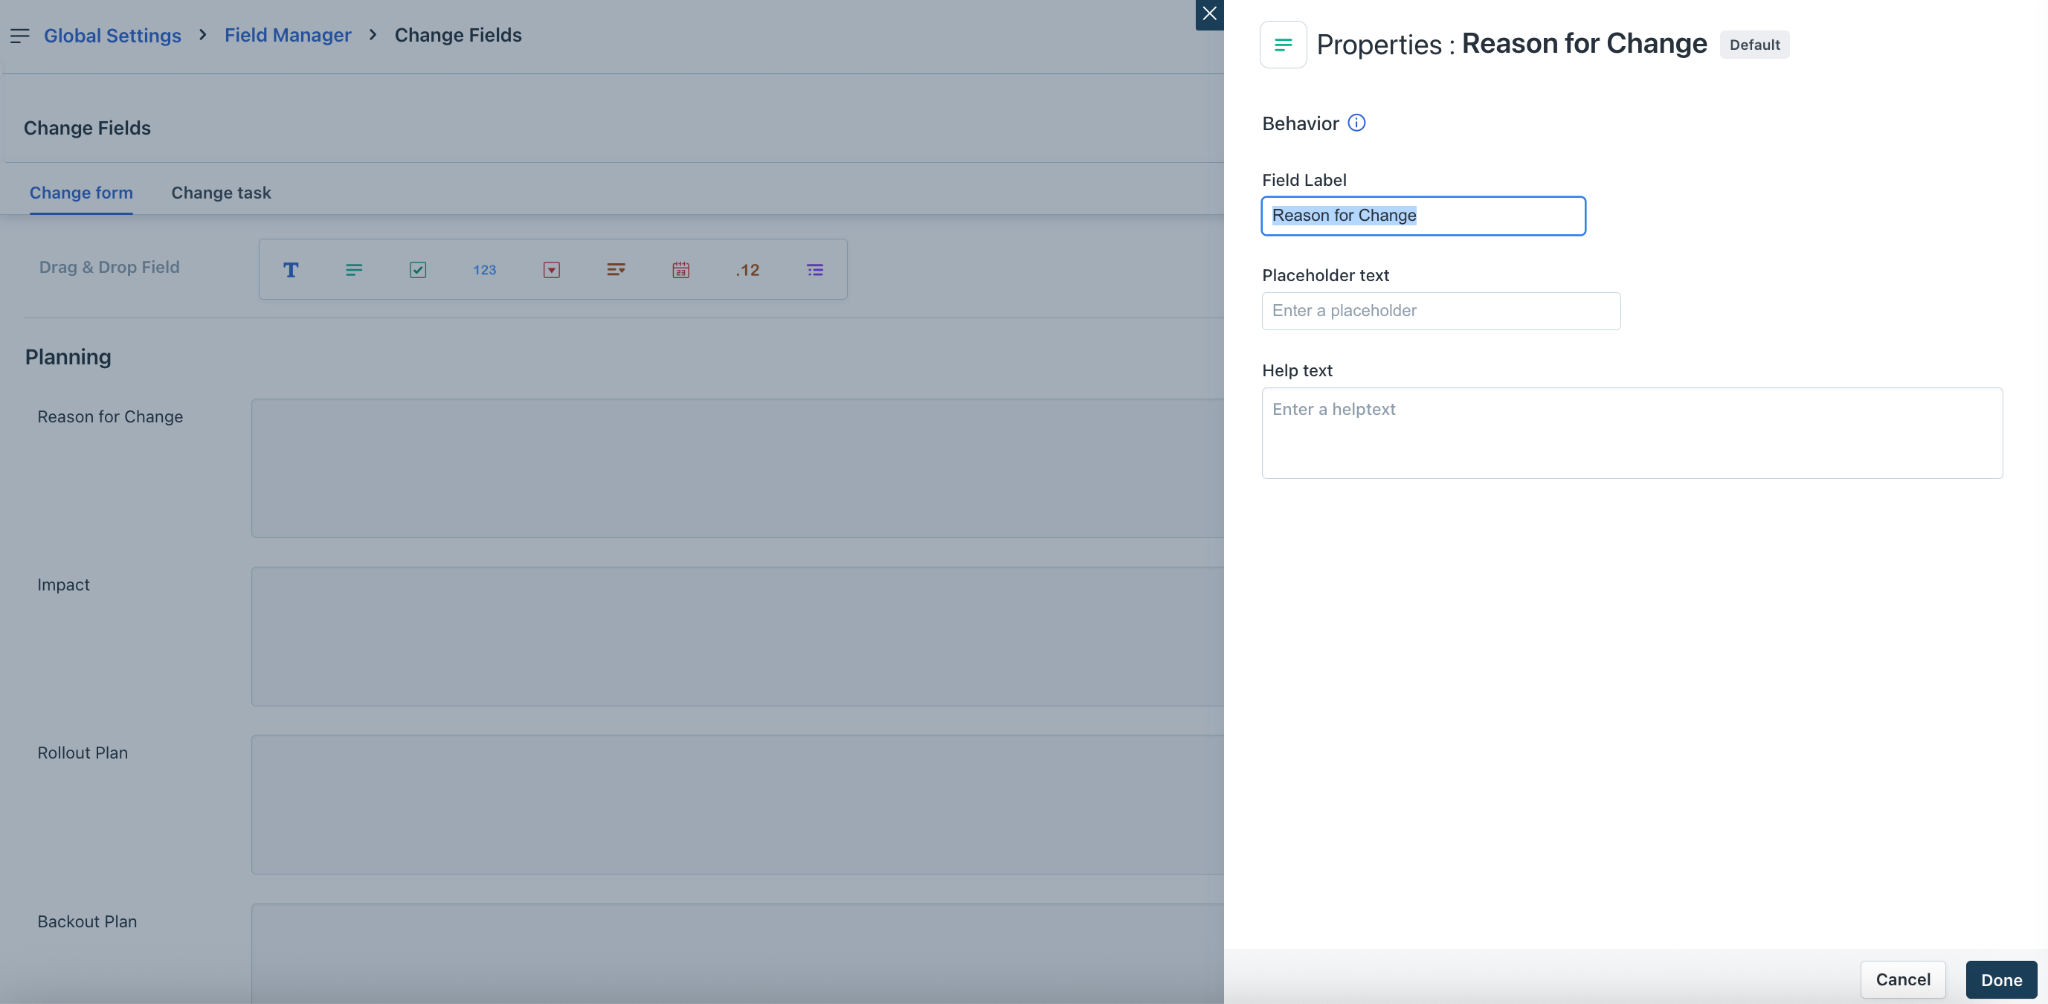
Under the Planning section, click the field you want to edit (for example, Reason for Change).
The Properties slider opens to the right.
Make the necessary updates, and click Done.
After updates to all the required Change fields are done, click Save.
Request CAB approvals
Once you have laid out plans for your change, you can submit it to CABs in your service desk. This will help Change Managers take appropriate decisions.
To request CAB approvals:
Log in to your Freshservice account.
Click Changes on the left pane.
Click any Change Subject to view its details page.
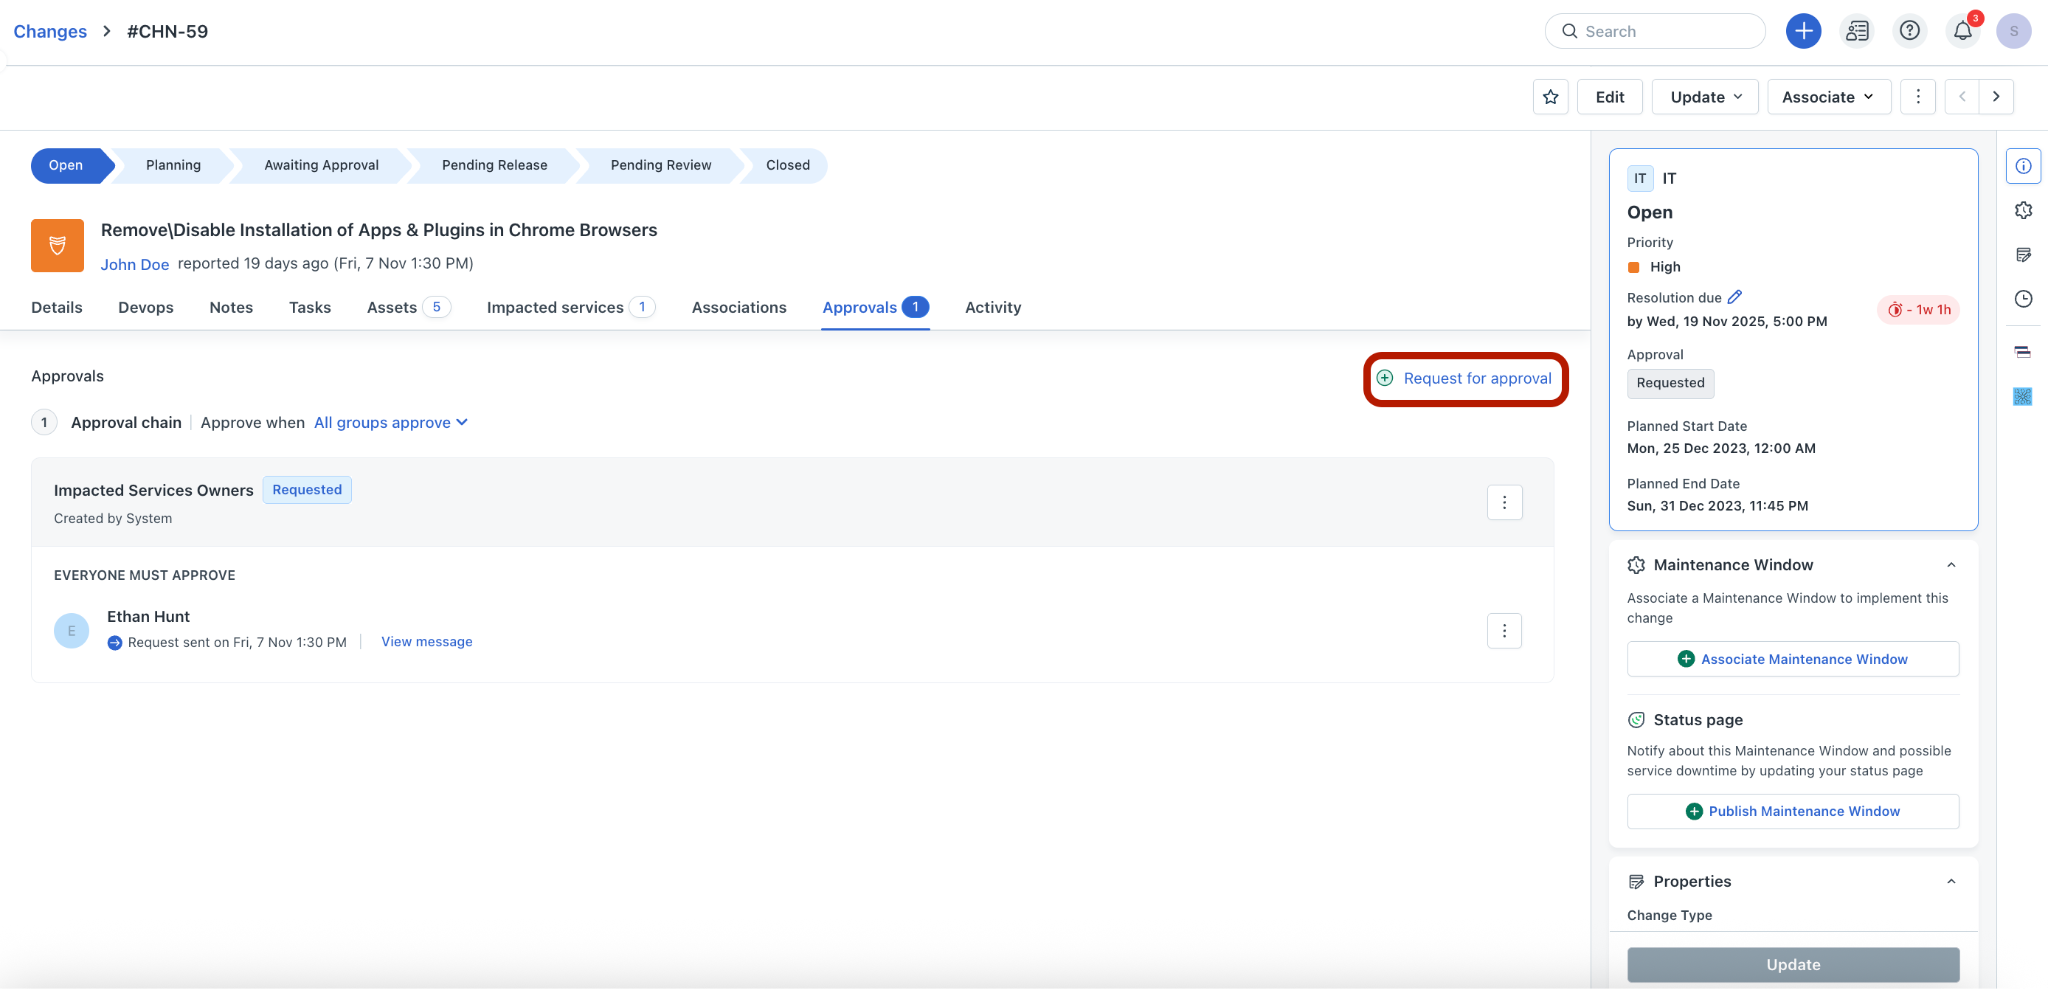
Go to the Approvals tab.
Click + Request for Approval.
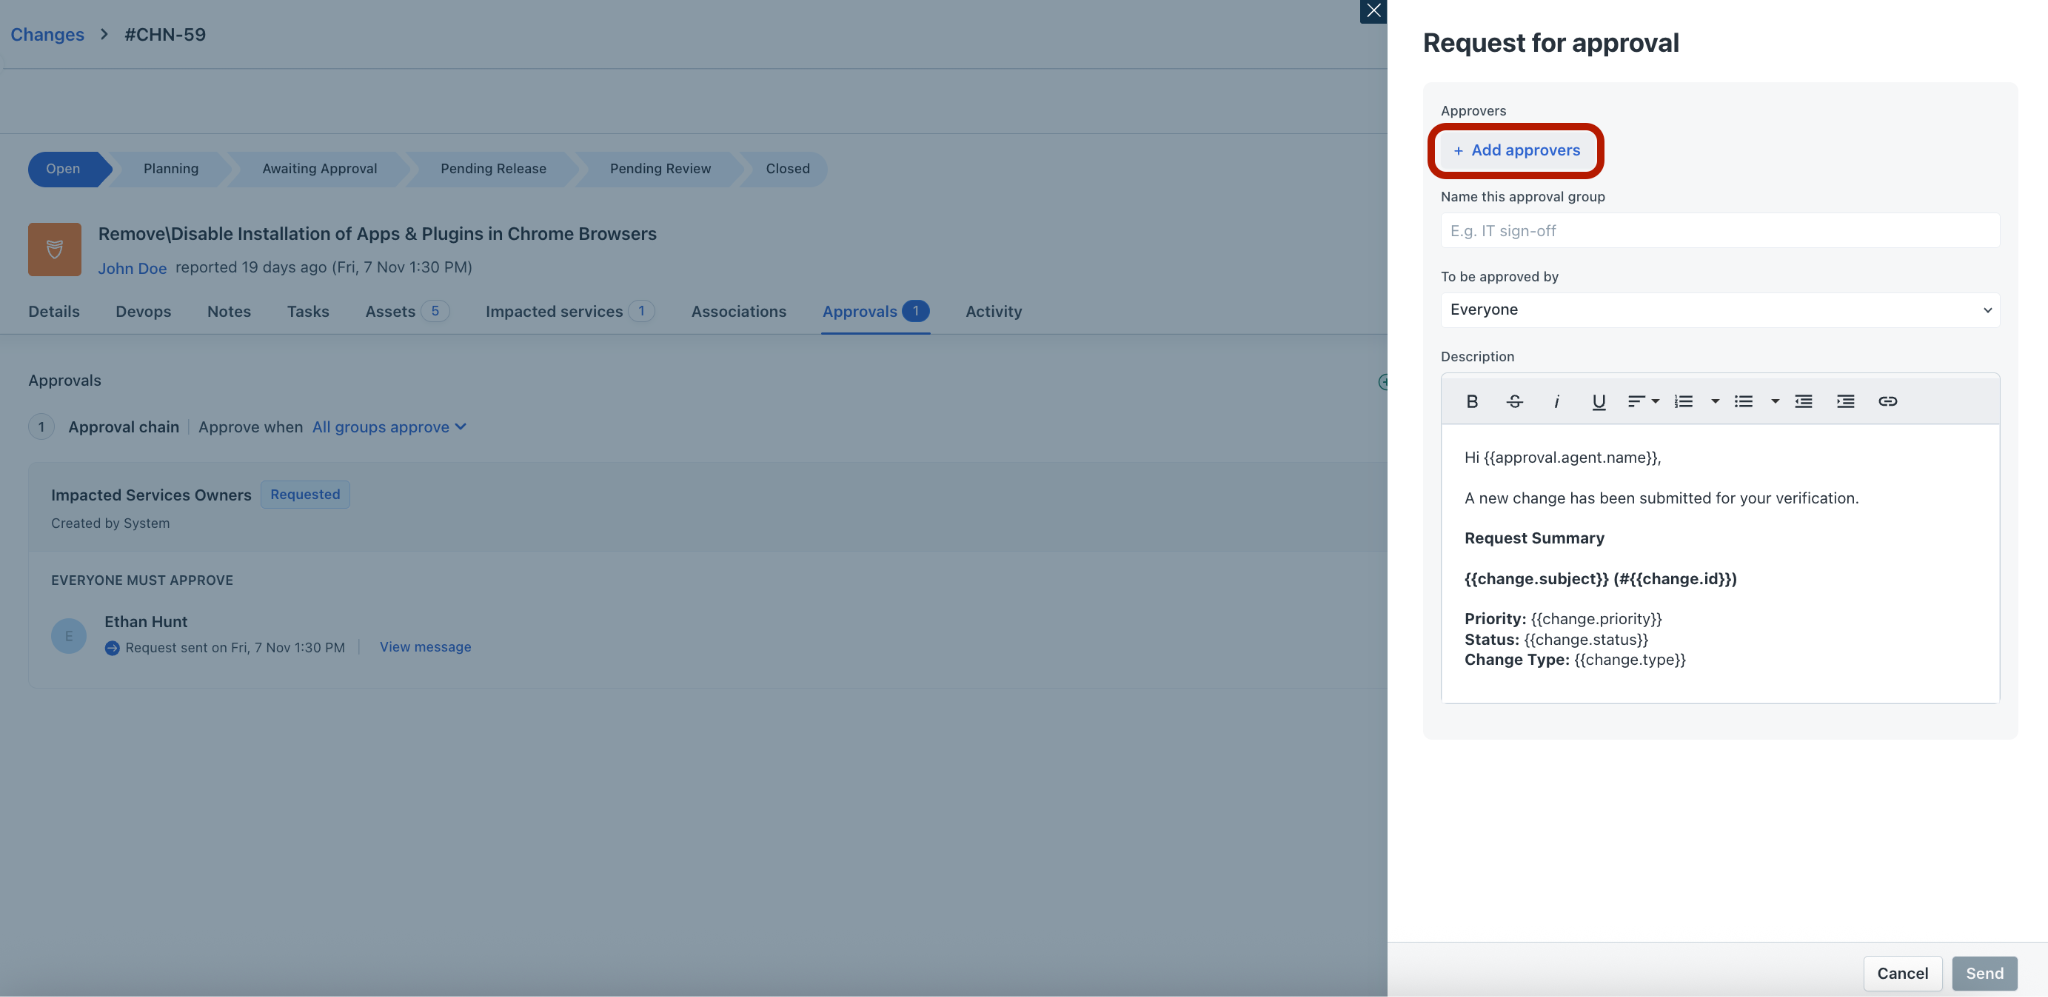
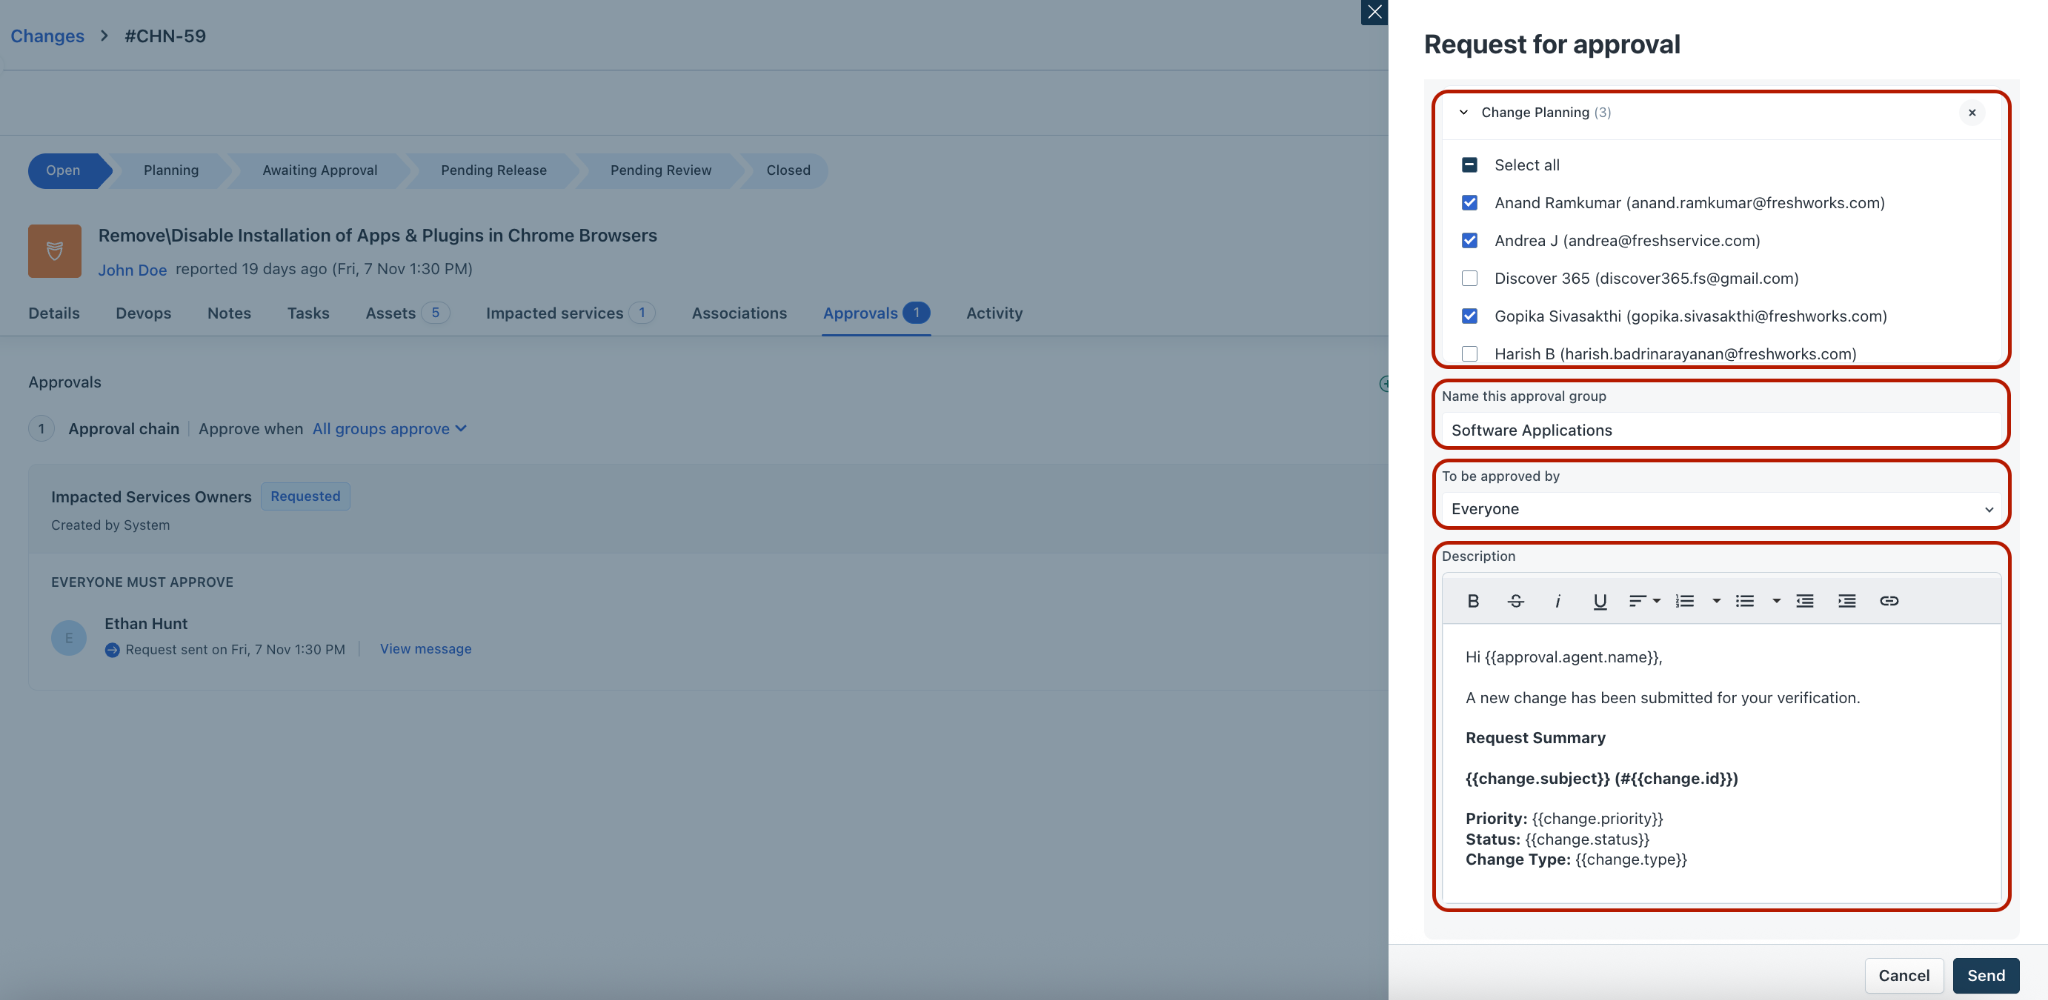
The Request for approval slider opens on the right.
Click + Add approvers.
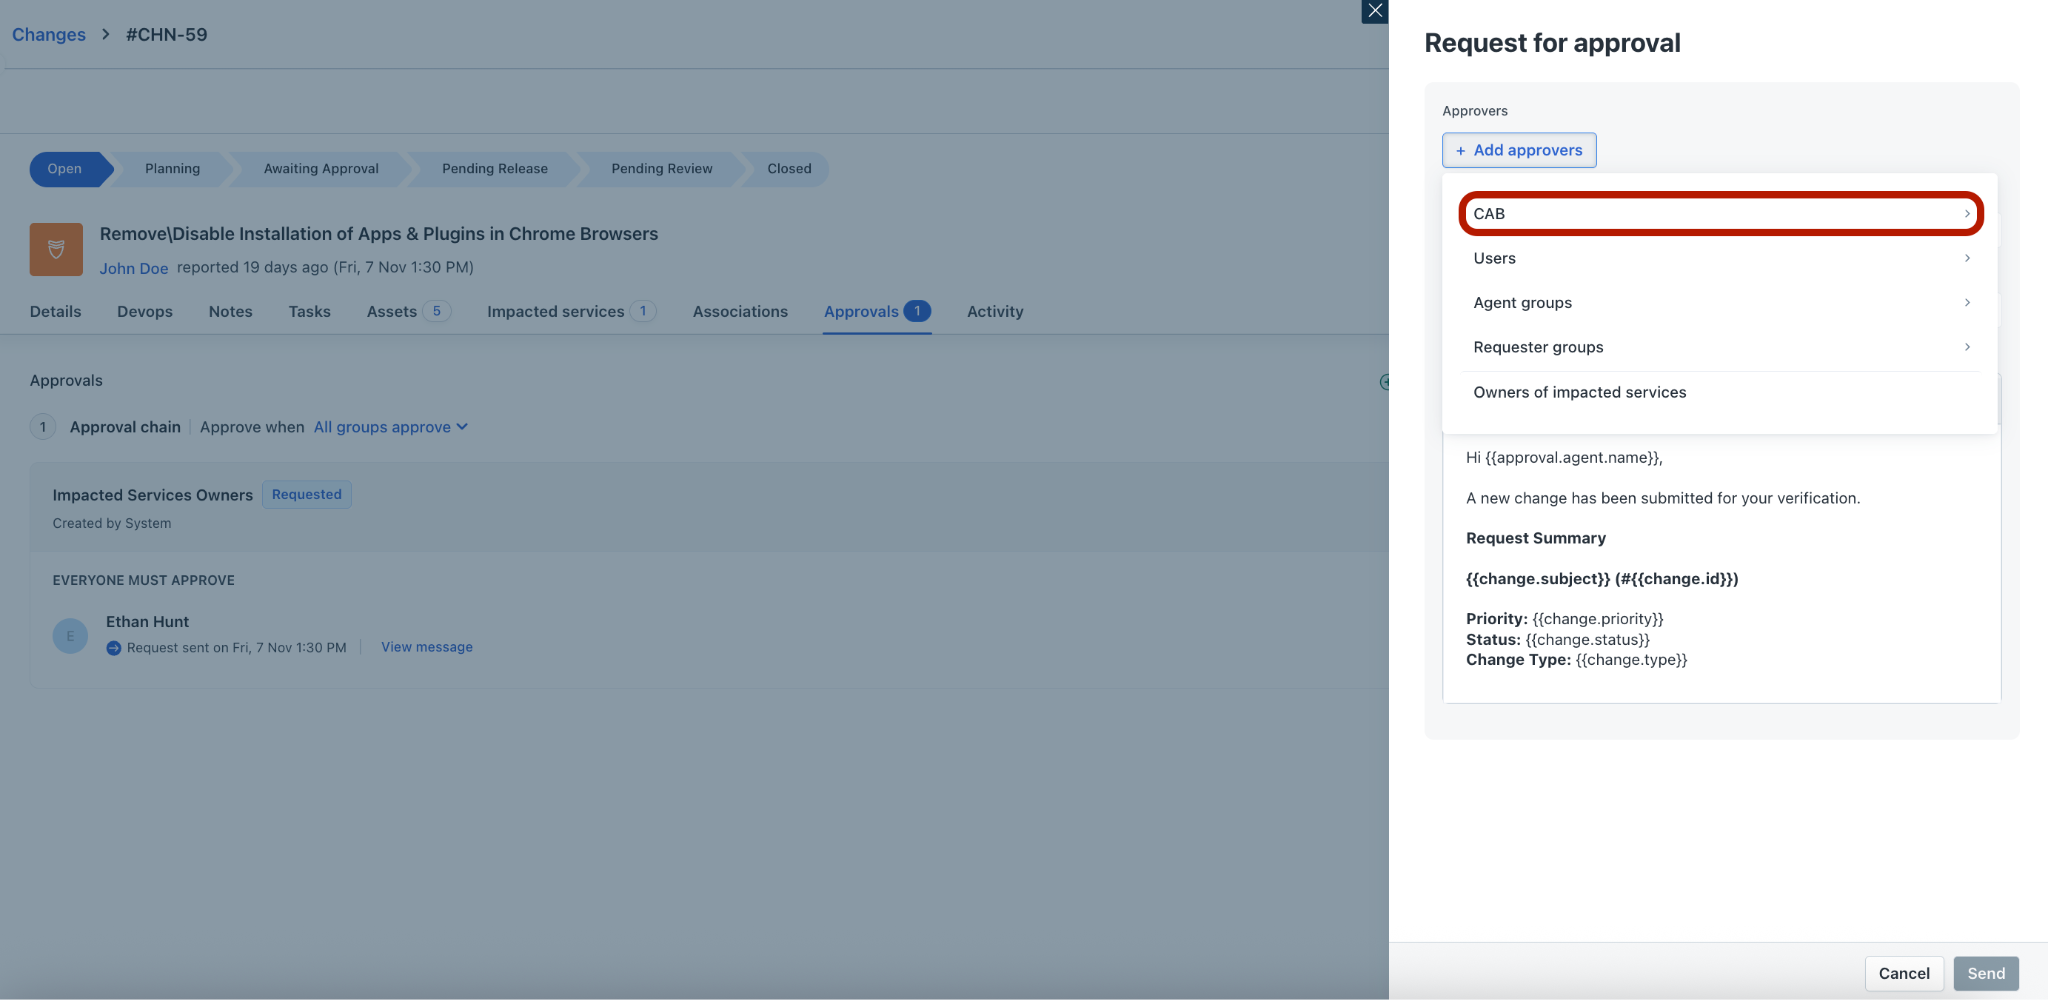
Click CAB.
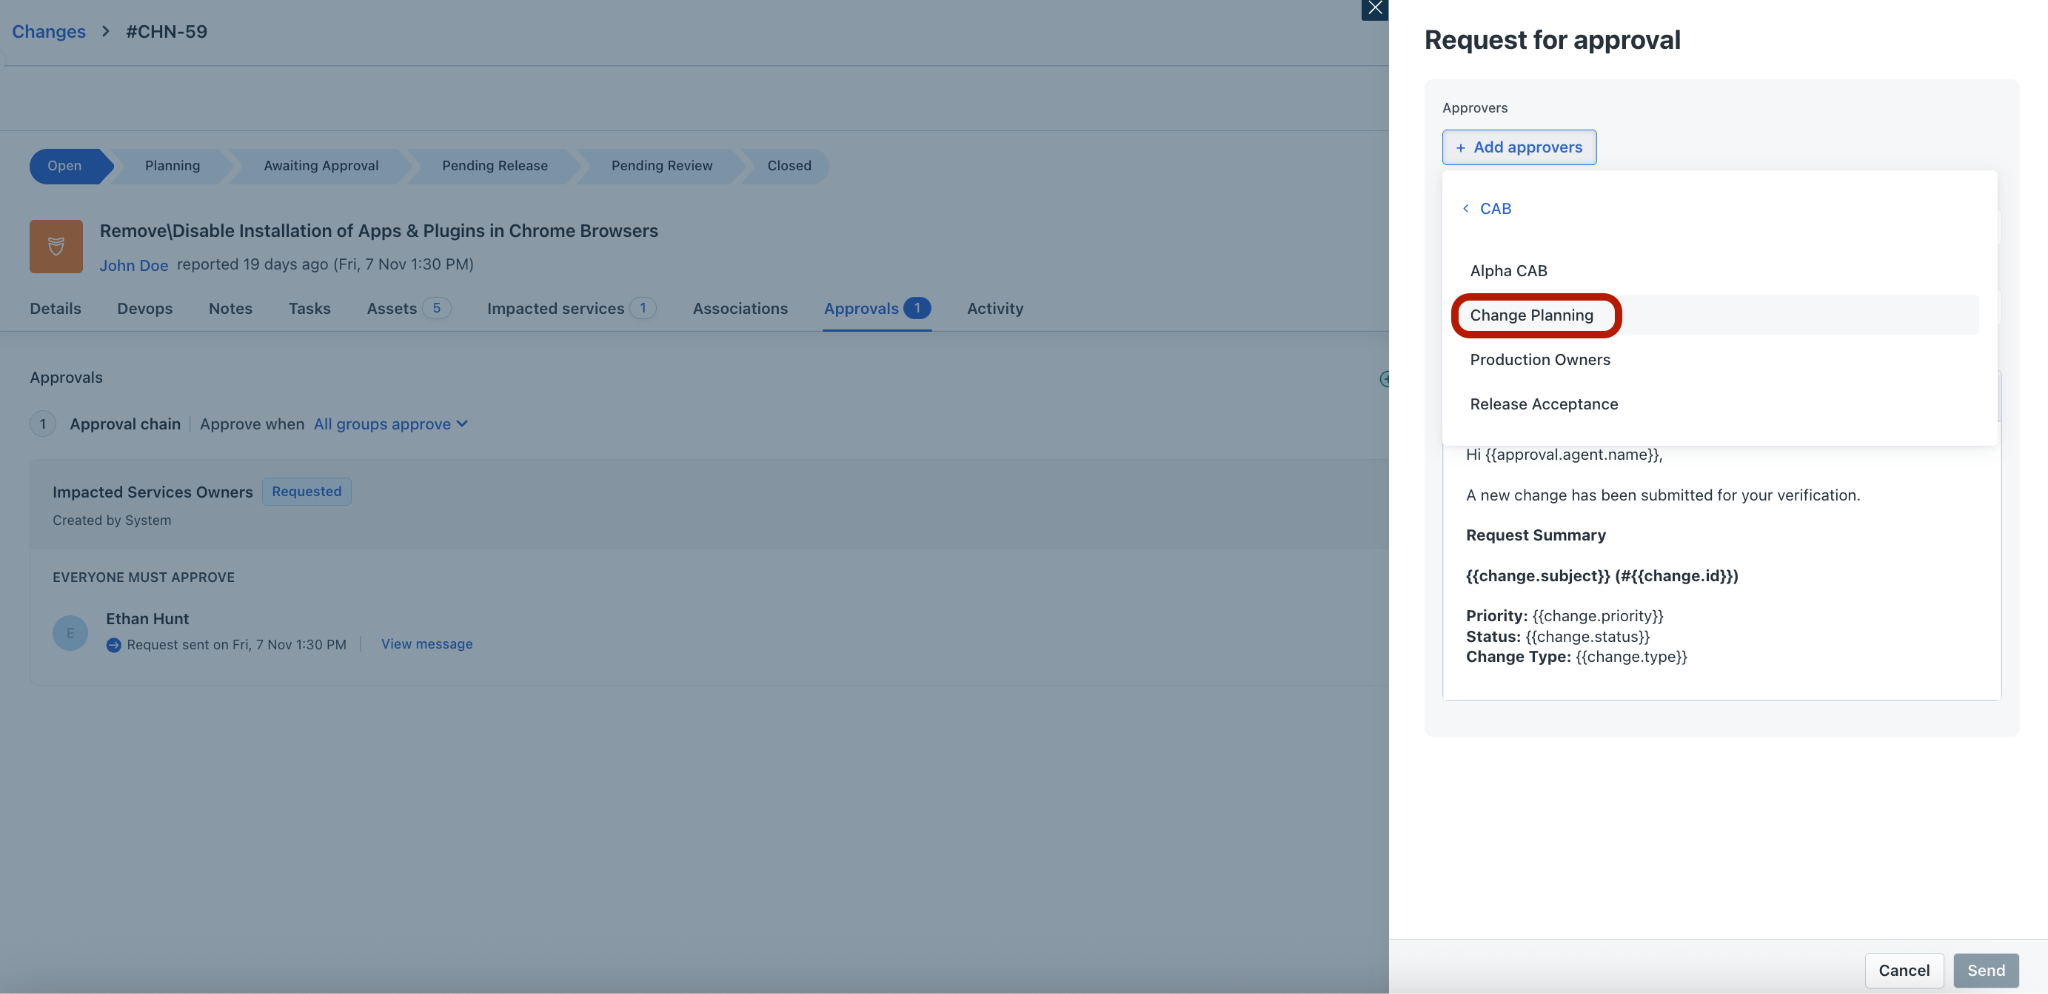
Then, select a relevant CAB (for example, Change Planning).
Specify relevant details or select relevant options under Change Planning, Name this approval group, To be approved by, and Description sections.
Click Send.
FAQs
1. Where can I edit the Change Lifecycle status?
The change lifecycle status can be modified based on the change type. To edit and customize, go to Admin > {Workspace name} > Service Management > Service Desk Settings > Change Lifecycle. Learn more about this here.
2. How do I modify the email template for Change approvals?
This can be modified from Admin > {Workspace name} > Email Notifications > Changes > Agent Notification > Notify CAB Member.
3. I am unable to mandate or edit the Change Planning fields, how to resolve this?
You will be able to edit the Change Planning fields from Admin > Global Settings > Service Management > Service Desk Settings > Field Manager > Change Fields > Change form.
Or, Admin > {Workspace name} > Service Management > Service Desk Settings > Field Manager > Change Fields.
Note: There’re no configuration settings to make the Planning fields mandatory via the Field Manager module. However, it can be done via the Business Rules module for Changes.

