Note: This feature works the same across all Freshservice products. Some screenshots or articles may reflect older designs, but the functionality remains unchanged. If certain options do not appear in your account, they may not be included in your current plan.
TABLE OF CONTENTS
- Overview
- Prerequisites
- Configure ticket form fields
- Configure ticket task fields
- Business rules for ticket fields
- Frequently asked questions (FAQs)
Overview
The Field Manager service desk settings help you configure the default and custom fields for your service desk ticket forms and ticket tasks.
You can configure distinct ticket fields to capture the precise information necessary for effectively addressing and managing service requests. You can define various field types, such as text, number and date fields, dropdown lists, and checkboxes based on your specific requirements. Further, you can designate fields as mandatory or optional, arrange fields in a logical order, and so on.
Note:
Ticket form fields and Ticket task fields (both) can be configured at the global settings level. However, only the Ticket form fields can be configured at the workspace level.
The default fields that are pre-configured for Ticket forms and Ticket tasks, such as, Category, Subject, Description, Status, Impact, Title, or Note cannot be archived or deleted. However, the custom fields that you configure can be archived or deleted.
For some of the default fields (such as ‘Status’, which is a dropdown field type) as well as custom fields, you can add more dropdown choices. Additionally, you can configure specific business rules for these fields.
Standard/default fields configured at the global level are universally applicable and cannot be removed from Ticket list filters for specific workspaces.
If you want to apply any specific rules for Ticket form fields, such as ‘Show’, ‘Hide’, ‘Enable’, ‘Disable’, ‘Mandate’, ‘Set options’, and so on, you can use Business Rules for Forms. You can also configure the execution of business rules specifically on New form, Edit form, or both; set the rule application for agents, requesters, or both; configure advanced settings (such as, auto-reverse or enforce system-wide); and configure various conditions for ticket forms.
The custom fields configured at the global settings level can be edited only at that level, and the custom fields configured at the workspace level can be edited only at that level.
A workspace must be fully set up and published before ticket fields for that workspace can be edited in its field manager. System fields such as ‘Requester’ can only be edited in the Global settings field manager.
Prerequisites
Ensure the following permission is enabled for the Admin role to manage Ticket fields: ‘Manage Fields and Tags’.
Ensure the relevant permissions are enabled for the Agent role to perform various actions on Tickets, such as viewing tickets, editing ticket properties, moving tickets, viewing documents, and so on.
To set the required permissions for admin and agent roles, go to Admin > User Management > Roles.
Configure ticket form fields
To configure the ticket form fields:
Log in to your Freshservice account.
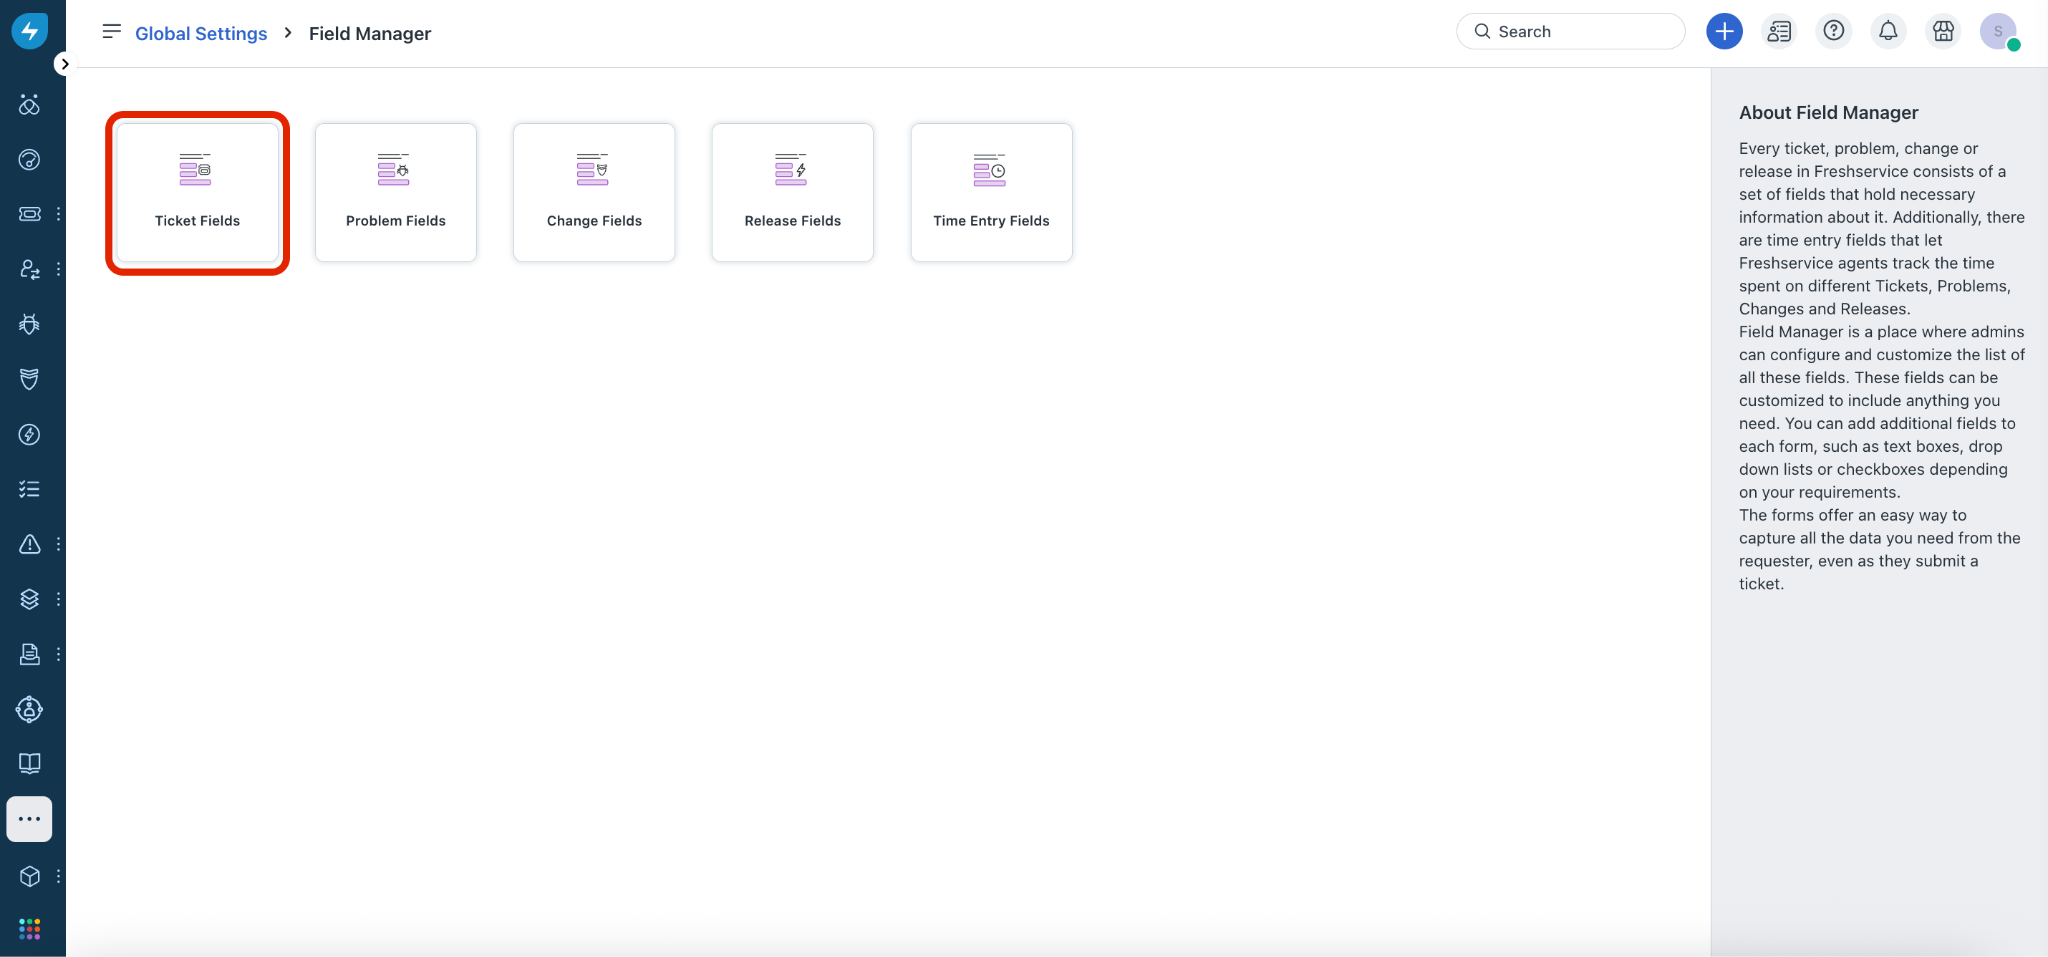
(To configure ticket form fields at the global level) Go to Admin > Global Settings > Service Management > Field Manager > Ticket Fields.
(To configure ticket form fields at the workspace level) Go to Admin > Global Settings.
Click the ellipses icon at the top left corner, and select a workspace under Workspace Settings.
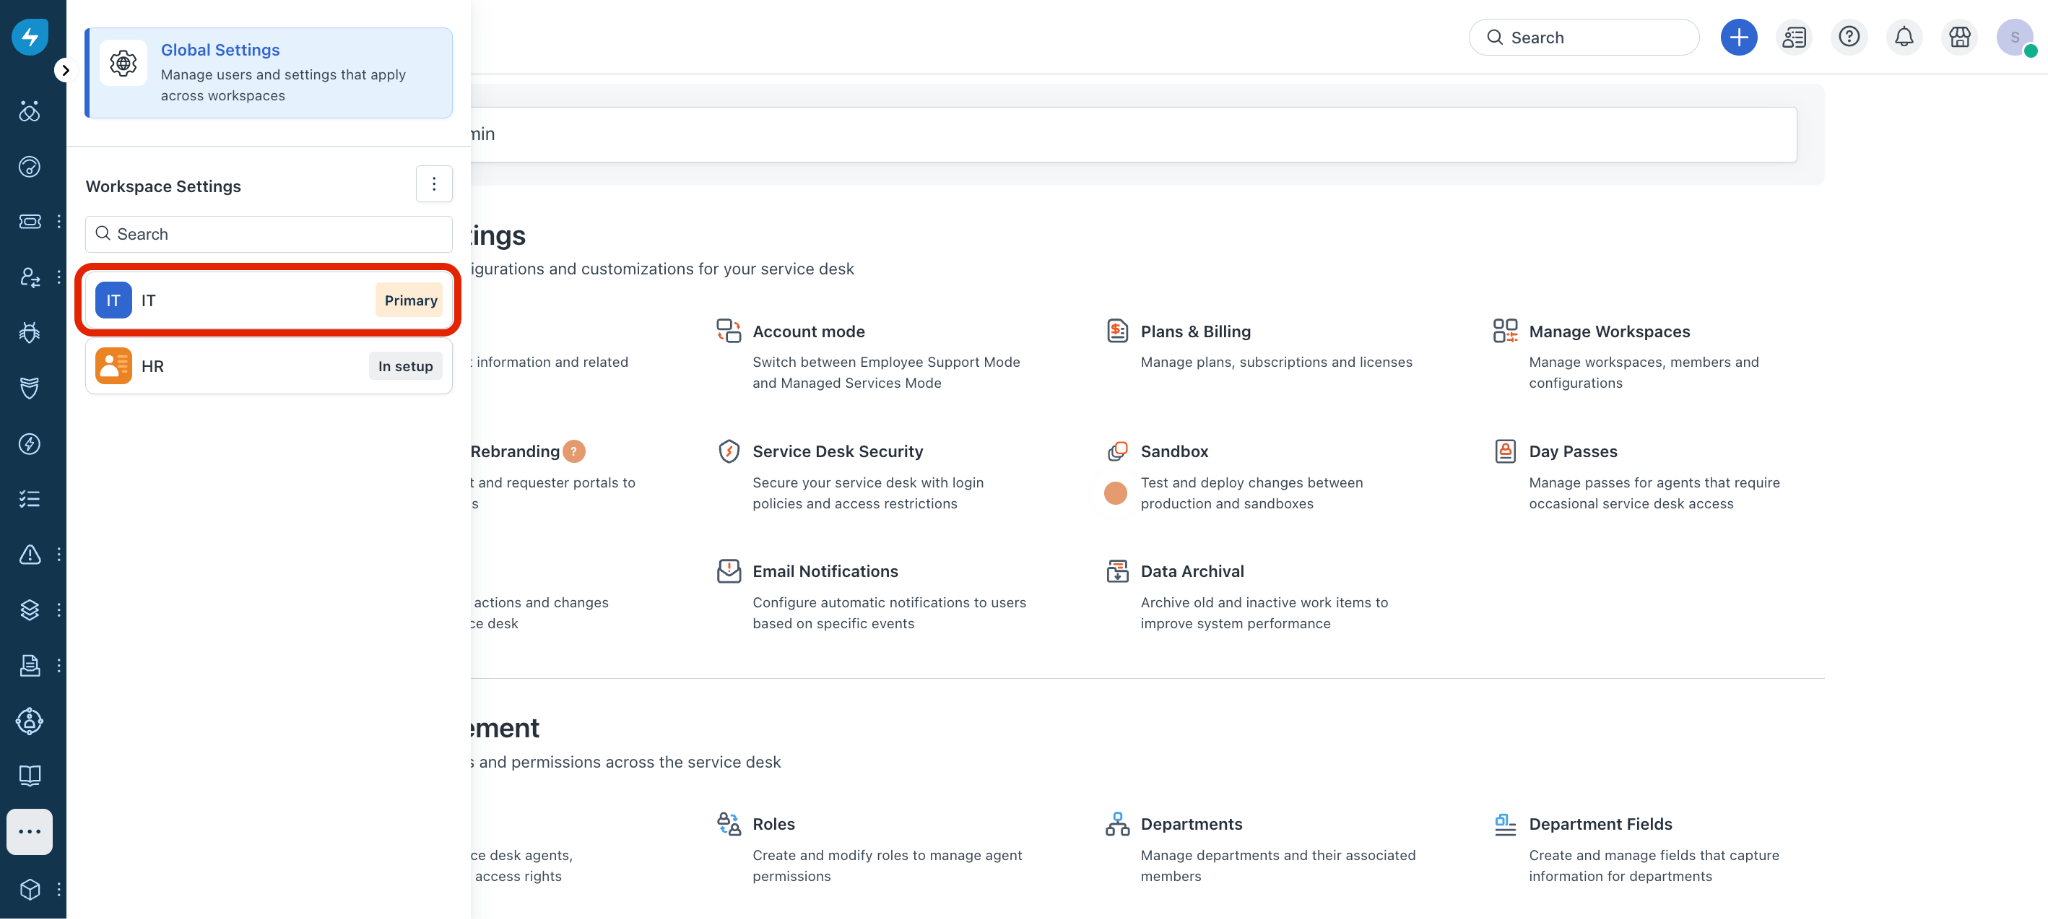
Then, go to Service Management > Field Manager > Ticket Fields.
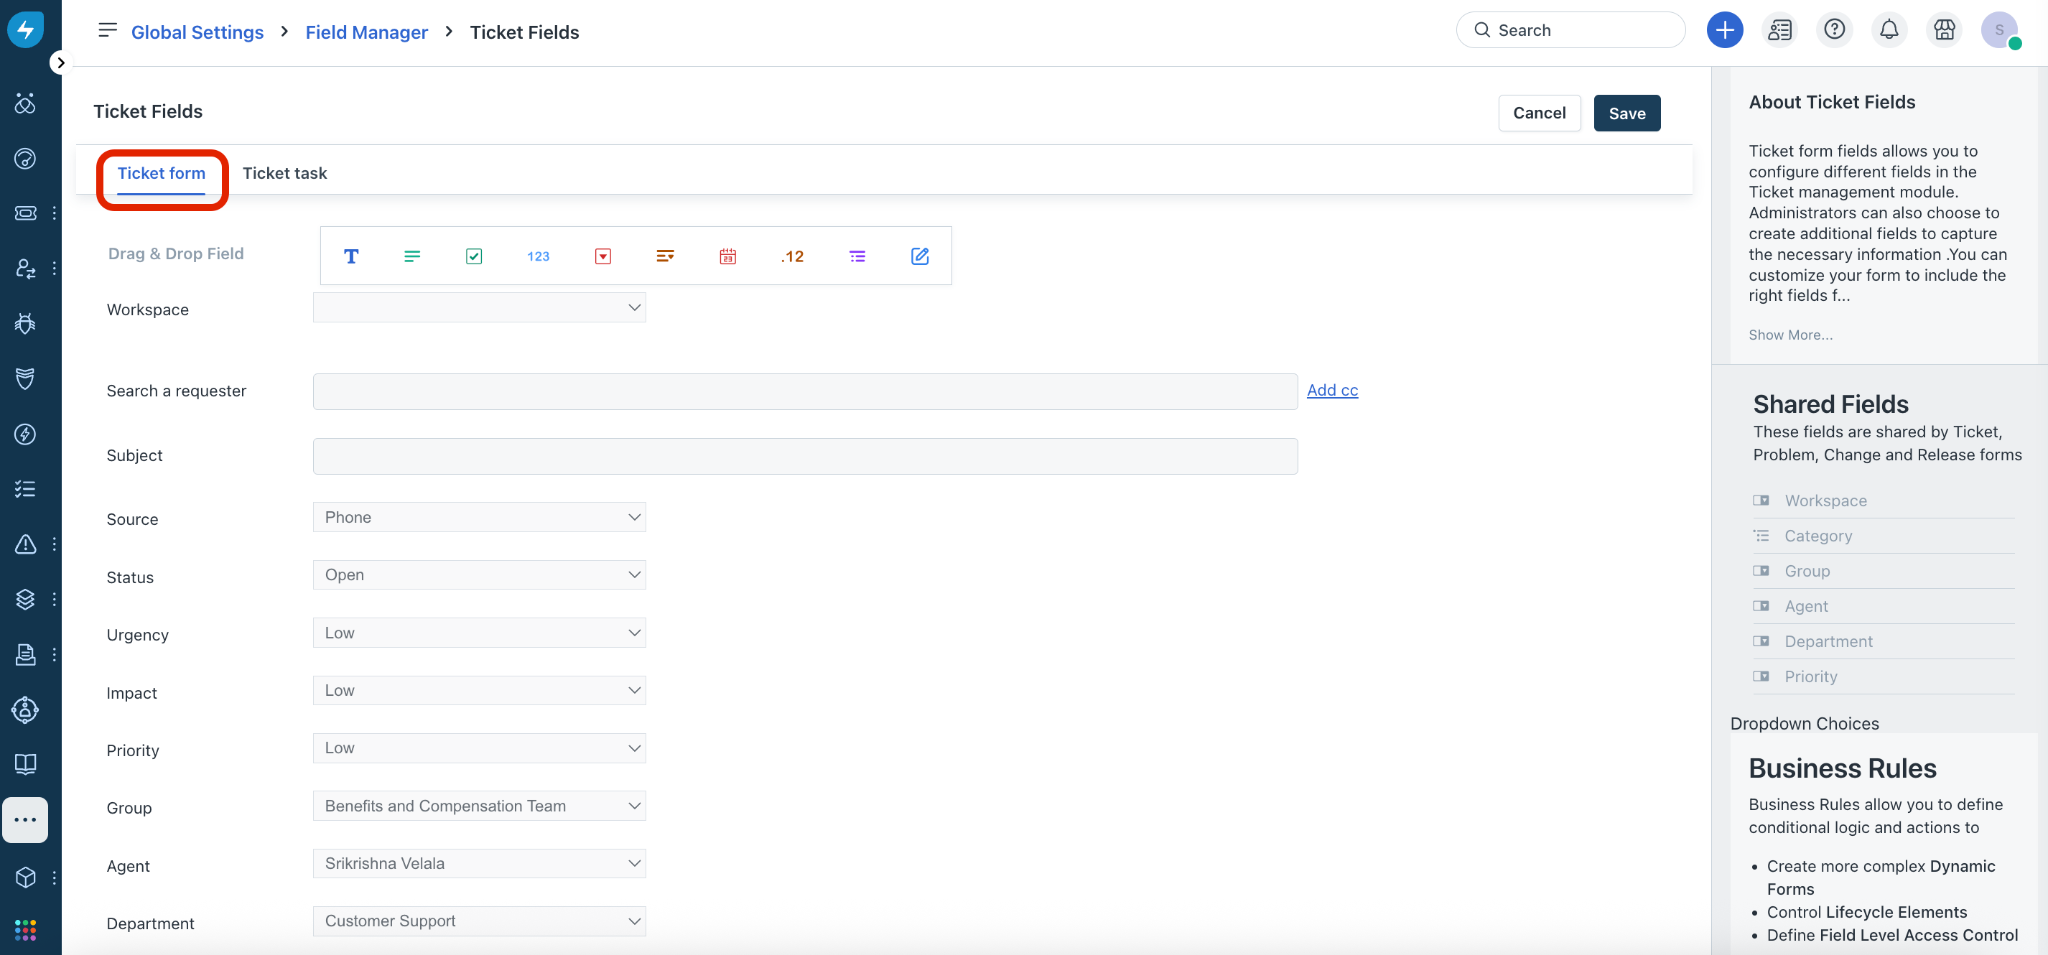
If you are configuring ticket form fields at the global settings level, the Ticket Fields > Ticket form page is displayed.
Or, if you are configuring ticket form fields at the workspace level, the Ticket Fields page is displayed.
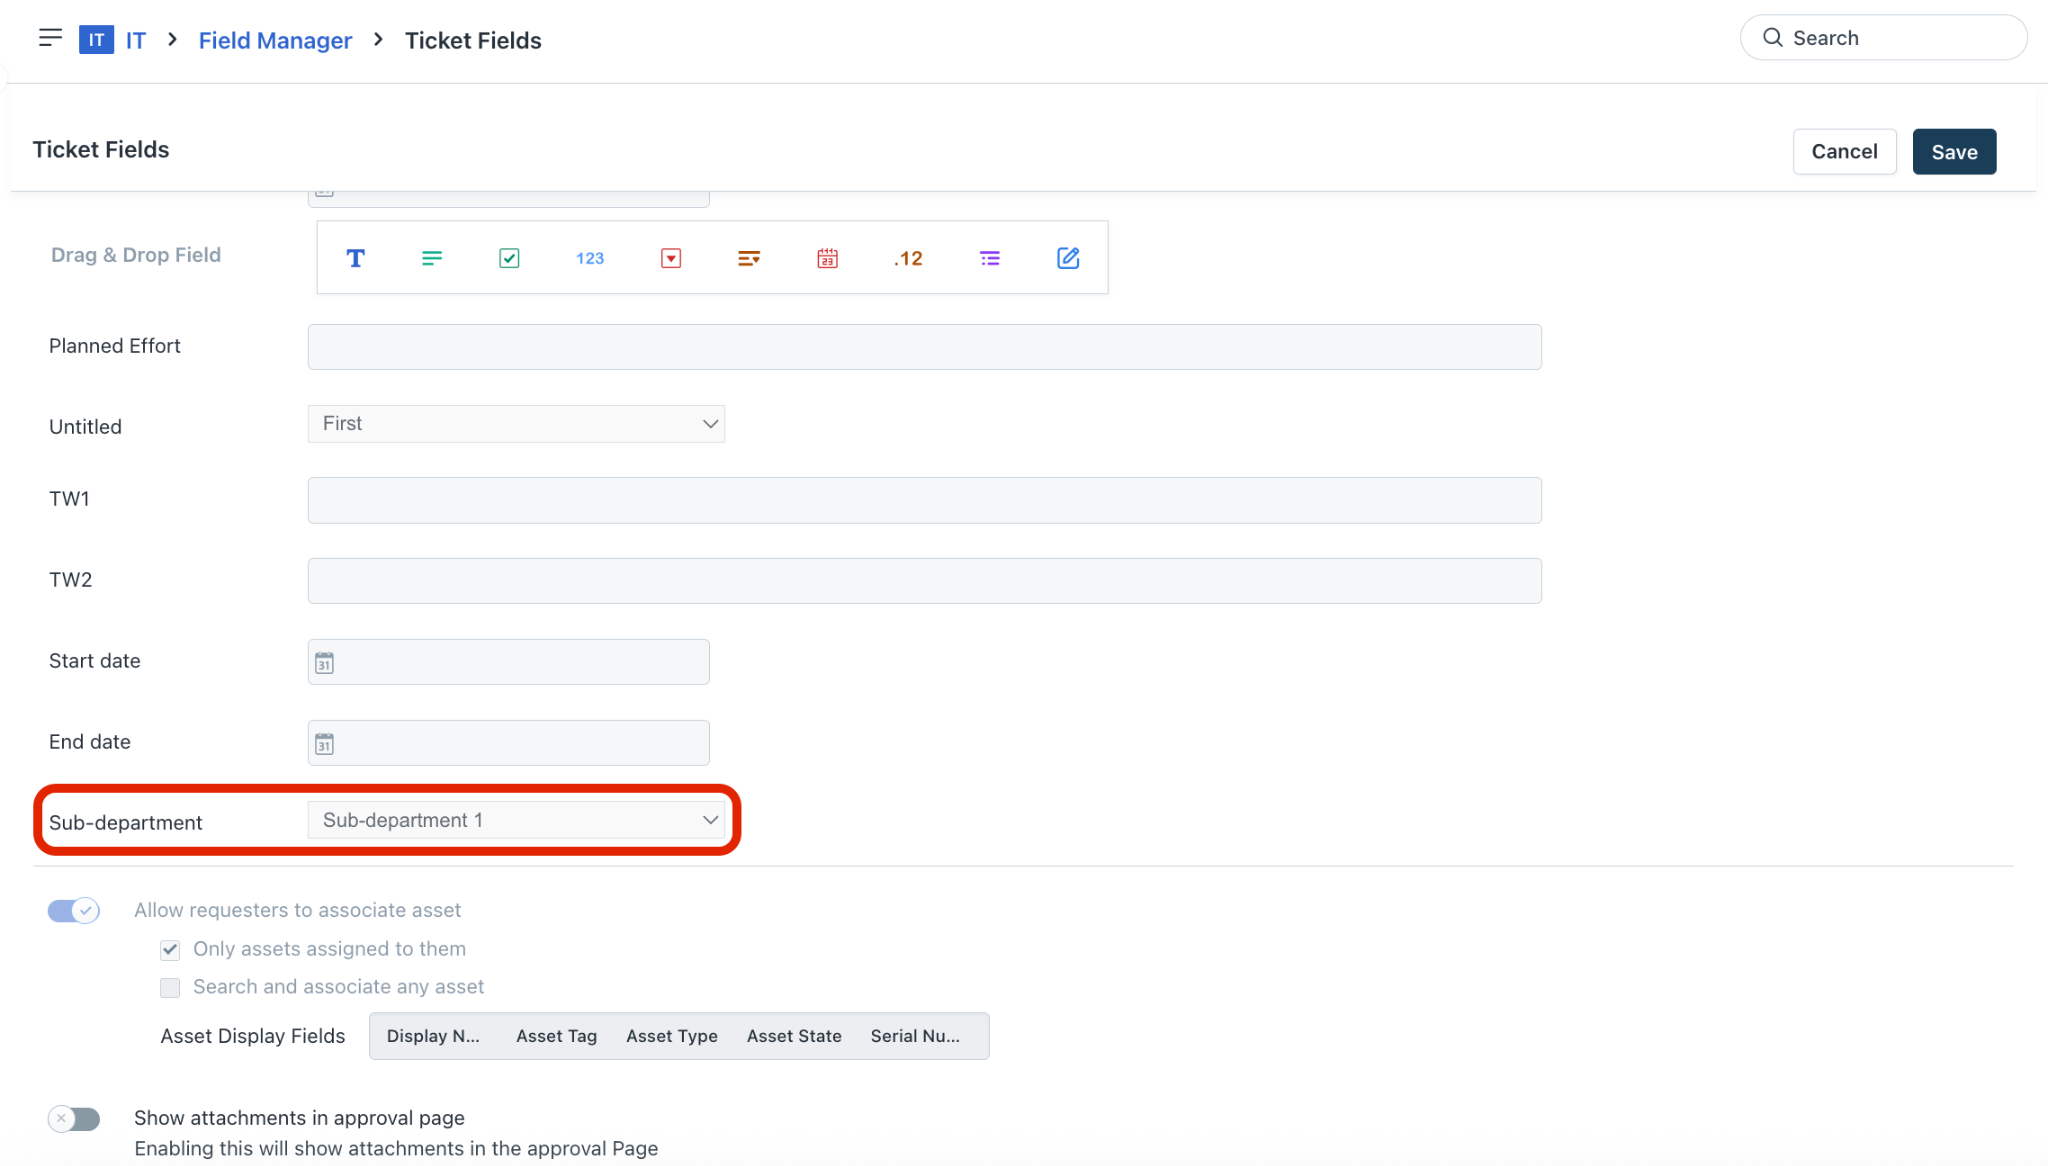
Click any default field to view and update its properties.
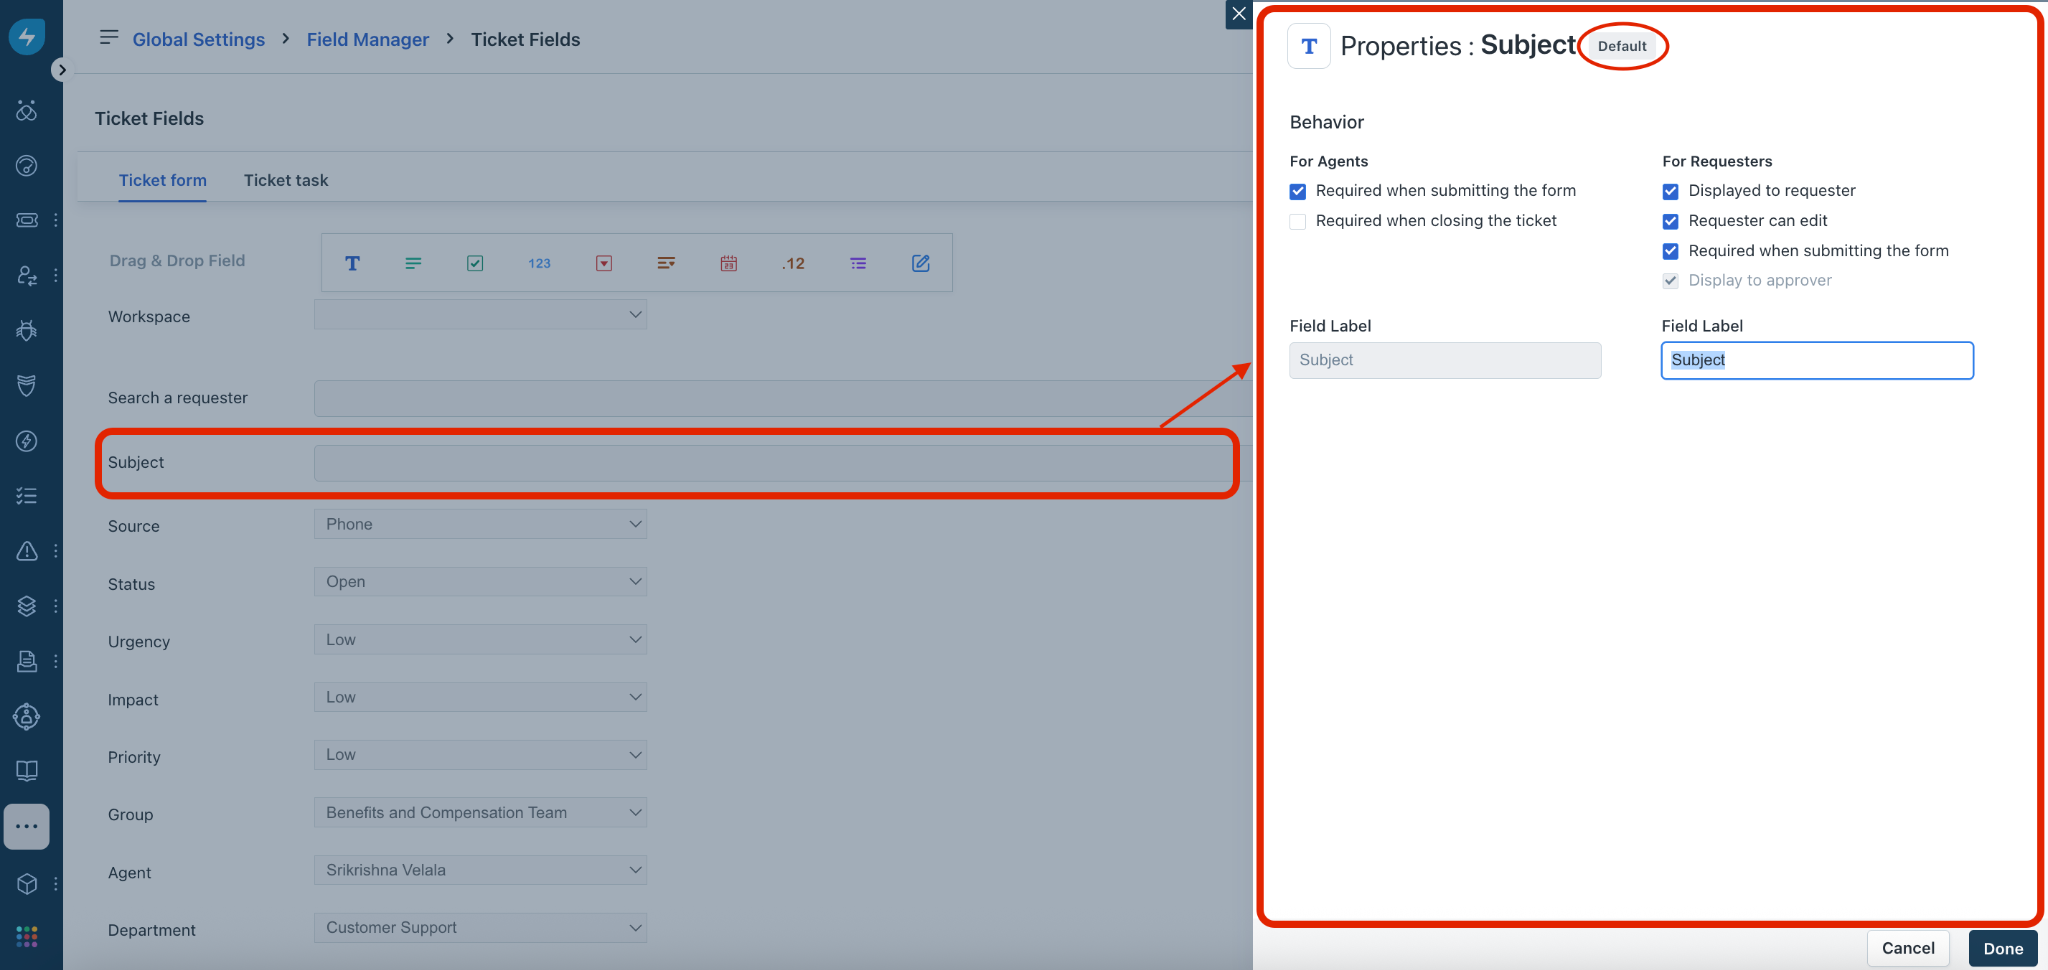
Update the field properties (as required), and click Done.
To add a new custom field to the form, select the required field type from the Drag & Drop Field options (for example, ‘Date’ field type).
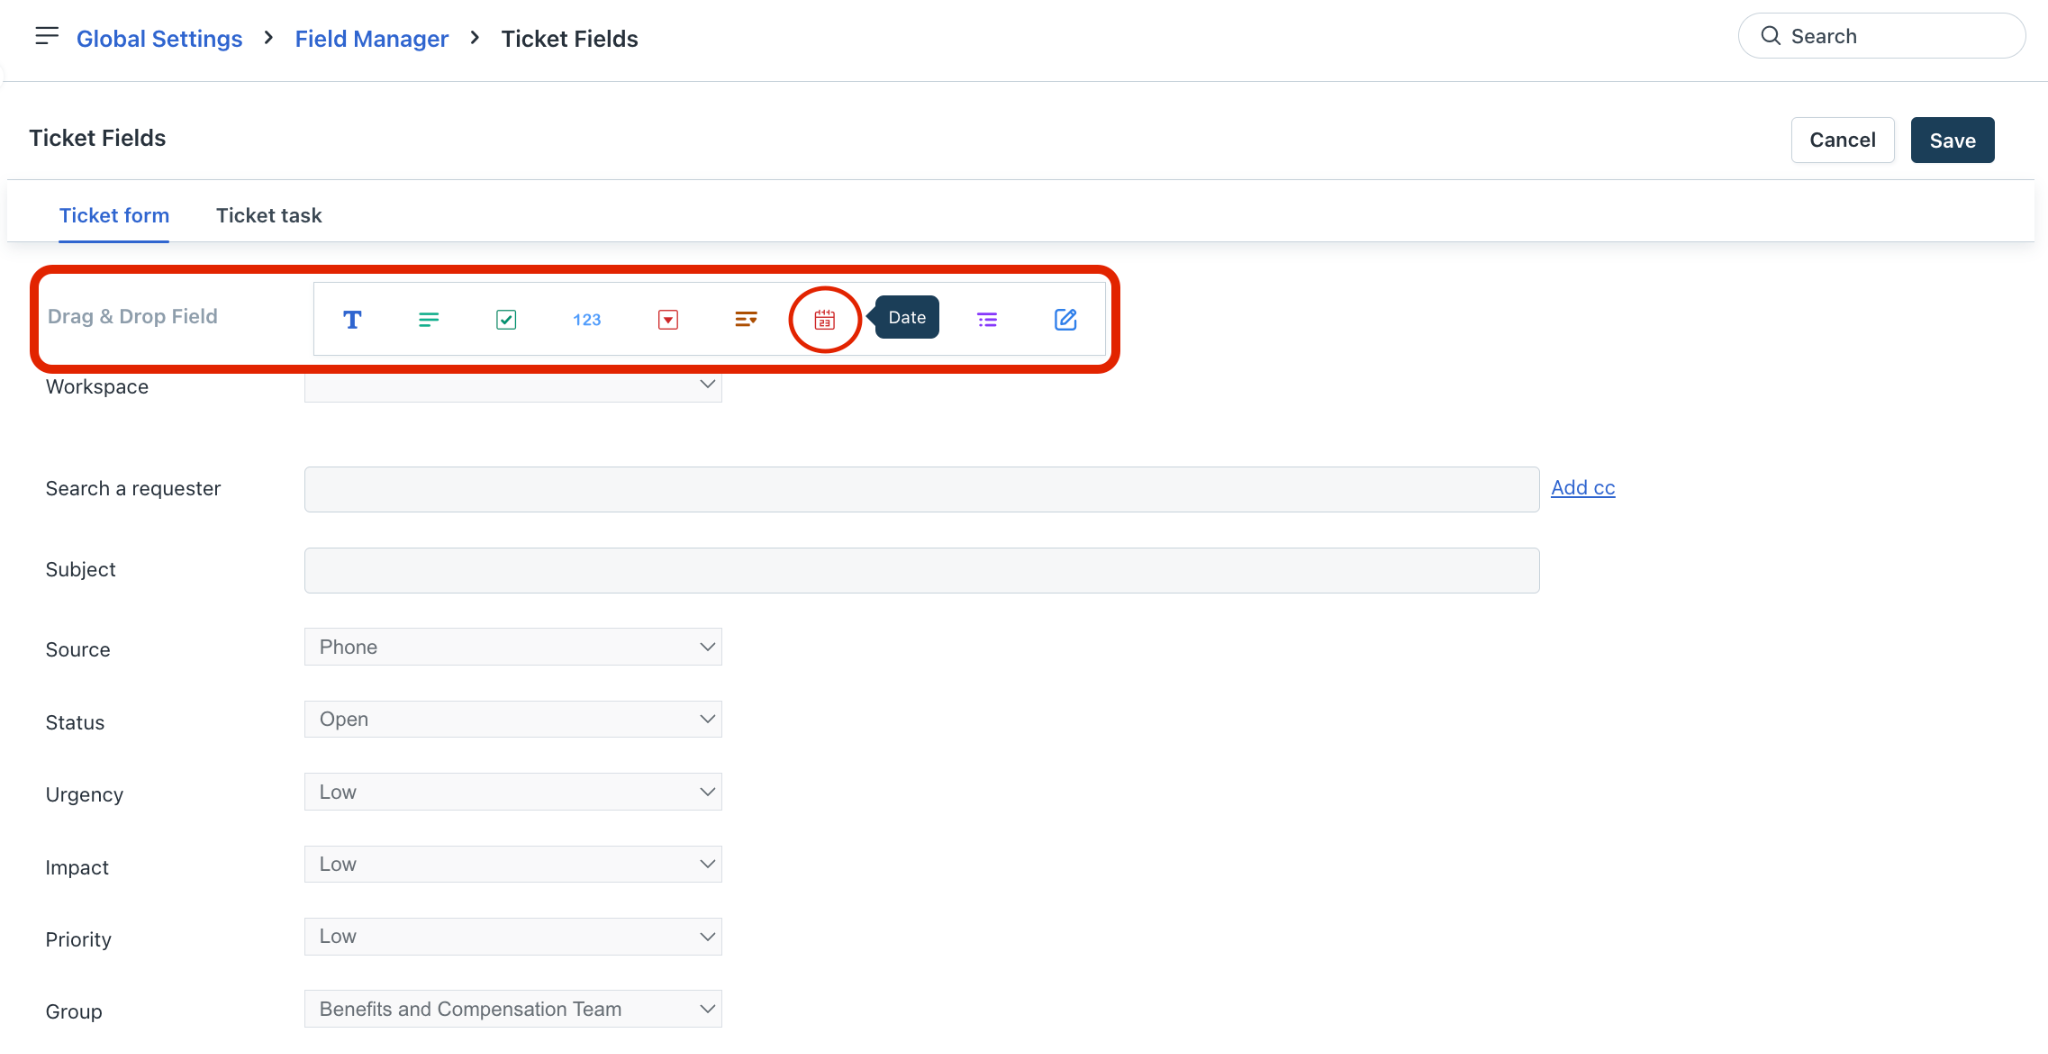
The Properties section for adding the new custom field is shown on the right pane.
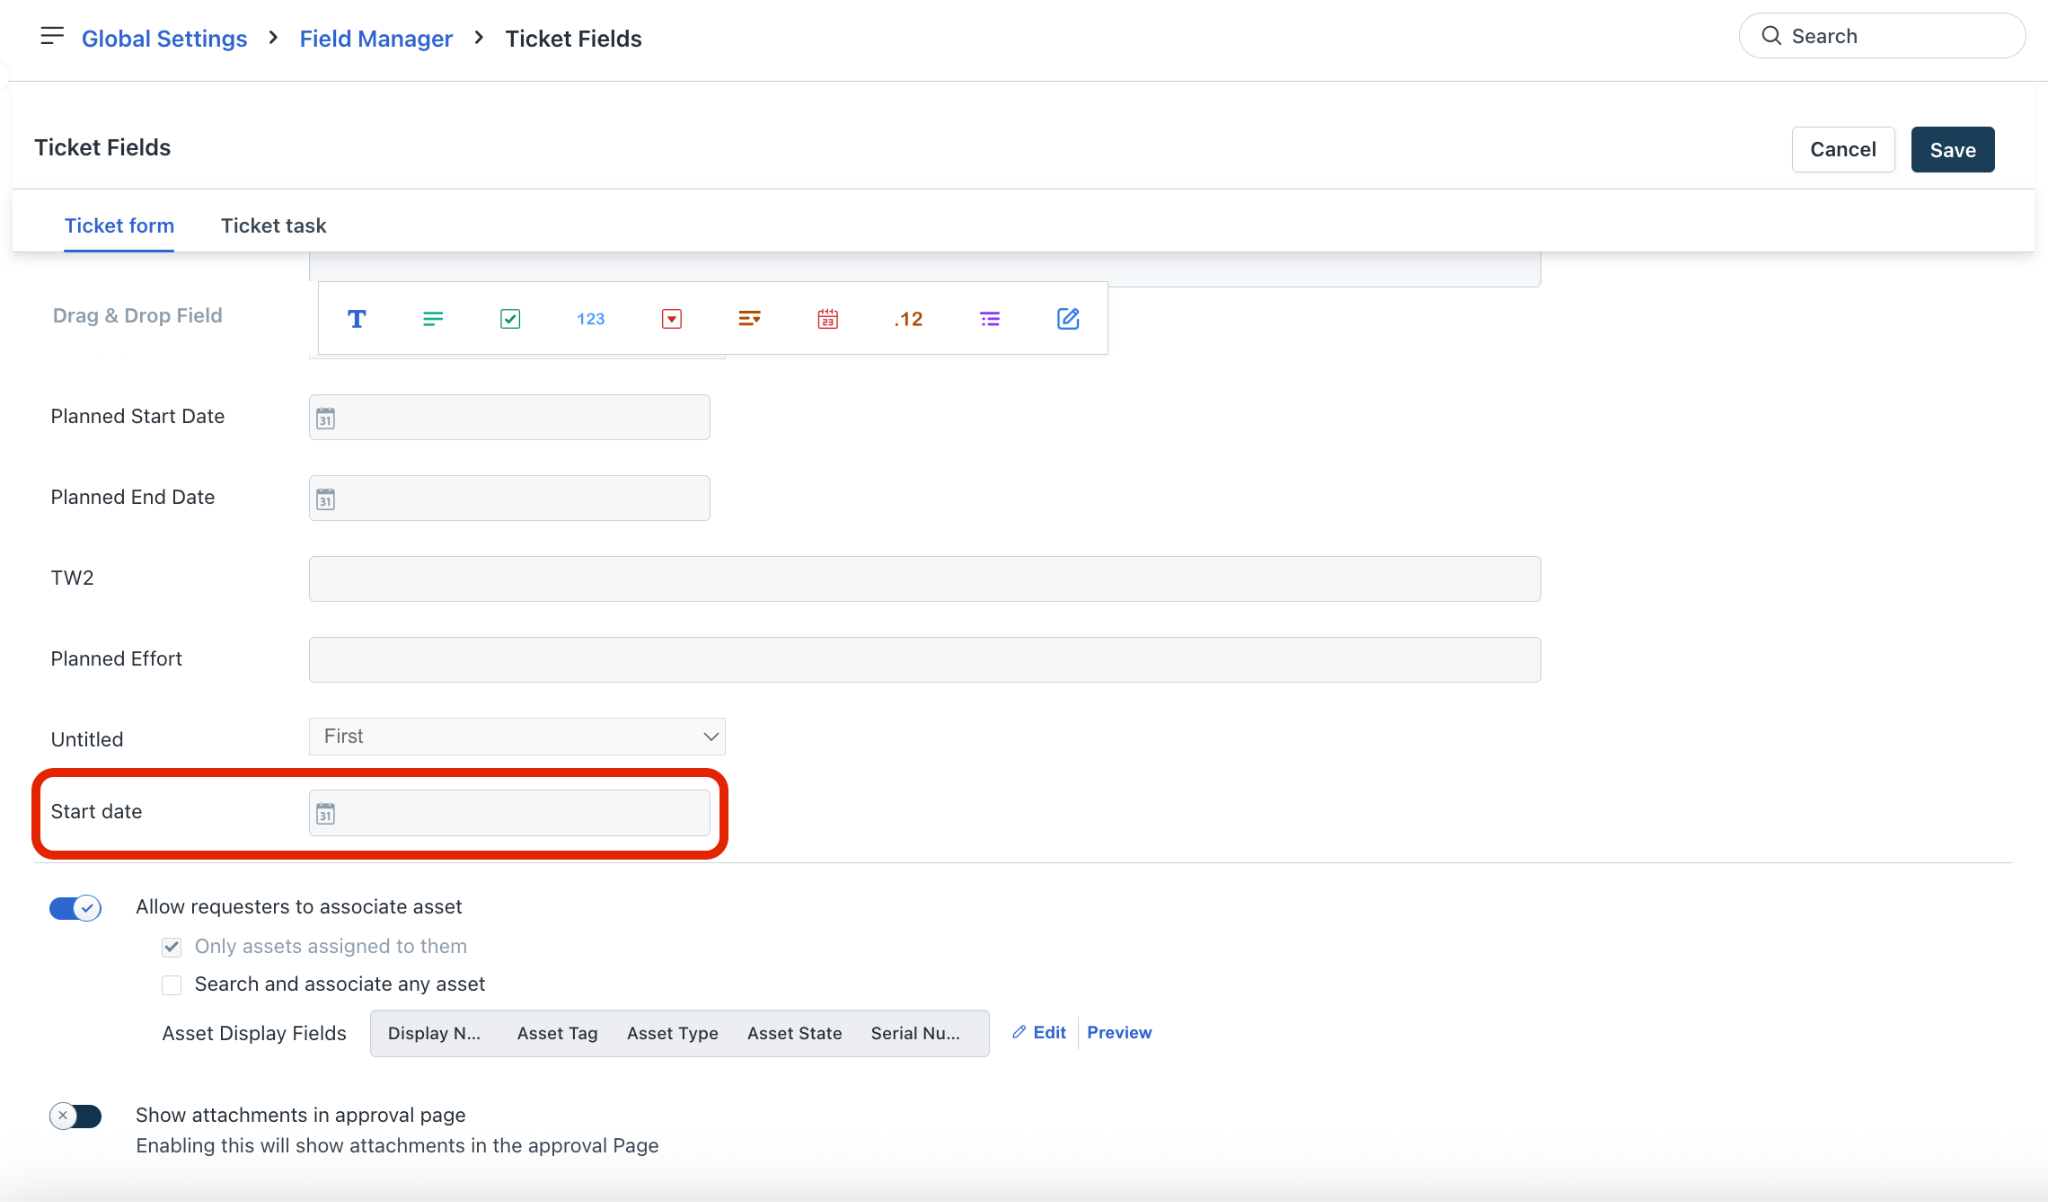
Enter a name for the new field in the Field Label box (for example, Start date).
Update any other properties for this field, and click Done. The new custom field will be added to the form.
Update other ticket form settings, such as Allow requesters to associate asset or Show attachments in approval page.
After adding or updating all the ticket form field configurations, click Save.
Note:
If you want to apply any specific rules for Ticket form fields, such as ‘Show’, ‘Hide’, ‘Enable’, ‘Disable’, ‘Mandate’, ‘Set options’, and so on, you can use Business Rules for Forms. You can also configure the execution of business rules specifically on New form, Edit form, or both; set the rule application for agents, requesters, or both; configure advanced settings (such as, auto-reverse or enforce system-wide); and configure various conditions for ticket forms.
Visibility configurations for Field Manager are uniform across the Freshservice mobile app and web application; no separate settings exist for the mobile platform.
Custom fields created in a new workspace will not appear on the service desk portal until the workspace is published.
Custom fields are not included in ticket exports. Use default fields for data exports.
Default fields such as Type, Status, and Priority follow a fixed display order in the ticket properties that cannot be changed. Only custom fields can be reordered, and they always appear below the default fields.
Field reordering in the field manager only applies to new tickets. The display order in the ‘Edit’ view of existing tickets is controlled by the ticket layout engine, and it’s not updated by the field manager changes.
Configure dynamic sections for ticket forms
You can configure dynamic sections for custom dropdown fields in your ticket forms at the workspace level. This enables the selection of different sets of fields that appear based on user input.
For example, you may want to capture specific details (such as workstation number and IP address of devices) in the tickets associated with a workspace. Whereas, you may want to capture specific details (such as employee ID and date of joining) in the tickets associated with another workspace.
Using dynamic sections in your ticket form can help your agents filter tickets easily and resolve them faster.
To configure dynamic sections for your ticket forms:
Go to Admin > Global Settings. Click the ellipses icon at the top left corner, and select a workspace under Workspace Settings.
Go to Service Management > Field Manager > Ticket Fields.
To add a new custom dropdown field to the form, select a dropdown field type from the Drag & Drop Field options (for example, Dropdown field type).
The Properties section for adding the new custom field is shown on the right pane.
Enter a name for the new field and update other properties under the Behavior section (as required).
Select the relevant option for adding dropdown choices: Custom dropdown or Select from Data Source (for example, Custom dropdown).
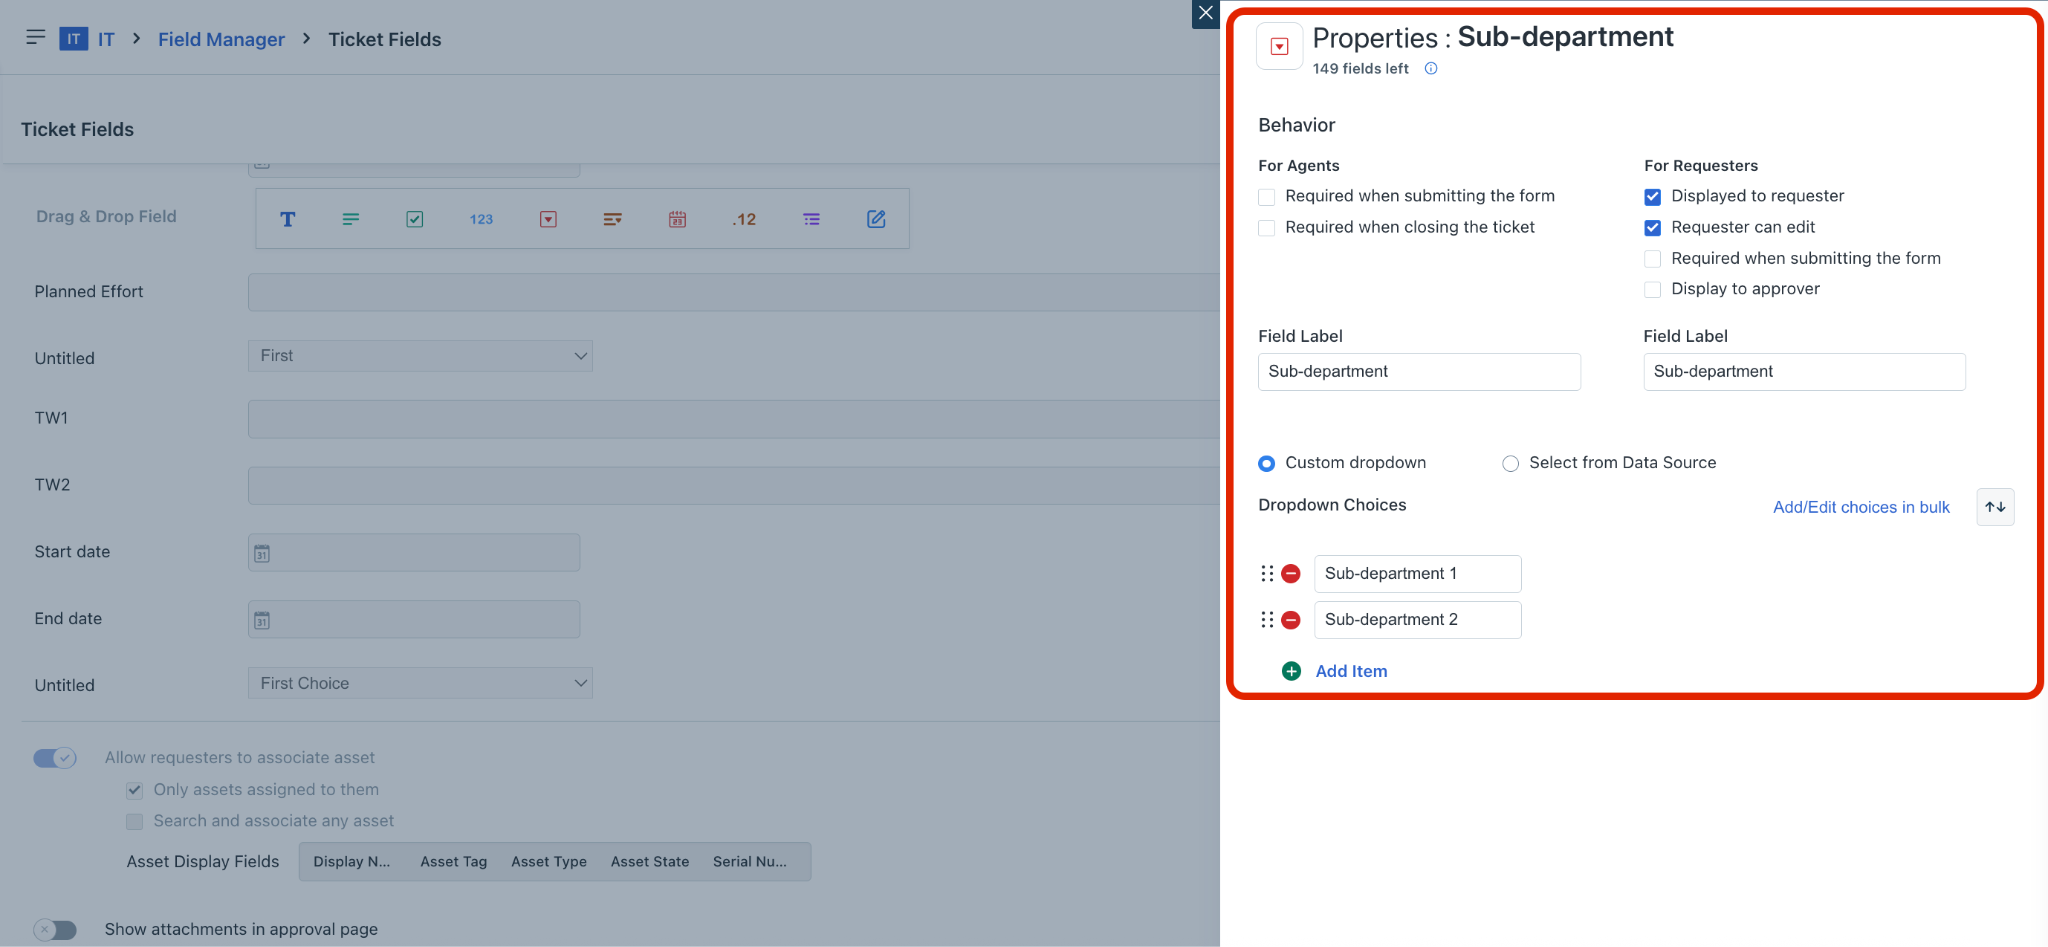
Add or update items under the Dropdown Choices section, and click Done. The new custom field will be added to the form.
Then, click Save on the Ticket Fields page.
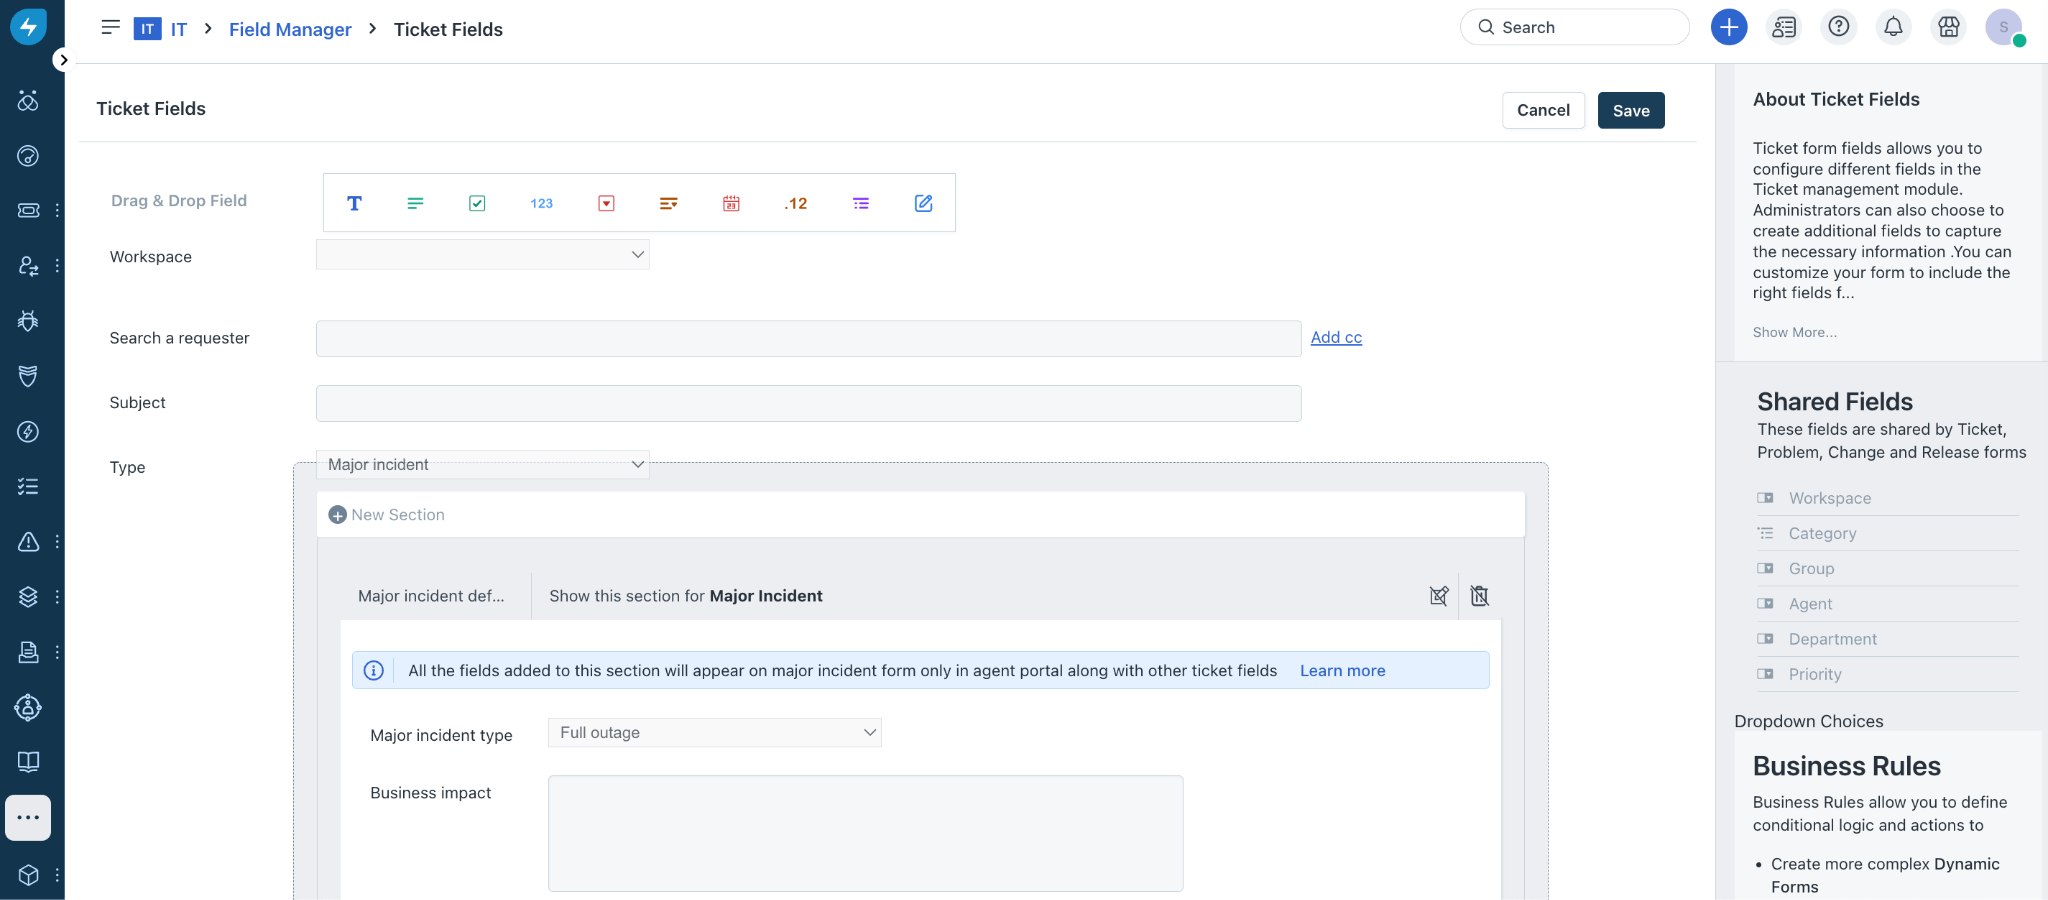
To add dynamic sections, hover over the added field and click the ‘+’ icon.
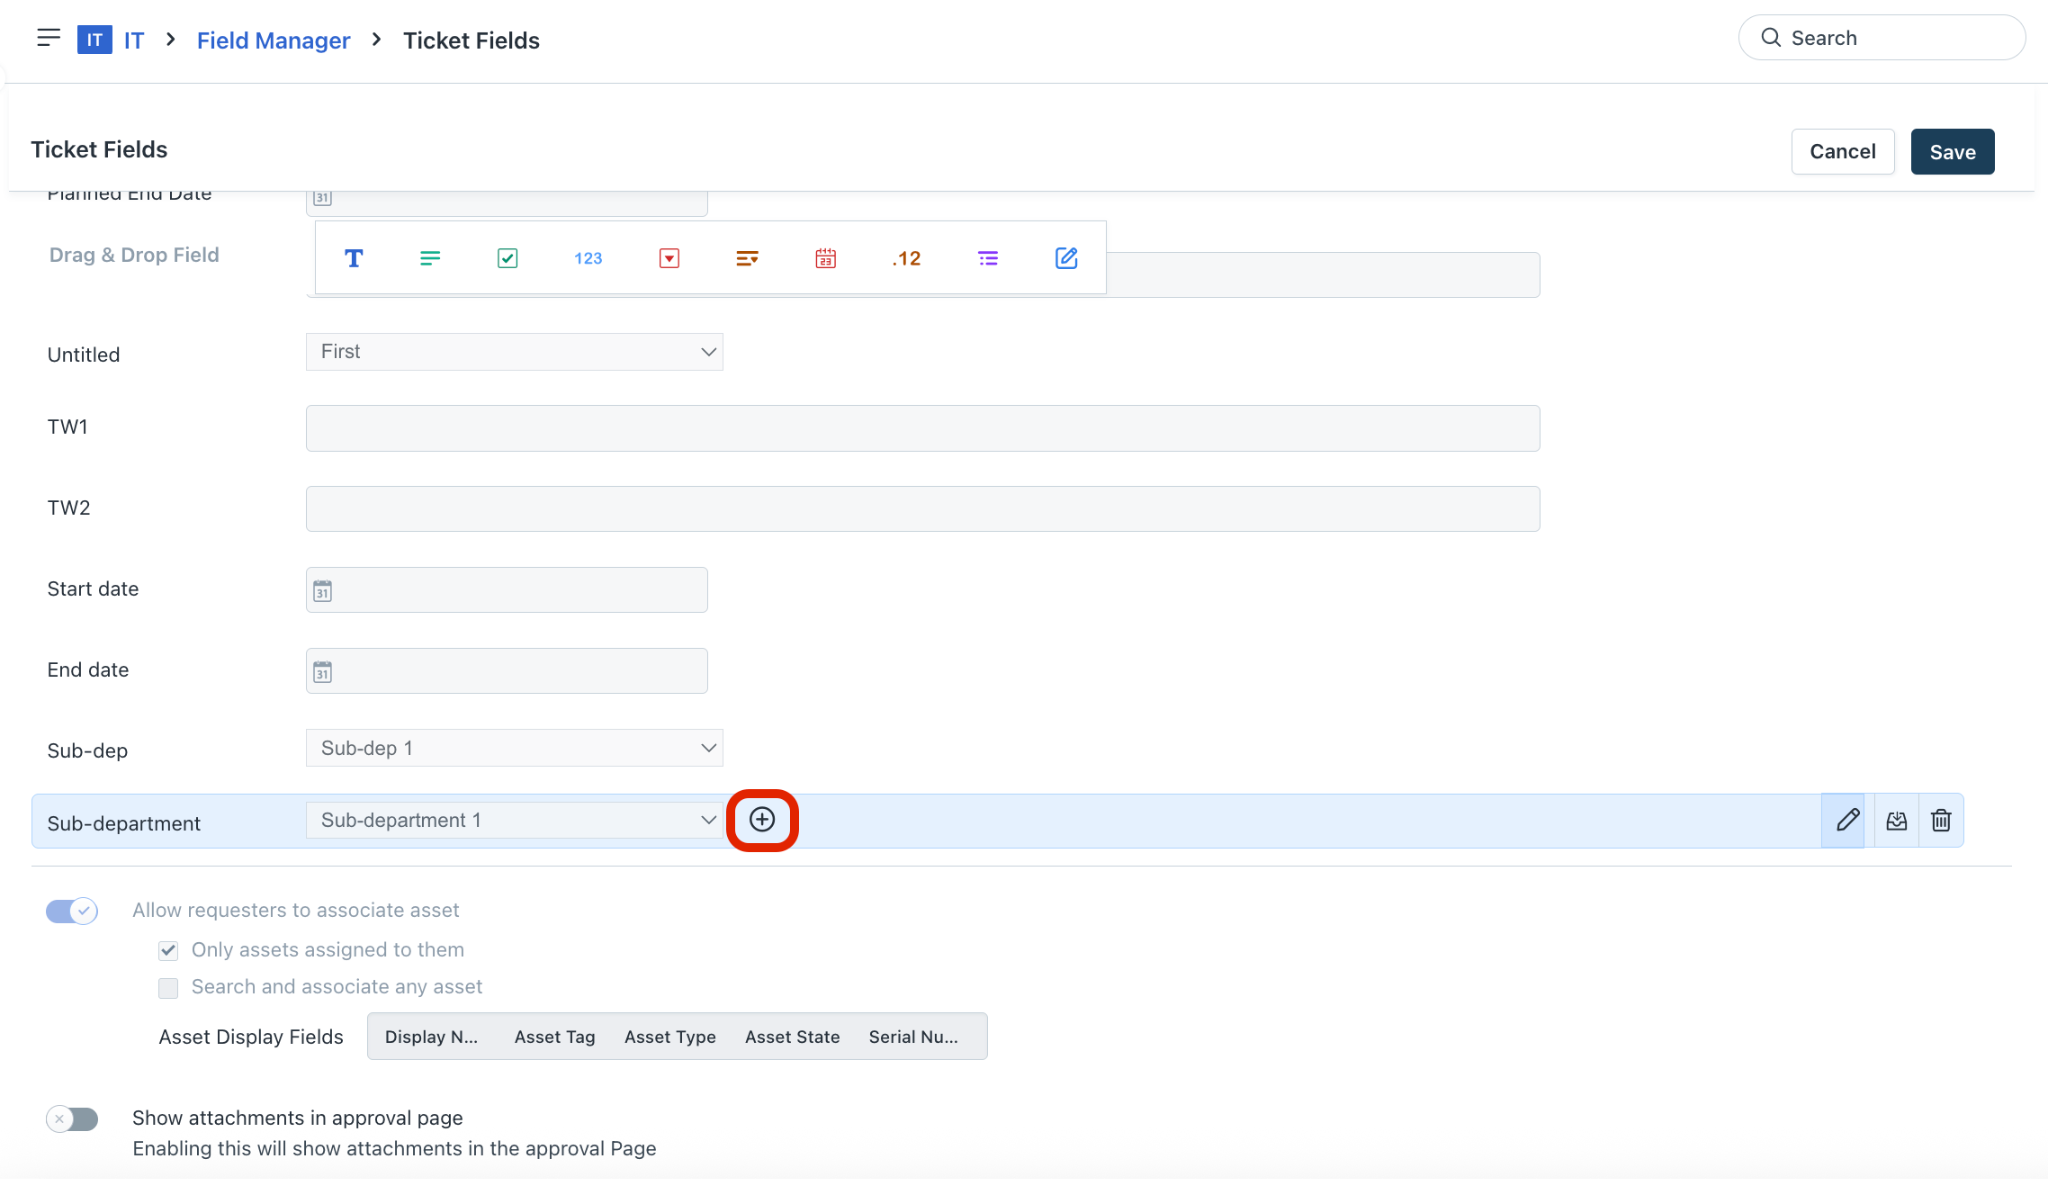
The Section Properties dialog is displayed.
Enter a section title (for example, Legal) and select the required dropdown choice from the Show this section for field.
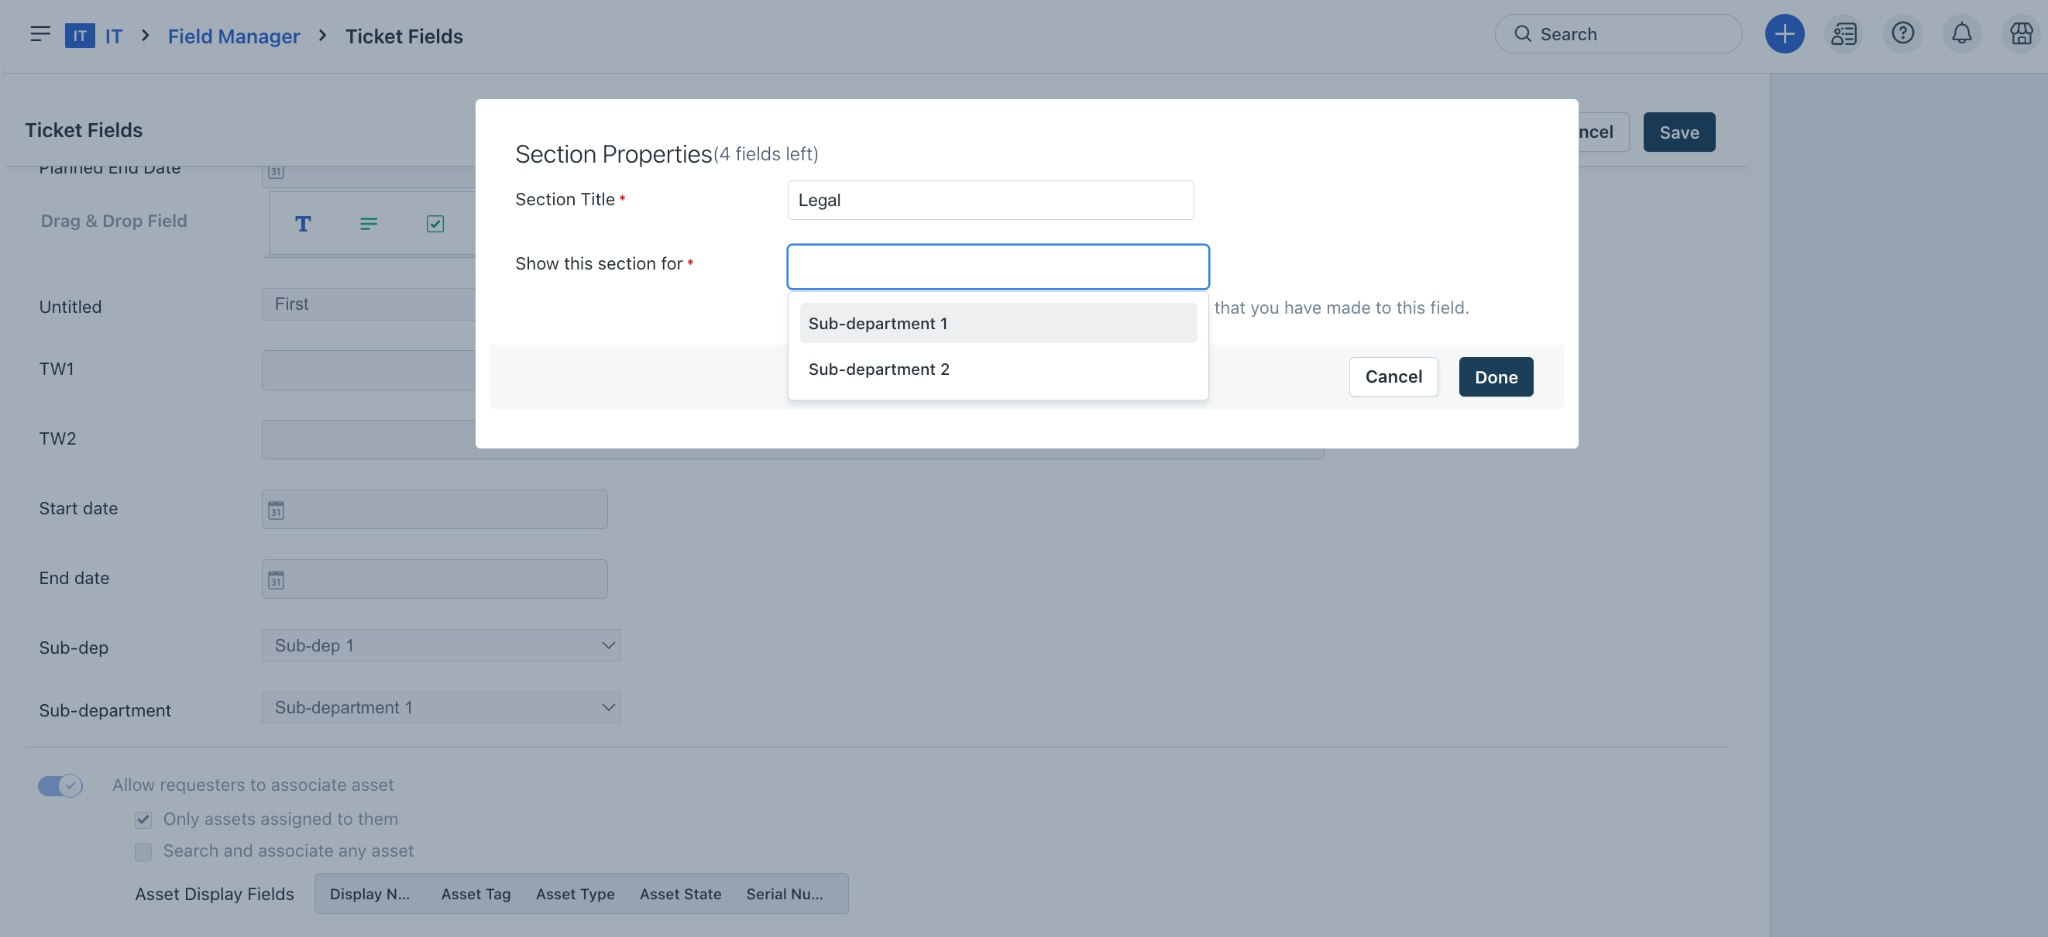
Click Done. The section is added under the new custom dropdown field.
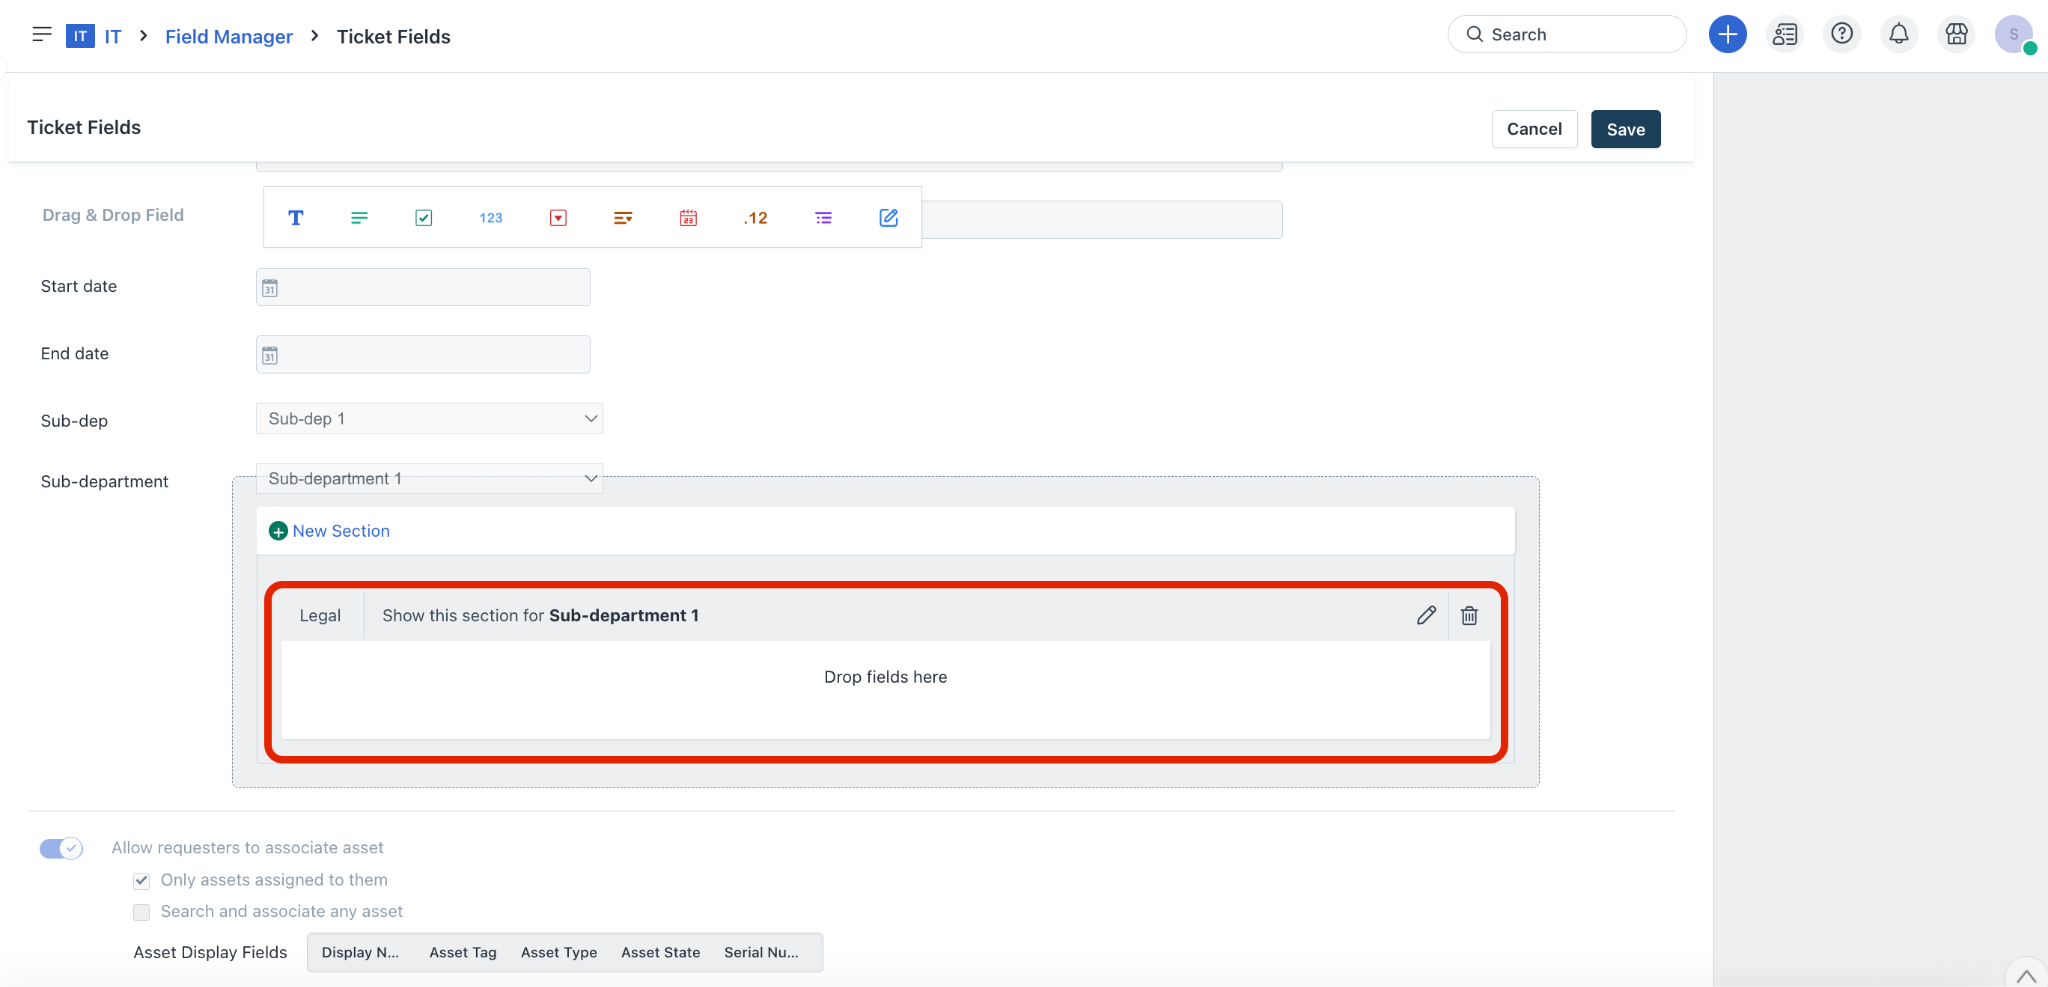
Drag and drop the field type you want to add to this section from the Drag & Drop Field options (for example, Checkbox).
The Properties section is displayed on the right pane.
Add a field label, update other properties (as required), and click Done. The field will be added to the section.
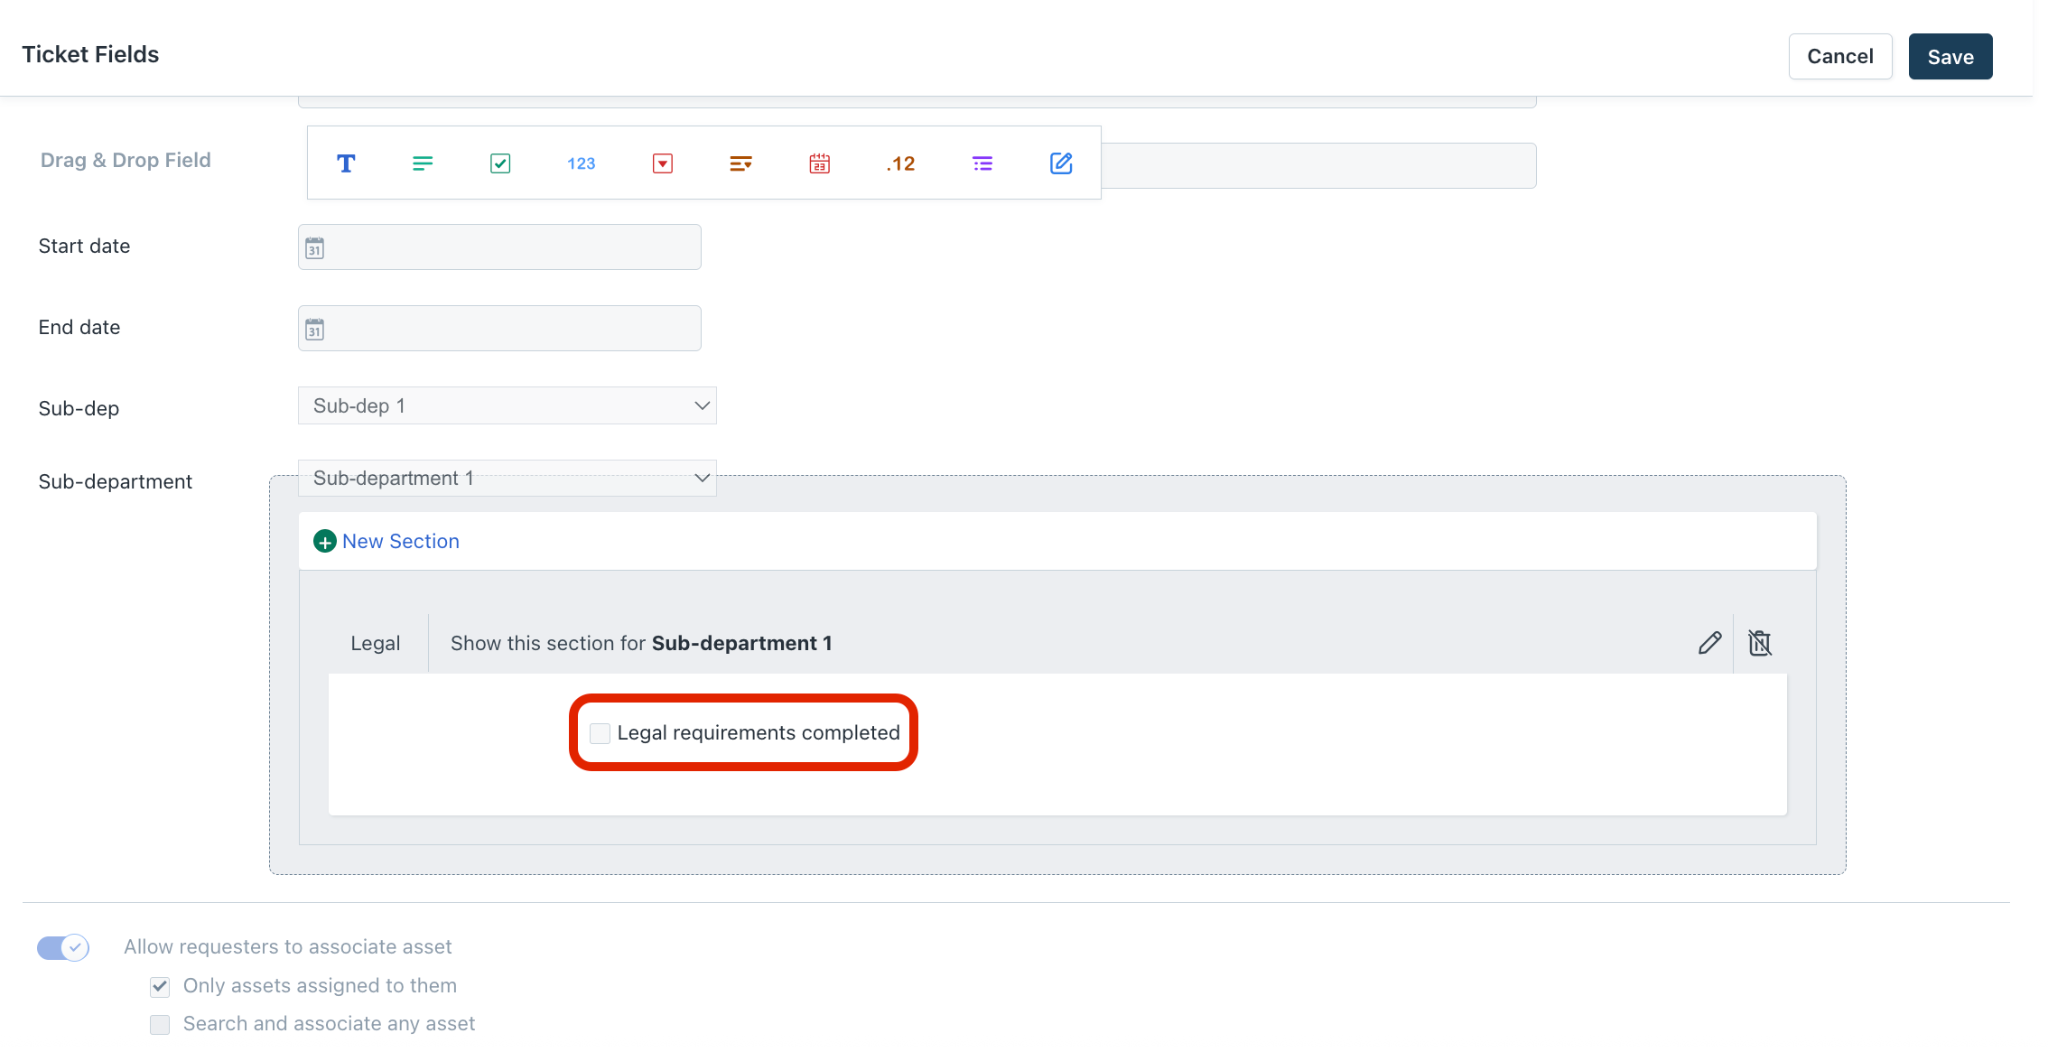
Note: You can add more sections using the New Section option, and edit or delete any sections.
Then, click Save on the Ticket Fields page.
Configure dependent fields for ticket forms
You can configure dependent fields to introduce hierarchy in your field choices and organize them into categories and subcategories. Dependent fields allow you to nest each item into various levels of categories.
To configure dependent fields:
Go to Admin > Global Settings > Service Management > Field Manager > Ticket Fields.
Or, go to Admin > Workspace Settings > {Workspace} > Service Management > Field Manager > Ticket Fields.
Select the dependent field type from the Drag & Drop Field options.
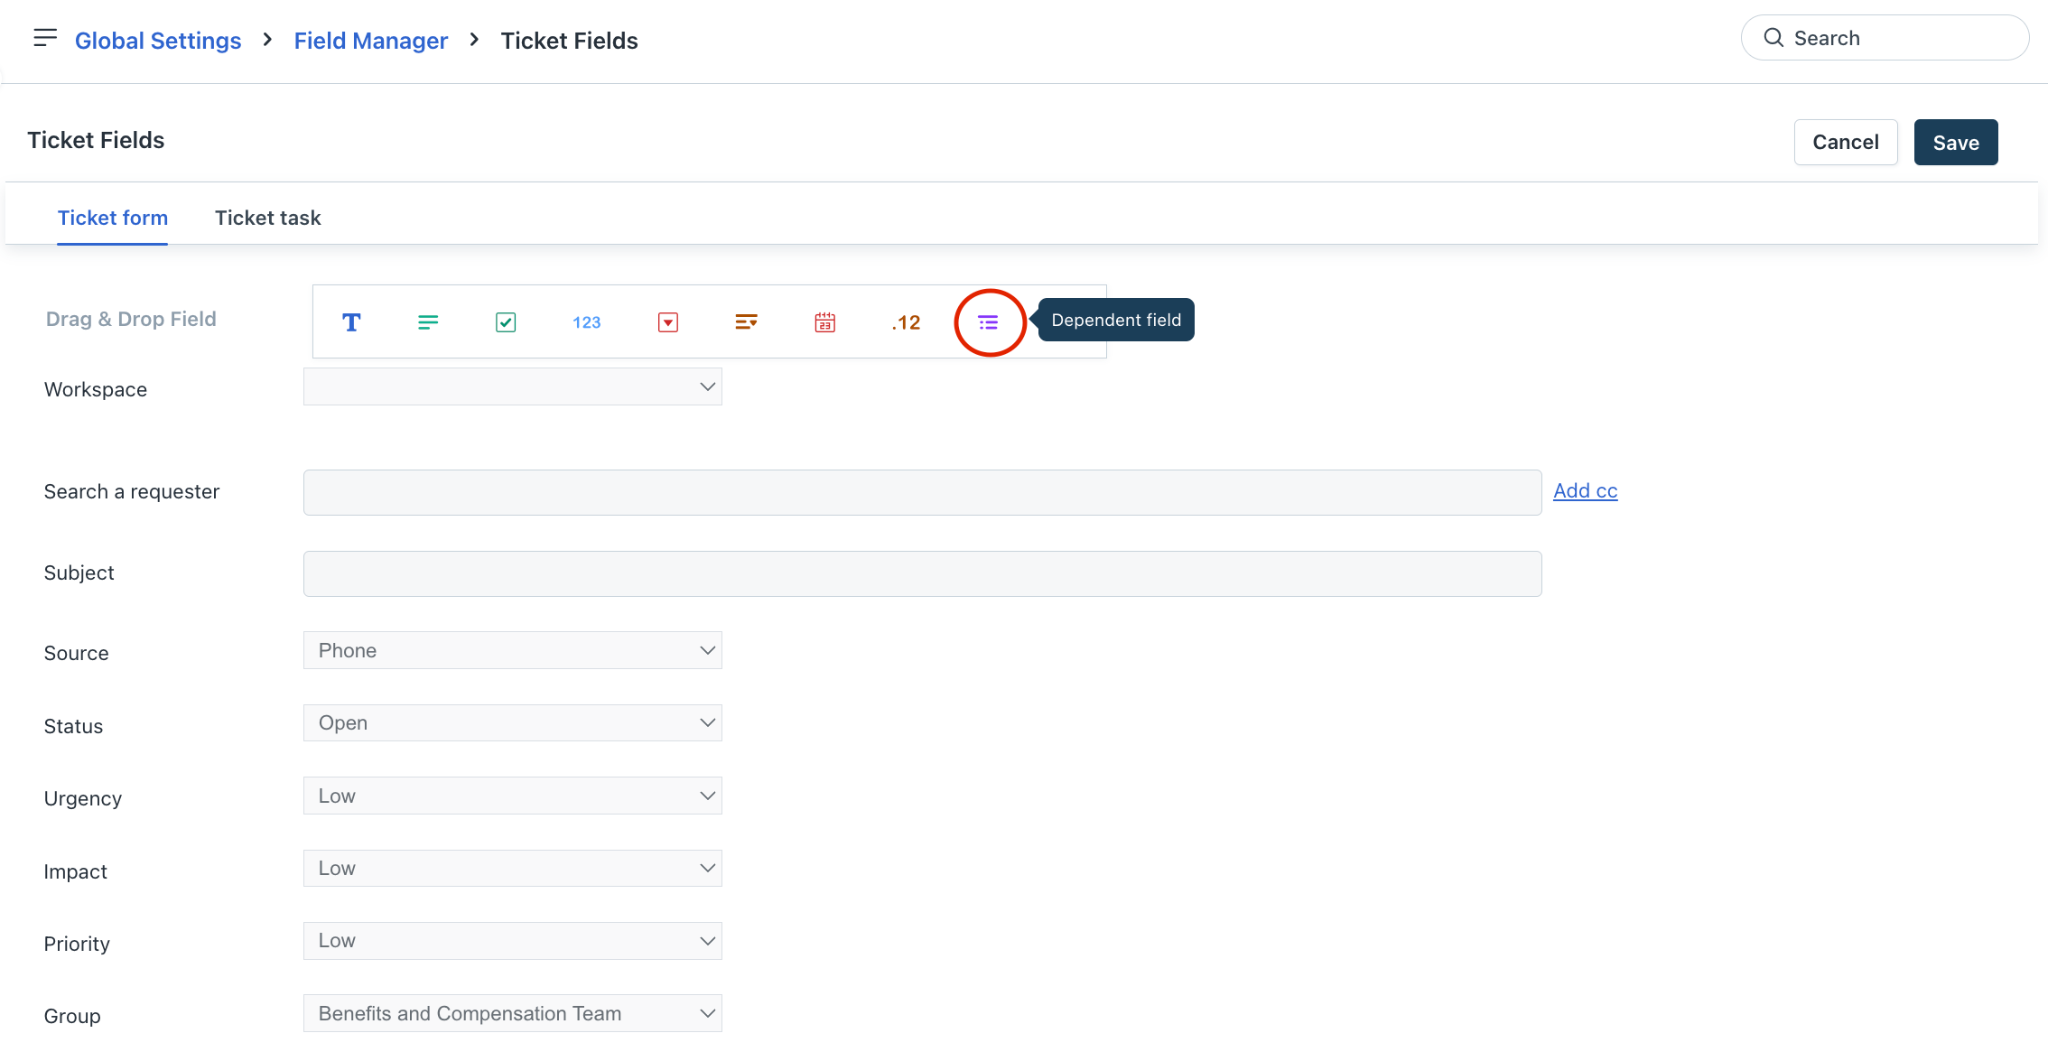
The Properties section is displayed on the right pane.
Select the required behavior properties.
Enter the nested field label names for three levels of hierarchy (for example, Category > Sub category > Item).
Then, enter values for each hierarchy level in the Dropdown Choices box. Ensure to use the tab key to indent values (one tab makes it a level 2 hierarchy, while two tabs makes it a level 3 hierarchy).
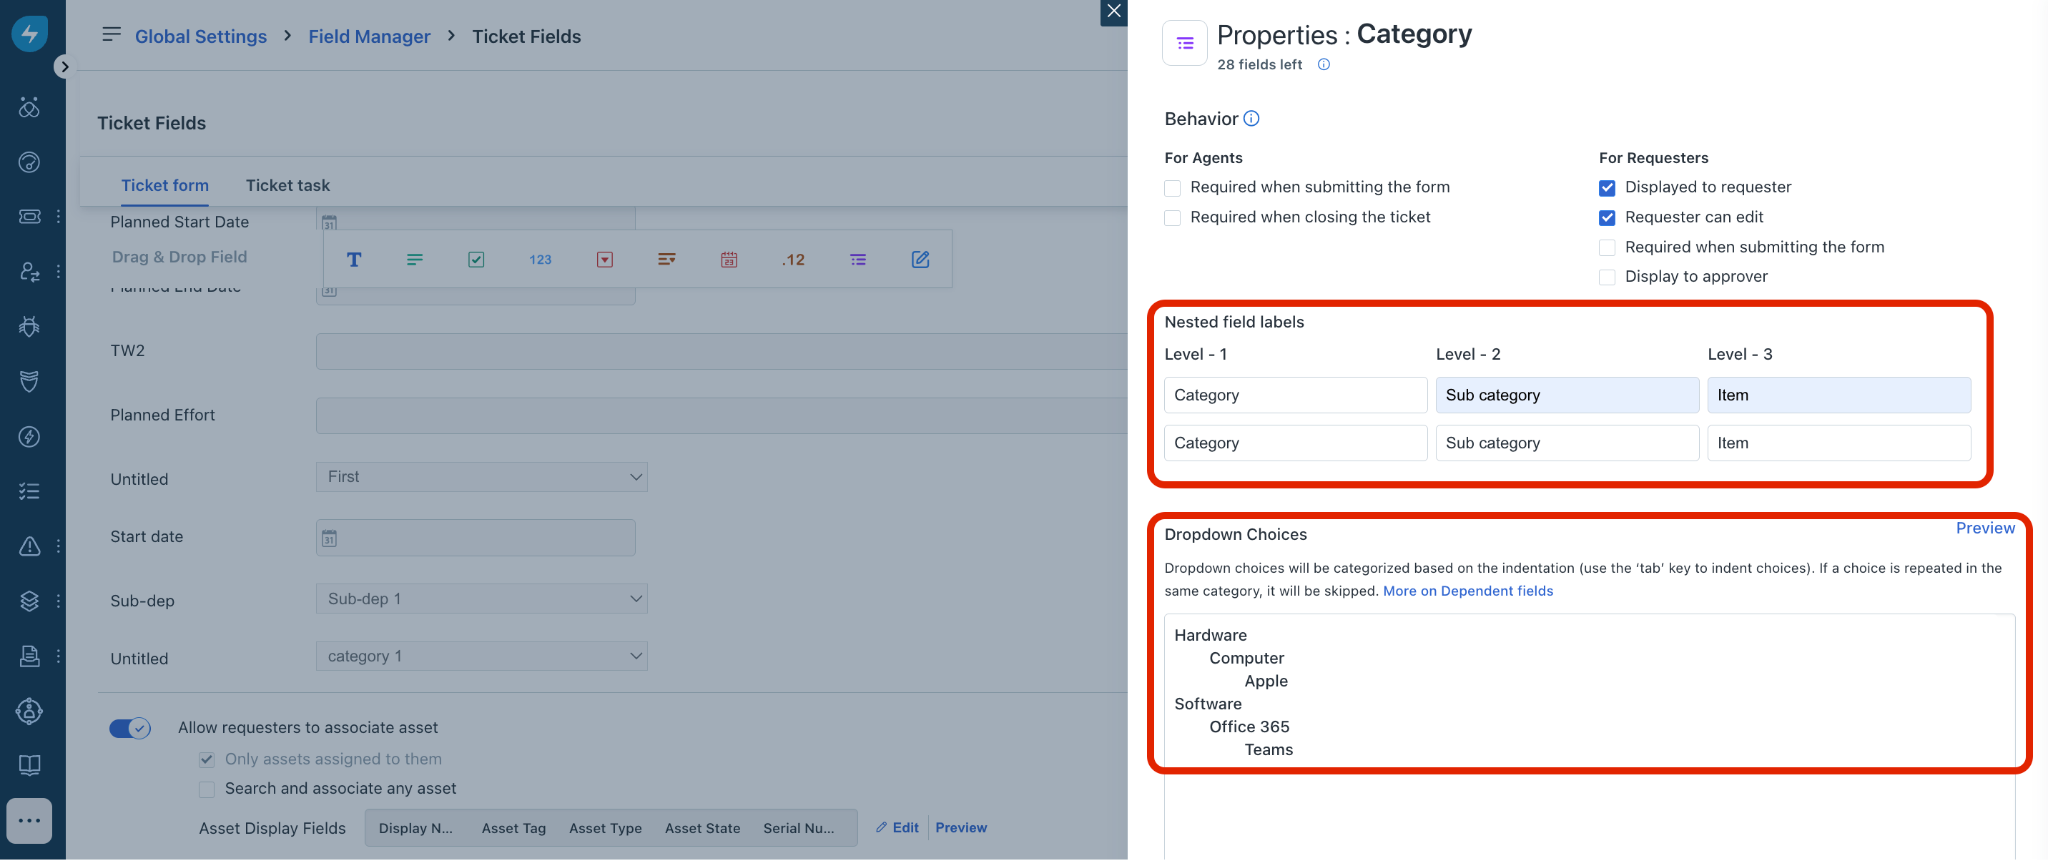
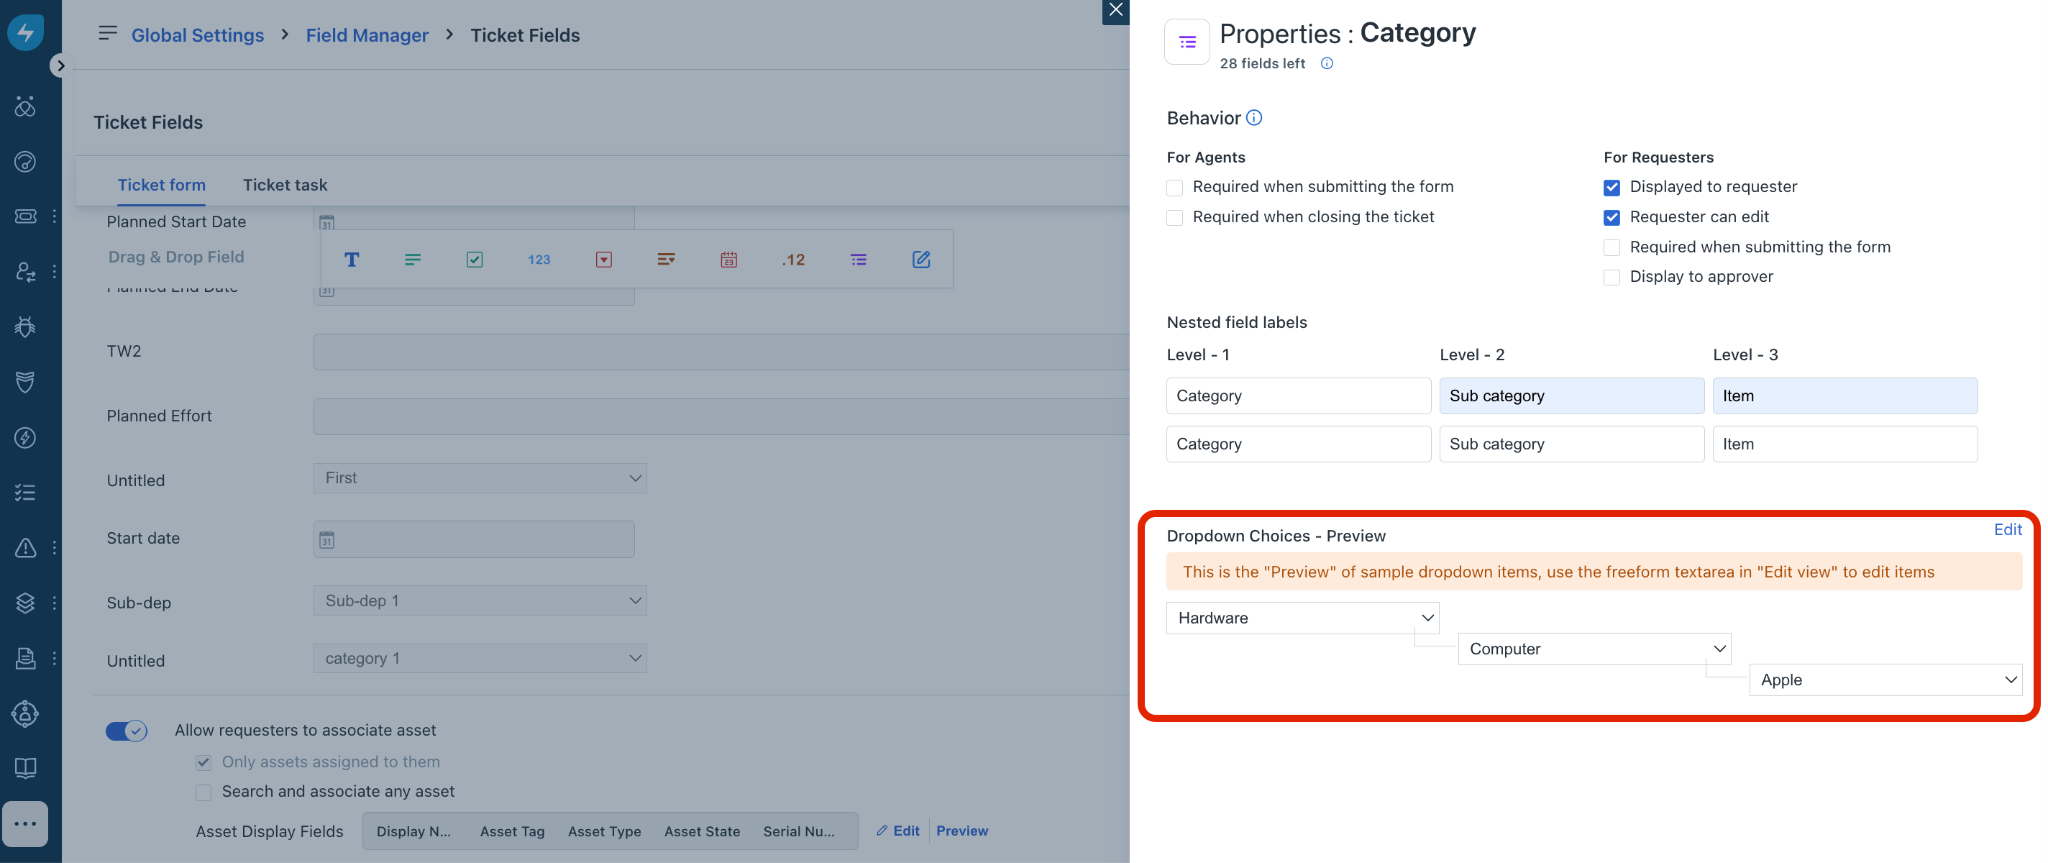
Click Preview to preview the configurations.
Click Done. Then, click Save on the Ticket Fields page.
Configure ticket task fields
To configure the ticket task fields:
Log in to your Freshservice account.
Go to Admin > Global Settings > Service Management > Field Manager > Ticket Fields.
Note: Ticket task fields can be configured only at the global settings level.
Click Ticket task. The Ticket Fields > Ticket task page is displayed.

Click any default field to view and update its properties.
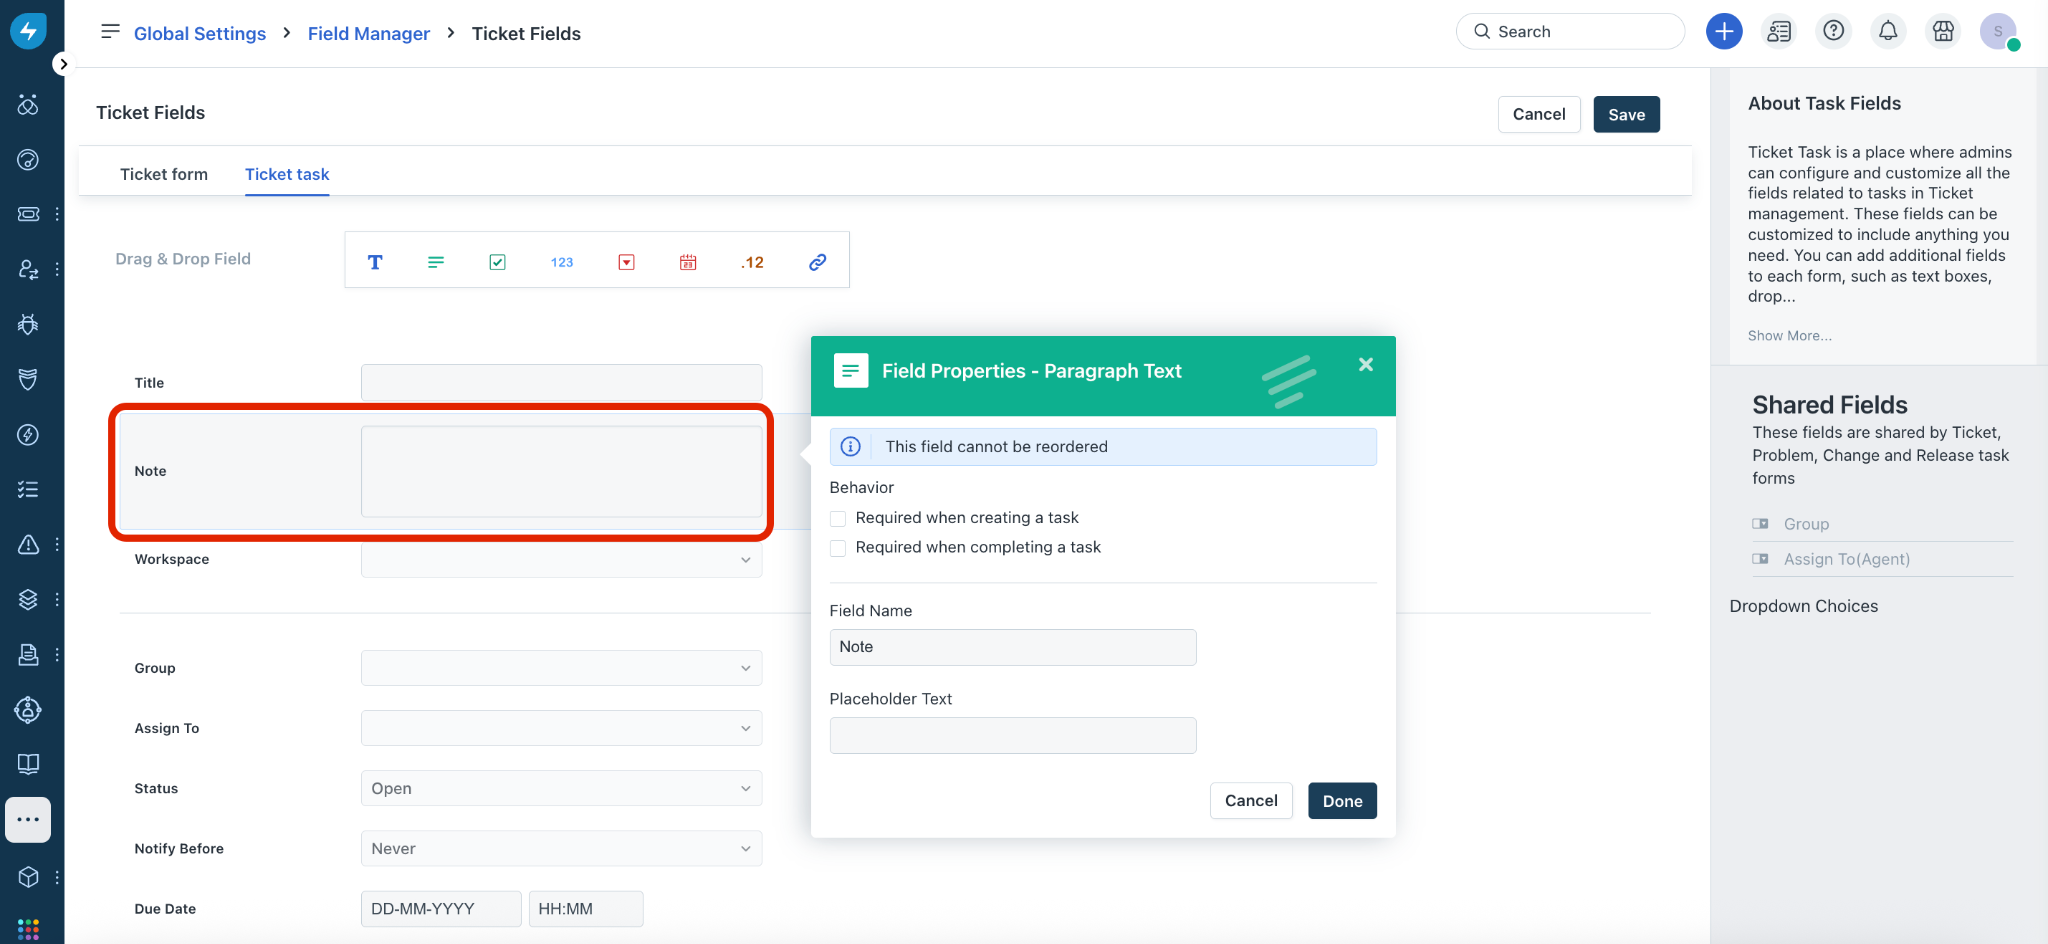
Update the field properties (as required), and click Done.
To add a new custom field to the ticket task, select the required field type from the Drag & Drop Field options (for example, ‘URL’ field type).
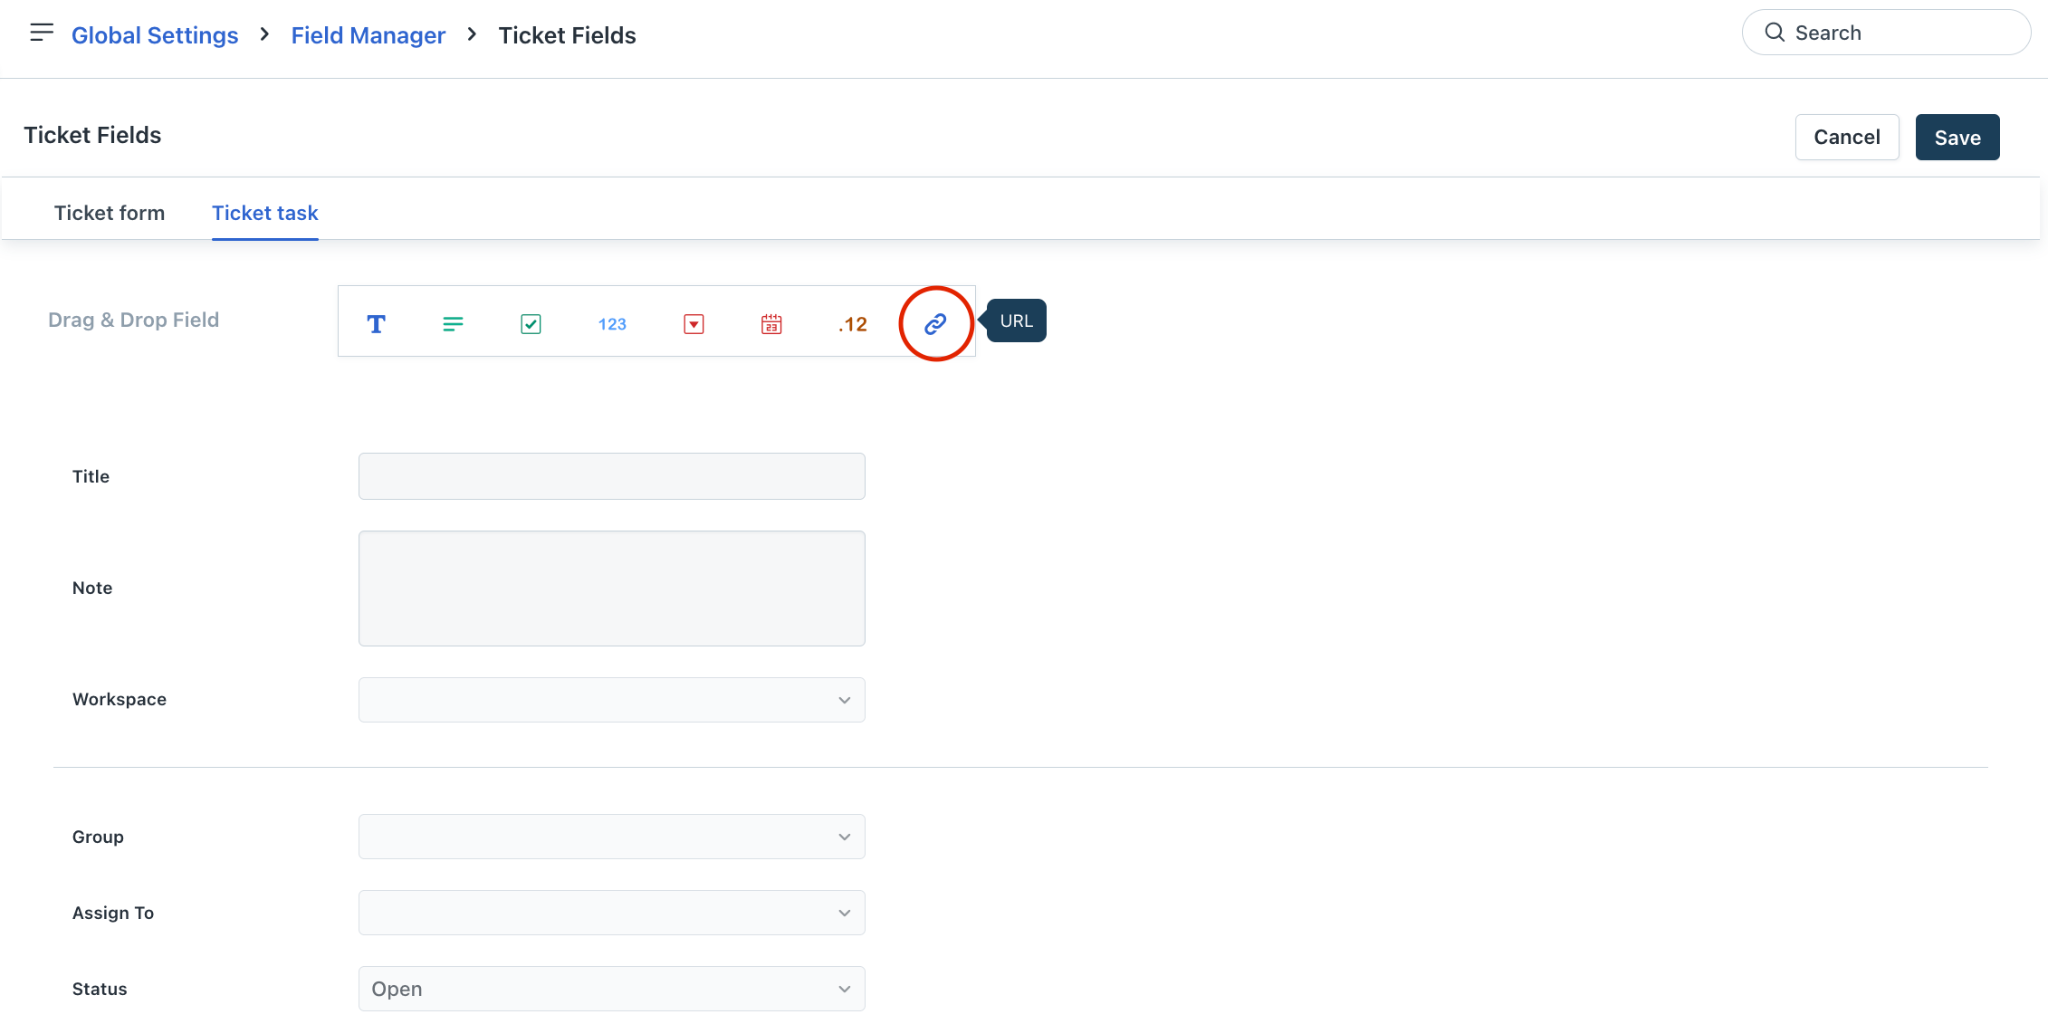
The Field Properties dialog for adding the new custom field is shown.
Enter a name for the new field in the Field Name box.
Update other properties and click Done. The new custom field is added to the Ticket task page.
After adding or updating all the ticket task field configurations, click Save.
Note: If a mandatory field in a Ticket task is not displayed as required, verify its mandatory setting in Admin > Global Settings > Field Manager > Ticket Fields > Ticket task. The mandatory indicator may not appear if the setting is not saved correctly.
Business rules for ticket fields
You can utilize business rules to execute conditional actions on specific form fields. These rules empower users to interact with fields effectively, manage the ticket lifecycle, and enforce field-level access. This ensures that only authorized stakeholders are able to modify the data within certain fields.
To access business rules for ticket fields:
Log in to your Freshservice account.
Go to Admin > Service Management > Business Rules for Forms.
Click Create New Rule, and select Ticket.
To set up specific business rules, consider the following ticket fields scenarios.
Determining the scope of a business rule: Use the Applies to dropdown to designate whether the rule should be implemented for Requesters, Agents, or both groups.
Specifying business rule execution: Use the Execute On dropdown to select if the rule applies to the New Form, Edit Form, or both.
Establishing conditions: To set conditions for specific ticket form fields, such as Priority, Impact, or Status, use the Add new condition option.
Defining actions: To define field-specific behaviors, such as Show, Hide, Enable, or Disable on ticket forms, use the Add new action option.
Additional field items/properties: Business rules can be applied to additional properties of default fields or custom fields. For instance, if you introduce a custom "On Hold" item to the default "Status" dropdown field, you can then create a specific rule triggered by that new status.
Field visibility for specific categories: Business rules can be configured to show or hide a field based on specific category conditions, which ensures the field appears only for the specified categories.
Status-specific configurations for agents: Business rules can also be configured in scenarios, such as restricting agents in setting specific field statuses. For example, restricting agents from setting a ticket's ‘Priority’ to "Urgent" status while allowing them to change other Priority statuses.
Multiple business rules configuration: Multiple business rules can be configured in scenarios, such as creating one business rule that hides all fields except the ones that should be visible by default (Subject, Description, Priority, Requester, Category, and so on), and another rule that shows additional fields dynamically (Access type 1, Access type 2, and so on) based on the selected category and sub-category.
Advanced settings in business rules: Advanced settings, such as auto-reverse or system-wide can be set up with business rules that are useful in reversing specific actions if the defined conditions are not met, or enforcing rules not only on specific forms but also on bulk actions, scenario automations, and API requests.
Global vs. Workspace configuration: Business rules can manage field visibility across different environments. For example, if the ‘Group’ field needs to be hidden only within the IT Workspace, you can establish a rule in Global Settings. By targeting that specific workspace in your conditions and setting the action to hide the field, you ensure it remains visible in all other areas.
Frequently asked questions (FAQs)
1. How can I find the source value for "API" or a custom source to use in a web request for creating a new ticket in Freshservice?
Use the Freshservice API endpoint to identify the source value.
Send a GET request to URL. For example, <your-domain>.freshservice.com/api/v2/ticket_fields
Review the response to locate the custom source field and its corresponding value.
Use that value as the source identifier when creating a new ticket via API.
2. How can I correctly include a lookup field value (Location ID) in the Freshservice API code when creating a ticket without encountering a validation failed error?
When using lookup fields in Freshservice, the correct field name must include the lookup field prefix.
For example, if the correct field name is "lf_primary_property" instead of "primary_property", then the correct JSON syntax for including the lookup field value will be: "custom_fields": { "lf_primary_property": <numeric value> }
Removing unnecessary quotes around numeric values also helps prevent validation errors.
Once the correct lookup field name and value format are used, the API call successfully creates the ticket.
3. How can the exact API name of a checkbox field in Freshservice be identified and referenced correctly in API calls, and why might updates to this field not immediately reflect in API responses?
Checkbox fields reside in the custom fields section. Reference them in API calls within the "custom_fields" JSON structure using their exact label. For example:
"custom_fields": {
"AI approval":
}
If a field was added manually, it will appear under custom fields and should be referenced accordingly.
Checkbox field updates may face brief API response delays due to backend processing and caching. While typically reflected within seconds, longer delays may stem from system synchronization issues.
4. Why is a configured ticket field not visible when submitting a ticket?
If a configured field is not visible when submitting a ticket, you need to check the following: (1) the field is enabled and visible in Field Manager, (2) no business rule is hiding it, and (3) the correct workspace Field Manager was used.
5. How can new ticket fields be created in Freshservice using APIs?
Freshservice does not support creating or modifying ticket fields through APIs. Only existing ticket fields can be viewed using the available API endpoints. Field creation and modification must be done directly through the Freshservice portal.
6. How can I export a list of ticket categories from Freshservice?
It is not possible to export a list of ticket categories directly from the Freshservice user interface. To obtain this information, use the Freshservice API. Access the API endpoint for viewing ticket fields, which provides the details of ticket categories. The endpoint should be available at: <your-domain>.freshservice.com/#view_all_ticket_fields
7. How can a separate ticket form be created in Freshservice with specific user fields that do not affect other existing ticket forms, and how can articles be linked to the form for users opening a case?
To create a separate ticket form with specific user fields without affecting other forms, create the ticket fields within a workspace. This ensures that fields are applied only to that workspace and not globally. If certain fields need to be hidden based on conditions, use business rules for forms to control field visibility. This approach allows customization of each ticket form independently and ensures that only the required fields appear for users.
8. Why is the newly added field that should appear only when the ticket status is updated to Resolved or Closed not applying to old tickets?
This issue occurs when the business rule or field condition applied to show the field based on ticket status is configured to trigger only on new or updated tickets. Existing (old) tickets do not automatically refresh their field visibility unless they are updated to meet the rule conditions again. To fix this, review the business rule configuration to ensure it includes conditions that apply when ticket status changes to Resolved or Closed, and update old tickets accordingly so the rule can be applied.
9. How can a custom field be correctly configured and validated as a string field after changing its type from dropdown to free text, ensuring the API recognizes and accepts the correct field name and data type?
This issue occurs because Freshservice stores custom fields by their API key, not by the field label seen in the interface. When a field's type or label is changed, its internal API key remains the same unless the field is deleted and recreated. Therefore, that field no longer exists causing an invalid field error. The valid field key may be “xx_yy_zz”, but the data sent does not match the expected string type. To resolve the issue:
Validate the JSON payload and ensure the field name matches the correct API key.
Confirm that the value being sent matches the expected data type for the field (String).
Use the API call GET - /api/v2/ticket_form_fields to verify the field type and confirm it is created as a string field (custom_text).
Remove or update any references to the old field “xx_yy_zz” in the development code, as it no longer exists.
Use the correct field key and ensure the input data conforms to the expected string format.
10. Why are there two description fields appearing in a service request, and how can the required field prompt be removed when editing the ticket?
The appearance of two description fields in a service request is an intended system behavior. Because service requests lack a default ticket description, that field remains empty, while the second description displayed is the one belonging to the service item itself. Consequently, when a service item is included in a request, both the empty ticket description and the specific service item description are shown. If you are prompted to complete a mandatory description field while editing a ticket, you can resolve this by adjusting the field requirements within the Field Manager settings.
11. How can the ‘Cost’ field in the service request form be hidden for requesters while remaining visible to agents when raising a service request?
The ‘Cost’ field in service request forms is a system-defined default field. Its visibility cannot be modified.
12. Why can't I locate a field I created in the Field Manager?
This might be because you have multiple workspaces in your account, and the field could either be in Admin > Global Settings > Field Manager or within a specific workspace in Admin > Workspace Settings > Workspace > Field Manager.
13. Is it possible to create a custom status called "Cancelled" and will it work the same way as closed or resolved status?
You will be able to create a custom status field from Admin > Global Settings > Field Manager or within a specific workspace in Admin > Workspace Settings > Workspace > Field Manager, and add a new choice as "Closed".
However, even if we set a ticket to “Cancelled” status using custom status, the system doesn't map the status to "Closed". The system considers these as Unresolved tickets.
14. Why am I unable to CC users when raising a ticket?
Go to Admin > Global Settings > Field Manager > Ticket Fields, select the Search a requester field, and enable the Display CC Field option to be able to CC users.
15. How do I create sub-types for the Category ticket field?
To add sub-categories for a field, drag and drop a Dependent field within Admin > Workspace Settings > Workspace > Field Manager > Ticket Fields.
16. How do we remove the SLA condition on the Status field?
Go to Admin > Global Settings > Field Manager > Ticket Fields. Select the Status field, and disable the SLA timer toggle.
17. Is it possible to rename the Priority tags in Ticket fields?
No, default fields cannot be customized.
18. Is it possible to edit a default field like Category?
No, you will not be able to edit any default field. You can create a rule in Admin > Global Settings > Business Rules for Forms to hide or disable an existing default field.
19. How to export the Category field from Ticket fields?
Currently, there is no direct option to export the Category field from Ticket Fields. However, you can retrieve the Category field values using the following API.
https://api.freshservice.com/#view_all_ticket_fields
20. How do you delete the Category field?
Default fields, such as the Category field cannot be deleted.
If you do not need this field to be visible in Ticket form, you can hide or disable it using Business Rules.
Note: If you have more than one workspace, which requires this field to be hidden, create a business rule in Admin > Global Settings > Business Rules for Forms.
21. Are all ticket form field labels and backend names unique across the system?
Yes, enhanced validation for all ticket form field labels and backend names has been introduced to ensure they are unique across the system. This new rule applies whenever you create or update a ticket field. The system now checks the new label or name against all existing default and custom fields, and any action fails if a duplicate is found. This enhanced validation update for field labels and names addresses key inconsistencies, such as preventing the creation of custom fields with labels that match default system fields (for example, 'Status'), and ensures improved data consistency for both agents and admins.
22. How can a single closed ticket that was closed accidentally be reopened when the ticket properties and status field are no longer visible?
The ticket status can be changed back to Open. If the Status field or other properties are not visible, they may have been hidden by a business rule or field manager configuration. In Freshservice, closing a ticket does not remove its properties unless a business rule or field manager setting hides them. To resolve this, check if any business rule or field manager configuration is hiding the fields.
23. Why are the user management options, specifically the Requesters tab, not appearing for an admin, and how can custom fields be added to the helpdesk incident form in the portal?
The user management options may be missing because the navigation is set to workspace-level settings instead of global settings. In global settings, all the user management options including Requesters will be available.
For customizing the helpdesk incident form in the portal, go to Admin > Global Settings > Field Manager > Ticket Fields. Add or modify the required fields under Ticket Fields to adjust the form design.