
 Community
 Video Library
 Agent Training
 Freshservice
 Freshdesk
 Freshchat
 Freshcaller
 Freshsales
 Freshteam
 Freshworks Neo
 Freshsurvey
 Freshservice for MSP
Discover Windows endpoints and keep their hardware, software, and configuration inventory up to date in Freshservice using the ITAM Discovery Agent.
TABLE OF CONTENTS
- Overview and architecture
- Prerequisites
- Download the installer
- Install using the setup wizard (UI)
- Install using the command prompt
- Scenario A: First-time installation (Default settings)
- Scenario B: First-time installation to a custom directory
- Scenario C: First-time installation with custom scan intervals and discovery flags
- Scenario D: First-time installation with an external configuration file
- Scenario E: Upgrade an existing installation
- Installer properties
- Configure the agent (optional)
- Verify the installation
- Upgrade and repair
- Troubleshooting
Overview and architecture
The Freshservice ITAM Discovery Agent scans local Windows workstations and servers and transmits system inventory directly to your Freshservice Asset Management console.
When installed, the package deploys three components into C:\Program Files\Freshworks\Freshservice ITAM Agent\:
fs_itam_agent.exe – The core discovery scan engine.
fs_itam_windows_service.exe – The background service wrapper that triggers scans at specified intervals (default: 24 hours).
fs_itam_updater.exe – The auto-update engine triggered every 3 days and upon user login via Windows Task Scheduler.
Prerequisites
Ensure your target Windows devices and environment meet the following requirements before installing the agent:
You need local administrator rights on the target Windows device to run the installation.
If a standalone version of the agent was previously installed using a PowerShell (.ps1) script, uninstall or remove it before installing the MSI package. Also, delete all folders and files associated with the previous standalone installation.
Ensure both downloaded items remain together in the same directory:
Freshservice-ITAM-Windows-Agent-x64-<version>.msi (or the 32-bit package).
fs_itam_agent_config.enc – the encrypted account configuration file.
Windows Script Host (specifically JScript custom action execution) must not be blocked or disabled, as the MSI installer relies on custom actions during setup and configuration.
Ensure that organization-wide security policies and endpoint security tools do not block the installer or its associated binaries. The following operations must be permitted:
MSI package execution.
Windows Script Host scripts.
Background service installations.
Task Scheduler modifications on enrolled devices.
If installing the agent in a custom directory rather than the default path, specify a folder dedicated exclusively to the agent.
Download the installer
Follow these steps to download the installer:
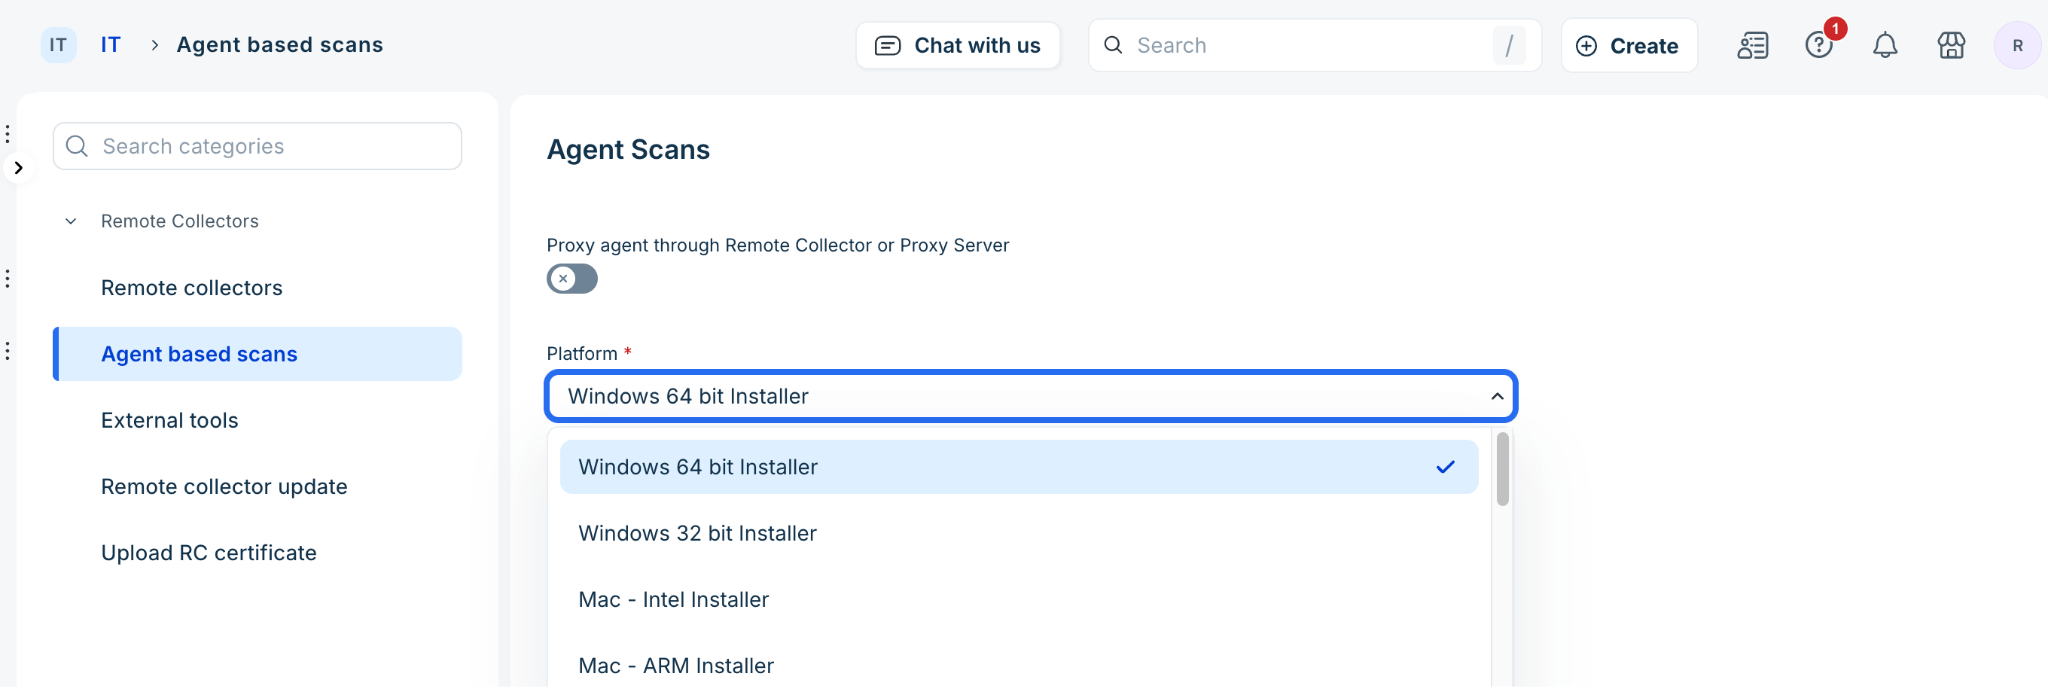
Go Admin > Asset Management > Discovery > Agent-based scans.
Under Platforms, select either Windows 64-bit Installer or Windows 32-bit Installer.
Click Download Agent.
Extract the downloaded ZIP archive. Ensure the extracted folder retains both files together:
Freshservice-ITAM-Windows-Agent-<arch>-<version>.msi
fs_itam_agent_config.enc (Encrypted tenant identification file)
Install using the setup wizard (UI)
Follow these steps to install and configure the agent on a Windows machine:
Double-click Freshservice-ITAM-Windows-Agent-x64-<version>.msi.

On the Welcome to the Freshservice ITAM Agent Setup Wizard screen, click Next.
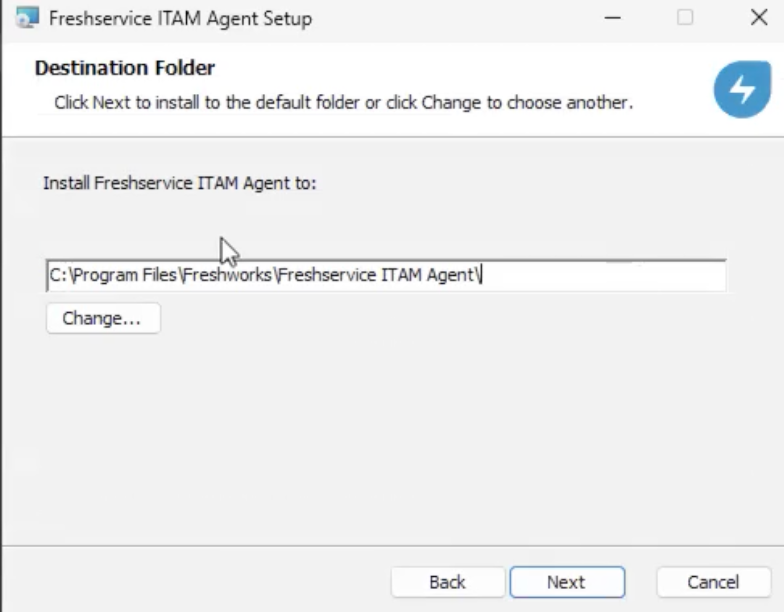
On the Destination Folder screen, accept the default location or click Change... to choose another. The default folder: C:\Program Files\Freshworks\Freshservice ITAM Agent\.
On the Configure Agent Options screen, set the following (both are optional):
Click Next, then complete the installation. If a UAC prompt asks whether to allow the app to make changes, click Yes.
When setup finishes, the agent is running and the device reports to Freshservice ITAM.
Tip: Leave the arguments field empty and the interval at 24 if you want the standard behavior.
Install using the command prompt
Automate and deploy the Freshservice ITAM Agent across Windows endpoints using the command prompt or deployment tools (such as Microsoft Intune or SCCM).
Open Command Prompt as an administrator and execute one of the command options below based on your deployment scenario. Replace <version> with the version number in your installer's file name.
Important:
EULA acceptance: ACCEPT_EULA=1 is required for command-line installations.
Configuration file location: The fs_itam_agent_config.enc file must reside in the same folder as the .msi package unless its path is explicitly defined using the CONFIG_FILE parameter.
Scenario A: First-time installation (Default settings)
Install the agent for the first time with default settings to the default path (C:\Program Files\Freshworks\Freshservice ITAM Agent\).
msiexec /i "Freshservice-ITAM-Windows-Agent-x64-<version>.msi" /qn ACCEPT_EULA=1
Scenario B: First-time installation to a custom directory
Install the agent for the first time to a custom drive or directory using INSTALLDIR. The target folder must be dedicated exclusively to the agent.
msiexec /i "Freshservice-ITAM-Windows-Agent-x64-<version>.msi" /qn ACCEPT_EULA=1 INSTALLDIR="D:\CustomApps\Freshservice ITAM Agent"
Scenario C: First-time installation with custom scan intervals and discovery flags
Customize discovery behavior during initial installation by specifying the scan frequency in hours (INTERVAL) and passing supported discovery flags (EXTRA_ARGS).
msiexec /i "Freshservice-ITAM-Windows-Agent-x64-<version>.msi" /qn ACCEPT_EULA=1 INTERVAL=12 EXTRA_ARGS="--light-mode --hostname-precedence"
Scenario D: First-time installation with an external configuration file
Install the agent when fs_itam_agent_config.enc is stored in a separate network share or local folder rather than alongside the .msi installer.
msiexec /i "Freshservice-ITAM-Windows-Agent-x64-<version>.msi" /qn ACCEPT_EULA=1 CONFIG_FILE="C:\Deployment\Config\fs_itam_agent_config.enc"
Note: Parameters from Scenarios B, C, and D can be combined into a single command as needed.
Scenario E: Upgrade an existing installation
Update a previously installed agent to a newer version. Setting INSTALLDIR is not required; existing installation directories (default or custom) and configuration parameters are retained automatically.
msiexec /i "Freshservice-ITAM-Windows-Agent-x64-<version>.msi" /qn ACCEPT_EULA=1
Installer properties
Installer properties are NAME=value settings that you add to an msiexec command. They give the installer the same information that the wizard collects. Use them only in command-line installs and changes. You don’t need them when you use the setup wizard.
Notes
If you pass no properties during a change or repair, the agent keeps its saved arguments and interval.
If you pass both CLEAR_ARGS=1 and REPLACE_ARGS=1, CLEAR_ARGS=1 takes priority.
Change settings on an installed agent
To change agent arguments or the run interval without reinstalling, run msiexec with the product code of the installed agent. The product code is the unique ID that Windows assigns to the installed agent. You don’t need the .msi file on the device.
Open Command Prompt as an administrator.
Find the product code:
reg query "HKLM\SOFTWARE\Microsoft\Windows\CurrentVersion\Uninstall" /s /f "Freshservice ITAM"
The product code is the key name in braces, for example {XXXXXXXX-XXXX-XXXX-XXXX-XXXXXXXXXXXX}.
Run the command for your change. Replace {ProductCode-GUID} with your product code.
Note: Use REINSTALL=ALL. Don’t use /f, because /f doesn’t pass installer properties.
Configure the agent (optional)
You can control how the Freshservice ITAM Agent behaves on each device by setting two options:
Agent arguments: Optional settings that change what the agent collects or how it runs. For example, --light-mode reduces CPU use on the device, and --skip-software stops the agent from collecting installed software. Each argument starts with two hyphens, and multiple arguments are separated by spaces.
Run interval: How often, in hours, the agent scans the device and sends its details to Freshservice ITAM. The default is 24 hours.
You can set these options when you install the agent and change them later without uninstalling:
Using the setup wizard: Enter them on the Configure Agent Options screen. To change them later, open Programs and Features, select Freshservice ITAM Agent, choose Change, and then Repair. The wizard opens again.
Using the command line: Pass them as installer properties in an msiexec command, as described next.
Supported agent arguments
The following arguments are supported. Enter each argument with two leading hyphens, for example
--light-mode.
Verify the installation
Confirm that the agent is installed and functioning properly on the machine by checking the following components:
Files: The agent is installed under C:\Program Files\Freshworks\Freshservice ITAM Agent\ (or your specified custom folder) and contains fs_itam_winagent_x64.exe, fs_itam_winservice_x64.exe, and fs_itam_updater_x64.exe.
Data folder: C:\ProgramData\Freshworks\Freshservice ITAM Agent\ contains configuration and data files, including agent_local.conf, agent_local.log, fs_itam_agent_config.enc, and fs_itam_config.json.
Processes: In Task Manager, search for fs_itam and verify that fs_itam_winagent_x64.exe and fs_itam_winservice_x64.exe are running.
Auto-update task: In Task Scheduler > Task Scheduler Library > Freshworks, confirm that the Freshservice ITAM Agent Updater task is registered to run every 3 days and at logon of any user.
Freshservice ITAM: Navigate to Inventory > All devices in your Freshservice console. Verify the device appears in the list and open it to view discovered hardware, software installations, and device attributes.
Logs: Access the log files located in C:\ProgramData\Freshworks\Freshservice ITAM Agent\ to troubleshoot or verify activity:
agent_local.log: Check this file if the device does not appear in Freshservice or if inventory transmission fails.
agent_updater.log: Tracks auto-update checks, showing whether new agent versions were detected and if the download began.
agent_upgrade.log: Confirms whether the version upgrade completed successfully after the package was downloaded.
Upgrade and repair
Manage the lifecycle of the agent on Windows devices using the following procedures:
Upgrade: Run the newer MSI using the silent upgrade command. Previously configured arguments and scan intervals are retained automatically.
Repair: Run msiexec /i {ProductCode-GUID} REINSTALL=ALL /qn to repair the installation.
Downgrade: Direct downgrades over an existing installation are not recommended. Reverting to an older version requires completely uninstalling the current agent first and then running the older installer. Devices should remain up to date to ensure proper discovery functionality and security.
Renamed or copied MSI: Perform repairs using the product code instead of the file path. If a renamed MSI is executed, the installer temporarily creates a copy under the original registered package name next to it and removes it once the operation completes.
Troubleshooting
Refer to the table below to diagnose and resolve common issues that may occur during agent installation, repair, or asset discovery.