
 Community
 Video Library
 Agent Training
 Freshservice
 Freshdesk
 Freshchat
 Freshcaller
 Freshsales
 Freshteam
 Freshworks Neo
 Freshsurvey
 Freshservice for MSP
 TABLE OF CONTENTS
- Prerequisites
- Business rules for journey forms
- Create a business rule for a journey form
- Frequently asked questions
Business rules for journey forms let you configure dynamic behavior for fields in Journey forms. You can show or hide fields, enable or disable fields, make fields mandatory or optional, and prefill field values based on conditions.
Prerequisites
Before you configure business rules for journey forms, ensure that you have the following:
Administrator privileges to access Journey Builder.
At least one form-based activity in the journey.
Familiarity with configuring conditions.
Business rules for journey forms
You can configure business rules for journey forms directly in the Journey forms. A rule can use the following as conditions:
Fields in the current form.
Fields in forms configured earlier in the same journey.
Journey and requester fields, such as the requester's department.
Rules are evaluated as the form is filled out. Changes to field visibility, editability, mandatory status, or values are reflected without requiring the form to be saved or reloaded.
Supported rule actions
Rule precedence
When multiple rules affect the same field, the rules are evaluated according to a defined order of precedence. This ensures consistent behavior when rules overlap.
If rules create dependencies between fields, such as one field hiding another and the second field hiding the first, the system resolves the dependencies without creating an evaluation loop.
Rule applicability
Business rules for journey forms apply to Agents and Requesters by default. You can specify whether a rule applies to Agents, Requesters, or both when you configure the rule.
API and bulk journey initiation
Business rules are applied to API-triggered and bulk journey initiations only when system-wide enforcement is enabled for the rule.
When system-wide enforcement is enabled, and records in a bulk initiation fail rule validation, the validation errors are displayed in a consolidated list.
Versioning and audit tracking
The following changes update the activity and journey versions:
Adding a business rule.
Editing an existing business rule, except for its name.
Deleting a business rule.
All additions, edits, and deletions of business rules are recorded in the central audit log.
Create a business rule for a journey form
Business rules let you control how fields behave on a journey form based on specific conditions. For example, showing, hiding, enabling, disabling, or mandating a field, or setting its options.
To create a business rule for a form-based activity in a journey, follow these steps:
Go to Global Settings > Journeys, and select the required journey.
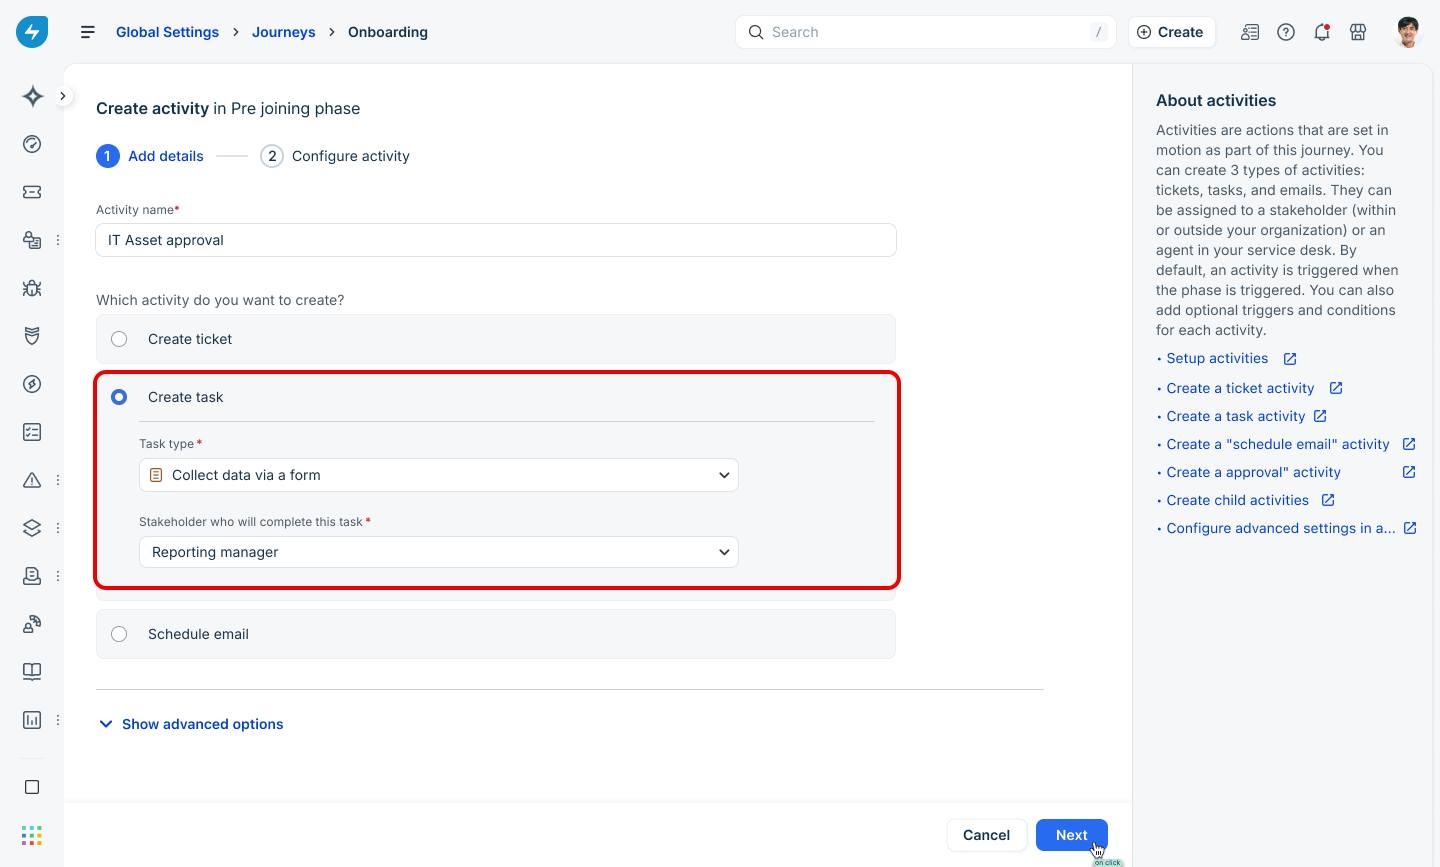
Select the form-based task for which you want to configure the rule, or create one:
Click + Create activity.
Enter an Activity name.
Under Which activity do you want to create?, select Create task.
From the Task type dropdown, select Collect data via a form.
From the Stakeholder who will complete this task dropdown, select the appropriate stakeholder.
Click Next.
On the Configure activity step, enter a Form title, and, if required, select a due date.
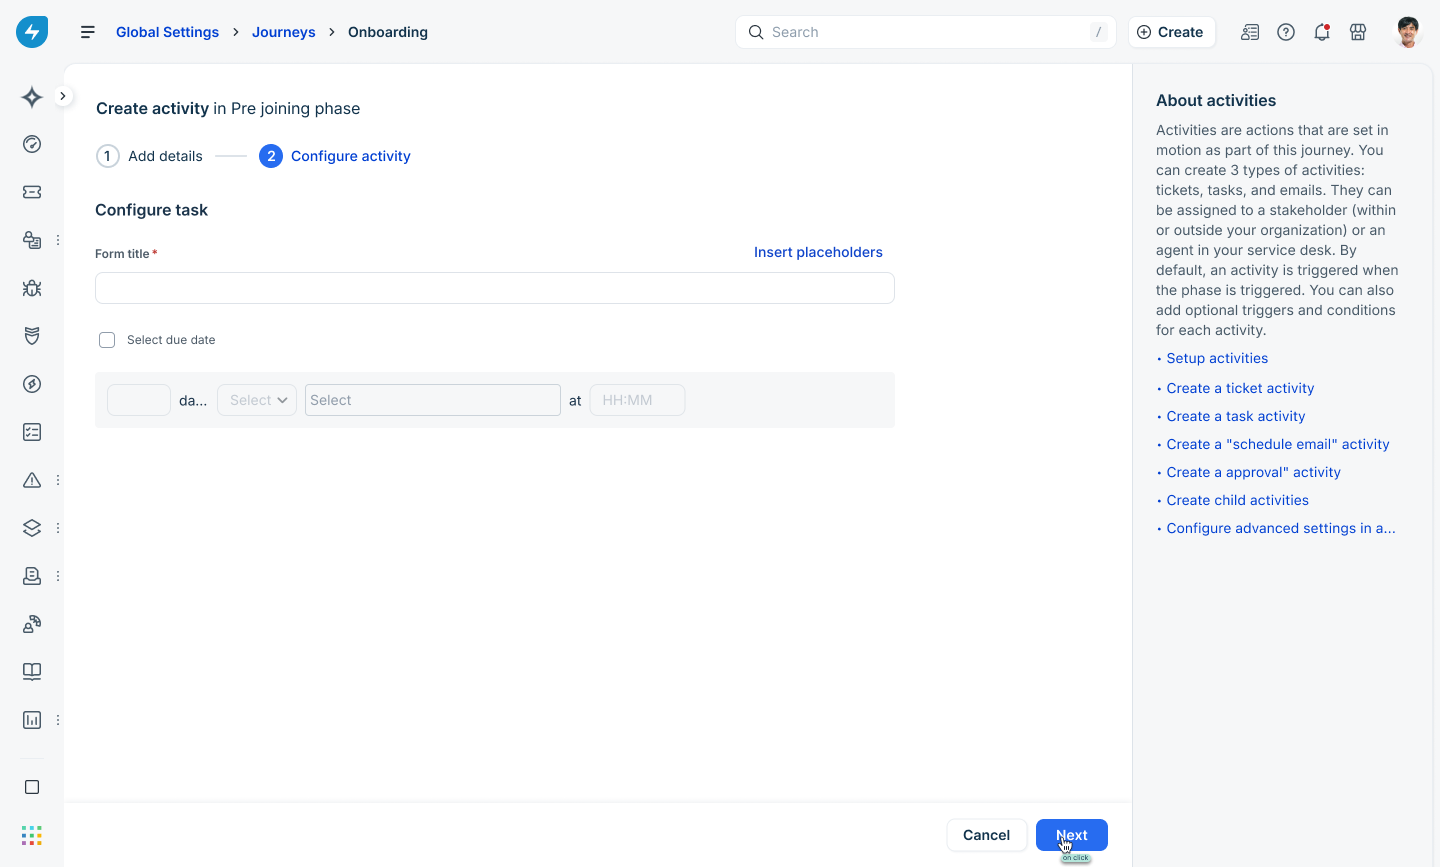
Click Next.
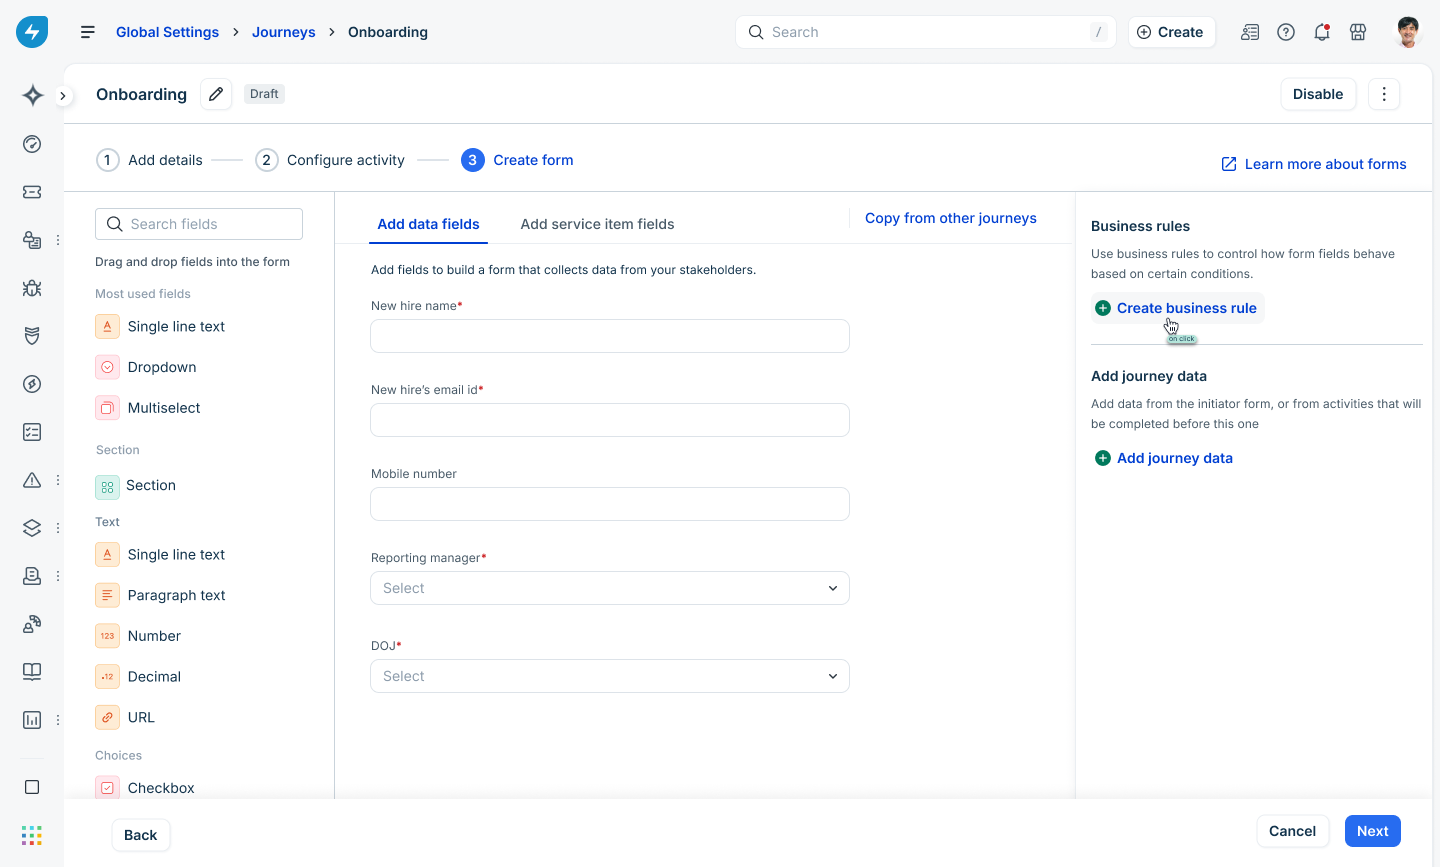
On the Create form step, add the required fields to the form using the field panel on the left.
In the Business rules panel, click + Create business rule.
In the Create business rule side panel, follow these steps:
Enter a Rule name.
From the Execute on dropdown, select when the rule should run (for example, New form).
(Optional) Click Show advanced settings, and select the applicable options:
Auto Reverse if False: Reverses the specified actions if the conditions are no longer met.
Enforce system-wide: Applies the rule to bulk actions, scenario automations, and API requests, in addition to the form.
Under Conditions, from the Match dropdown, select All or Any, depending on whether the rule should apply when all conditions are met or when any one condition is met.
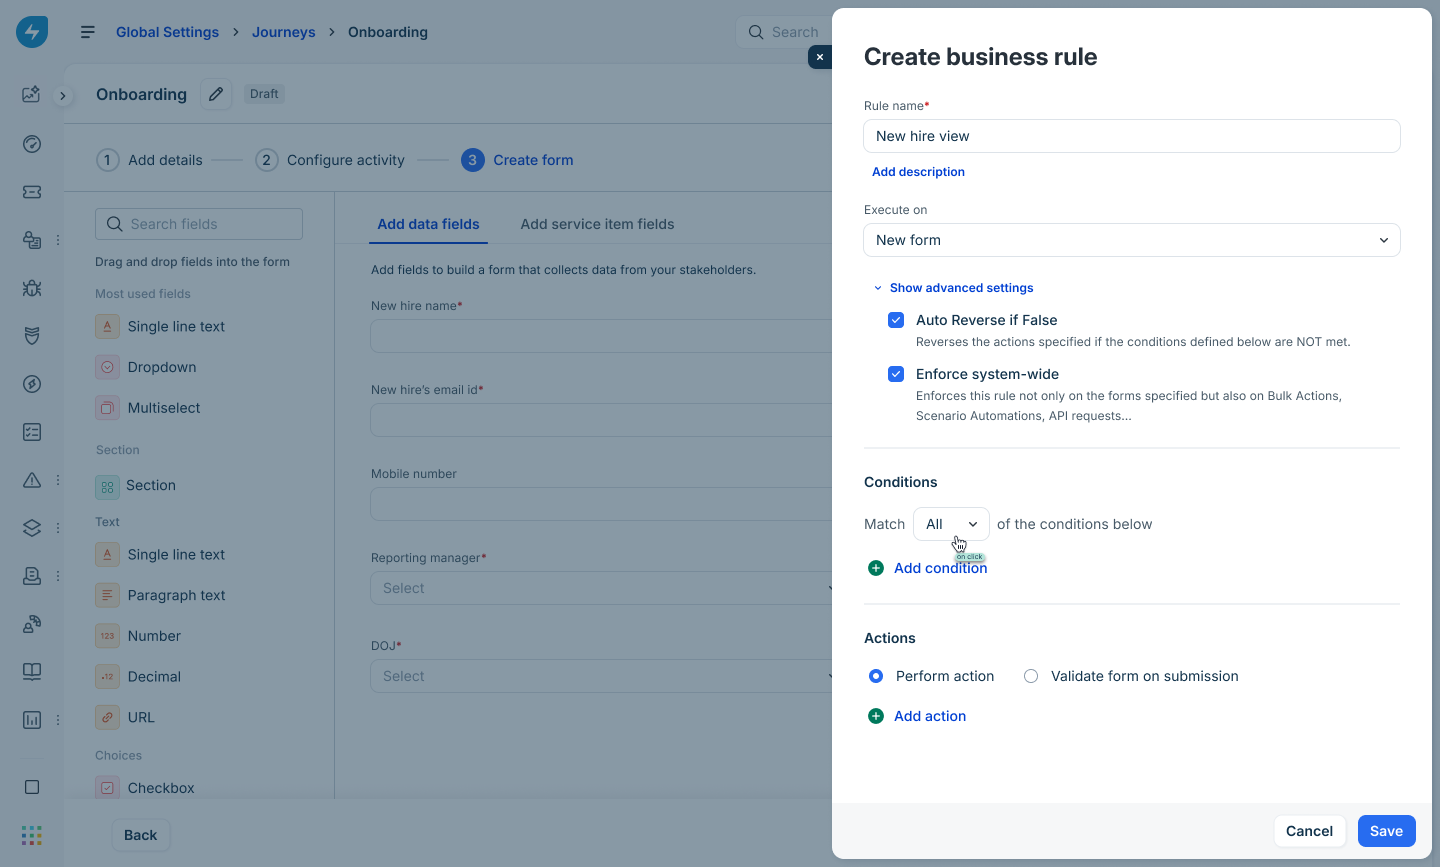
Click Add condition, and select the field to evaluate:
To use a field from the current form or an earlier activity in the journey, select Journey fields, and then select the Initiator form or Activities tab and choose the field.
To use an attribute of the person interacting with the form, select Logged in user, Requester, or Requested for, and then select the required attribute (for example, First name, Email, or VIP user).
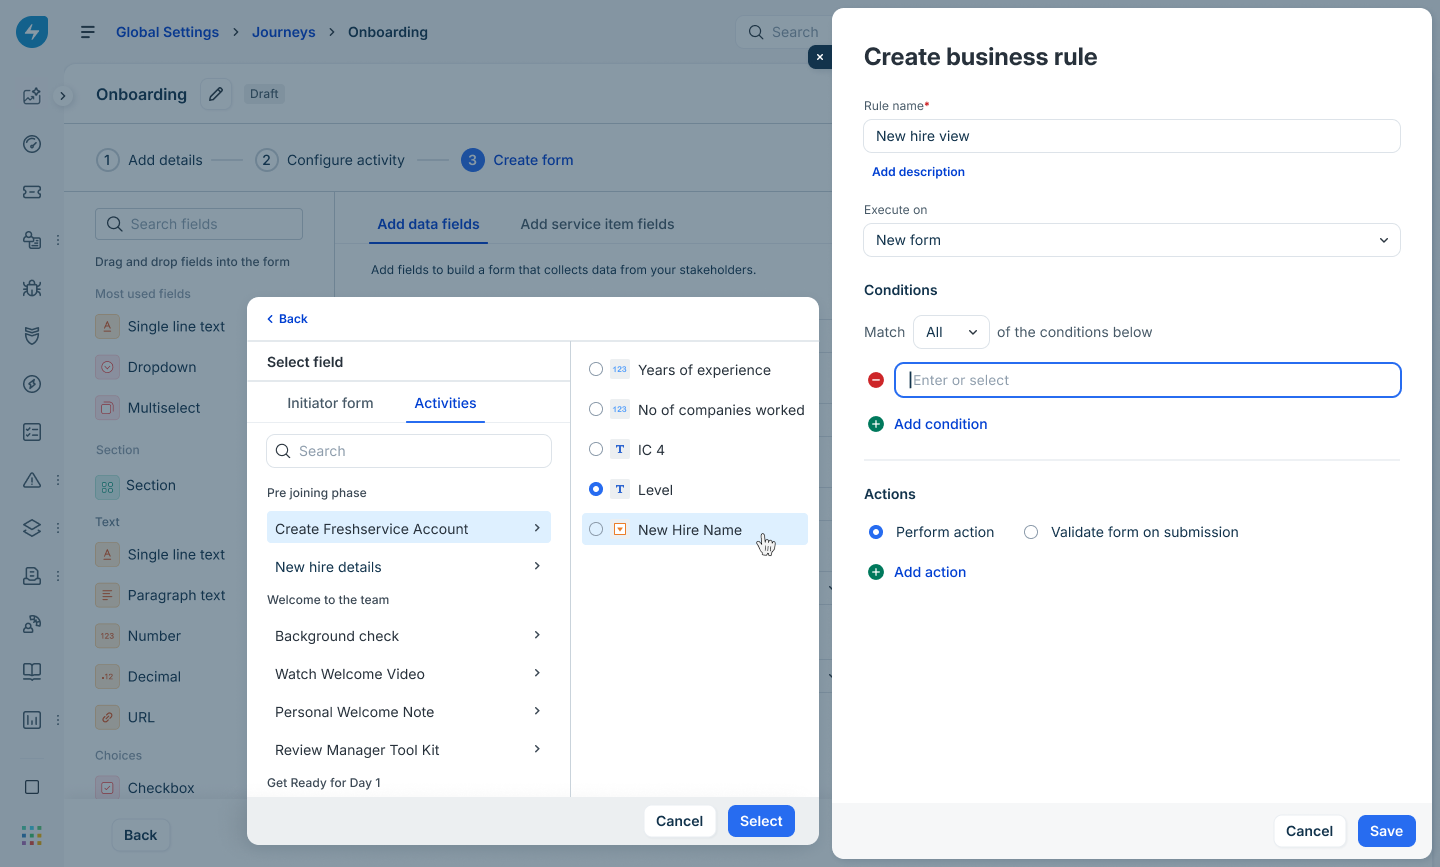
Note: The Logged in user option applies to requesters only.
Select the operator and value for the condition.
Add further conditions, if required.
Under Actions, select Perform action or Validate form on submission.
Perform action: Applies a field-level action (such as showing, hiding, enabling, disabling, or mandating a field) to the form when the specified conditions are met. Use this option to dynamically change how the form behaves based on the stakeholder's input.
Validate form on submission: Checks the specified conditions when the stakeholder submits the form, and blocks submission with a validation message if the conditions aren't met. Use this option to enforce data-entry rules rather than change field behavior.
Click Add action, and from the dropdown, select the action type: Show, Hide, Enable, Disable, Mandate, Non-Mandate, or Set options.
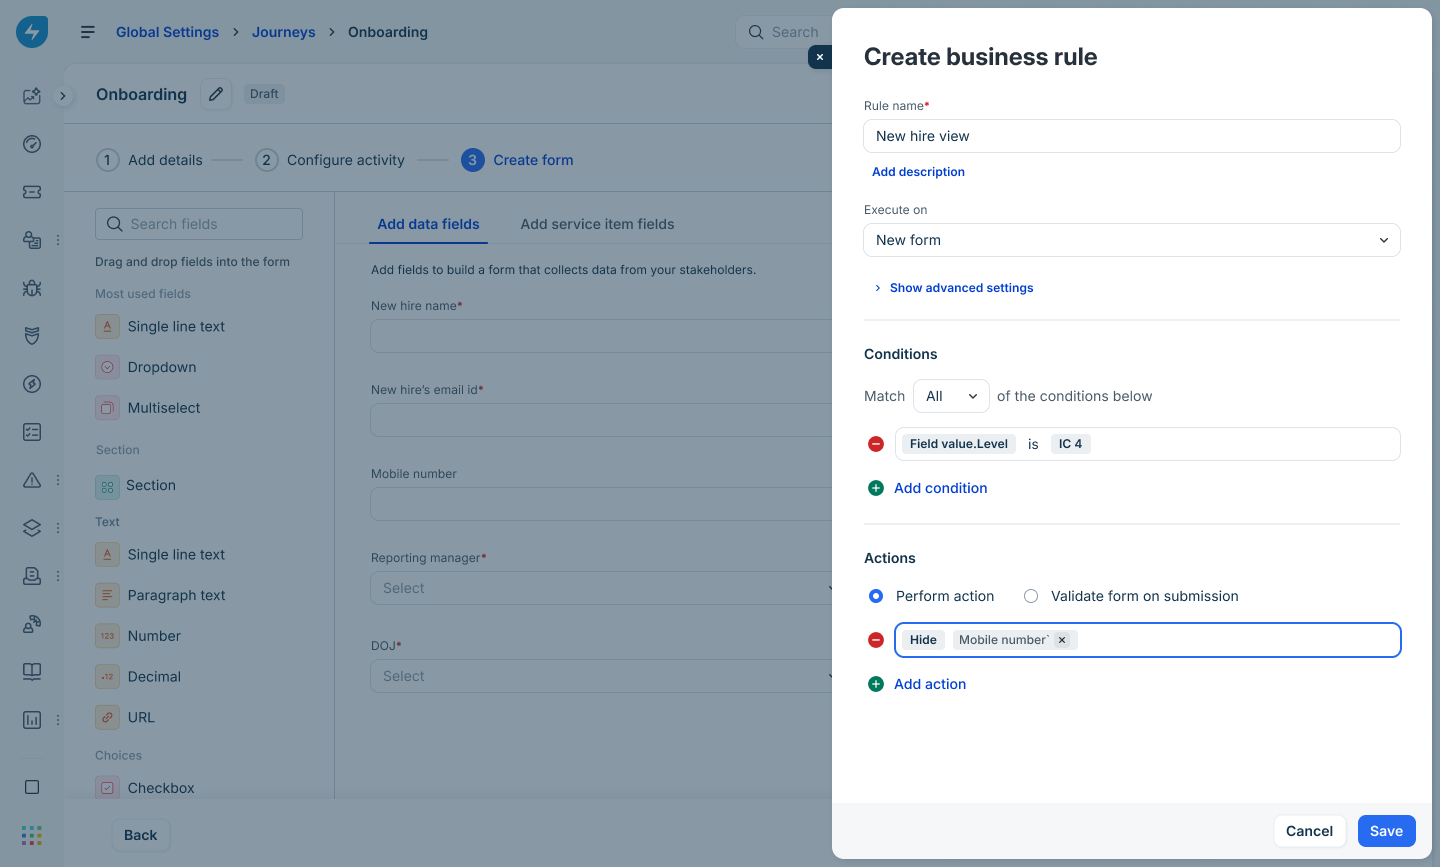
Select the form field(s) to which the action should apply.
Click Save.
Frequently asked questions
1. Do I need to use the Business Rules for Forms module for journey forms?
No. You can configure business rules for journey forms directly in the Conditions section of the form-based activity in Journey Builder.
2. Do business rules work in real time?
Yes. Business rules are evaluated as the form is filled out. You do not need to save or reload the form for the configured field behavior to take effect.
3. What happens if multiple rules affect the same field?
The system evaluates the rules according to a defined order of precedence. This ensures consistent behavior when multiple rules affect the same field.