
 Community
 Video Library
 Agent Training
 Freshservice
 Freshdesk
 Freshchat
 Freshcaller
 Freshsales
 Freshteam
 Freshworks Neo
 Freshsurvey
 Freshservice for MSP
 TABLE OF CONTENTS
- Overview
- Plan availability and limits
- Prerequisites
- Access integration users
- Create an integration user
- Configure permissions
- Manage API keys
- Track integration user activity and audit logs
- Edit or deactivate an integration user
- Technical constraints and limitations
Integration users are dedicated, non-interactive system accounts created specifically for server-to-server automations, API scripts, and third-party integrations (such as Jira or Slack). They execute background tasks and public API calls without consuming paid agent licenses or requiring interactive web portal logins.
Overview
Automated integrations traditionally relied on personal agent API keys or required purchasing extra agent licenses for dummy accounts. This could cause security vulnerabilities during employee offboarding, incurring double taxation on licensing and Identity Provider (IdP) seats, and operational friction when managing credentials in various tools like Okta, Azure AD, or Google Workspace.
Key benefits
Integration users solve these challenges by providing:
License cost savings: Eliminates the need to allocate paid agent licenses or day passes for automated scripts, bots, and external tools.
Enhanced security: Non-interactive account structure prevents web user interface (UI) logins via password or Single Sign-On (SSO), eliminating credential exposure and password-recovery attack vectors.
Synthetic identity management: Generates an internal system email address automatically for database compliance, removing the requirement to configure email accounts in external IdPs.
Uninterrupted automations: Keeps system integrations operational when employees leave or personal agent accounts are deactivated.
Clear audit logging: Logs machine actions under a distinct display name across audit logs, ticket conversations, and system activity threads.
Plan availability and limits
The maximum number of integration users permitted per instance depends on your Freshservice plan tier:
Prerequisites
To create and manage integration users, you must have an Administrator role in Freshservice with the following permissions configured in Admin > Global Settings > User Management > Roles:
Integration users: View, Create, Edit, Delete
Reset API key for integration users
Reactivate integration users
Access integration users
Log in to your Freshservice account.
Go to Global Settings > User Management > Integration Users.
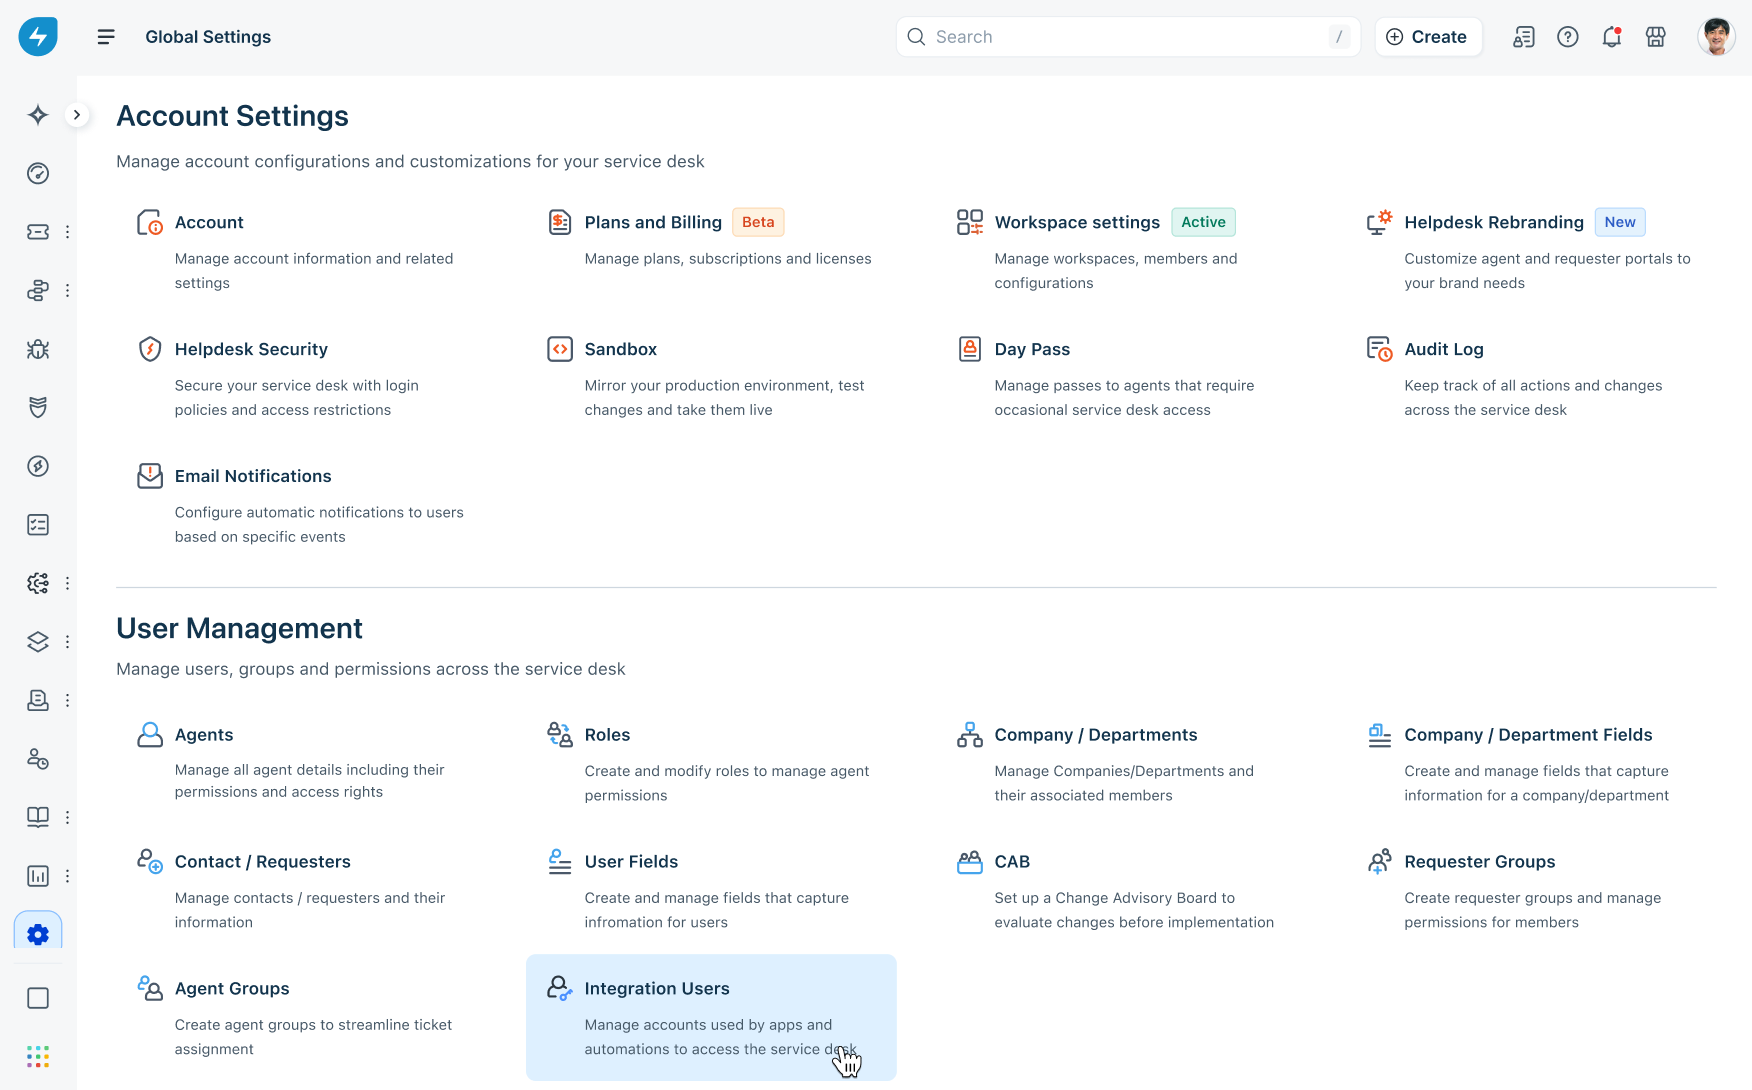
Create an integration user
On the Integration users page, click Create integration user (or click + Create integration user from the empty state view).
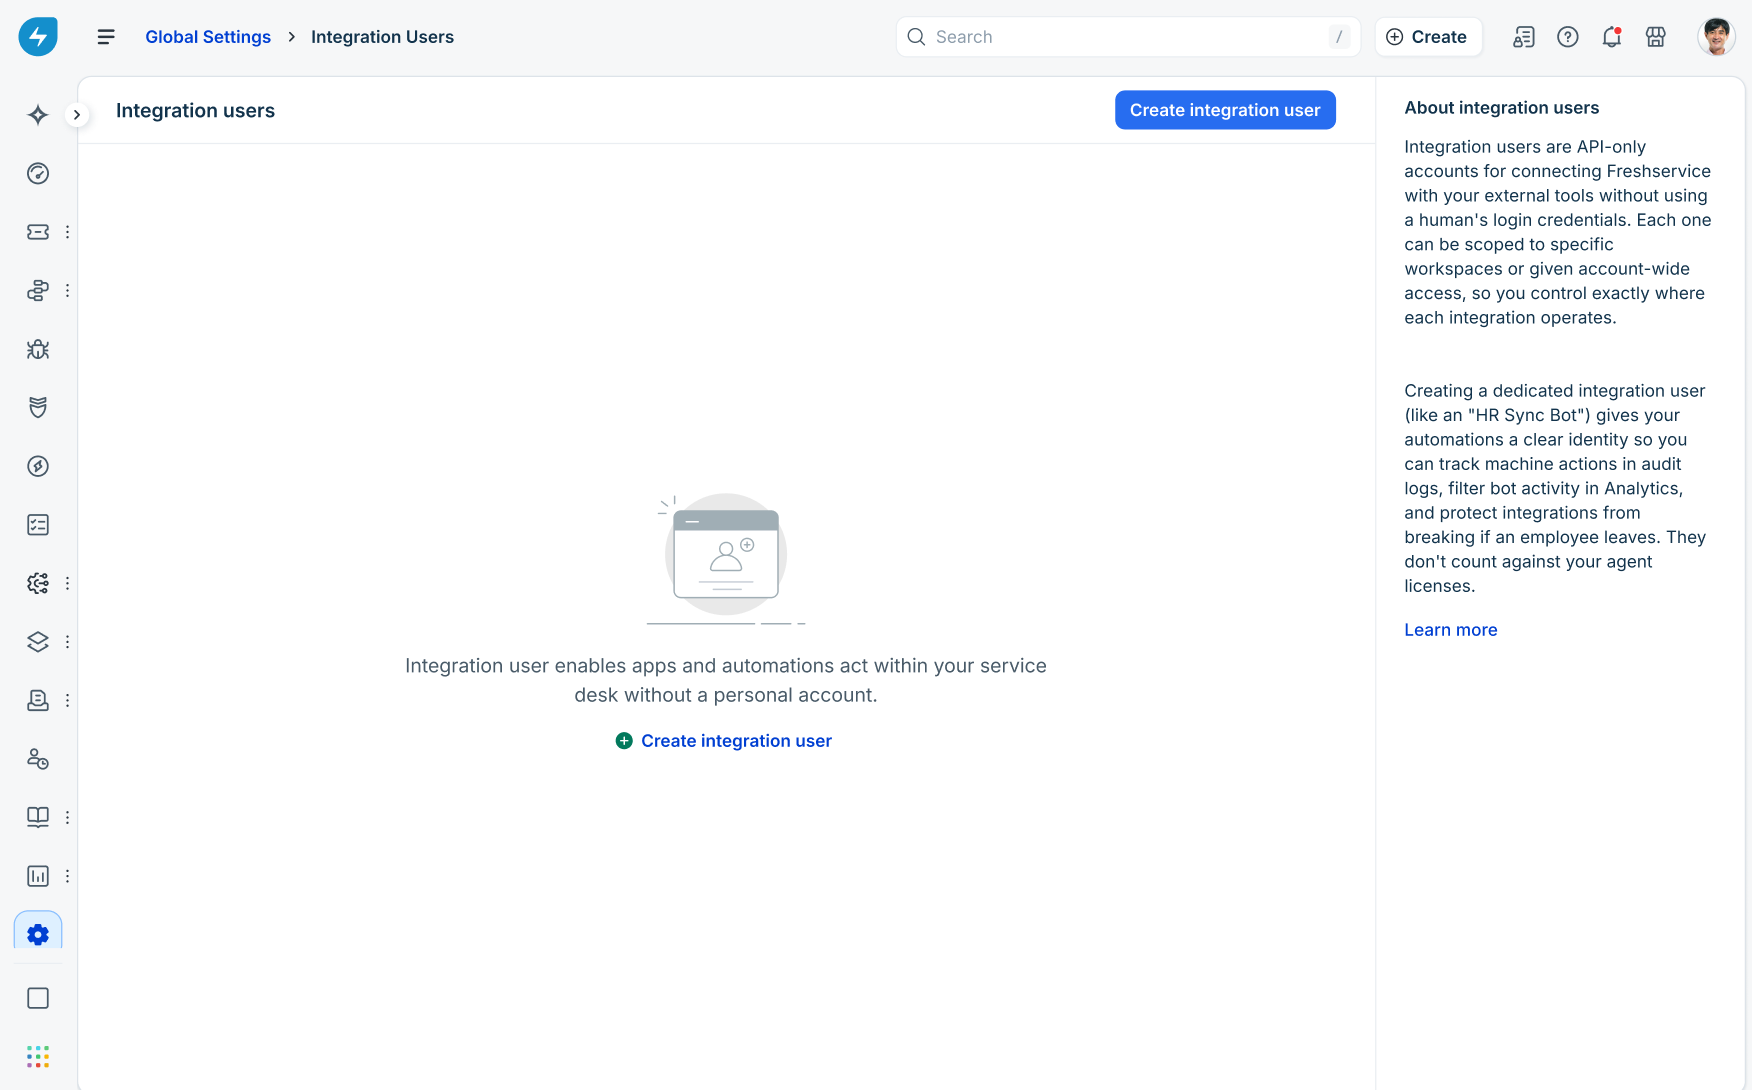
In the Create integration user slider, configure the following fields:
Display name (Required): Enter a clear identifier for the bot.
Description: Enter details describing the integration purpose.
Display picture: Upload a display image.
Click Create. A confirmation banner is shown.
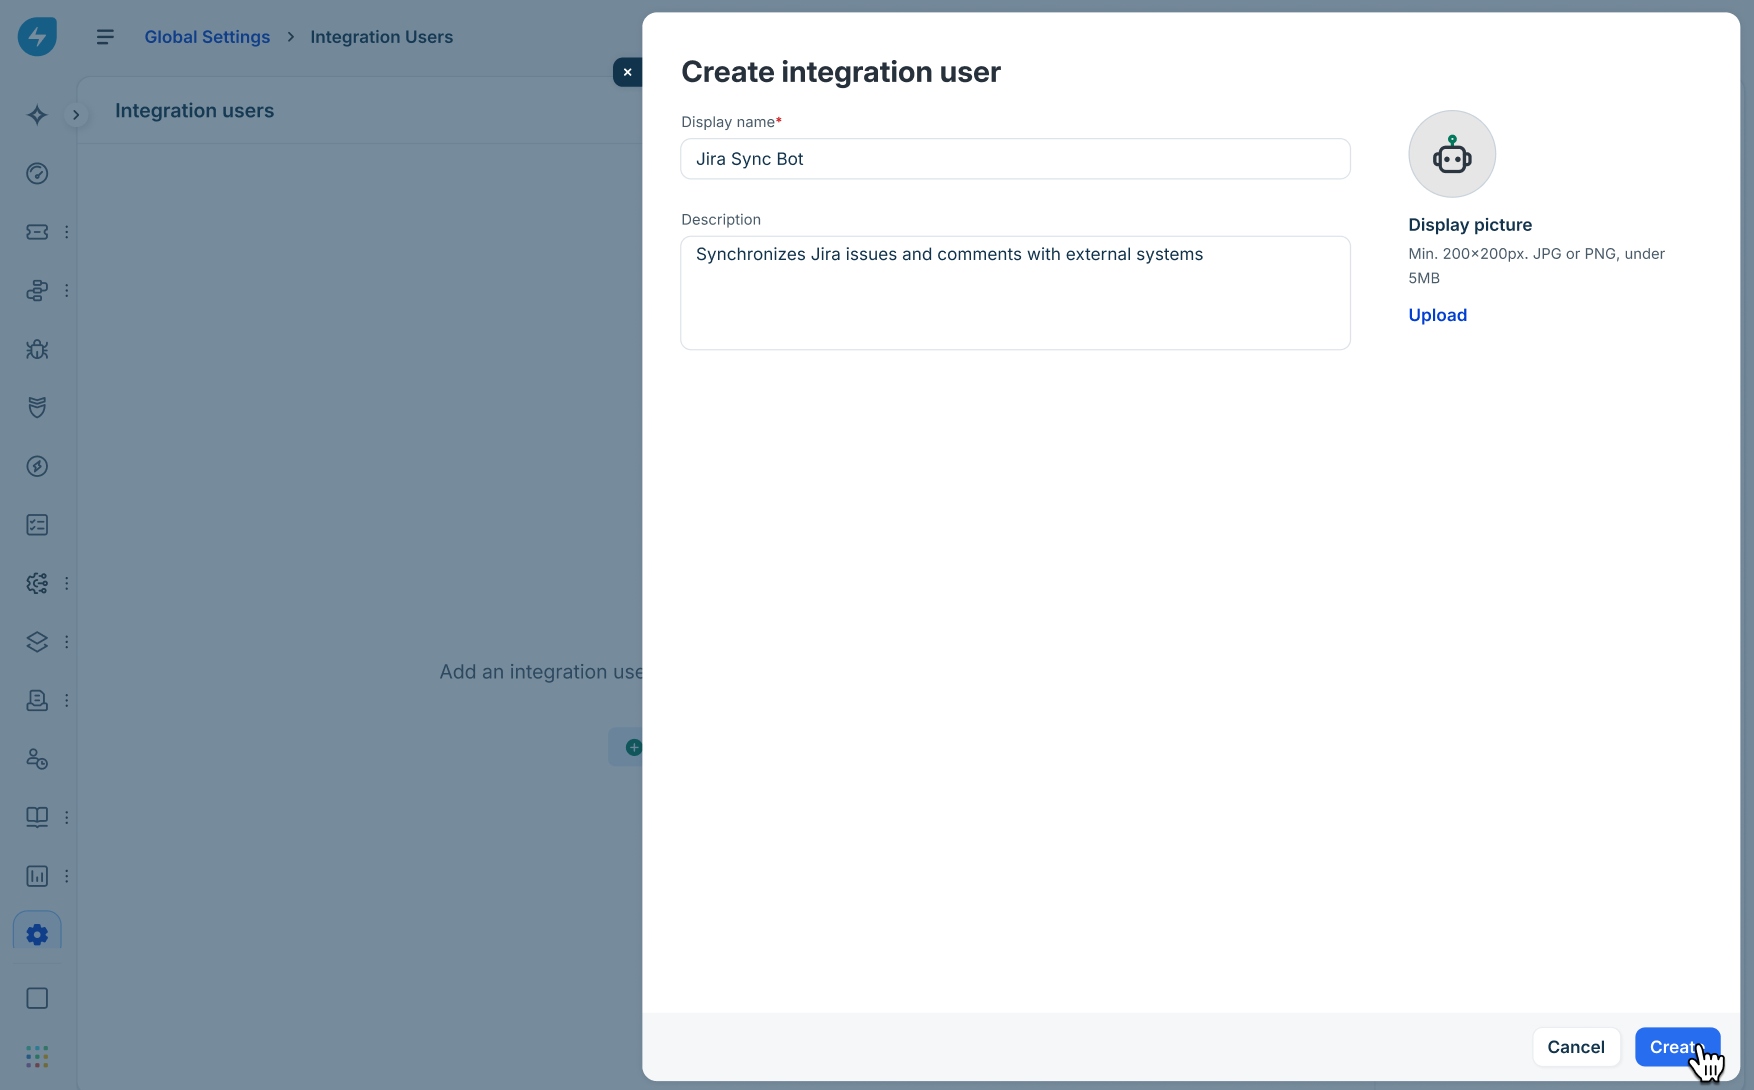
Configure permissions
Assign workspace permissions
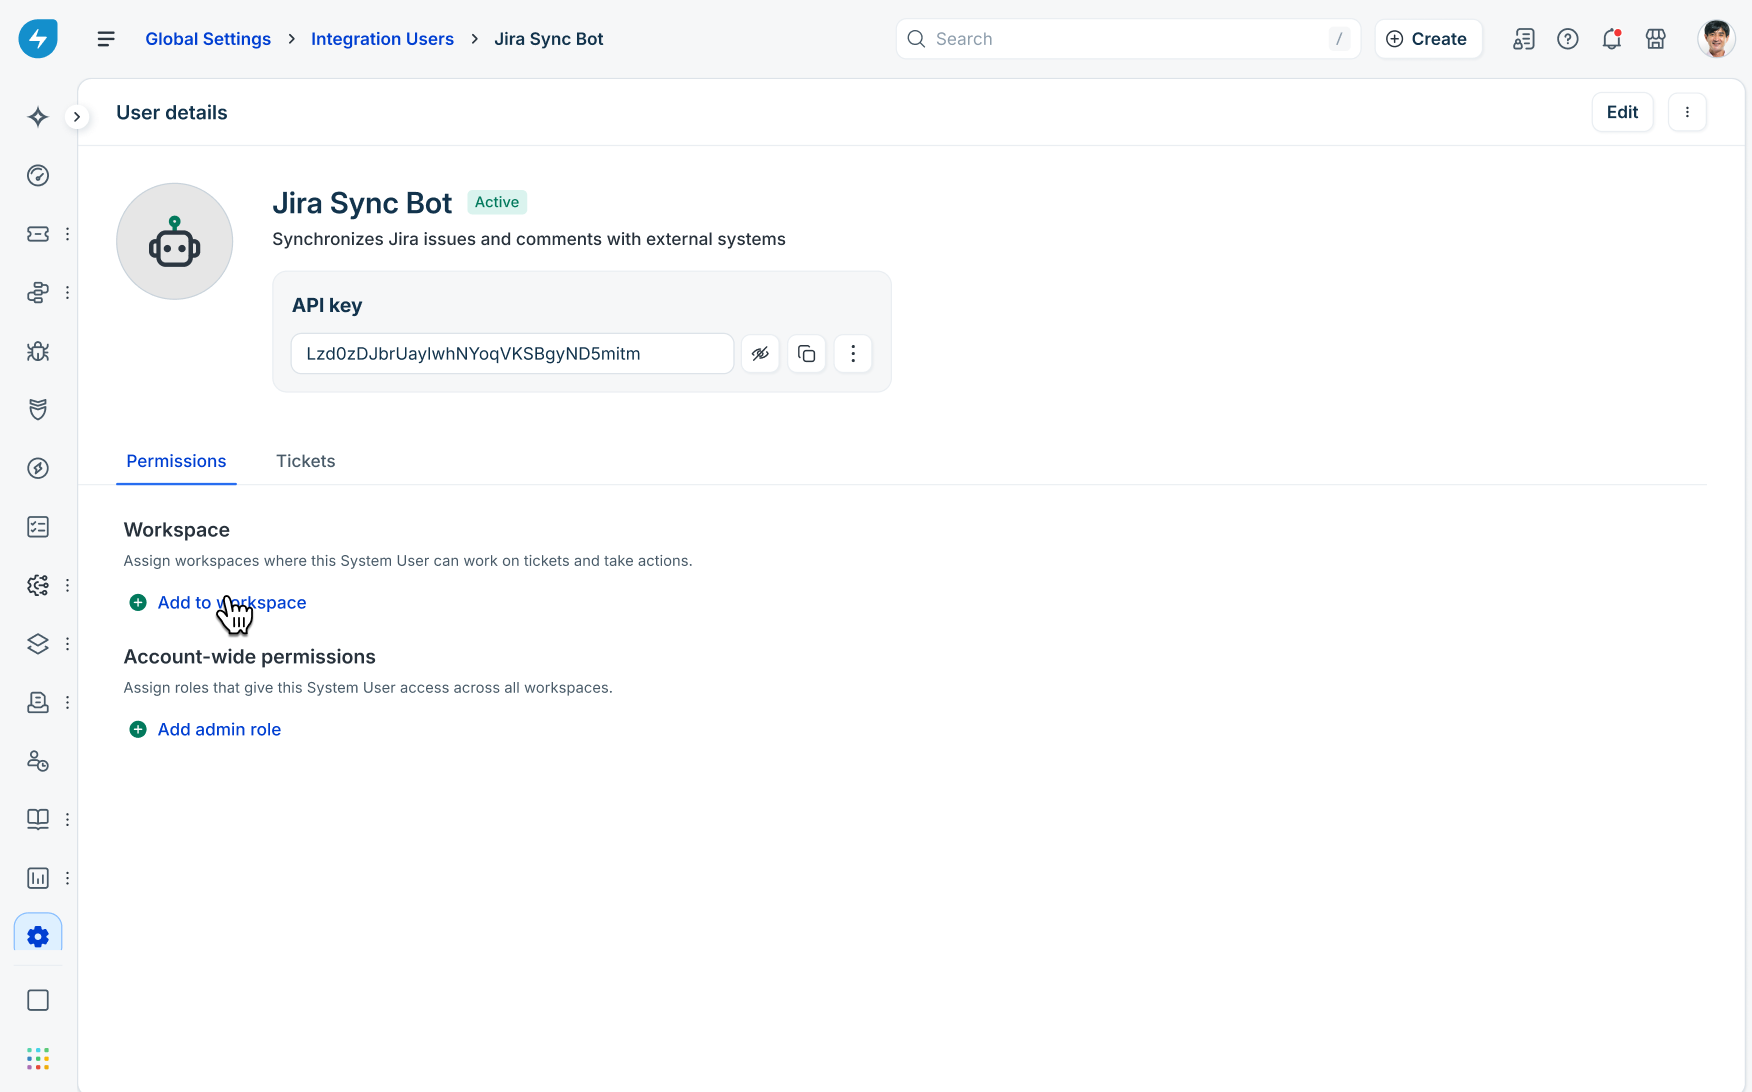
On the Permissions tab under Workspace, click Add to workspace.
In the Add user to workspace slider, select the workspace from the Workspace dropdown (for example, IT or Finance).
Under Roles, click + Add role to assign workspace-level roles (for example, IT Supervisor or Freddy Copilot).
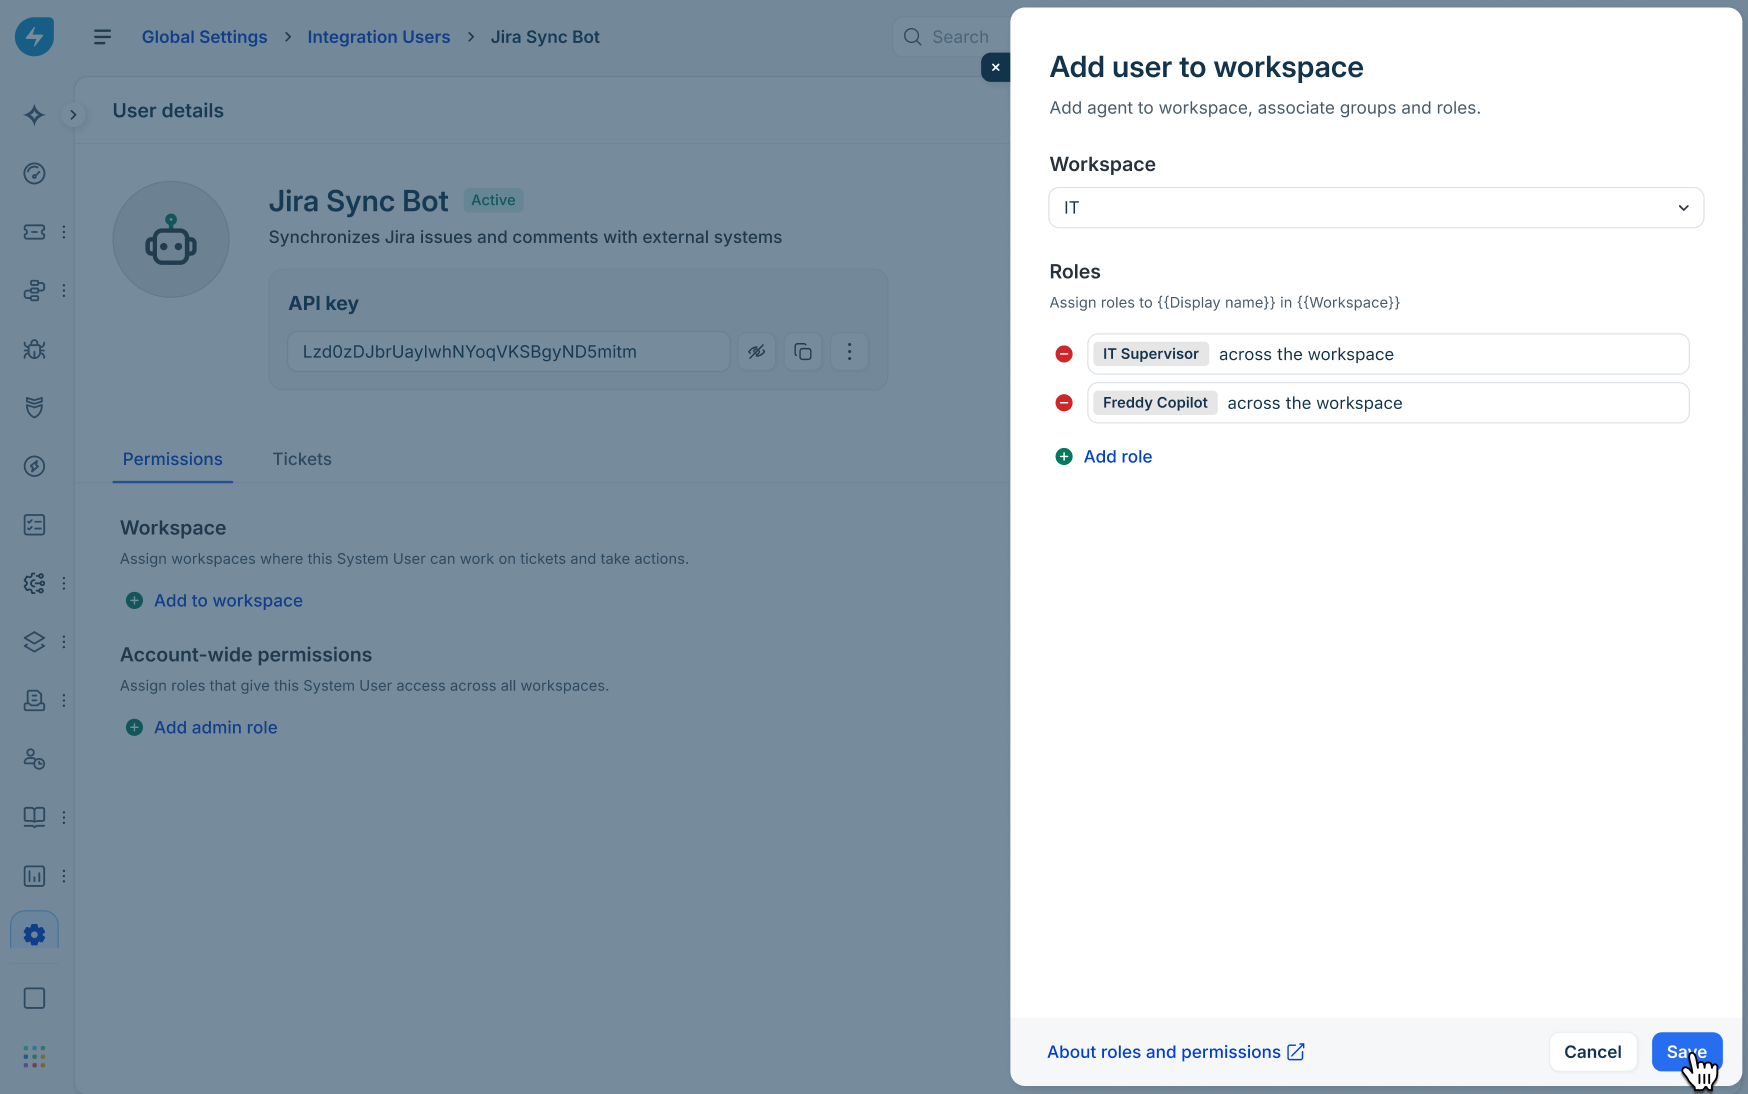
Click Save. The assigned permissions display in a card showing the workspace name and roles.
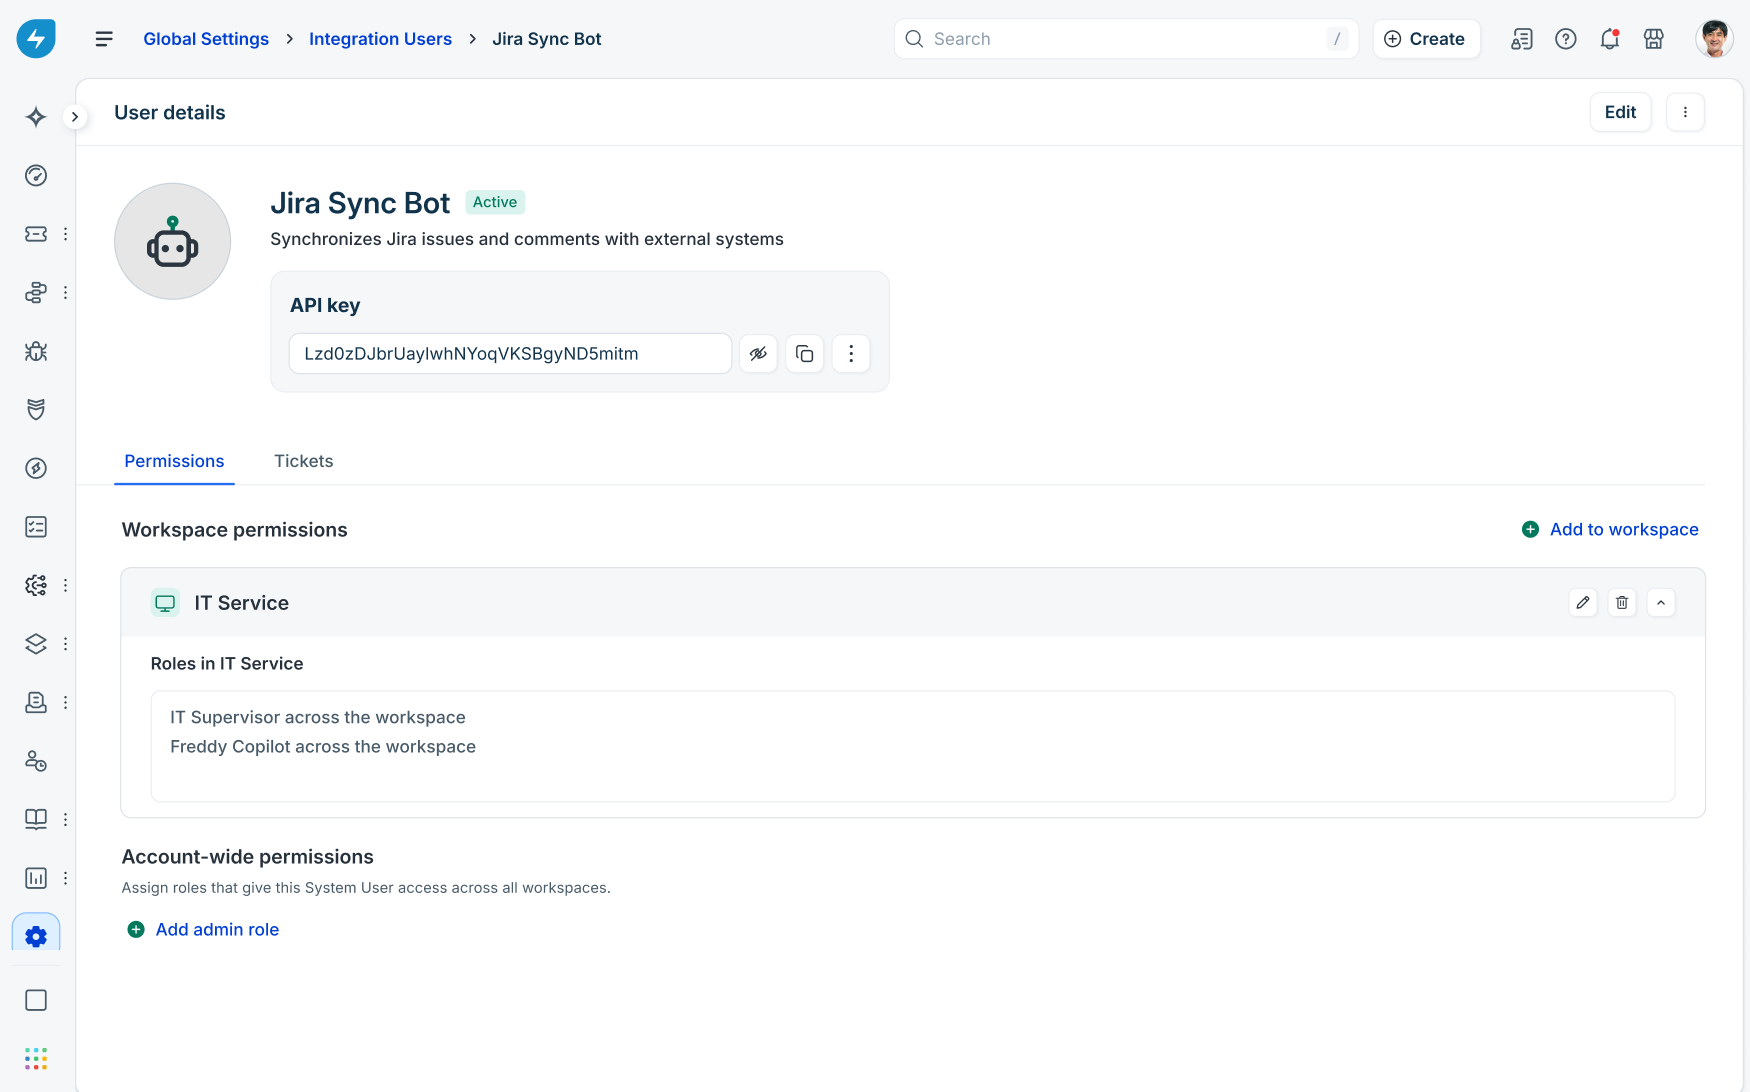
To modify assigned workspace roles later, click the Edit (pencil) icon on the workspace permissions card, add or remove roles, and click Save.
Assign account-wide permissions
Under Account-wide permissions, click + Add admin role.
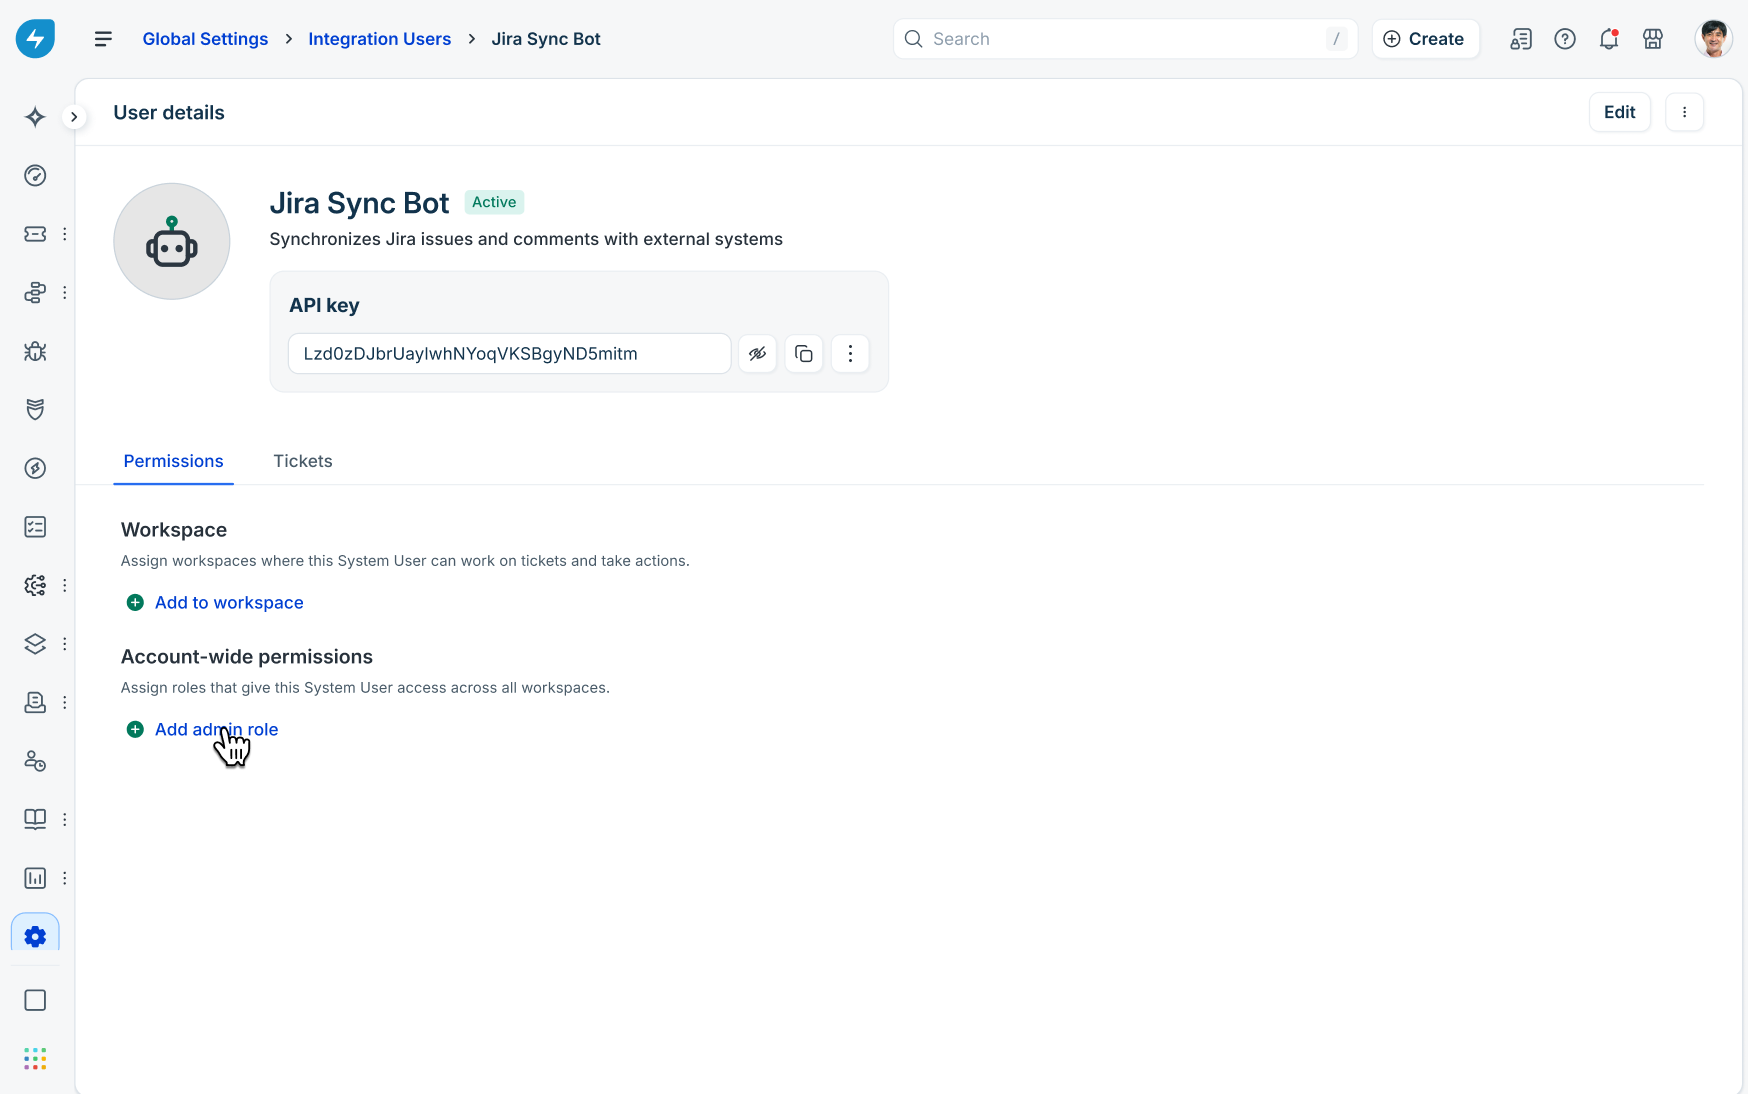
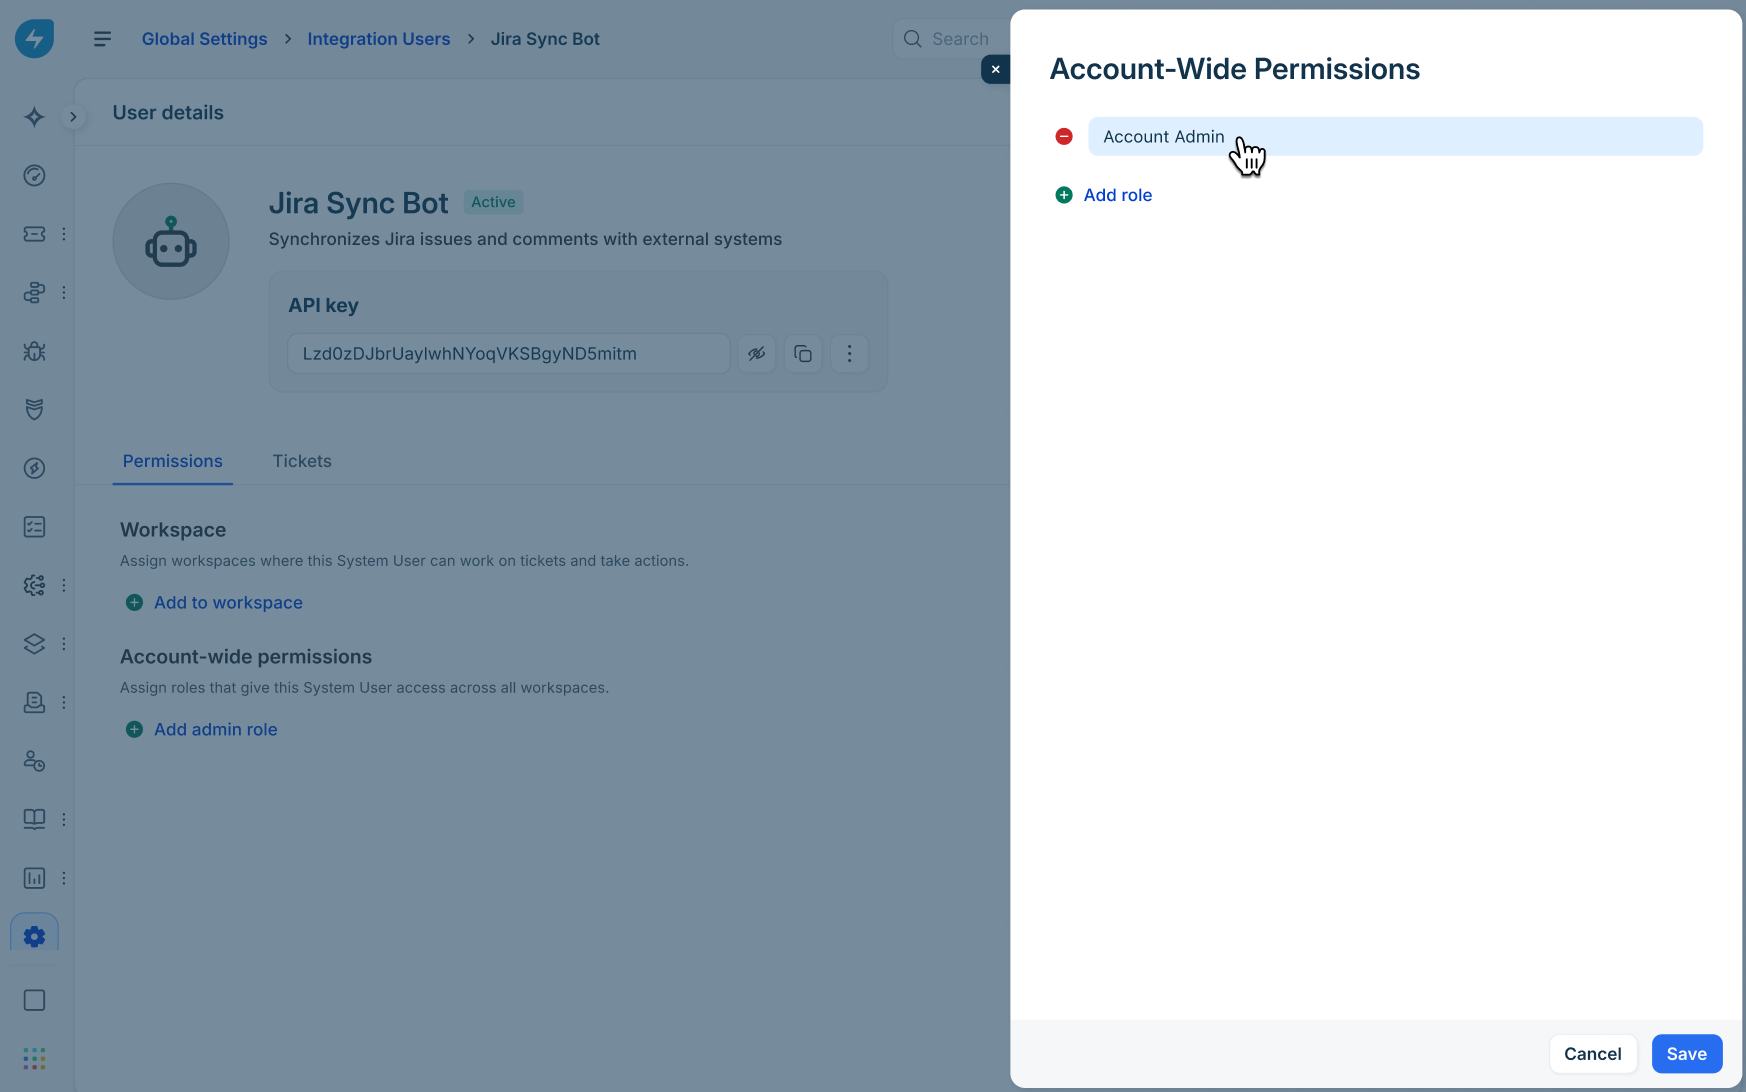
In the Account-Wide Permissions slider, click + Add role and select an administrative role (for example, Account Admin).
Click Save.
Manage API keys
View and copy an API key
On the user details page, locate the API key card.
Click the Show (eye) icon to reveal the plain-text key.
Click the Copy icon to copy the API key to your clipboard for use in script request headers.
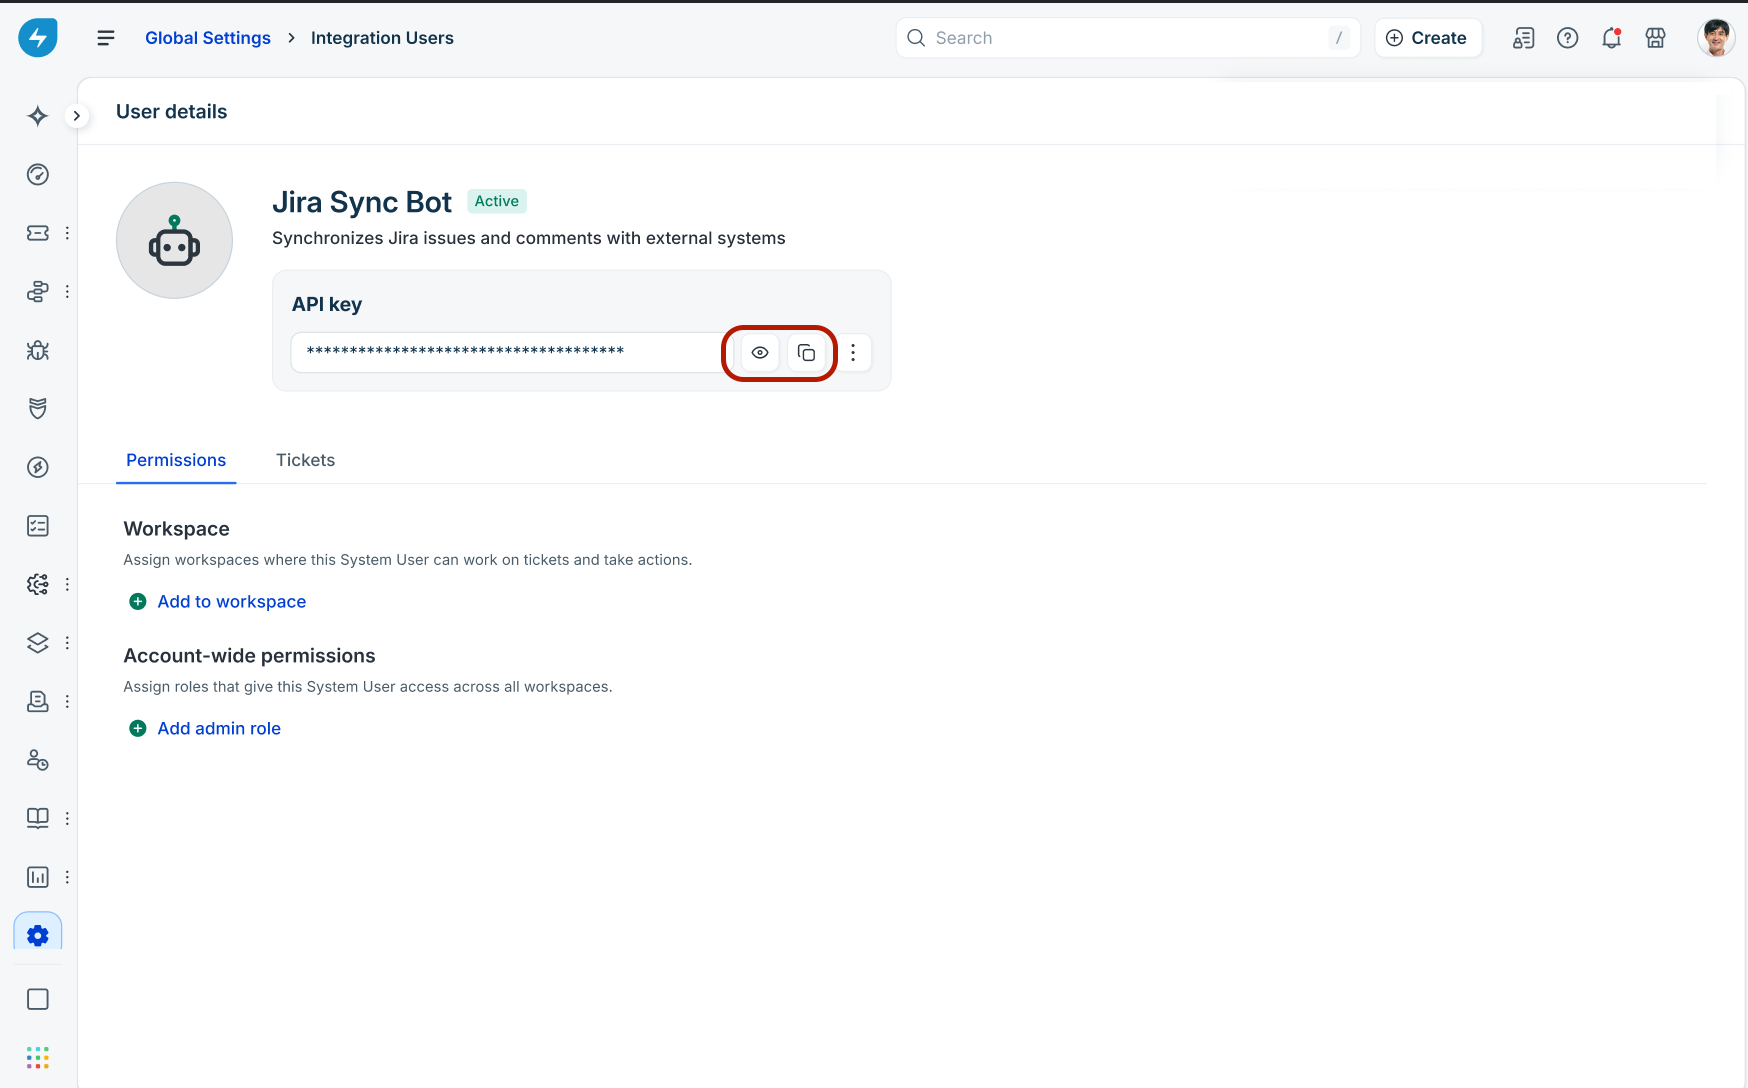
Click the Hide (eye slash) icon to mask the key again.
Reset an API key
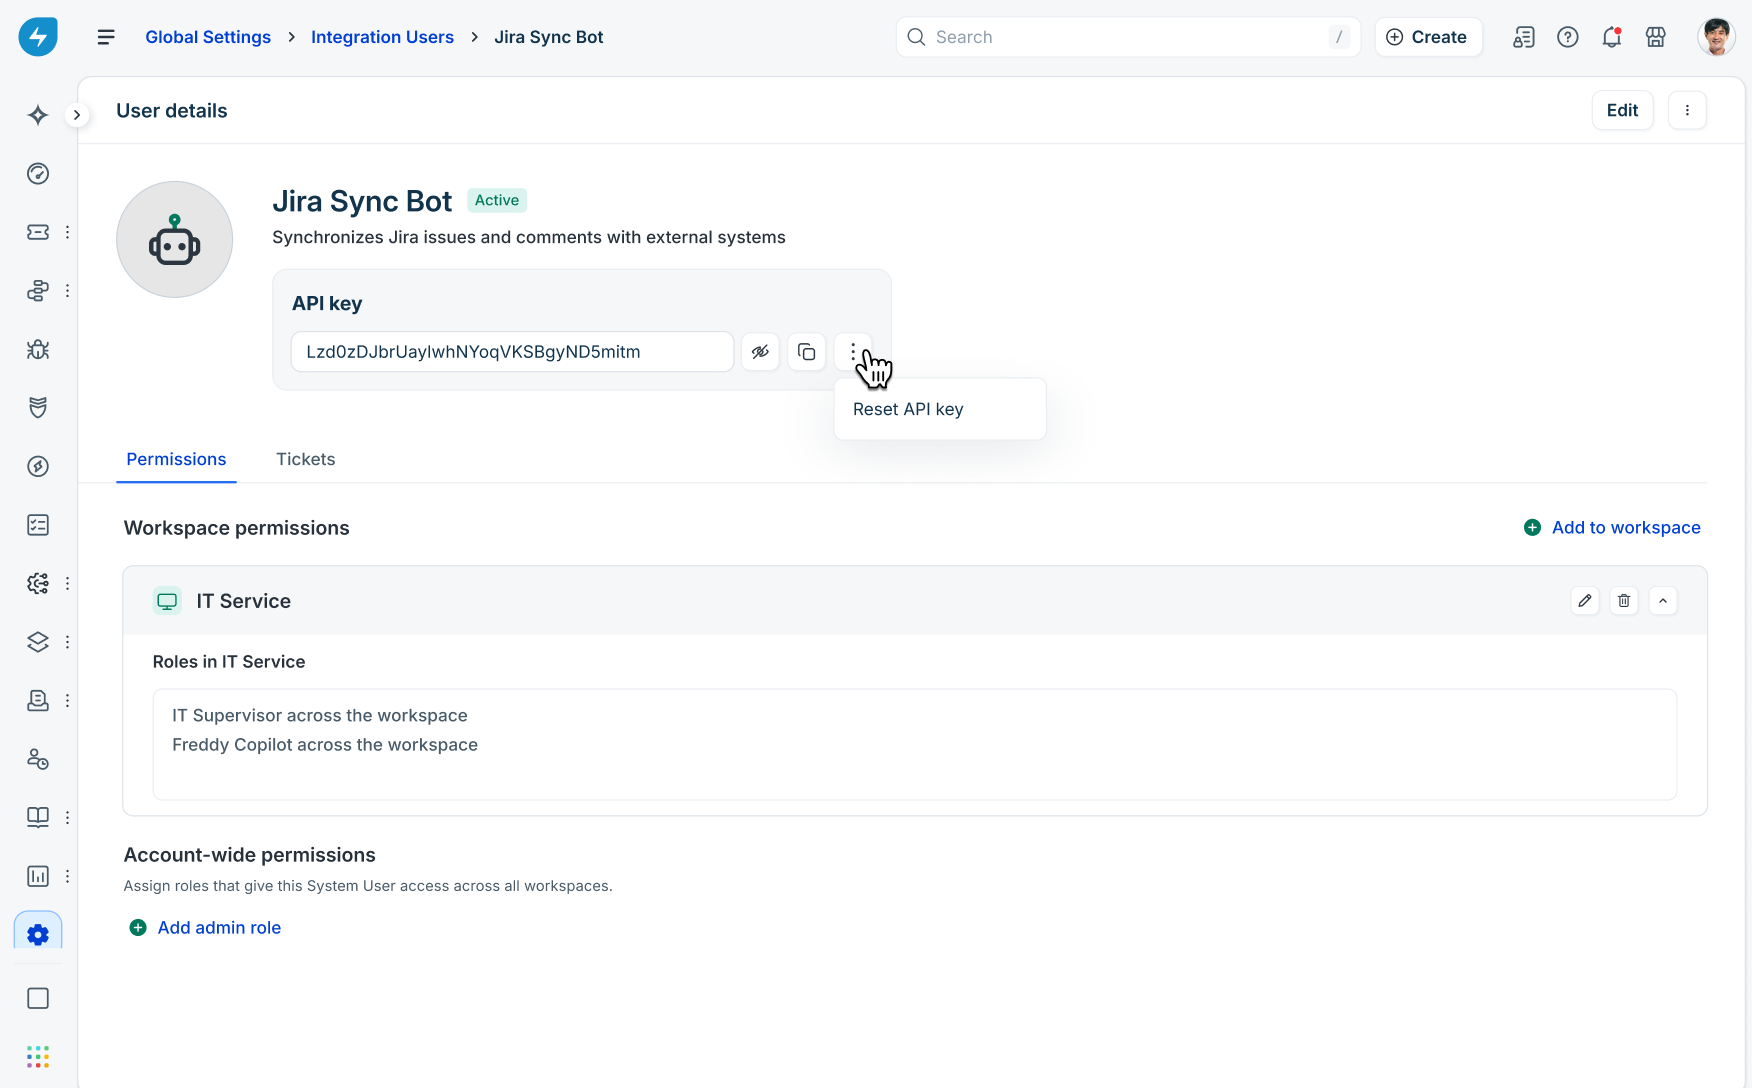
Click the More options (three dots) menu inside the API key card.
Click Reset API key.
In the confirmation dialog, review the warning: "This will break any apps or automations using the current API key. You'll need to update them with the new key."
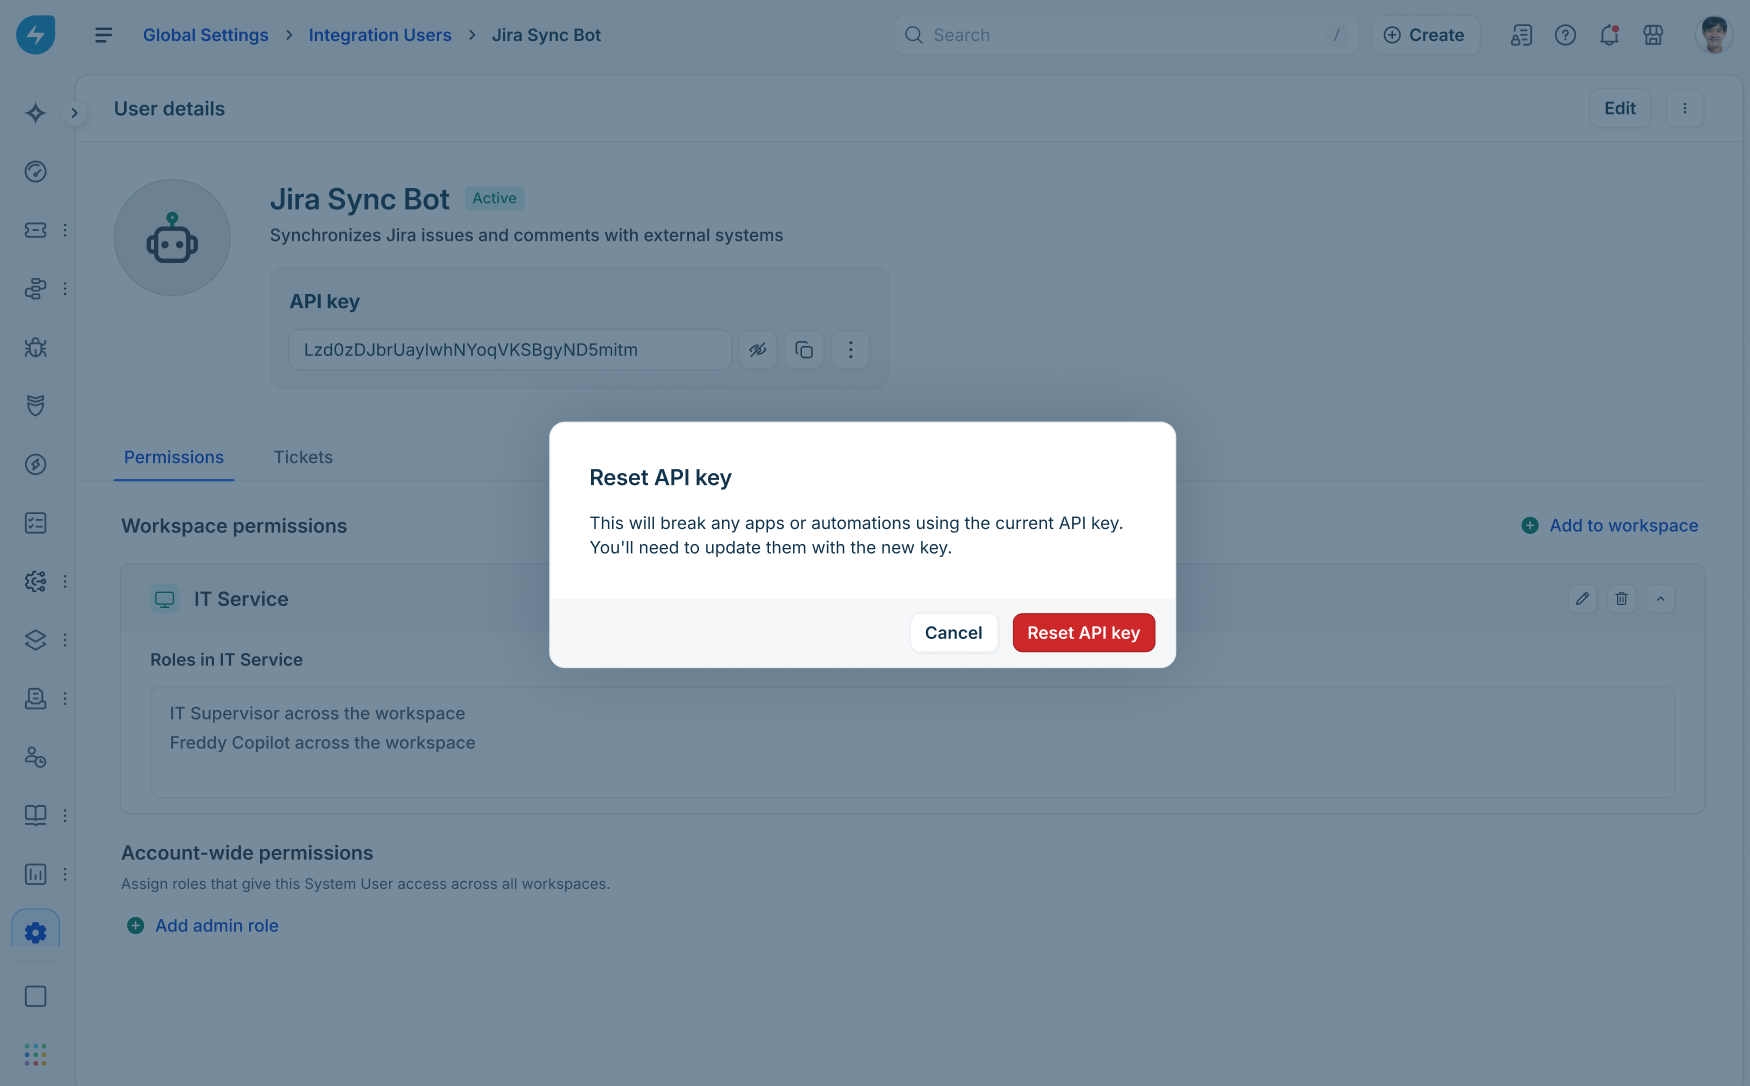
Click Reset API key.
Track integration user activity and audit logs
Integration User Tickets tab: Click the Tickets tab on the integration user details page to view tickets requested or created by the user.
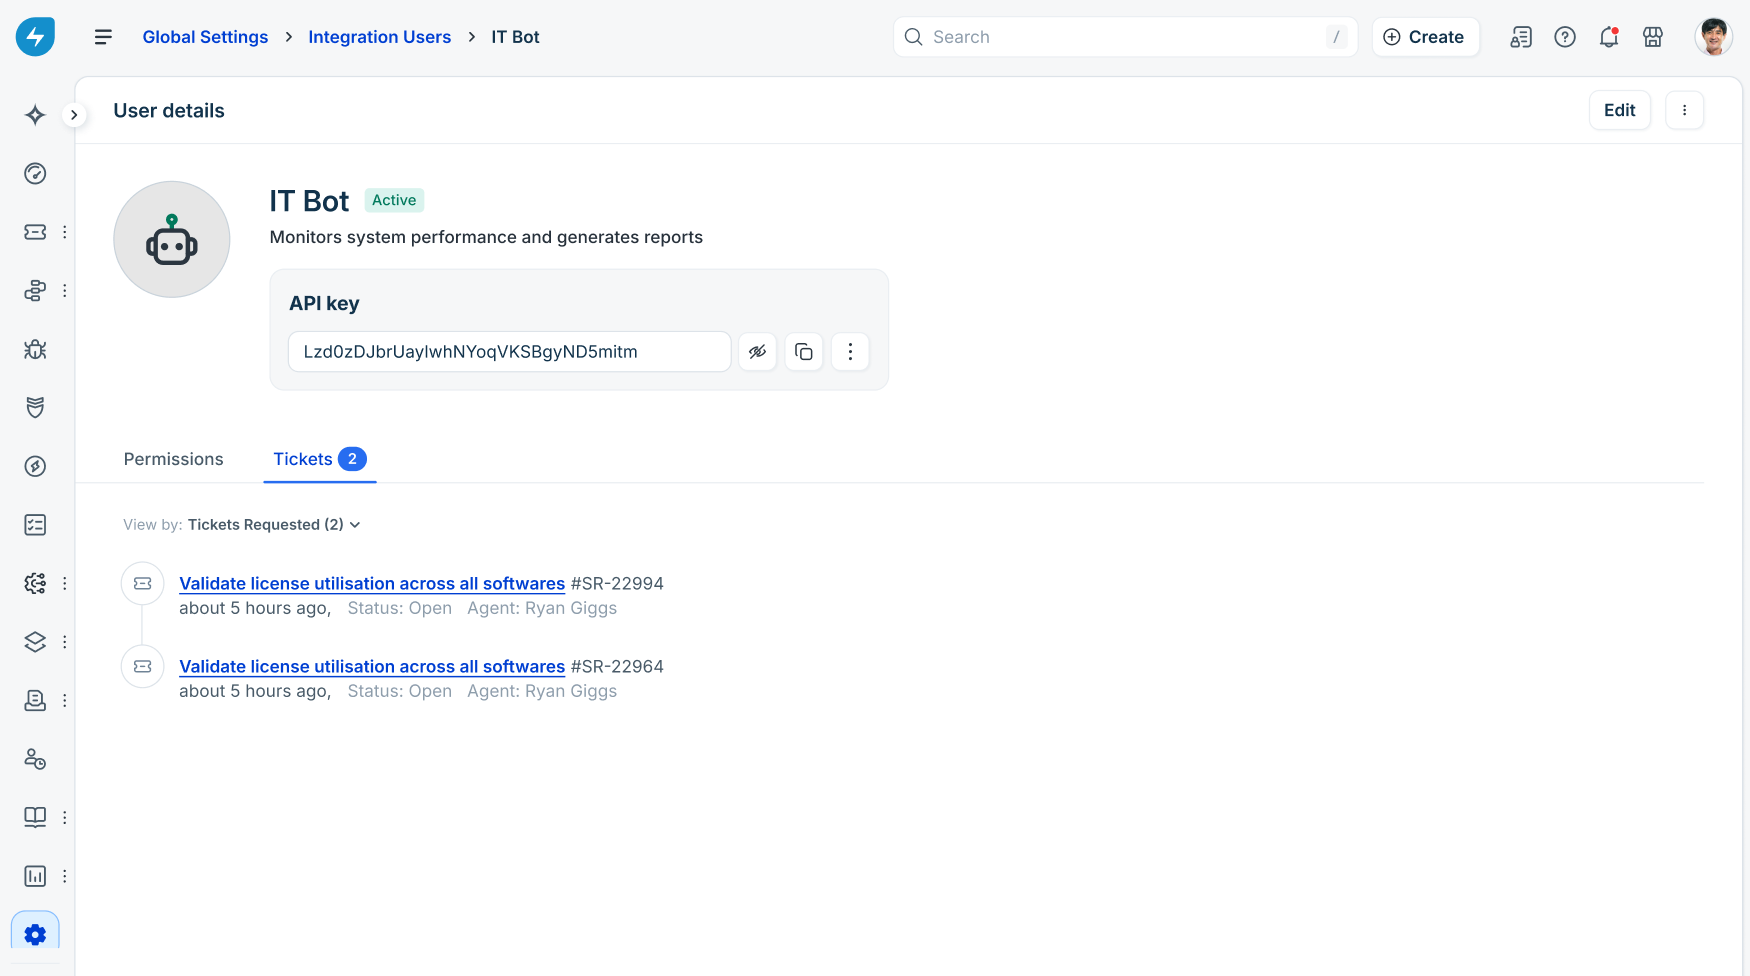
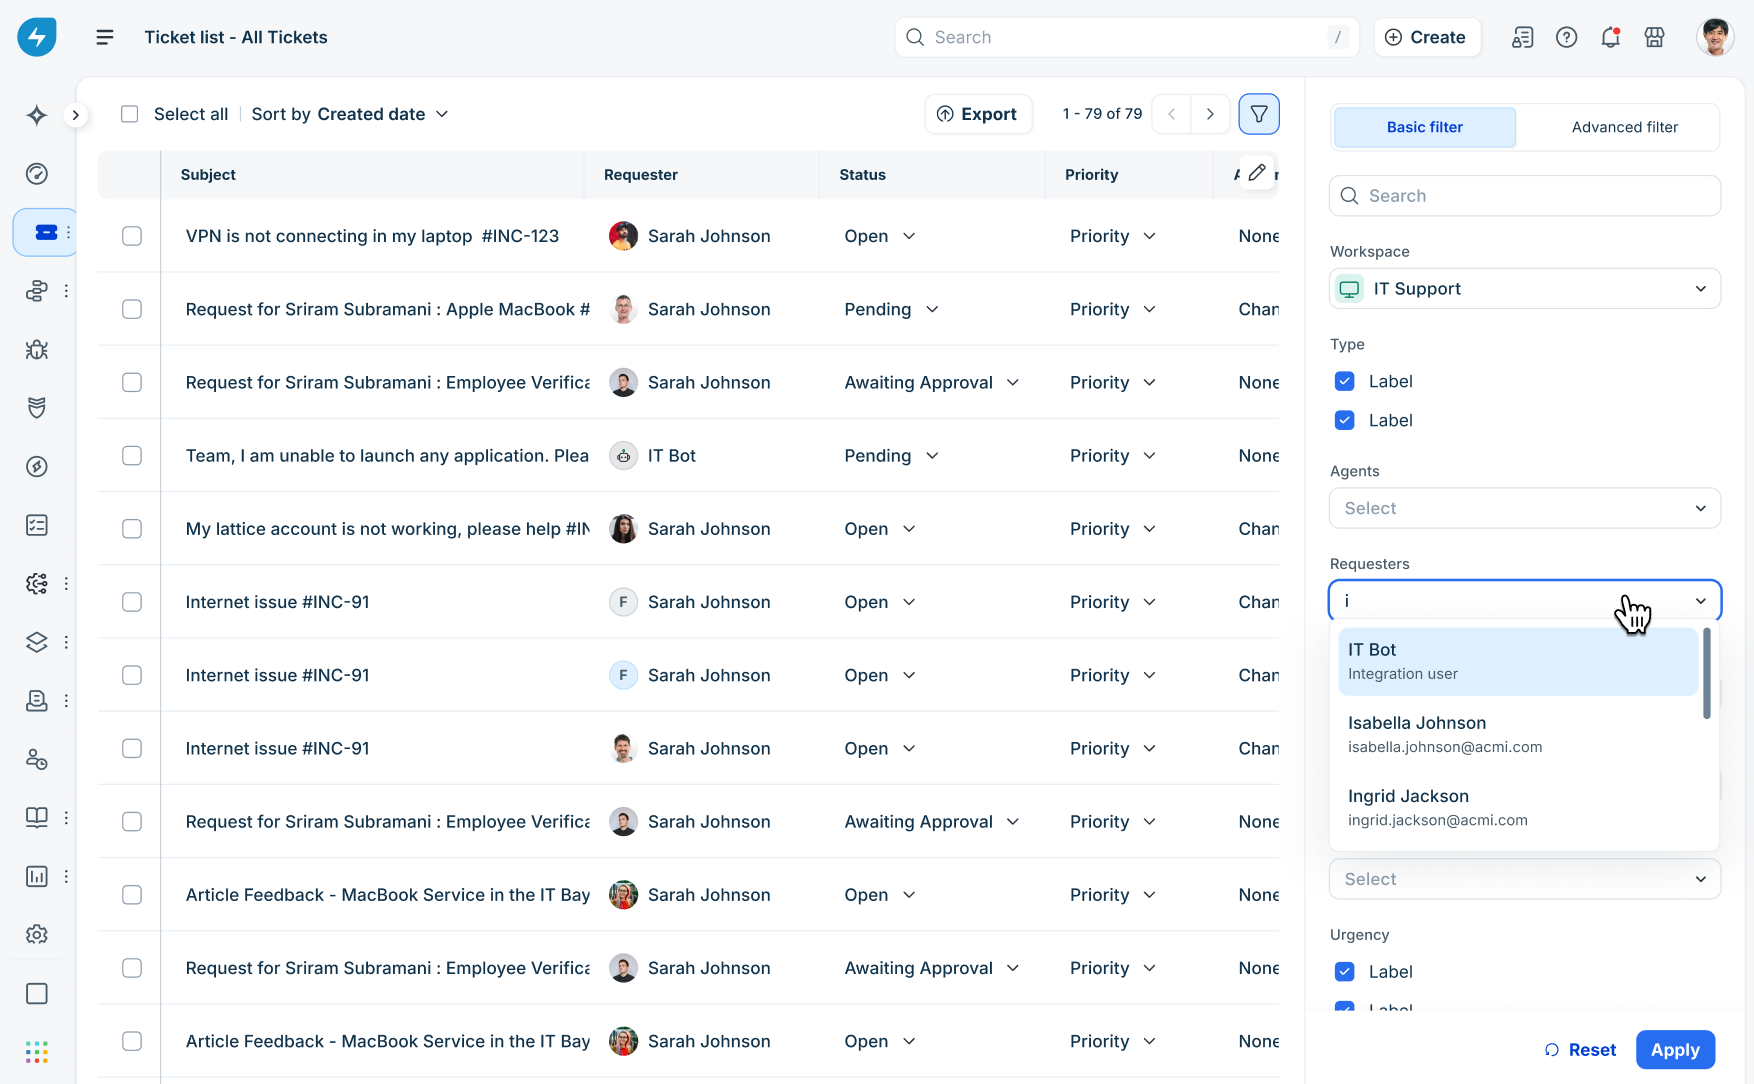
Ticket List filter: Filter tickets by typing the integration user name under the Requesters filter, where it appears tagged as an Integration user.
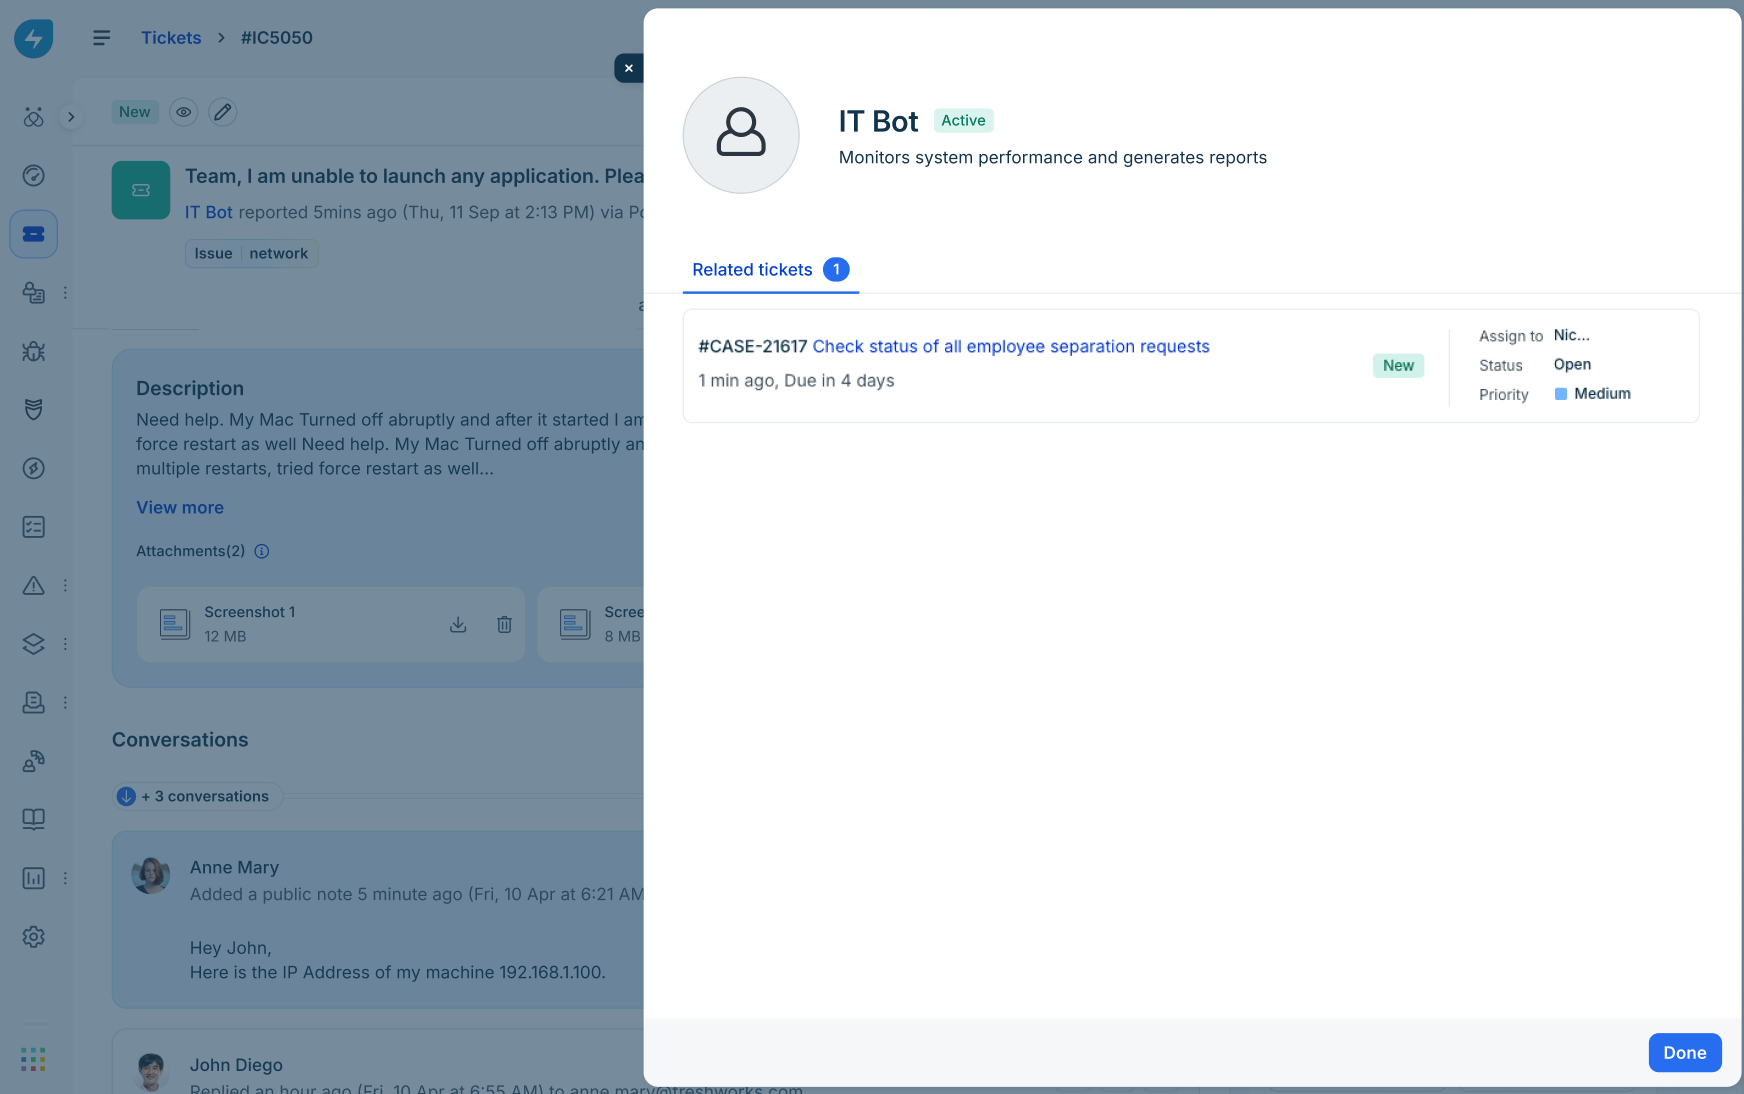
Ticket details: In the ticket detail view, the integration user is listed as the requester. Click View more details under Requester information to open a slider displaying Related tickets requested by the bot.
Activity: System automations executed by the integration user appear in the ticket Activity tab.
Audit Log tracking:
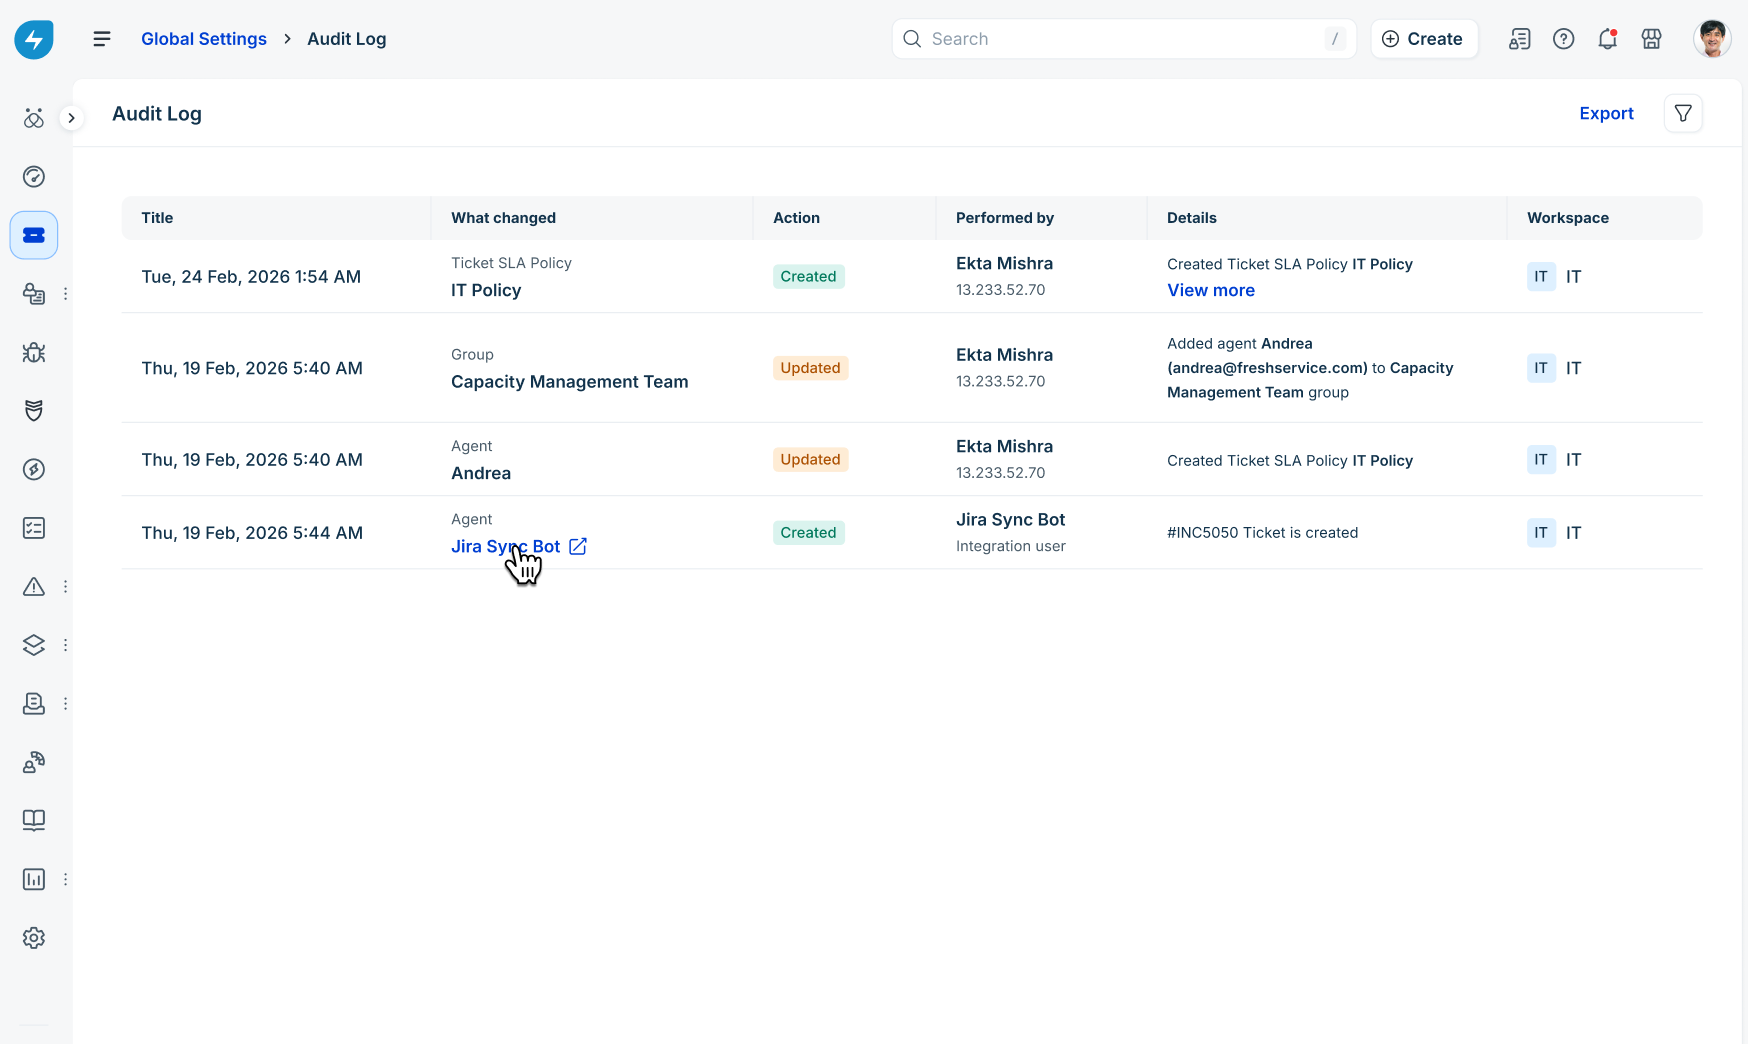
Go to Global Settings > Audit Log.
View system events where Performed by displays the integration user name tagged as Integration user. Audit log entries and exports maintain consistency with the logged-in user's configured time zone.
Edit or deactivate an integration user
Edit user details
Click Edit in the top-right corner of a user details page or select Edit from the three-dots menu in the list view.
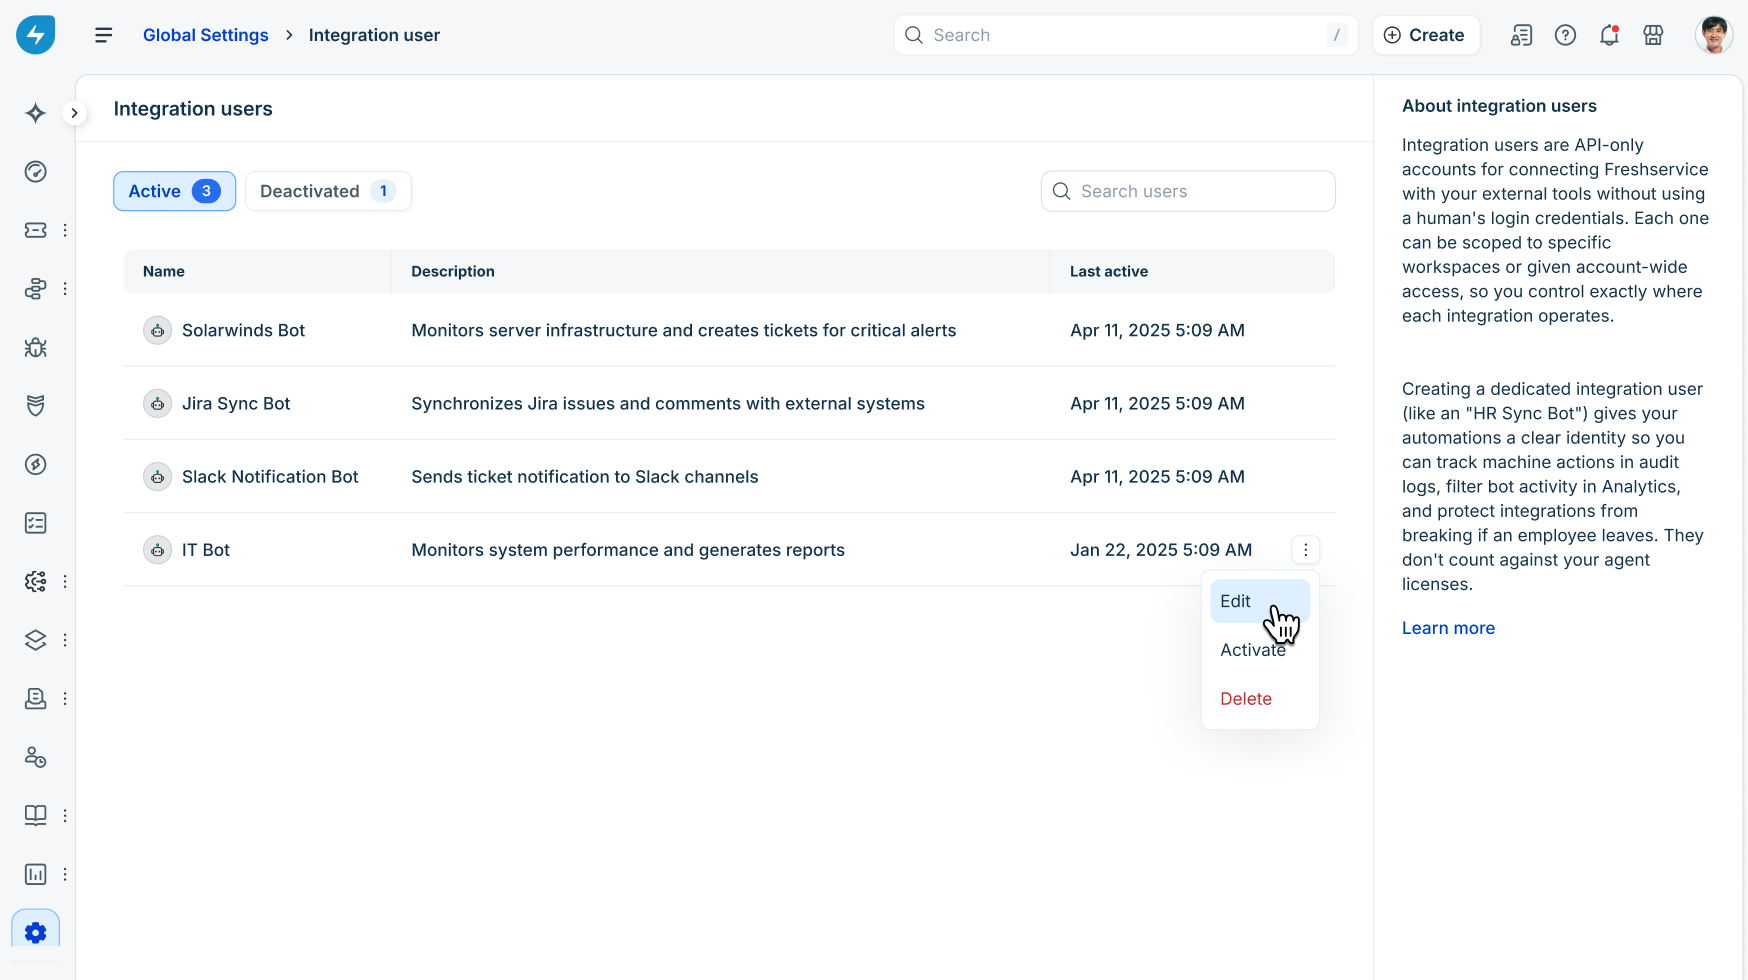
Update the Display name, Description, or Display picture.
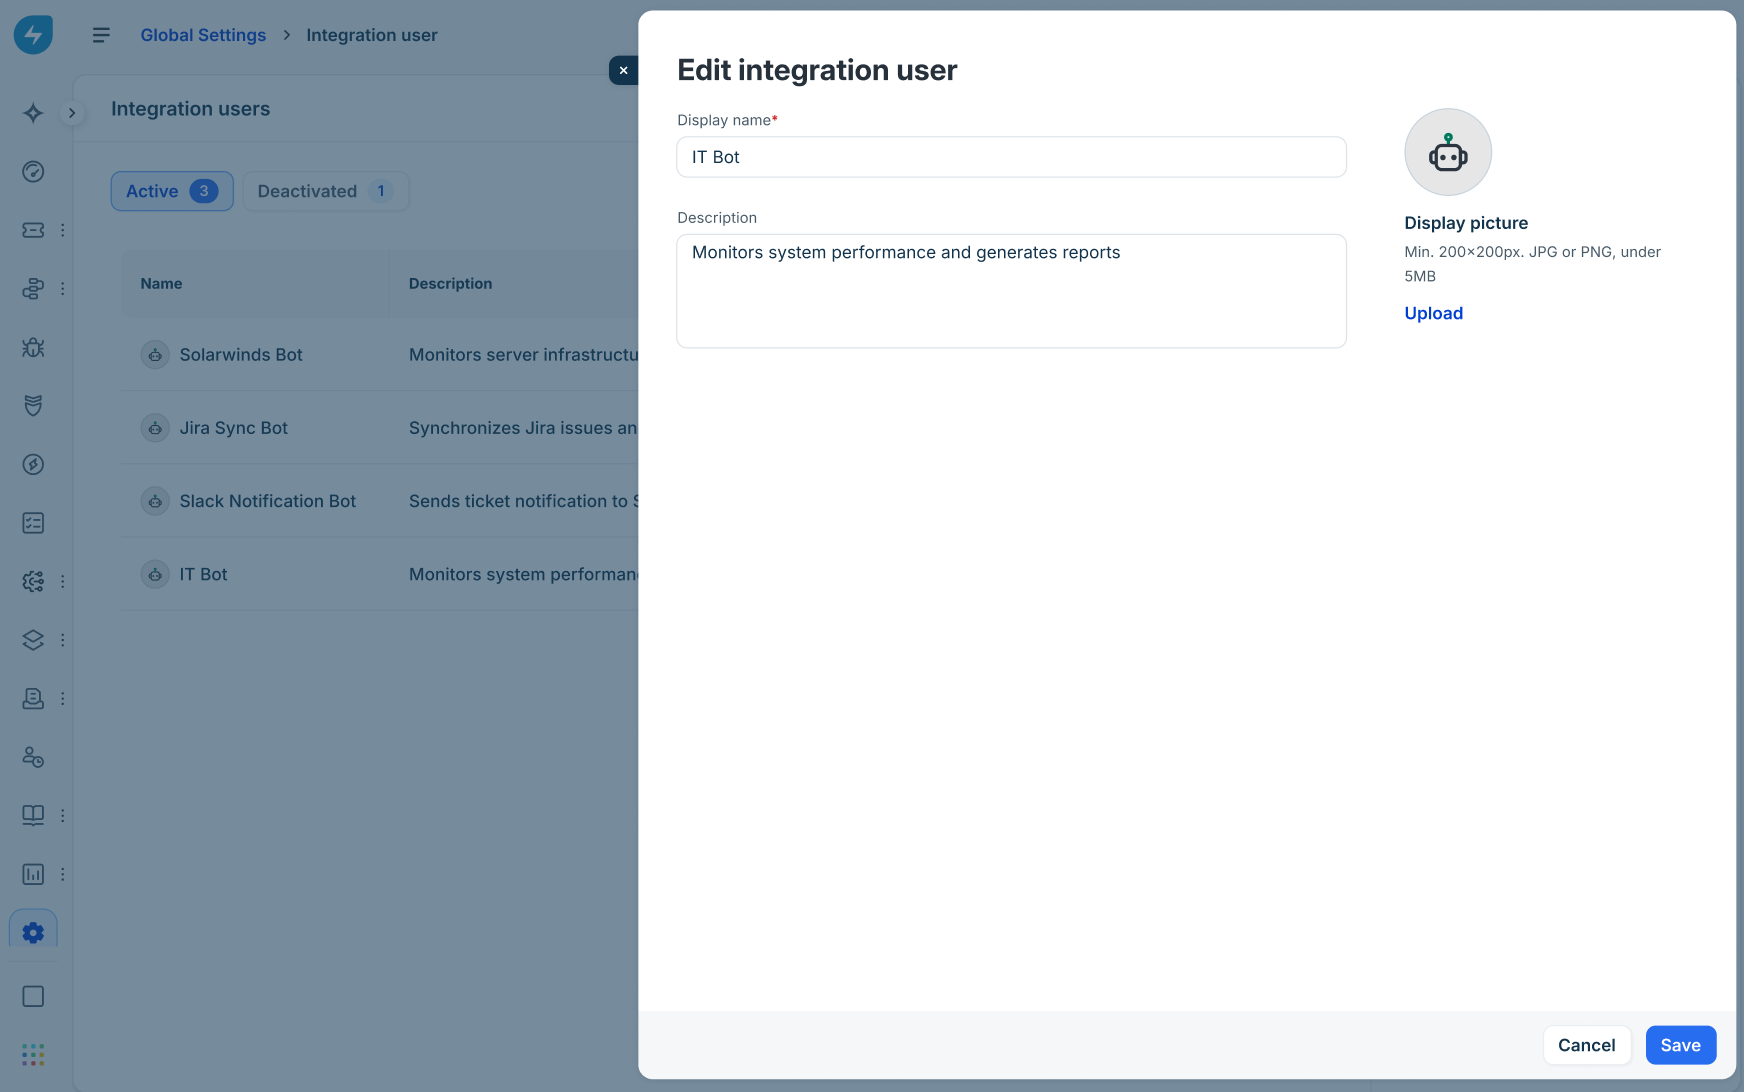
Click Save.
Deactivate or activate an integration user
To temporarily suspend API access, click the three-dots menu on the User details page and select Deactivate Integration user or select Deactivate from the three-dots menu in the list view.
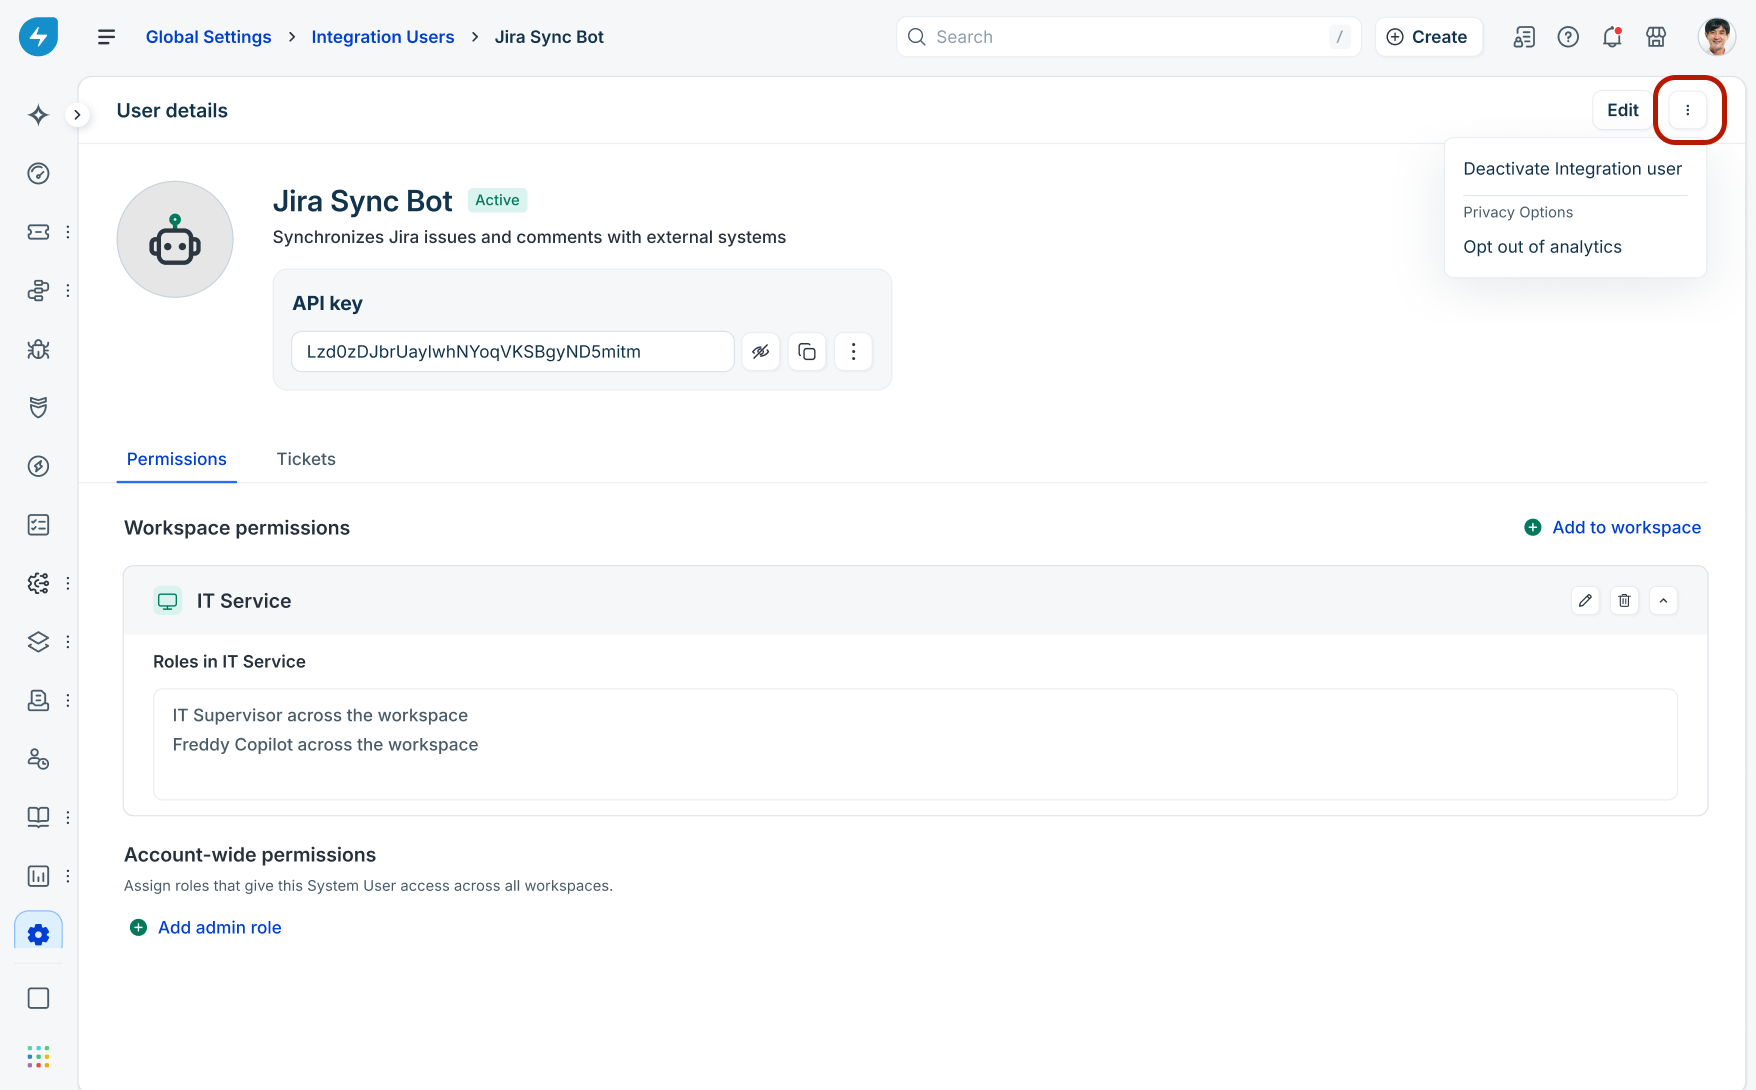
In the warning dialog ("Any apps or automations using this Integration user's API key will stop working."), click Deactivate.
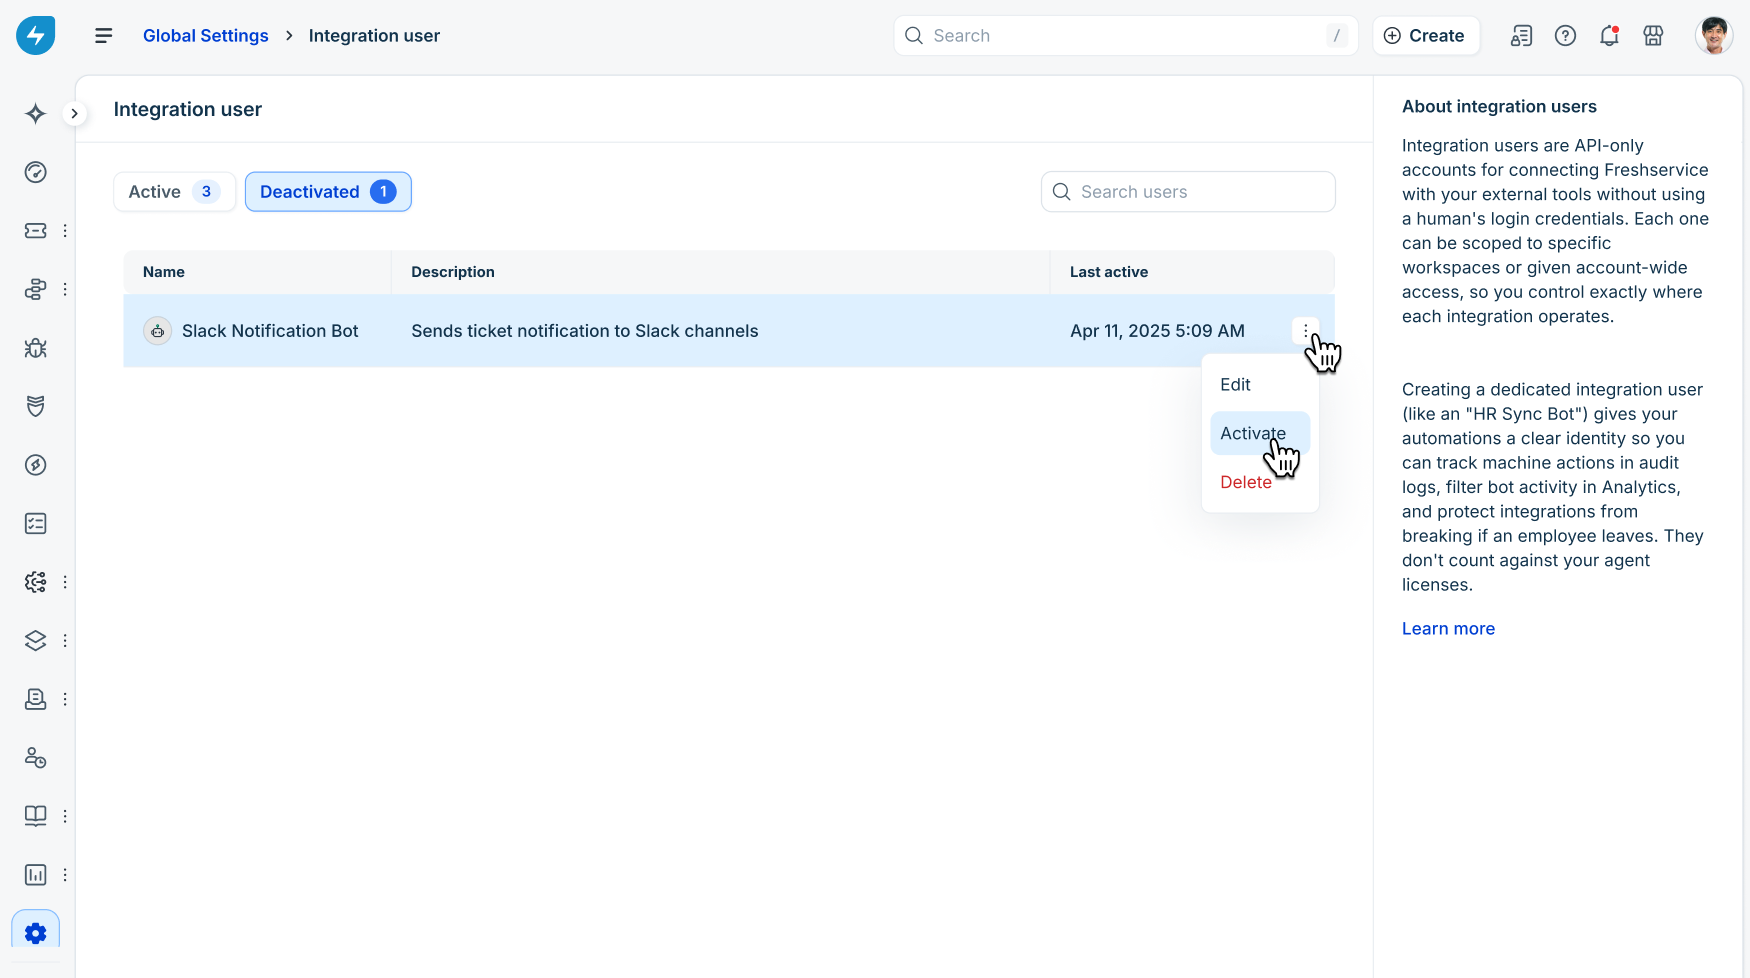
To reactivate a deactivated user, switch to the Deactivated tab on the main list page, click the three-dots menu on the integration user row, and select Activate.
Technical constraints and limitations
No portal access: Integration users cannot access the Freshservice web UI or mobile app, nor can they initiate password resets.
Restricted role scoping: Permissions are limited to Workspace or Account-wide roles. Integration users cannot be assigned to Agent Groups, Requesters, Shift Schedules, Round-Robin rules, or Approval workflows.
Bulk utilities excluded: Integration users cannot be created, updated, or exported using CSV bulk user utilities.
MSP accounts excluded: Managed Service Provider (MSP) multi-account architectures are currently out of scope for this feature.