A large share of Freshservice interactions involves sharing files. The Google Drive Storage app for Freshservice lets agents and requesters attach documents directly from their Google Drive accounts to tickets, problems, changes, and other modules, so teams can collaborate on the latest version of a file without leaving Freshservice.
With the Google Drive Storage app, you can maintain a secure document inventory that the whole team can use.
Note: Agents and end users must sign in to their own Google Drive accounts to attach files. The app does not share files on behalf of another user.
Prerequisites
Make sure you have the following before you start the setup:
A Google Workspace administrator account for the customer's domain, with access to the Google Cloud Console.
A Freshservice administrator account with permission to install and configure apps.
Your Freshservice domain in the format https://<your-account>.freshservice.com.
A secrets manager or other secure store for the Client Secret. Treat it like a password.
Part 1 — Set up the Google Cloud Console
Your Google Workspace administrator performs Part 1 once for the customer's domain. The setup has five steps in sequence: create a project, enable the Drive API, configure the OAuth consent screen, create an OAuth client to obtain the Client ID and Client Secret, and add a test user.
Note: Google has reorganized parts of the Cloud Console under the new Google Auth platform. Menu labels such as Data access and Audience may appear as Scopes and User type in older tenants. The actions are the same; only the labels differ.
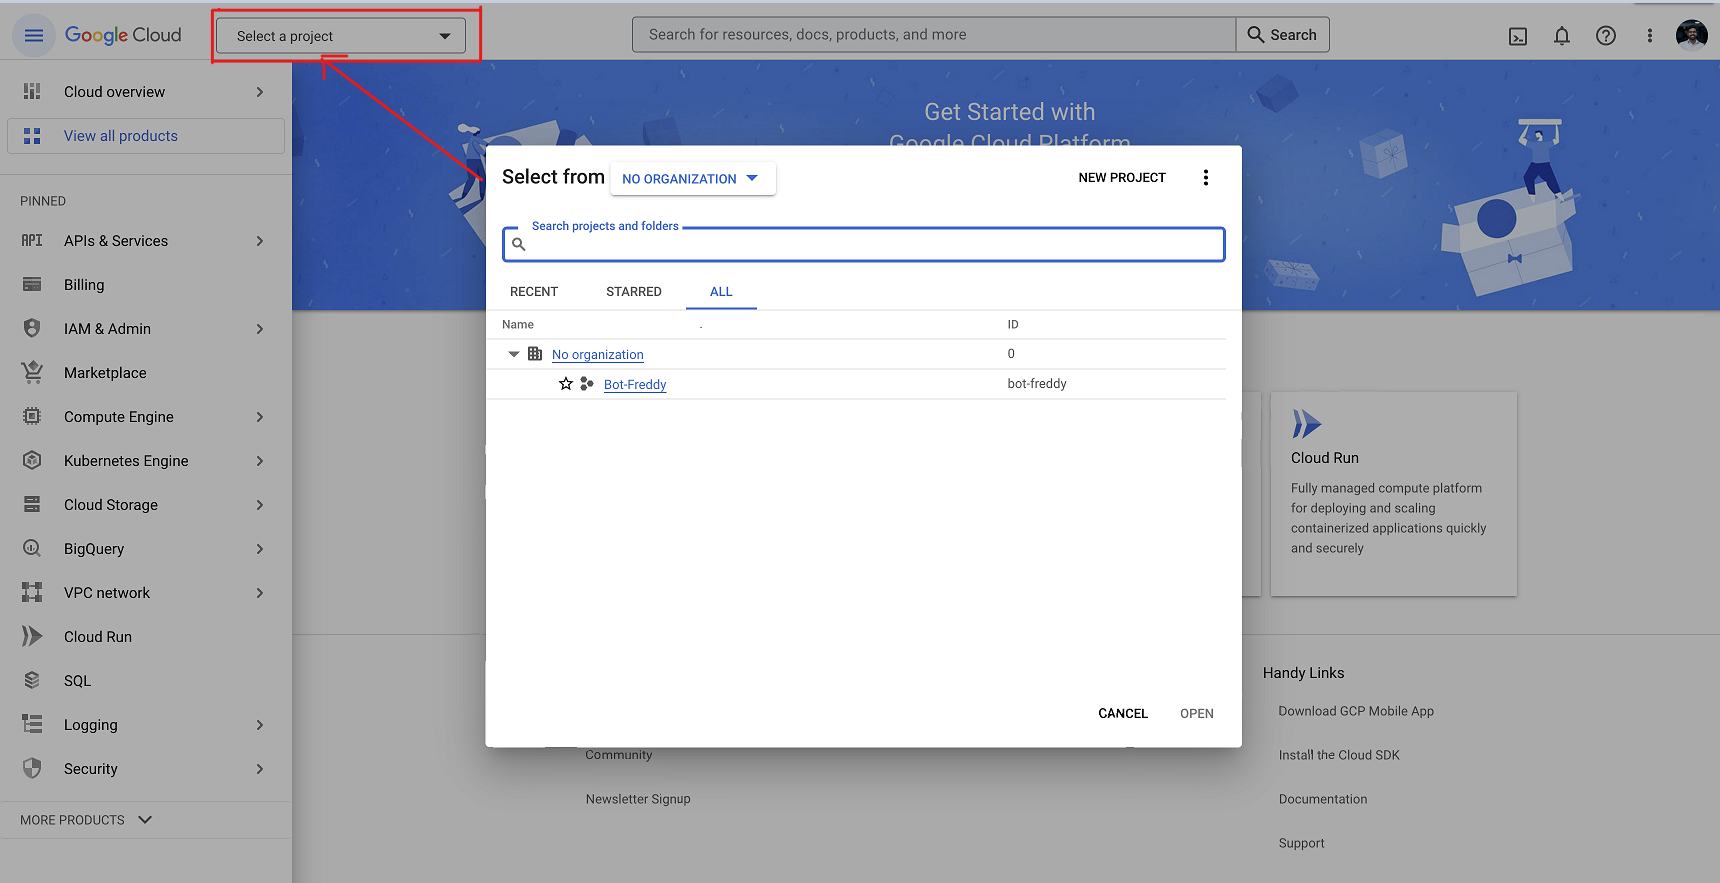
Step 1: Create a project
Sign in to the Google Cloud Console at https://console.cloud.google.com using a Google Workspace admin account.
Click on Select a project at the top left of the screen and click on the NEW PROJECT button in the pop-up window to create a new project.
Enter a Project name — for example, Freshservice Drive.
Select the Organization and the Billing account associated with your Workspace domain.
Click Create. Once the project is provisioned, select it from the project picker so that all subsequent steps apply to this project.

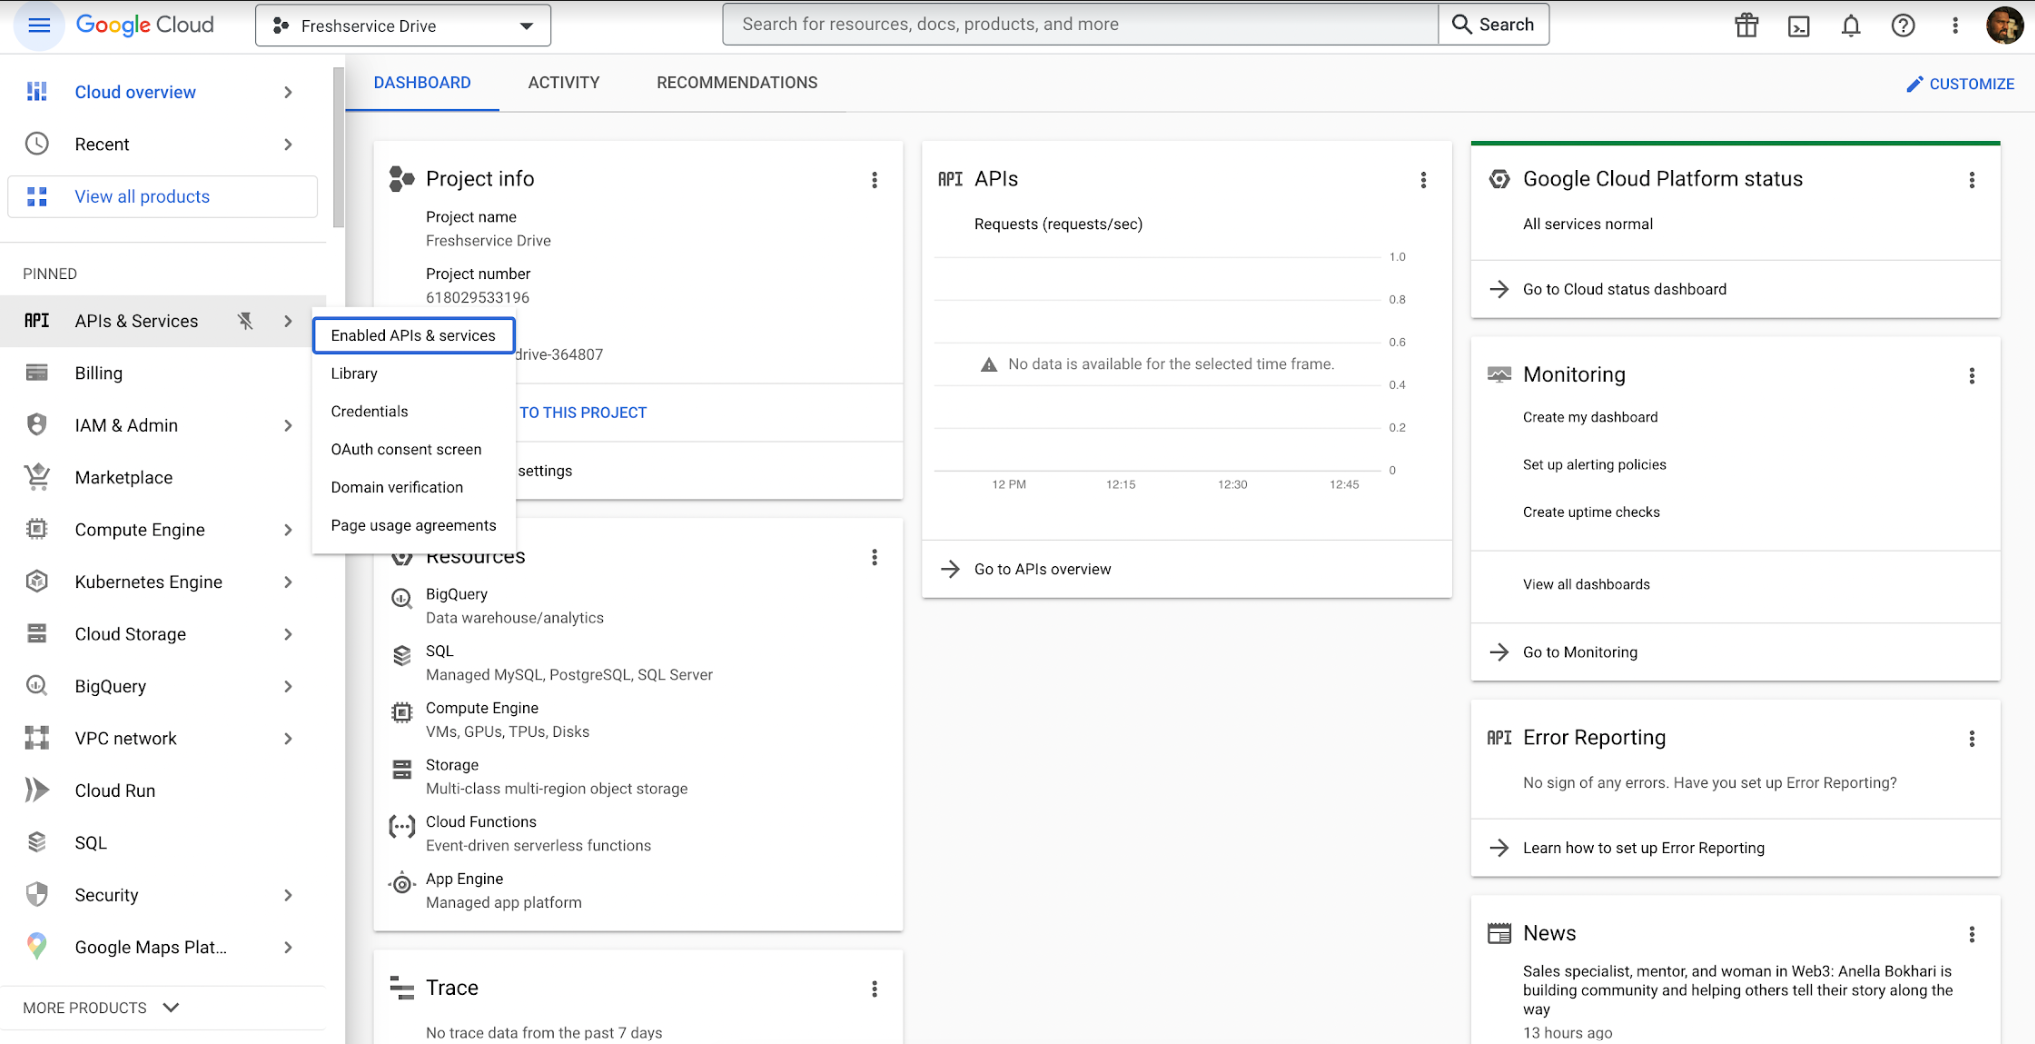
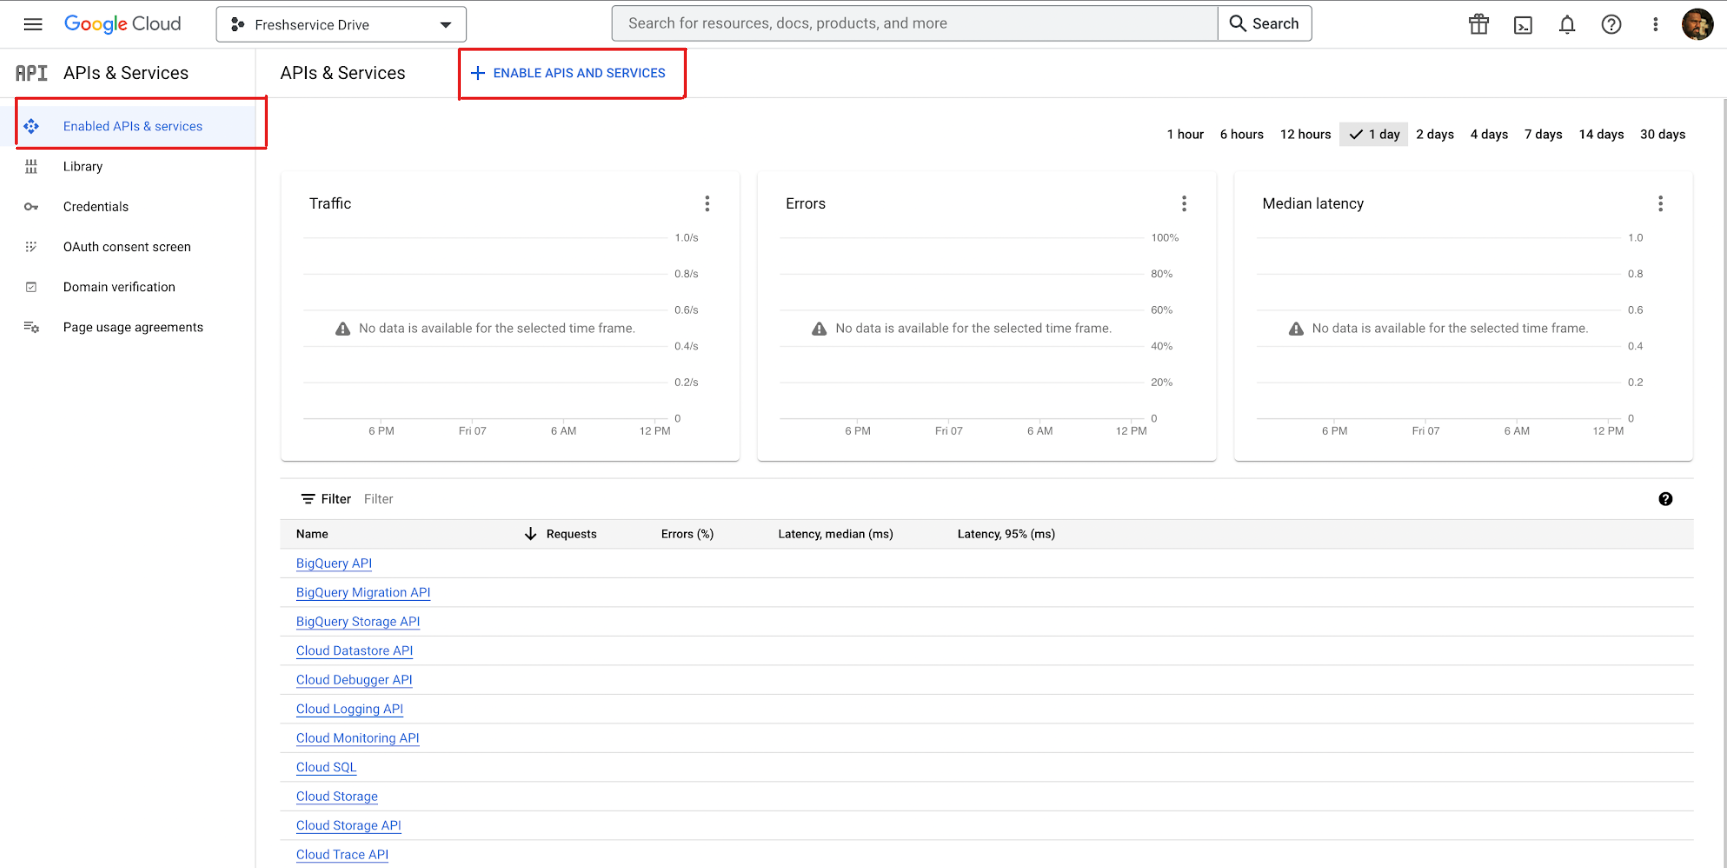
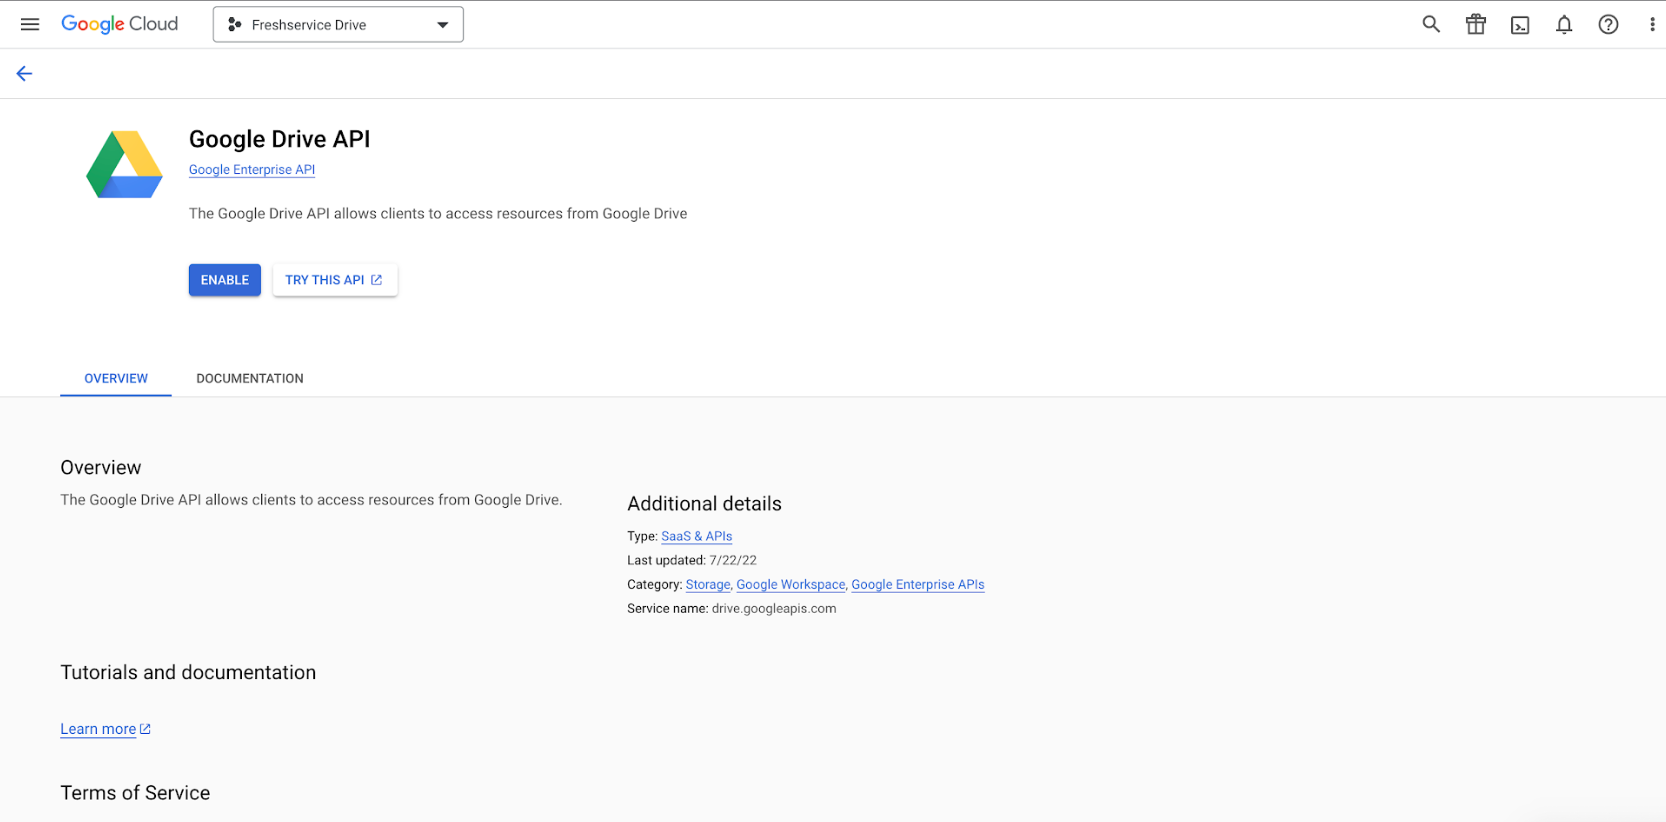
Step 2: Enable the Google Drive API
In the left navigation, go to APIs & Services > Enabled APIs and Services.
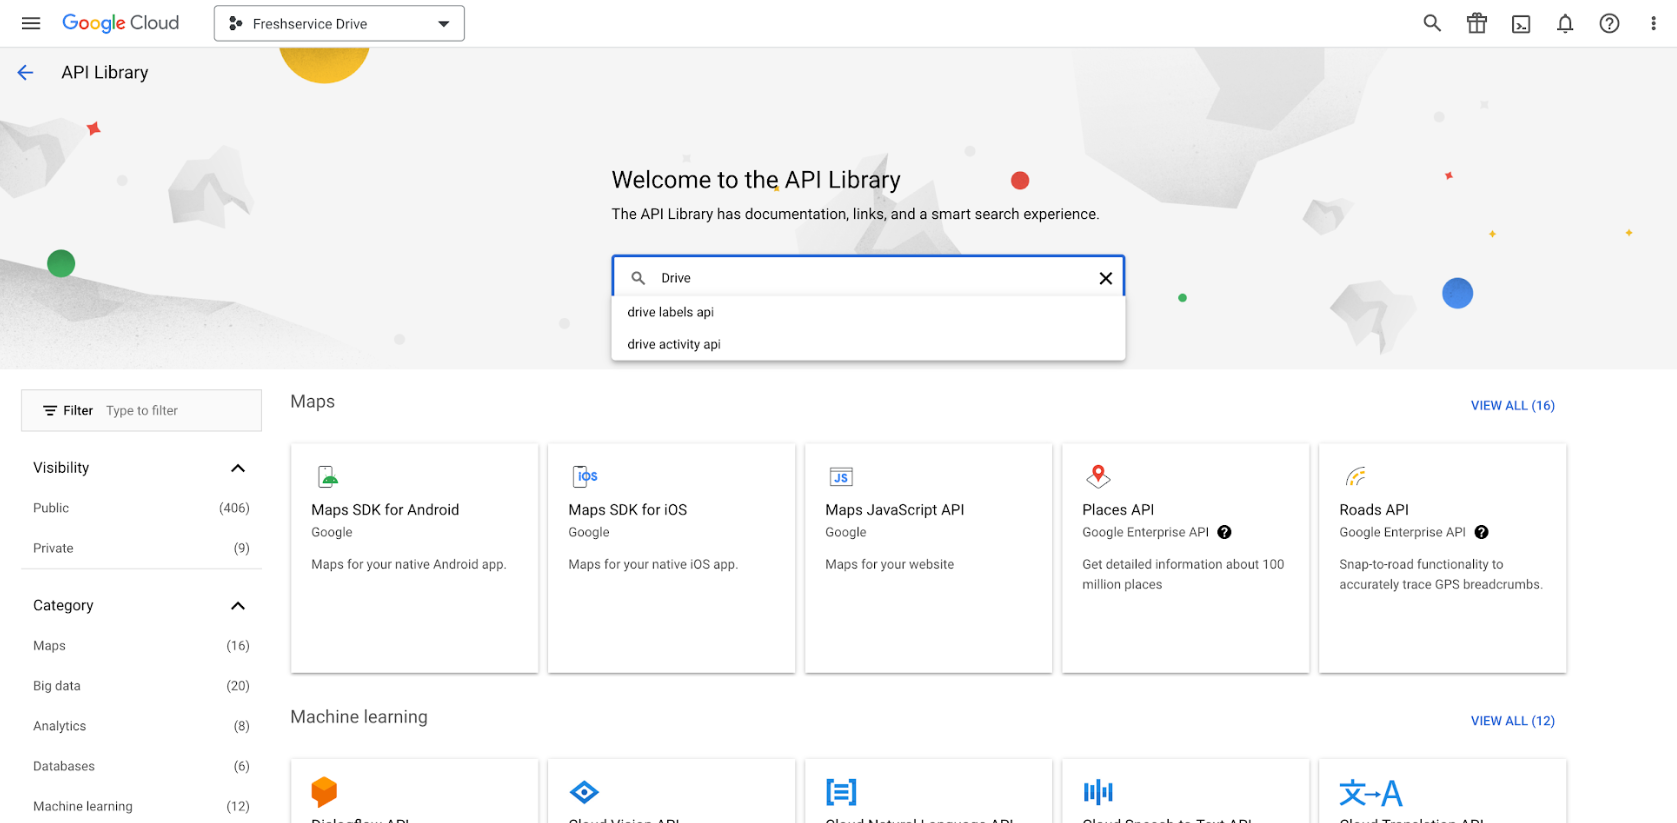
Click +ENABLE APIS AND SERVICES at the top of the dashboard to access the API library.
Search for Google Drive API and open the listing.
Click Enable and wait for the API to be enabled for the project.
Note: Some Workspace tenants restrict API enablement to administrators. If you do not see the Enable button, contact your Workspace administrator.
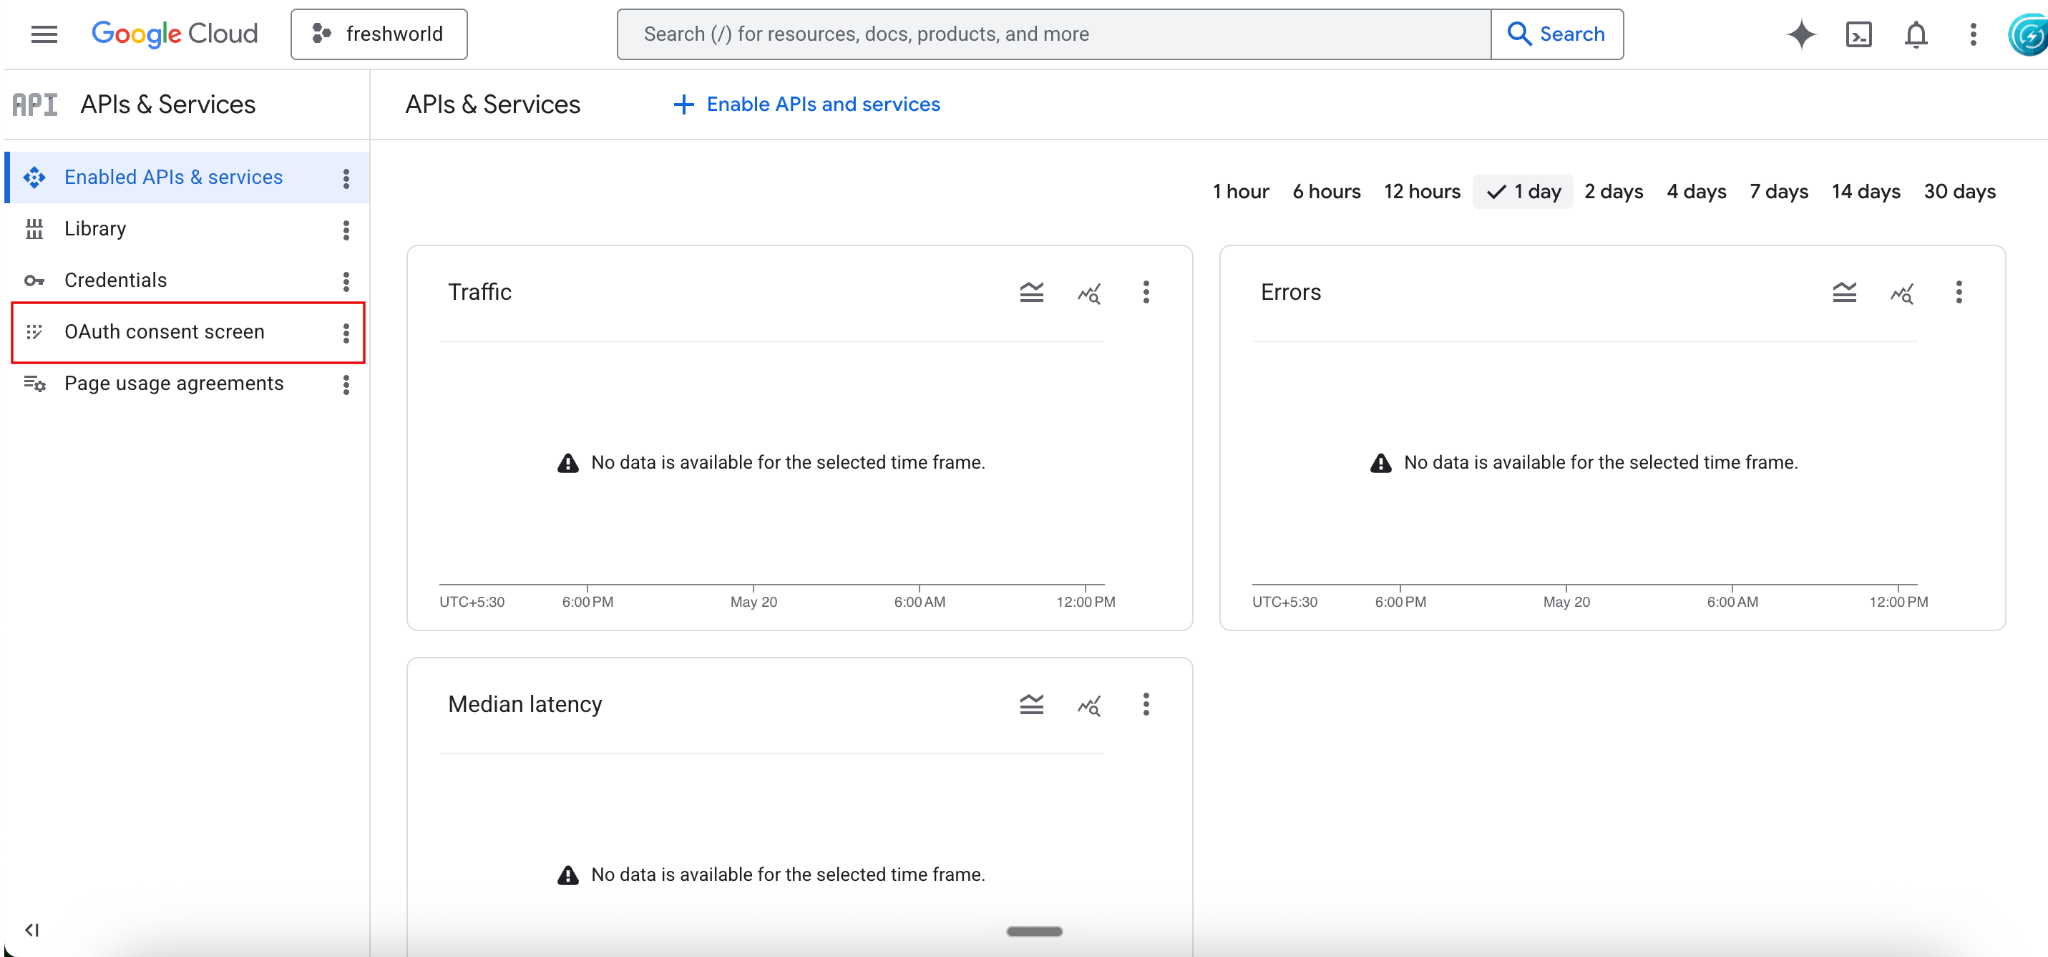
Step 3: Configure the OAuth consent screen
Configure the consent screen before you create the OAuth client. If you create the client first, Google prompts you to complete the consent screen anyway.
In the left navigation, go to APIs & Services > OAuth consent screen (also labeled Google Auth platform > Branding in newer tenants).
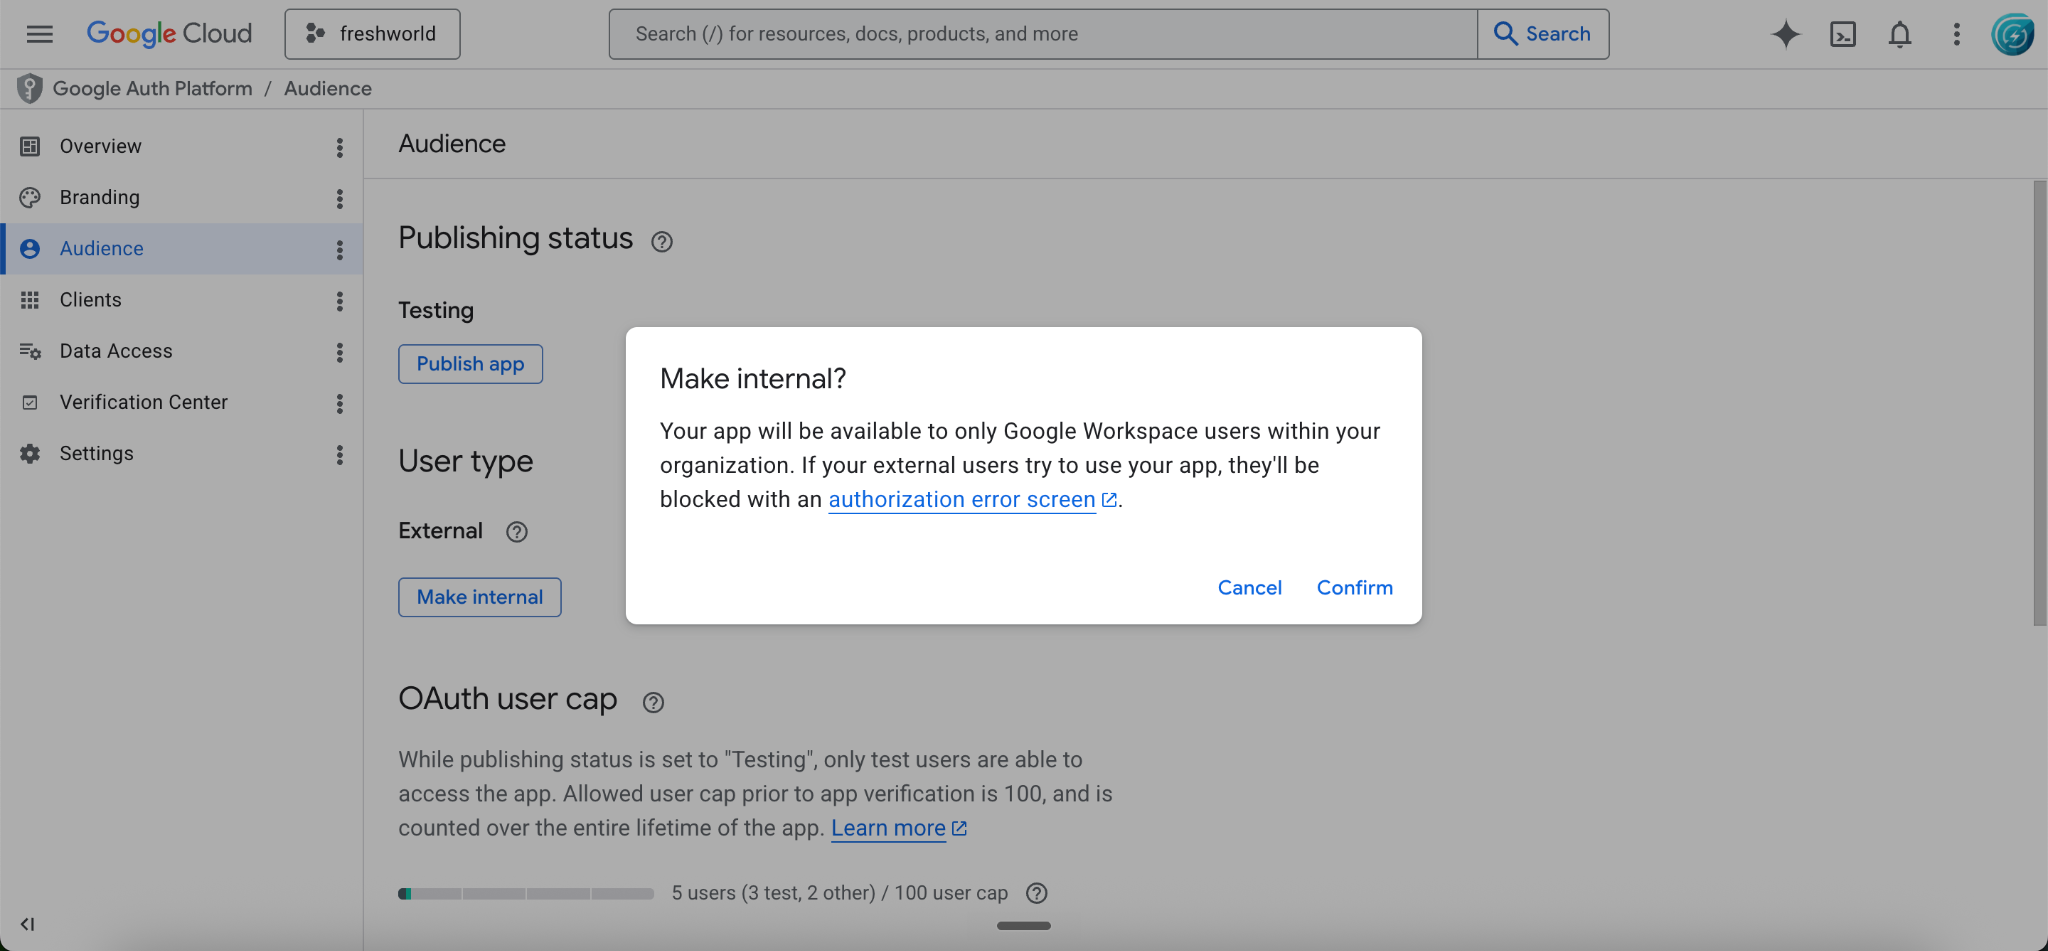
Under Audience, select Make internal as the user type. Internal restricts authorization to users in your Workspace organization, which is the recommended path for tenant-specific integrations. External is only required if your users sit outside the Workspace organization.
Click Confirm to apply the changes.
Step 4: Add the Google Drive scope
In the Data access tab, click Add or remove scopes.
Add the Google Drive scope https://www.googleapis.com/auth/drive. This scope lets the app access files in the authorizing user's Drive on their behalf.
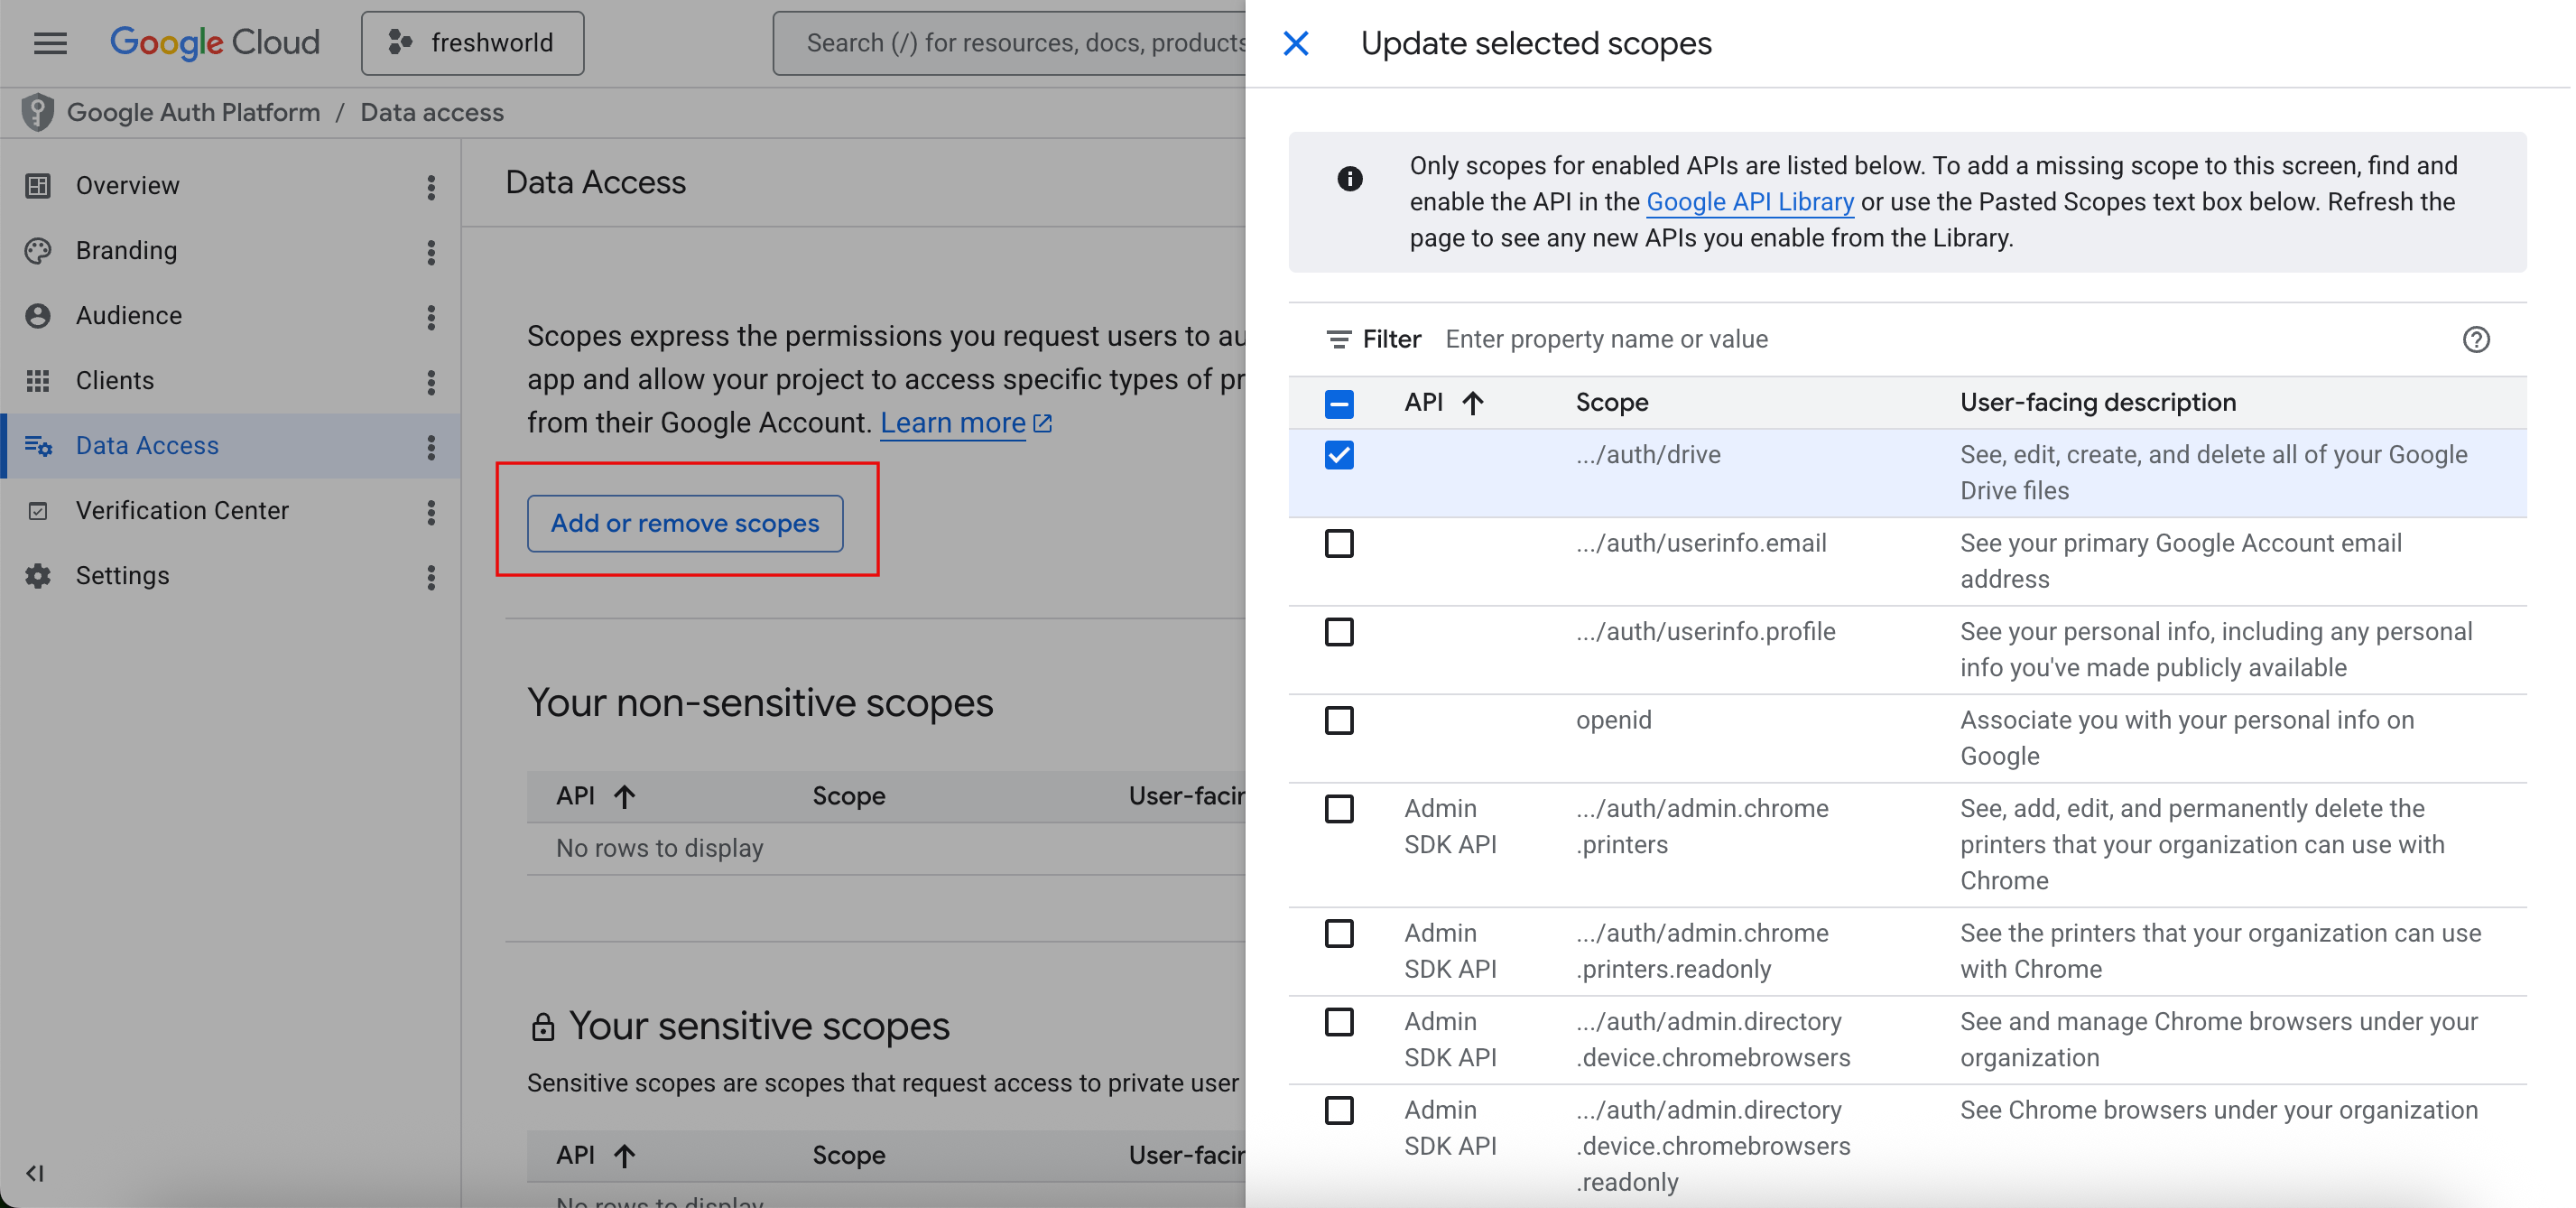
Click Update, then confirm that the new scope is listed under Your sensitive scopes or Your restricted scopes before saving.
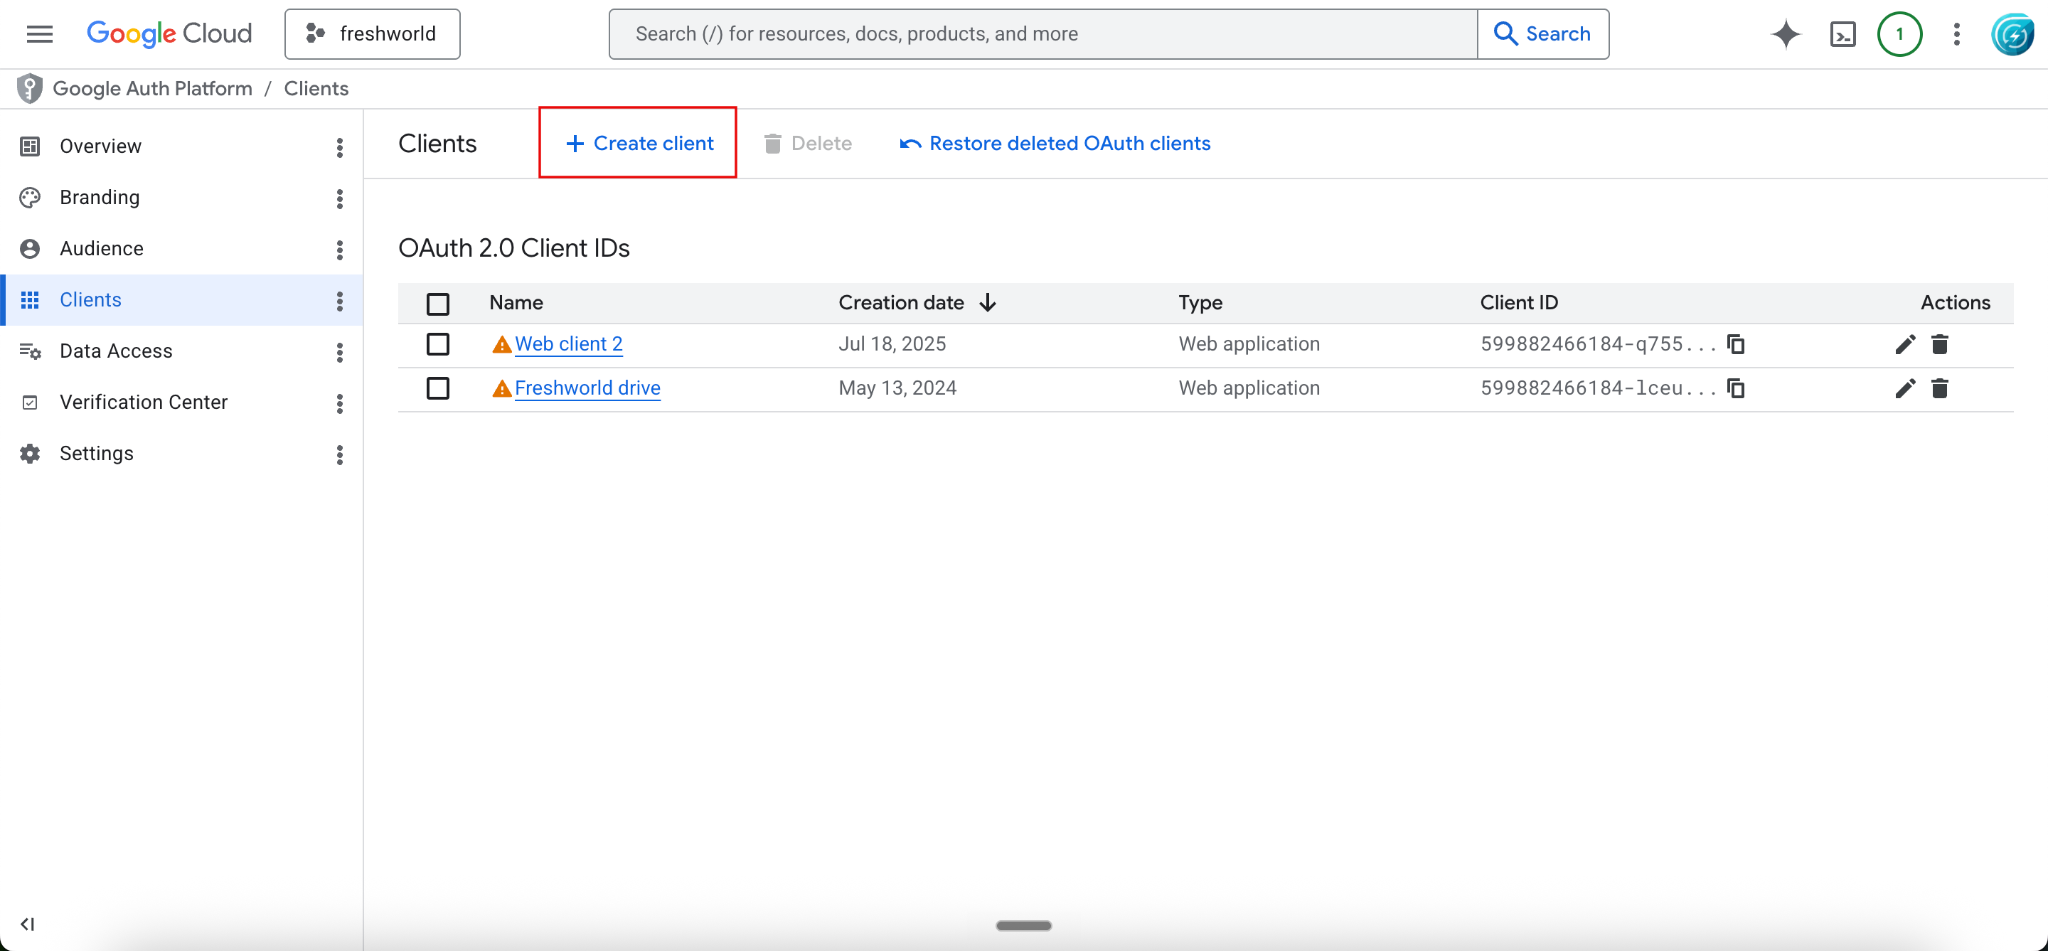
Step 5: Create an OAuth client (Client ID and Client Secret)
Go to APIs & Services > Clients.
Click + Create client.
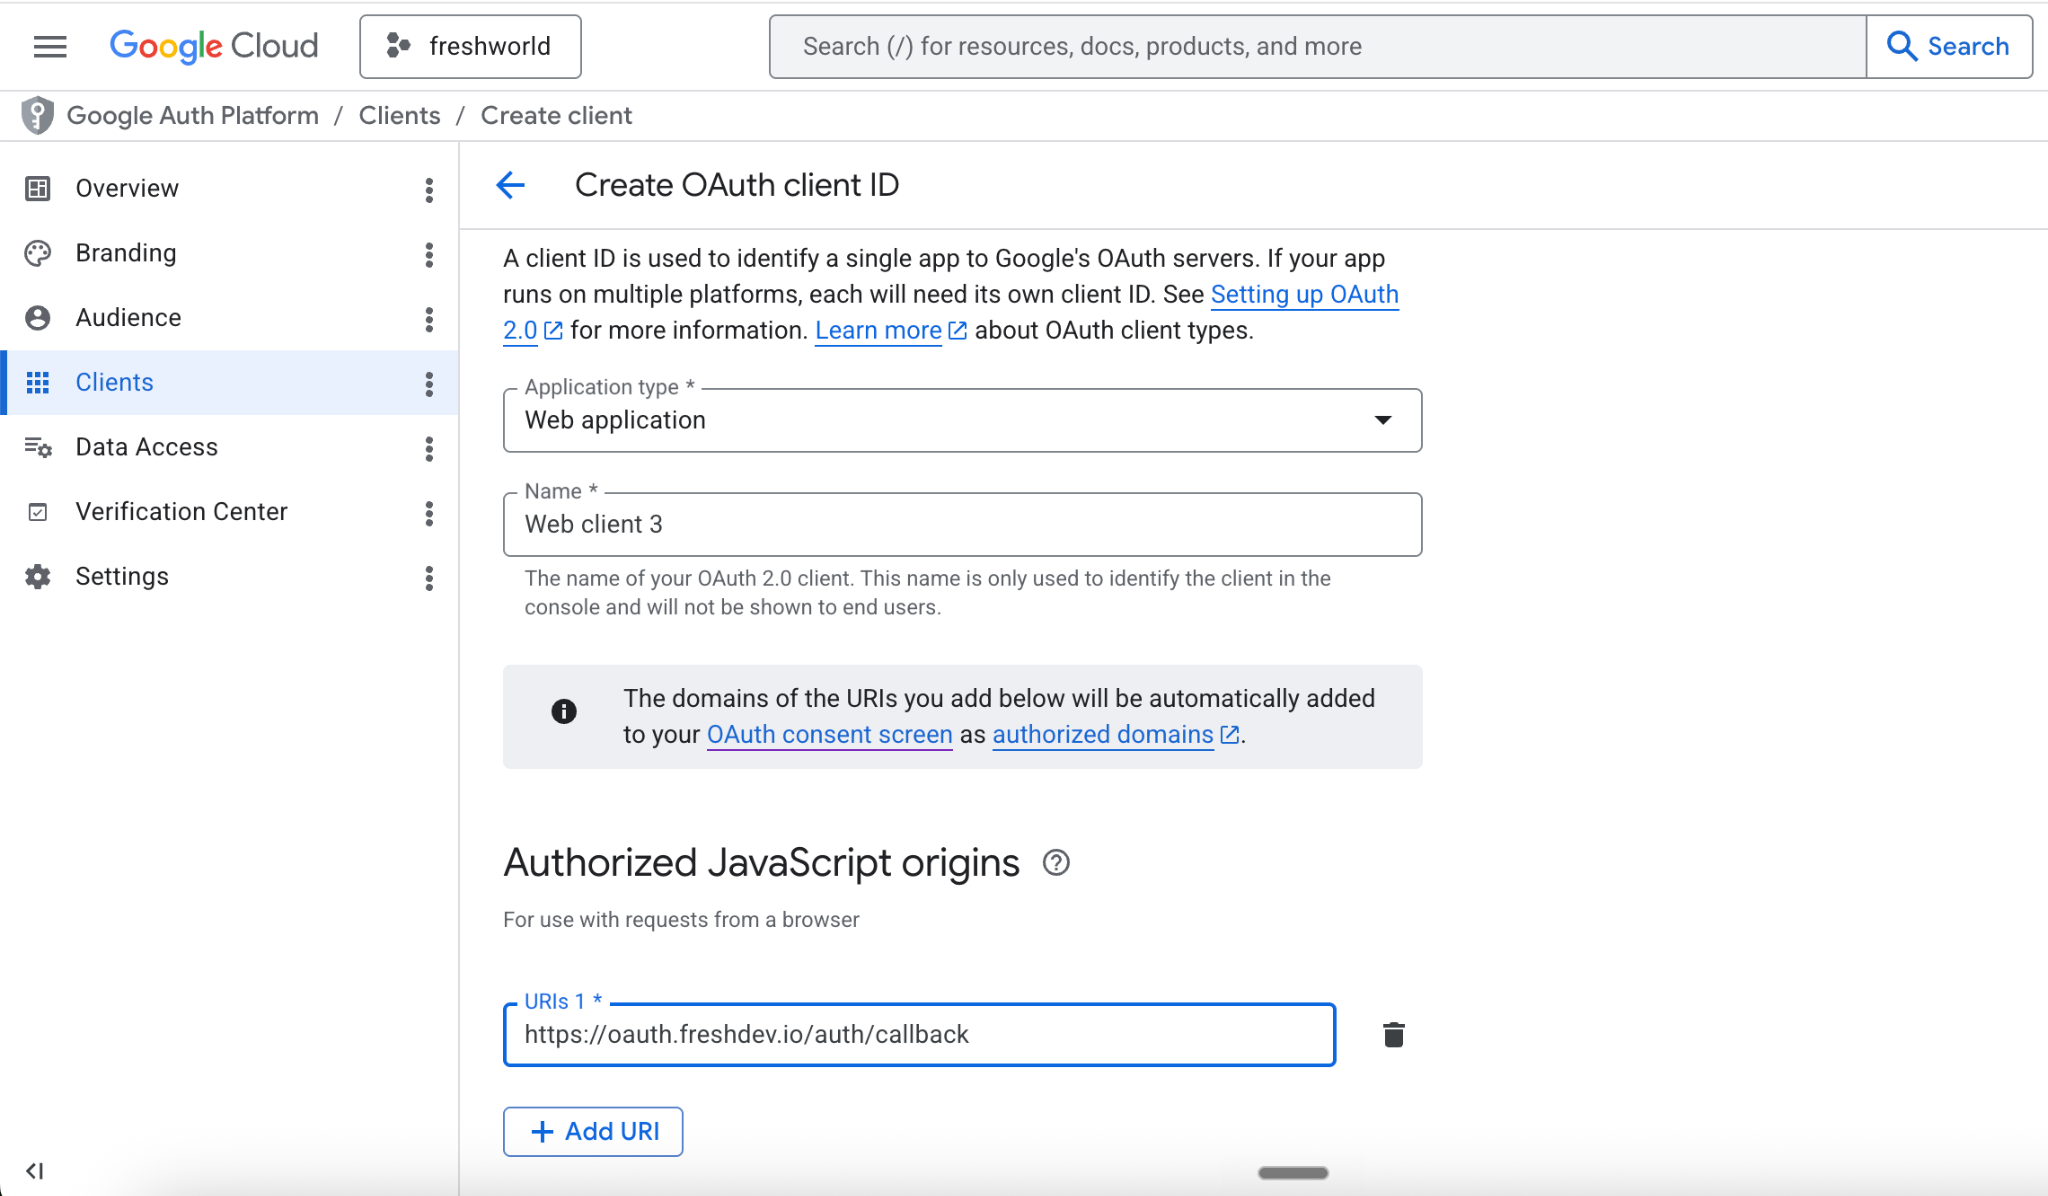
Choose Web application as the Application type and give it a name — for example, Freshservice Drive Web Client.
Under Authorized JavaScript origins, add your Freshservice domain — for example, https://<your-account>.freshservice.com.
Under Authorized redirect URIs, add https://oauth.freshdev.io/auth/callback. The path is fixed.
Click Create. Google displays the Client ID and Client Secret.
Copy the Client ID — it remains visible in the console at any time — and copy the Client Secret immediately. The Client Secret is shown in full only once. If you lose it, you must generate a new one.
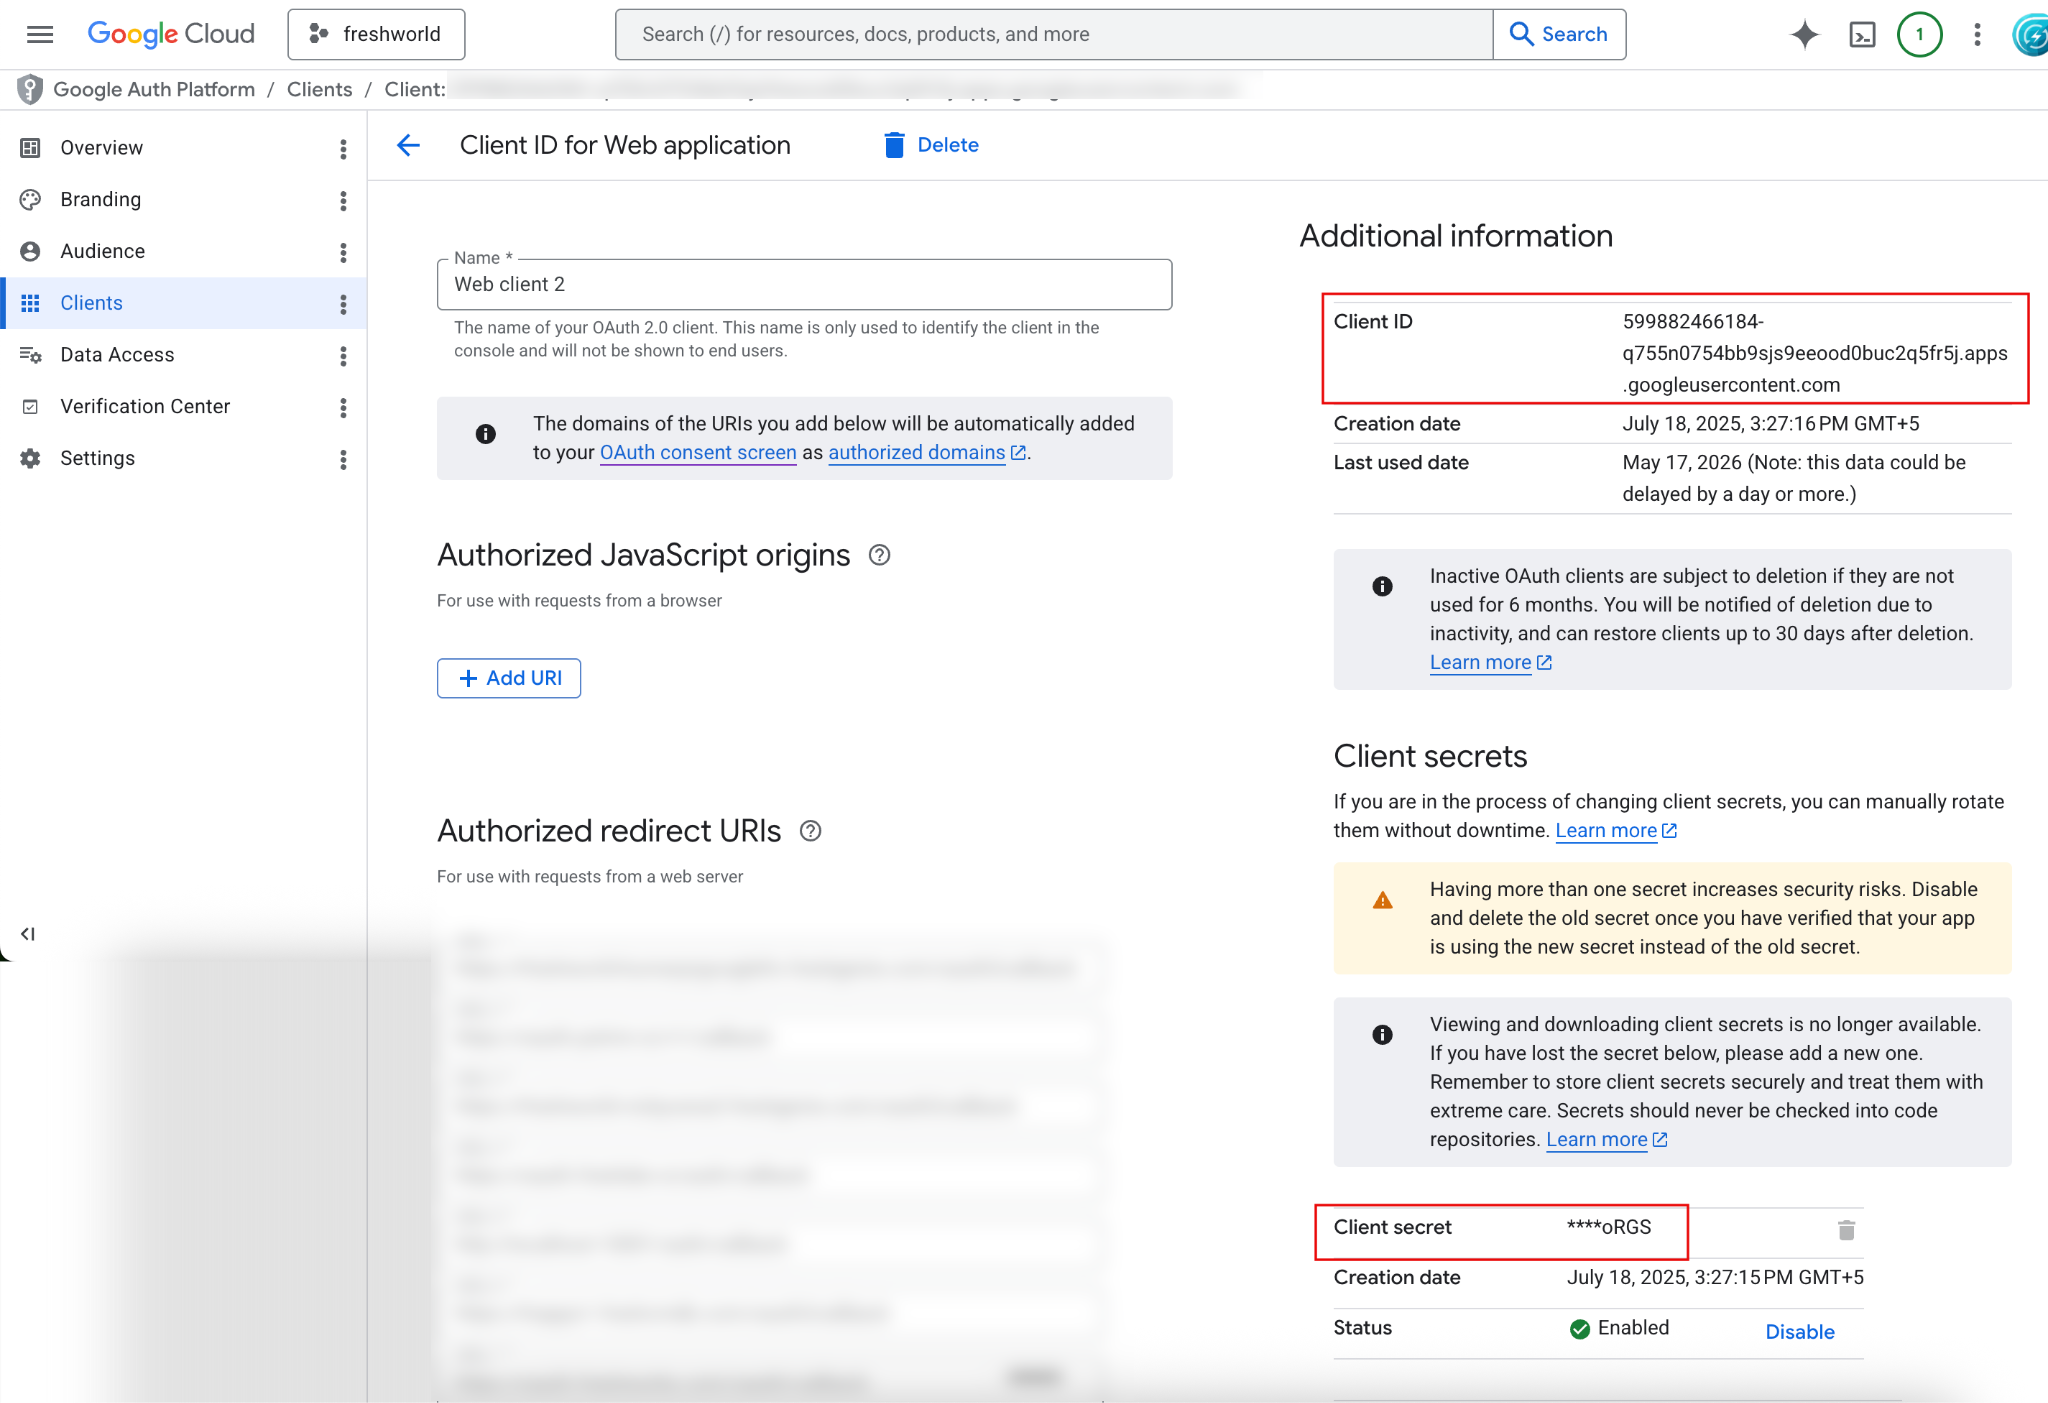
Note: An OAuth client can have a maximum of two active Client Secrets. Treat the Client Secret as a password and store it in your secrets manager. Do not paste it into chat, email, or tickets.
Step 6: Add a test user
While the OAuth app remains in Testing status, only explicitly listed test users can authorize it. You do not need to publish the app to use it within your own Workspace tenant — keeping it in Testing is the recommended path.
On the OAuth consent screen, scroll to Test users and click Add users.
Enter the email address of the Freshservice administrator who will install and authorize the app, then save.
Repeat for any additional agents who need to authorize the integration during validation.
Note: A project in Testing status supports up to 100 test users. Internal apps within a Workspace organization are not subject to the 7-day refresh-token expiry that applies to External Testing apps.
Part 2 — Install the Google Drive Storage app in Freshservice
In Freshservice, go to Admin > Service Desk Productivity > Apps.
Click Get More Apps to open the integrations gallery.
Search for Google Drive and open the listing.
Click Install. The first installation screen asks for two values:
Client ID — paste the value copied in Part 1, Step 5.
Client Secret — paste the value copied in Part 1, Step 5.
Click Enable. The app validates the credentials with Google and completes the installation.
Note: The earlier API Key field has been removed. If you are referring to older internal screenshots that show an API Key, ignore that field — only Client ID and Client Secret are required in the current version of the app.