TABLE OF CONTENTS
- Supported plans and account modes
- Overview
- Audience
- Portal limits
- Requester portal components
- Understanding portal, workspace, and user relationships
- Single-portal vs. multi-portal accounts
- Getting started: a recommended setup flow
- Key limitations
- Related articles
Supported plans and account modes
Plans
Freshservice Pro and Enterprise
Freshservice for Business Teams Pro
Note: If you downgrade to a plan that does not support multiple portals, all secondary portals are deleted, leaving only the default portal. Review your portal setup before you change plans.
Account modes
The details regarding multiple requester portals in this article apply exclusively to accounts in 'Employee Support (ESM)' mode (that is, accounts with workspaces enabled). While accounts in 'Managed Services (MSP)' mode also have access to multiple portals, their rules and behavior may differ, and users must switch their account mode to Employee Support to utilize the specific capabilities described here.
Overview
Organizations often need to support multiple audiences, such as employees across regions, business units, and subsidiaries, as well as external users like vendors, partners, and customers. A single support portal can make it difficult to deliver relevant content and experiences to each audience, while managing multiple service desk instances increases administrative overhead.
Multiple requester portals let you create dedicated portals for different audiences from a single Freshservice account. Each portal can have its own URL, branding, content, and authentication settings. Requesters see only the content and workspaces relevant to them, while agents and administrators continue to work from a single, unified backend.
Audience
The feature is built for organizations that need to serve more than one distinct audience from the same Freshservice account.
Common use cases include:
Multi-brand or multi-subsidiary organizations: One portal for each brand or subsidiary, each with its own URL.
Employee and external audiences: Separate portals for employees, vendors, partners, and contractors.
Educational institutions: One portal for each school, college, or campus within a university.
Regional divisions: One portal for each country or region, each with its own language and branding.
Departments: One portal for each department, such as IT, HR, or Finance.
Portal limits
The number of portals you can create depends on the account state:
Trial accounts: up to 3 portals, no matter how many workspaces are enabled.
Paid accounts: the portal cap matches the workspace cap on the account. For example, an account with a workspace cap of 25 can have up to 25 portals, and an account with a cap of 50 can have up to 50.
Note: The workspace cap is a maximum, not a prerequisite. You can have a single workspace on an account whose workspace cap is 25 and still create up to 25 portals, all mapped to that one workspace.
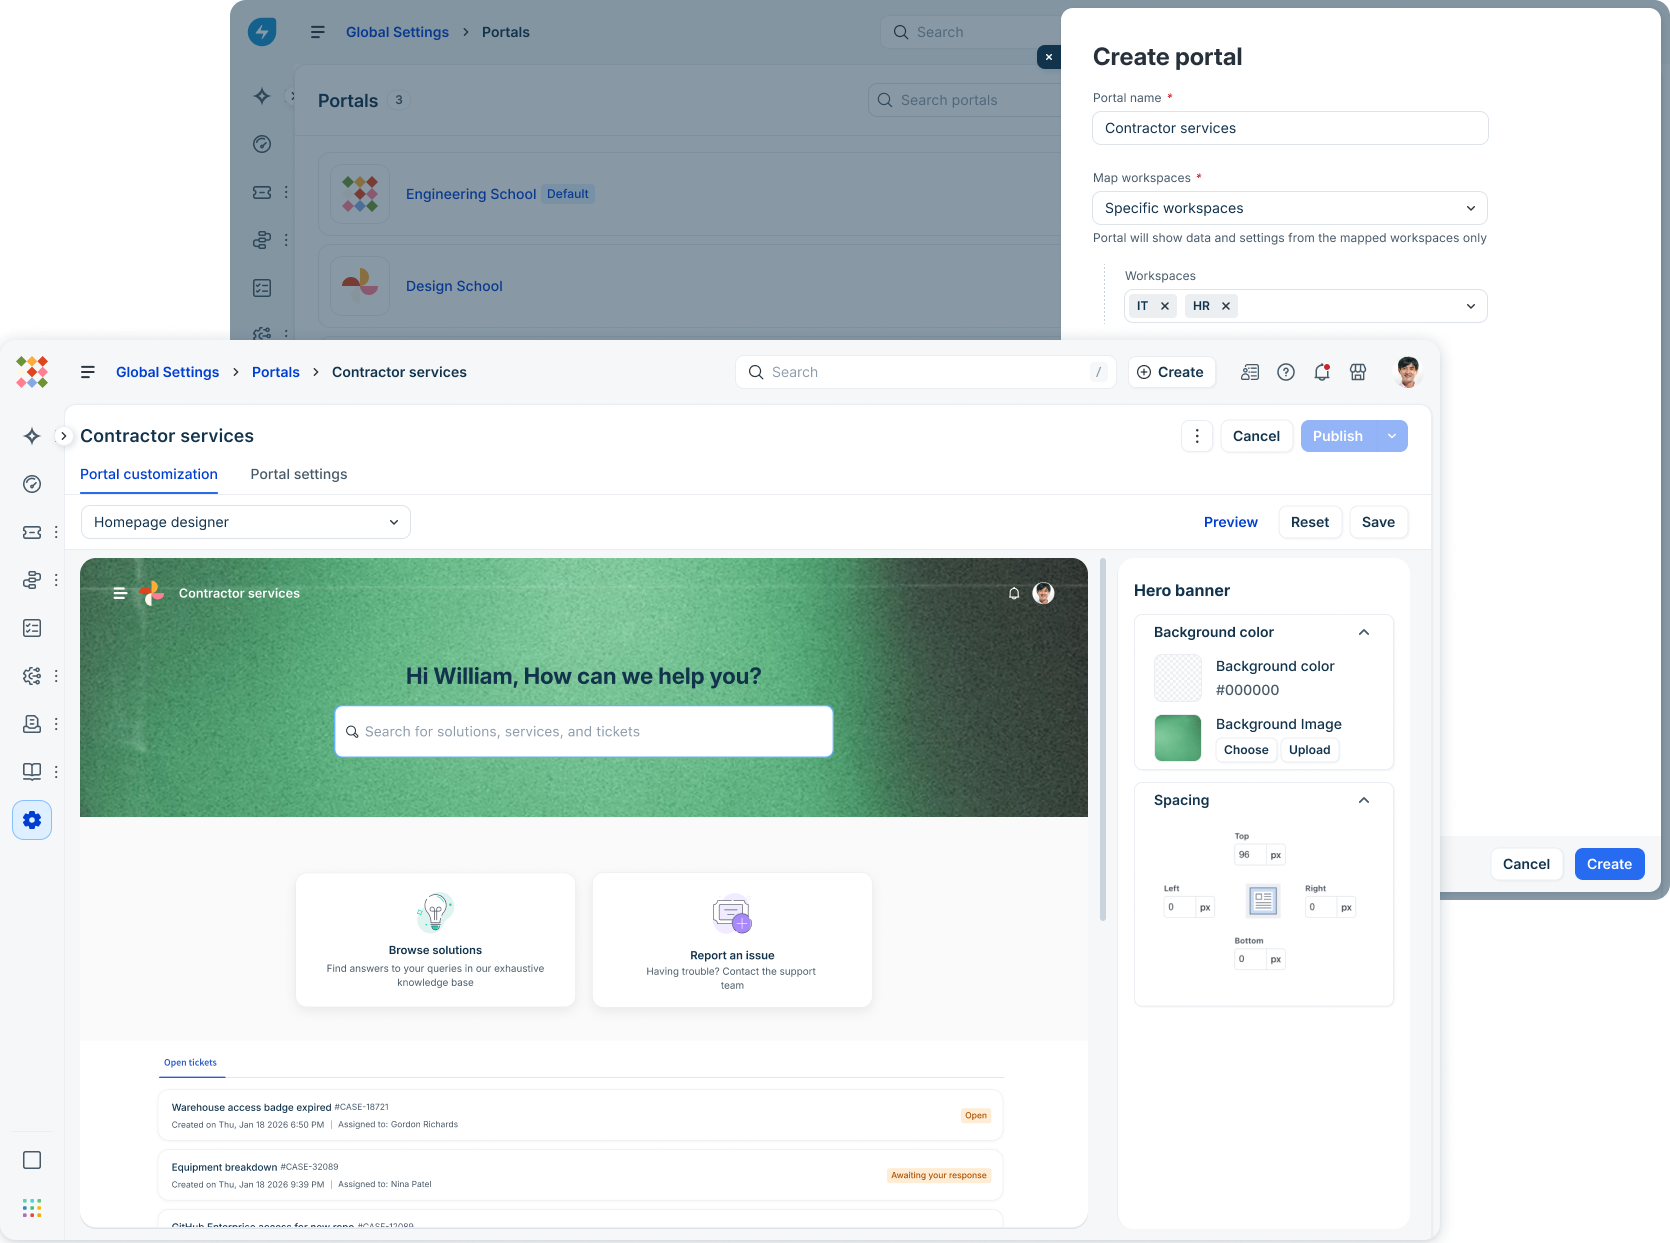
Requester portal components
With multiple requester portals, you can add more on top of the default and serve each audience from its own portal.
Each portal you create has its own:
URL: A unique web address for accessing the portal.
Branding: Custom logos, themes, colors, banners, and footers.
Login policy: Authentication options such as SSO, Google Sign-In, or username and password.
Content: Ticket forms, change forms, service catalog items, solution articles, journeys, and announcements available through mapped workspaces.
Users: The users who can sign in to the portal.
Understanding portal, workspace, and user relationships
Portals, workspaces, and users are linked through mappings. Two rules govern the model:
Every portal must be mapped to at least one workspace: a portal with no workspace mapped shows an empty state to anyone who signs in.
Every workspace must be mapped to at least one portal: a workspace cannot exist without a portal that serves it.
Within those two rules, mappings are flexible. A portal can be mapped to any number of workspaces, a workspace can be mapped to any number of portals, and a user can be granted access to any number of portals.
The default portal cannot be deleted, and you cannot select a different portal as the default. You can, however, delete secondary portals at any time.

In this example:
The Employee portal serves user group U1 and exposes data from the IT and Procurement workspaces.
The Vendor portal serves user group U2 and exposes data from the Procurement and Accounts Payable workspaces.
Procurement is shared between both portals. A user with access to either portal can submit and track Procurement items, but each user does so from a portal branded for their audience.
Users live in one global pool at the account level. Agents and requesters are not created per portal. The mapping (U1, U2) controls who can sign in where, but the user records themselves are shared across the account.
Requester experience
Requesters can be scoped to specific portals, so each portal serves only the audience it is meant for.
A requester sees only the workspaces, catalog items, and content exposed by the portal they sign in to.
If a requester is granted access to more than one portal, they can sign in to any of them and get each portal's scoped view.
On the requester side of a portal, even agents see the scoped view. They see only what that portal exposes.
Agent experience
Agents are granted access to all portals by default. They can sign in from any portal URL, as long as the login policy allows it, and they always land on the same agent interface, because the back end where they work on tickets is unified. What an agent can see and do on the back end is governed by their role, not by the portal they signed in from.
Example: An agent signs in through the Vendor portal, which is mapped only to the Procurement and Accounts Payable workspaces. The role assigned to that agent also grants ticketing permissions in the IT workspace. Because agent access is governed by roles, the agent can still view and act on items in the IT workspace through the agent interface, even though the sign-in portal is mapped to only two of the three workspaces. This lets agents collaborate across teams, move data between any two workspaces, and generate unified reporting.
Single-portal vs. multi-portal accounts
Some configuration options only become available after a second portal is added. Knowing this upfront avoids confusion when you first explore the settings.
Single-portal accounts
The portal can’t be mapped to specific users or specific workspaces.
It is automatically mapped to all workspaces and all users in the account.
Multi-portal accounts
As soon as you add a second portal, each portal can be mapped to specific workspaces and to specific users.
Note: Deleting the second-to-last portal reverts the account to a single-portal system. Before you can execute this final deletion, you must map the remaining default portal back to all workspaces and users.
Getting started: a recommended setup flow
Following these steps in order helps you get a clean multi-portal setup live without rework.
Before you begin, decide whether to build this setup directly in Production or first in a Sandbox environment (available on the Enterprise plan). Portals currently cannot be synced from Sandbox to Production or vice-versa, so if you build and test in a Sandbox, you will need to manually replicate the final configuration in your Production environment. To perform the actions below, you need the Play God permission.Map out your audiences first: List the distinct groups you want to serve, such as Employees, Contractors, or a specific business unit. Each group that genuinely needs a different experience is a candidate for its own portal.
Decide your workspace structure: Make sure each audience has the right workspace or workspaces to support it. Portals show data only from the workspaces they are mapped to, so the workspace model is the foundation.
Create your secondary portals:
Map the portal to workspaces: Connect each portal to the workspaces whose data it should expose. A portal can serve multiple workspaces if needed.
Map users to the portal: Scope users to their portals by applying conditions based on user fields. Adding a new portal does not notify other users or affect the existing setup, so it is safe to experiment even in your production environment. Agents are mapped to all portals by default.
Configure the portal: Customize its branding, URL, behavior, and login experience.
Communicate the rollout: Once your portal is configured and tested, plan your announcement. When you are ready, send each audience their specific portal URL along with a brief note explaining what to expect.
Key limitations
Before you set up multiple requester portals, plan around the following limitations:
Freddy AI/Virtual agent works only on fully mapped portals
Freddy AI Agent/Virtual Agent can be deployed only on the default portal of the account.
The Slack and Microsoft Teams service bot isn’t multi-portal aware
The service bot used in Slack and Microsoft Teams does not recognize multiple portals. Users who interact with the bot are always routed to the default portal, even if they belong to a different portal’s audience group. If you currently rely on the service bot, we recommend one of the following approaches:
Target a single audience via the bot: Use the bot exclusively for the audience group that accesses the default portal.
Keep it generic: Map the default portal to all workspaces and users so every audience can use it as a universal fallback.
If your requirements fall outside these two options, please note that the multi-portal architecture does not support them at this time.
Related articles
For a complete understanding of how multiple requester portals work across different modules, including key considerations and limitations, review the related articles below.