Note: Available only for new signups after the 31 March, 2026 release. If you signed up earlier, refer to the existing ITAM documentation.The Subnet Tree view provides a hierarchical, visual representation of your network infrastructure, allowing you to manage VRF groups, subnets, and individual IP addresses from a single interface.
This article covers how to navigate the hierarchical Subnet Tree, manage IP associations, and use the recommendation engine to optimize your network layout.
Prerequisites
You need the following before accessing and managing Subnet Tree view:
Access to the IT Asset Management module in your Freshservice instance.
Administrator privileges or specific permissions to create and edit Subnet Tree view.
Access the Subnet Tree view
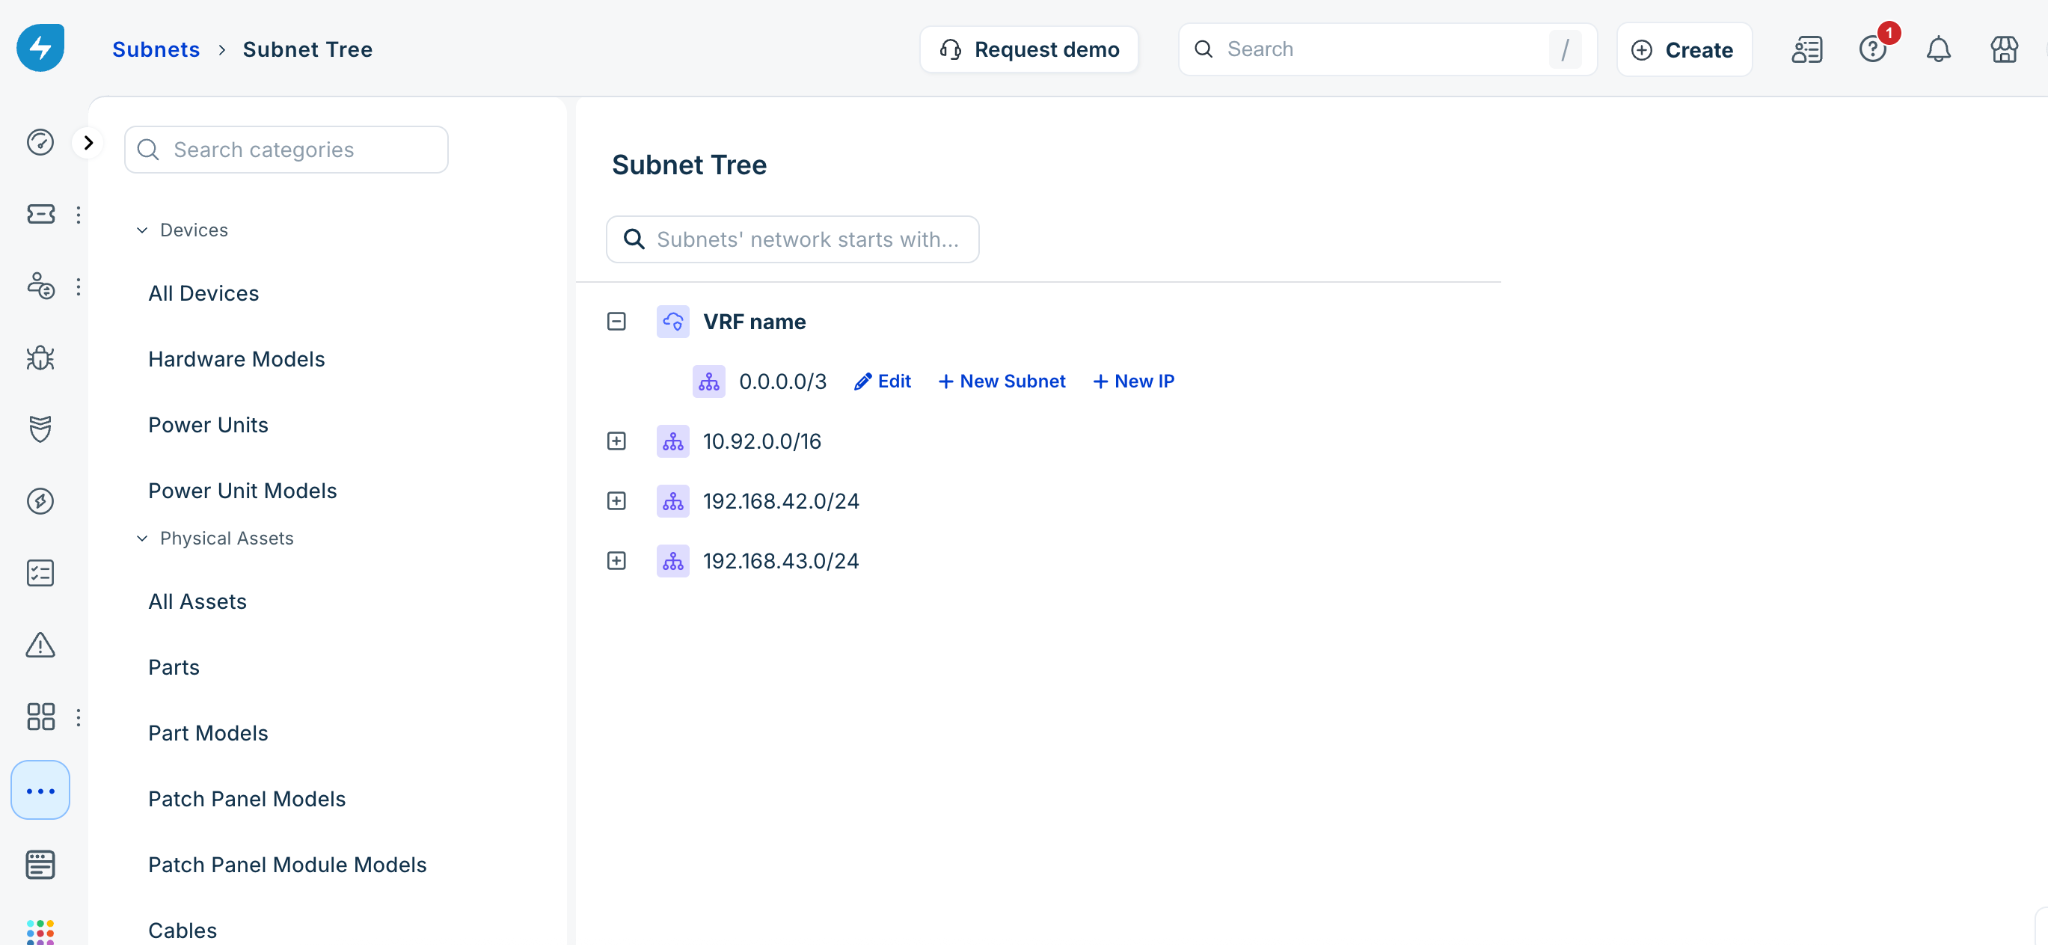
To access this view, go to IT Asset Management > Inventory > Subnet Tree. In this page, subnets and IP addresses are organized by VRF Groups, as shown in the image below.
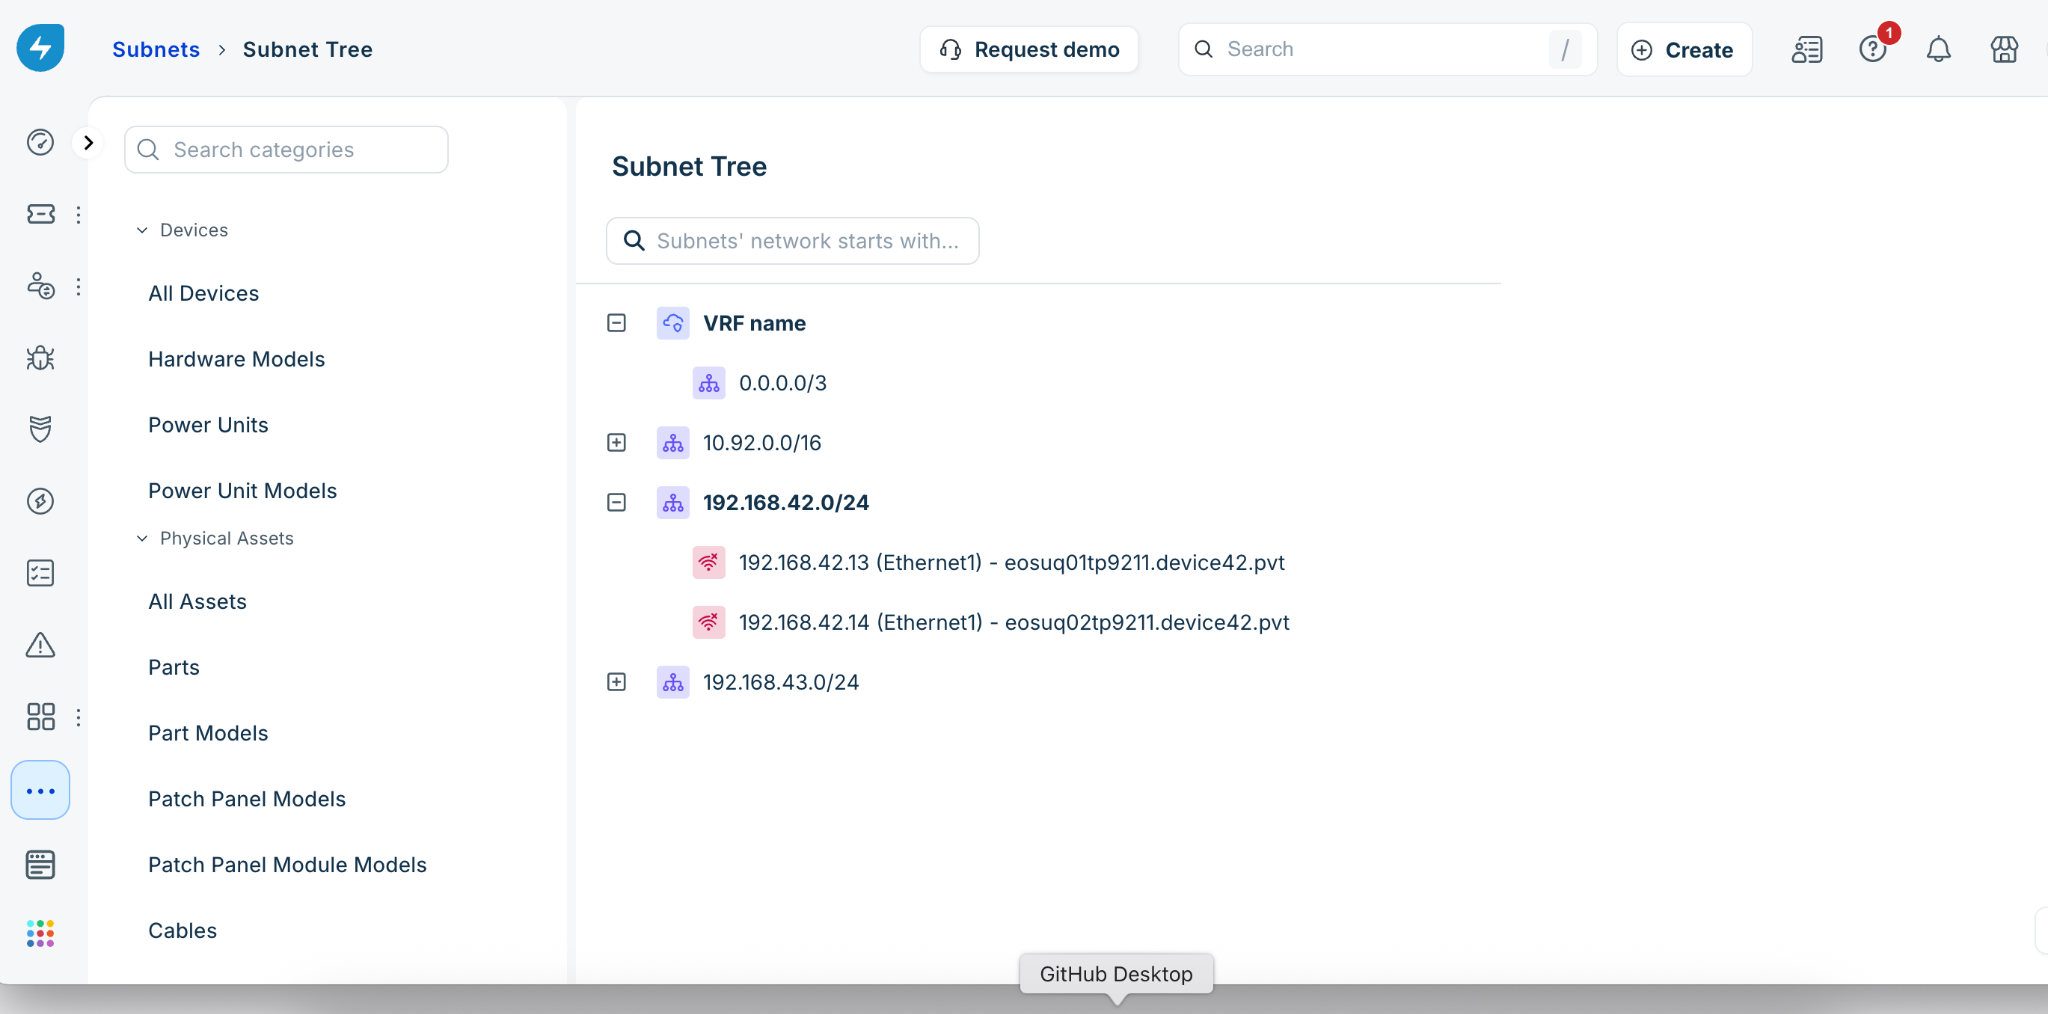
Because VRF groups are associated with specific buildings, the display also includes the building name for better geographic context. This hierarchy allows you to see exactly how your address space is distributed across your physical and logical network.
Visualize subnet and IP details
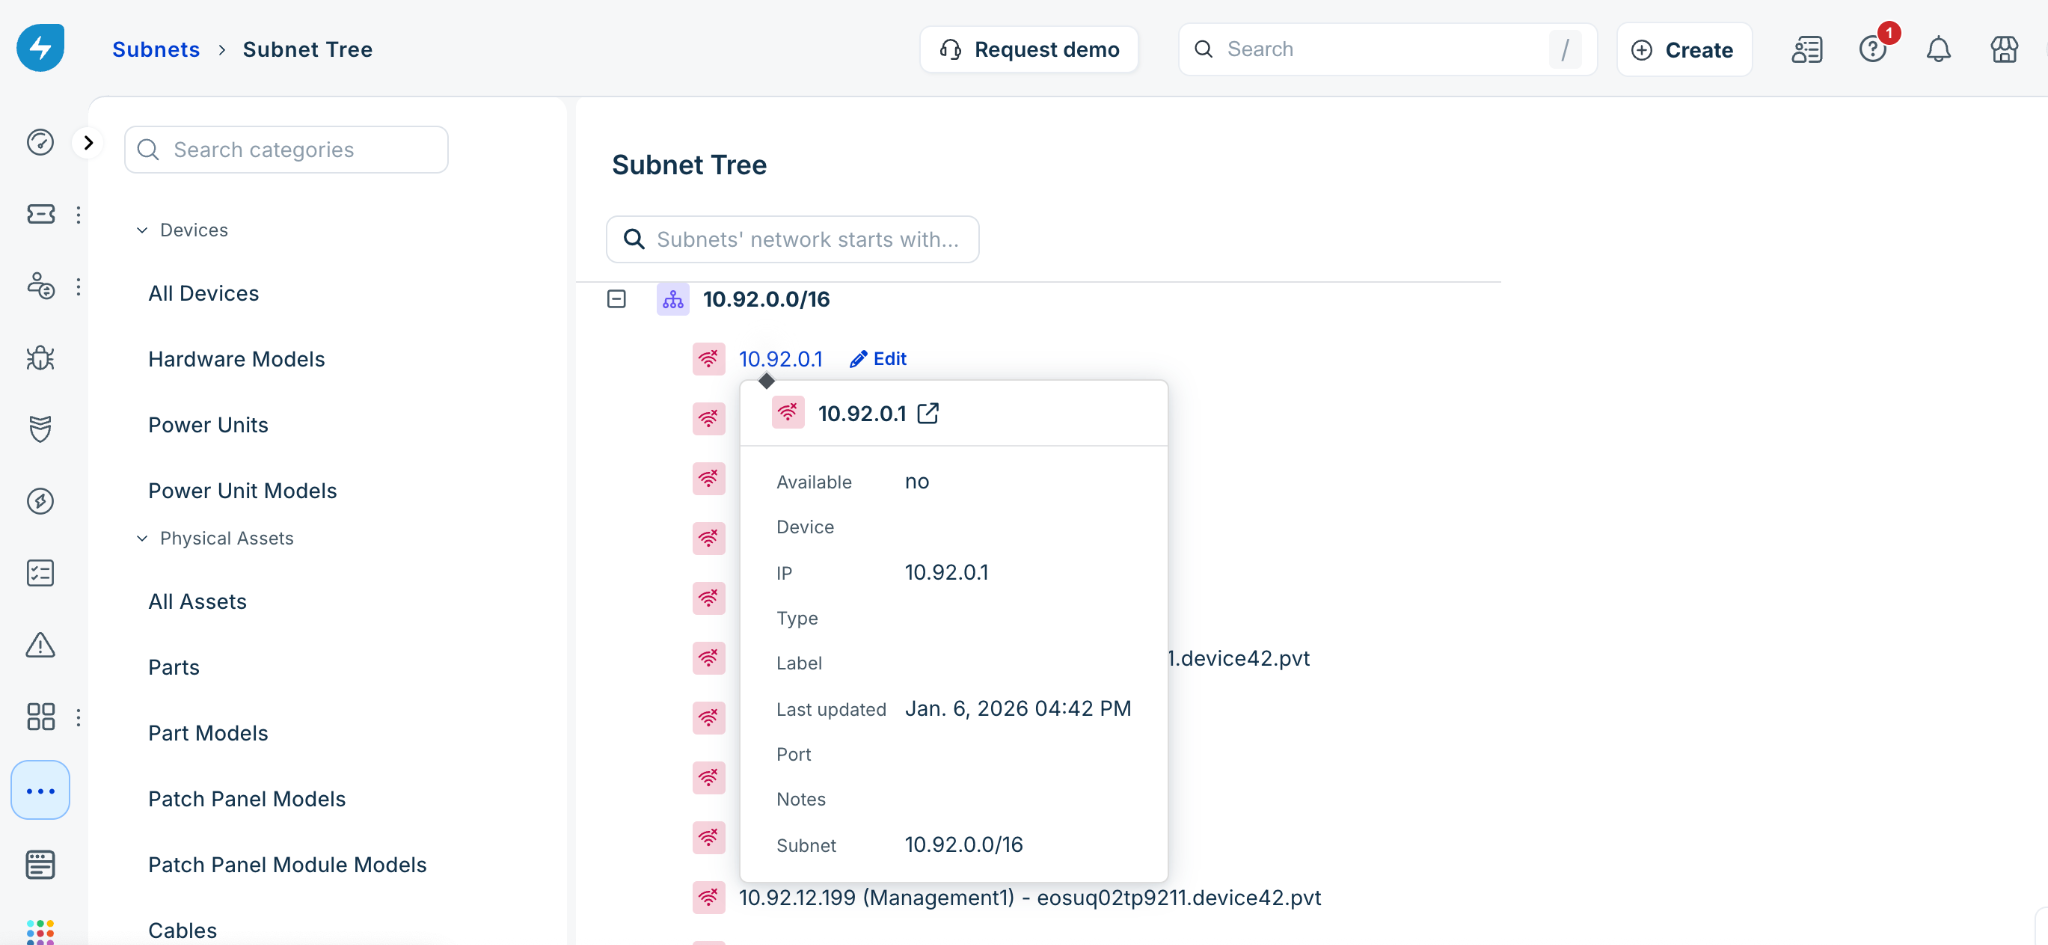
The Tree View is interactive, providing real-time data as you navigate:
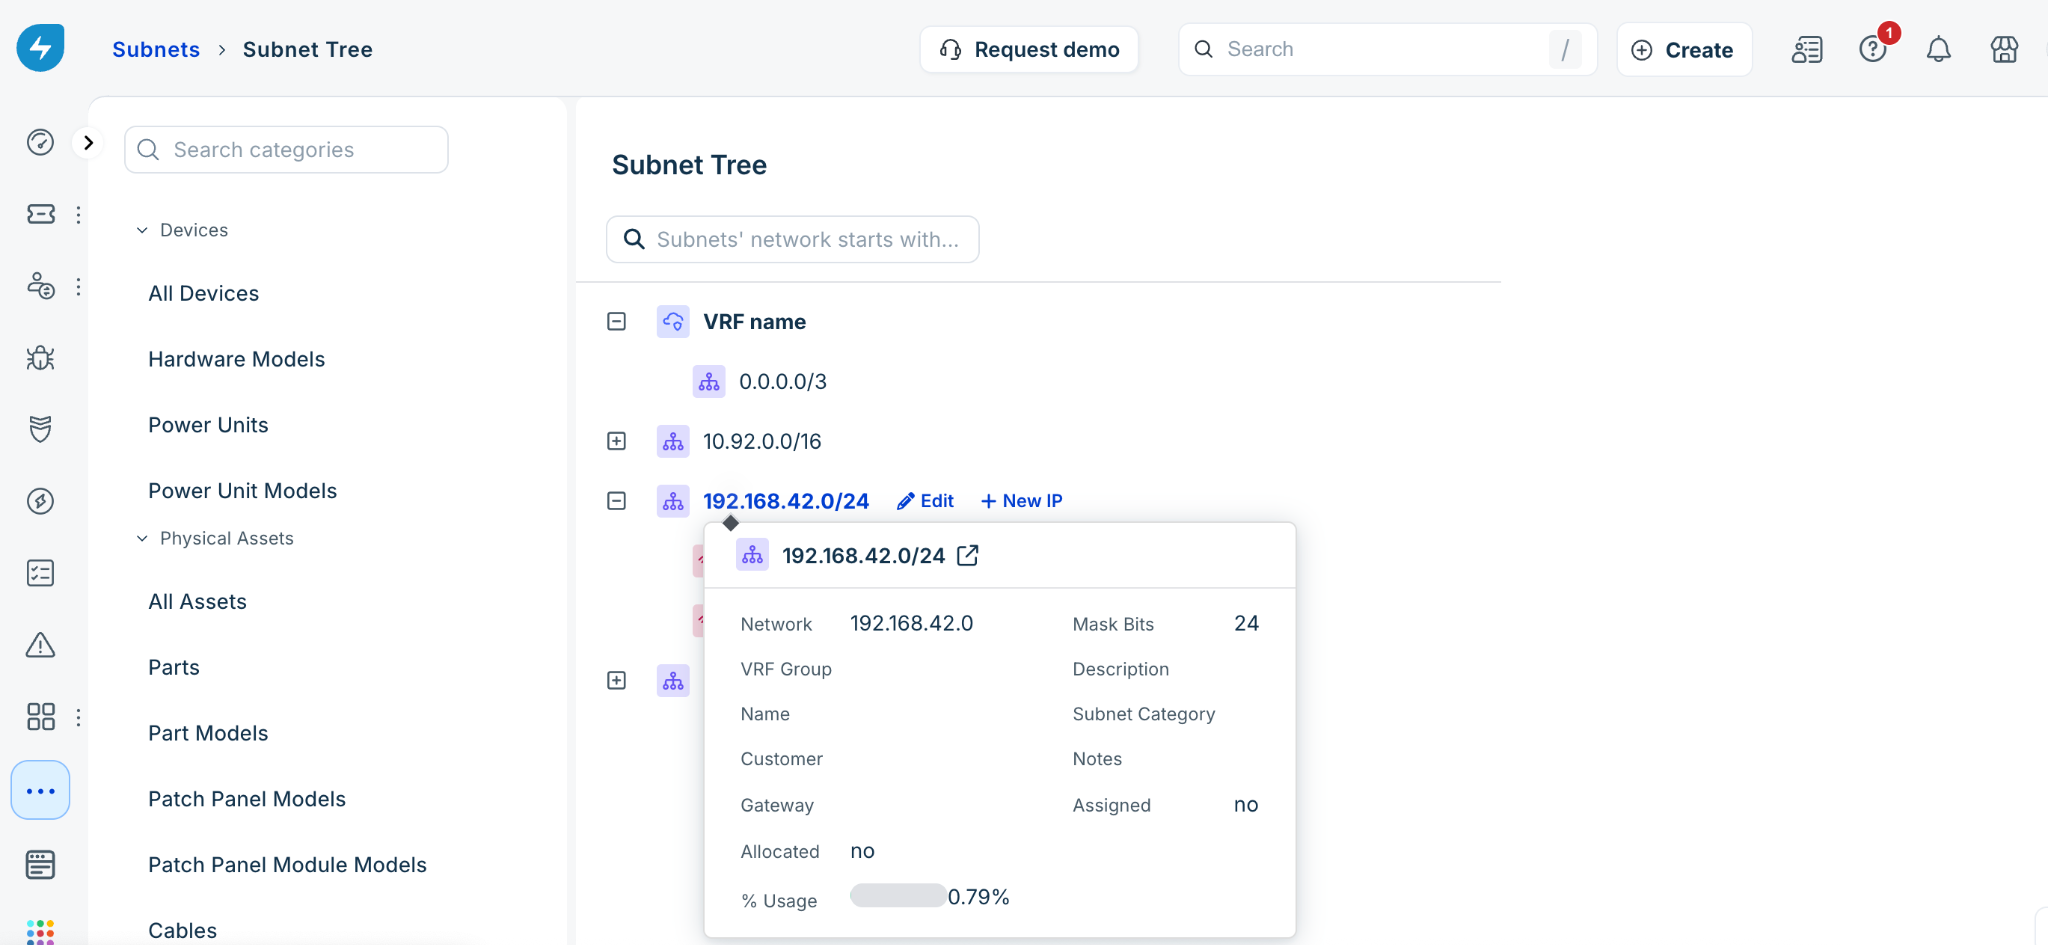
Detail pop-ups: Hover your mouse over any VRF group, subnet, or IP address to view a summary of its attributes.
Usage graphs: Subnet details include the % Usage field indicating the percentage (%) of IP addresses currently in use.
Direct editing: Click the Edit button next to any subnet or VRF group to modify its properties without leaving the tree view.
Add or edit subnets and IPs
You can expand your network directly from the Subnet Tree view. To do so, go to the Subnet Tree view and follow these steps:
New Subnets: Hover over a VRF Group and click the + New Subnet button.
New IPs: Hover over a subnet and click the + New IP button.
For subnets with a mask smaller than /24, the system displays a list of all available (non-existent) IPs for quick selection.
For larger subnets, a dialog box appears for direct data entry.
IP Management: Click the Edit button next to an individual IP to update its device association, status, or other attributes.
Nest and relocate subnets
The Subnet Tree view supports advanced organization through nesting and drag-and-drop.
Nesting: Click + New Subnet next to an existing subnet to view a list of available child subnets. Selecting one will nest it under the parent.
Drag-and-Drop: You can move subnets into different parents or VRF groups by dragging them.
Note: Drag-and-drop functionality is disabled for trees containing more than 2,000 subnets to maintain performance.
View subnet usage
To view the availability of subnets within your network, follow these steps:
In the Subnet Tree view, hover over a VRF group or subnet and click + New Subnet.
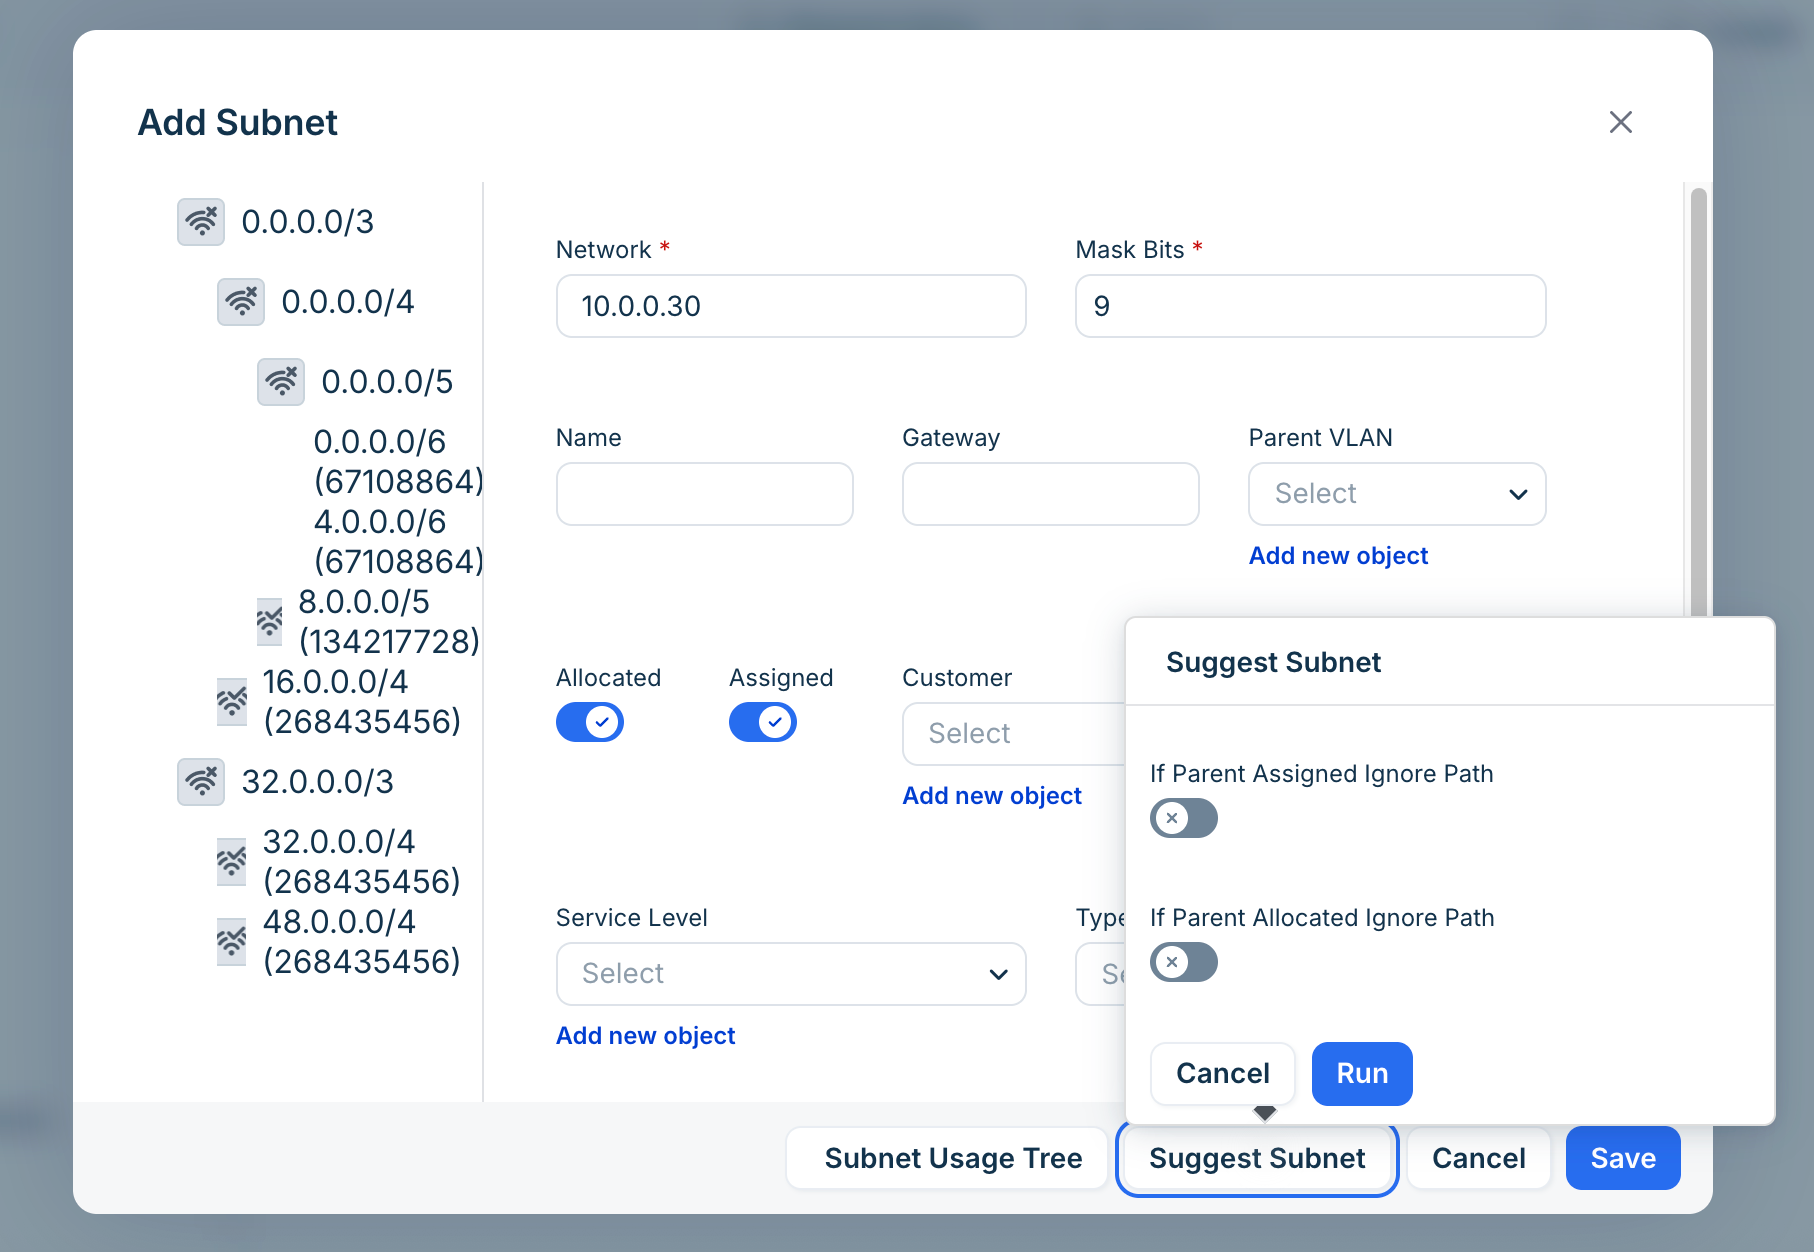
In the Add Subnet window, click the Subnet Usage Tree button.
A new window opens to display a color-coded map of your address space:
Green: Indicates available subnets.
Red: Indicates used or partially used subnets.
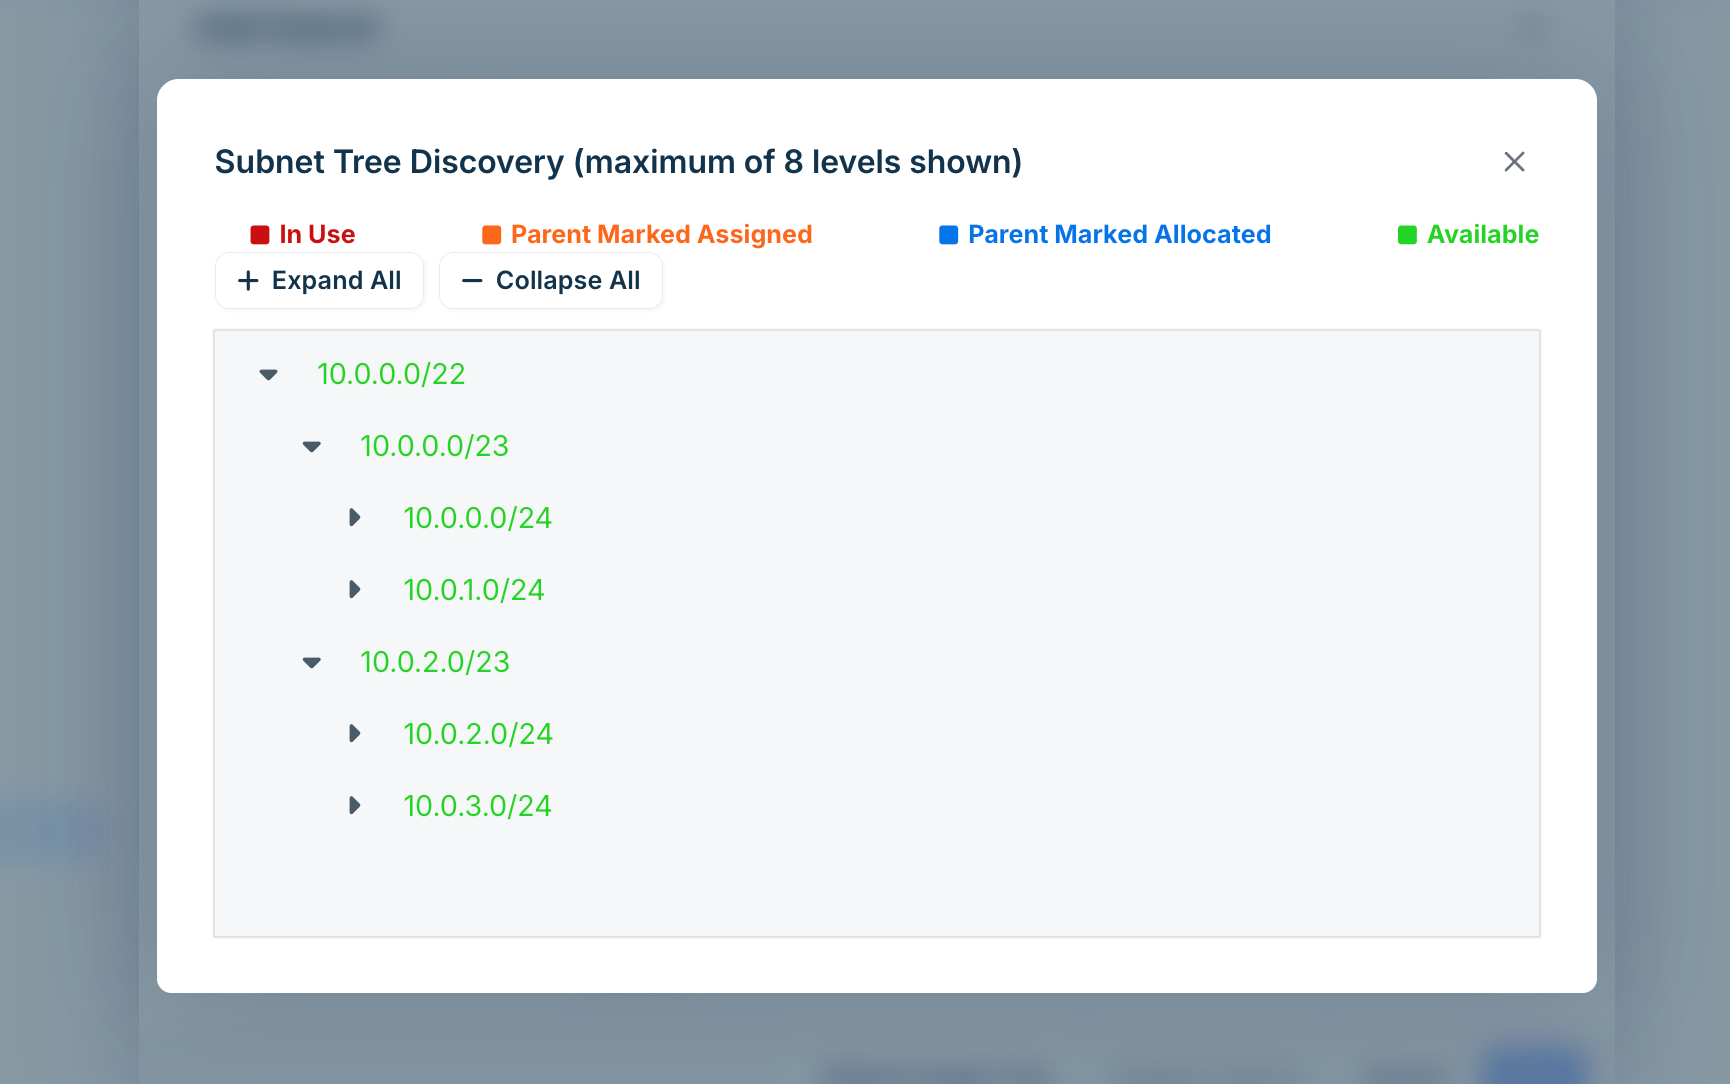
Click the Expand All button to drill down into the hierarchy and identify the optimal gaps for new assignments.
Use subnet suggestions
To avoid manual calculation errors in finding the optimal location for a new subnet, use the recommendation engine by following these steps:.
In the Subnet Tree view, hover over a VRF group or subnet and click + New Subnet.
In the Add Subnet window, enter the required value in the Mask Bits field and click Suggest Subnet.
Freshservice calculates the optimal location to maximize future network flexibility.
Choose whether to ignore parent subnets that are currently empty by enabling the following fields:
If Parent Assigned Ignore Path: Ignores parent subnets marked as "Assigned."
If Parent Allocated Ignore Path: Ignores parent subnets marked as "Allocated."
Click Run to generate the suggestion.
Click Yes to accept the suggested subnet, or No to decline it.