Ping Sweep discovery identifies live IP addresses across your network by performing a series of pings against specified ranges.The data collected is automatically uploaded to your inventory, allowing you to track IP utilization and identify unknown devices on your network.
This article provides information on how to configure Ping Sweep discovery jobs, manage results, and use the external standalone utility.
Note: Available only for new signups after the 31 March, 2026 release. If you signed up earlier, refer to the existing ITAM documentation.
Prerequisites
You need the following before the installation:
Define respective subnets in your environment before running the discovery to avoid IPs being assigned to an undefined subnet.
Ensure the discovery tool has line-of-sight to the target network ranges.
For the external utility, the discovery account requires add, change, and view permissions for Ping Sweep, IP Address, Subnet, and Device objects.
Create a Ping Sweep discovery job
To configure a Ping Sweep job within the application, follow these steps:
Step 1: Add a new discovery job
Go to Admin > Asset Management > Scan and discover and click the Discovery Jobs tab.
Select Ping Sweep from the list of discovery jobs and click Add new.
Fill in the following job details:
Name: Enter a unique identifier for the job.
Networks: Enter the range using CIDR notation. For example, 192.168.11.0/24 or hyphenated ranges (192.168.11.1-254). Multiple ranges can be separated using commas, spaces, or new lines.
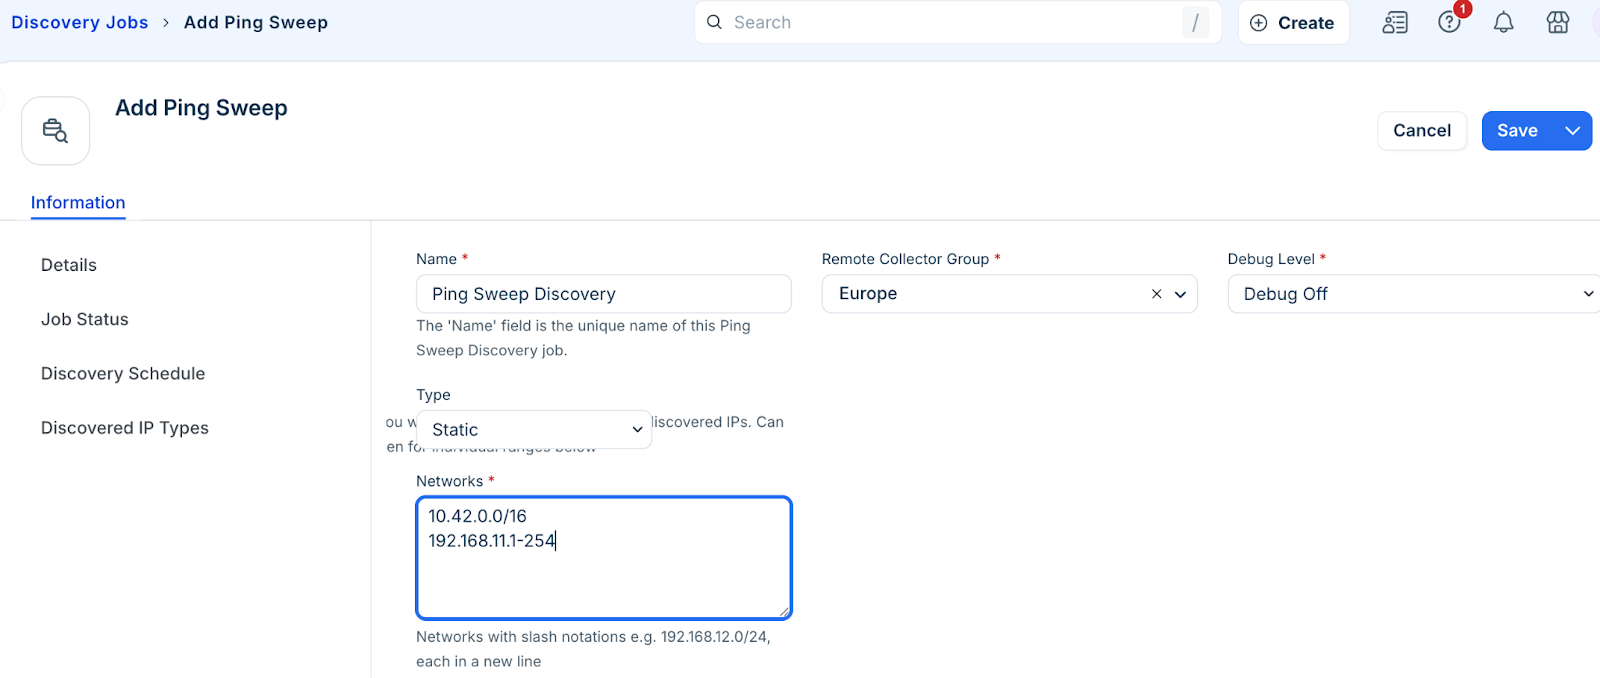
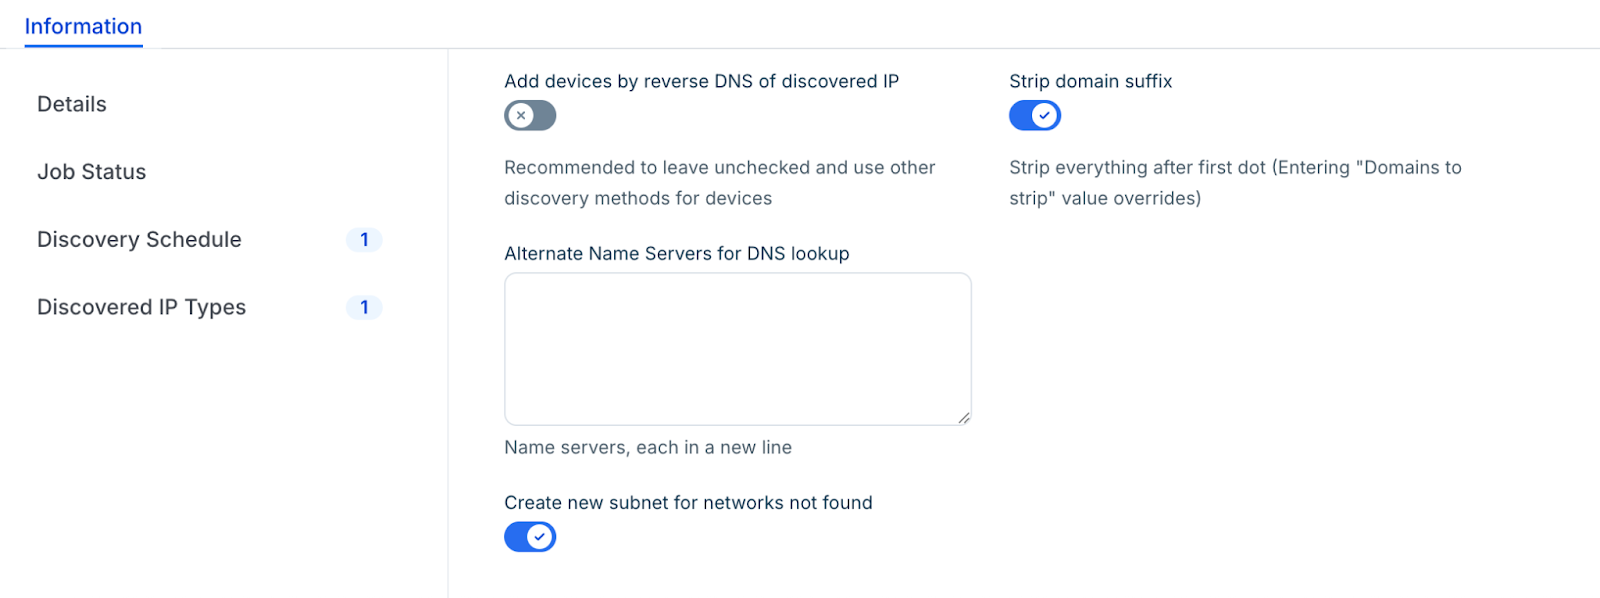
Step 2: Configure discovery options
By defualit, the Add devices by reverse DNS is disabled. Enable only if you have a properly configured DNS environment to avoid creating duplicate devices. Enable this option, if you want to use reverse DNS values as device names.
Enable the Strip domain name suffix option to remove the FQDN suffix from discovered names.
Enable the Create new subnet for networks not found option to automatically generate subnets in the system if they do not already exist.
Step 3: Run or schedule the discovery job
In the Discovery Schedule section, click Add new to set a recurring interval.
Click Save.
To start the discovery immediately, click Run Now on the Ping Sweep list page.

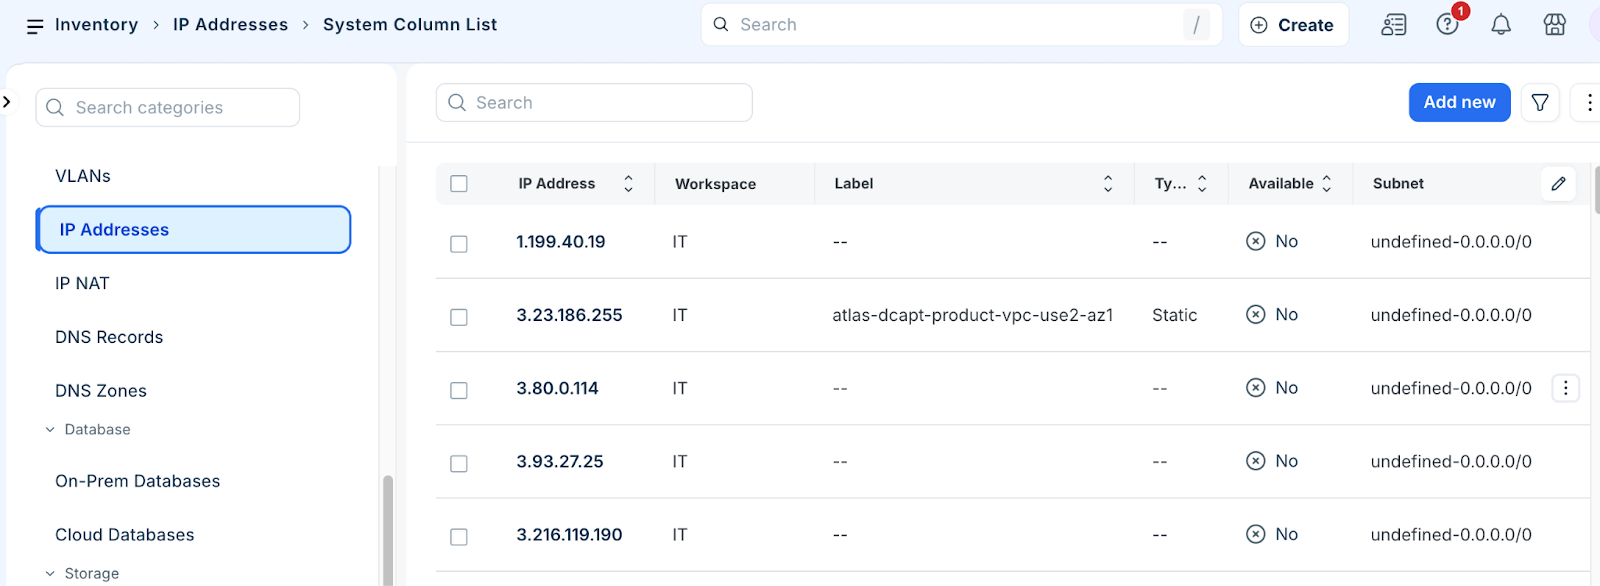
View Ping Sweep data
Once the scan is complete, you can review the results:
Click more options in the side bar > IT Asset Management > Inventory > All Resources.
Use the available filters to narrow the list by specific IP values or subnets.
Ping Sweep usage considerations and best practices
When configuring Ping Sweep discovery, keep the following considerations and best practices in mind to ensure accurate data collection:
Add the respective subnets in the system before discovering and uploading IP information. Otherwise, all discovered IPs will be assigned to an "undefined" subnet.
MAC address identification during a Ping Sweep functions only for local LANs.
If the reverse DNS option is selected, the discovery process will take longer to complete as the system resolves each live IP.
Depending on your network configuration, some subnets or IP addresses may show up as used when they are not. For example, some load balancers reply to pings for every IP in a given range, causing networks behind those load balancers to appear active.
Running a discovery job using a wireless card will typically only discover the wireless card itself.
You can choose between the built-in Ping Sweep tool for integrated management or the standalone external Ping Sweep utility for Windows or Linux environments.
Install and configure
Follow these steps to install Ping sweep:
Download the .zip file from the page.
Unzip the file and choose the appropriate executable for your OS (e.g., d42_pingsweep_windows_x64.exe or d42_pingsweep_linux).
For Linux, set the file as executable: chmod +x d42_pingsweep_linux.
Copy ping.cfg.sample to ping.cfg.
Edit ping.cfg to include your appliance URL, credentials, and target networks.
Run and schedule
Manual Run: Launch the executable from the command line with root or administrator privileges.
Automation: Use an operating system task scheduler (such as crontab or Task Scheduler) to run the utility on a recurring basis.
When the command prompt displays "Finished" and "Success," new and updated IP information will be visible in the application.