Note: Available only for new signups after the 31 March, 2026 release. If you signed up earlier, refer to the existing ITAM documentation.
Applicable plan: Growth, Pro, Enterprise
Microsoft Intune is a cloud-based service focused on mobile device management (MDM) and mobile application management (MAM). This integration allows organizations to control how mobile phones, tablets, and laptops are used while configuring specific policies for applications.
Intune autodiscovery identifies mobile devices and managed application software, importing them into the inventory. This article provides an overview on how to configure application permissions in Azure, set up discovery jobs, and manage device naming conventions.
Note: Intune discovery has been adjusted to import devices individually instead of in one large block that could time out for very large installations.
Prerequisites
You need the following before the installation:
An active Microsoft Intune license.
Administrator privileges to manage discovery settings.
Access to the Azure portal to register applications and grant permissions.
Admin consent for the following application permissions in the Azure portal:
DeviceManagementApps.Read.All
DeviceManagementManagedDevices.Read.All
User.Read.All
Note: Do not use delegated credentials for Intune autodiscovery jobs.
Configure Intune Discovery Job
To set up a new discovery job for your Microsoft Intune environment, follow these steps:
Go to Admin > Asset Management > Scan and discover and click the Discovery Jobs tab.
Select Cloud from the list of discovery jobs and click Add new.
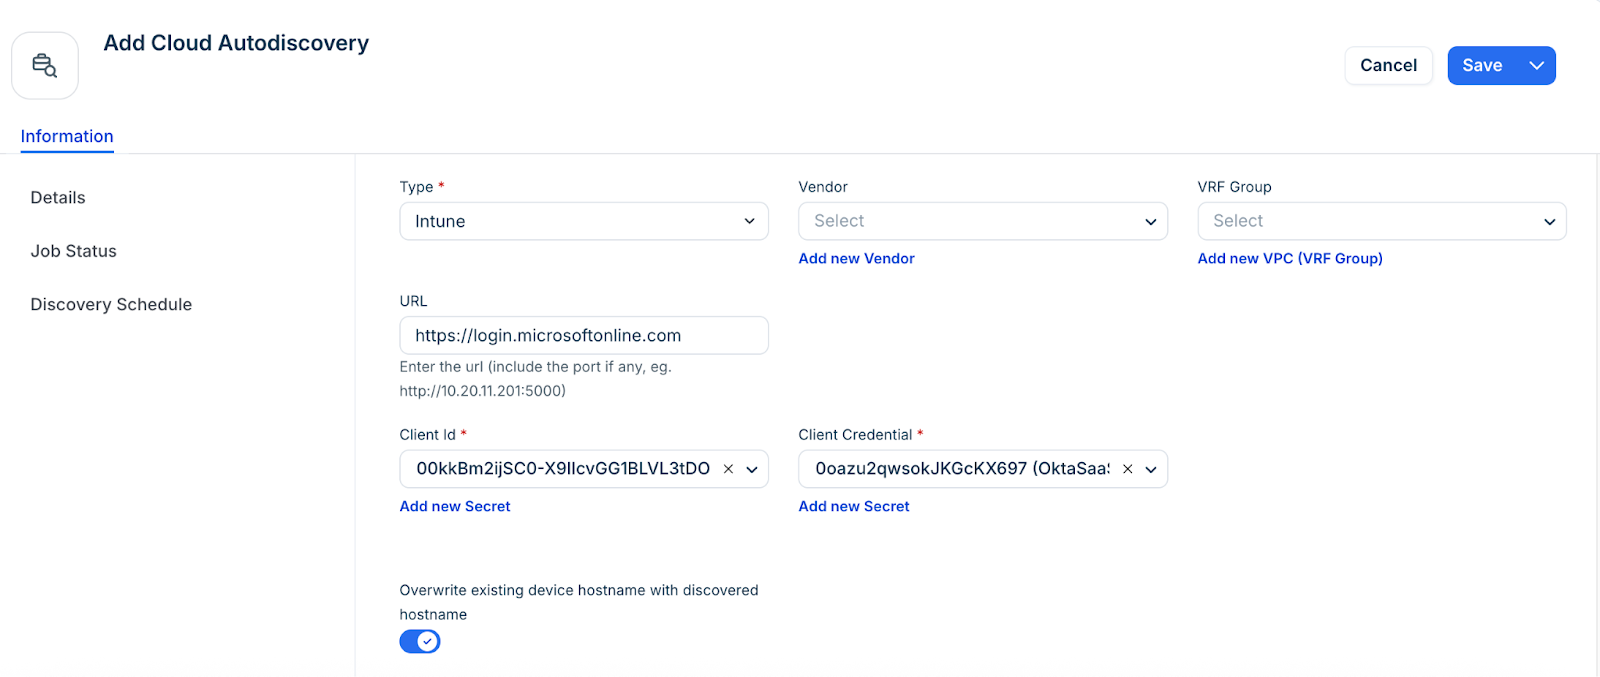
Select Intune as the discovery from the Type drop-down.
Enter a Name and URL for the discovery job. For example, https://login.microsoftonline.com/[tenant domain or ID].
Open the Azure portal and follow these steps to register an application on the same tenant as Intune:
Navigate to Azure Active Directory > Enterprise Applications > New Application > Create Your Own Application.
Enter a name for your application and select the Integrate any other application you don’t find in the gallery (Non-gallery) option.
Once your application has been created, do the following:
Go to the top-level directory you created the app and select App Registrations.
Select your newly created app and copy the Application (client) ID. This will be used as the Client ID.
Select Certificates & Secrets and then New Client Secret.
Give your secret an optional description and an expiration date, and select Add.
Copy the string in the Value column, as it will be used as the Client Credential for discovery.
On the Discovery job page:
Add the Azure Client ID to the discovery job Client Id field.
Add the Azure Secret value to the discovery job Client Credential field.
Optional, configurations:
Enable Overwrite existing device hostname with discovered hostname.
Enable Strip Domain Name to remove the domain name (everything after the first period) from the discovered name.
Enter comma-separated Tags for discovered devices.
Select or add a specific Customer for discovered devices.
Set the Debug level for the job.
Select an option from the Service Level drop-down, or add a new Service level category. For example, you can set it so that the Development, Deployment, or Production service level is applied to discovered items.
Select a customer for discovered devices to add another specialized classification or create a new by using the Add new Cost Center option.
In the Discovery Schedule section, click Add new to create an autodiscovery for the job. You can create multiple schedules.
Click Save.
