Freshservice enables users to request approval for a Service Request(SR) or Change request by manually adding the approver's email address. You can also automate a service request approval by creating a Workflow Automator.
If you have configured a workflow to send approval emails and it is not working as expected, here are a few checks to troubleshoot the issue.
- Check if the rule is set for Incident tickets.
- Check if the 'Sent approval email to' action is configured correctly.
- Check if the approver is mapped correctly.
- Check for email delivery issues.
Check if the rule is set for Incident tickets.
One of the most common issues with sending approval emails through automations is users trying to send approval for an incident ticket using workflow. The workflow will not be triggered in such cases since approvals work only on service requests. Furthermore, you will not find any logs under the Activities section of the ticket.
To correct this, navigate to the Events block of your workflow, and replace Incident with Service request.
Check if the 'Sent approval email to' action is configured correctly.
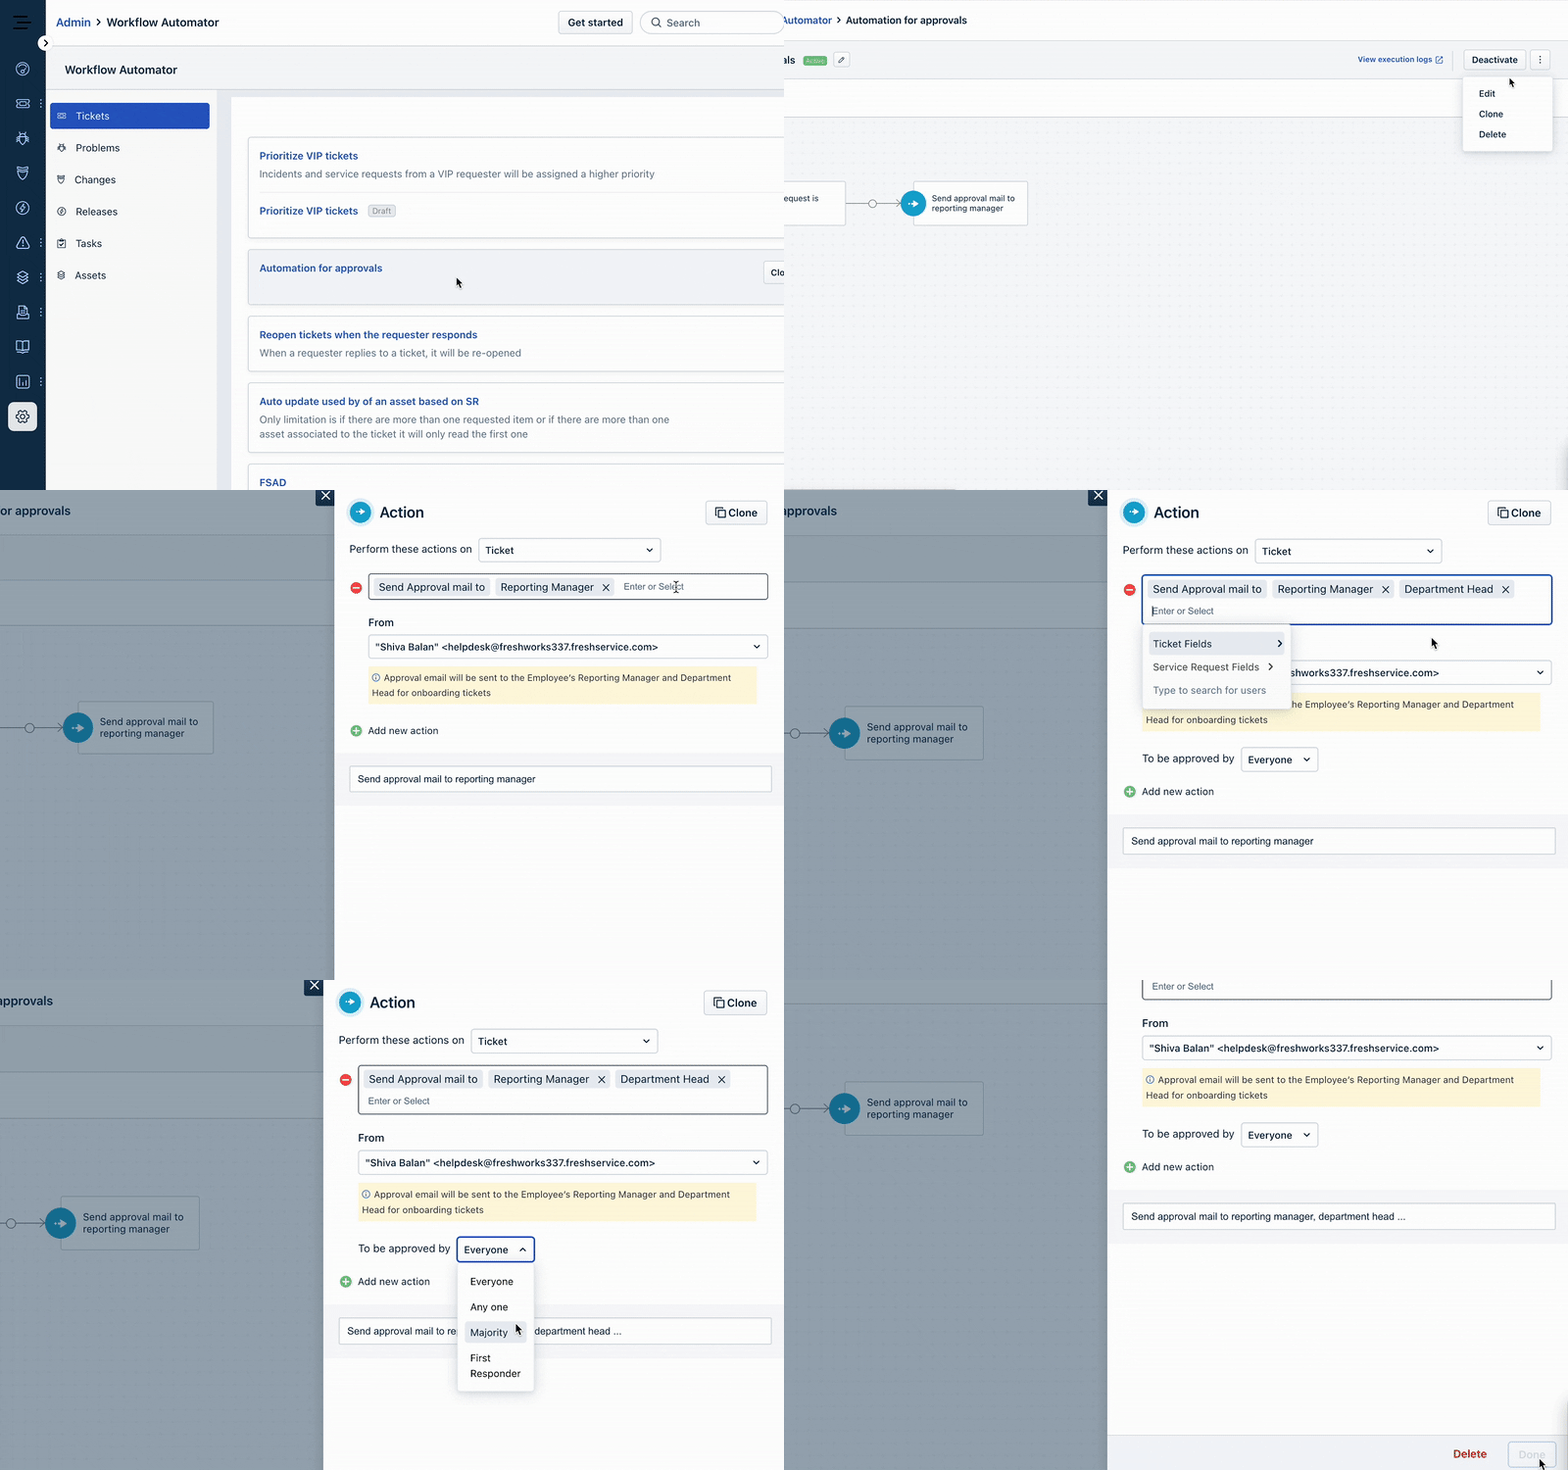
Another common misconfiguration in the workflow is not providing the correct approver under the workflow's action block. Follow the steps below to identify and correct the issue with the approver.
Navigate to Admin. Under the Automation & Productivity section, select the Workflow Automator option.
Click on your approval workflow and select the Action block.
Check if the 'Send approval email to' includes the options 'Reporting Manager' and/or 'Department Head' as per your business use case.
If not, click on Enter or Select and select the appropriate option for the approver.
Under the ‘To be approved by’ dropdown, select ‘Everyone’ if you need both the Reporting manager and Department Head’s approvals.
You can also choose the other options based on your business rule.
Save and Activate your updated workflow.

Check if the approver is mapped correctly.
Another critical step is ensuring that the approvers are correctly mapped to the Reporting Manager or Department Head roles. If not, the workflow will execute, but the approval email will not be sent. This is indicated by the ‘Approver not present’ message under the Activities section of the service request.
Follow the steps below to map the Reporting Manager for the agent raising the service request.
Navigate to Admin. Under User Management, select the Agent option.
Click on the Agent profile of the user raising the service request, and select Edit Agent.
Scroll down to the Reporting Manager field and enter the approver’s name.
Click on Update to save the changes.

Follow the steps below to map the Department Head for the service request’s department.
Navigate to Admin. Under User Management, select the Departments option.
Select the rervice request’s department and click the Edit button.
Enter the approver’s name or email address in the Department Head field.
Click on Update to save the changes.

Check for email delivery issues.
The email delivery time can vary based on your ISP or connection. Also, a spam filter may catch your email content on your mail server. You can contact your email administrator, to check the logs of all inbound emails to see if it's being delivered, rejected, or marked as spam.
If you still face the issue after performing these checks, please reach out to support@freshservice.com, and our support specialist will assist you in resolving the issue.

