
 Community
 Video Library
 Agent Training
 Freshservice
 Freshdesk
 Freshchat
 Freshcaller
 Freshsales
 Freshteam
 Freshworks Neo
 Freshsurvey
 Freshservice for MSP
 You've landed on our support article. If you are looking to learn about automations in Freshservice, check out our IT Automations page.
Workflow Automator allows you to automate all the repetitive tasks and manual processes that you perform on a daily basis. This includes processes like assigning tickets to the right agent or team, following up on approval, and so on. With the Workflow Automator, you can create a workflow using simple drag-and-drop actions.
Components of a workflow
A workflow is made up of these components:
- Event - defines when a workflow has to be triggered
- Condition - defines the parameter(s) that need to be validated during the execution of a workflow
- Action - The outcome of the workflow
- Reader Node - The reader nodes are used to read and reference information from the custom objects into the workflows
A workflow is not limited to one condition or one action. You can add multiple conditions and actions as documented in the Common Scenarios section.
TABLE OF CONTENTS
- Create a workflow
- Manage workflows
- Common scenarios
- What are Reader Nodes?
- JSON Parser Node
- Advanced workflow capabilities & constraints
- Troubleshooting automations
Create a workflow
To create a new automated workflow from scratch, follow these steps:
Go to Admin > Automation & Productivity > Workflow Automator.
Click Create and select Workflow from the dropdown.

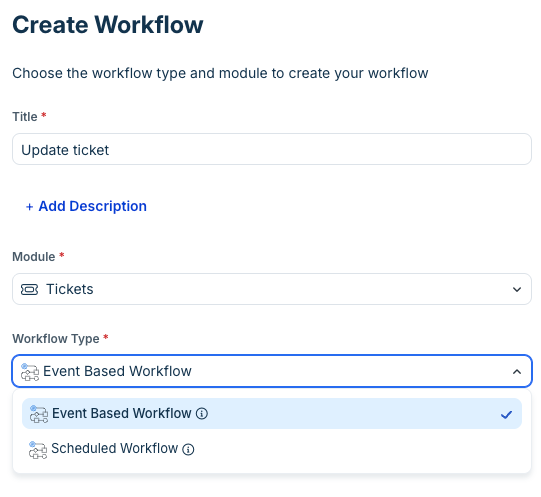
Enter a title and description for the workflow to help other admins understand its function.
Select the target module for your workflow (for example, select Ticket if you are creating a ticket workflow).
Select one of the workflow type from the dropdown and click Create:
Event Based Workflow
Scheduled Workflow
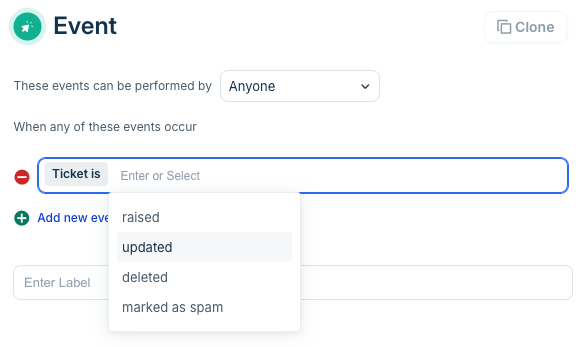
In the Event pane, select a node to define when the workflow should be triggered, select the specific trigger conditions, and click Done.
- To add conditions and actions:
- Drag the Condition node to define criteria for triggering the workflow. To add more parameters, click Add New Condition.
- Drag the Action node to configure actions that occur when the conditions are met. Include multiple conditions and actions to handle various scenarios.
Click Activate on the top right corner to enable the workflow. The automator automatically saves your progress as a draft while you build.
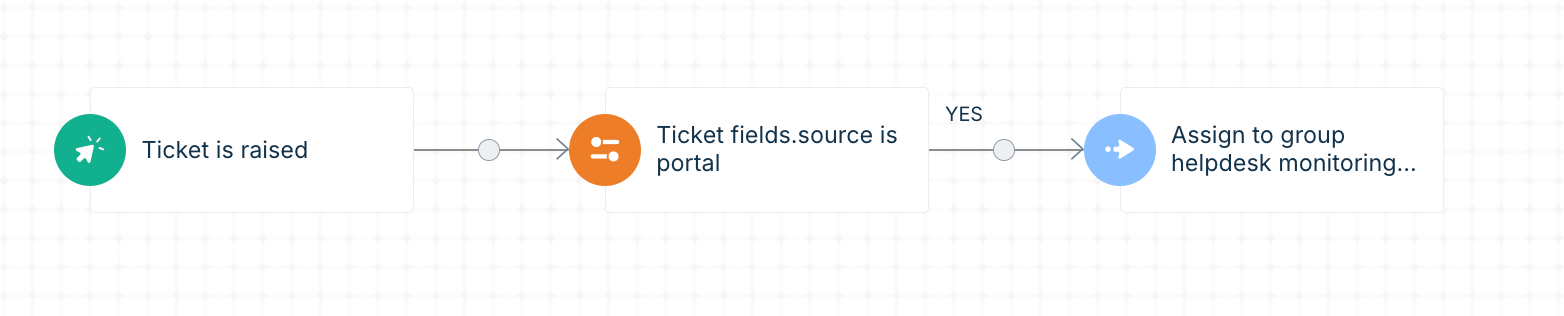
Example Use Case: Web Portal Tickets
Tickets created from the web portal may not immediately assign to a default agent group. To resolve this:
Set your Event to when a ticket is raised.
Set your Condition specifying that the source of the ticket is Portal.
Add an Action node to assign the ticket to the required agent group (e.g., Helpdesk Monitoring). This will ensure standard assignment email notifications are correctly triggered.
Note: To explore more scenarios, see Common scenarios.
To gain more clarity on how to set up a workflow, watch the video.
Manage workflows
This section guides you through creating, editing, cloning, and managing the lifecycle of your workflows.
Saving a workflow
As you keep adding conditions and actions, the automator will automatically save the workflow as a draft. If you wish to activate the workflow, you can click on Activate.
Editing a workflow
You can click any part of a workflow: an event, a condition, or an action and make changes to the selected conditions and parameters.
Deleting a workflow
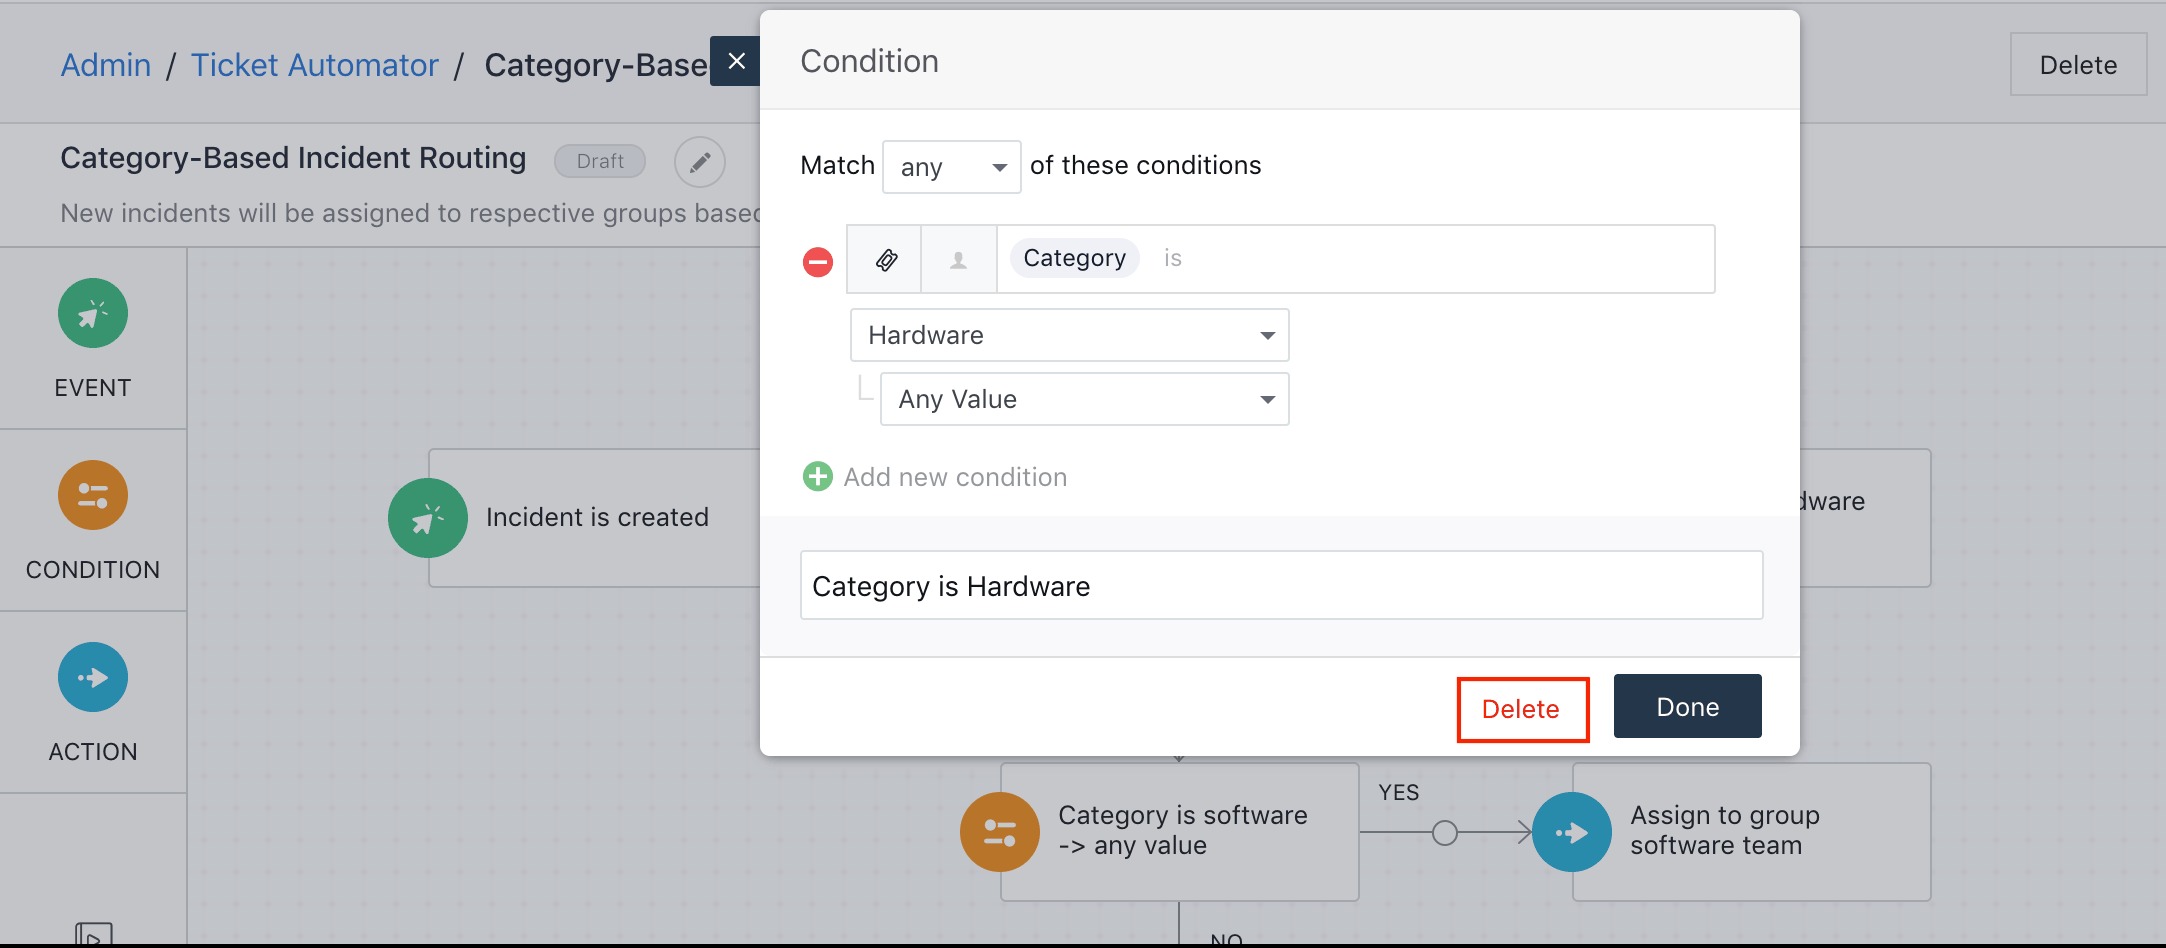
You can now choose to delete either a YES/ NO condition branch (or) delete an action in a workflow.
Cloning a workflow
You can clone an existing workflow and make necessary changes to it. To clone a workflow,
- Go to Settings > Workflow Automator
- Select the workflow which you would like to clone and click on Clone.
- Provide a name for the new workflow and enter a description.
- Now, the workflow will be cloned under a new name.
- Make necessary changes to the event, condition, or action and save your workflow.
Cloning a Node
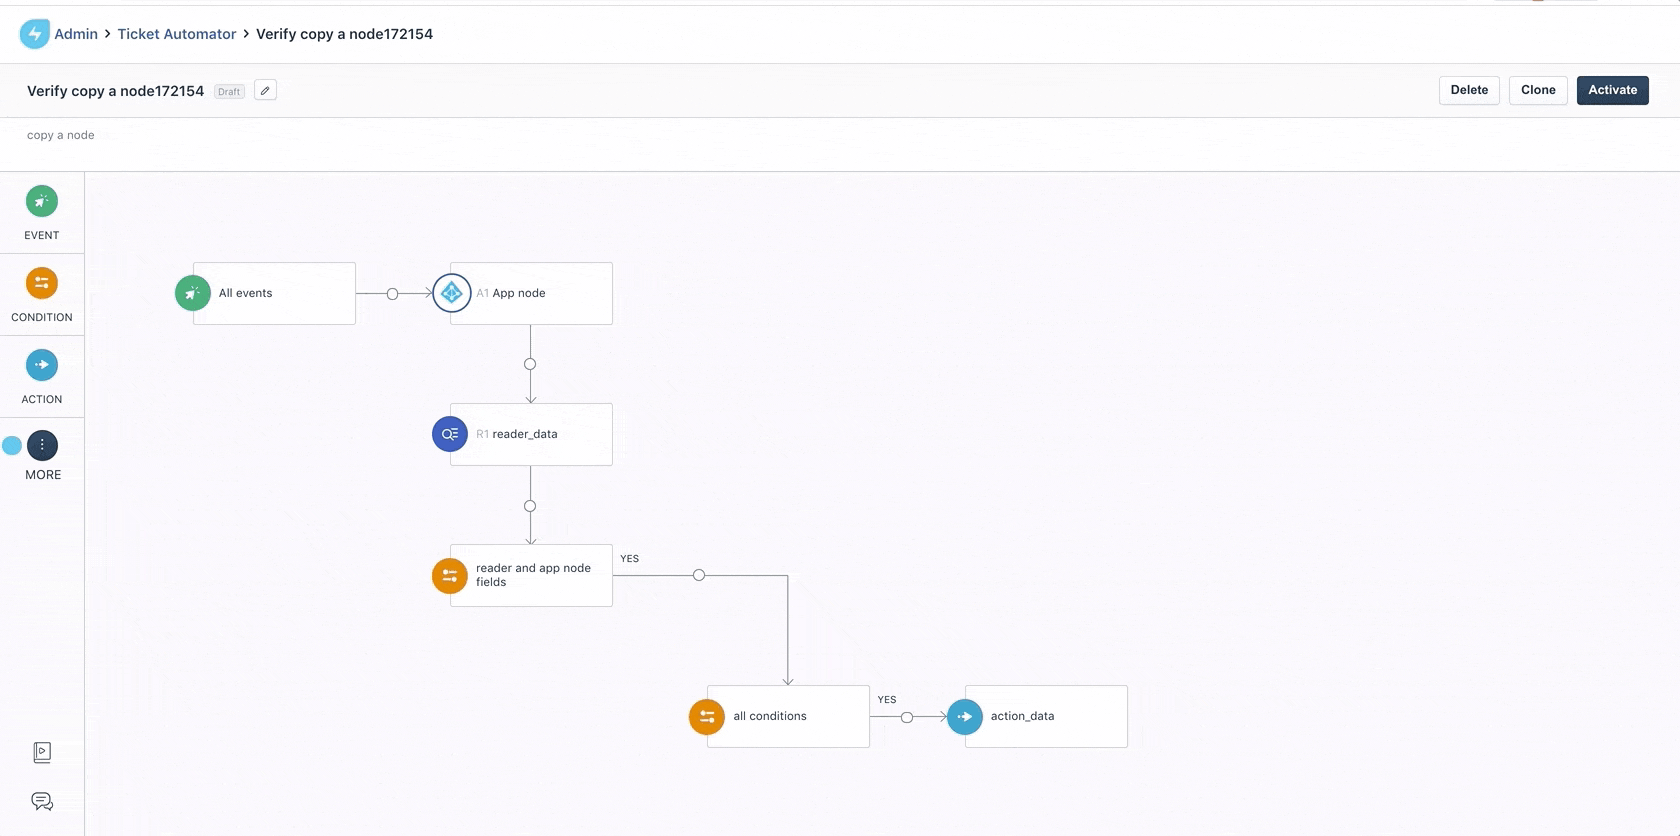
Configuring workflows for different business use cases might require multiple nodes with almost the same values and manually creating these nodes repeatedly is a tedious process.
You can now Copy/Clone a Node and configure automation faster by being able to copy multiple nodes with the same value in a click. The provision is applicable to all event, condition, action, app and reader nodes.
To clone a node:
- Hover on a node or even after opening the side model you will notice a 'Clone’ button.
- Click the button to copy the entire node data & drop it wherever you want it within the same workflow.
- Once copied it will act as a normal node.
Enabling/Disabling a workflow
A workflow, when created, will be saved as a draft. If you wish to activate the workflow, click on the Save and Activate button on the top right corner. The workflow will now be activated. You can then use the toggle switch to enable/disable the workflow.
Common scenarios
The above mentioned steps will help you in creating a workflow. But, in order to understand the level of flexibility offered by the Workflow Automator, let’s take a look at a few examples.
Scenario 1: Routing tickets to a specific team
When you need to route all hardware related tickets to a dedicated hardware team. To convert this into a workflow:
- Go to Admin > Automation & Productivity > Workflow Automator > Create > Workflow > Ticket.
- Enter a name and description for the workflow.
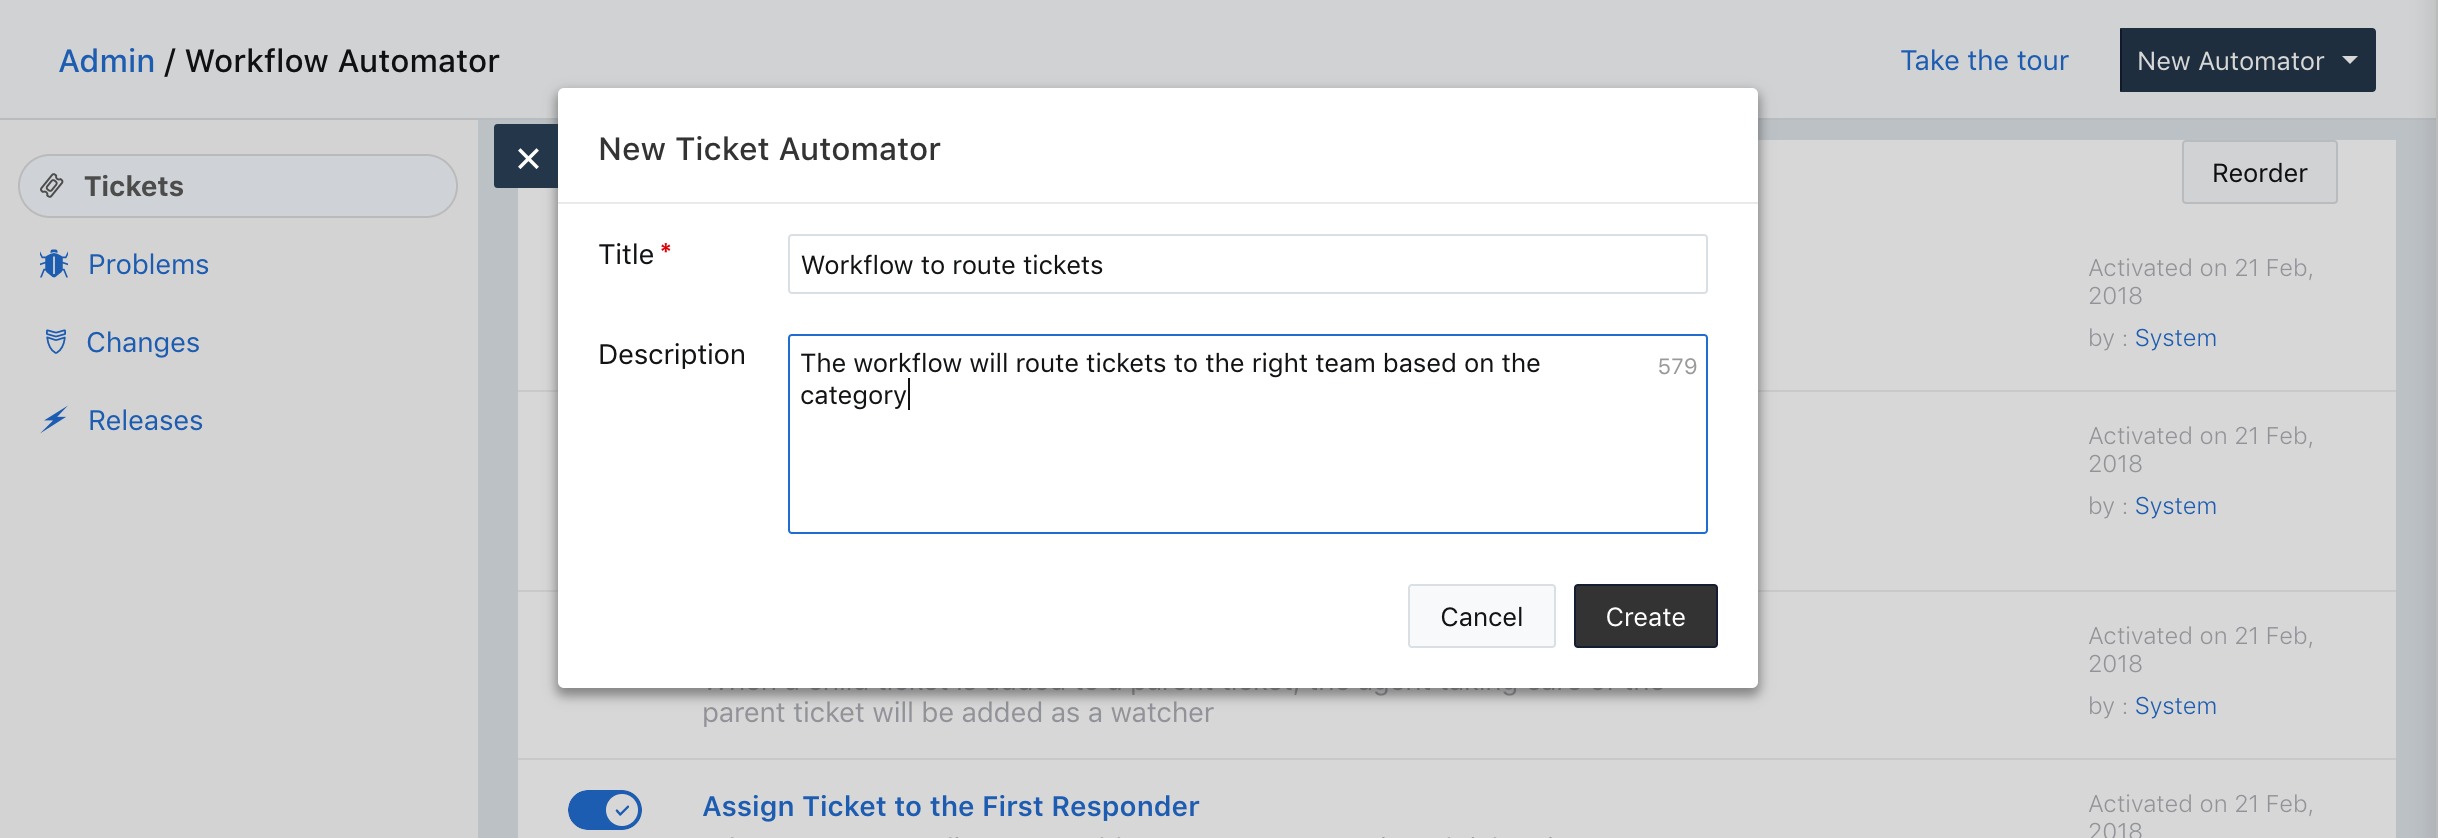
- Select the options to trigger the workflow whenever a ticket is created. Select the options Ticket is and Raised.
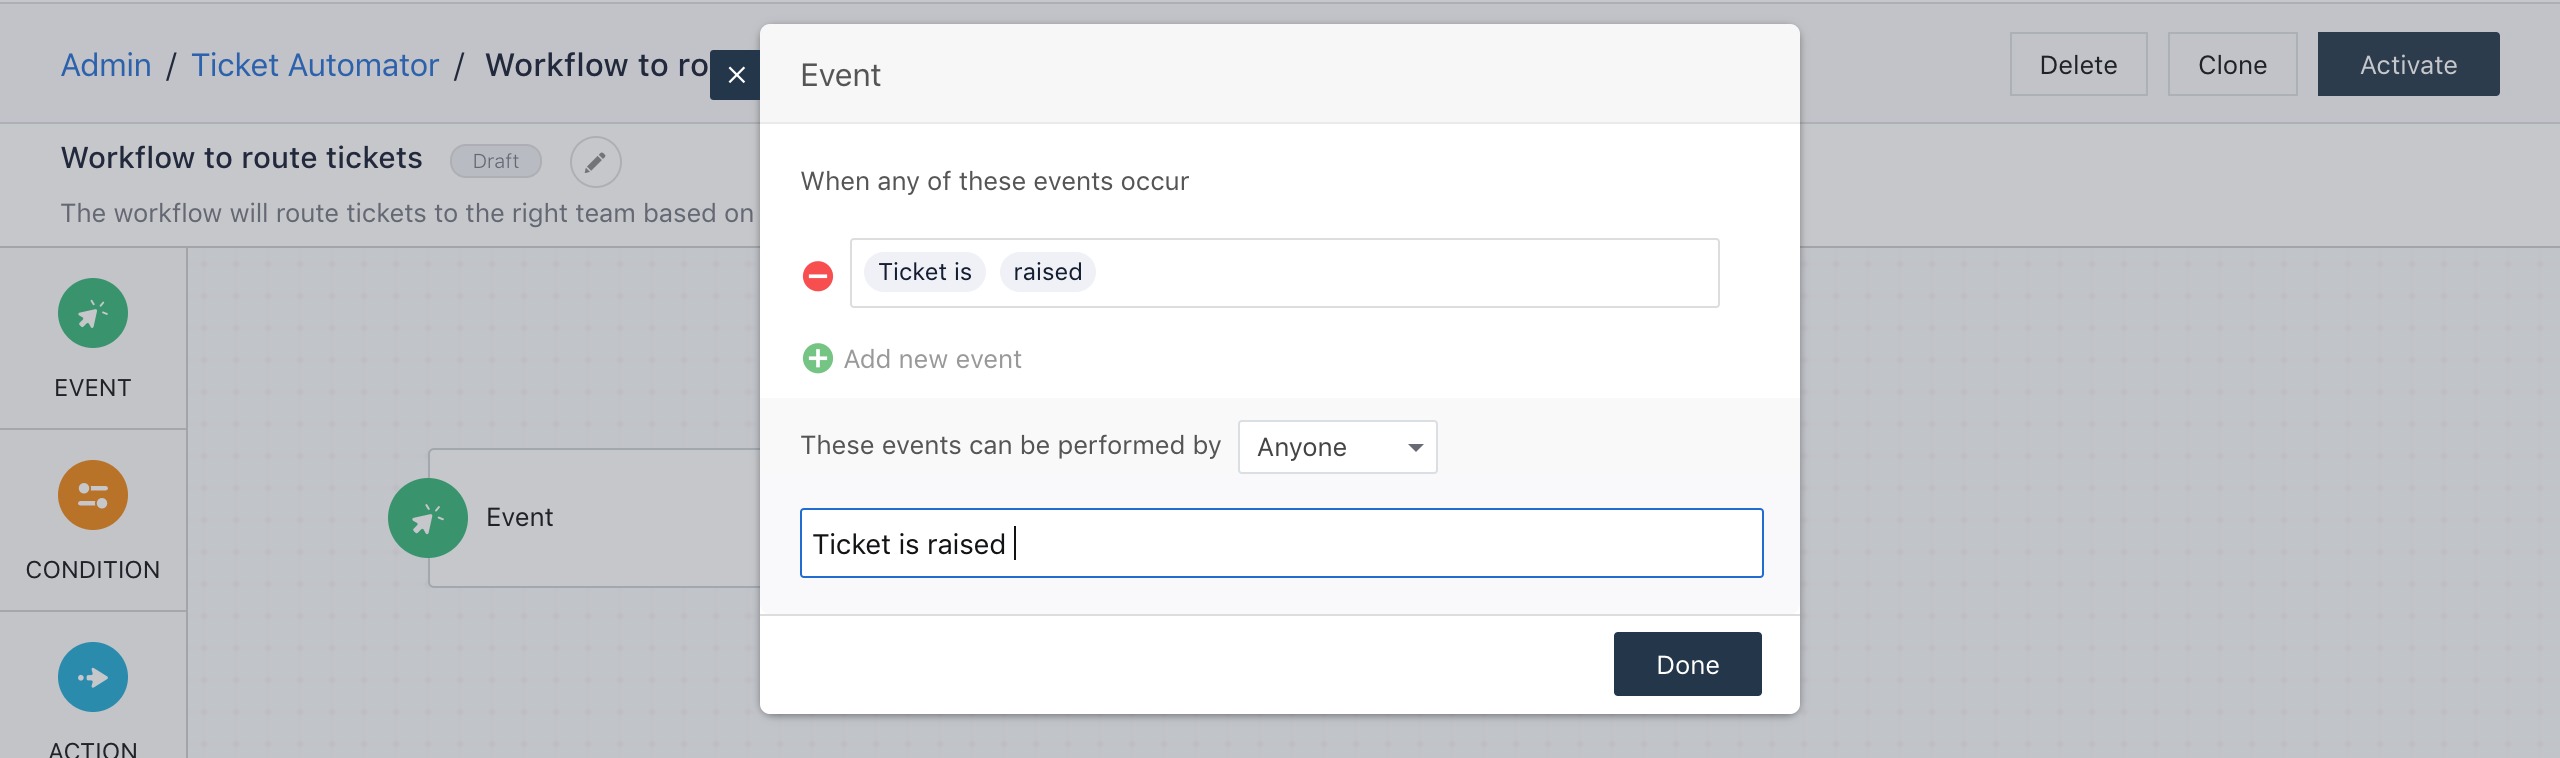
- Enter a label to the event and click Done.
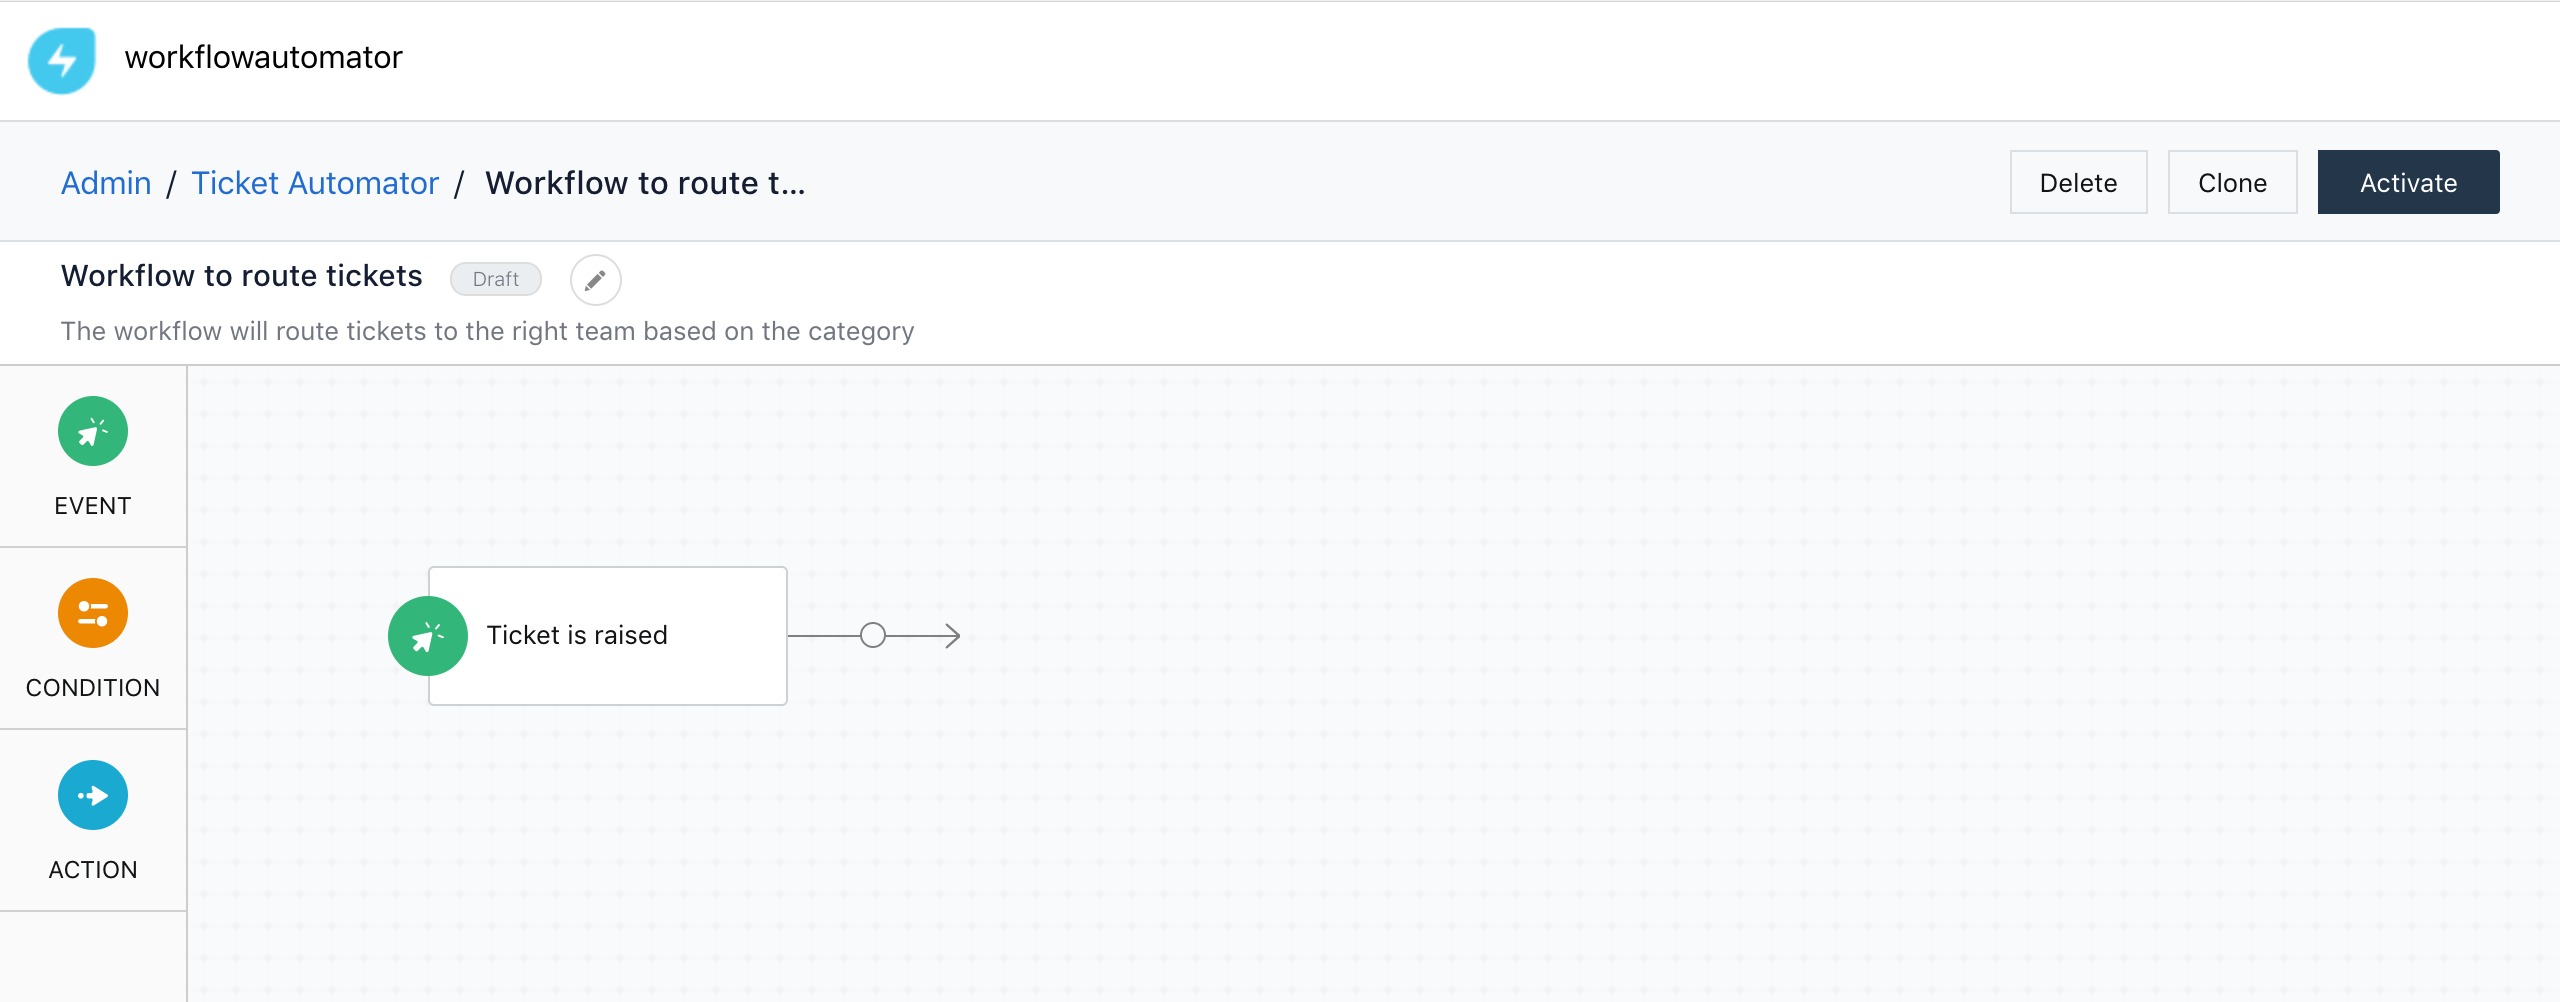
- Drag a condition icon and place it next to the event.
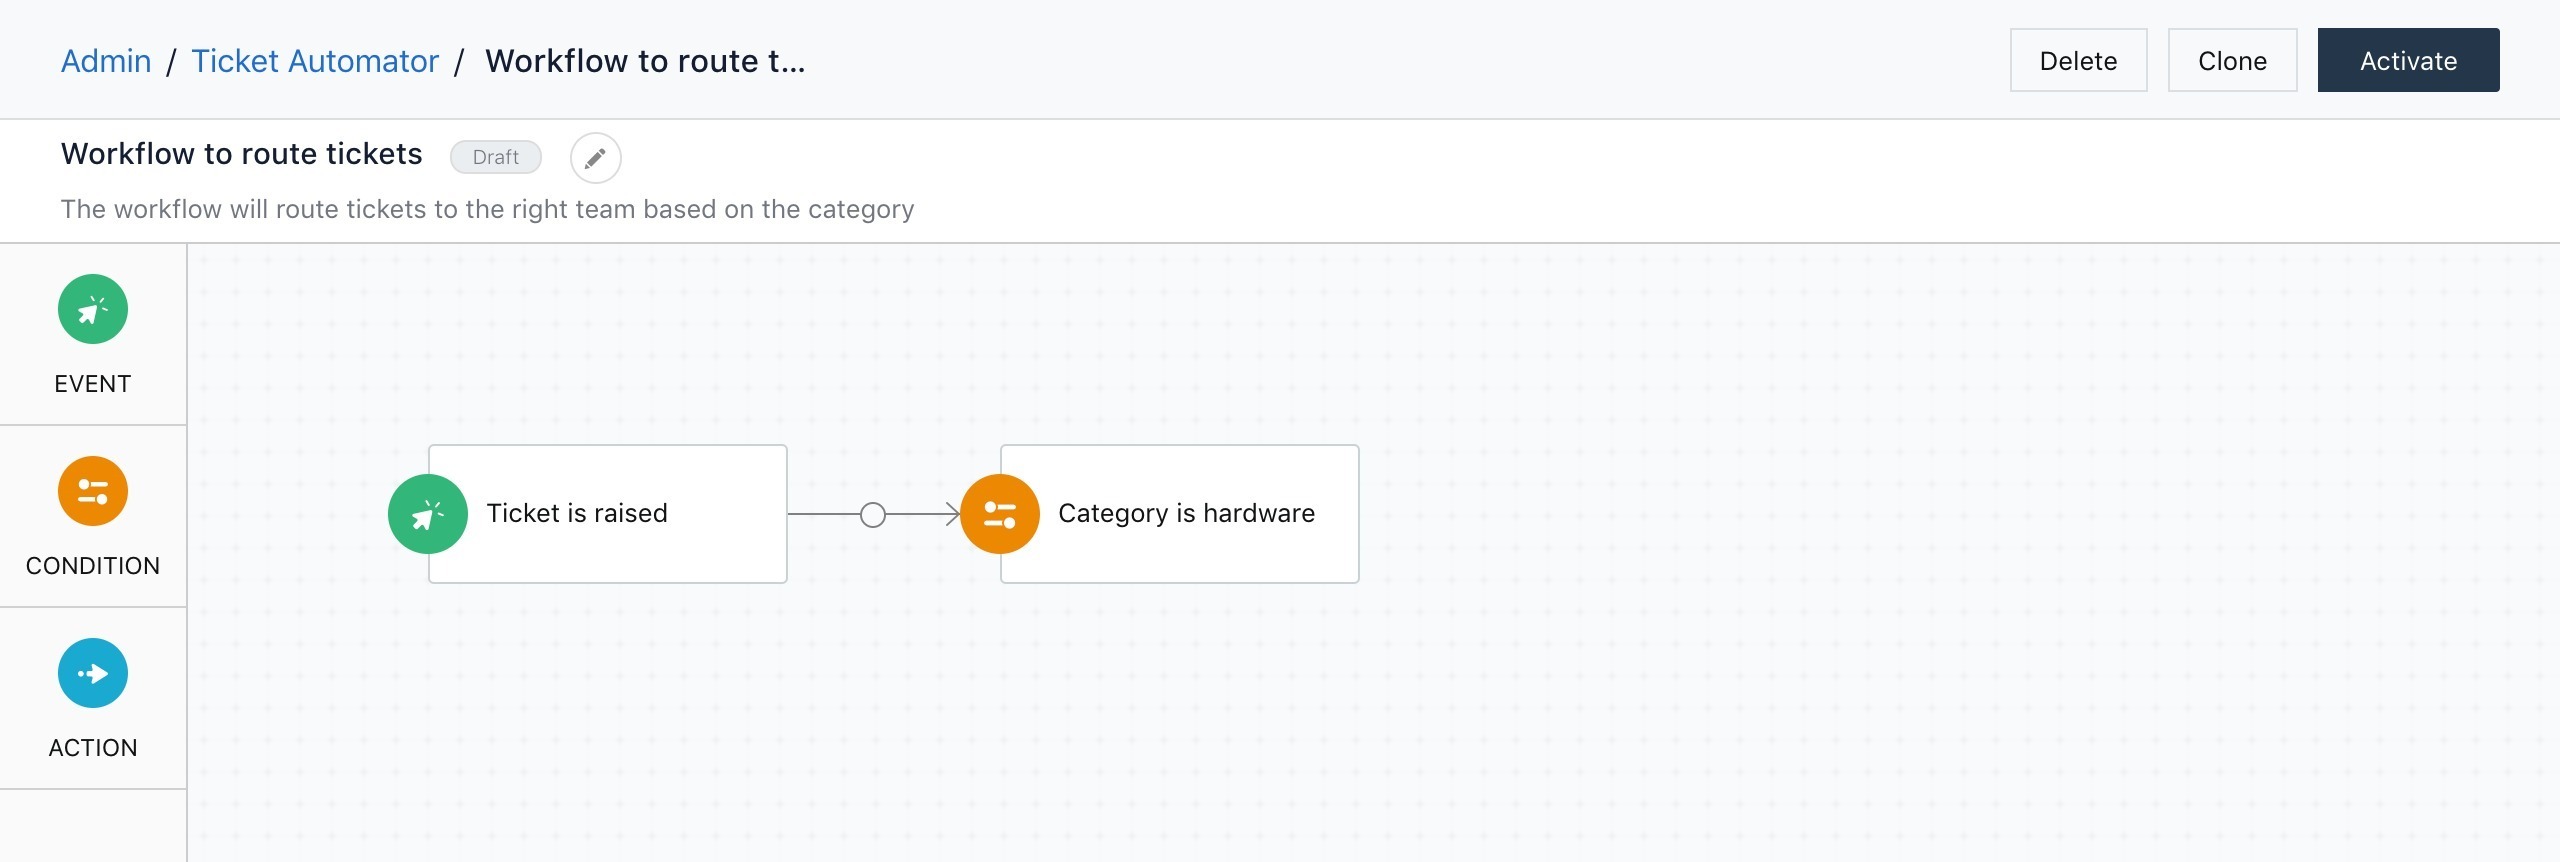
- Select the parameter if Category is and choose the value Hardware.
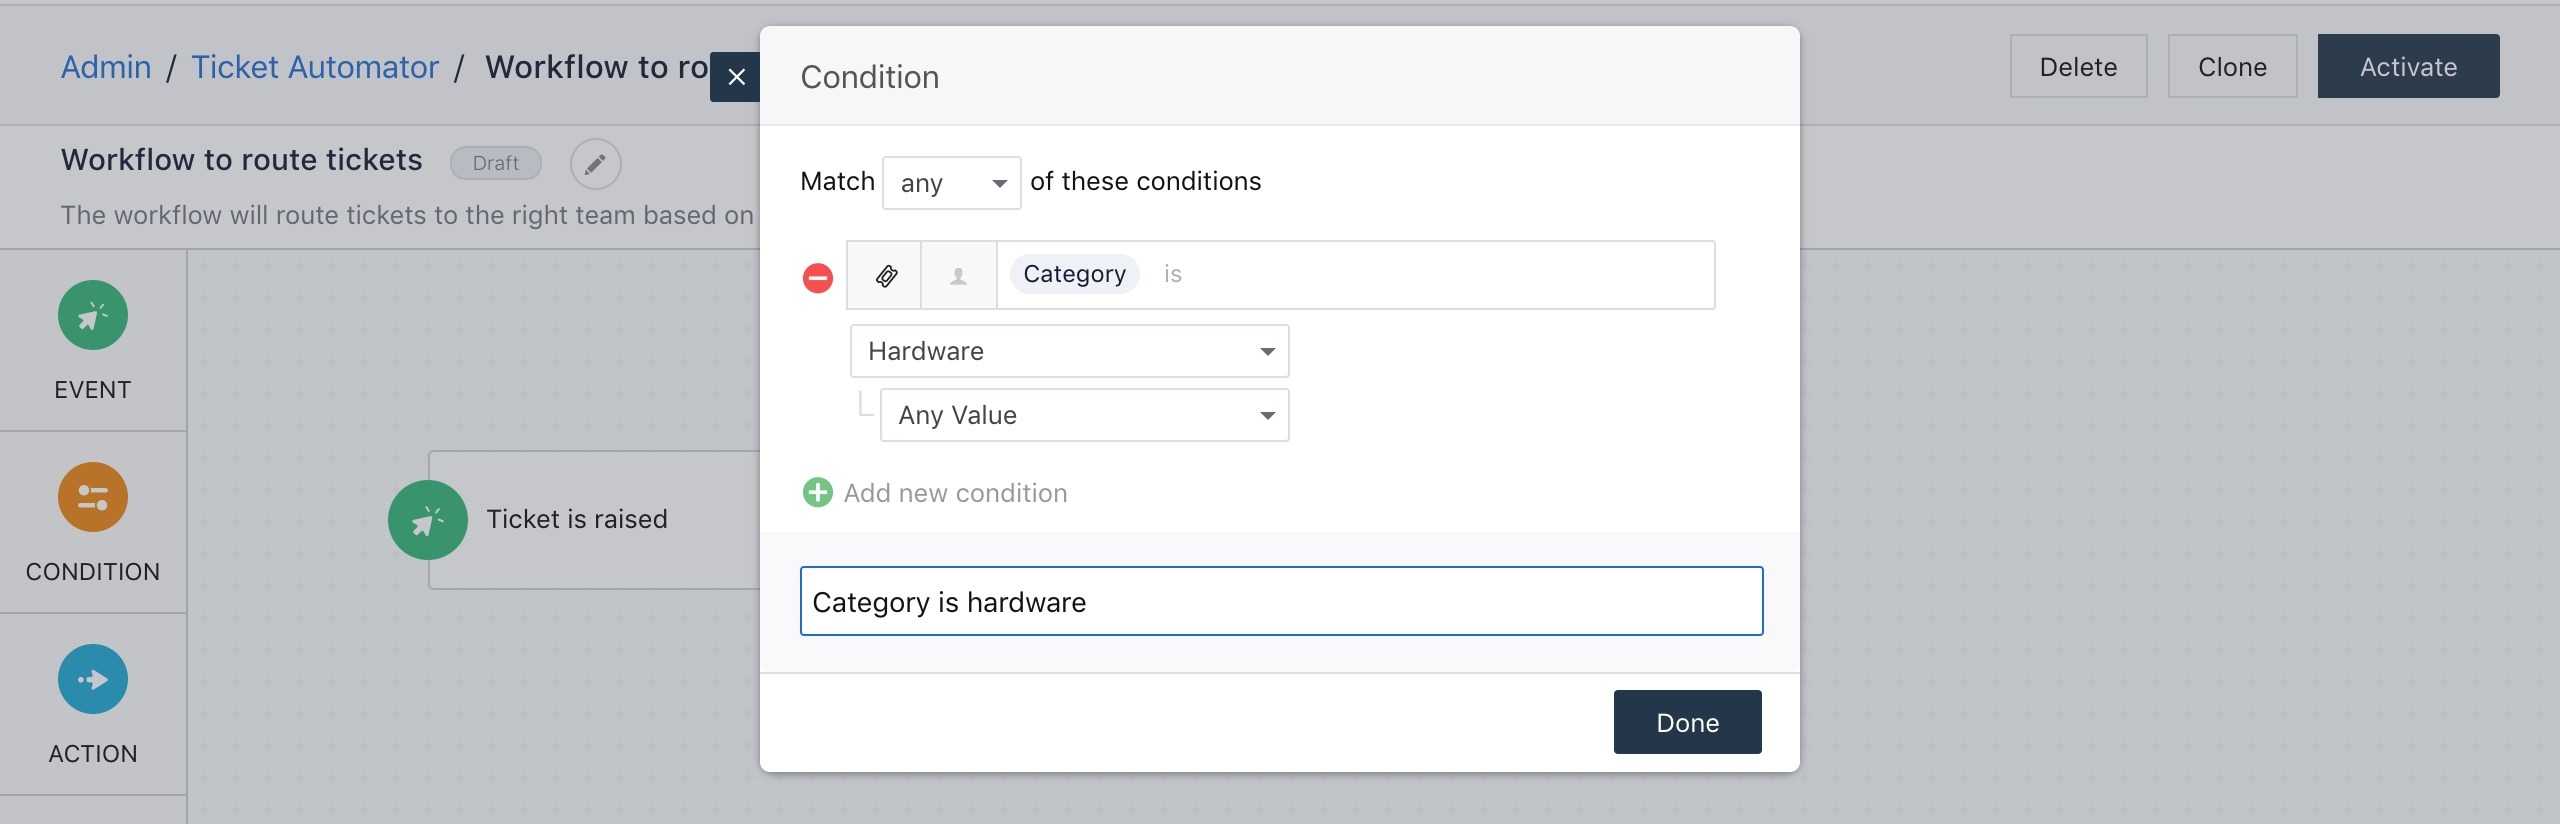
- Enter a label for the condition and click Done.
- Drag an action and place it next to the condition.
- Select the option Assign to group and choose Hardware Team.
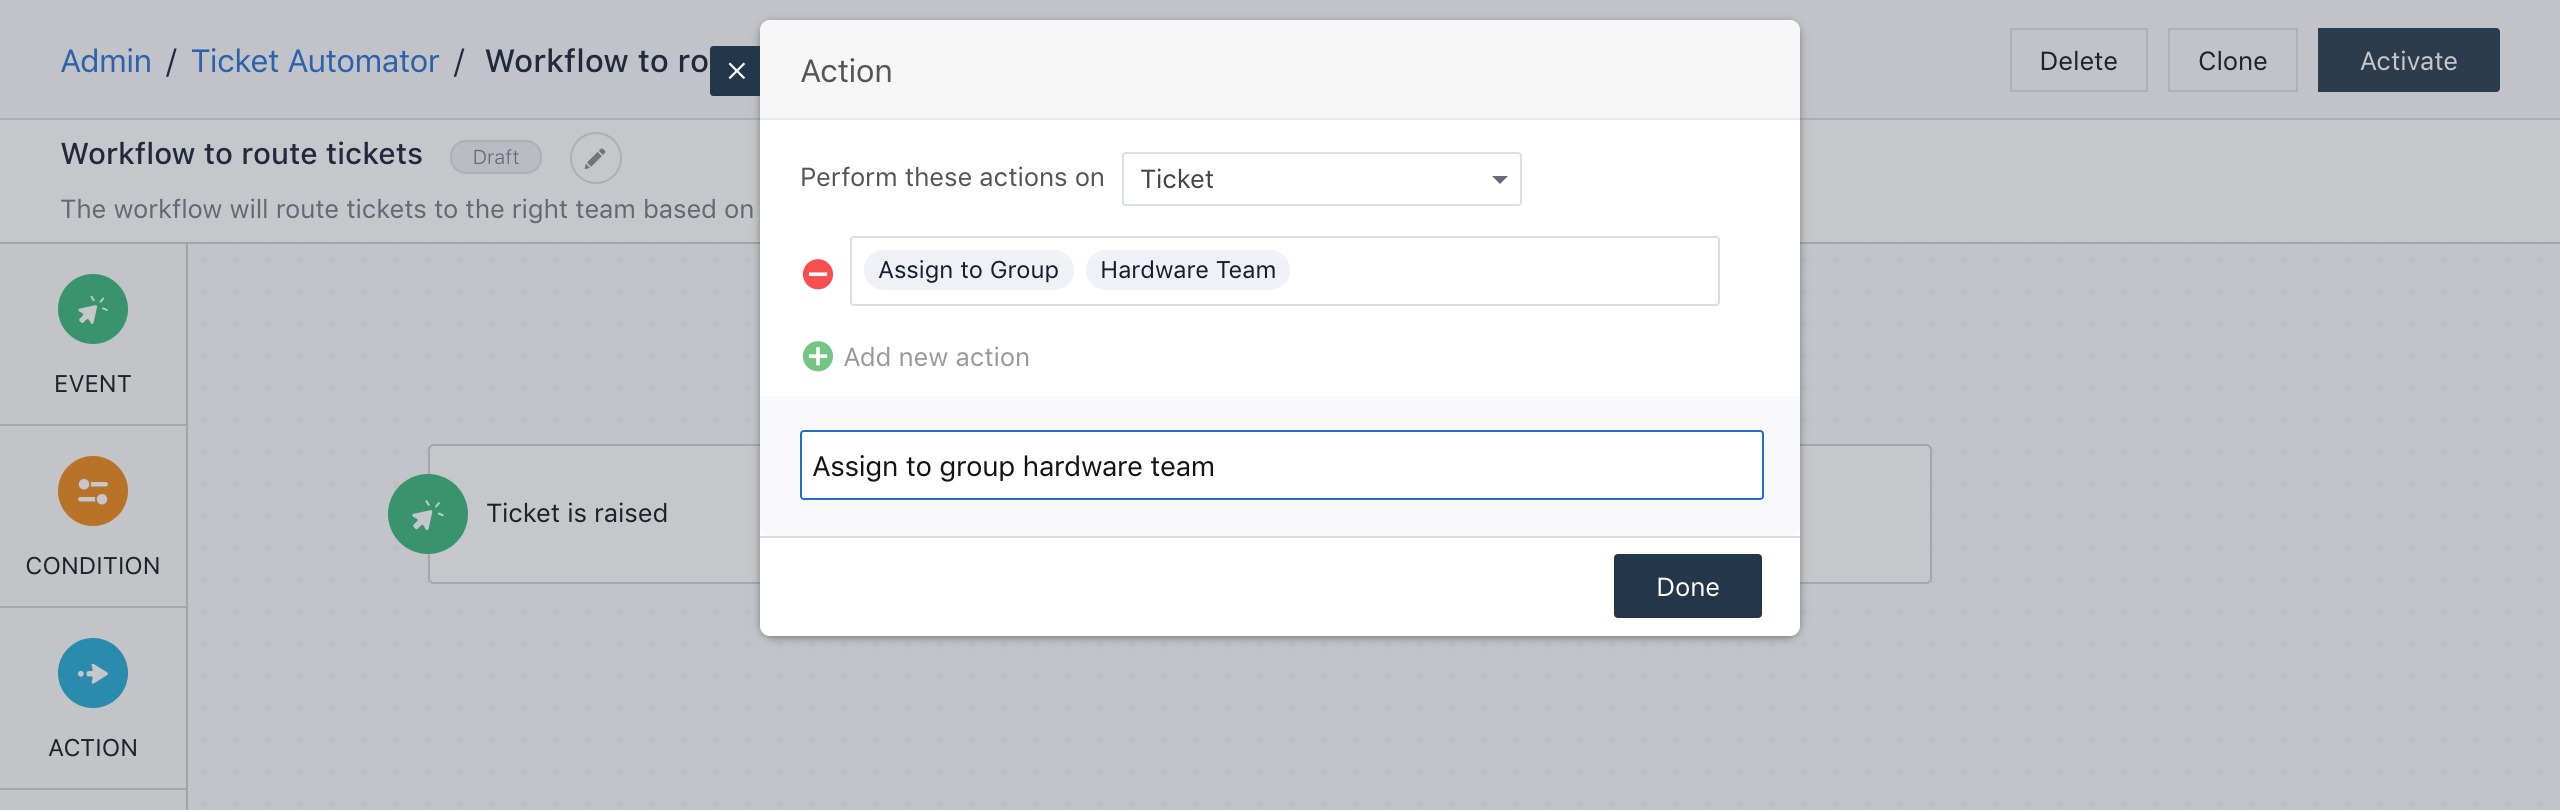
- Enter a label for the condition and click Done.
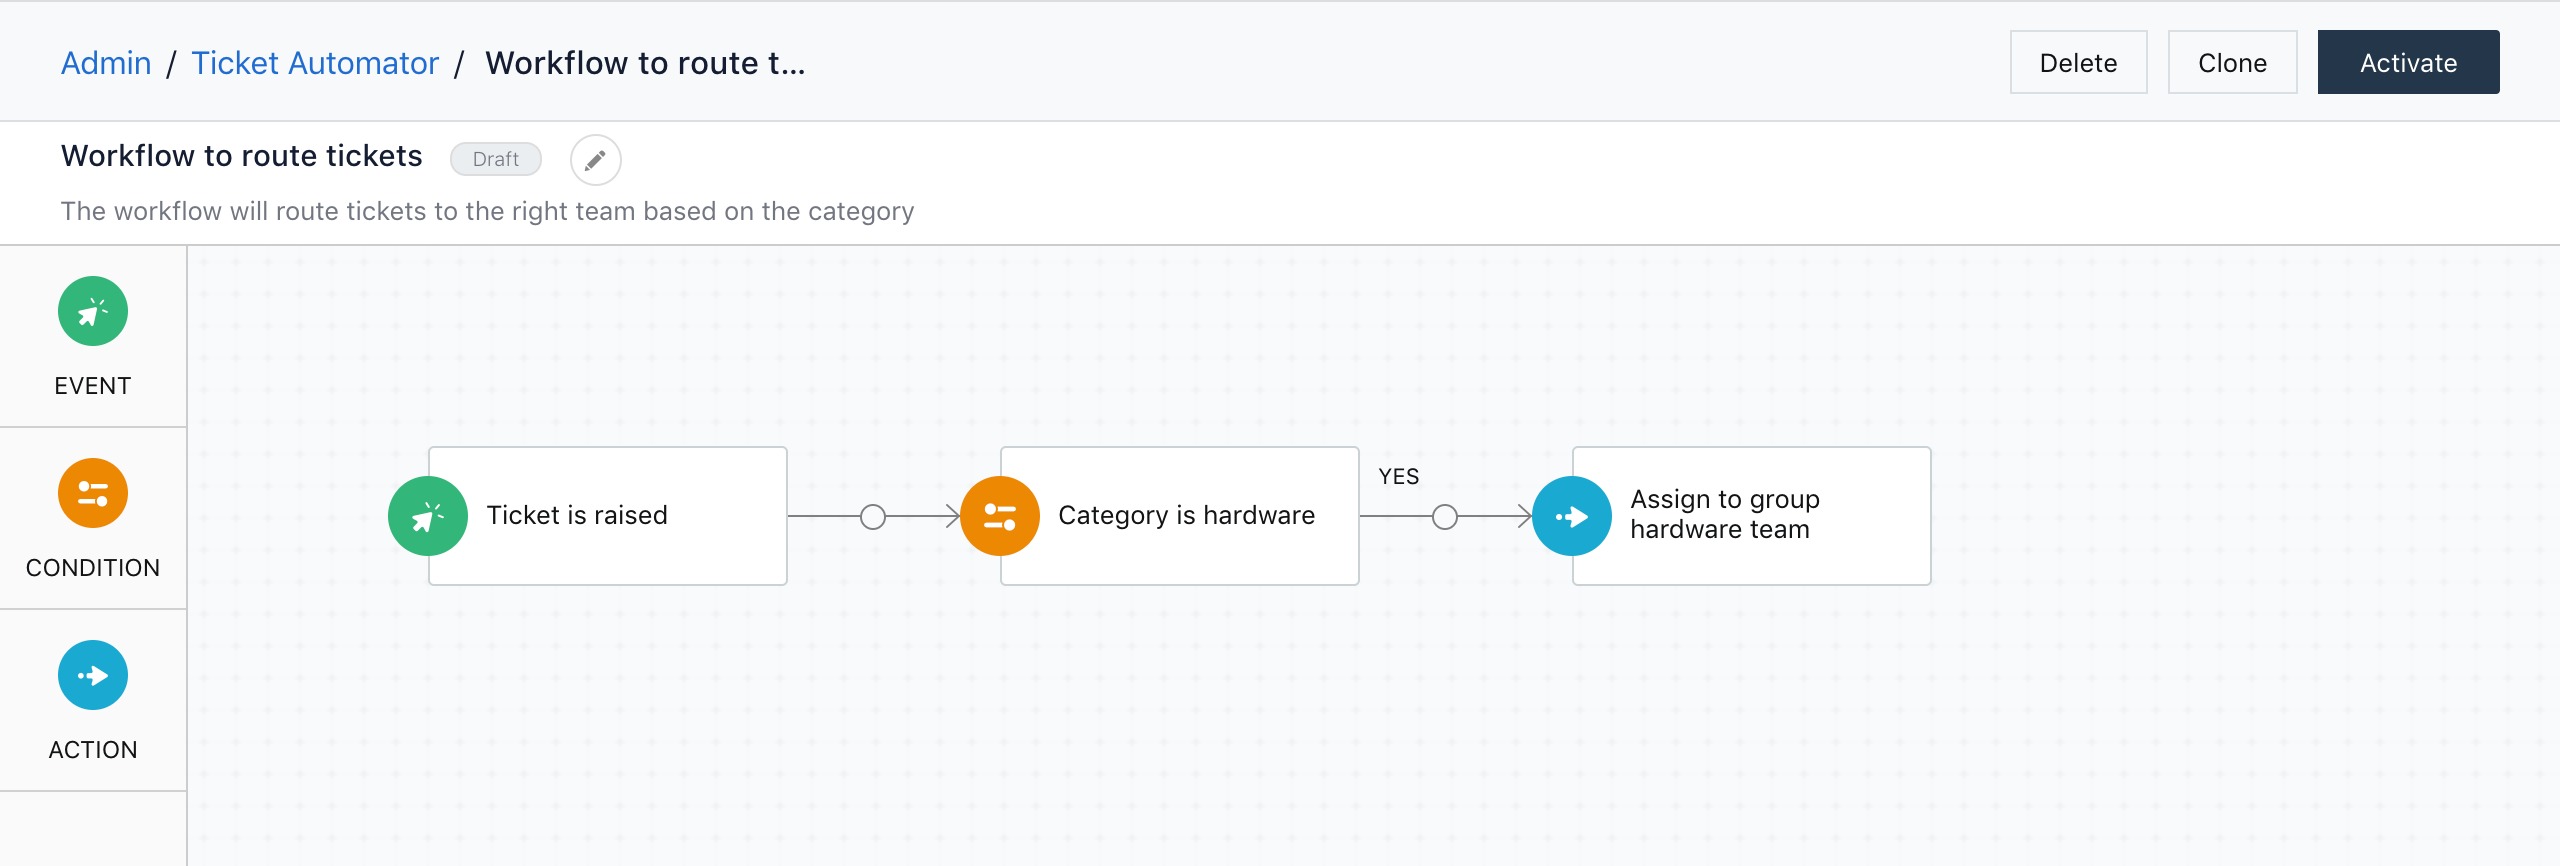
Now, the workflow to assign all hardware related tickets to the hardware team is ready. The workflow will be triggered when a ticket is created and it will check whether the category is ‘hardware’. If yes, then the ticket will be assigned to the hardware to the hardware team.
Note: Freshservice does not have an option to directly set a rule that limits the number of tickets assigned to an agent. However, ticket distribution can be managed through automation and group settings. Use Workflow Automator to create rules that restrict ticket assignments based on conditions or criteria such as category or priority, which can help control workload indirectly. Enable Round Robin Assignment within Agent Groups to automatically distribute tickets across all agents in a group. The auto ticket assignment feature in agent groups can be used to automate ticket distribution, although it will not prevent agents from manually assigning tickets to themselves.
Scenario 2: Routing tickets to different teams
Let’s take a scenario where you want to assign hardware, software, and network-related tickets to hardware, software, and network teams. Let’s take the workflow discussed in the previous scenario and see how we can customize it assign tickets to multiple teams.
Follow the below-mentioned steps to expand the previous workflow to accomplish more.
- Drag a condition and place it at the bottom of the previously existing condition.
- Set the parameter if Category is and choose the value Software.

- Provide a label and click Done.
- Drag an action and place it next to the condition.
- Select the option Assign to group and choose Software Team.

- You can follow the same step to assign network related issues to the network team.

Scenario 3: Setting up Multi-stage approval
Consider a scenario where you want to set up a multi-stage approval process. Whenever an employee requests a laptop priced higher than $1500 dollars, the request needs approval from the employee’s reporting manager and the company’s IT head.
To set up this workflow:
- Set the workflow to be triggered when a ticket is created.
- Add a condition and set the parameter when Type is Service Request.
- Add another condition and choose the parameters When a service request includes any Apple Macbook
- Choose Cost under sub condition and enter the value 1500.

- Add an action and choose the options Send approval email to and Reporting Manager. Provide a label and click Done.
- This completes setting up the first stage of approval.
- To add the second stage of approval, add another condition and choose the parameters when Request Approval is Approved.
- Add another action next to the newly added condition and choose the option Send approval email to and IT head.
- In the event of notifying the requester through email, you can add another action and select the Send email to option. Enter the subject, add recipients in the Cc and Bcc fields, compose the email content, and include placeholders where necessary. The Send email to group option is available for ticket, problem and
- Provide a label and click Done.

What are Reader Nodes?
Let’s say you want to route your service request based on the service item requested.

The reader nodes are used to read and reference information from the custom objects into the workflows. You can create conditions based on which a record is read into workflows from the custom objects.
For example, if a service request was raised requesting for a Macbook, the reader node can read the record from the business object by matching the service item information, and returns the right agent groups and approvers to route the request to.
Note:
- The reader node returns only one record. If multiple records match your conditions the reader node returns only the first record. You can choose a sorting order to ensure that the first record is picked right in such conditions.
- You can set up only up to 10 filter by conditions in the reader node. Please note that, if you are using dependent fields like category, every dependent field is considered as a unique condition.
To learn more about custom objects and reader nodes, you can refer to the articles here.
Before Using Reader Node Click on the image to zoom in | After Using Reader Nodes Click on the image to zoom in |
 |  |
JSON Parser Node
The JSON Parser node enables you to parse any JSON payload within the context of the workflow and use the outputs with subsequent conditions and actions.

You can use the JSON Parser node right away to work with JSON outputs from app actions that get custom attributes from GSuite, Okta and JIRA. You will also be able to use this to parse rest API responses within the workflow automation. Learn More

Image: Left side: The source of the payload and a sample JSON payload is configured
Right side: Outputs can be generated automatically or configured manually using JSON path expressions.

Image: The outputs configured in the JSON parser node can be referenced and used in the subsequent nodes
Freshservice API
You can refer to the Freshservice API documentation for guidance on performing API calls such as GET, PUT, POST, and DELETE in web requests or webhook.
Advanced workflow capabilities & constraints
When dealing with complex logic, be aware of the following platform behaviors:
Structure & APIs:
Freshservice workflows do not support loop-back or rejoining flows. Separate condition flows cannot rejoin the main flow.
To adjust flow layouts, use the clone node feature to duplicate and drag necessary nodes, as direct rearranging is not supported.
When copying expressions, ensure the expected output is set to a "number" to avoid syntax errors.
For API GET requests ([your-domain][.freshworks.com/api/v2/tickets/](https://.freshworks.com/api/v2/tickets/){{ticket.id_numeric}}), set the web request password to "x".
Post-Closure Delays: If you need a workflow to execute days after a ticket is closed (e.g., creating a follow-up 6 days later), a standard Timer node will not trigger properly. Replace it with an Expression node configured to check the specific time elapsed since the status change.
Troubleshooting automations
- Execution Timing: Workflows apply logic at the exact timestamp of execution. If you update a workflow, but a ticket was submitted before the change took effect, it will route based on the old rules.
- Keyword Failures: If a subject-keyword automation stops working, check for extra spaces or special characters in the text matching rule. If another workflow is intercepting it, reorder the workflow list to prioritize the keyword automation higher in the queue. If your workflows are not operating as expected, go to Admin > Workflow Automator > Execution Logs to see exactly which rules triggered or failed.
- Configuration Errors: If you suspect a conditional node is fundamentally broken and the logs do not explain why, please raise a support ticket with Freshservice to investigate backend configuration errors.