Community
 Video Library
 Agent Training
 Freshservice
 Freshdesk
 Freshchat
 Freshcaller
 Freshsales
 Freshteam
 Freshworks Neo
 Freshsurvey
 Freshservice for MSP
 The Email AI Agent empowers support teams to automatically respond to incoming emails using context-aware, article-based answers. Before the agent can actively respond to tickets, it must be properly configured. This article describes the configuration step, from defining trigger conditions to setting response languages, customizing templates, and enabling the Email AI Agent for production use.
TABLE OF CONTENTS
- Create a new Email AI agent
- Test the agent
- Deploy the agent
- Configure rule-based deployment
- Configure workflow-based deployment
Create a new Email AI agent
The Email AI Agent setup process in AI Agent Studio lets you customize how the agent learns, acts, and communicates across multiple workspaces. Create an email AI agent using the following steps:
Access AI Agent Studio
Build - Knowledge, Instructions, Configurations
Test
Deploy
Access AI Agent Studio
To access the Email agent follow these steps:
Go to AI Agent Studio from the left navigation.
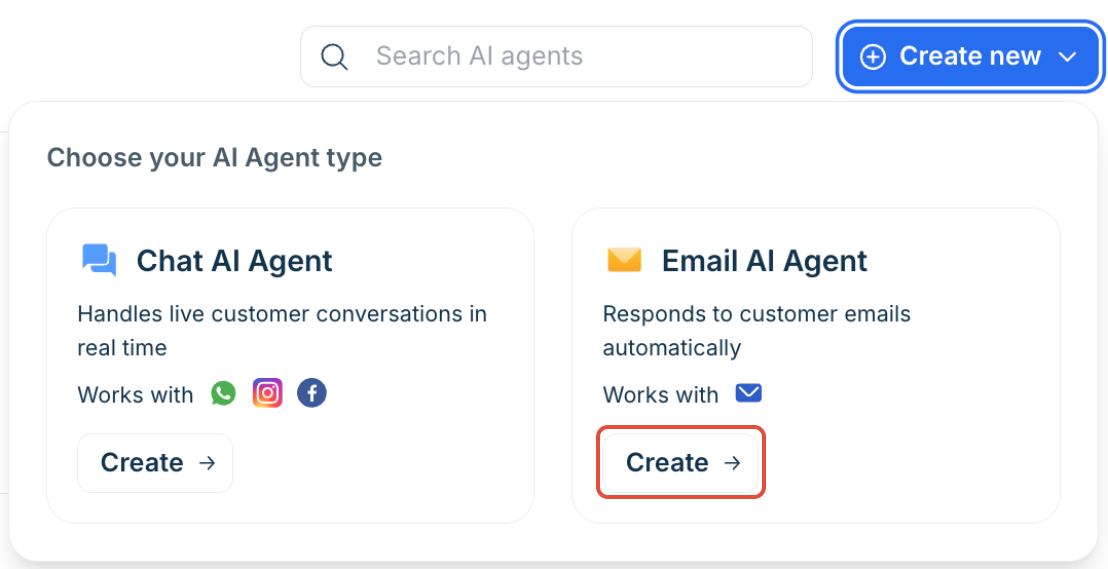
On the AI Agents list page, select Create new and click Create under Email AI Agent.
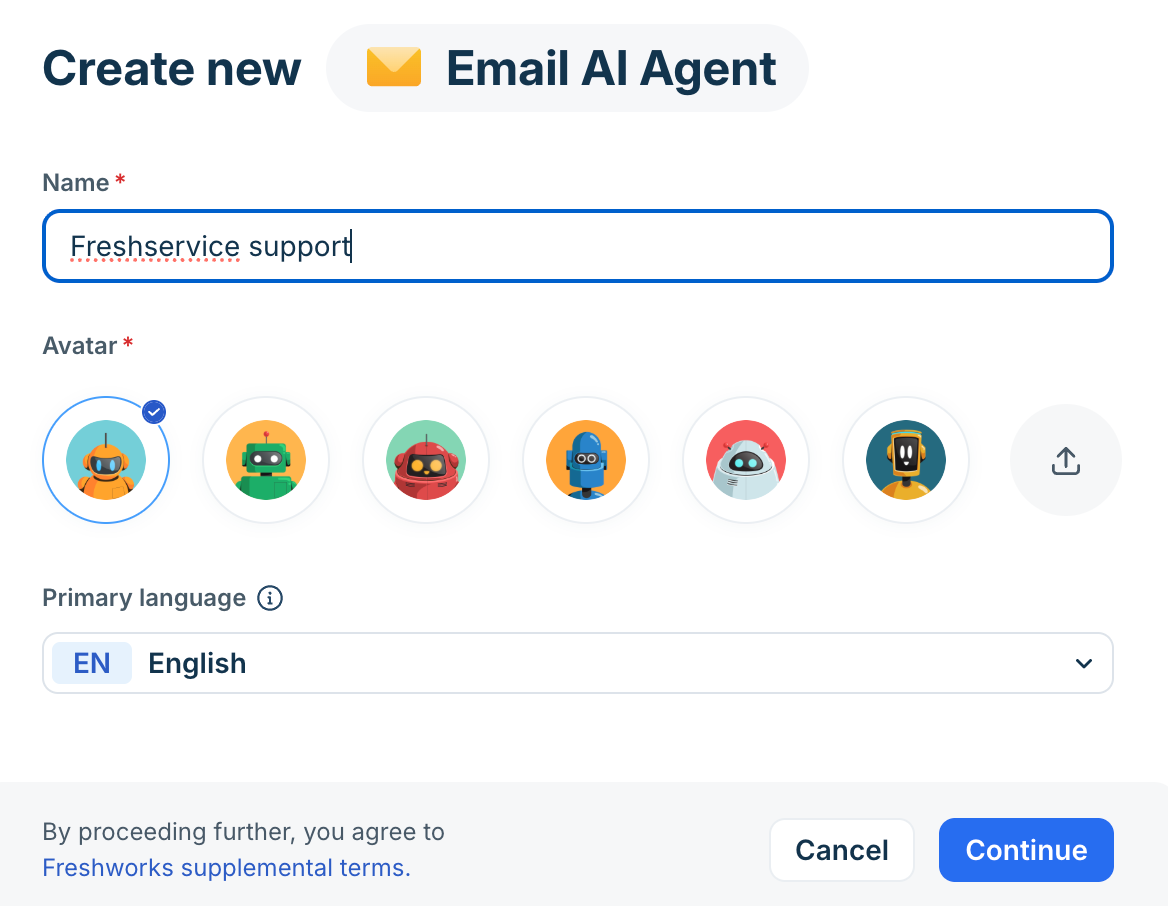
Enter a name and select an avatar for the agent. You can also upload your own avatar. The name is internal and does not appear in customer emails.
Select your Primary language and click Continue. The agent is created in an Inactive state.
Note: A combined maximum of 50 agents (chat and email) is allowed per account. Once the limit is reached, the Create new button is disabled. Archive or delete an existing agent to create a new one.
Build the agent
Building an agent involves four primary setup areas that define its intelligence, capabilities, operational rules, and response behavior. The following steps are involved in building an Email AI Agent.
How to build an Email AI Agent
Follow these steps to navigate Agent Studio and set up the core components of your Email AI Agent.
Go to Admin > Agent Studio > AI Agents.
Click Create new.
Under the Build menu go to the following pages to configure the agent:
Knowledge: Connect solution articles, files, URLs, and apps to establish the agent's factual learning scope. For more information, see Connect your knowledge sources to the AI Agent.
Service Catalog: Enable service request fulfillment capabilities across specific workspaces and categories. For more information, see Connect your service catalog to the AI Agent.
Instructions: Define system prompts, persona guidelines, and response boundaries to control agent tone and logic. For more information, see Customize the agent persona and tone of voice.
Configurations: Set up handover routing, business hours rules, spam management, and communication footers. For more information, see Configure agent behavior and human handover.
Select Test in the left menu to evaluate agent responses against sample queries before deployment.
Select Deploy to activate the agent in your required workspace.
Click Save.
Test the agent
Once you have created the agent, navigate to Test in the left navigation. Testing your email agent before mapping it to a live mailbox is recommended. The Test section has two tools:
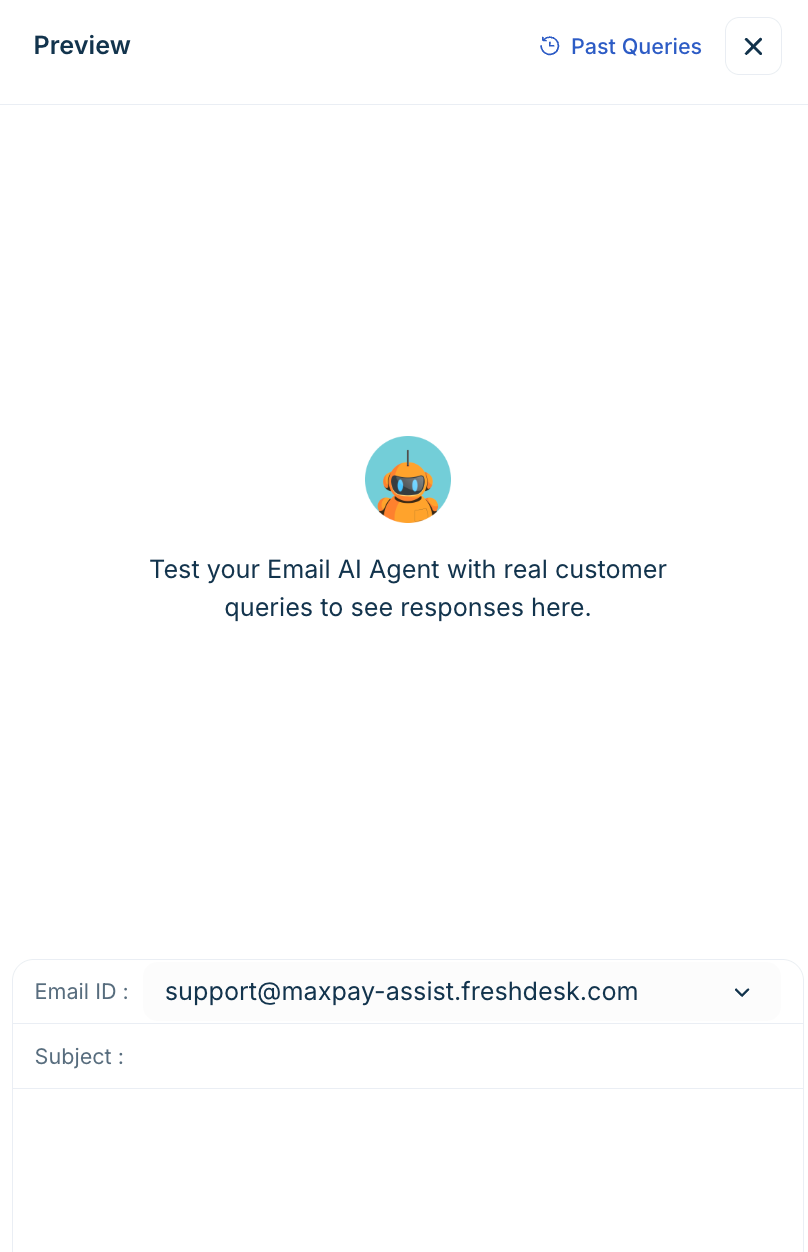
Preview - single-query testing
Select Preview AI Agent.
Enter a subject and body that represents a realistic customer query.
Review the full response including the main answer, citations, feedback button placement, and signature block.
If the response is incorrect or off-tone, update your Instructions or Knowledge and re-test.
Use multi-turn testing to verify context handling by submitting follow-up emails in the same thread to check whether the agent maintains context across replies.
Note: The preview uses the current draft configuration. It does not affect live conversations or consume message limits.
Evaluate - bulk query testing
Select Test > Add queries.
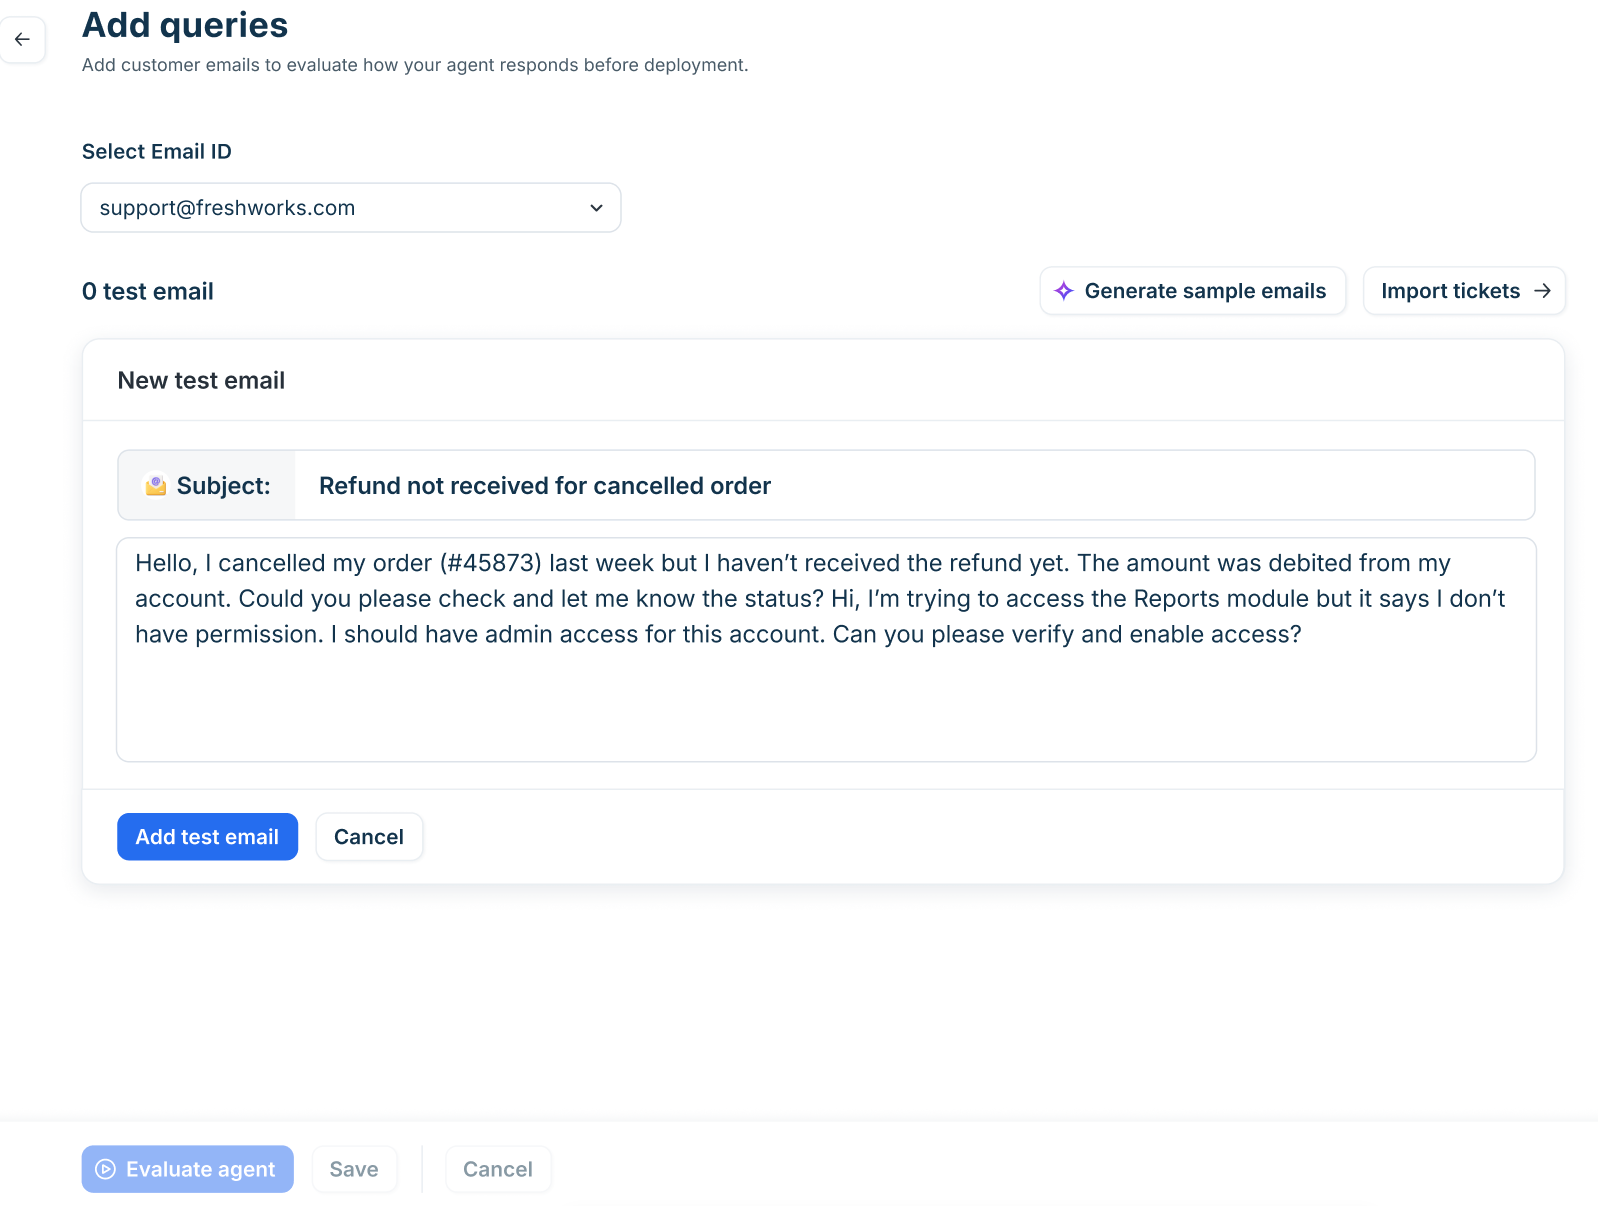
Build your test set. You can add queries manually in email format, use Generate sample emails to create AI-generated test cases aligned to your business context, or Import tickets to use solved historical tickets.
A maximum of 50 queries per evaluation run is supported.
Select Run evaluation. Results show Answered, Unanswered, or Error status per query.
Select any row to inspect the full response, citations, and workflow triggers for that query.
For queries the agent could not answer, select Add Q&A to create a knowledge entry directly from the result.
Select Export to download evaluation results for stakeholder review.
Best practice: Run an evaluation with at least 20 representative queries before deploying. Include edge cases, such as, multi-part questions, queries outside the agent's scope, and queries in non-primary languages if multilingual support is enabled.
Deploy the agent
Freshservice Agent Studio allows administrators to deploy the Email AI Agent across specific workspaces using flexible routing rules.
Deployment methods
You can choose between two deployment methods to activate automated email ticket processing for each workspace.
Rule-based deployment: Automatically processes incoming tickets based on designated agent groups, support email channels, and ticket filtering strategies.
Workflow-based deployment: Makes the Email AI Agent available as an action block within custom Workflow Automator flows.
Note: A workspace can use only one active deployment method at a time. Switching between deployment methods replaces the existing deployment logic for that workspace upon confirmation.
How to deploy Email AI Agent
Follow these steps to access deployment settings and choose a deployment method for your target workspace.
Go to Admin > Agent Studio > AI Agents.
Select your target Email AI Agent from the agent list.
In the left navigation pane, click Deploy.
Select your target workspace from the Available workspaces list, such as IT Workspace. You can deploy one Email Agent across different workspaces.
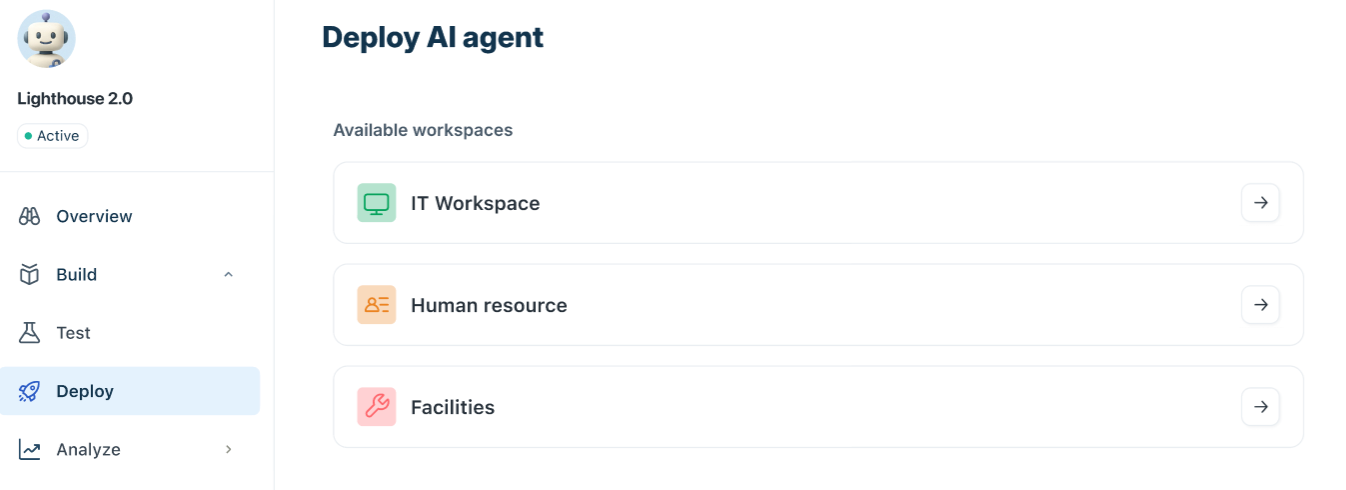
Click Rule-based deployment or Workflow-based deployment to select your deployment method.
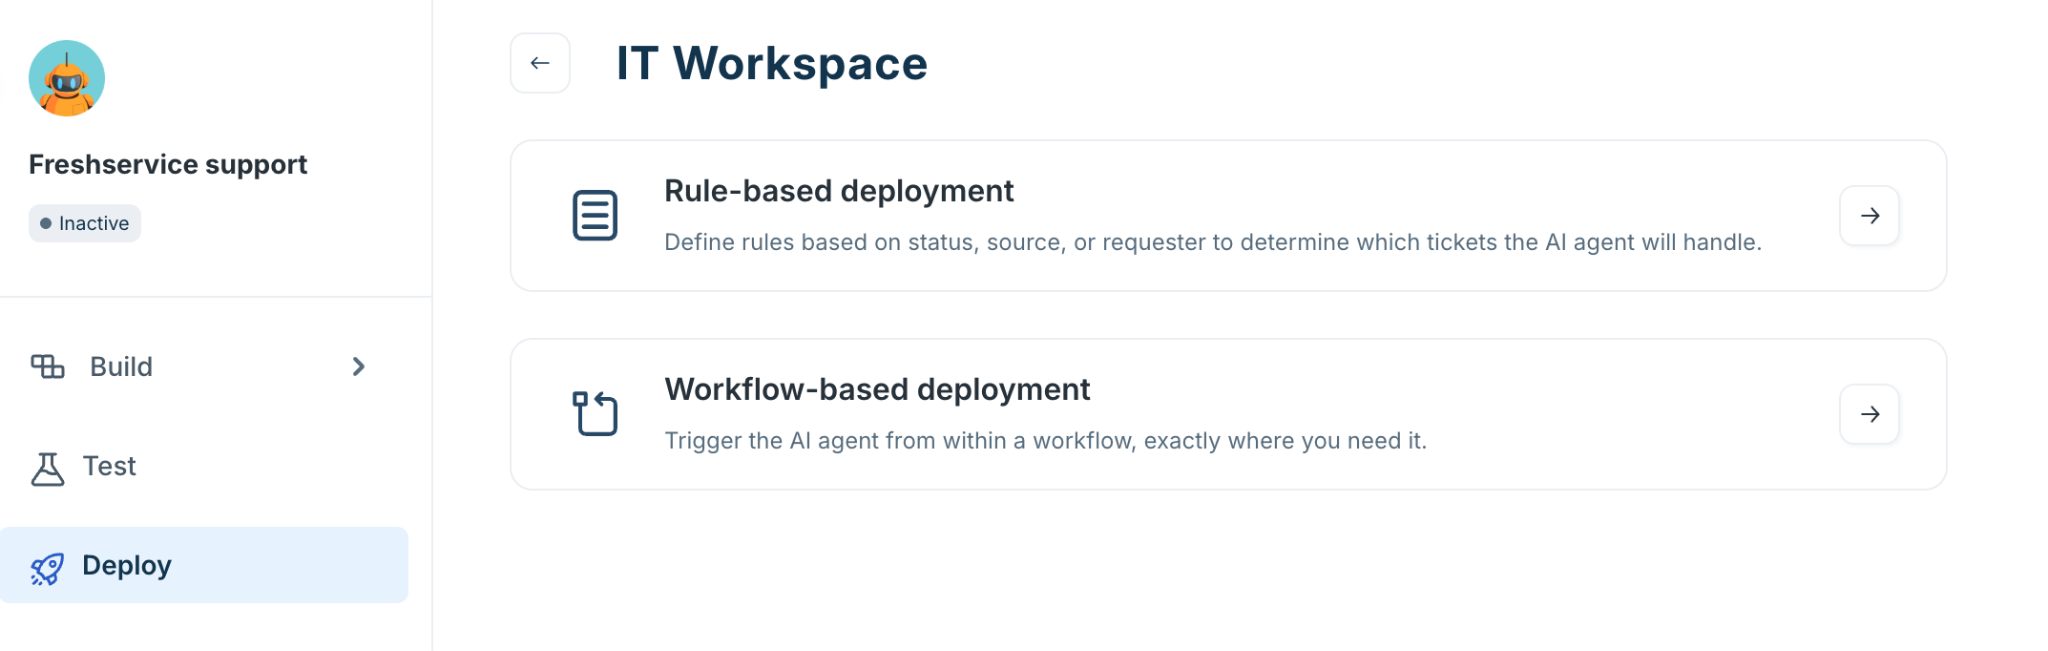
Follow the configuration procedures for your selected deployment method in the sections below.
Configure rule-based deployment
Rule-based deployment evaluates incoming ticket properties against assigned agent groups, support email addresses, and deployment strategies.
Follow these steps to configure agent groups, email channels, and routing strategies for rule-based deployment:
Go to Admin > Agent Studio > AI Agents.
Select your target Email AI Agent and click Deploy in the left menu.
Select your target workspace and click Rule-based deployment.
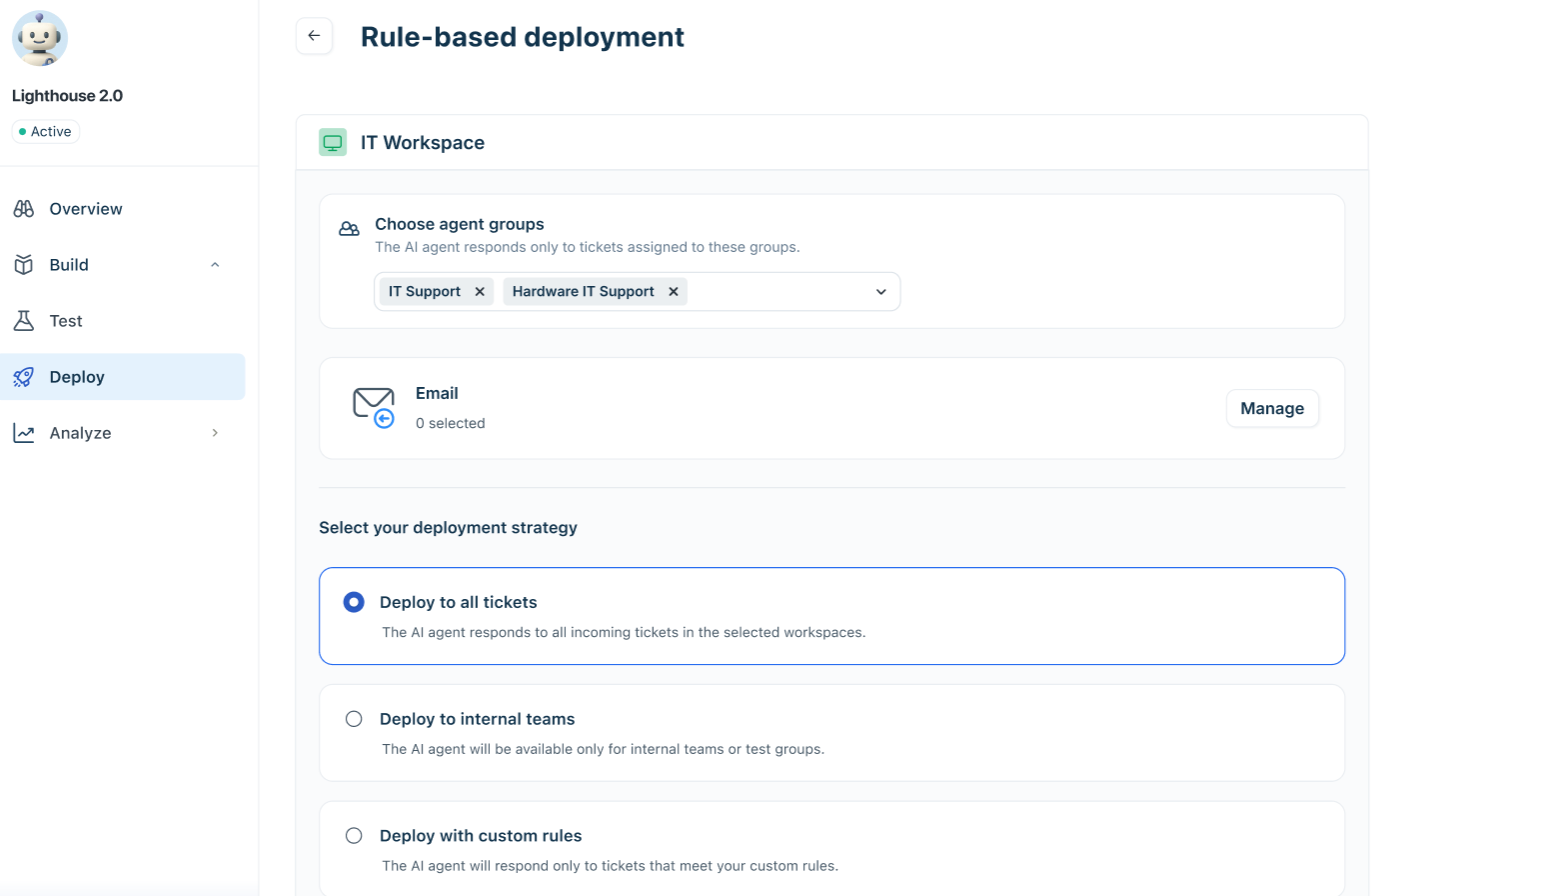
Under Choose agent groups, click the dropdown menu and select the agent groups whose incoming tickets the AI agent will process.
Under Select your deployment strategy, select a deployment strategy option:
Deploy to all tickets - Responds to all incoming tickets in the selected workspaces.
Deploy to internal teams - Restricts responses to internal teams or test groups for controlled testing.
Deploy with custom rules - Responds only to tickets that meet specific custom rule conditions.
Click Save to store your configuration, or click Deploy to activate rule-based routing.
Configure workflow-based deployment
Workflow-based deployment allows you to trigger the Email AI Agent as an automated action within Freshservice Workflow Automator flows.
Follow these steps to assign agent groups and integrate the Email AI Agent into your Workflow Automator flows:
Go to Admin > Agent Studio > AI Agents.
Select your target Email AI Agent and click Deploy in the left menu.
Select your target workspace and click Workflow-based deployment.
Under Choose agent groups, click the dropdown menu and select the agent groups the AI agent will be part of.
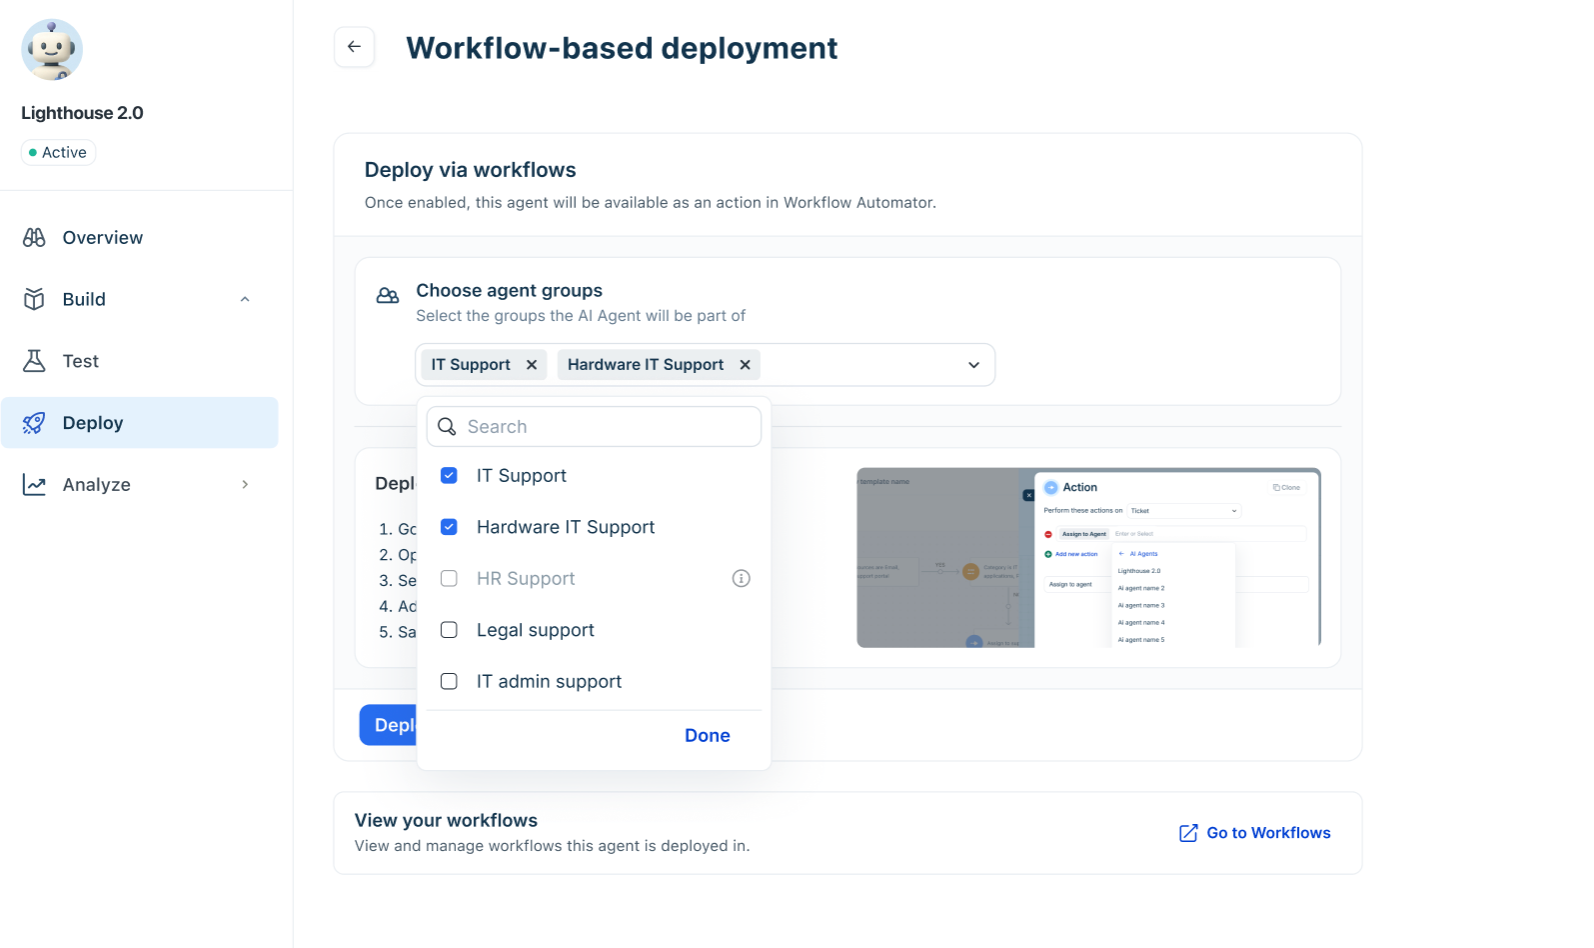
Click Deploy to make the AI agent available as an action in Workflow Automator.
Click Go to Workflows to open Workflow Automator.
Open an existing workflow or click New Workflow to create a new one.
Set or review the trigger event for the workflow.
Under Actions, click Add new action, select Assign to Agent, choose AI Agents, and select your Email AI Agent.
Click Save and click Activate.