
 Community
 Video Library
 Agent Training
 Freshservice
 Freshdesk
 Freshchat
 Freshcaller
 Freshsales
 Freshteam
 Freshworks Neo
 Freshsurvey
 Freshservice for MSP
 Note: Natural Language Workflows are currently available through early access. Contact your Customer Success Manager to request access.
Natural Language Workflows let you create AI Agent workflows by describing your business process in plain English instead of building the workflow one block at a time. This makes it easier to automate common support processes without requiring extensive workflow-building experience.
Natural Language Workflows are ideal for using existing support processes, standard operating procedures (SOPs), and business workflows to create AI-powered automations that are easy to build, maintain, and update.
TABLE OF CONTENTS
- Workflow types
- Overview
- Prerequisites
- Natural Language Workflow process
- Create a Natural Language Workflow
- Configure the workflow trigger
- Write the workflow
- Use inline data and actions
- Preview and activate
- Example workflows
- Best practices for writing workflows
Workflow types
AI Agent Studio provides two ways to create workflows:
Create workflow – Create a new workflow by either Write it (Natural Language Workflow) or Build it (Visual Workflow).
Prebuilt workflows – Start with a predefined workflow template that you can customize to meet your business requirements.
This article focuses on Write it, which uses Natural Language Workflows. Natural Language Workflows let you define workflow behavior using plain language instead of manually configuring workflow blocks.
Overview
AI Agent Studio interprets your instructions and converts them into a structured workflow while preserving the flexibility to use advanced capabilities such as triggers, API actions, data collection, property references, group assignments, and agent handoffs. You can also review, refine, and test the generated workflow before publishing it.
For example, you can write instructions such as, when an employee requests software, collect the required details, assign the request to the IT team, and notify the employee. AI Agent Studio converts these instructions into a workflow that you can further customize to meet your organization's requirements.
Prerequisites
Before creating a Natural Language Workflow, ensure that:
You have access to AI Agent Studio.
Any API actions, ticket properties, requester properties, or integrations that the workflow depends on have already been configured.
You understand the business process that you want to automate. Existing SOPs, playbooks, or support guides can often be used as the starting point for your workflow.
Natural Language Workflow process
A Natural Language Workflow consists of two components:
Trigger – Defines the event or condition that starts the workflow.
Instructions – Describe how the AI Agent should respond and guide the conversation after the workflow is triggered.
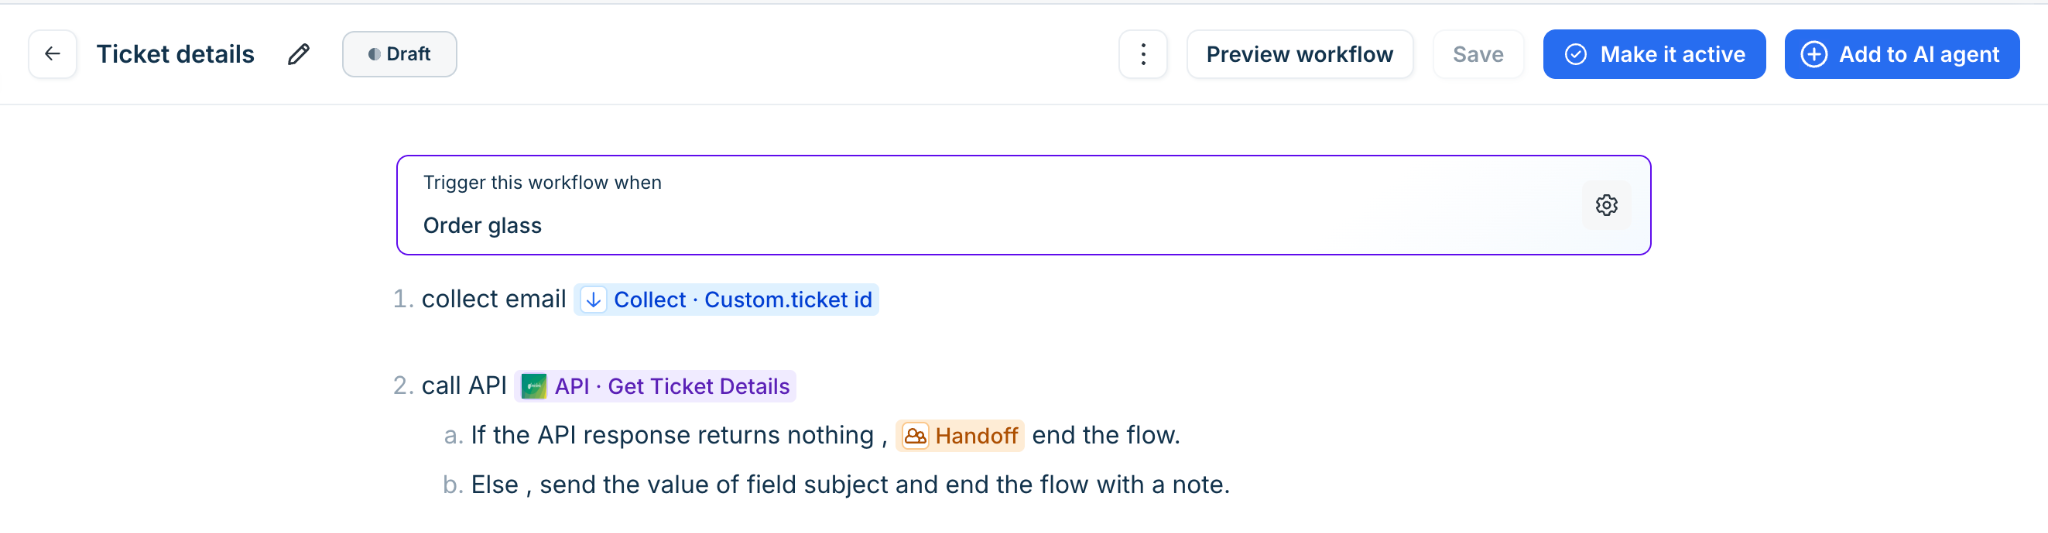
The trigger determines when the workflow begins. Similar to visual workflows, a Natural Language Workflow can start when a customer message matches a specific intent or when a configured system event occurs.
After the workflow is triggered, the AI Agent interprets the instructions and determines the appropriate next action based on the conversation context. Instead of following a fixed sequence of workflow blocks, the AI Agent continuously evaluates information such as the user's request, collected inputs, ticket and requester properties, API responses, and the current conversation state to decide how to progress the workflow.
Create a Natural Language Workflow
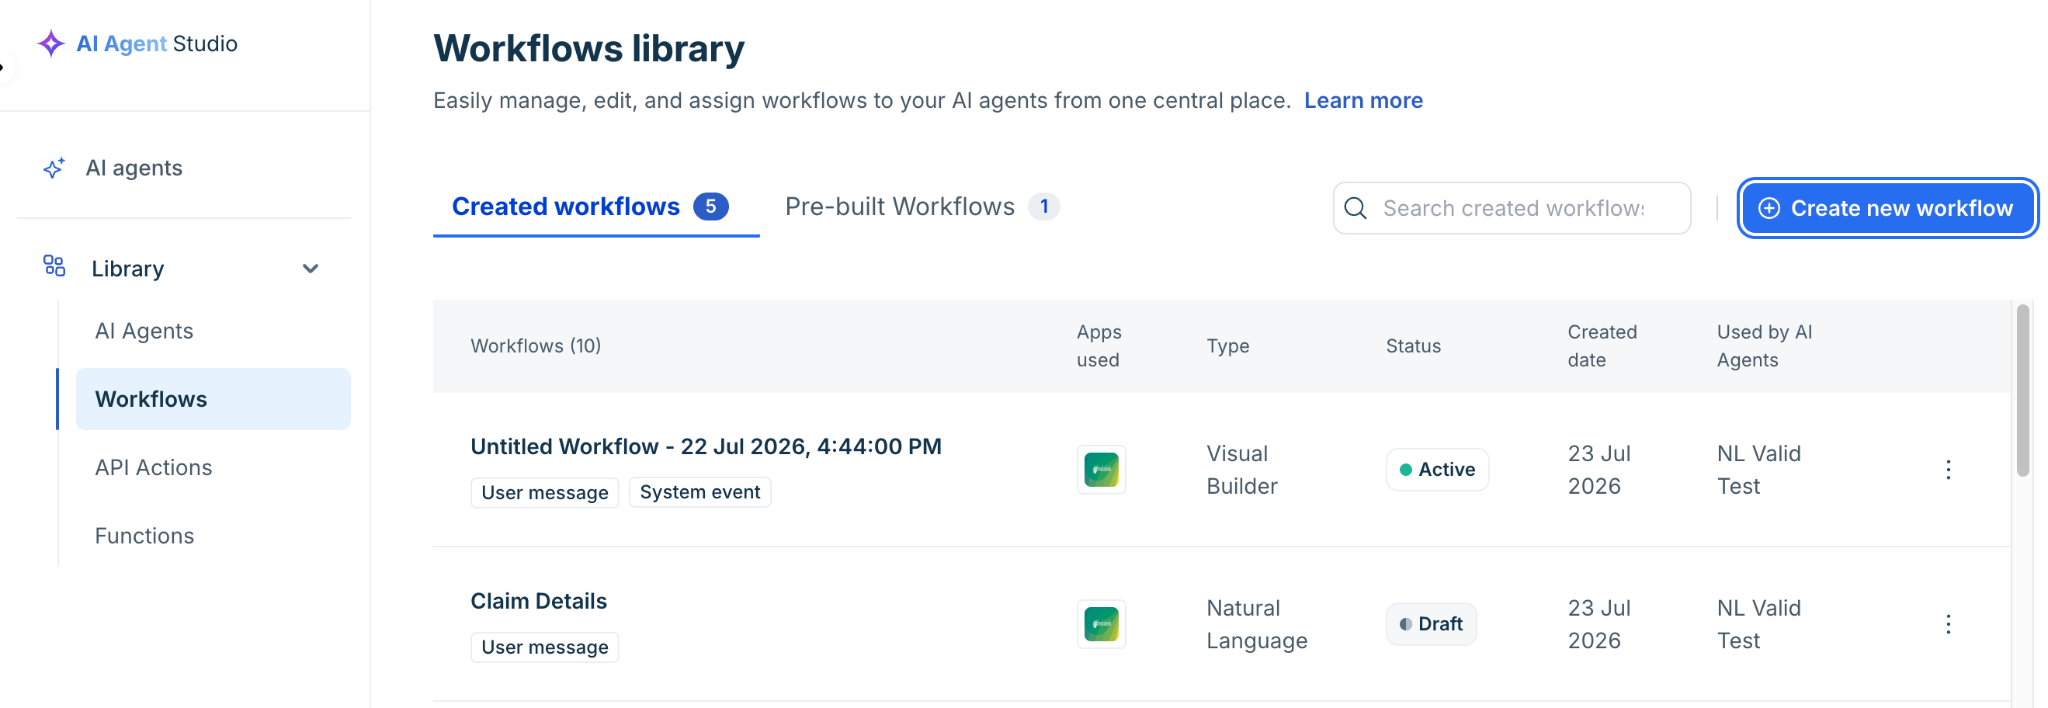
You can create a Natural Language Workflow from the Workflow Library or from the Workflows page of a specific AI Agent. To create a Natural Language Workflow:
Go to AI Agent Studio.
Do one of the following:
To create a workflow for a specific AI Agent, select the AI Agent and navigate to Build > Workflows.
To create a reusable workflow, open the Workflow Library.
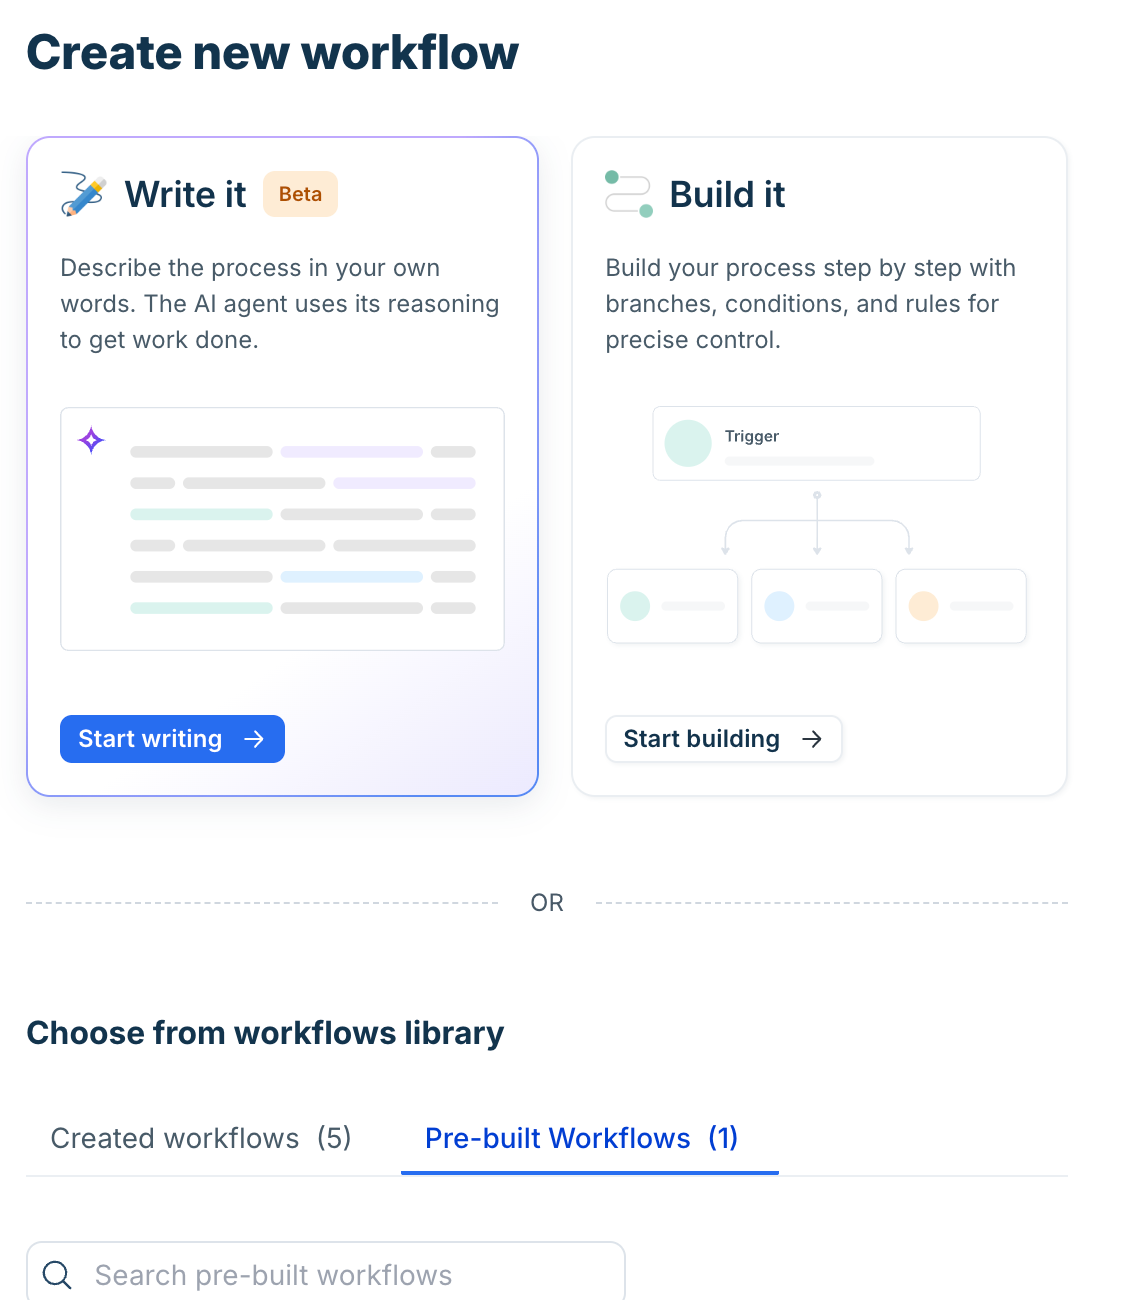
Click Create new workflow.
In the Write it section, click Start writing.
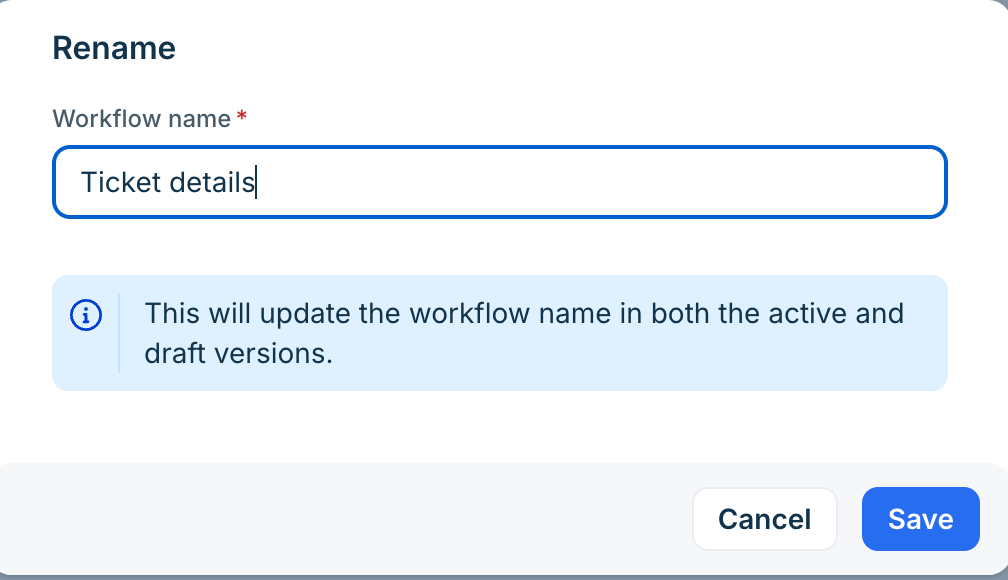
Click edit to rename the workflow.
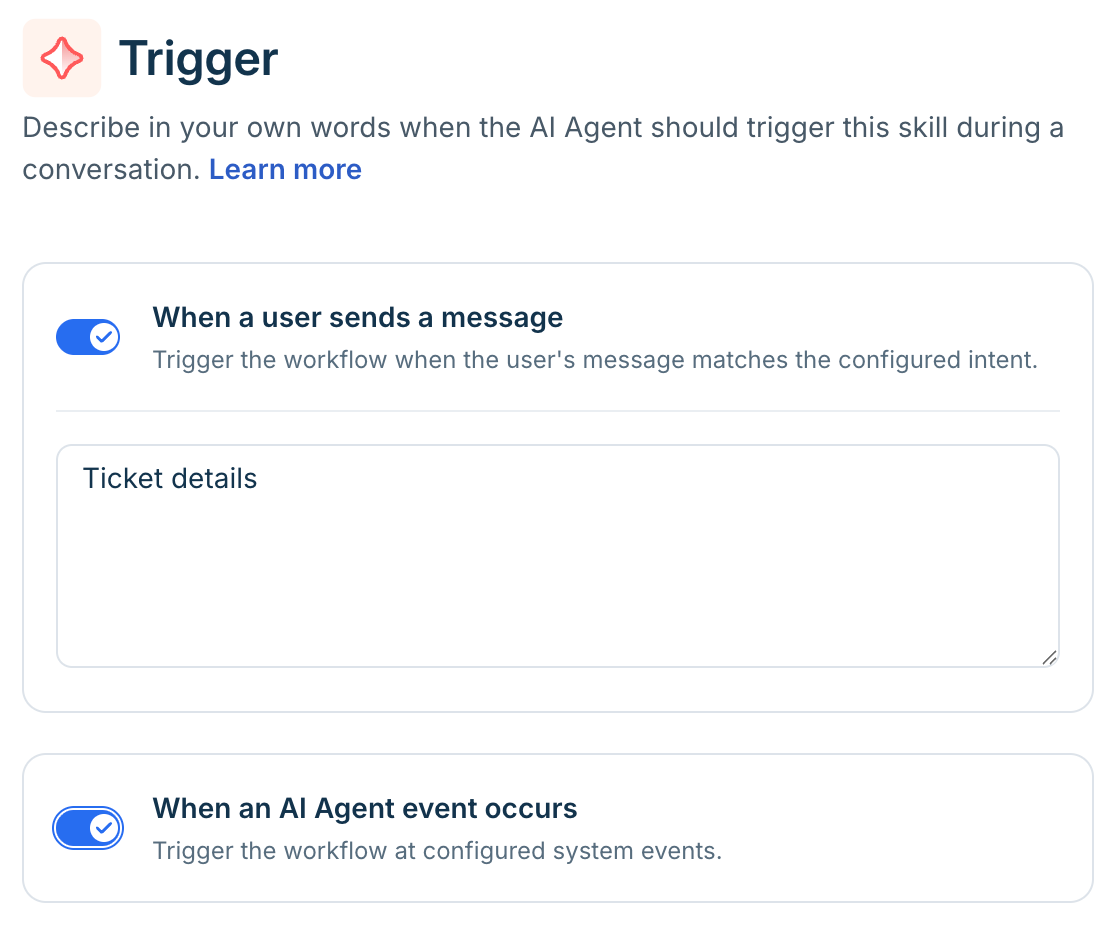
Click the Trigger this workflow when text box to configure the workflow. For detailed instructions, refer to Configure the workflow trigger section.
Write the workflow instructions.
Add data references, API actions, or other workflow controls where required.
Click Preview workflow to test different conversation scenarios.
Click Save draft to save the workflow, or click Activate to publish it.
If you created the workflow from the Workflow Library, associate it with the required AI Agent before or after activation.
Configure the workflow trigger
After you select Write it, the workflow editor opens with two sections:
Trigger – Defines when the workflow starts.
Workflow – Defines how the AI Agent responds after the workflow starts.
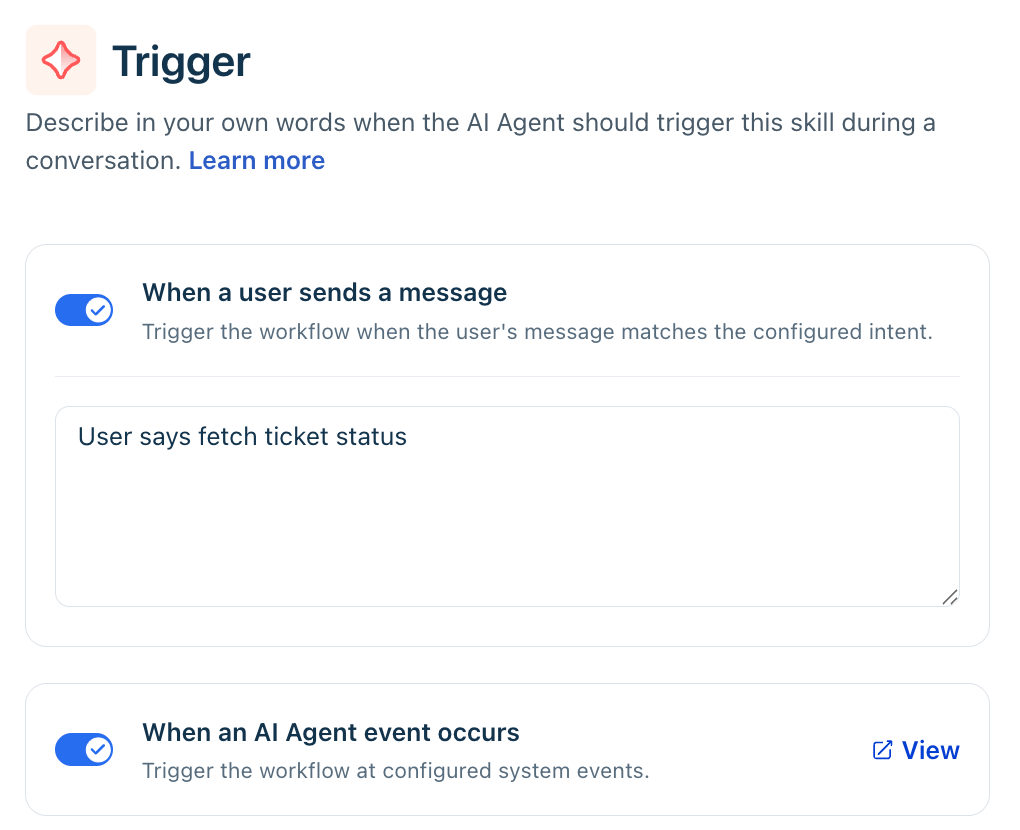
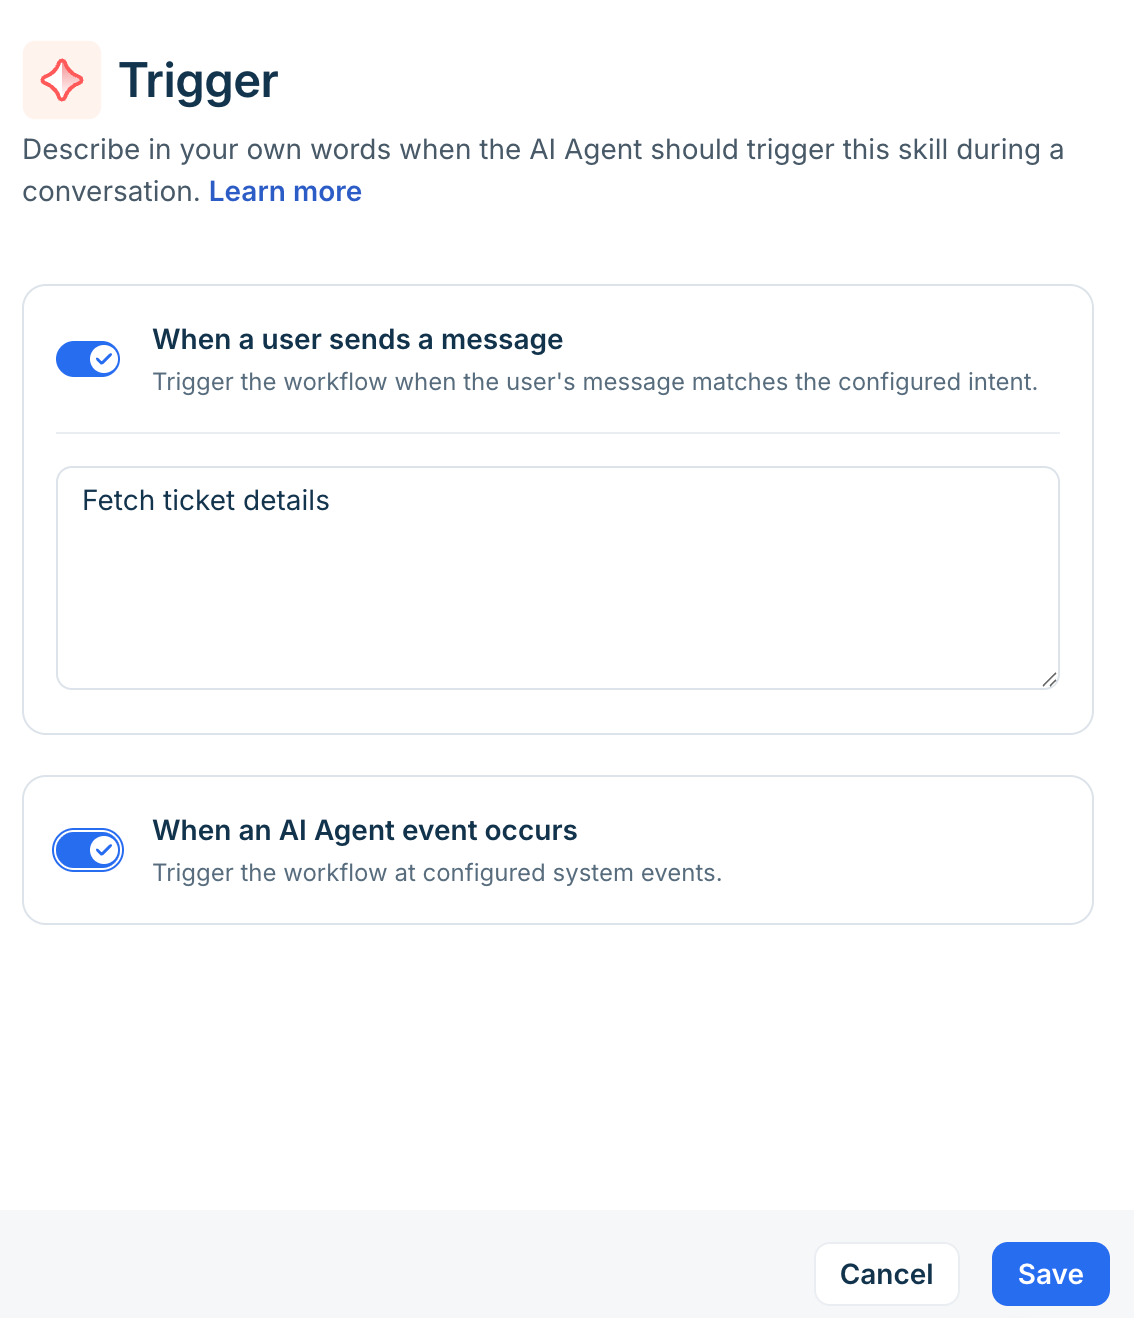
When a user sends a message
Select When a user sends a message to start the workflow when a user's message matches the configured intent. Describe the user's intent in natural language instead of specifying keywords. For example:
Fetch ticket status
Reset password
Request software access
Update billing information
AI Agent Studio interprets the user's intent rather than matching an exact phrase. For example, a trigger defined as Fetch ticket status can match requests such as:
What is the status of my ticket?
Can you check my ticket?
I want to know the progress of my request.
Has my issue been resolved?
This enables a single trigger to handle multiple variations of the same request.
When an AI Agent event occurs
Select When an AI Agent event occurs to start the workflow when a predefined AI Agent event is triggered. You can configure the workflow to start for events such as:
Fallback – The AI Agent cannot answer the user's query.
Positive feedback or Negative feedback – A user submits feedback on an AI Agent response.
Talk to agent – A user requests to speak with a human agent.
After the selected trigger is activated, the AI Agent executes the workflow instructions that you define.
Write the workflow
After you configure the trigger, define how the AI Agent should handle the conversation. Describe the business process in natural language, focusing on the desired outcome instead of individual workflow actions.
Review this example of an employee requesting a laptop replacement to structure your workflow steps effectively.
Write the workflow as logical business steps:
Identify the employee's currently assigned laptop using their email API Fetch Asset.
Check the laptop assignment date:
2.1 If the laptop assignment date >= 4 years, create a replacement request using API Replacement Request.
2.2 If laptop assignment date < 4 years, collect the reason for replacement.
If the reason is performance issues (slow, hanging, freezing):
Ask the employee if they have tried restarting the laptop.
Ask if the issue started after installing any specific application.
Ask if the issue occurs only when using a specific application.
After collecting the information, let the employee know that the IT team will review the issue and get back within 24 hours.
For all other reasons, inform the employee that the laptop is not yet eligible for replacement.
Organizing the workflow into logical steps improves readability and makes it easier to review, maintain, and troubleshoot.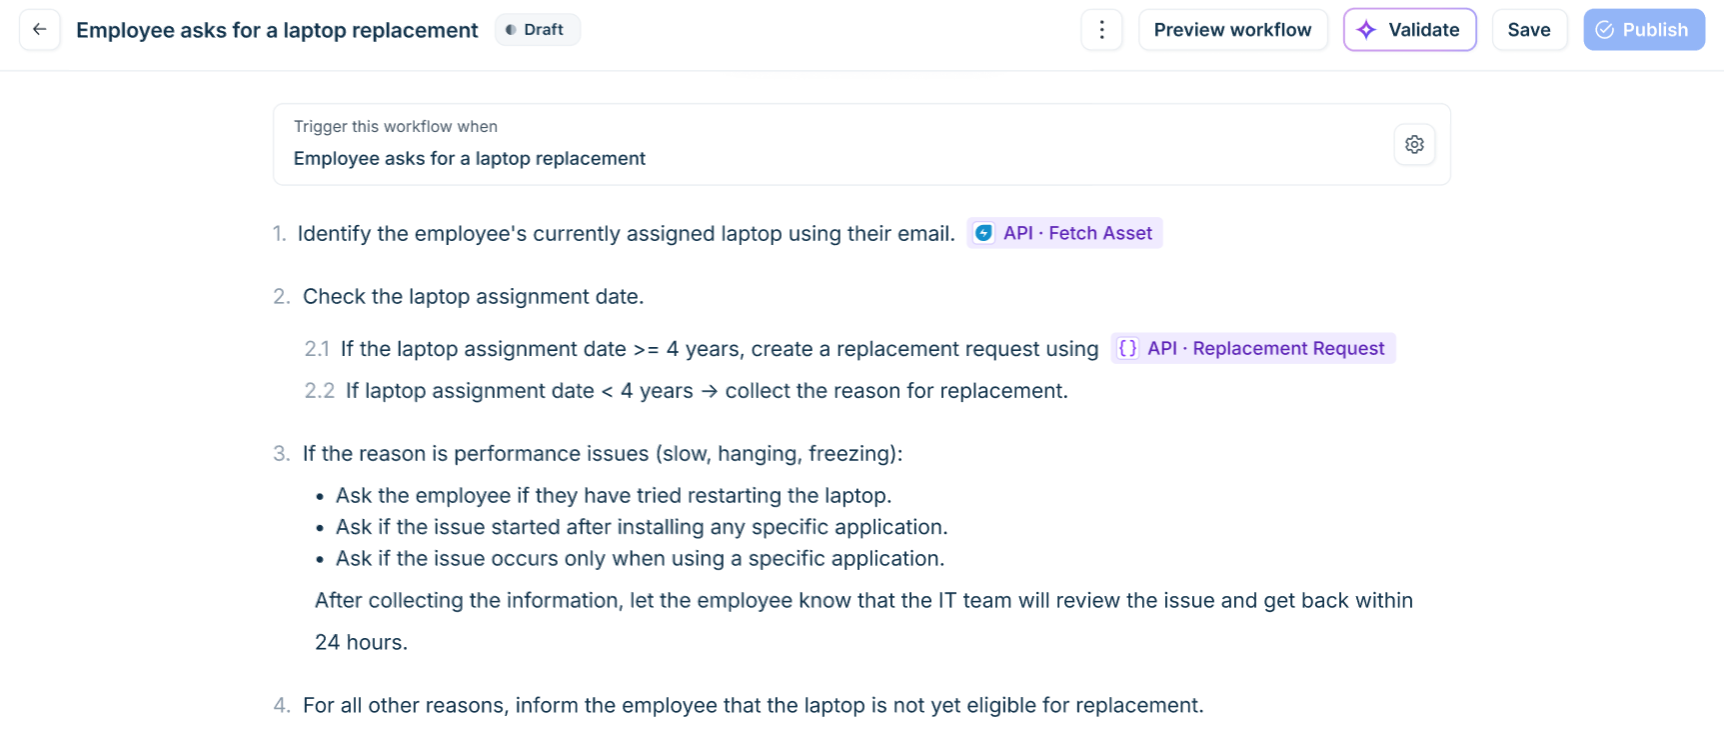
Use inline data and actions
Natural Language Workflow combines free-form instructions with structured workflow components. When a workflow requires a predefined action, type / to insert the appropriate structured control. The following controls are available.
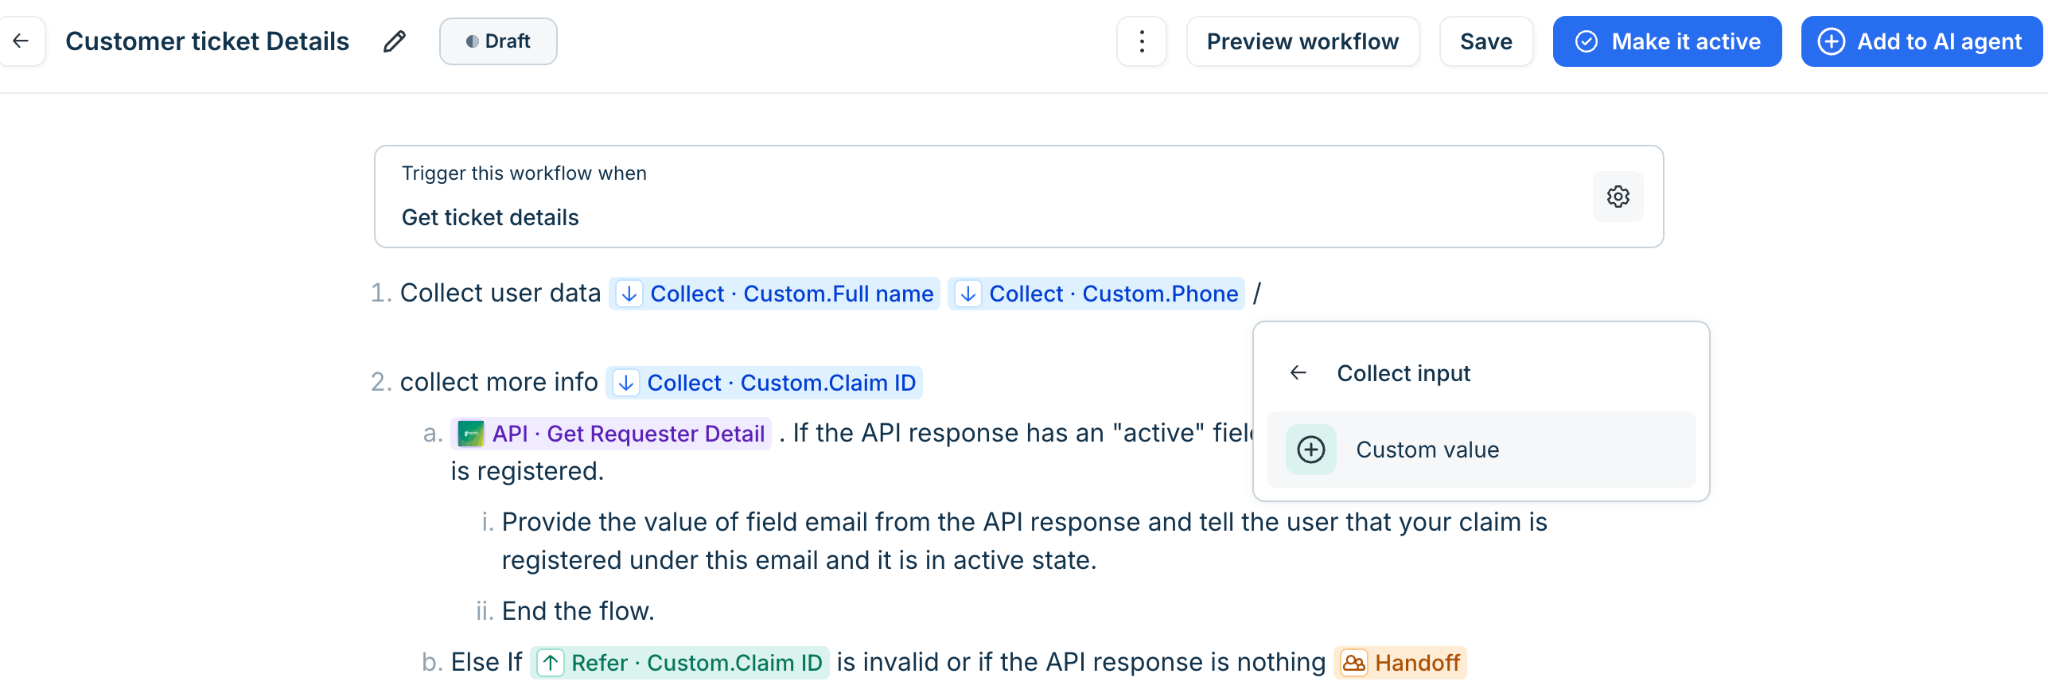
Collect input
Use Collect input to capture information during a conversation and reuse it later in the workflow. The collected values are stored as variables and can be referenced in subsequent instructions, eliminating the need to ask the user for the same information again. For example, you can use Collect input to capture details such as:
Ticket ID
Order ID
Email address
Note: If the information is only needed for the current step and won't be referenced later, simply instruct the AI Agent to ask for and validate it. Use Collect input only when the value needs to be retained for subsequent steps in the workflow.
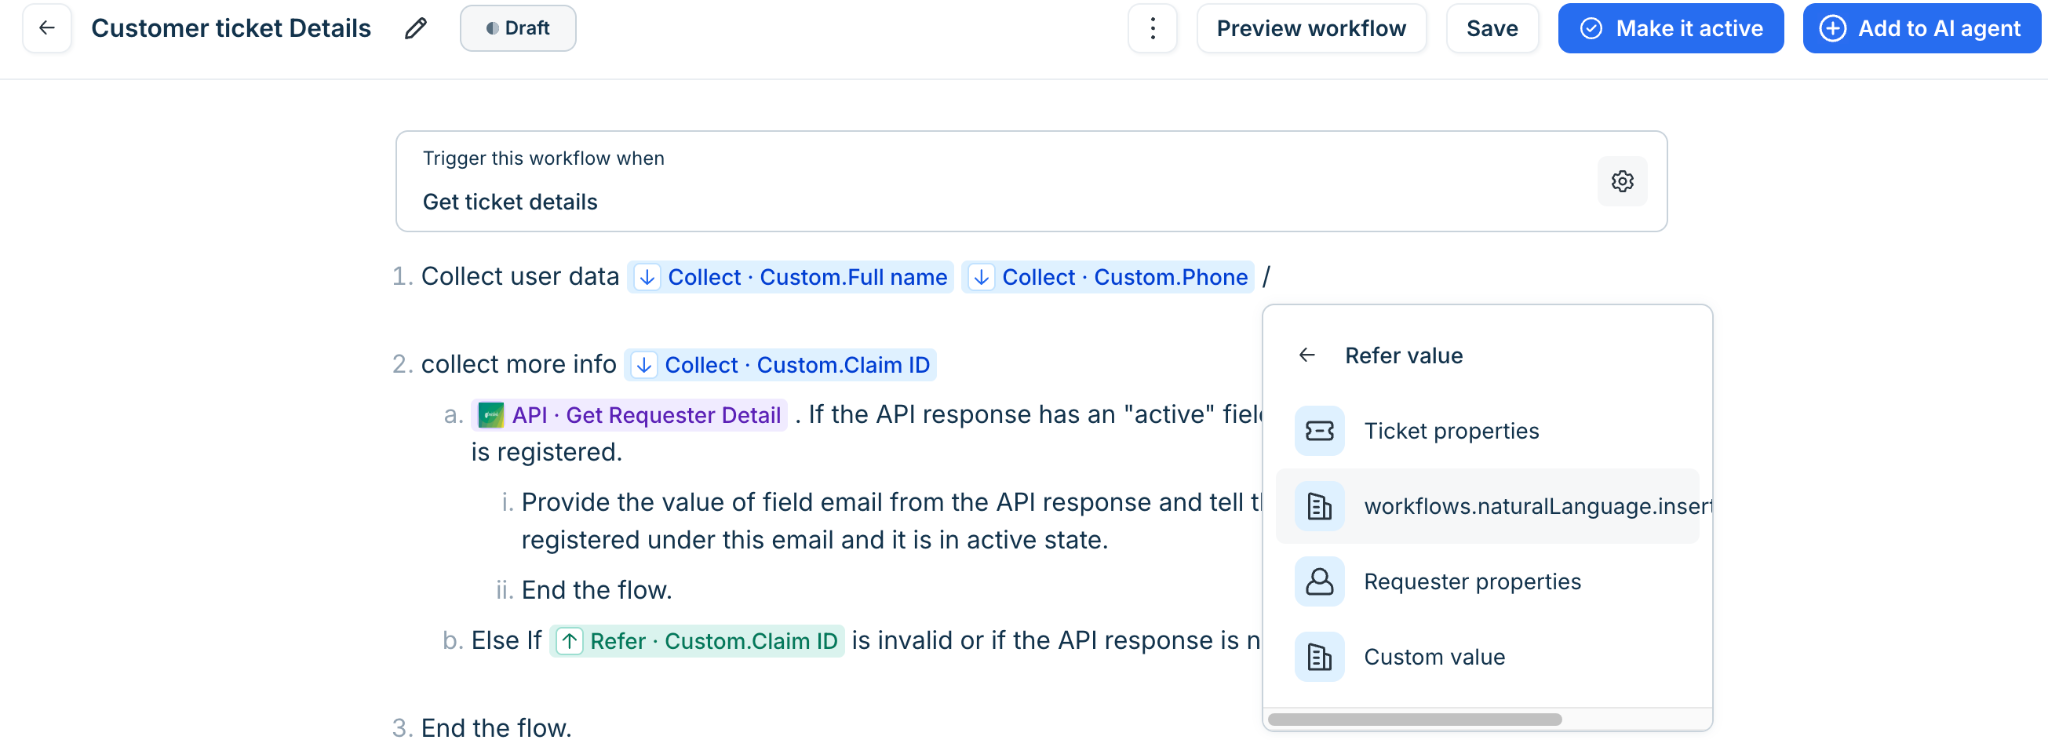
Refer existing value
Use Refer Value when the required information is already available in the ticket or requester record. Instead of asking the customer for the same information again, reference the appropriate property in the workflow. You can reference properties such as:
Requester name
Ticket details
Ticket priority
Referencing existing properties keeps conversations concise, reduces repetitive questions, and improves the customer experience.
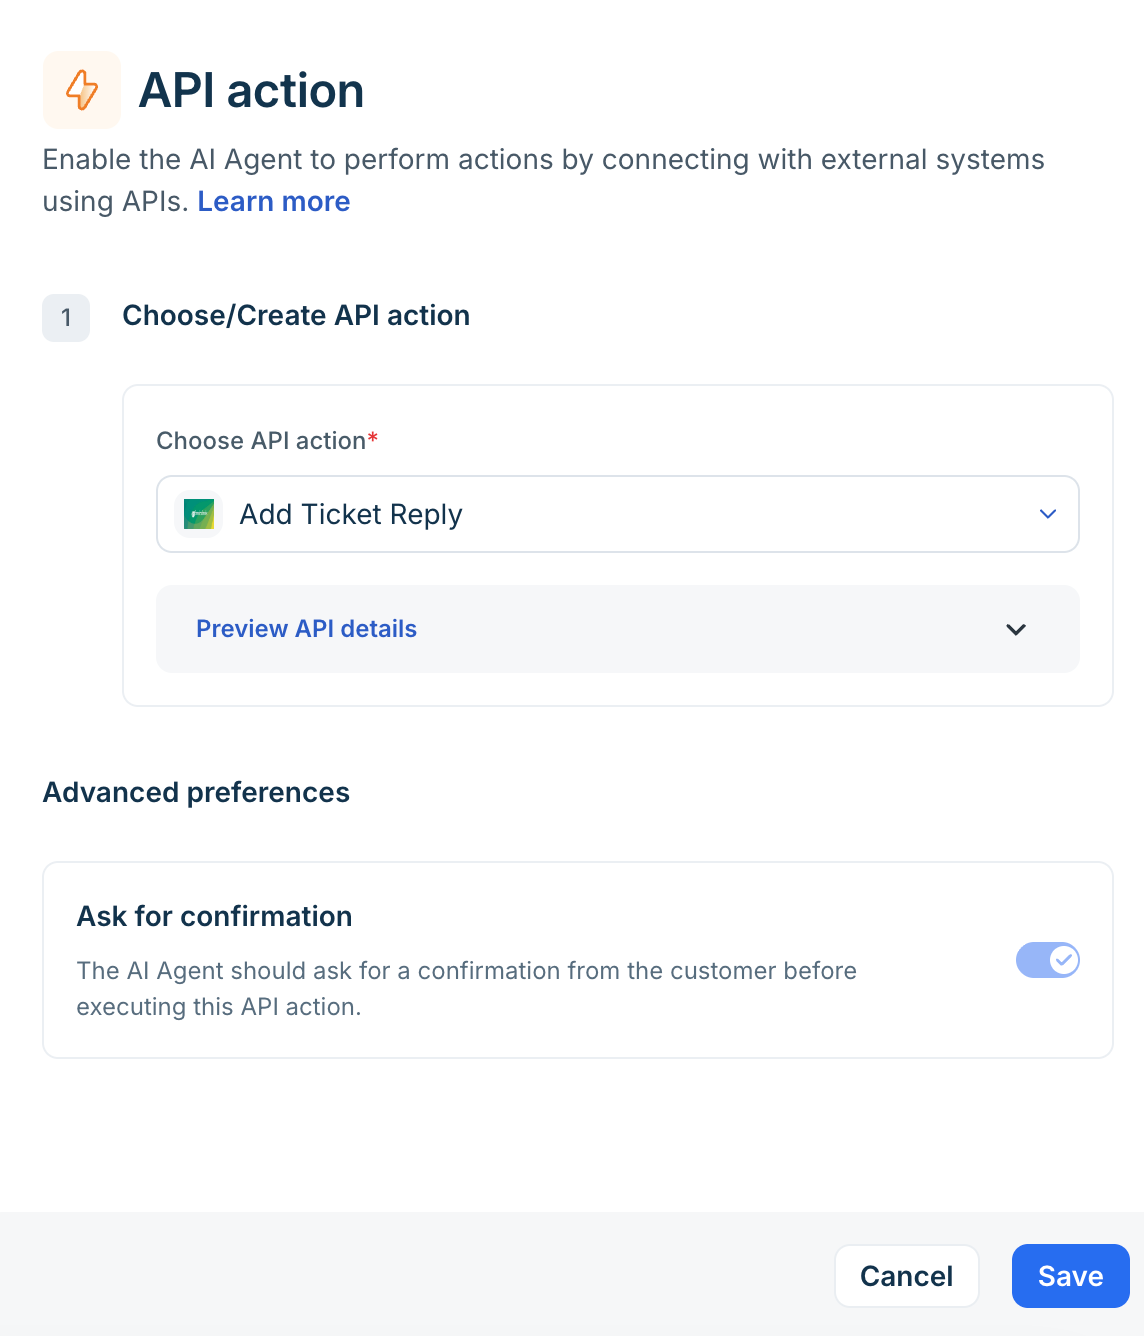
API actions
API actions allow the AI Agent to interact with external systems during workflow execution. Rather than describing how the integration works, simply insert the appropriate API action into the workflow and map the required inputs. For example, the AI Agent can:
retrieve order details
verify account information
create return requests
update customer records
check subscription status
validate eligibility
Agent handoff
If the AI Agent cannot complete the request or human intervention is required, insert an Agent handoff step. The AI Agent completes the automated portion of the workflow before transferring the conversation with the necessary context.
For example, you might hand off conversations when:
customer verification fails
an exception requires manual approval
policy restrictions prevent automated resolution
the customer requests to speak with an agent
When setting up an agent handoff, you can configure an automated custom message to send to the customer during handoff.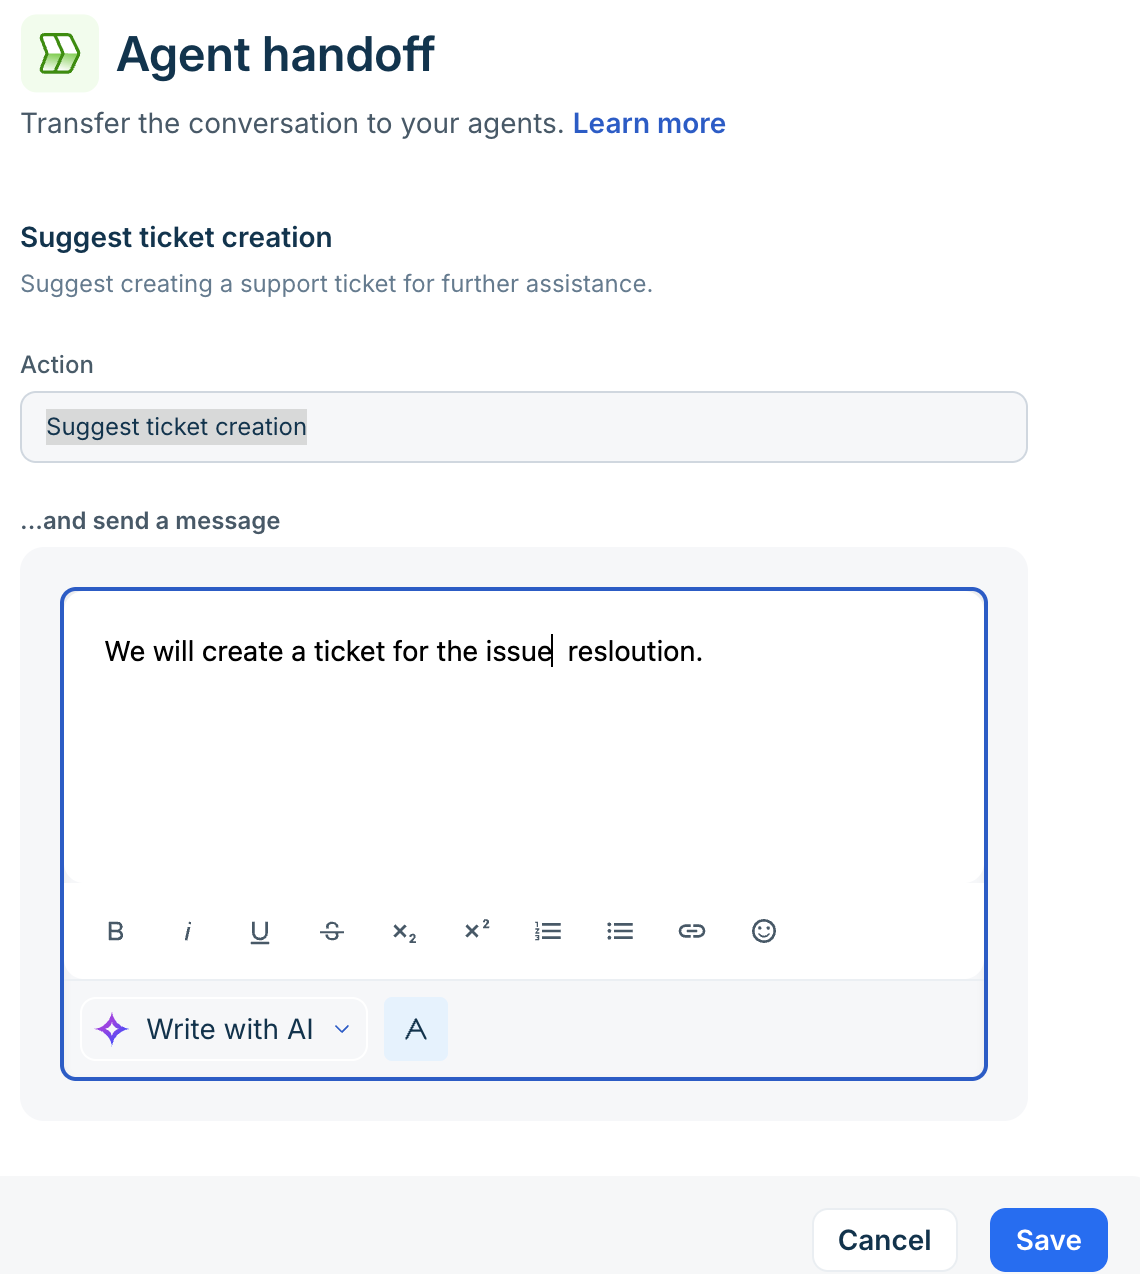
Preview and activate
Before activating a workflow, validate its configuration and execution to ensure it functions as intended. Testing the workflow helps identify configuration issues, validate business logic, and confirm that each step executes correctly before it is made available to customers. Use Preview workflow to test the workflow in an isolated environment without affecting live conversations.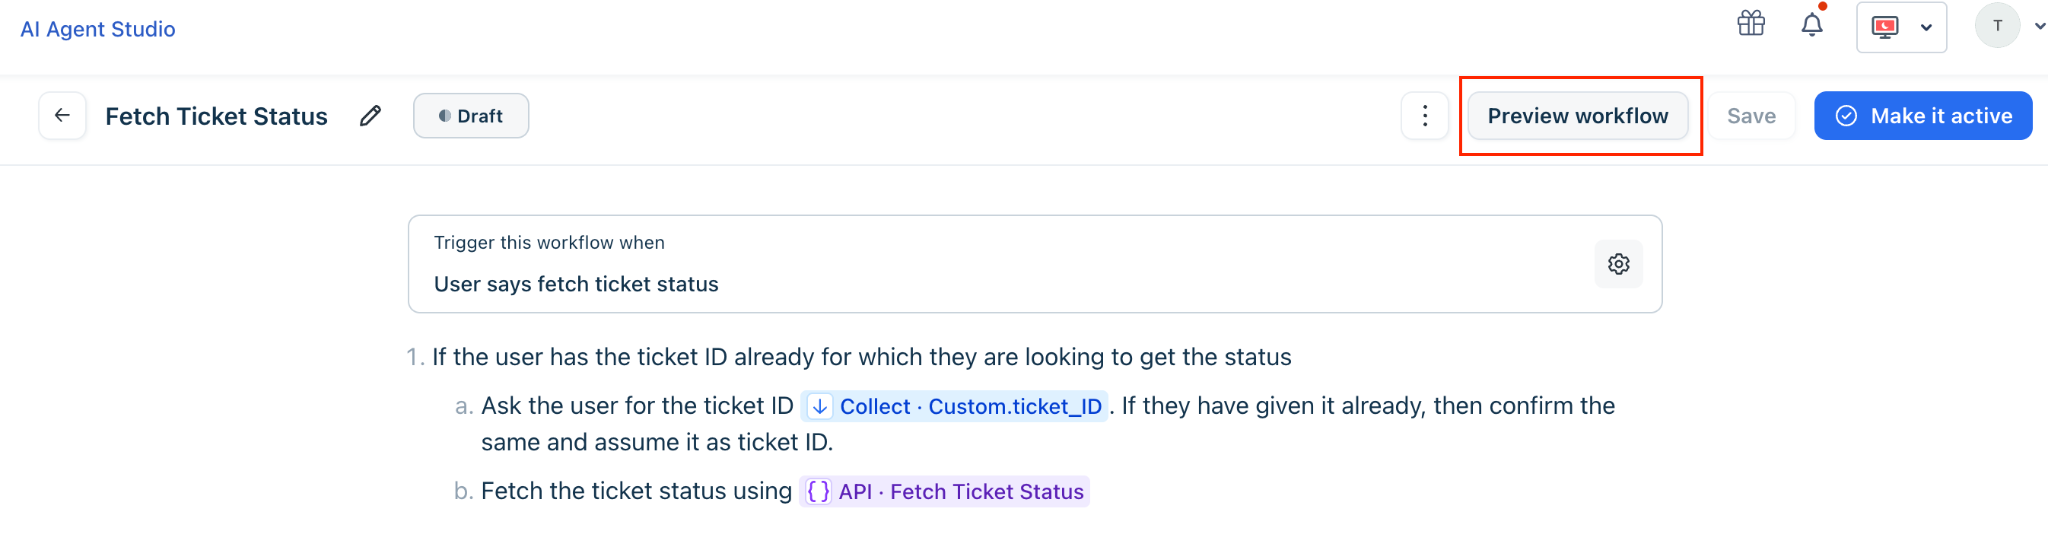
During testing, verify that:
The trigger starts the workflow for different customer phrasings.
The AI Agent collects information in the expected sequence.
API actions receive the correct input values.
Group assignments and conversation handoffs occur at the appropriate stages.
Exception scenarios are handled correctly.
The workflow reaches the expected outcome.
After testing, Save as draft if additional changes are required, or Activate the workflow to make it available for customer conversations. After activation, monitor workflow execution and conversation logs to ensure the workflow performs as expected in production.
Example workflows
The following examples illustrate how Natural Language Workflows can be written for common customer support scenarios. These examples demonstrate how conversational instructions and inline workflow controls work together to automate business processes.
Ticket status check
This example demonstrates an automated workflow for looking up IT service ticket details.
Trigger: When the user asks to check ticket status.
Workflow:
If the user already provides the ticket ID for which they want the status:
Ask the user for the ticket ID Collect · Custom.ticket_ID. If they have provided it already, confirm the ID.
Fetch the ticket status using API Fetch Ticket Status.
If the user states they do not know their ticket ID:
Ask the user for their email address Collect ·Requester.Email ID.
Fetch all active tickets associated with this email address through API Fetch Tickets.
Display the list of ticket IDs Refer · Output.[].id. If multiple tickets exist, present them sequentially.
Collect the selected ticket ID Collect · Custom.no_ticket_id.
Fetch the ticket status using API Fetch Ticket Status.
IT hardware request
This example shows how to collect requirements and submit an IT asset request for fulfillment.
Trigger: When the user wants to request new hardware.
Workflow:
Ask the user for their employee ID using Collect · Custom.Employee_ID.
Display the employee details using Refer ·Requester.Name.
Ask the user which hardware item they require (for example, laptop, monitor, or headset).
Collect the preferred device model details.
Ask whether the item is a replacement or a new allocation.
Summarize all request details and ask the user to confirm them.
If the user wants to modify any information, collect updated details and present a revised summary.
Once confirmed, submit the Service Request and inform the user that their request has been logged.
Thank the user and end the conversation.
Best practices for writing workflows
Follow these best practices to create clear and effective Natural Language Workflows for your AI Agent.
Start with an existing process: Begin with a standard operating procedure (SOP) or playbook. Remove organization-specific details and simplify ambiguous instructions.
Focus on the outcome: Describe the expected result instead of the implementation details. For example, write Verify the customer's email address and retrieve the account details instead of Validate identity and execute the API.
Keep one task per step: Limit each workflow step to a single task. Split complex or multi-action instructions into separate steps.
Use clear action verbs: Begin instructions with verbs such as ask, verify, retrieve, check, confirm, and escalate, and avoid unnecessary technical jargon.
Handle exceptions explicitly: Include instructions for handling invalid input, missing information, empty API responses, and ineligible requests instead of relying on generic error-handling statements.
Use structured workflow controls: Use controls such as Collect input, Reference existing properties, API action, and Agent handoff wherever applicable instead of describing these actions in free text.
Test different scenarios: Validate the workflow using both expected and edge-case scenarios. Verify how it handles invalid input, skipped questions, changes in user intent, and follow-up requests.