
 Community
 Video Library
 Agent Training
 Freshservice
 Freshdesk
 Freshchat
 Freshcaller
 Freshsales
 Freshteam
 Freshworks Neo
 Freshsurvey
 Freshservice for MSP
Note: Available only for new signups after the 31 March, 2026 release. If you signed up earlier, refer to the existing ITAM documentation.
Agent-based discovery is designed for environments that are unreachable through the network or governed by strict security rules that limit traffic flow. While agentless discovery is the recommended best practice, agents provide a reliable alternative for security-hardened assets.
Note - The information gathered is identical to agentless methods, but the agent does not support Resource Utilization (RU) data or database discovery.
Supported platforms
Autodiscovery agents are available for deployment on the following platforms:
Windows 64-bit (Recommended)
Windows 32-bit
Mac - Intel (Signed)
Mac - ARM
Linux 32-bit
Linux 64-bit
FreeBSD 32-bit
FreeBSD 64-bit
OpenBSD 32-bit
OpenBSD 64-bit
Solaris Sparc 64-bit
See Windows Discovery Agent Service Wrapper and Mac Agent Service Launcher for information on installing versions of the Windows and Mac discovery agent as a service. Configure environment variables for proxy
If your network requires a proxy, configure the following environment variables on the host machine:
HTTP_PROXY: Define the HTTP proxy server.
HTTPS_PROXY: Define the HTTPS proxy server.
NO_PROXY: Enter a comma-separated list of IP addresses that should bypass the proxy.
On Windows, you can set these by clicking Environment Variables in the System Properties window.
Download and install the agent
To deploy the discovery agent on your assets, follow these steps:
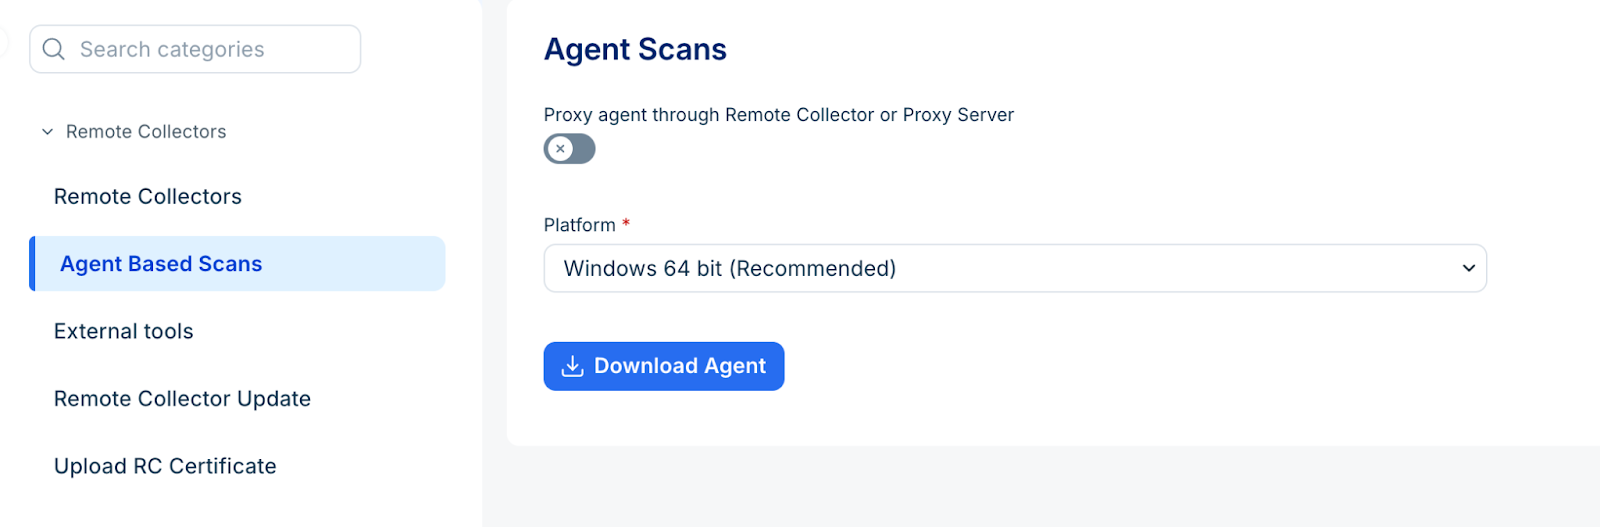
Go to Asset Management > Discovery Hub > Remote Collector and agents > Agent Based Scans.
Select your operating system from the Platform dropdown.
(Optional) Enable the Proxy agent through Remote Collector or Proxy Server toggle if the agent cannot reach the cloud directly.
Enter the Remote Collector or Proxy Server URL.
Click Download Agent.
Caution: Do not use critical or production account credentials for autodiscovery scans. Create a dedicated discovery account to prevent potential account lockouts and service outages.
View agent details
To monitor the status and version of your deployed agents, follow these steps:
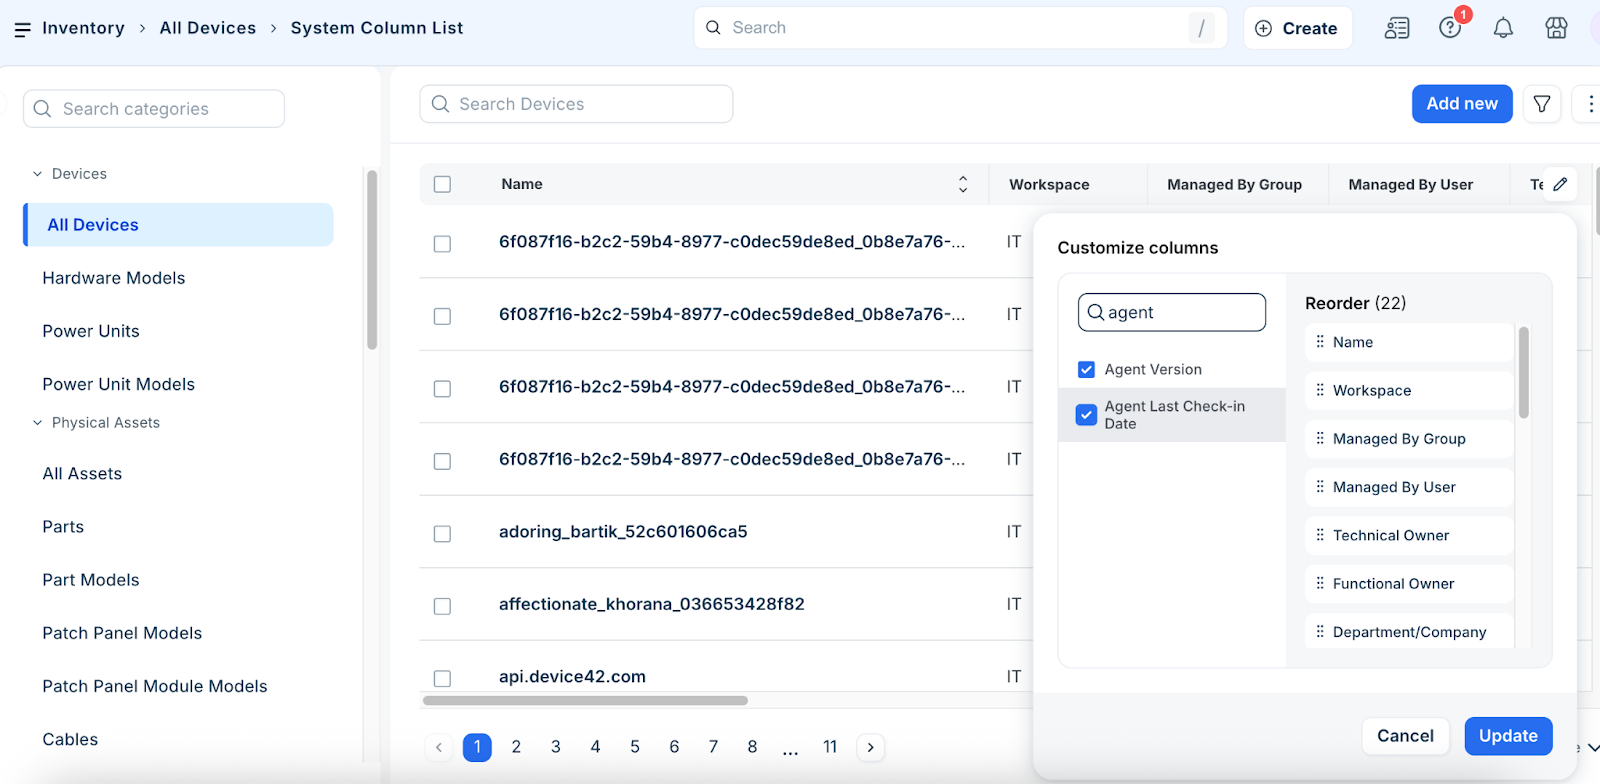
Navigate to Admin > click more > IT Asset Management > Inventory > All Devices.
Click the Edit icon to modify the list view.
Select Agent Version and Agent Last Check-in Date from the columns dropdown menu.
Click Save to define this as a new custom view.
The agent details will be visible in your device inventory.
The agent can be run from the command line or can be scheduled using the relevant scheduling program per OS. When running the application, the following switches are available:
-capture-host-files
capture hosts files
-config-file string
reads the config from an encrypted file (Only works for signed binaries. Ignored otherwise)
-debug
prints the data being sent and result of post operation
-device-customer string
default device customer
-device-name-format int
1 - hostname, 2 - hostname + domain, 3 - hostname and hostname+domain as alias, 4 - hostname+domain and hostname as alias (default 1)
-device-object-category string
default device object category
-device-service-level string
default device service level
-device-tags string
default device tags
-discover-last-login
discover last login
-dry-run
doesn't do a post, just prints the data to be sent
-extended-logs
enables extended logs
-hostname-precedence
sets device name as 'new name' to prevent creation of new device if only hostname was changed
-ignore-domain
ignore domain
-ignore-ipv6
ignore IPv6 addresses
-ignore-local-ips string
sets list of local IPs to ignore
-ignore-local-ports string
sets list of local ports to ignore
-ignore-remote-ips string
sets list of remote IPs to ignore
-ignore-remote-ports string
sets list of remote ports to ignore
-ignore-subnets
ignore subnets
-ip-vrf-group string
default IP VRF group
-light-mode
reduces CPU utilization by cost of discovery speed
-new-device-object-category string
new device object category
-offline
doesn't connect with Device42, just prints the encrypted data to be sent
-prioritize-dns-name
Prioritize DNS domain name
-quiet
disables all logs
-service-ports-only
returns only service ports data
-skip-bios
disables bios discovery
-skip-cluster-info
disables cluster info discovery (Windows only)
-skip-cpu-info
disables CPU info discovery
-skip-database-info
disables database discovery
-skip-gpu-info
disables GPU info discovery
-skip-hardware-info
disables hardware discovery
-skip-hba
disables HBA discovery
-skip-hdd
disables HDD discovery
-skip-memory-info
disables memory discovery
-skip-mount-points
disables mount points discovery
-skip-network
disables network discovery
-skip-os-details
disables OS discovery
-skip-other-data
disables other data
-skip-parts
disables parts discovery
-skip-provider-unique-identifier
disables instance unique identifier lookup
-skip-serials
disables serial numbers discovery
-skip-service-ports
disables service ports discovery
-skip-services
disables services discovery
-skip-software
disables software discovery
-skip-tpm-info
disables TPM info discovery
-skip-virtual-machines
disables VM discovery
-software-initial-group string
default software group
-store-config-files
store configuration files
-sudo-password string
sudo password used in some OSes (Mac, Linux) to get information about the system
-use-global-ignore-software-file
use global ignore software file
-use-global-ignore-software-pattern-file
use global ignore software pattern file
-use-provider-token
use generated token to get instance info
-version
print version number and exit
Platform-specific Installation notes
The installation steps may vary depending on the operating system where the agent is being deployed. Follow the instructions below for your respective platform:
Linux and Mac: After downloading, make the file executable by running chmod +x <agentname>. For best results, run the agent with sudo. You can pass the password using the --sudo-password="password" command.
Windows: Use the Windows Task Scheduler to schedule the executable file (.exe) to run at your preferred intervals.