
 Community
 Video Library
 Agent Training
 Freshservice
 Freshdesk
 Freshchat
 Freshcaller
 Freshsales
 Freshteam
 Freshworks Neo
 Freshsurvey
 Freshservice for MSP
TABLE OF CONTENTS
- Overview
- Prerequisites for integration
- Scope of fields and items cloned
- Install the app
- Clone a change
- Limitations
Overview
Freshservice integration with the Clone Change Request app enables change managers to clone an existing change up to five times straight from the Change details sidebar. Every cloned request inherits the field values of the original change, with optional inclusion of its associated Attachments, Assets, and Tasks.
Prerequisites for integration
Ensure you have the following as part of the prerequisites for integration:
Account administrator privileges within Freshservice to initiate the integration.
Your Freshworks organization domain (for example, https://<my-org>.myfreshworks.com).
Scope of fields and items cloned
Default fields
Subject, Description, Status, Priority, Risk, Change type, Agent, Requester, Impact, Group, Planned start date, Planned end date, Department, Category, Sub-category, Planning fields, and Custom fields.
Additional items (optional)
Note:
When any additional item–Tasks, Assets, or Attachments is selected, the clone count is fixed at 1.
Clones follow the naming format ‘Clone {N} - {original subject},’ with numbering sequentially advancing from the most recent clone created from the source change.
Install the app
Follow these steps to install the app:
Log in to your Freshservice account.
Go to Admin > Automation & Productivity > Extensibility > Apps.
Or, click the Marketplace Apps icon at the top-right corner, and select Explore Marketplace Apps.
Search and select the Clone Change Request app using the Search apps option.
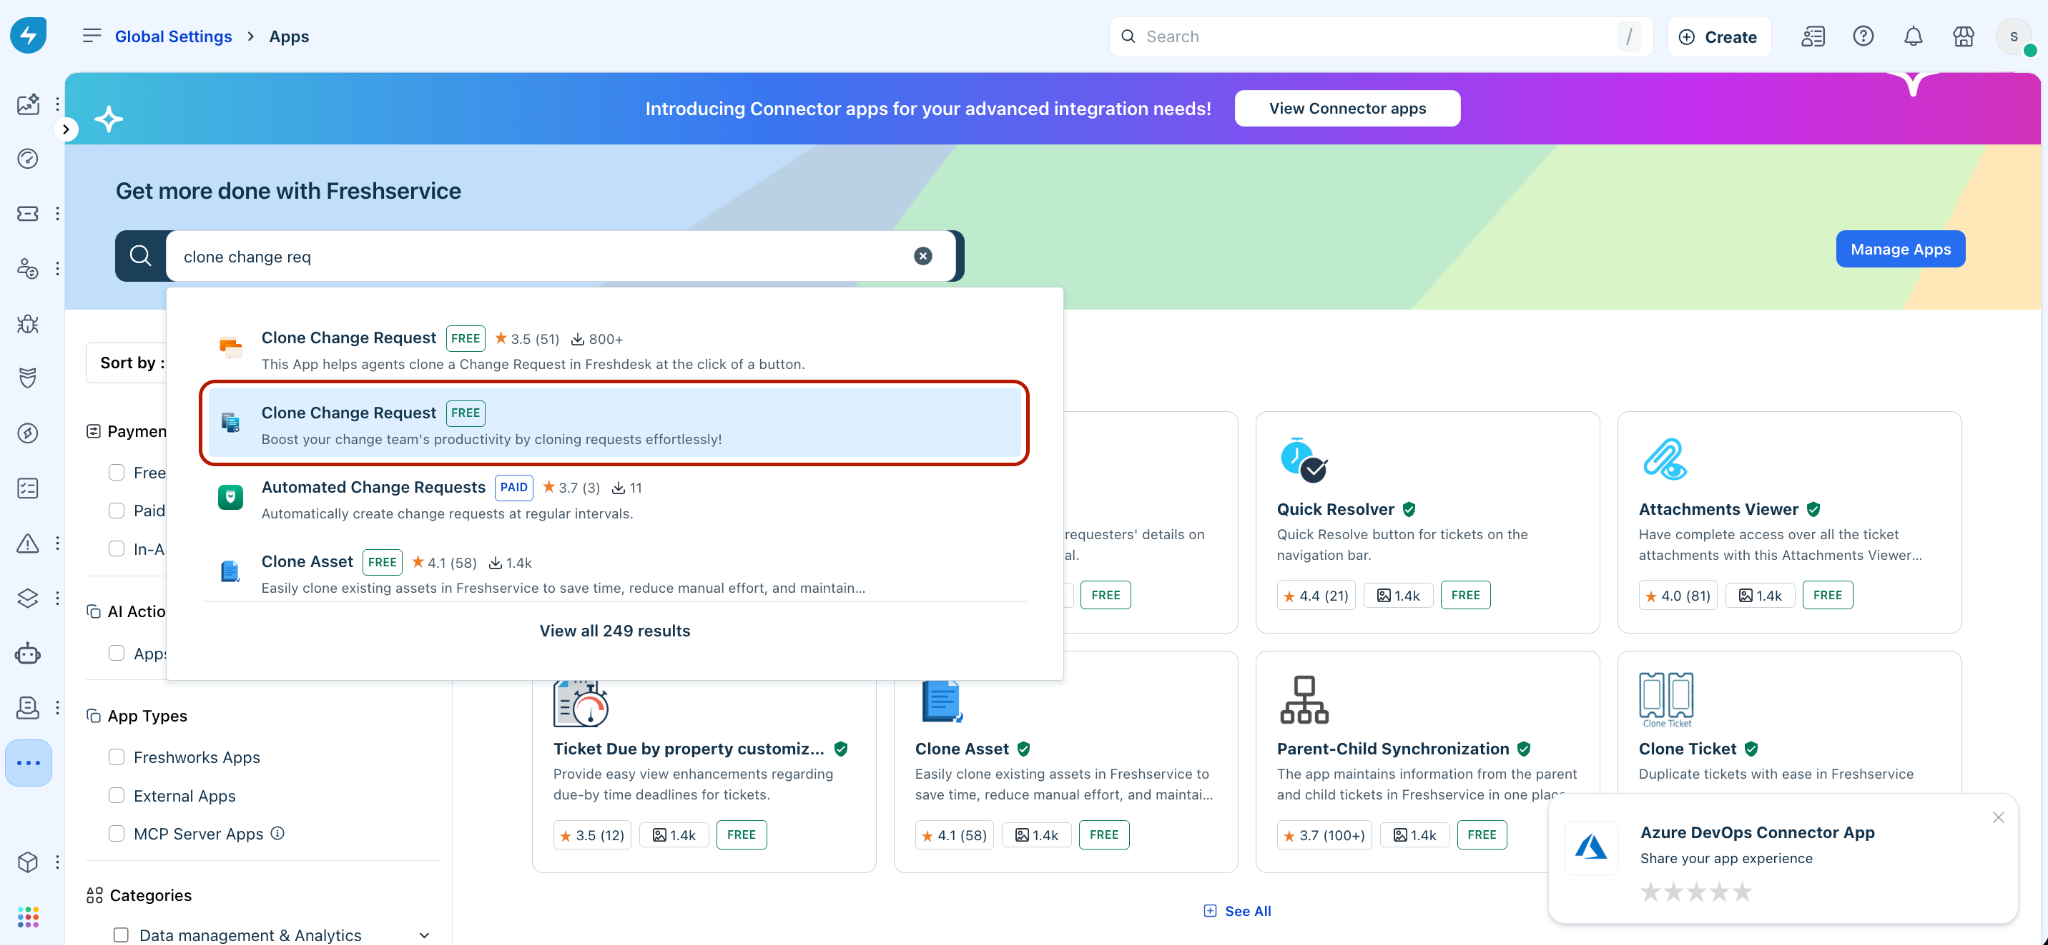
Click Install on the installation page.
(On the Configuration page) Under Freshservice - OAuth Parameters, enter the Freshworks Organization domain (for example, myorg.myfreshworks.com).
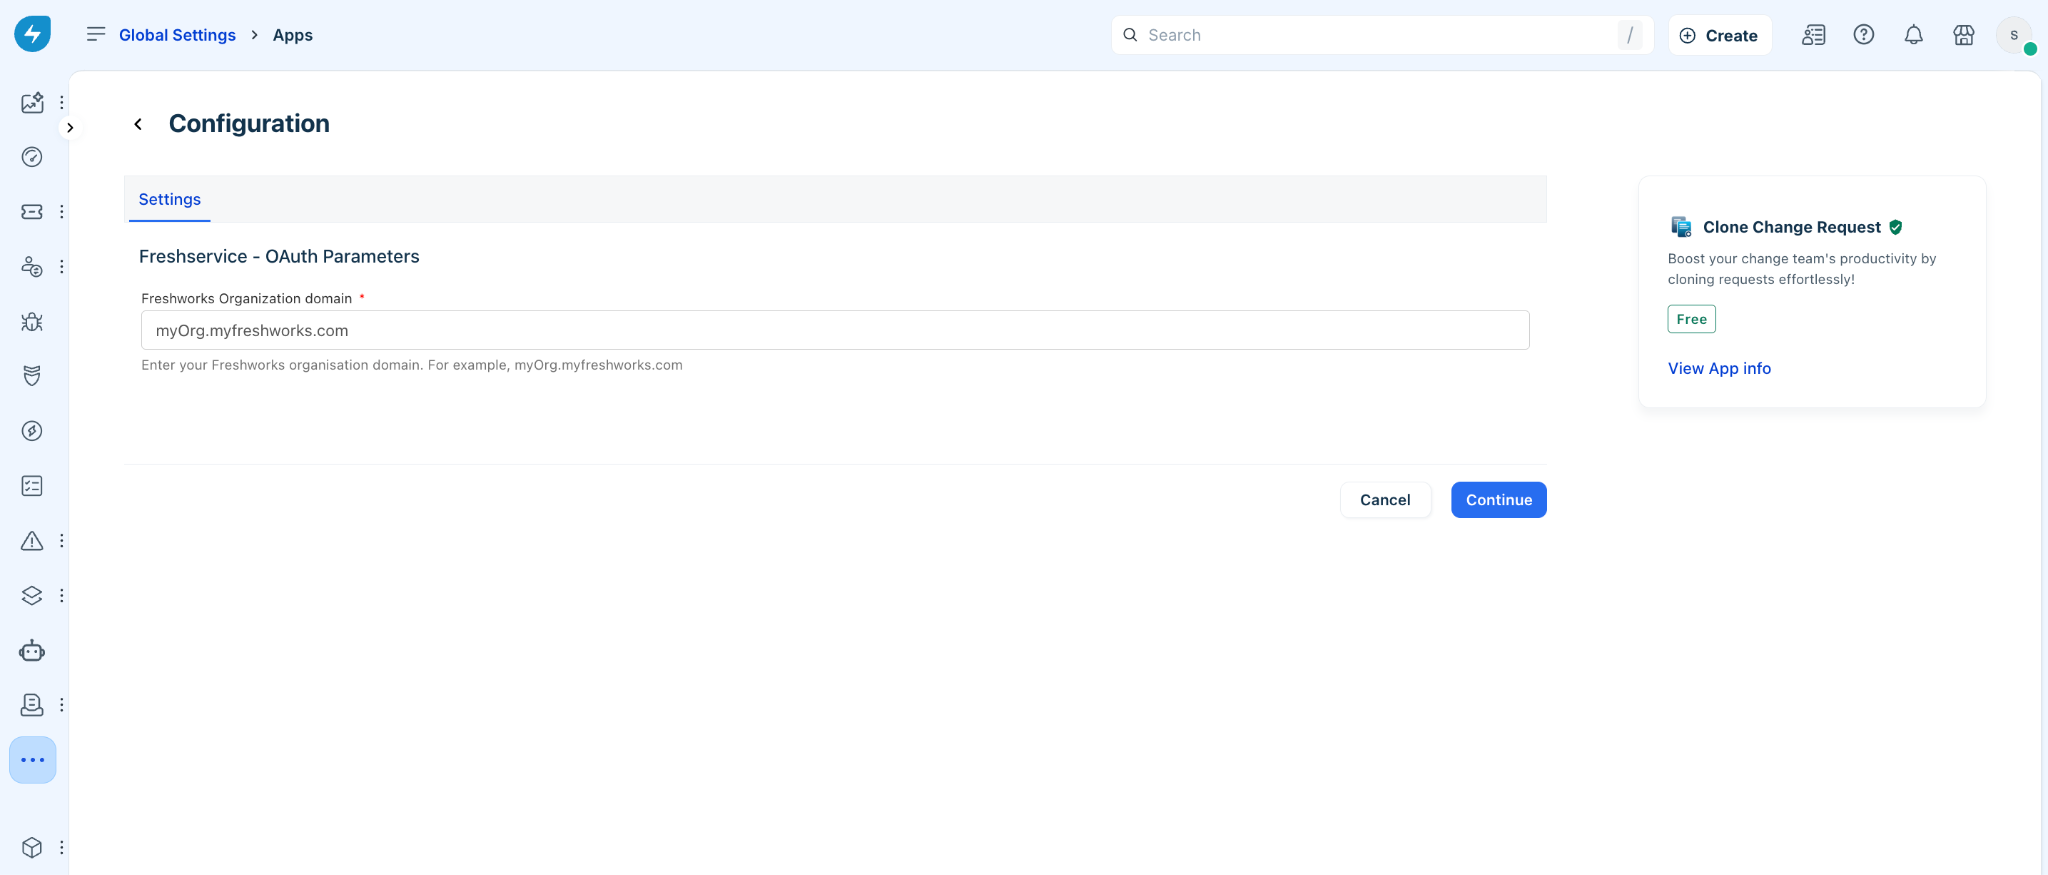
Click Continue. You are redirected to an authorization page.
Select your Freshworks account on the Authorization page and click Continue.
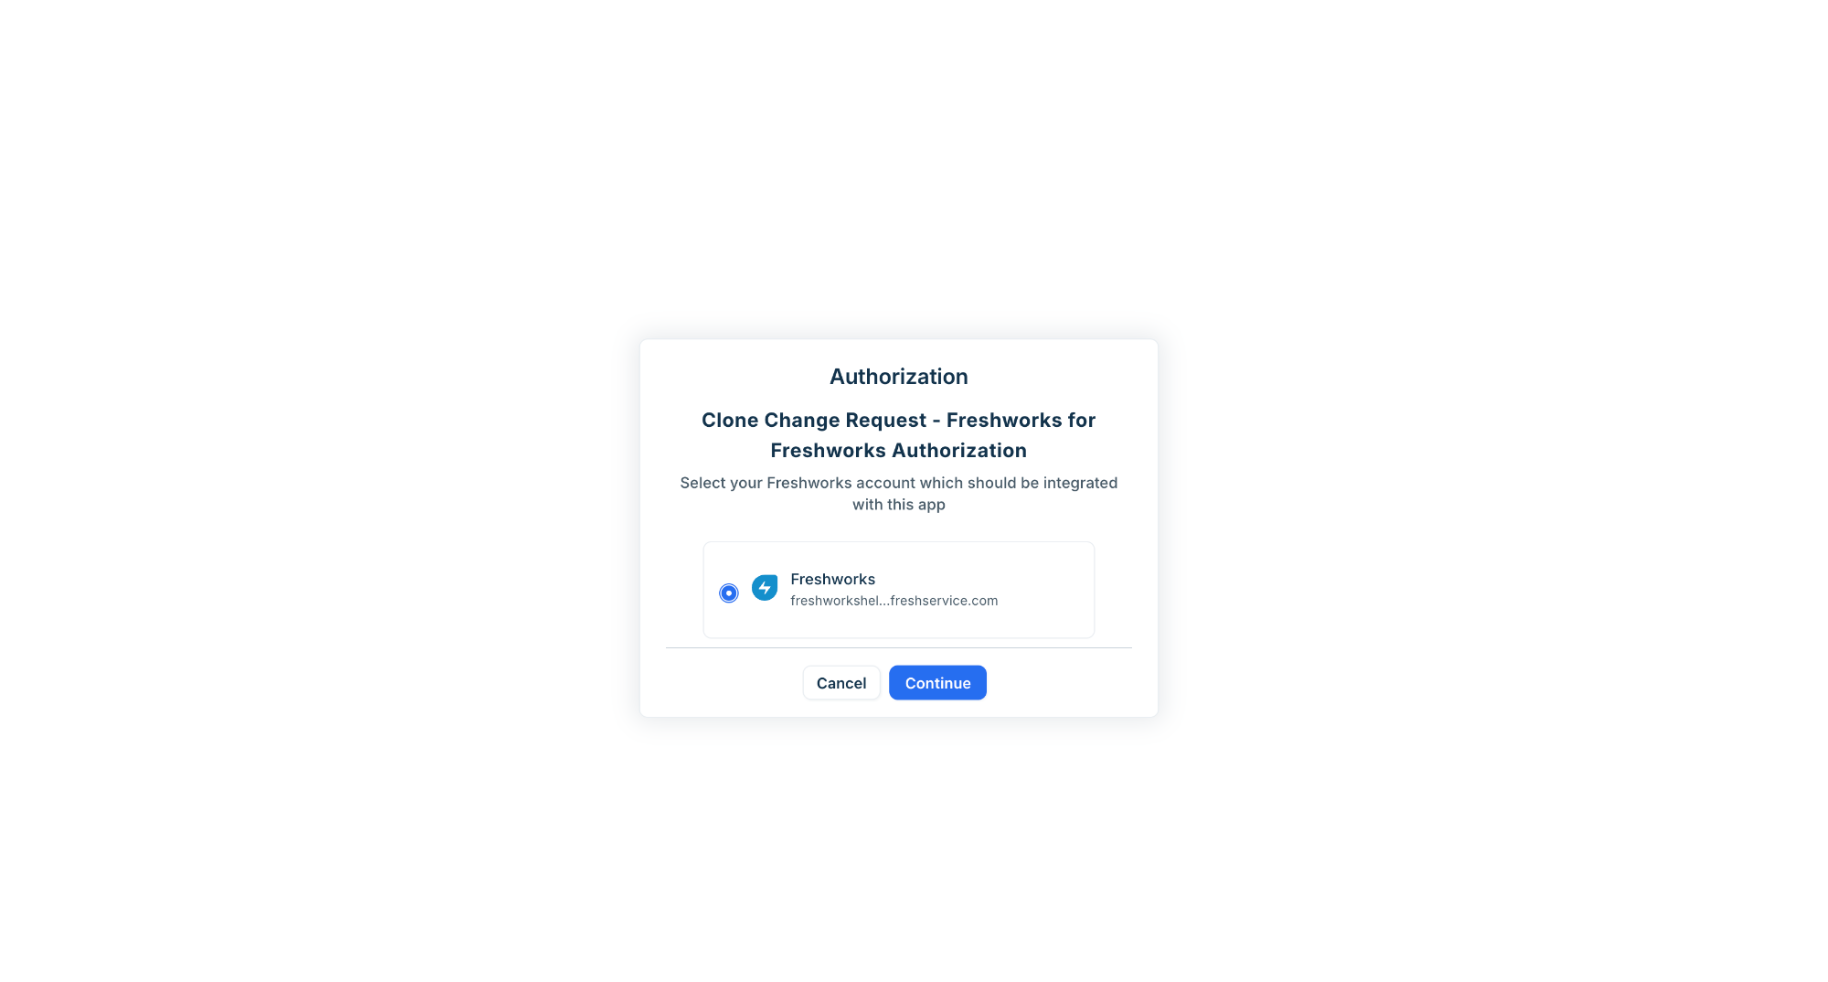
Note: Required app authorizations displayed on this page include: 'Changes – View, Create, and Edit' as well as 'Changes Tasks – View and Create.'
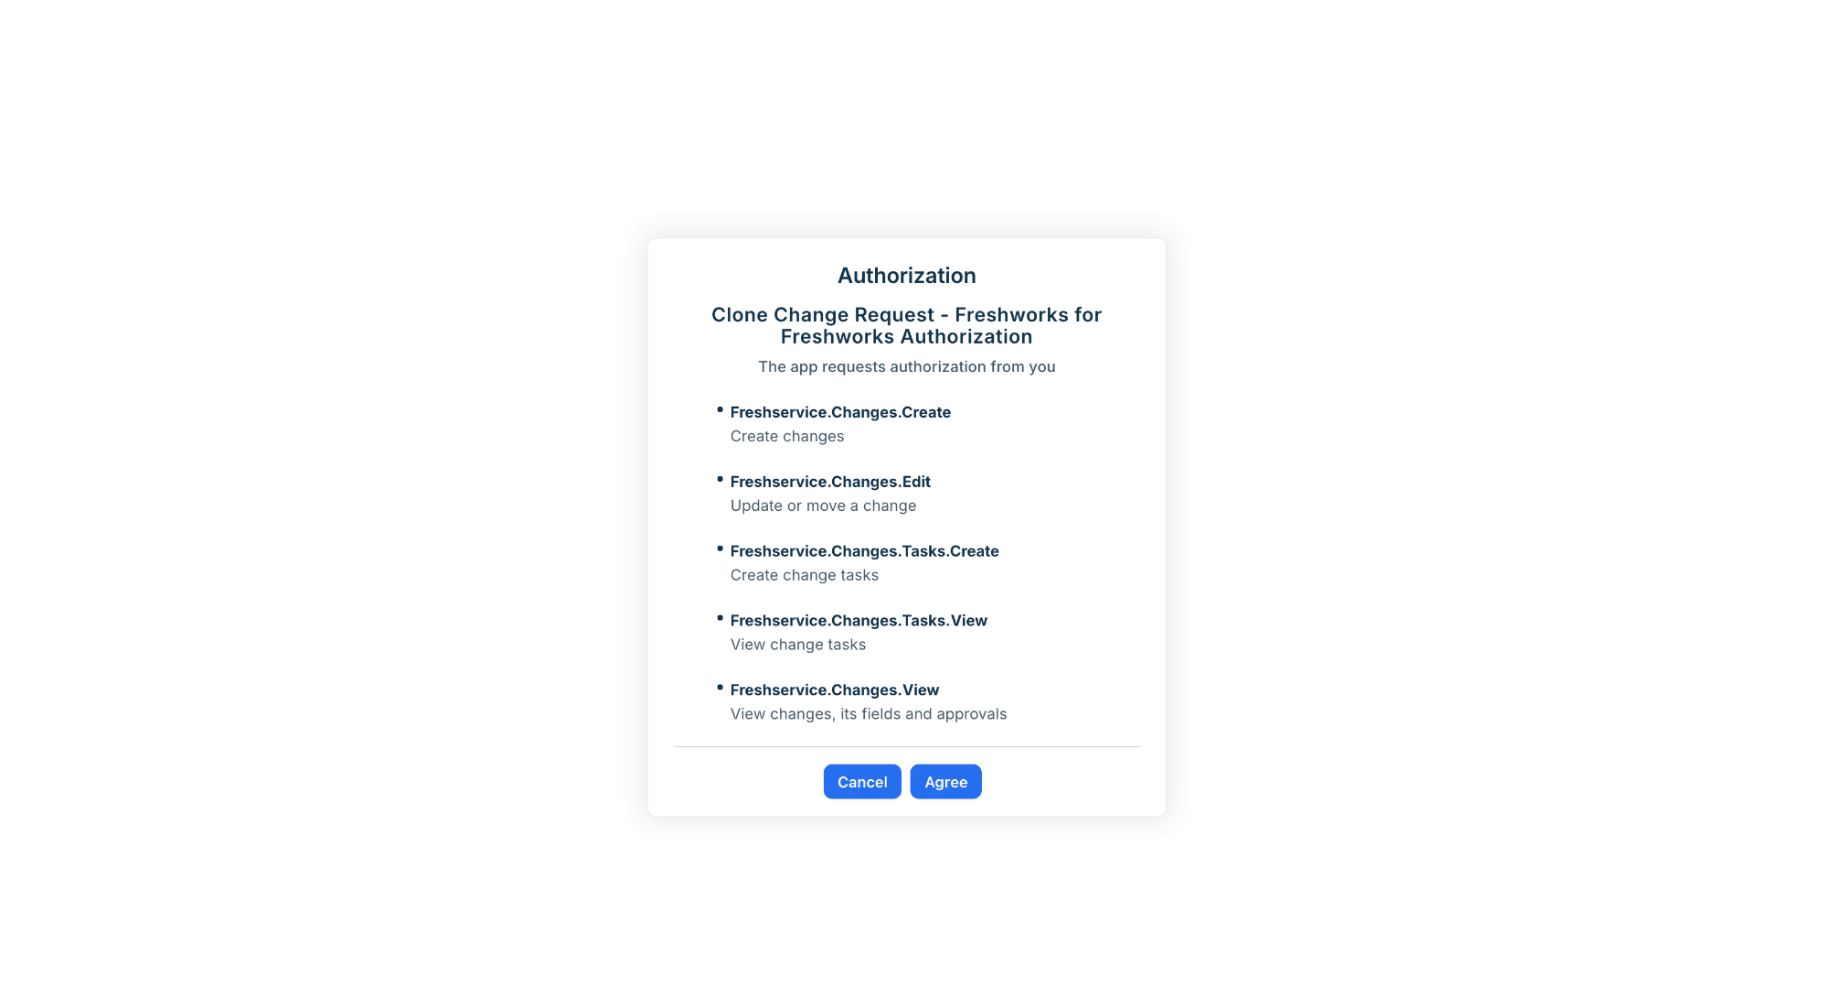
Review the list of required app authorizations and click Agree.
A notification confirms that the app has been successfully installed.
Clone a change
Follow these steps to clone a change:
Go to Changes.
Open the Change you want to clone.
Open the Clone Change Request app from the Change details sidebar.
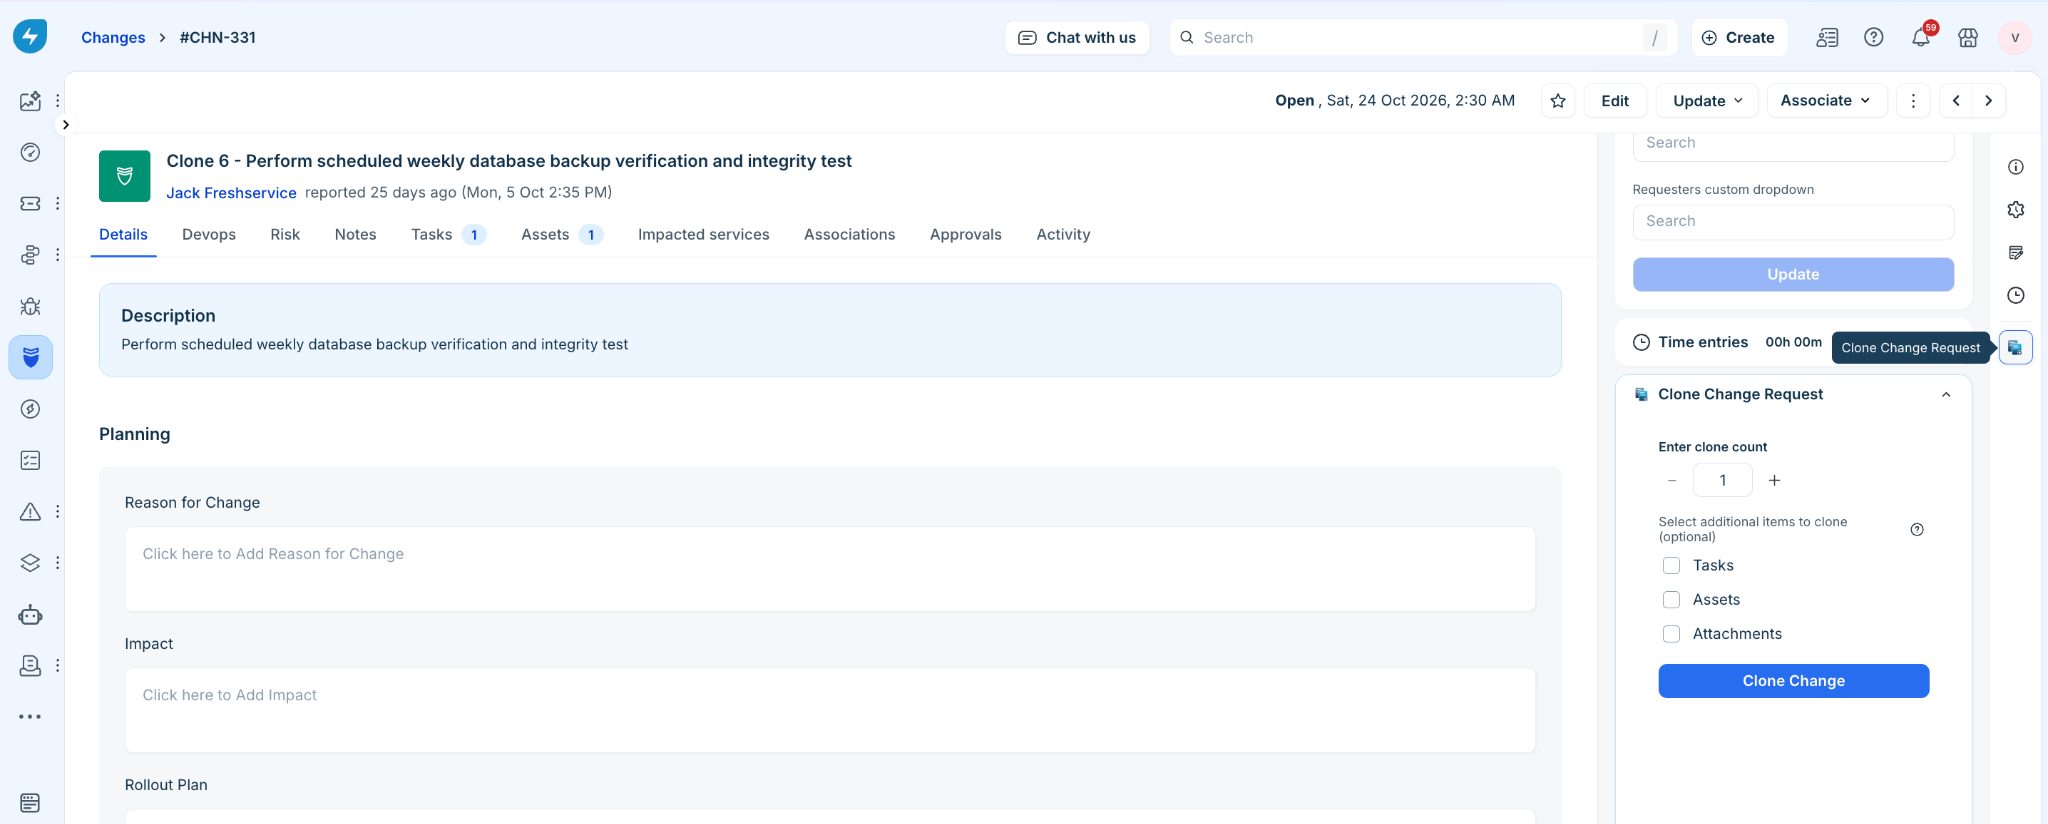
Set the number of clones (1 to 5) under Enter clone count.
(Optional) Select Tasks, Assets, and/or Attachments to copy them to the clone.
Note:
Selecting additional items automatically sets and restricts the clone count to 1.
Consequently, only a single clone can be created per operation when these items are included.
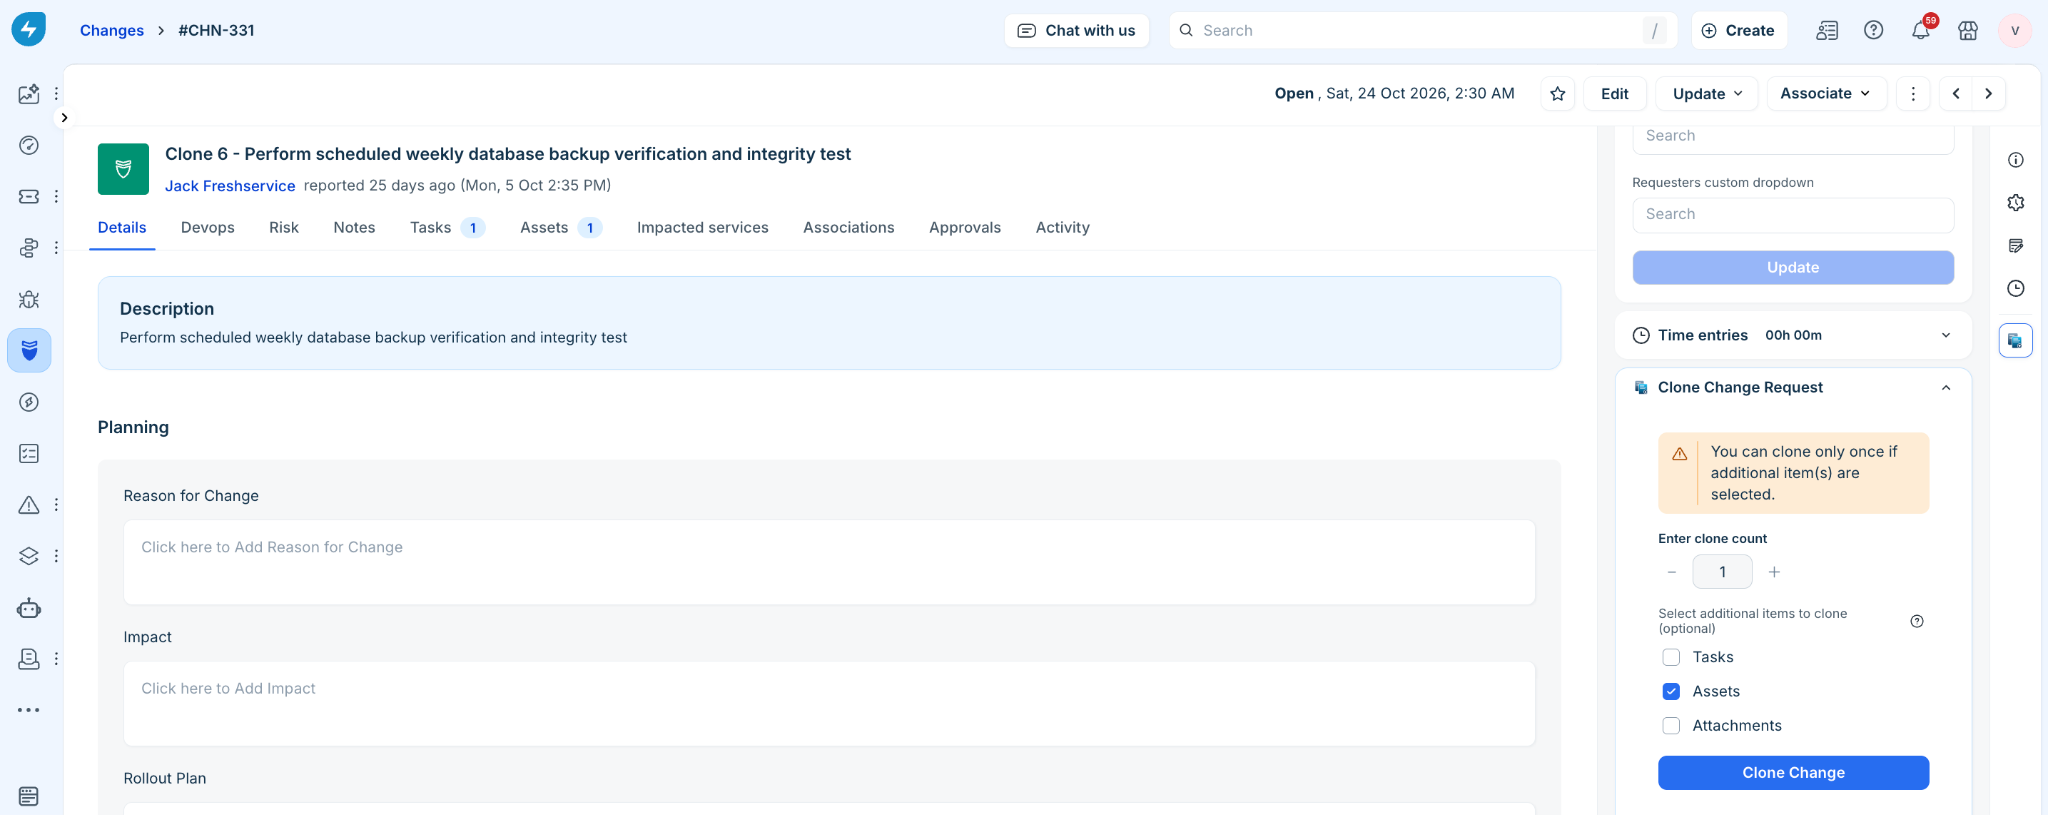
Click Clone Change.
Once the clones are generated, a confirmation message appears. Each new cloned change request is listed under Changes in the format ‘Clone {N} - {original subject}.’
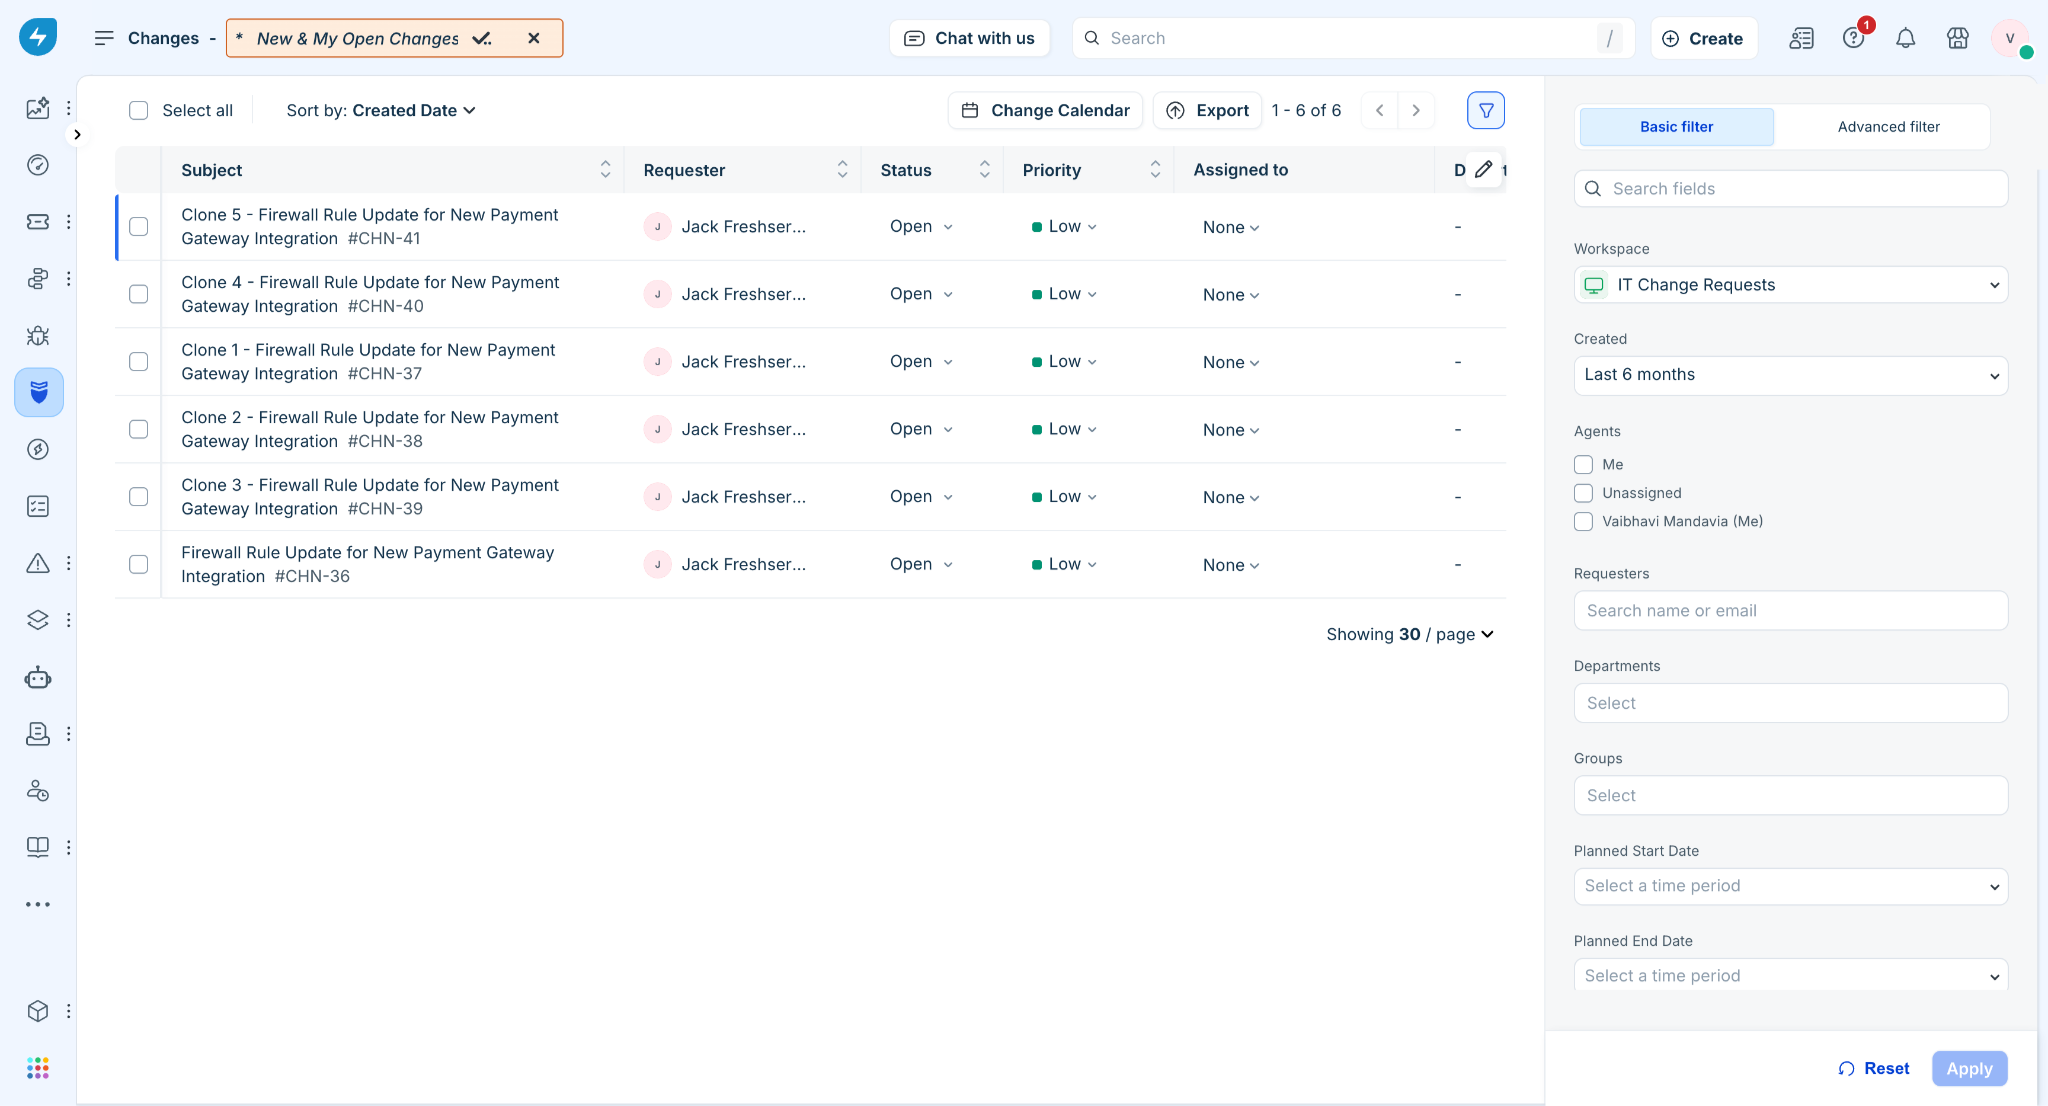
Example: Change cloned three times
When cloning the Change "Quarterly server patching" with a count setting of 3, the following instances are generated:
Clone 1 - Quarterly server patching
Clone 2 - Quarterly server patching
Clone 3 - Quarterly server patching
Subsequent cloning operations for this same Change will resume sequence numbering starting from Clone 4.
Limitations
Unsupported account types: The app currently does not support Enterprise Service Management (ESM) and Managed Service Provider (MSP) enabled IT service management accounts. The app supports Device42 (D42) enabled IT service management accounts, however the asset association is not supported when performing a change clone operation.
Clone quantity rules: When copying additional items such as Tasks, Assets, or Attachments, cloning is restricted to 1 copy per operation.
Attachment file constraints: Up to 5 attachments in .json format are supported per clone. Reliable copying is limited to text-based formats (like .json); non-text files such as images, PDFs, and Office documents may fail to copy. The app alerts users by listing any files that could not be processed.
Business rules validation errors: Because each clone is generated via a POST /api/v2/changes API call, Freshservice enforces standard agent and new-form business rules prior to saving the Change. Since the app copies existing values from the source Change (such as status, custom fields, and planning fields), rules that lock or disable specific fields may block creation—even if the user has permission to view the original request. The underlying platform provides no public API flag to bypass these business rules.
Sample HTTP 400 response:
{
"description": "Validation failed",
"errors": [{
"field": "business_rules",
"message": "Business Rules Violated - <rule label> cannot be edited",
"code": "invalid_value"
}]
}
Recommended workaround: Modify or scope the restricting rule under Admin > Workflow Automator / Business Rules so that creation payloads are not flagged for locked fields. Resolving this requires updating account configuration; excluding fields within the app code is not advisable as it would result in incomplete clones.