
 Community
 Video Library
 Agent Training
 Freshservice
 Freshdesk
 Freshchat
 Freshcaller
 Freshsales
 Freshteam
 Freshworks Neo
 Freshsurvey
 Freshservice for MSP
 TABLE OF CONTENTS
- Overview
- Prerequisites and permissions
- Supported file formats and import limits
- Import single or multiple document files
- Bulk import articles (csv or xlsx)
- Import rules and error validation messages
- Post-import status and error handling
Overview
Managing knowledge across multiple external systems can create governance gaps and unnecessary operational overhead. Freshservice enables account admins and knowledge admins to bring all external documentation into Freshservice and manage its complete lifecycle from a single platform, eliminating the need to maintain disparate tools.
To transition your existing documentation into Freshservice, you can use the Article Import feature. Whether you are transferring standalone files or migrating an entire repository from a legacy system, Freshservice supports both individual document uploads (.docx, .txt, .md) and bulk spreadsheet imports (.csv, .xlsx).
Centralizing your documentation in Freshservice maintains content governance, allows you to assign articles to specific agent groups, enforces approval workflows, and lets agents link solutions directly to tickets.
Prerequisites and permissions
To import articles, agents must have the required permission:
Required permission: ‘Publish a Solution’ under Global Settings > Roles > Agent role > Solutions.
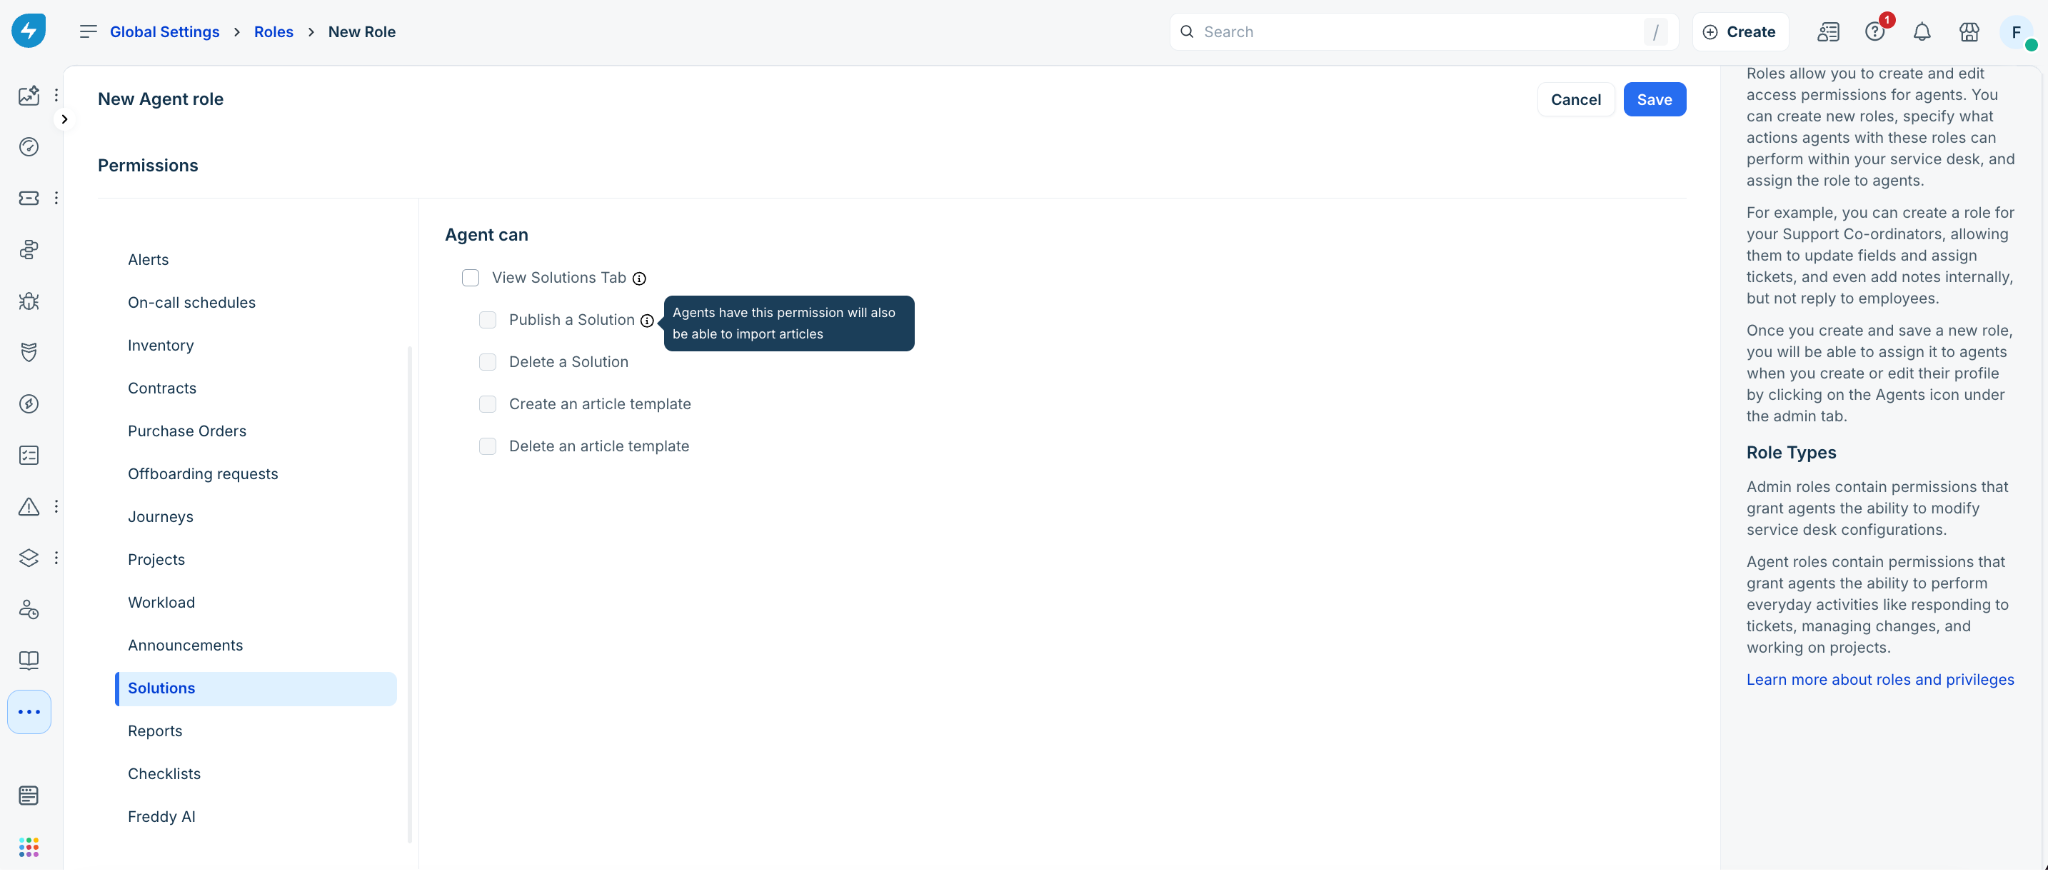
Access scope: Agents with this permission can import single or multiple document files as well as bulk spreadsheet files into any category or folder where they have write and publish privileges.
Note: If an agent attempts to import articles into a folder for which they lack edit or publish permissions, those specific articles will fail during the import process.
Supported file formats and import limits
Two import workflows: document-based imports and structured spreadsheet imports are supported.
File format requirements and rules
PDF files (.pdf) are NOT supported: Uploading .pdf files will result in an error. Convert PDF content to .docx, .txt, or .md before importing.
Markdown (.md) is supported: Native .md files can be uploaded directly using the document import option.
Do not mix file types: Document files (.docx, .txt, .md) and spreadsheet files (.csv, .xlsx) cannot be uploaded in the same import batch.
Import single or multiple document files
Use this method to import individual documents or a batch of text/markdown files into a designated Knowledge Base folder.
Log in to your Freshservice account.
Go to Solutions > Knowledge Base from the main navigation menu.
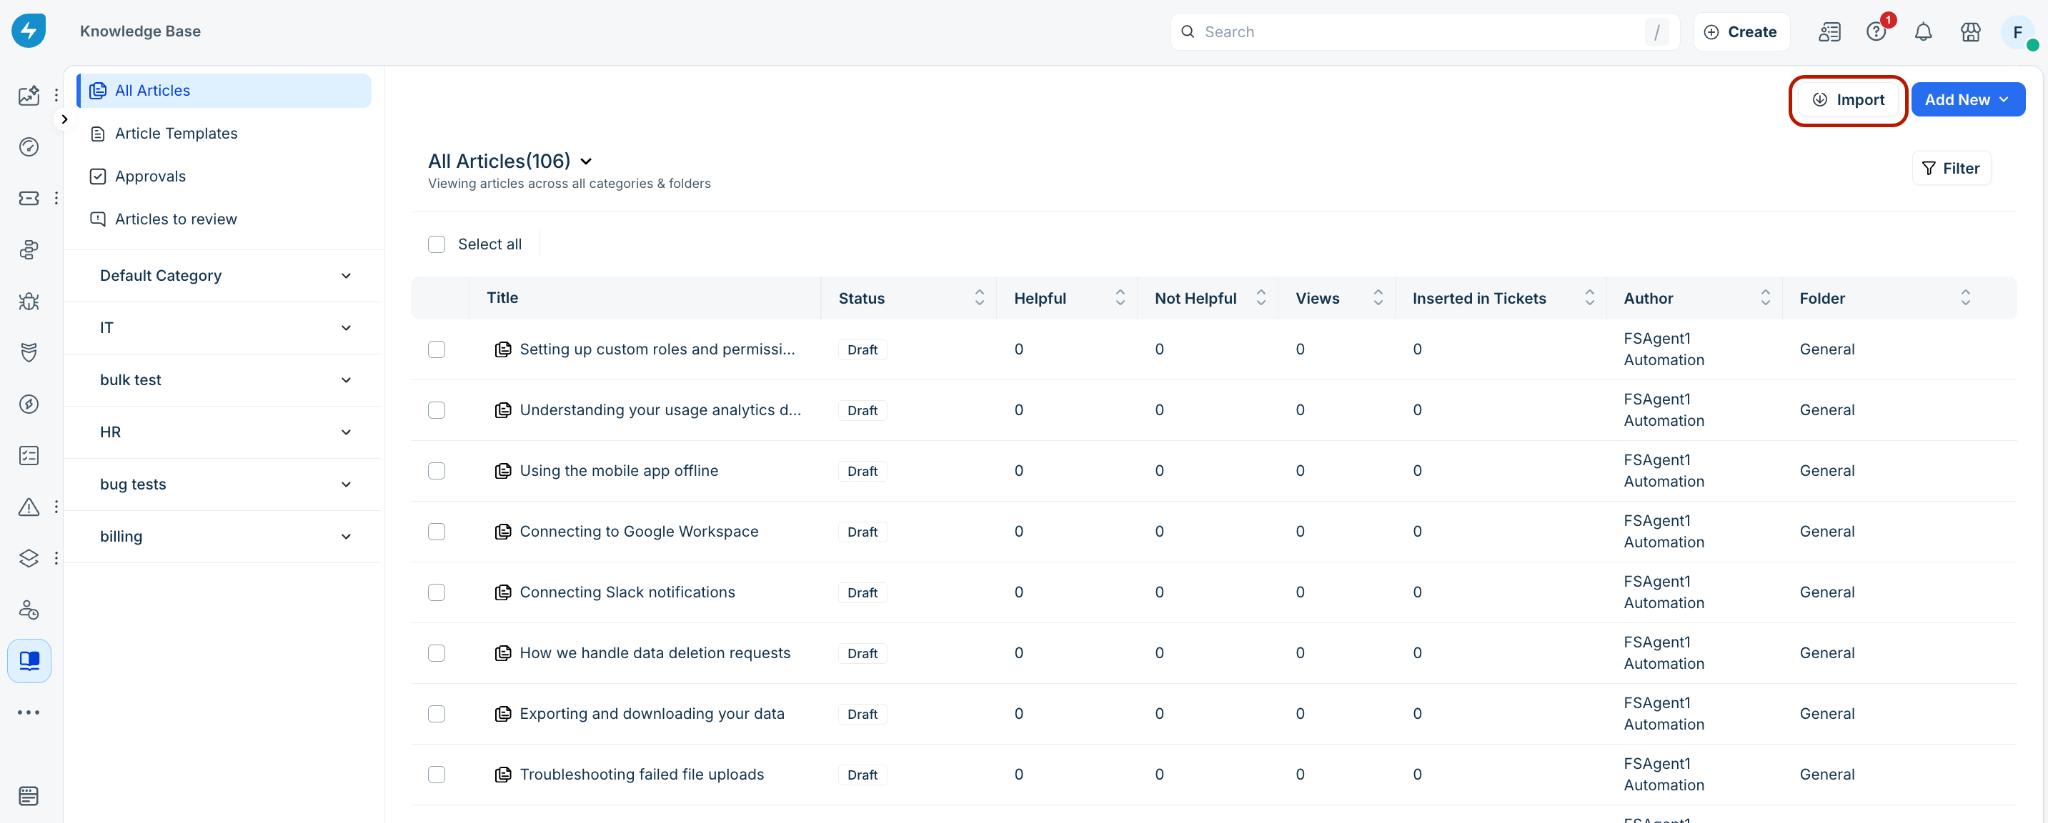
Click Import on the top right (or click Import on the Knowledge Base empty state screen).
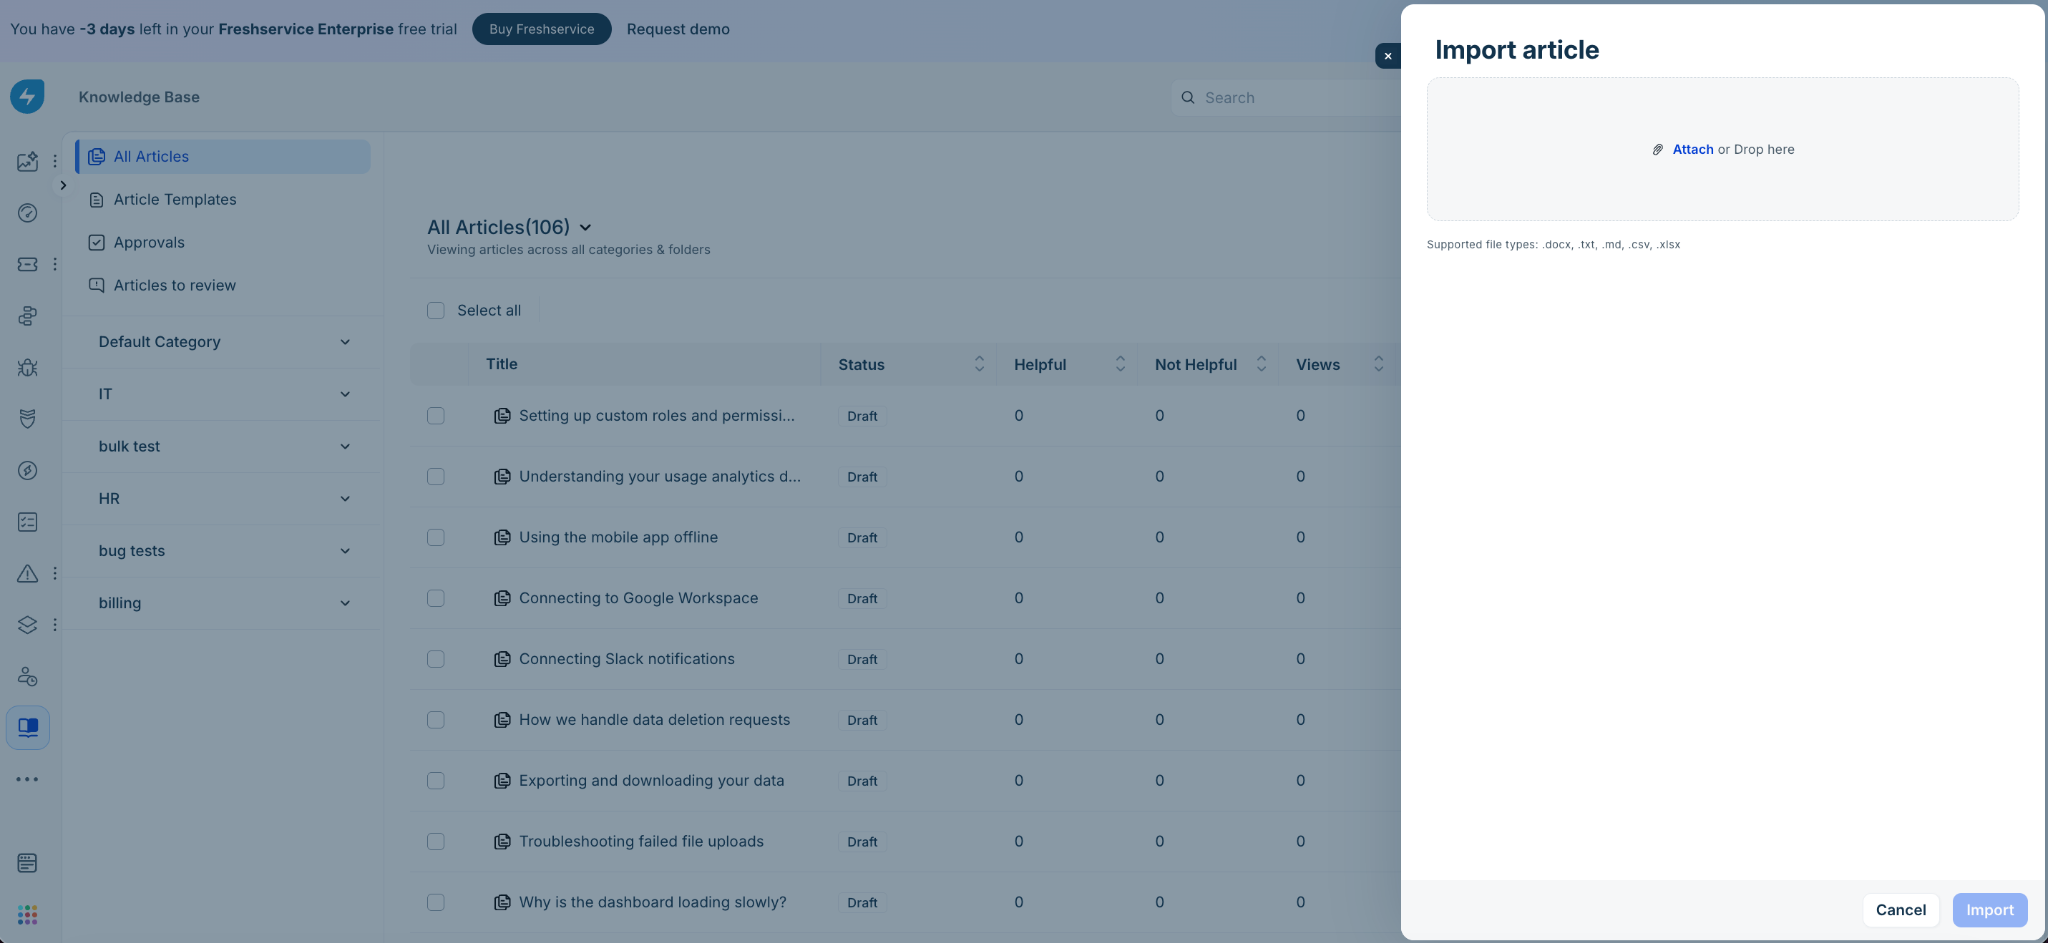
In the Import article slider, click Attach or drag and drop your files into the upload box.
Multiple supported document files (.docx, .txt, .md) can be attached as long as the total combined size is under 10 MB.
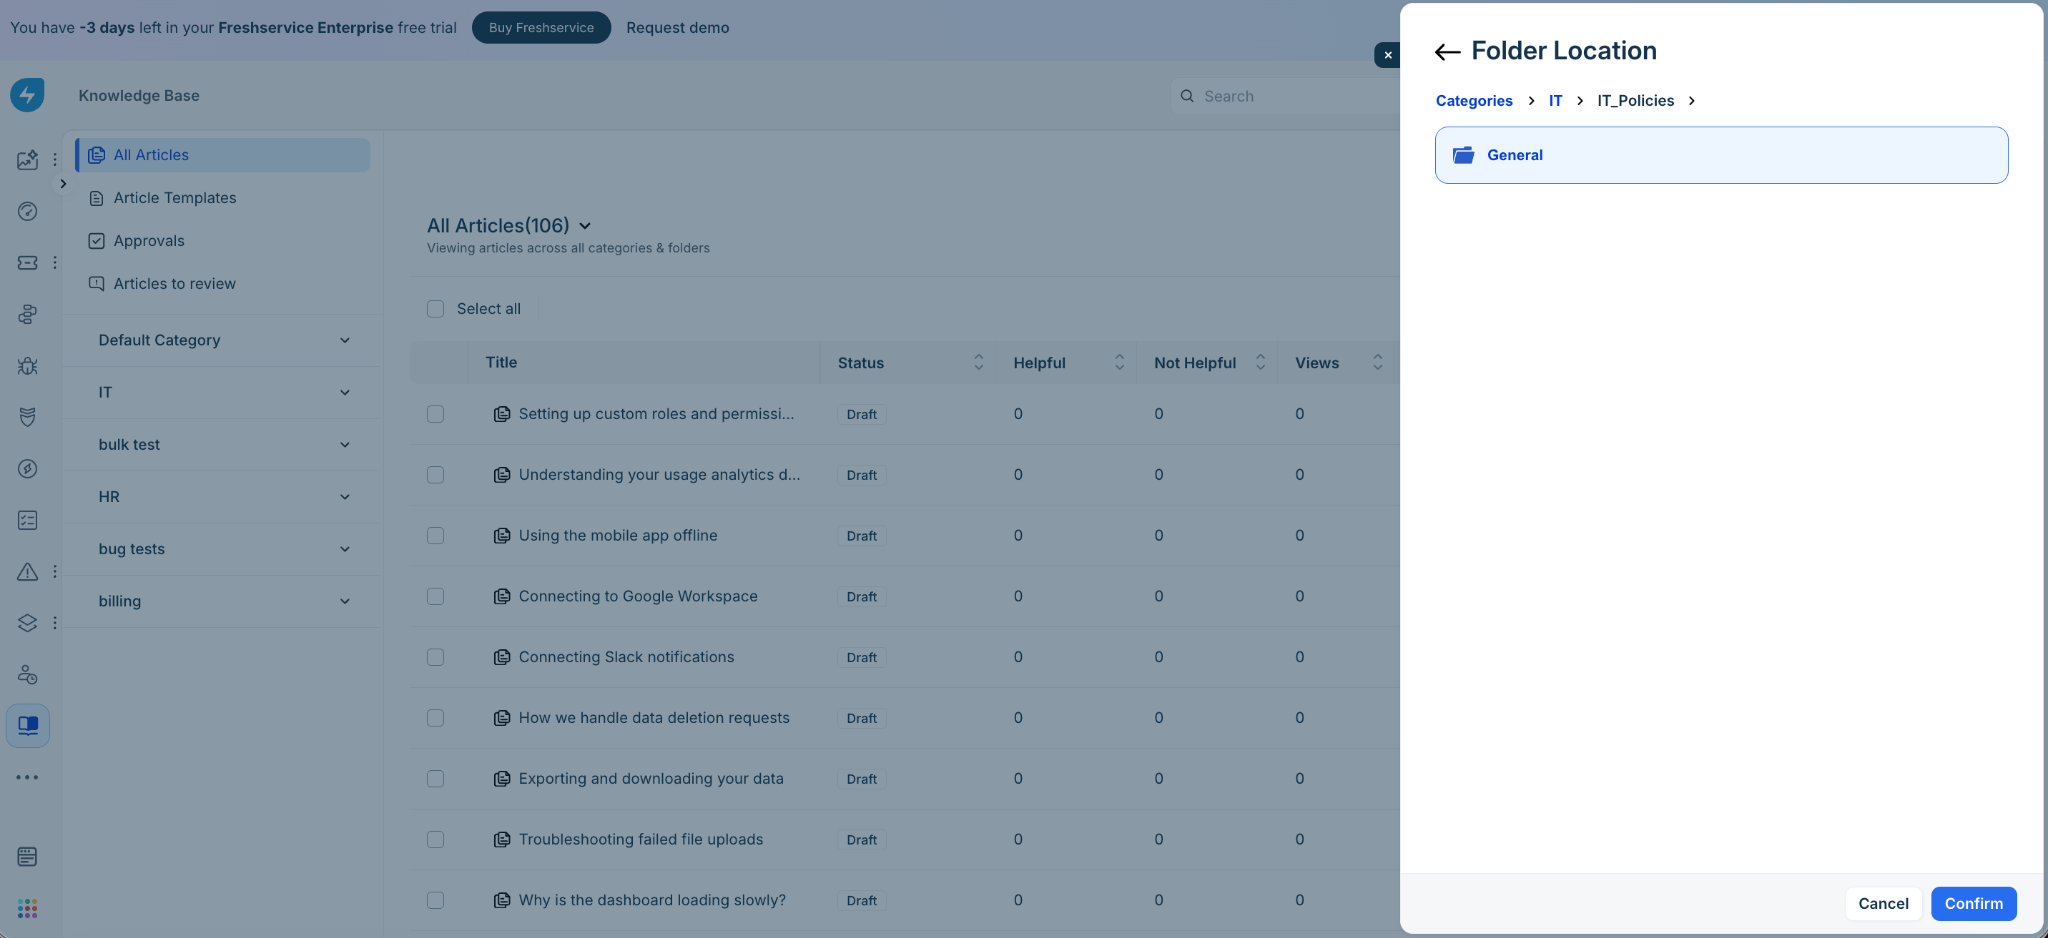
Select the mandatory Article location:
Click the location field to open the Folder location modal.
Drill down through Category > Sub-category > Folder (for example, IT > IT Policies > General).
Click Confirm. This target folder will be applied to all documents in the upload batch.
(Optional) Enter Tags and Keywords to apply metadata across all imported documents in the batch.
Click Import.
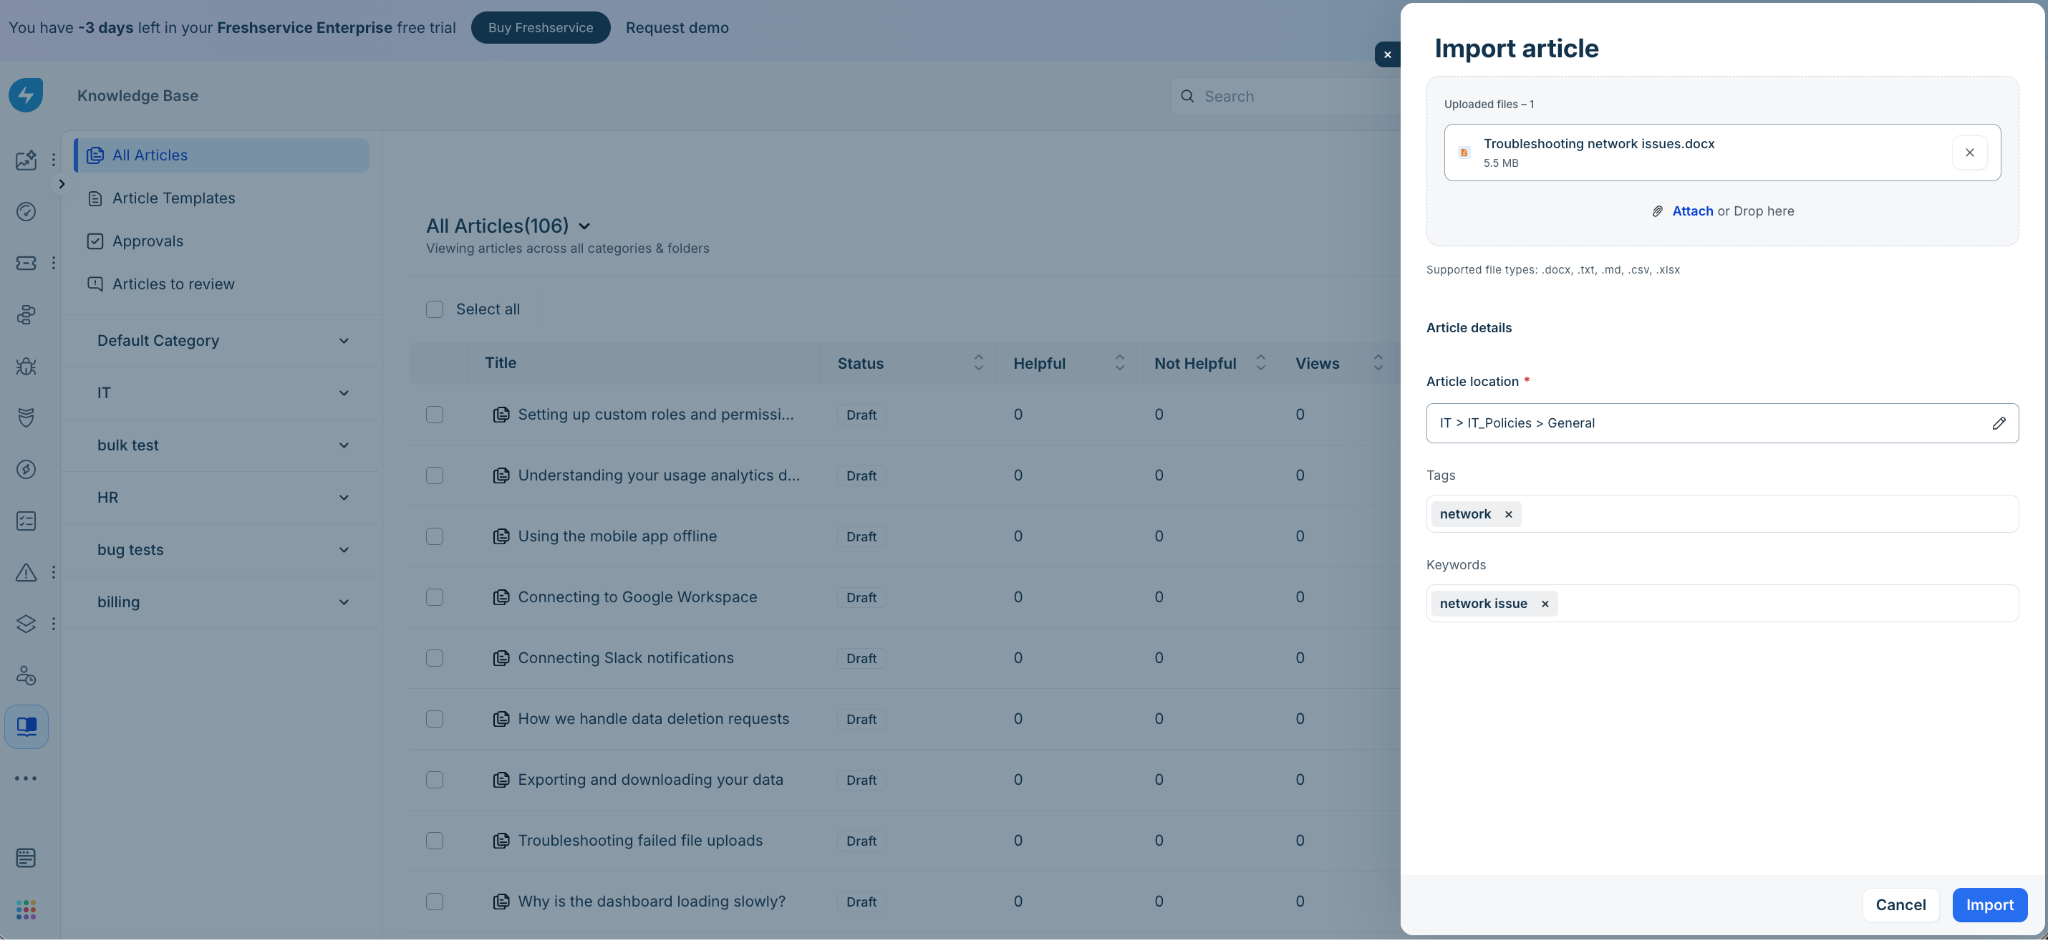
All imported document files are created as individual articles in Draft status within the selected folder.
Bulk import articles (csv or xlsx)
Bulk spreadsheet import is designed for migrating large volumes of articles. Each row in your csv or xlsx spreadsheet represents an individual knowledge article.
Step 1: Format spreadsheet data
Before uploading your csv or xlsx file, ensure your data meets these requirements:
Separators: Use semicolons (;) to separate multiple values in a single cell (such as multiple tags or keywords).
Mandatory content: At least one article content field (HTML or text) is required per row.
Date formats: Review dates must strictly follow YYYY-MM-DD, MM/DD/YYYY, or DD.MM.YYYY formats.
Pre-existing locations: Category and folder names listed in the spreadsheet must already exist in Freshservice. Missing categories or folders during import are not auto-created.
Step 2: Upload the file
Go to Knowledge Base and click Import.
Attach or drag and drop your single .csv or .xlsx file.
Click Continue.
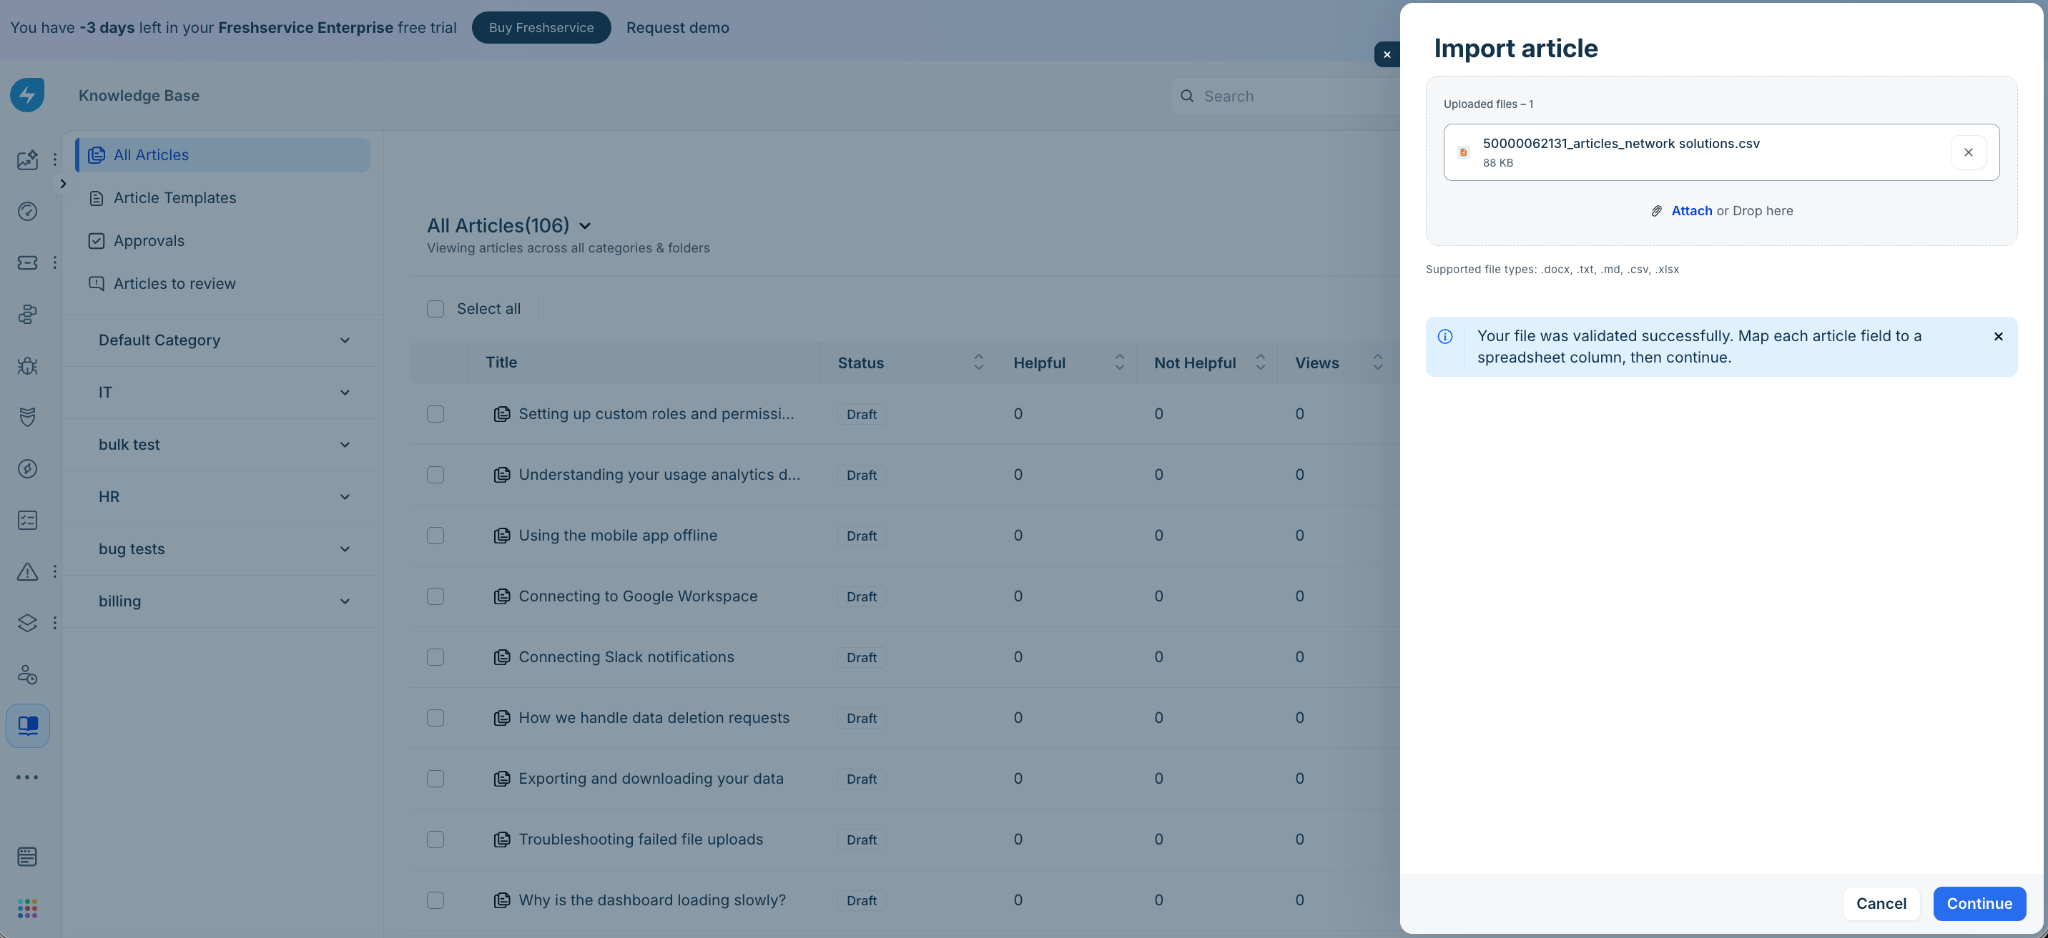
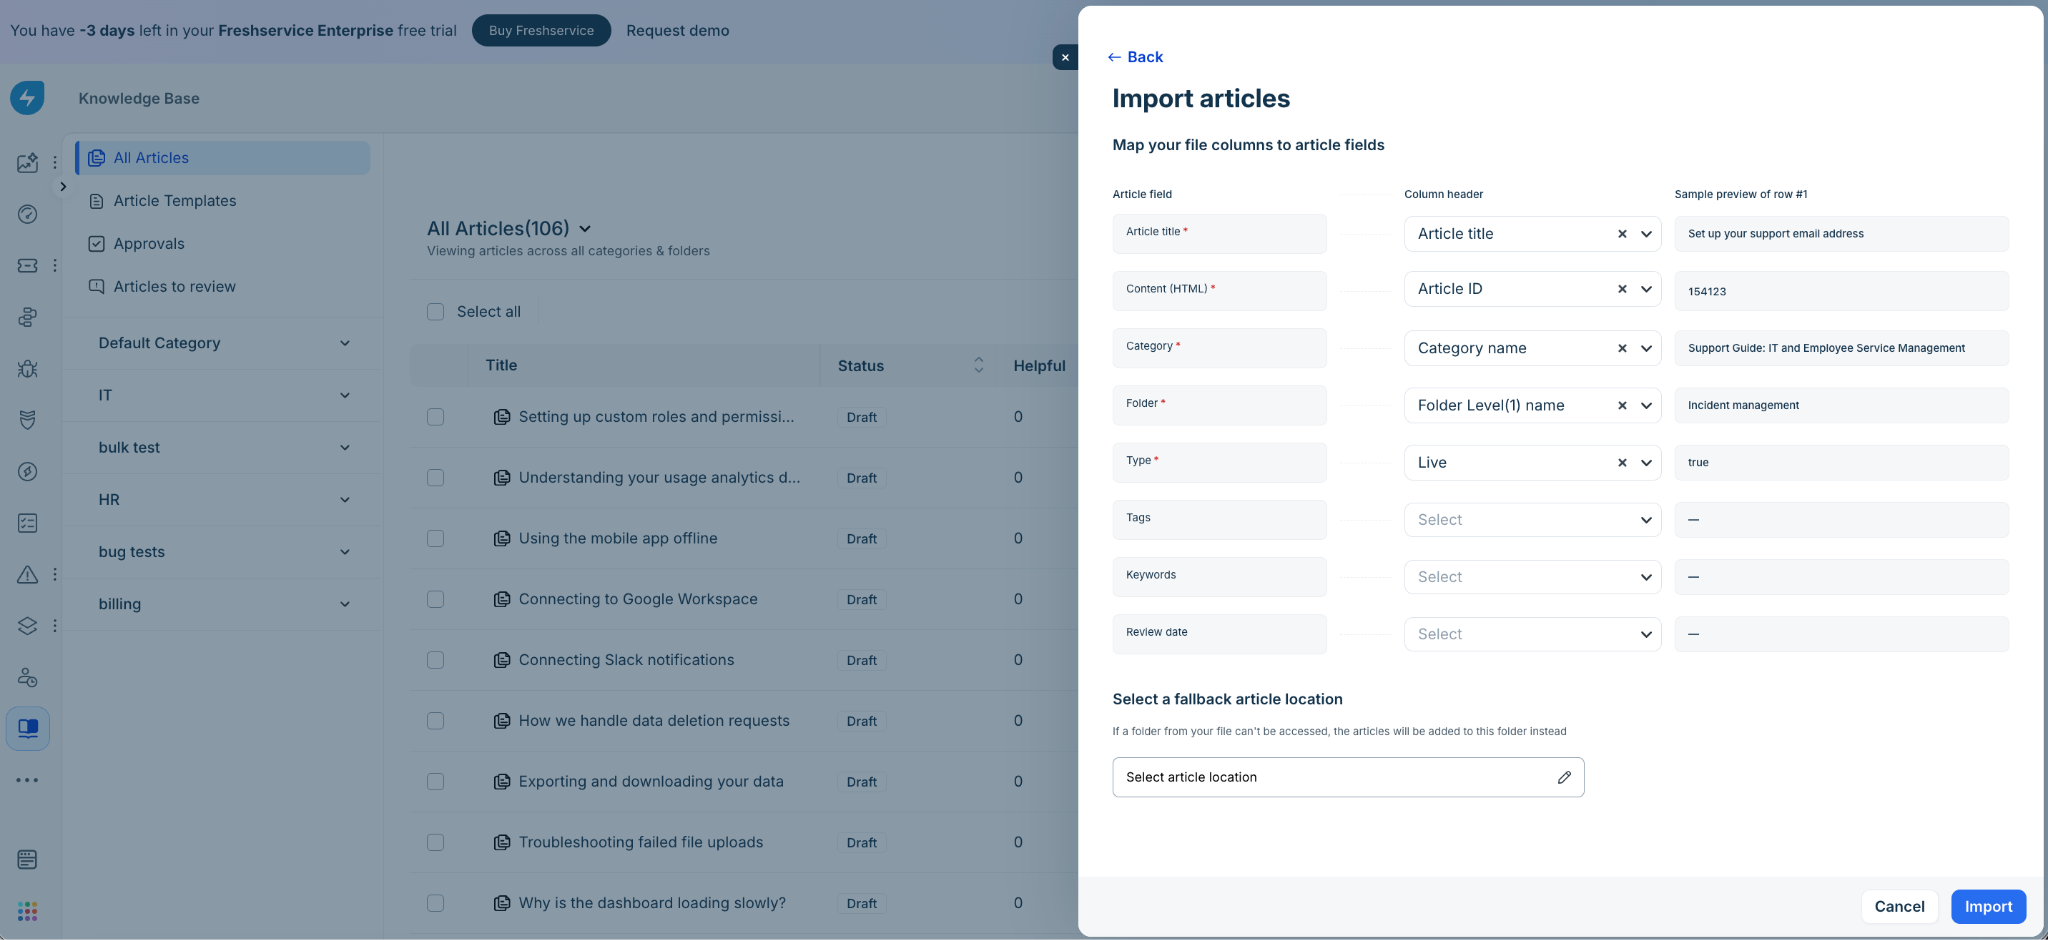
Step 3: Map columns to article fields
Freshservice automatically detects and maps column headers to corresponding solution fields. Review and adjust these mappings using the drop-down selectors:
Mandatory mappings:
Article title: Column header for solution article title.
Content (HTML): Column header containing article body content.
Category and Folder: Article placement location.
Type: Article classification.
Optional mappings:
Tags and Keywords: Searchability tags and keywords.
Review Date: Next review date (YYYY-MM-DD).
Note: Select Do not import from the dropdown for any column in your spreadsheet that should be excluded from the import.
Step 4: Set a fallback article location
Under Select a fallback article location, select a default Category and Folder.
If a row in your spreadsheet leaves the Category/Folder cells blank, or if the specified folder cannot be accessed, the article will automatically be created in this fallback folder instead of failing.
Step 5: Execute import
Click Import to initiate processing the spreadsheet.
Import rules and error validation messages
If your upload violates import rules, immediate in-app error messages are shown:
Mixing csv and documents: "You can't import csv and document files together. Remove one file type to continue."
Multiple csv Files: "Only one CSV or Excel file can be imported at a time. Remove the extra file to continue."
Unsupported file types: Attempting to upload unsupported files (such as .pdf) will show an invalid file type error.
Post-import status and error handling
Processing and email summaries
During bulk import, an in-app banner appears: "Bulk article import is in progress. You'll receive an email once it's completed."
All successfully imported articles are placed in Draft status and remain hidden from portal end-users until published by an agent.
When processing completes, an email with the subject "Solution articles import complete" is sent to the agent who initiated the import. The email includes total imported article counts, failed article counts, and direct links to View knowledge base or Download error report.
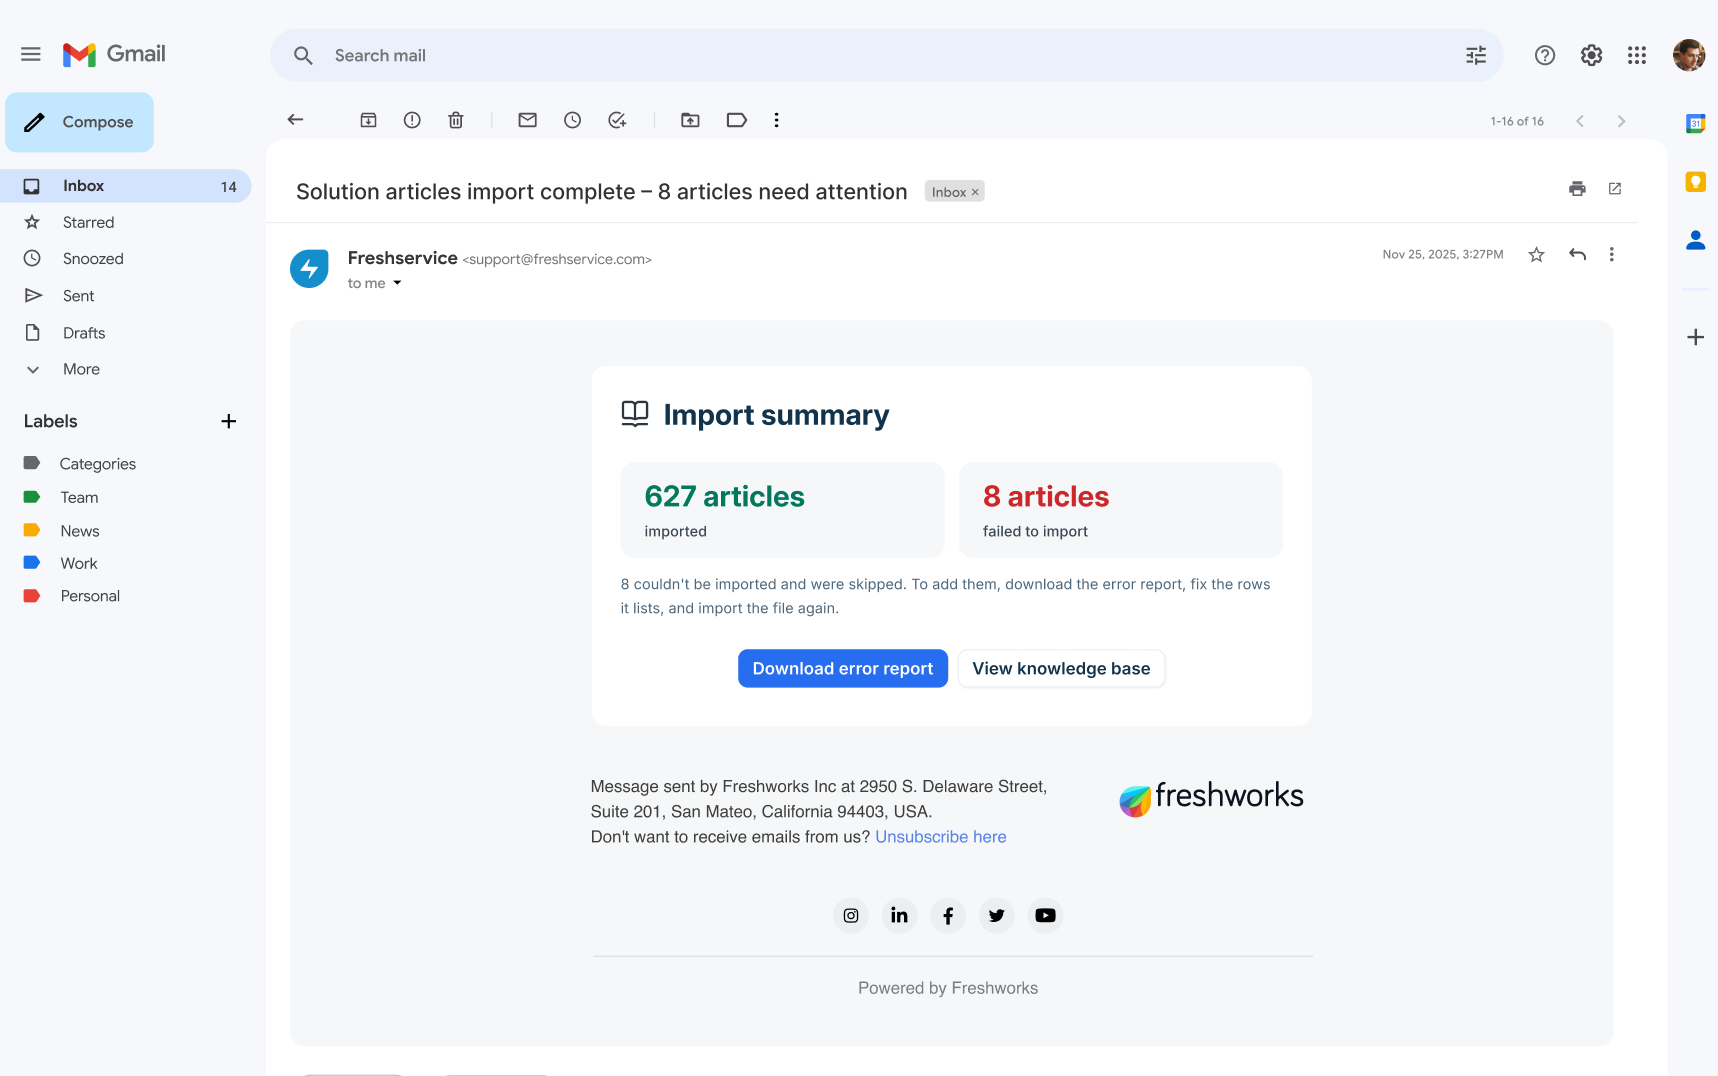
Resolving failed rows (via the error report)
If any rows fail during bulk import, click Download error report in the summary email. A downloadable csv file is provided containing your original uploaded rows with an appended Error message column detailing the failure cause.