
 Community
 Video Library
 Agent Training
 Freshservice
 Freshdesk
 Freshchat
 Freshcaller
 Freshsales
 Freshteam
 Freshworks Neo
 Freshsurvey
 Freshservice for MSP
 Asset templates allow you to define standardized assets that take U space or power in a rack. You can create custom racked asset templates or use predefined ones to quickly drag and drop assets into your visual rack layouts.
This article provides an overview of how to create new asset templates and use predefined template blocks for visually managing rack layouts.
TABLE OF CONTENTS
- Prerequisites
- Add a new asset template
- Edit a racked asset template
- Delete a racked asset template
- Export racked asset templates
Prerequisites
You need to have administrator privileges to access and manage the Infrastructure module.
Add a new asset template
To add a new asset template, follow these steps:
Go to Admin and select Racked Asset Templates under the Infrastructure section.
On the Racked asset templates page, click Add new.
On the Add Racked asset template page, under the Details section, configure the following properties:
Name: Enter a unique name for the template. This field is required.
Type: Select the hardware classification from the dropdown menu.
Size: Enter the size of the asset in rack units (U). You can enter values up to one decimal place. For example, enter 0.5 for a 1/2 U asset.
Depth: Select the physical depth constraint from the dropdown menu.
Width Ratio: Select the required width ratio value from the dropdown menu.
Image (Optional): Select a representative image for the asset from the dropdown menu.
Click Save.
Edit a racked asset template
If you need to update the hardware specifications or details of an existing template, you can modify it from its detail page.
To edit a template, follow these steps:
On the Racked asset templates list page, click the name of the template you want to modify to open its detail page.
Click the Edit button in the upper-right corner.
Update the template properties as needed, such as the Name, Type, Size, or Depth.
Click Save to apply your changes.
Delete a racked asset template
You can delete a racked asset template from the main list view or directly from the template's detail page.
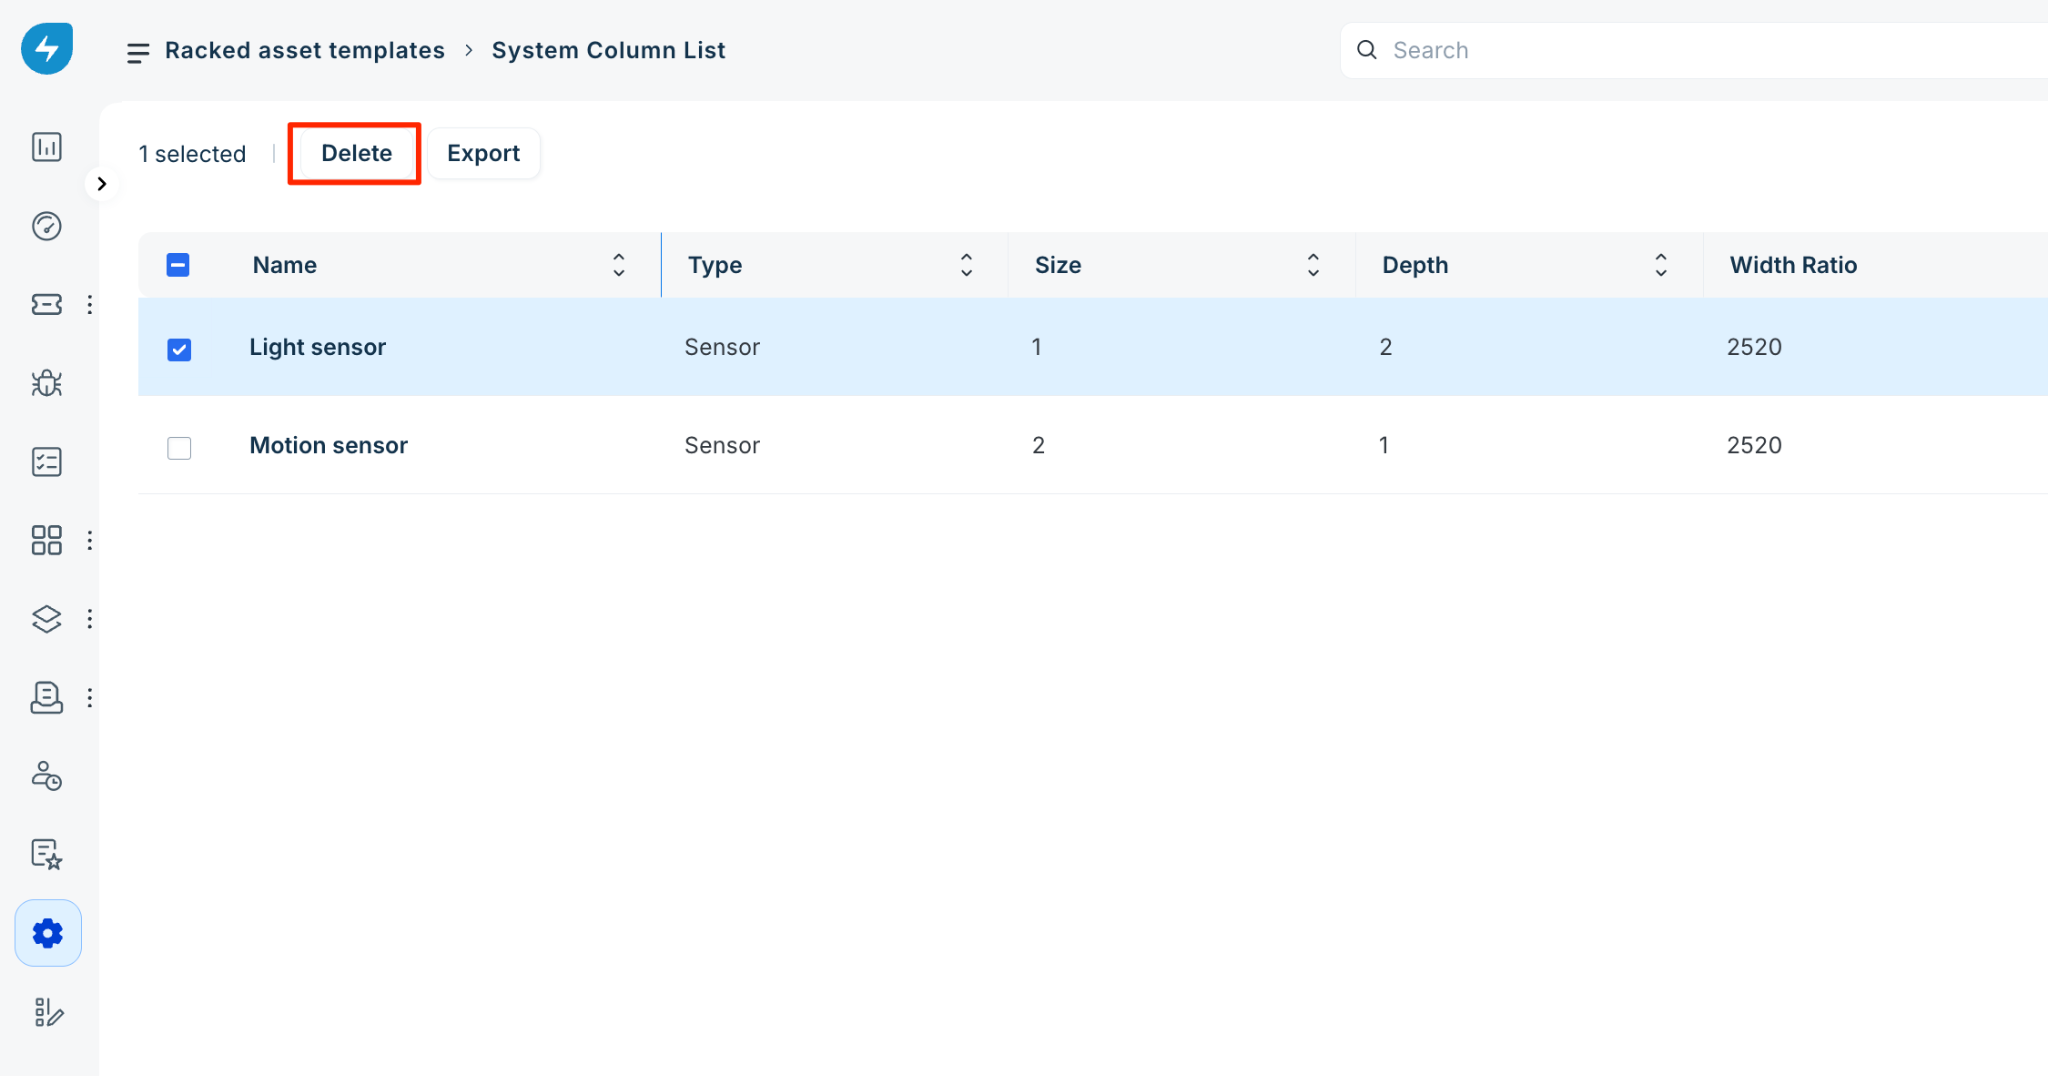
To delete from the list view:
On the Racked asset templates list page, select the checkbox next to one or more templates.
Click Delete from the action bar that appears at the top of the list.
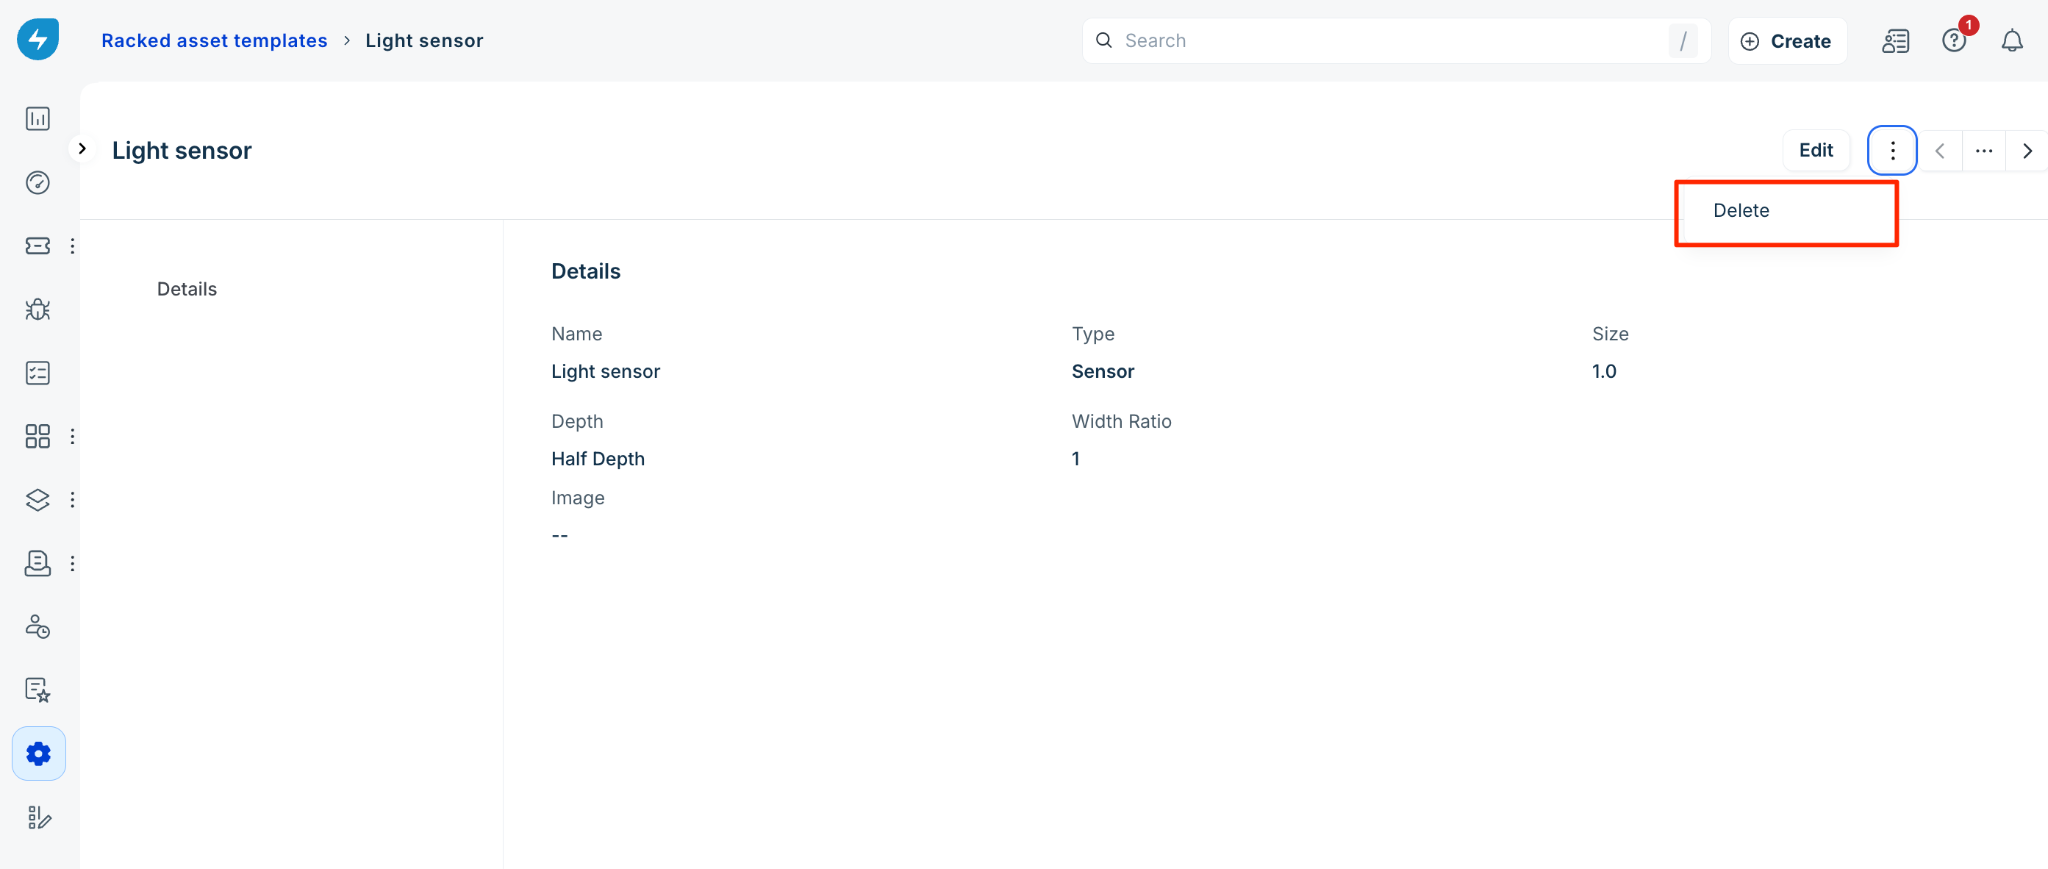
To delete from the template detail page:
Open the detail page for the specific racked asset template.
Click the More options (⋮) menu in the upper-right corner.
Click Delete from the dropdown menu.
Confirm deletion: When you initiate a deletion, a confirmation dialog appears.
The dialog warns that deleting racked asset templates will remove any related information in dependent records.
Click Delete to permanently remove the item, or click Cancel to abort the action.
Export racked asset templates
You can export data for selected templates to a CSV file from the list view.
On the Racked asset templates list page, select the checkbox next to the templates you want to export.
Click Export from the action bar at the top of the list.
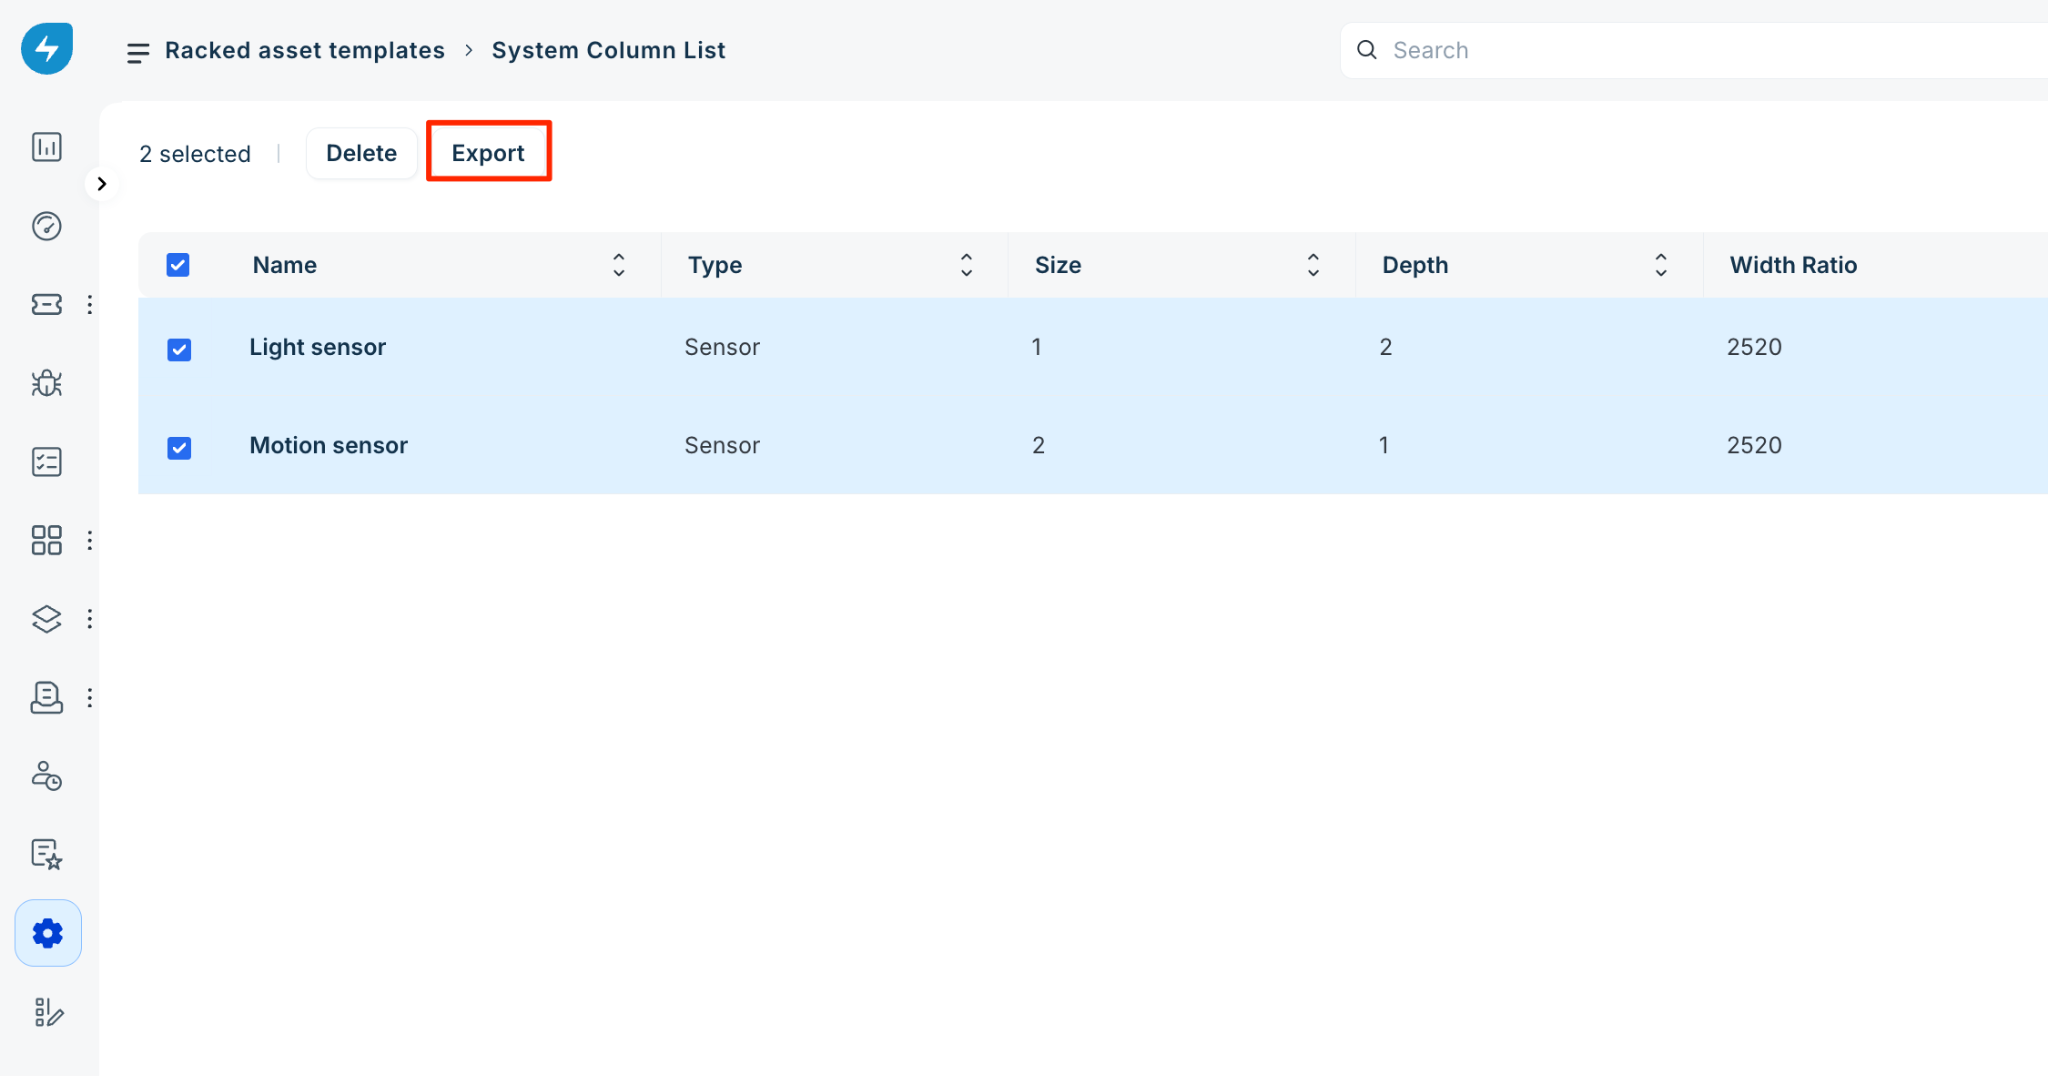
The Export Selected items as CSV dialog box appears. Ensure the Selected Columns (CSV) export type is chosen.
Click Export to download the file.