
 Community
 Video Library
 Agent Training
 Freshservice
 Freshdesk
 Freshchat
 Freshcaller
 Freshsales
 Freshteam
 Freshworks Neo
 Freshsurvey
 Freshservice for MSP
 TABLE OF CONTENTS
- Overview
- Prerequisites
- Define XLA score levels
- Initialize a new XLA policy profile
- Establish policy scoping and conditions
- Configure theme weighting and rules
- Construct proactive multi-tier escalations
- Validate calculations with policy preview
- Customize policy execution hierarchy
Overview
Service desks have traditionally relied on Service Level Agreements (SLAs) as their primary operational benchmark. While SLAs track ticket management speeds and deadline compliance, they operate on a binary matrix (met or breached) and fail to capture real-time user sentiment, process friction, or support quality.
Experience Level Agreements (XLAs) shift the focus from retrospective performance numbers to proactive, real-time experience management within Freshservice. This framework tracks the quality of support delivery while a ticket is active. This enables agents and service desk managers to address issues early, handle complex escalations, and correct poor user experiences before a ticket is closed or an adverse Customer Satisfaction (CSAT) survey is logged.
Unified experience score
The core engine of the Freshservice XLA module is the Unified Experience Score. Every ticket governed by an active XLA policy is dynamically measured and assigned a health rating ranging from 0 to 100. This live score updates in real time and is displayed in the right sidebar of the agent's ticket management screen. However, scores in other impact areas, such as Tickets list view, Analytics, and so on are synchronized only during ticket updates.
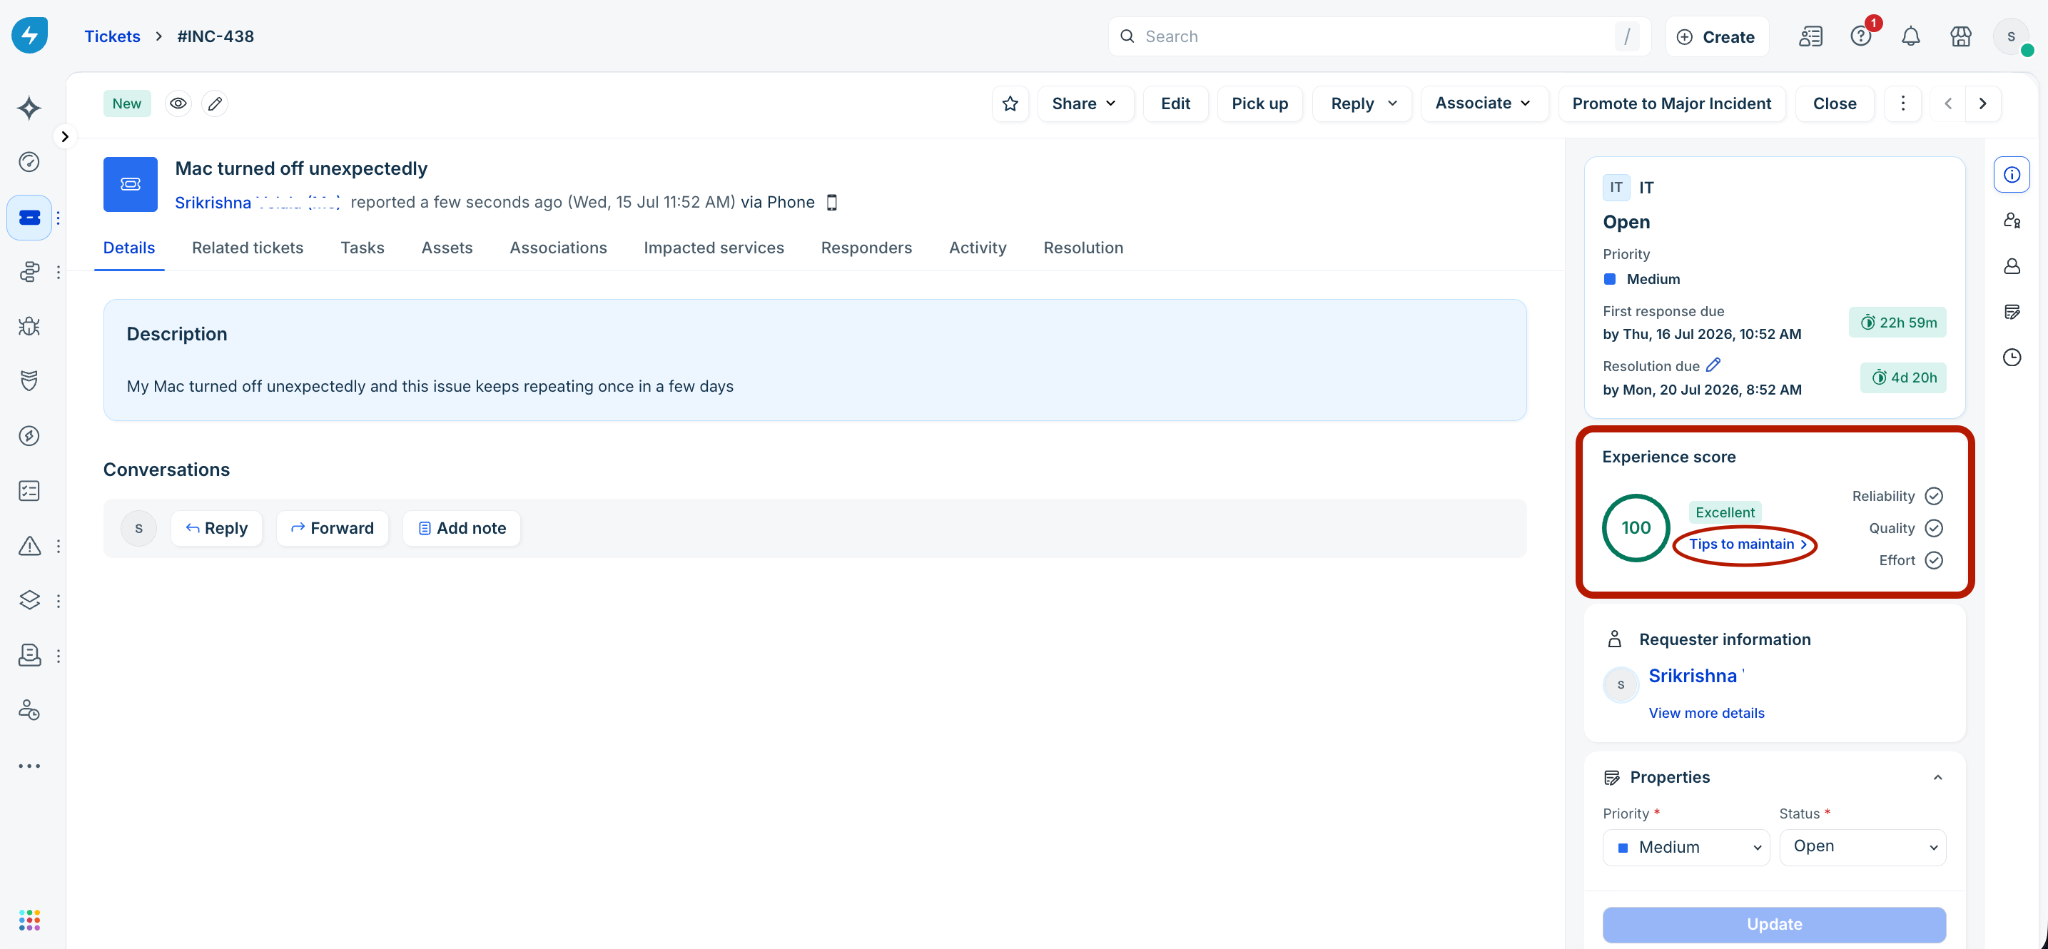
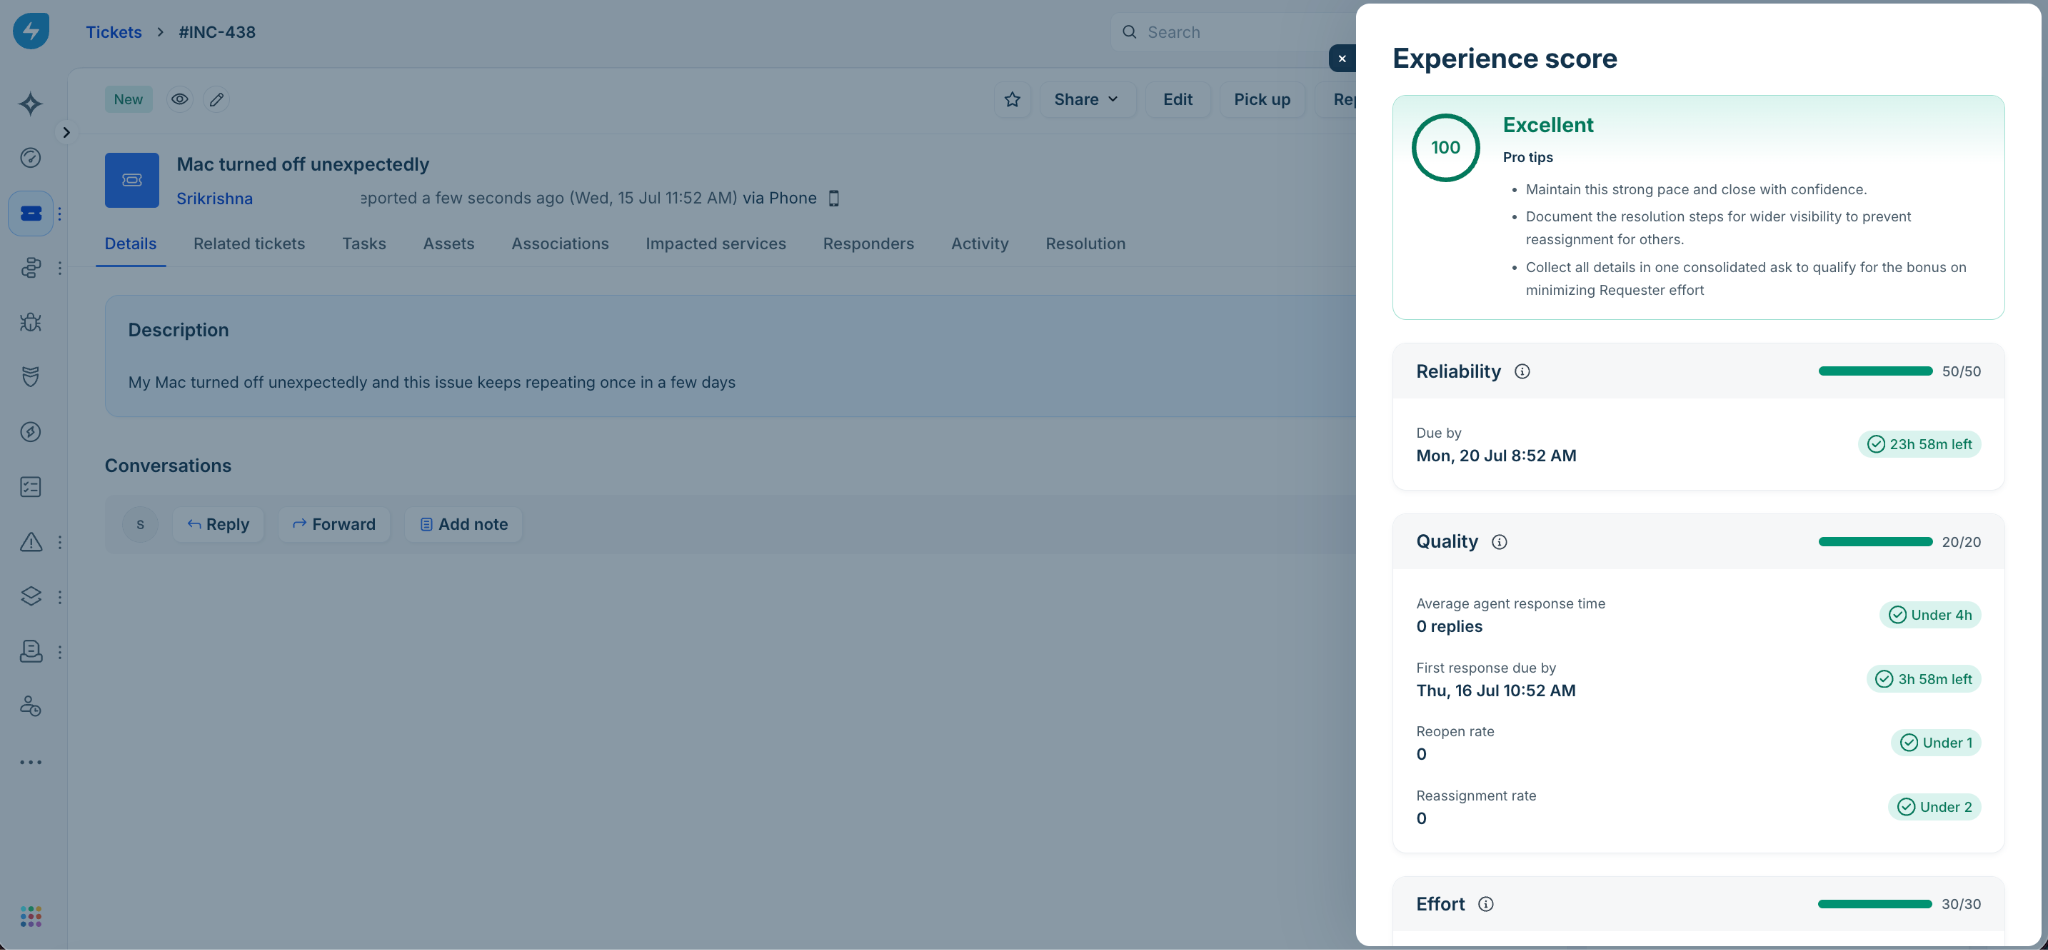
Every ticket begins with a baseline health score of 100. As the ticket progresses through its lifecycle, the score adjusts dynamically based on the weight distribution of three core themes and their underlying conditional configuration rules:
Service Reliability: Evaluates compliance with core fulfillment timelines and operational targets.
Service Quality: Measures communication standards, clarity, and precision during service desk interactions.
Requester Effort: Tracks process friction, conversational depth, and user fatigue caused by excessive back-and-forth updates.
Point adjustment logic
The calculation engine combines base theme weights with event-driven modifiers (Deductions and Rewards) triggered by agent actions or system updates:
Unified Experience Score = 100 minus [Sum of (Theme Weight x Rule Deduction Points)] + [Sum of (Theme Weight x Rule Reward Points)]
When an XLA rule condition is met, its point value is scaled by the corresponding theme's weight to calculate the exact impact on the overall score.
Example: If a Resolution time rule specifies a deduction of 10 points within a theme weighted at 30%, triggering that condition applies a penalty of exactly 3 points (10 x 0.30) to the overall XLA score.
XLA evaluation pillars and rule types
To maintain data integrity, each evaluation pillar supports a specific number of rule types designed to parse distinct ticket properties:
Threshold breaks and multi-level escalations
Within each policy, you can establish milestone boundaries known as Threshold Breaks. If a live ticket's score falls below a pre-configured limit (for example, dropping below 60), the platform triggers an automatic Level 1 (L1) Escalation. If the score continues to degrade past a second limit, it triggers a Level 2 (L2) Escalation.
These automated events notify designated teams or managers to step in while the ticket is still open, resolving issues before they impact end-user satisfaction.
Prerequisites
Before configuring XLA policies in Freshservice, ensure that you meet the following requirements:
You must have an Administrator role to configure, view, and manage XLA policies.
The XLA feature must be active on your organization's subscription tier (Enterprise accounts).
Support groups, custom ticket properties, and core SLA policies should be fully configured, as XLA target parameters reference these fields.
XLA policies can be configured both at the Global settings as well as Workspace-level settings.
Note: Activating any custom XLA policy automatically enables the default global XLA policy. This fallback prevents experience scores from becoming obsolete as ticket properties change across their lifecycle, ensuring accurate tracking even when no custom policy matches.
Define XLA score levels
Configure the score ranges and performance brackets that categorize user experiences across your entire Freshservice instance.
Log in to your Freshservice account.
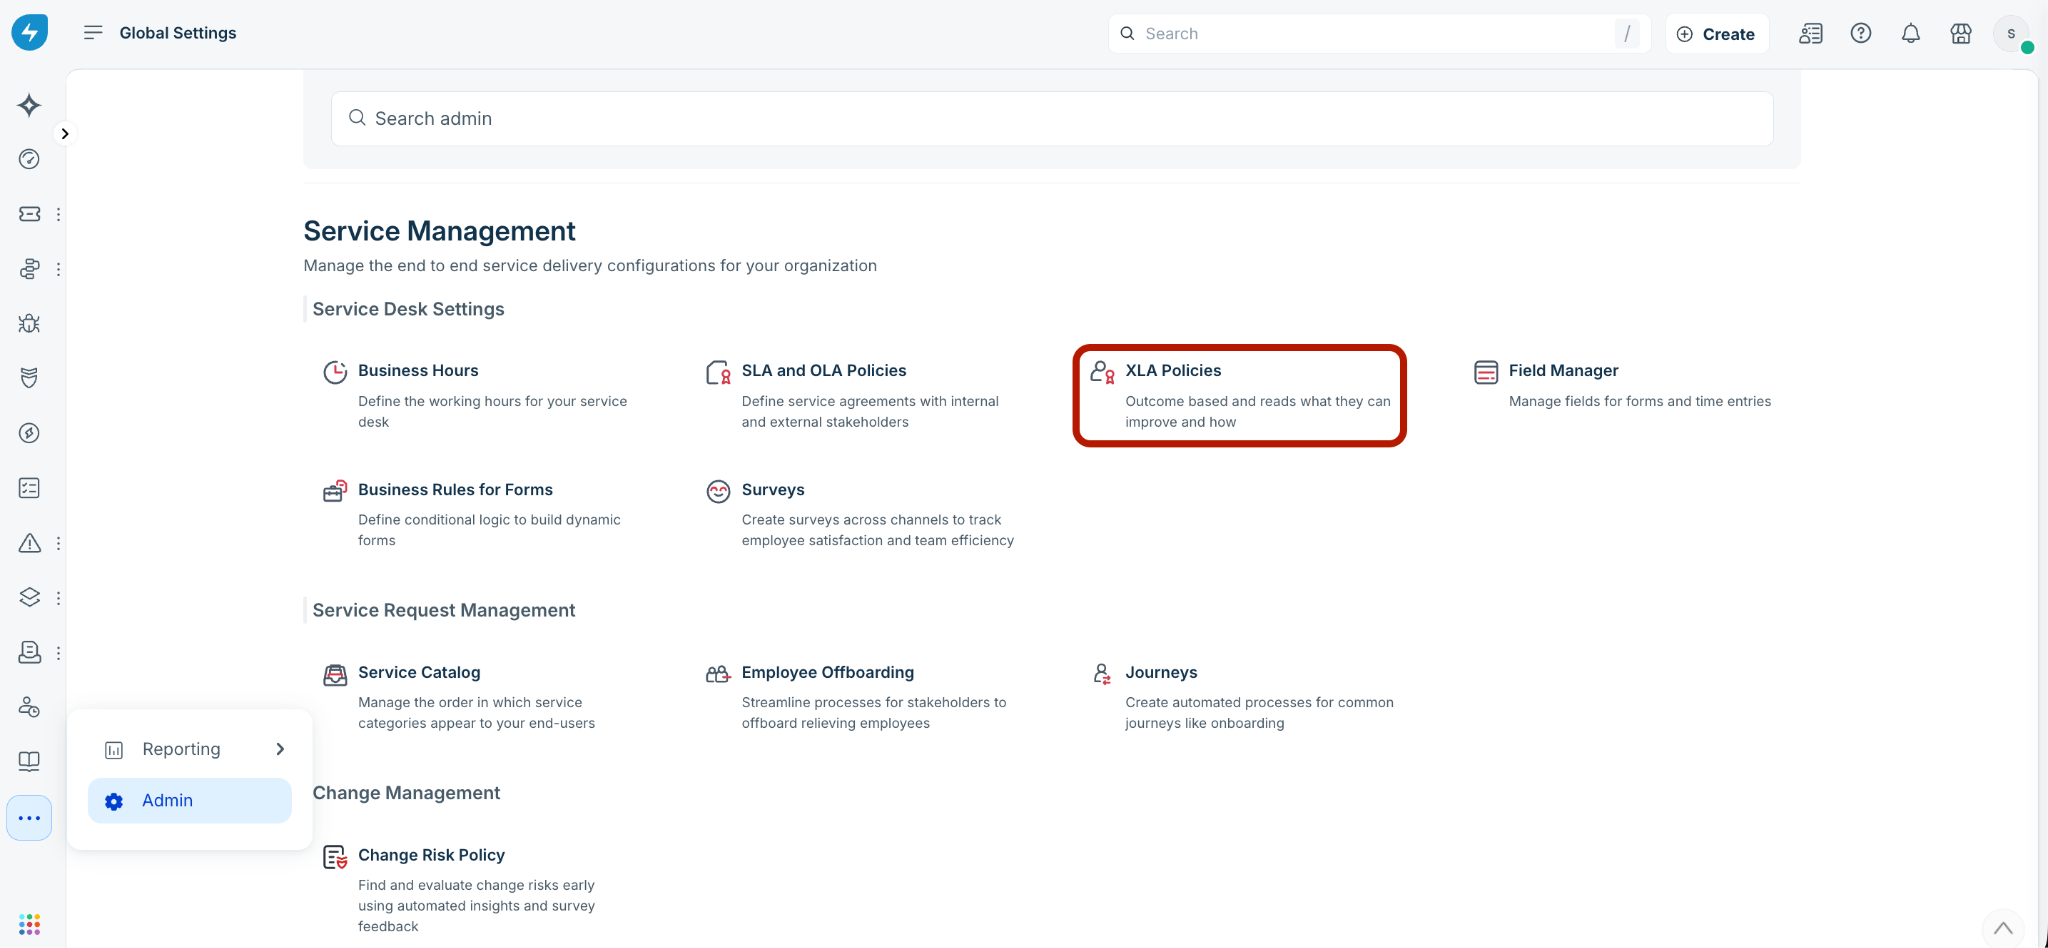
Go to Admin > Global or Workspace-level settings > Service Management > Service Desk Settings, and select XLA Policies.
On the XLA Policies page, click Set XLA score levels.
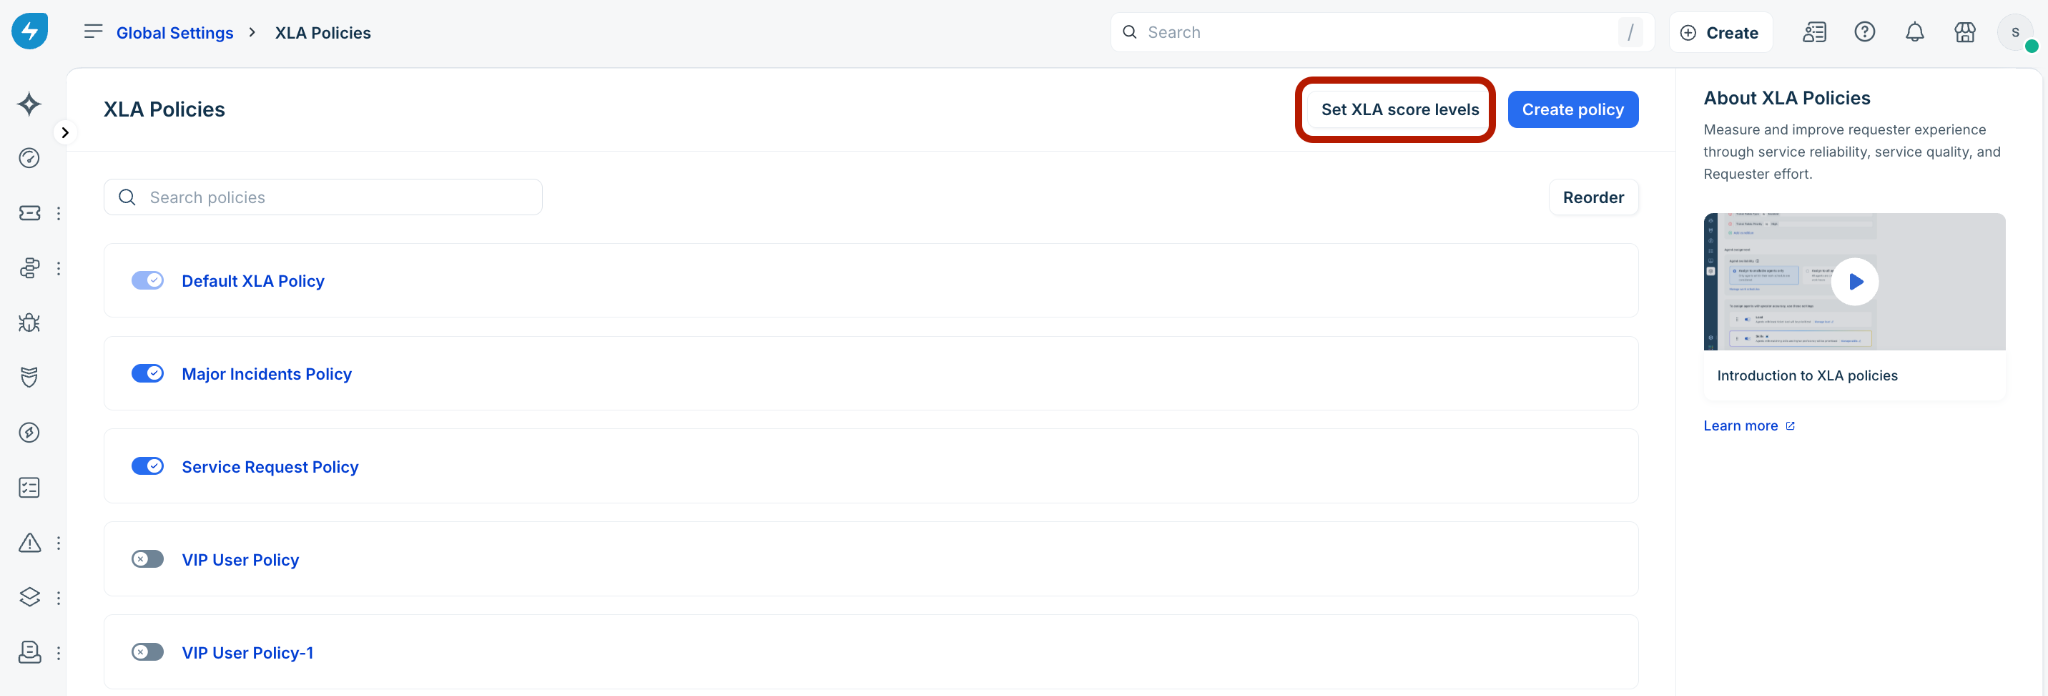
In the XLA score levels slider, review and modify the text boxes for each performance tier:
Poor: Set the baseline range (default is 0 to 25). This range displays a red status bar.
Average: Set the mid-low range (default is 26 to 50). This range displays an orange status bar.
Good: Set the mid-high range (default is 51 to 90). This range displays a blue status bar.
Excellent: Set the premium range (default is 91 to 100). This range displays a green status bar.
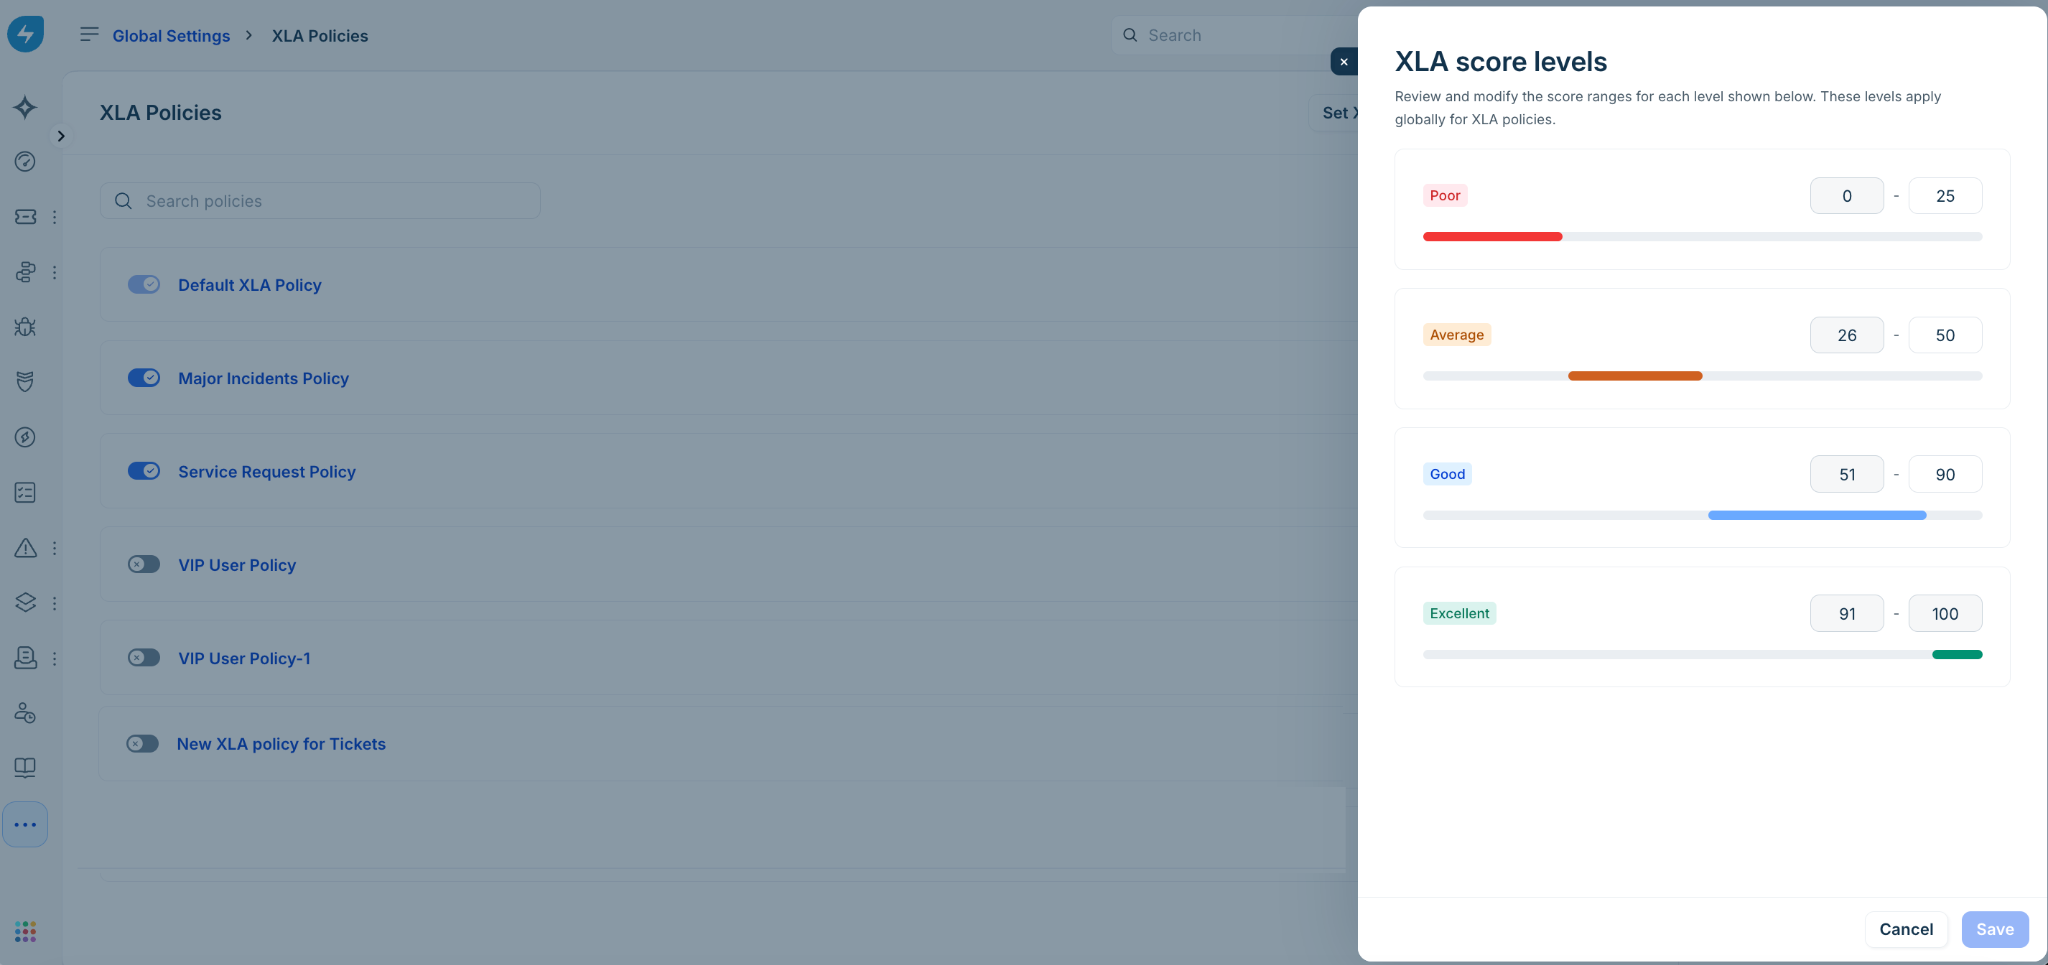
Click Save to apply these evaluation tiers across all policies.
Initialize a new XLA policy profile
Freshservice allows you to build an XLA policy from a blank slate or use specialized pre-configured templates designed for specific support scenarios.
On the XLA Policies page, click Create policy. The Create policy slider will appear on the right side of the screen.
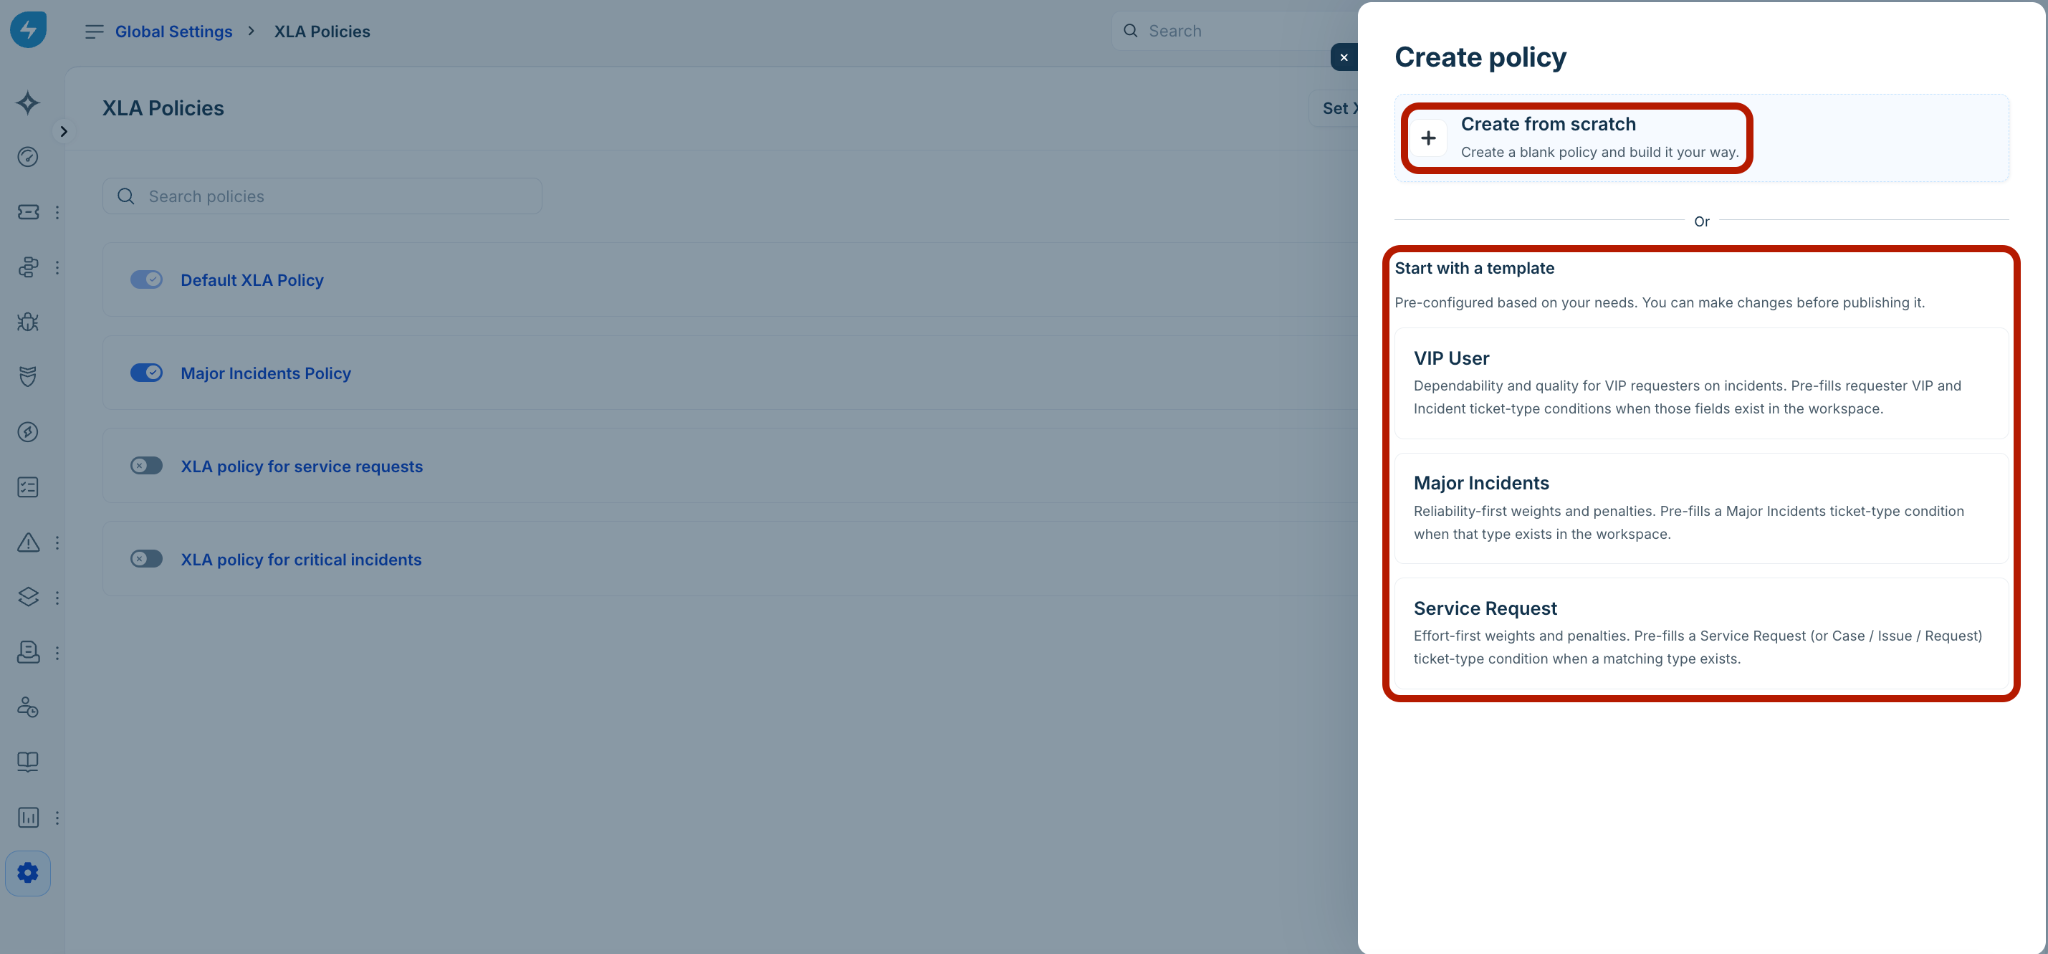
Choose one of the following options:
Create from scratch: Select this option to build a blank policy tailored to custom organizational workflows.
Start with a template: Select one of the three pre-configured options to pre-fill specific weights, penalties, and ticket types:
VIP User: Focuses on dependability and quality for high-priority requesters during incidents. It automatically adds conditions for the VIP User field and Incident ticket type.
Major Incidents: Applies a reliability-first framework with stricter time-based penalties. It pre-fills a Major Incident ticket-type condition.
Service Request: Applies an effort-first framework designed to minimize user friction. It pre-fills a Service Request (or Case / Issue / Request) ticket-type condition.
Once you choose a path, a Policy details dialog box appears. Configure the following fields:
Title: Enter a distinct, clear name for the policy.
Description: Enter a detailed summary that outlines the operational scope and goals of this policy.
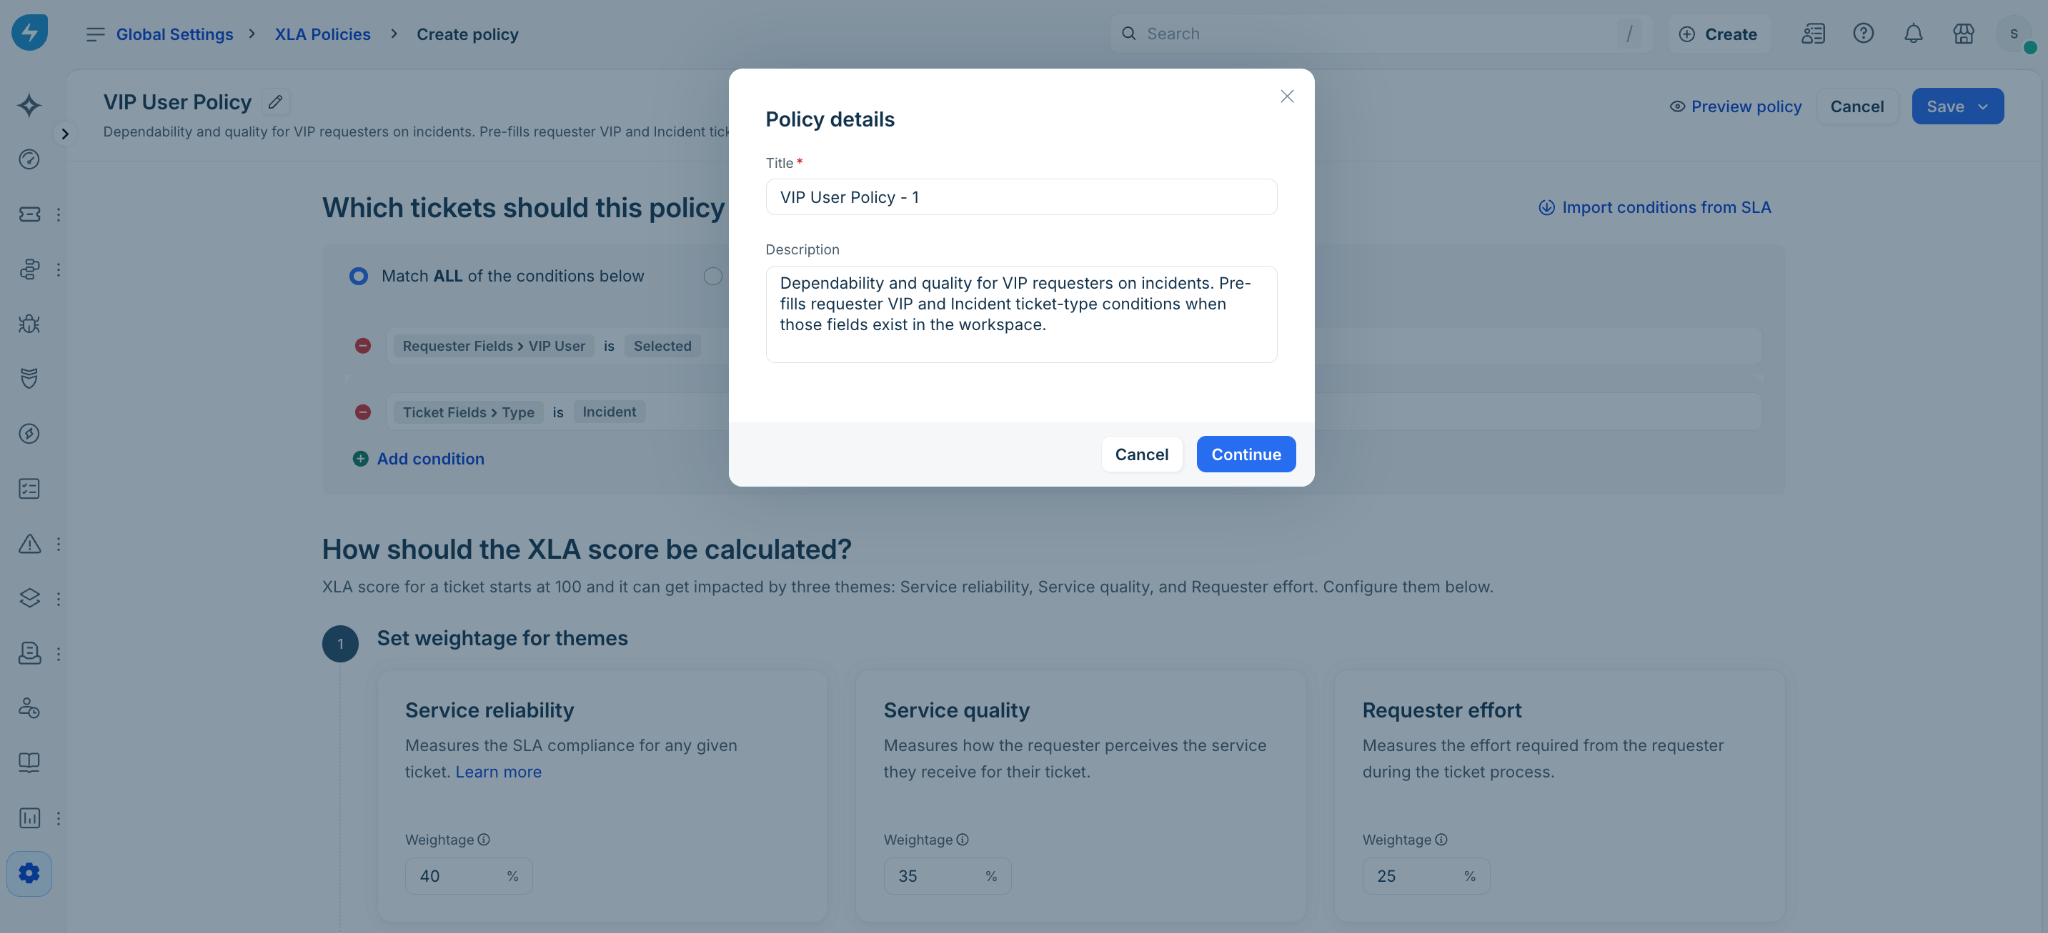
Click Continue to load the policy configuration workspace.
Establish policy scoping and conditions
Define the specific rules that determine which incoming tickets will trigger this XLA policy.
In the Which tickets should this policy apply to? section, select one of the following matching conditions:
Match ALL of the conditions below: The policy applies only if a ticket meets every single criteria row.
Match ANY of the conditions below: The policy applies if a ticket meets at least one of the criteria rows.
Note: XLA policies can be configured using ticket parameters as well as basic requester attributes.
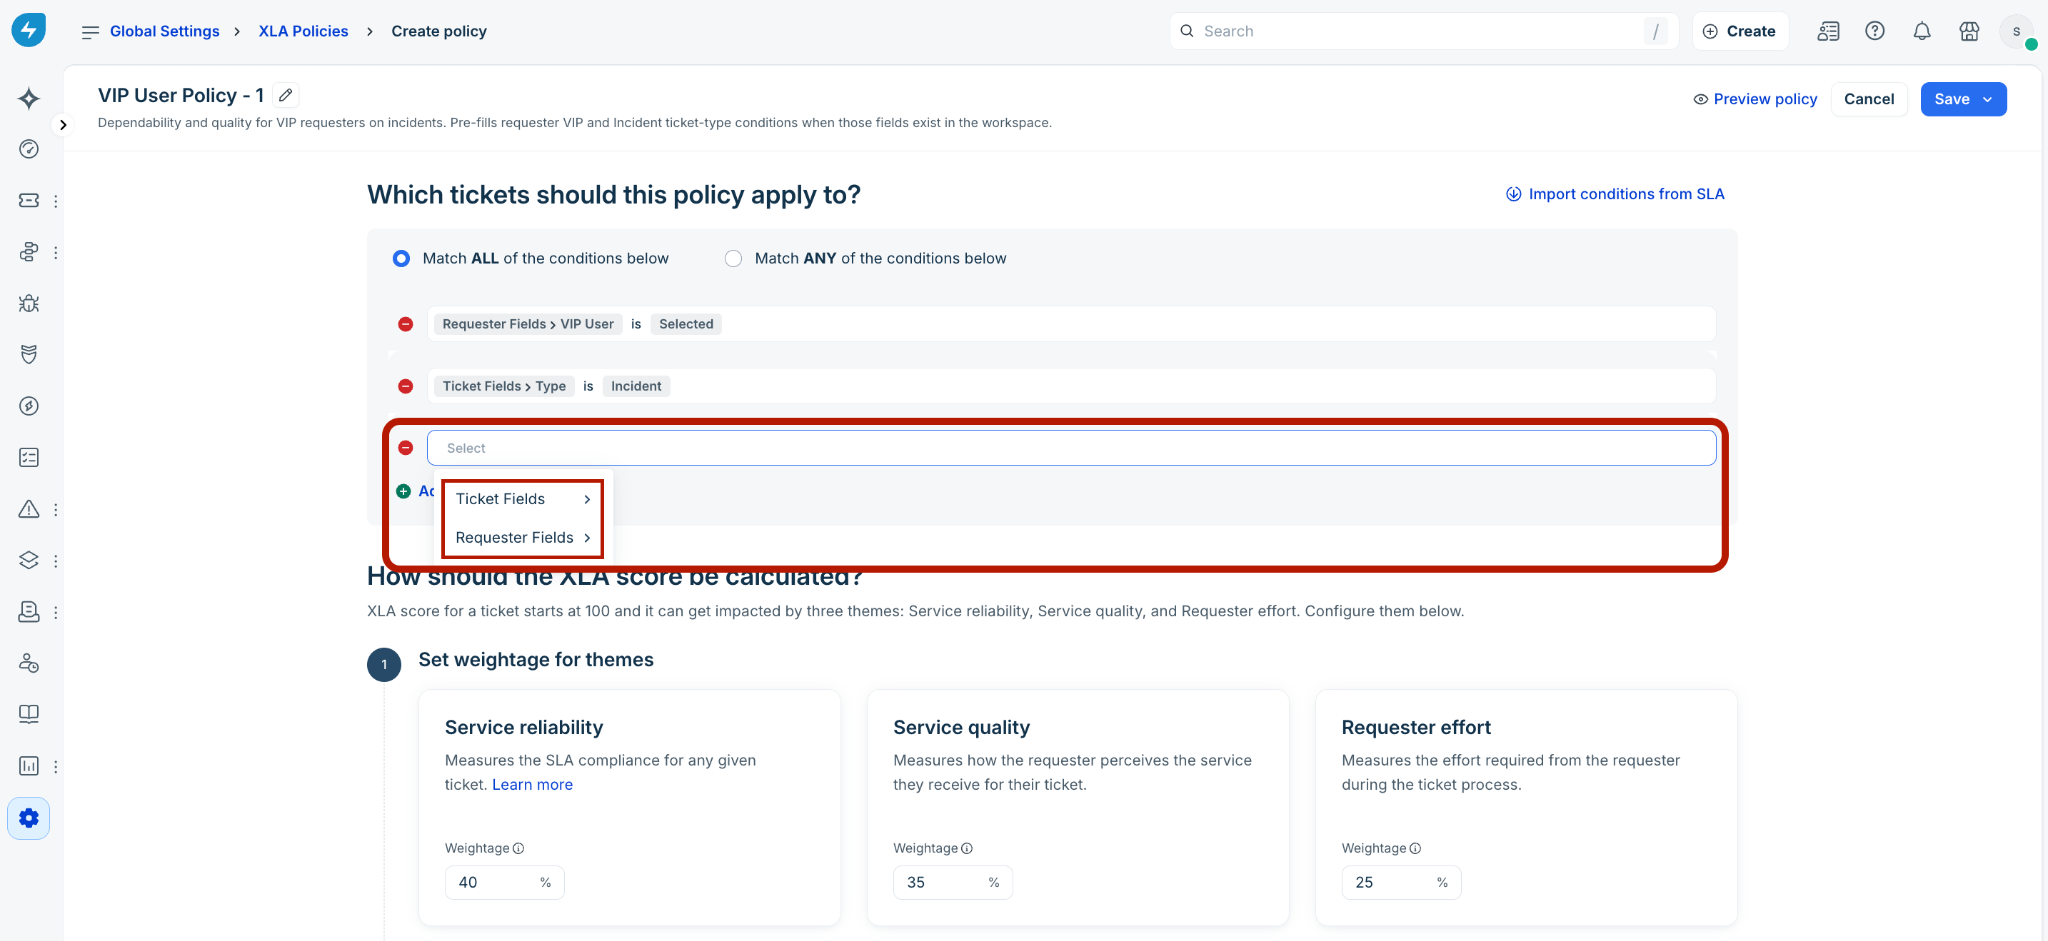
Click Add condition to construct your filter rules. You can select parameters from two distinct drop-down categories:
Ticket Fields: Filters by attributes like Status, Urgency, Priority, or Type.
Requester Fields: Filters by user attributes like Department, Location, or VIP User status.
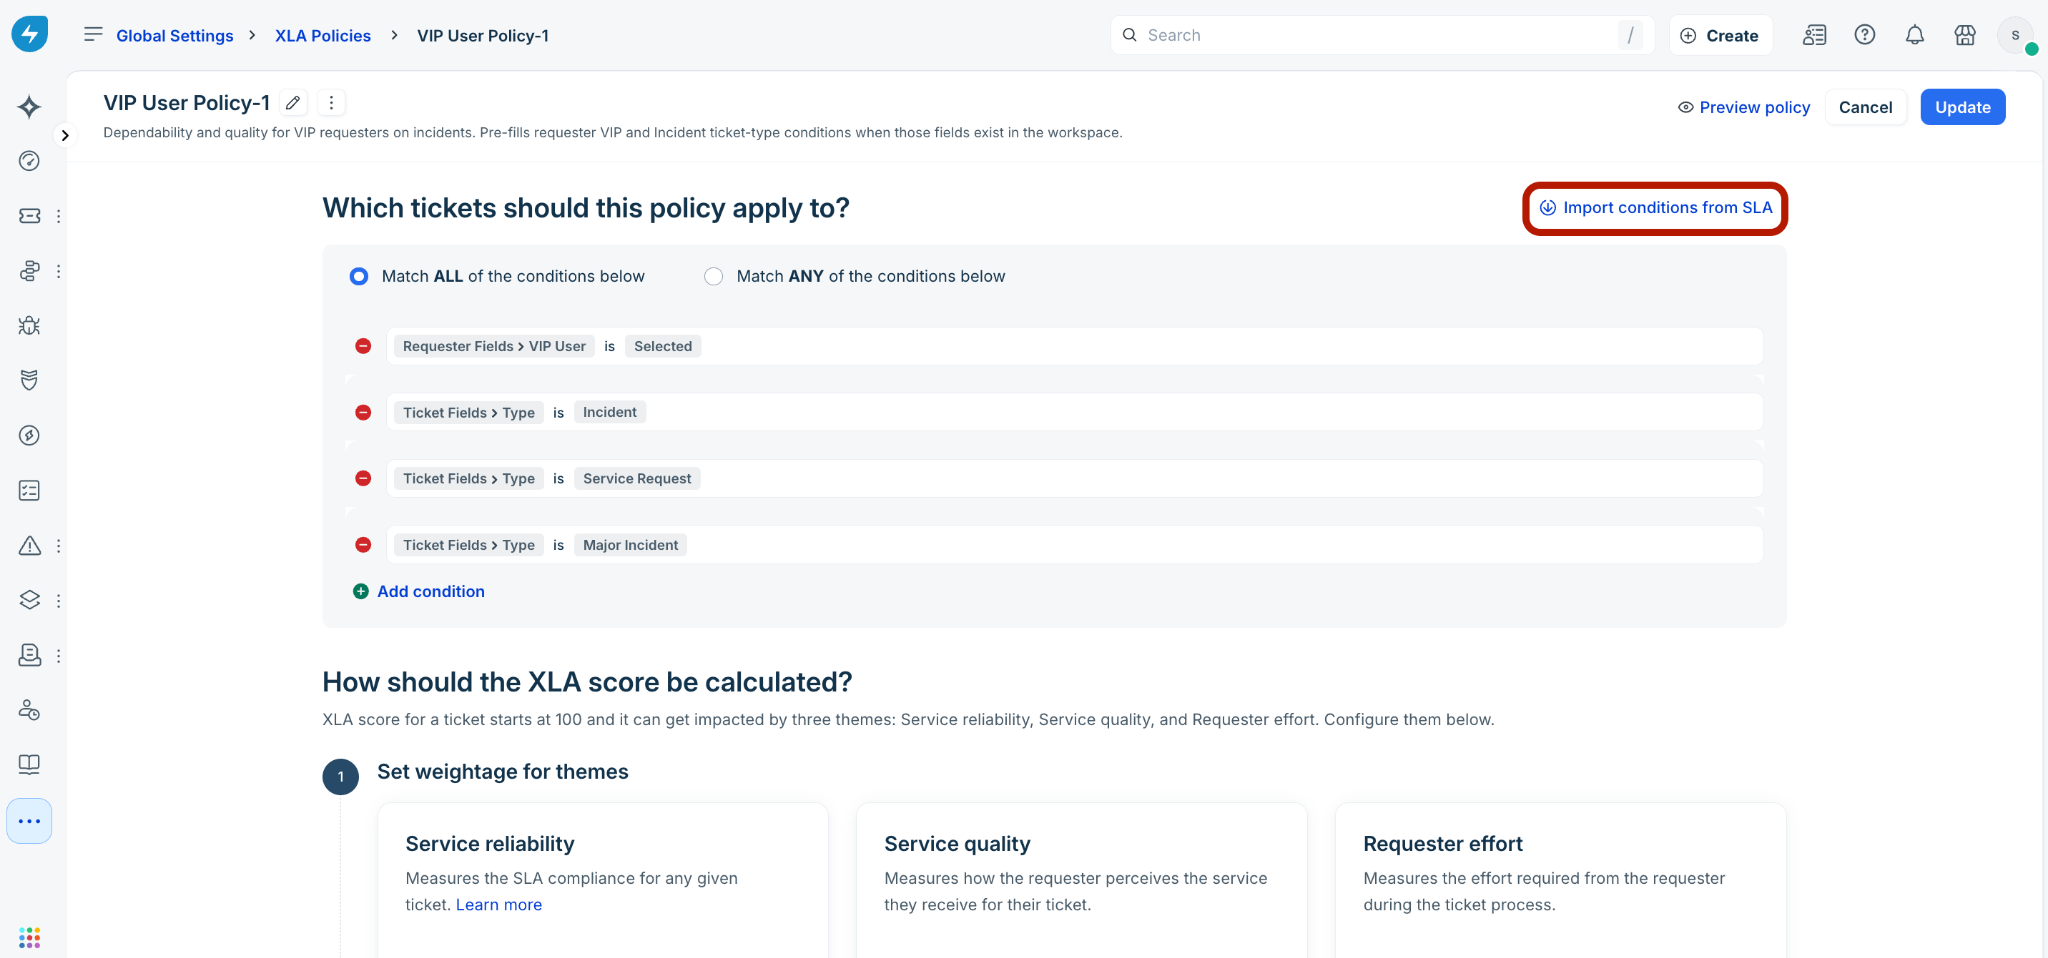
(Optional) To match your XLA policy scope with an existing SLA policy, click Import conditions from SLA.
In the Import conditions from SLA slider, click the Select SLA policy dropdown and choose an existing policy.
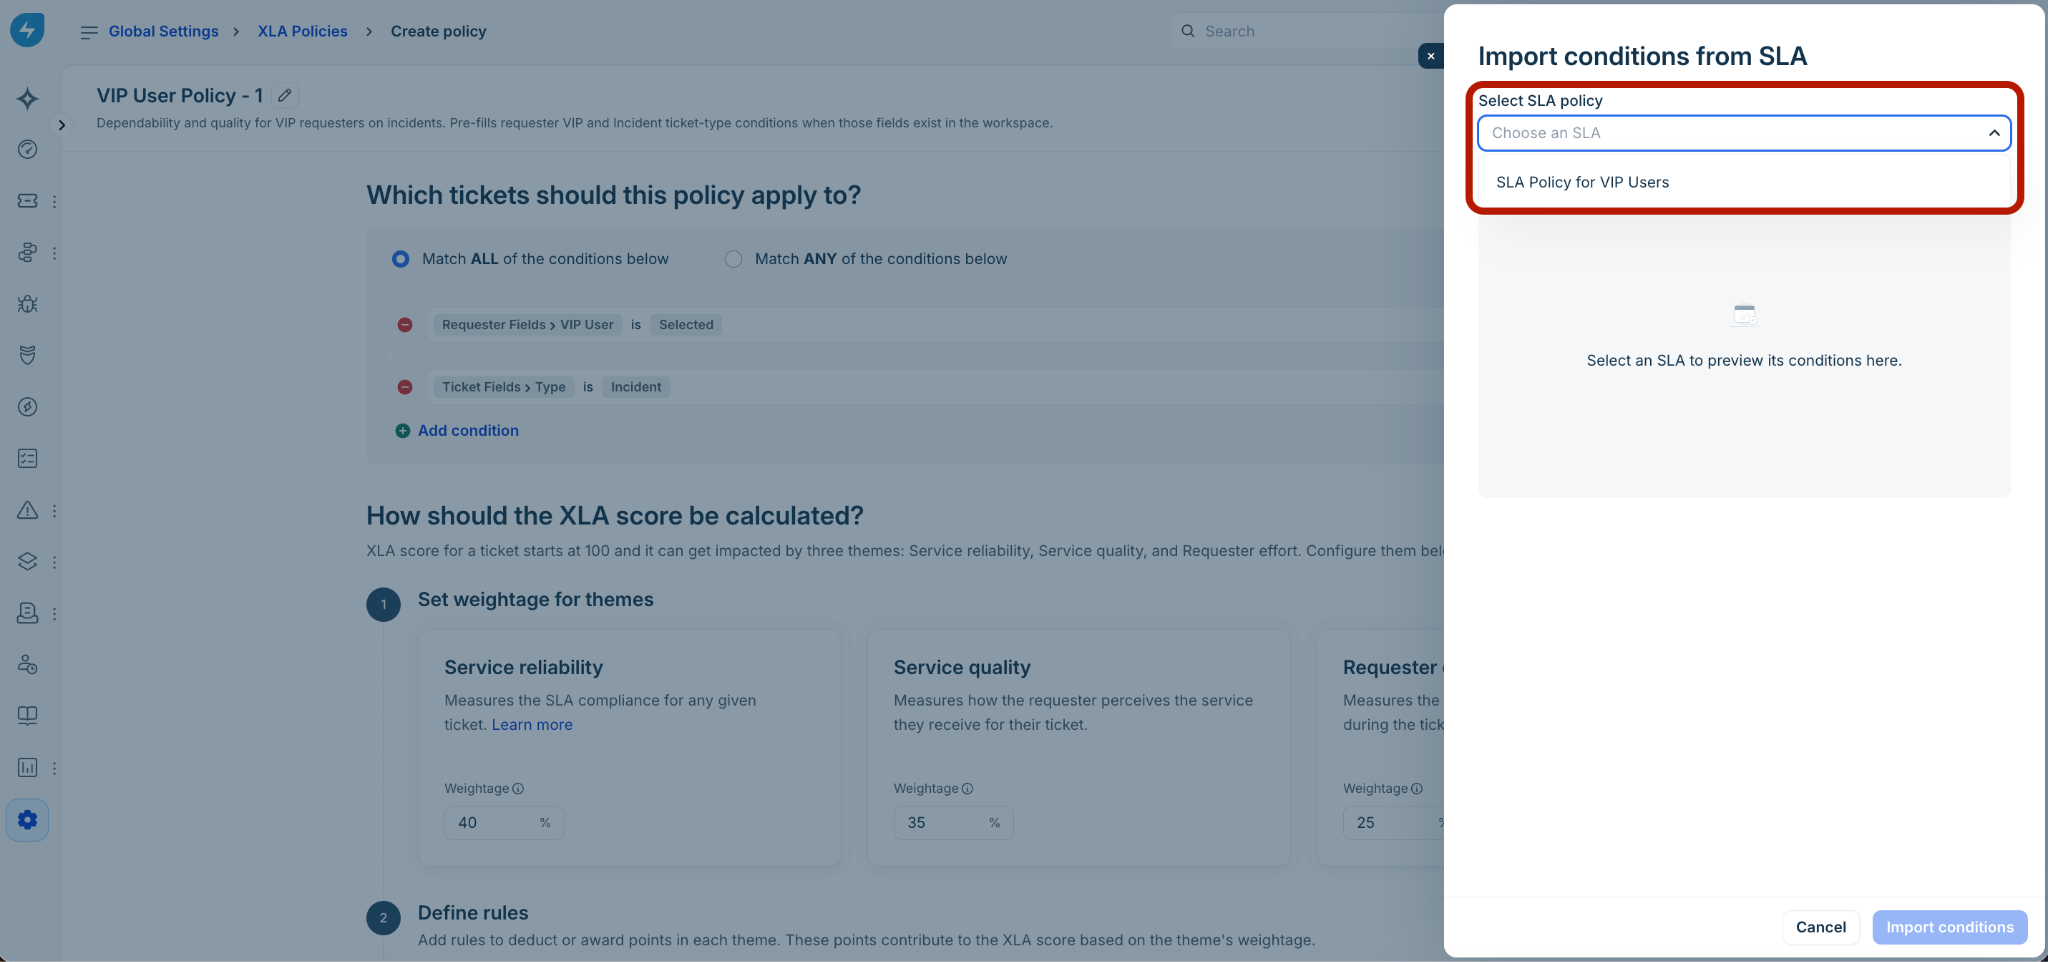
Note: For information on setting up SLA policies, see Create multiple SLA policies for specific departments and groups.
Review the criteria summary.
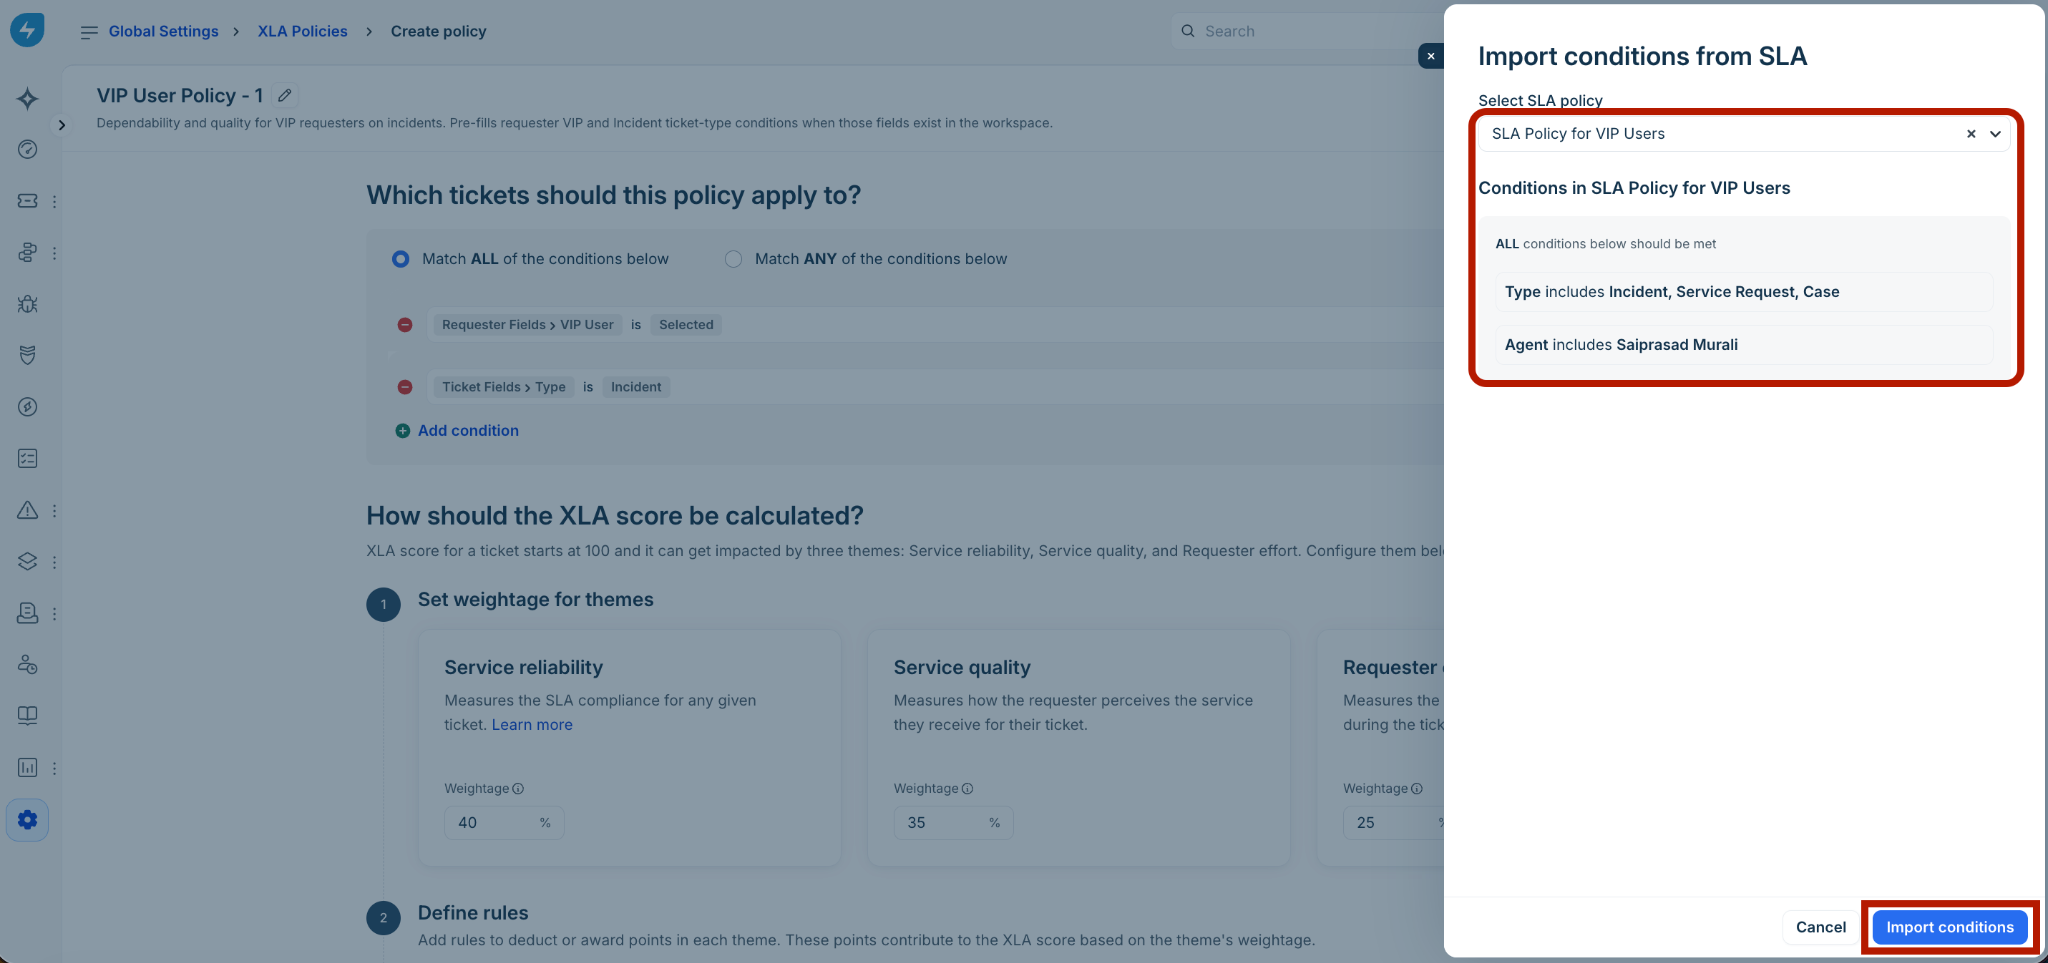
Click Import conditions.
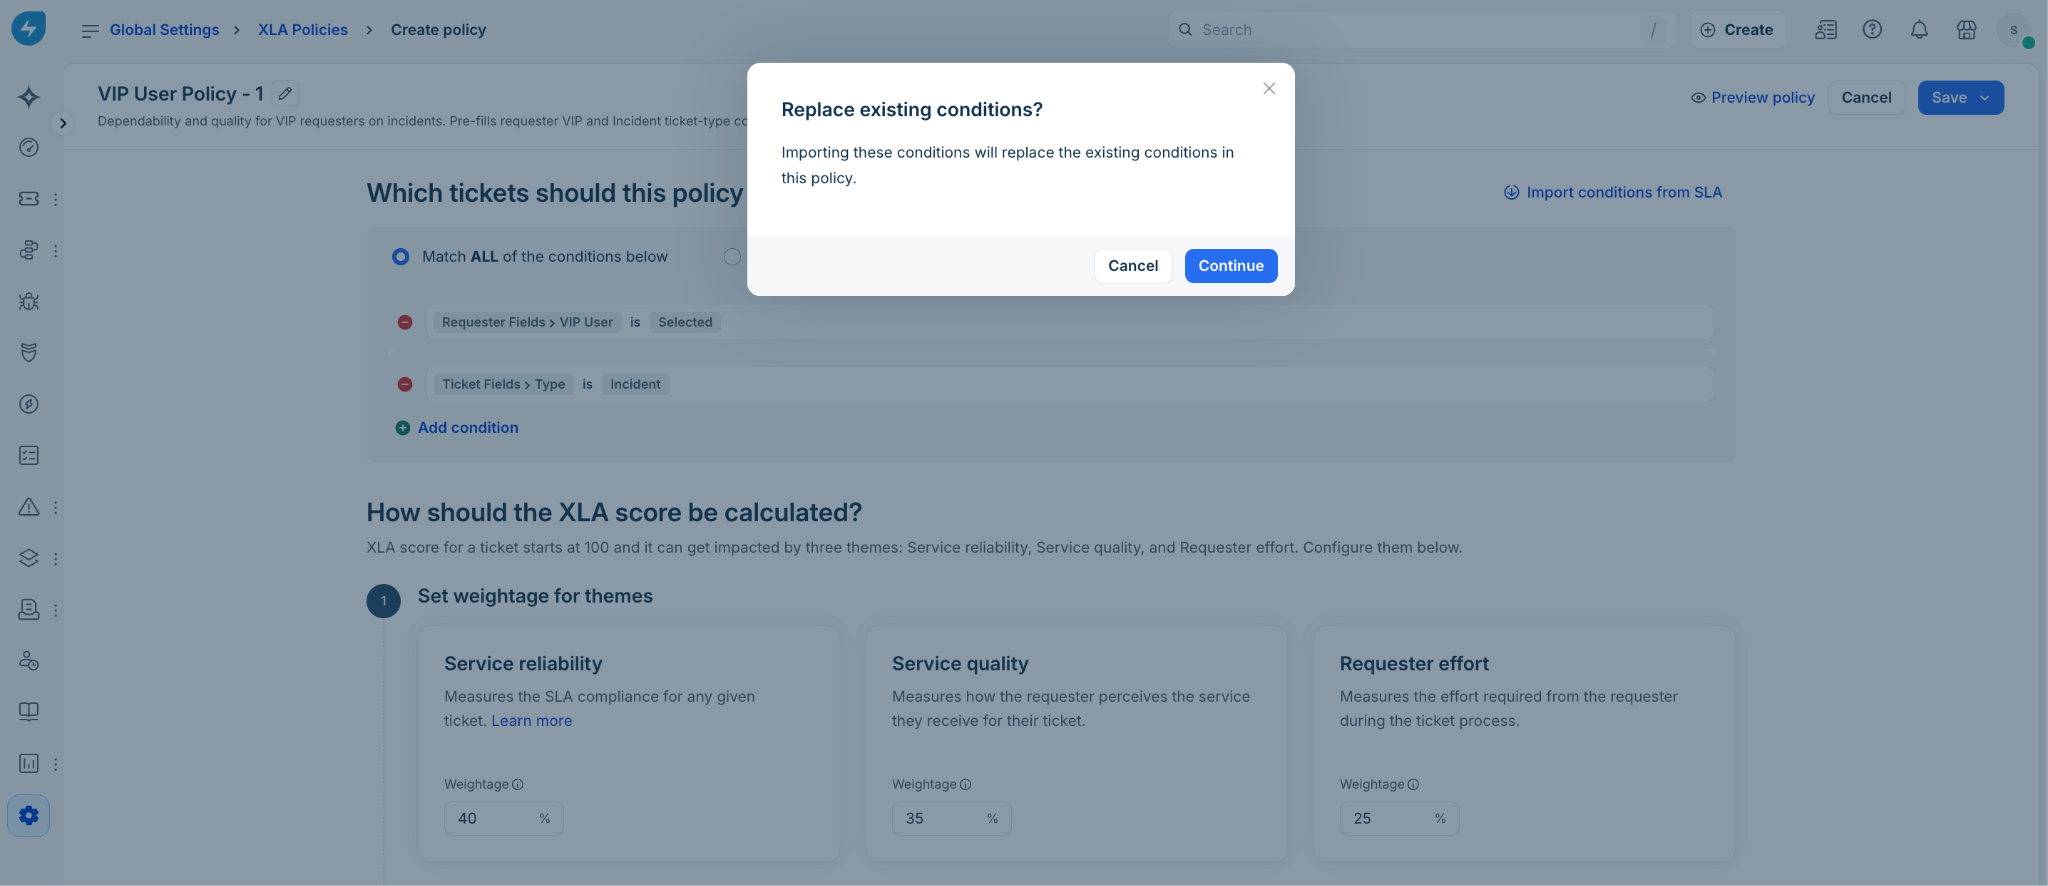
A confirmation dialog stating Replace existing conditions? will appear. Click Continue to overwrite your manual filters with the SLA structure.
Configure theme weighting and rules
Distribute percentage weights across themes and apply performance rules to control how point modifiers adjust active ticket health.
Go to the How should the XLA score be calculated? section.
Under Set weightage for themes, enter percentage values into the three theme containers. The total combined weight across all three fields must equal exactly 100%:
Service reliability: Controls the impact of timeline compliance on the score.
Service quality: Adjusts the impact of communication and resolution standards.
Requester effort: Sets score sensitivity relative to process friction and customer responses.
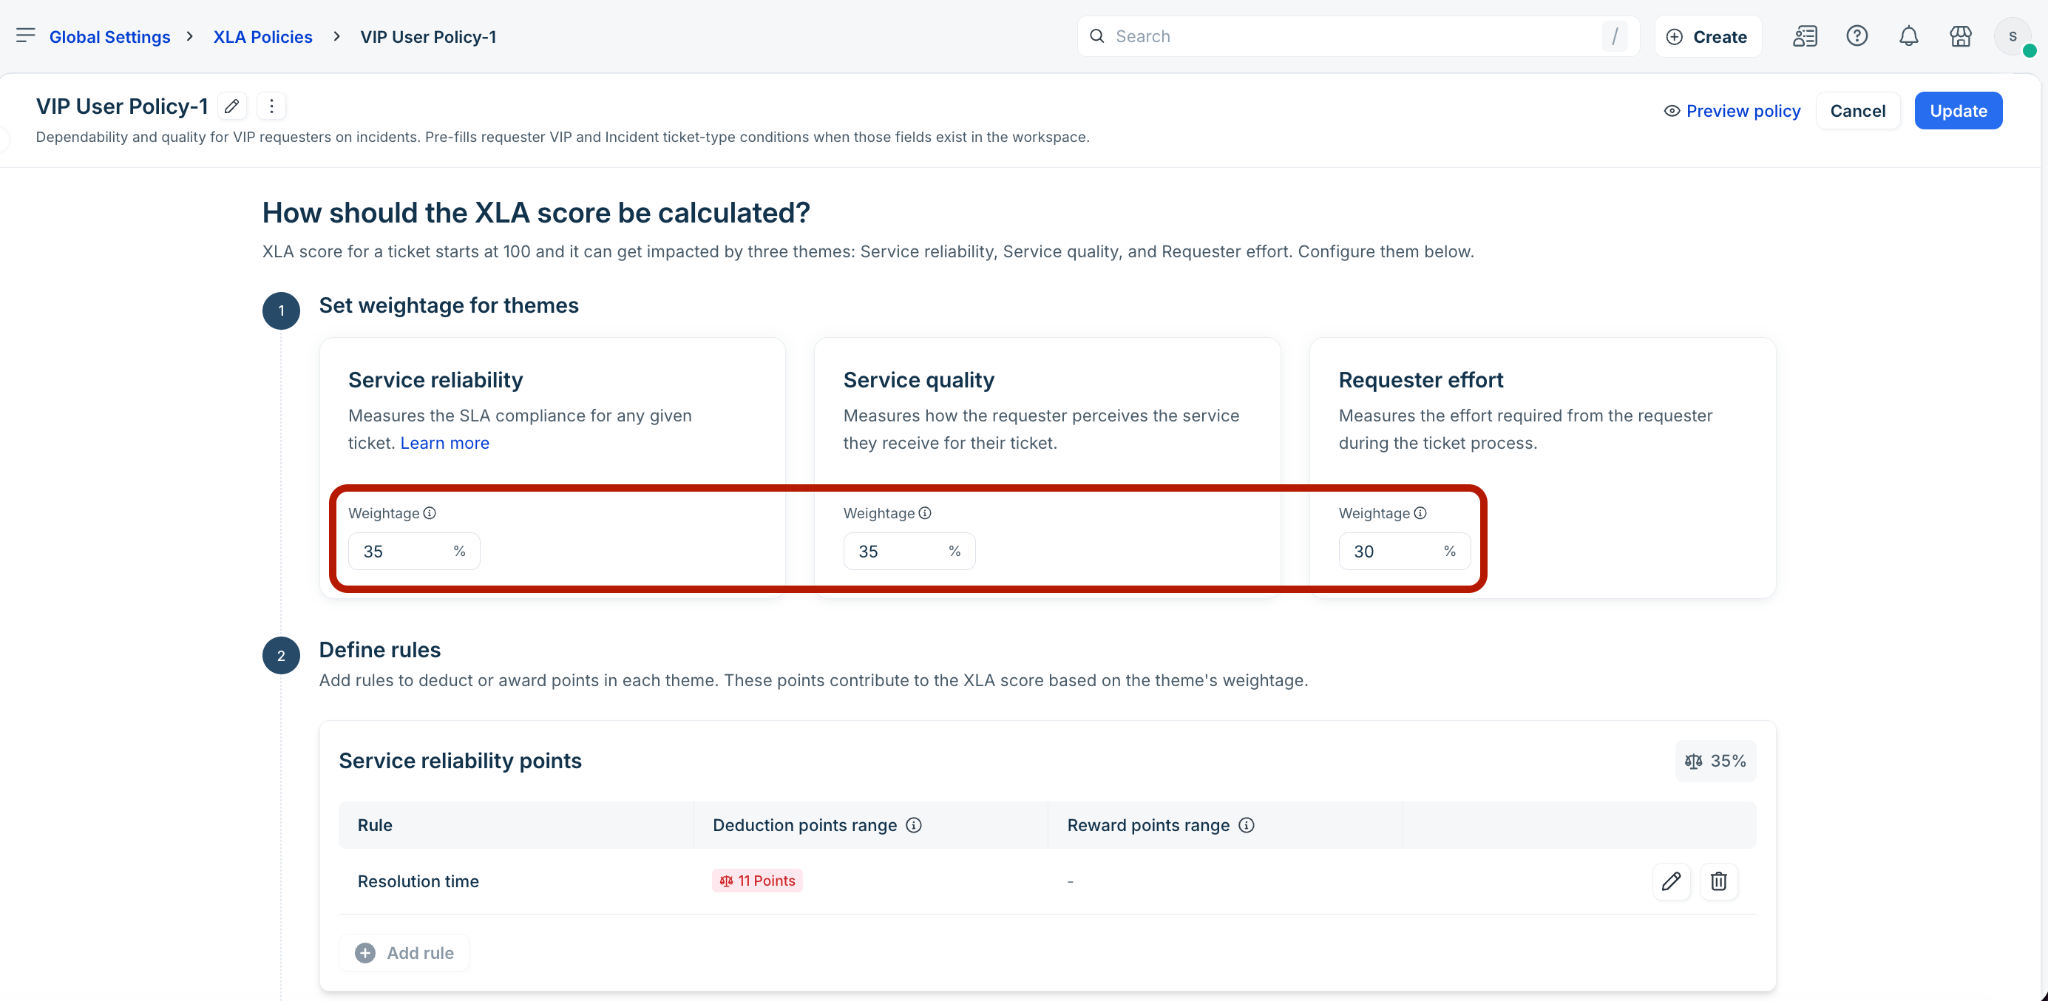
Under Define rules, map point adjustments for each theme block:
Service reliability points: Click + Add rule, and select an option (for example, Resolution time).
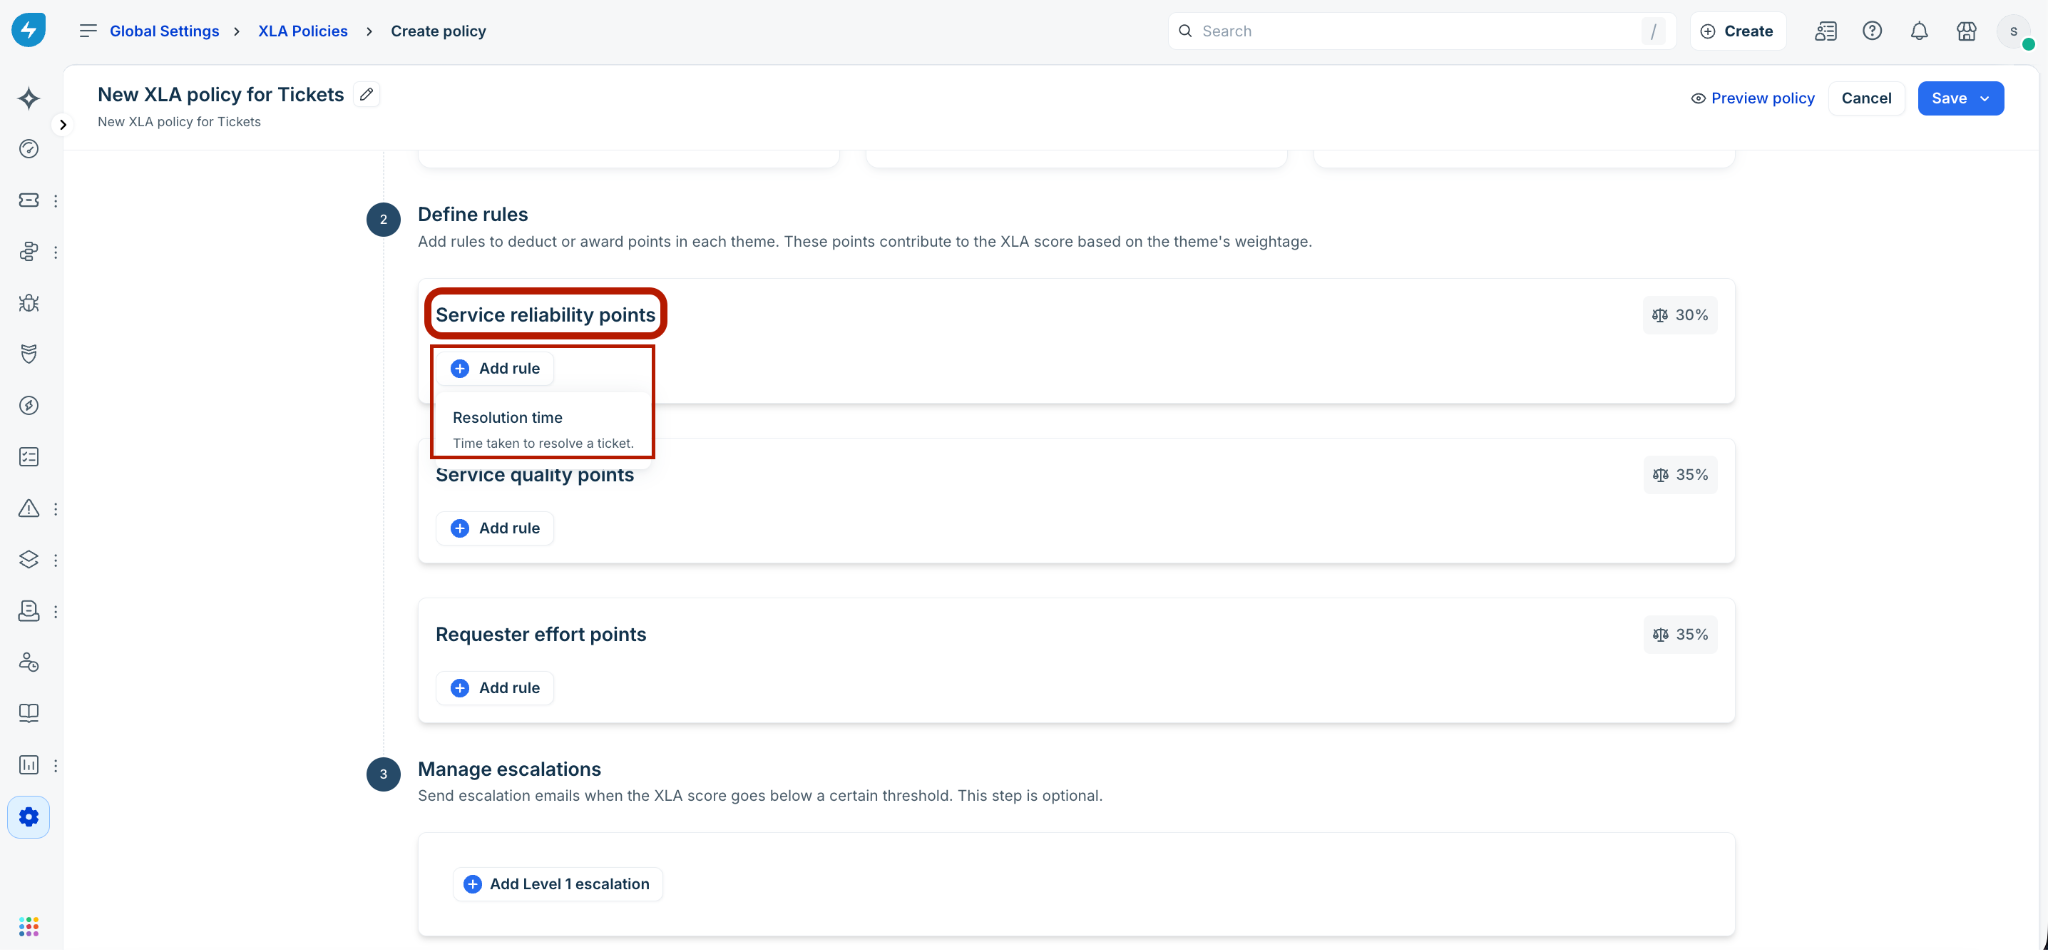
In the slider that appears, choose either the Deductions or Rewards tab. Click + Add condition to add a condition (for example, If resolution time is more than 10% of SLA resolution target, then deduct 10 points). Review the preview calculation text below the row and click Done.
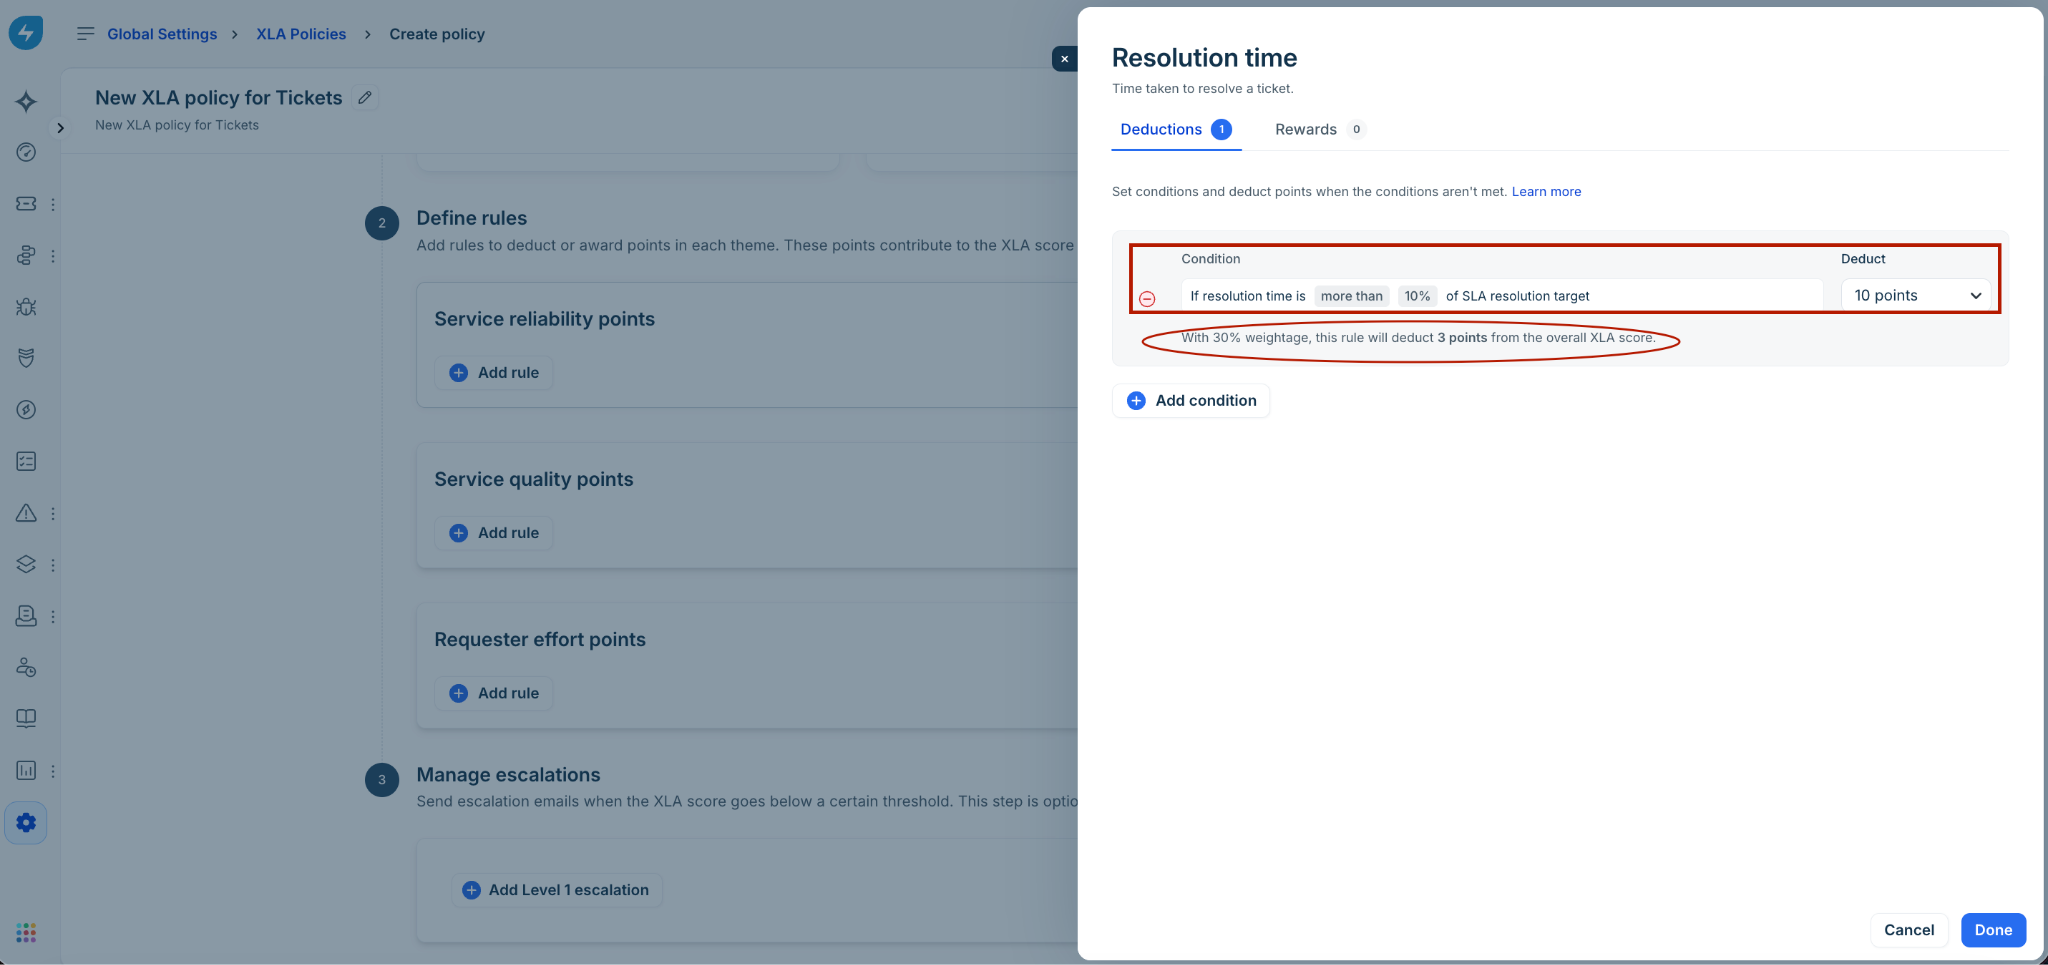
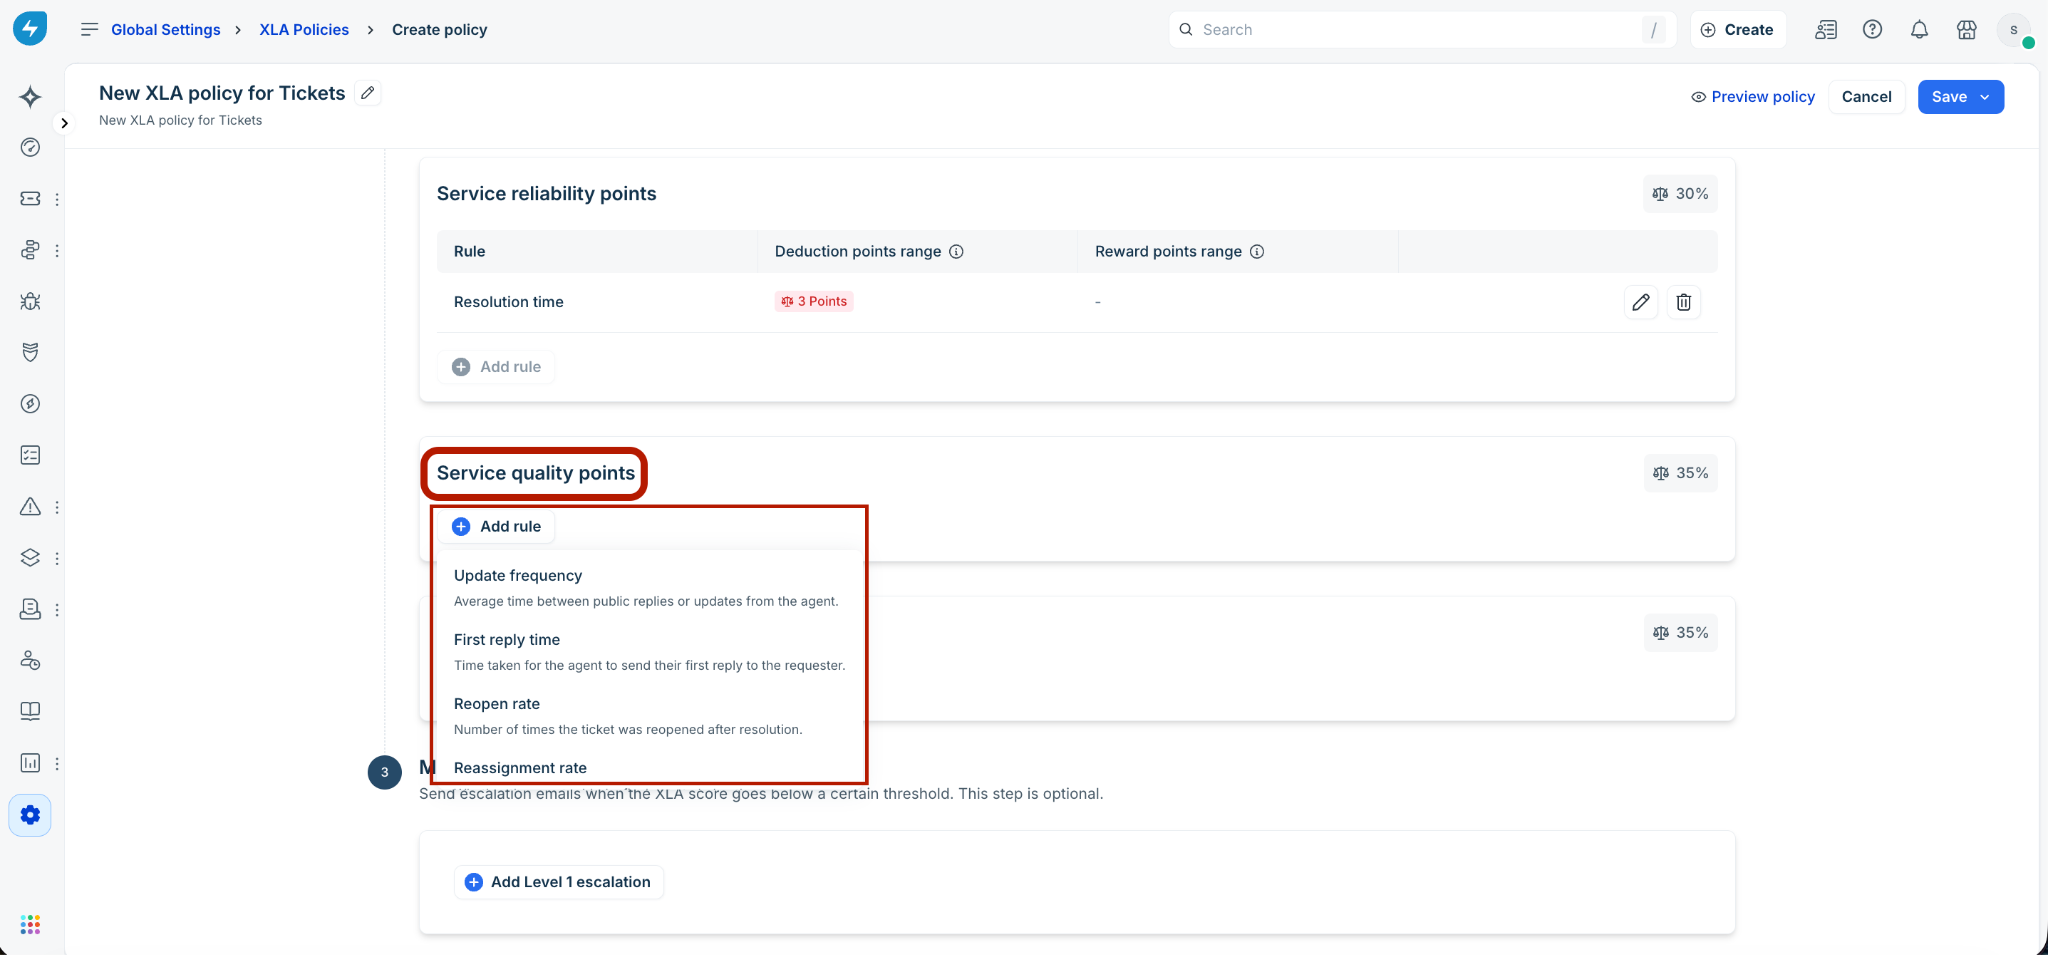
Service quality points: Click + Add rule, and select the required options: Update frequency (average time between agent public updates), First reply time (initial response delivery latency), Reopen rate (count of ticket reopen events), Reassignment rate (internal group bounce frequency), or Resolution note (documentation complete verification). Then, set your target points values.
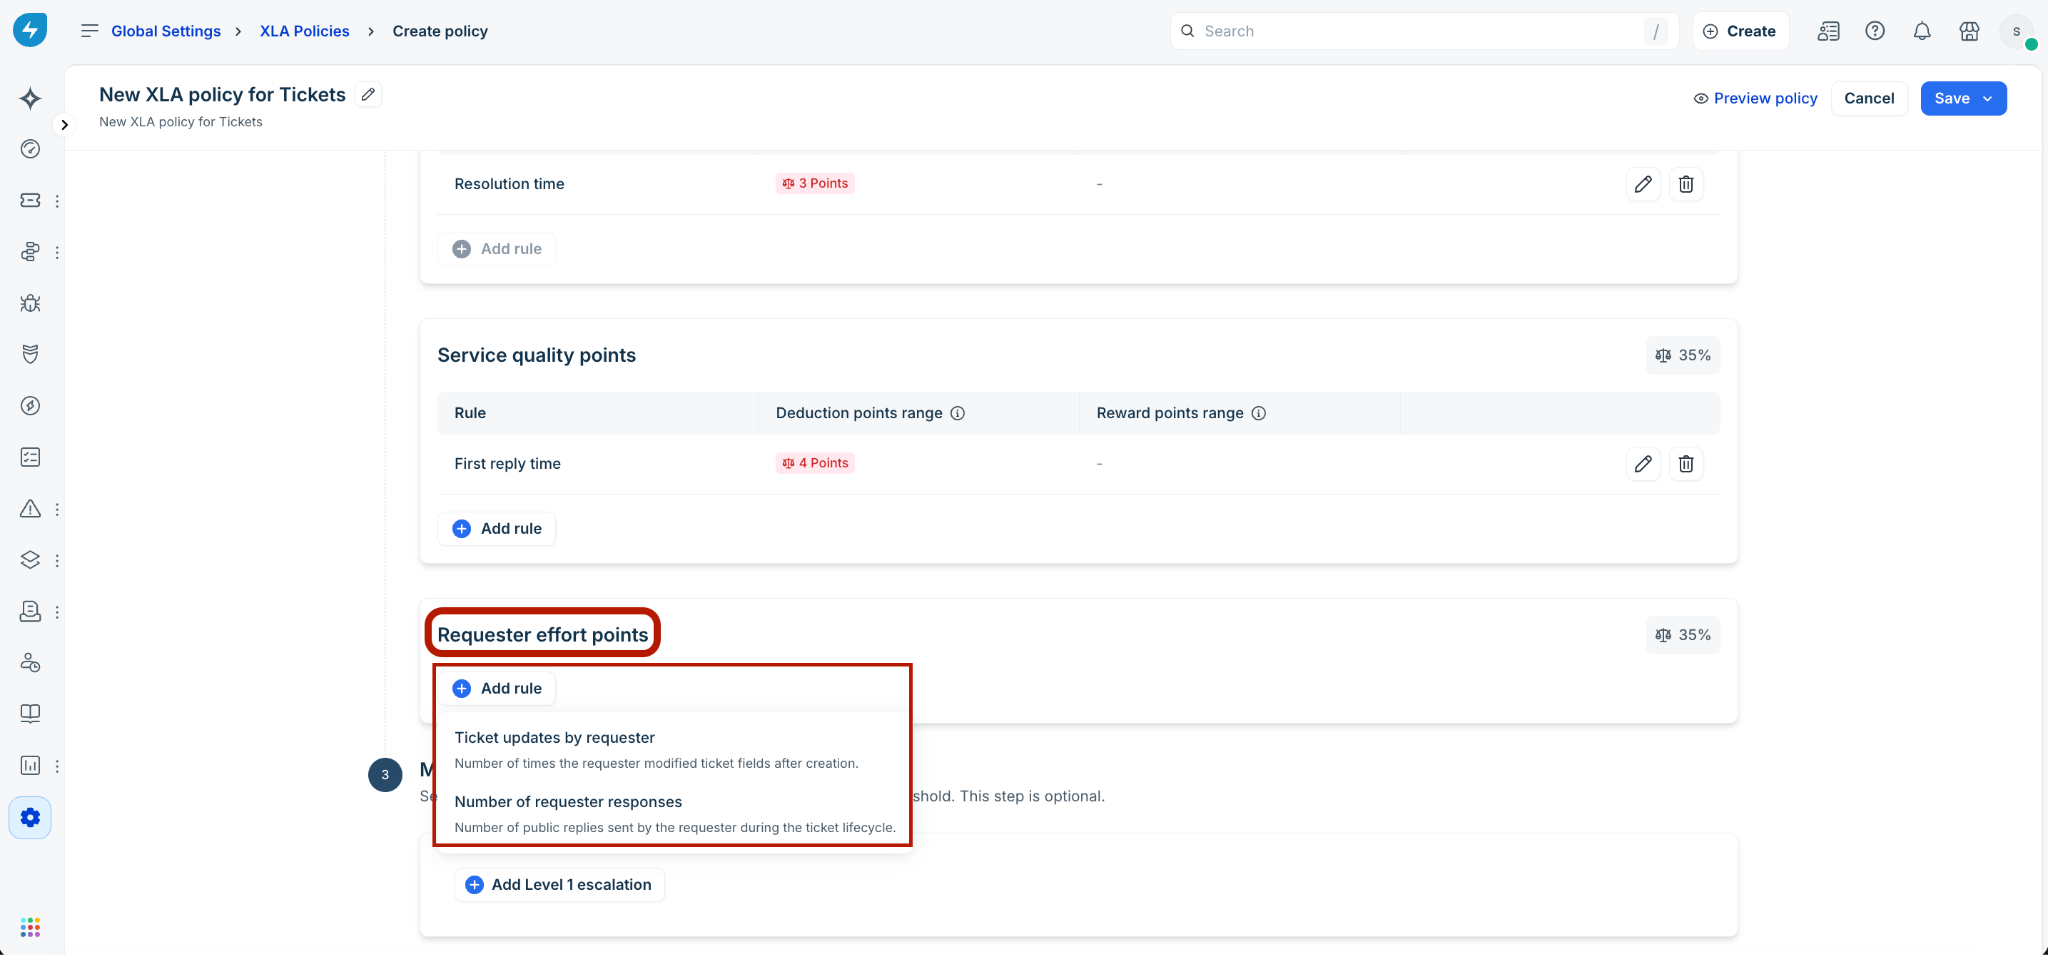
Requester effort points: Click + Add rule, and select the required options: Ticket updates by requester (modifications made by the customer after ticket creation) or Number of requester responses (total thread updates sent by the requester). Then, define your criteria boundaries.
Construct proactive multi-tier escalations
Configure automated escalation rules to alert service management groups before a ticket's score reaches a critical breach state.
Under Manage escalations, click + Add Level 1 escalation to open the L1 configuration row.
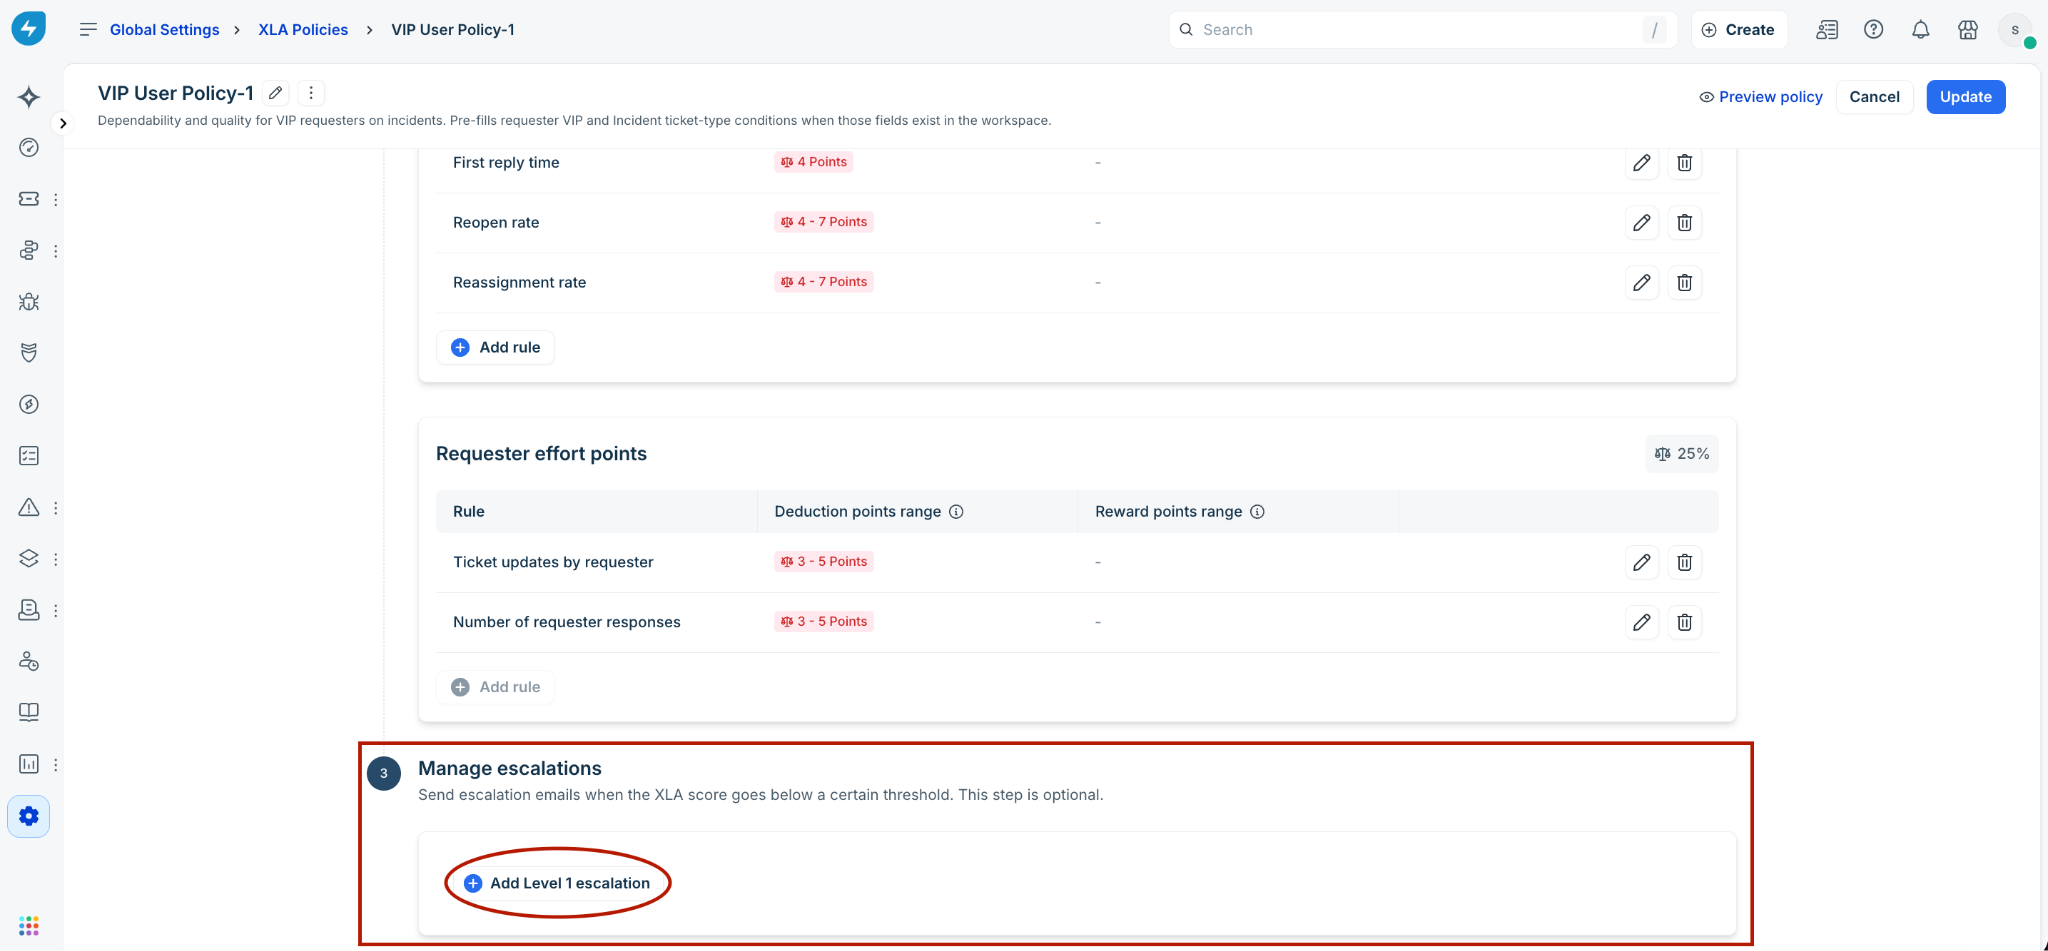
Define your first threshold boundary and target audience:
In the XLA is less than box, enter the lower-bound score that will trigger an alert.
In the Send escalation to field, select the specific agents, supervisors, or support groups who should receive the warning email notification.
(Optional) Click + Add Level 2 escalation to create a stricter secondary enforcement boundary (for example, when the XLA is less than 30, automatically escalate the alert directly to the Service Desk Lead).
Validate calculations with policy preview
Test your policy configuration against actual transactions to check for calculation accuracy before deploying the settings.
Click the Preview policy option of an existing XLA policy.
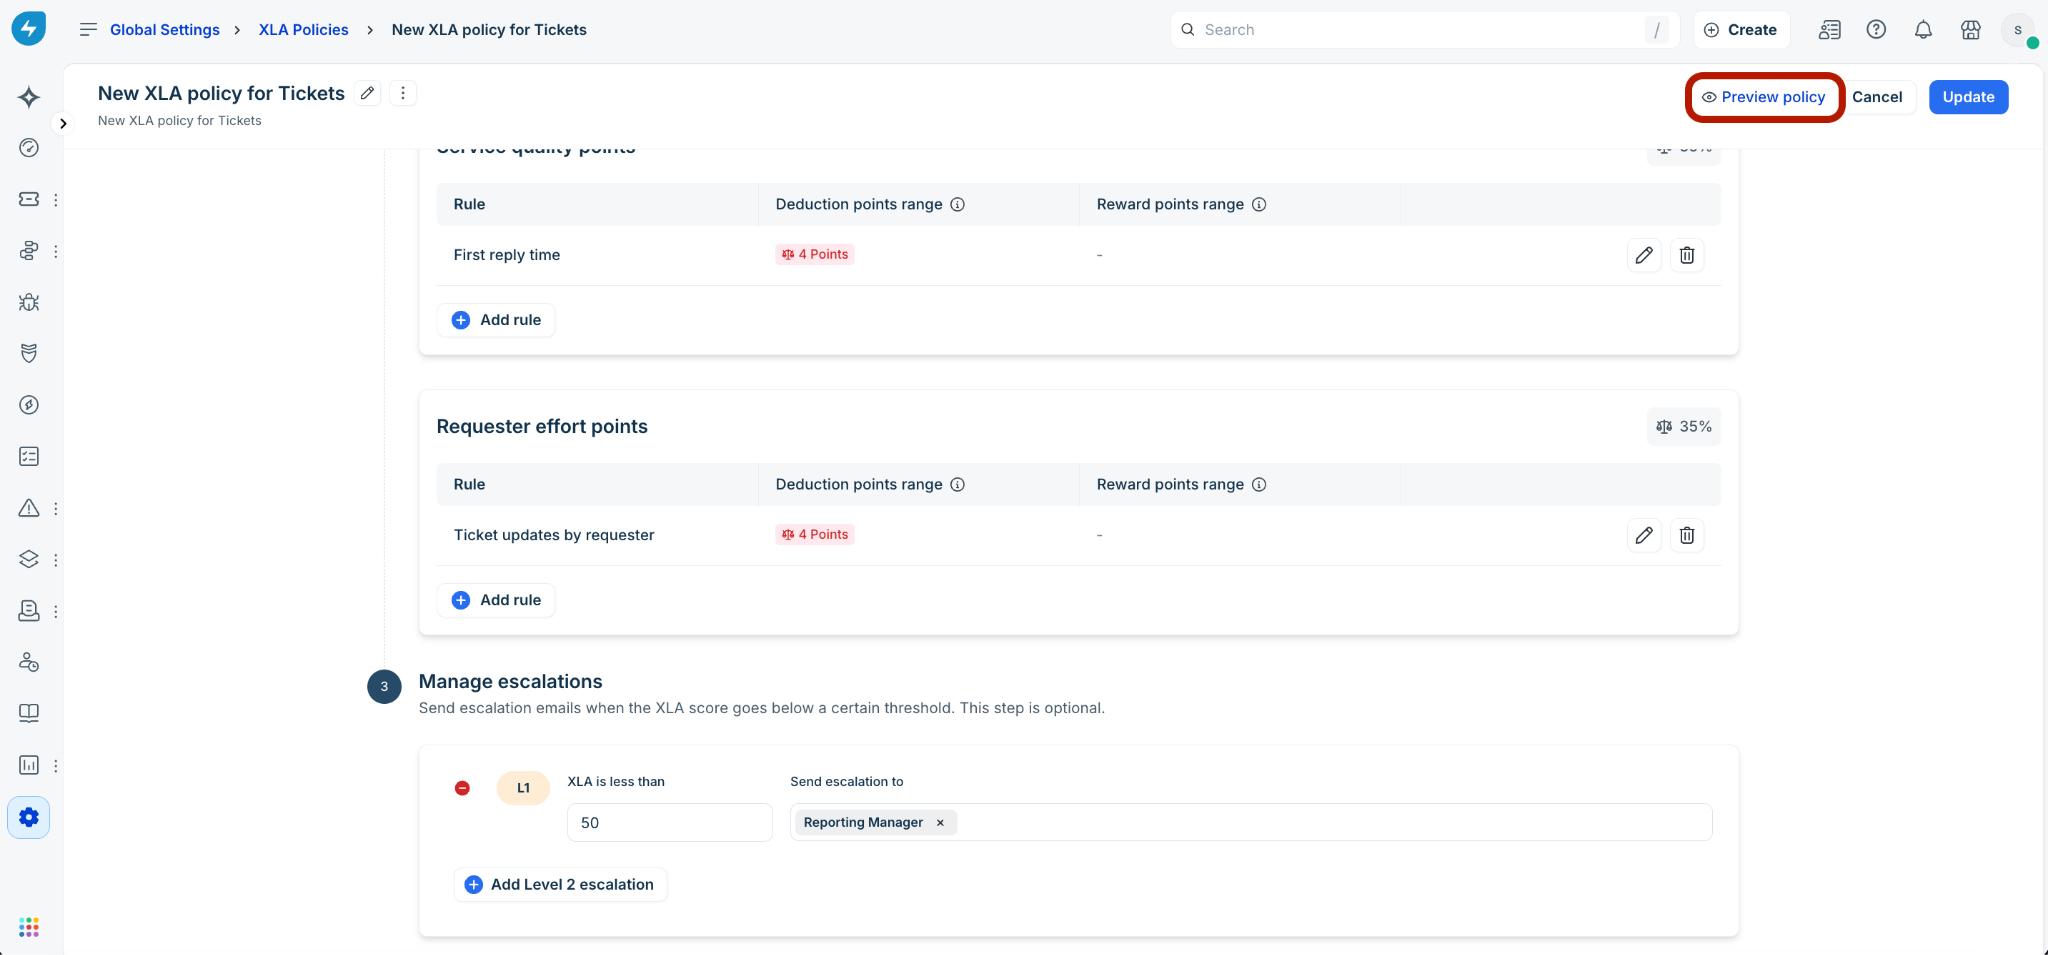
In the Policy preview slider, tickets that match the policy's scope are displayed.
Select a specific ticket from the list to view its complete experience rating profile:
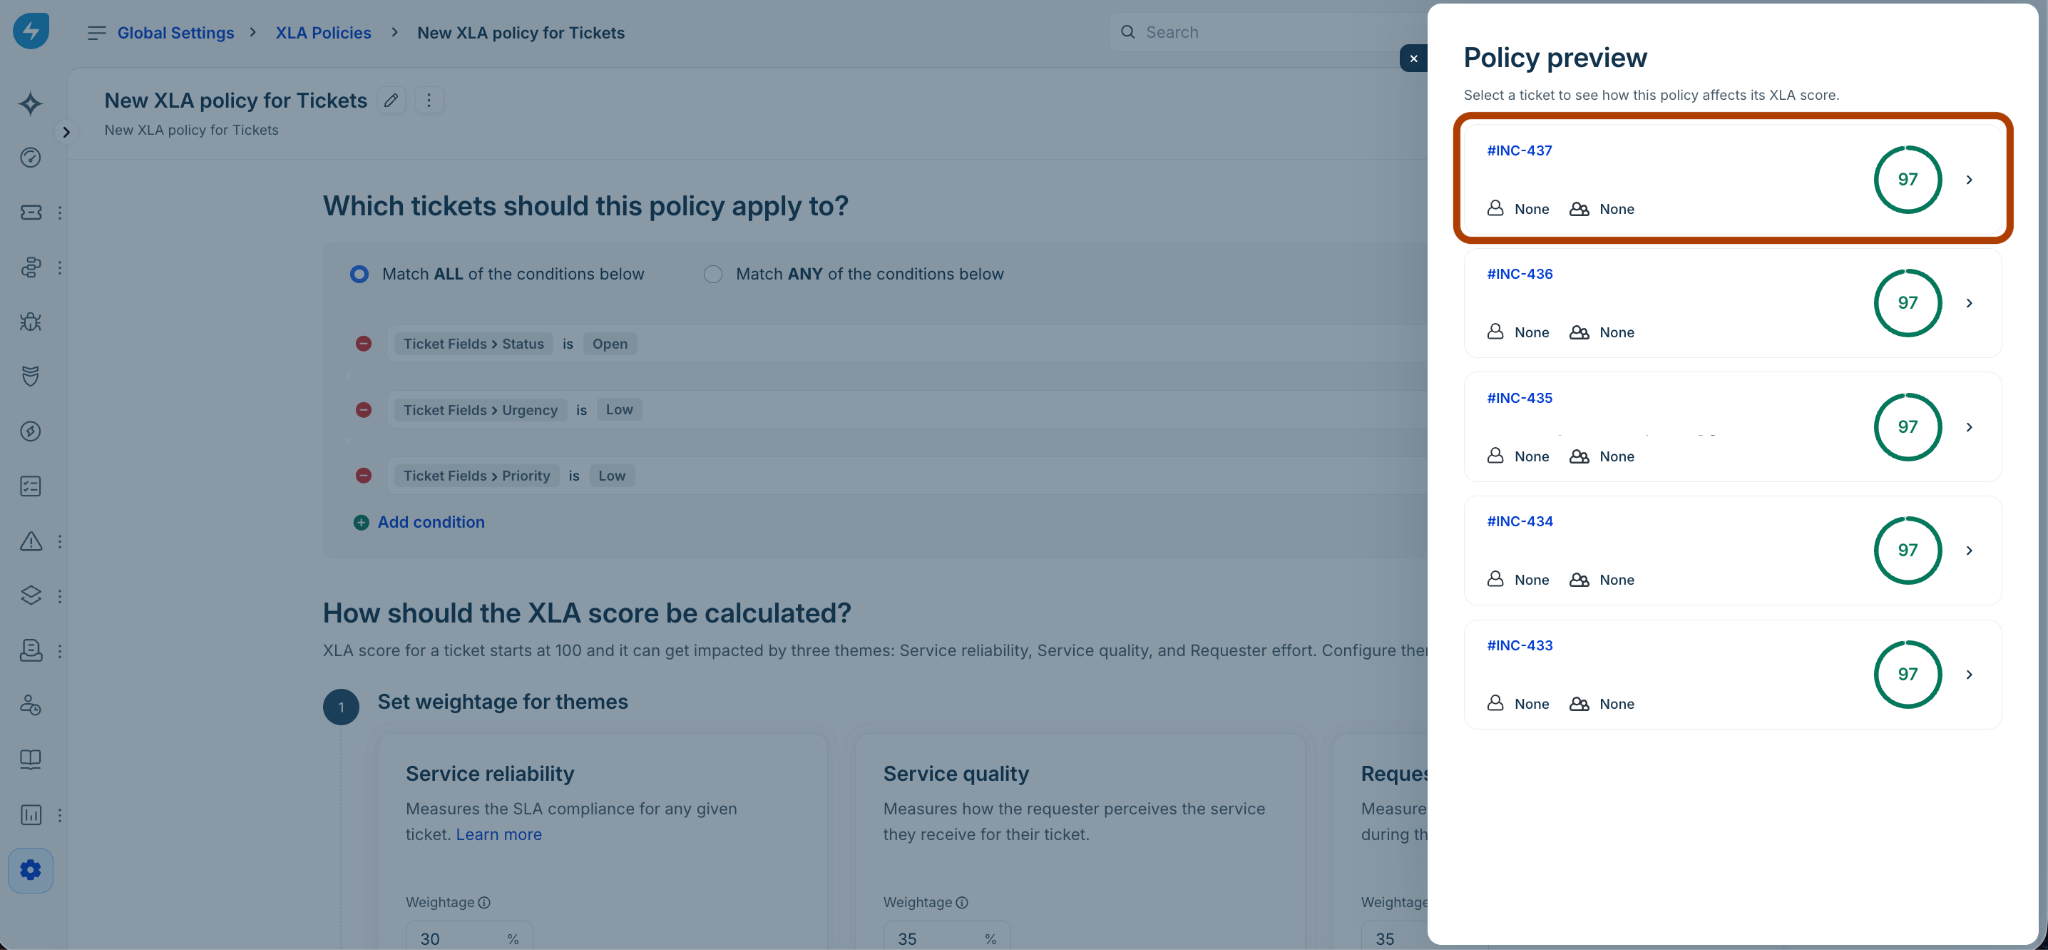
Experience score preview: Displays the calculated overall numerical rating (for example, 97) alongside its corresponding text banner (for example, Excellent).
Pro tips: Displays automated, prescriptive recommendations to improve support performance based on the ticket's results.
Themes: Review individual performance tracking bars for the three core themes:
Reliability: Displays overall reliability point distribution (for example, 27/30) alongside concrete time logs (marked with a red warning flag if it’s overdue).
Quality: Displays communication standards execution (for example, 35/35) along with milestones.
Effort: Displays user interaction parameters (for example, 35/35) and audit counts (for example, ‘1 updates’ flagged as compliant with an ‘Under 10’ criteria label).
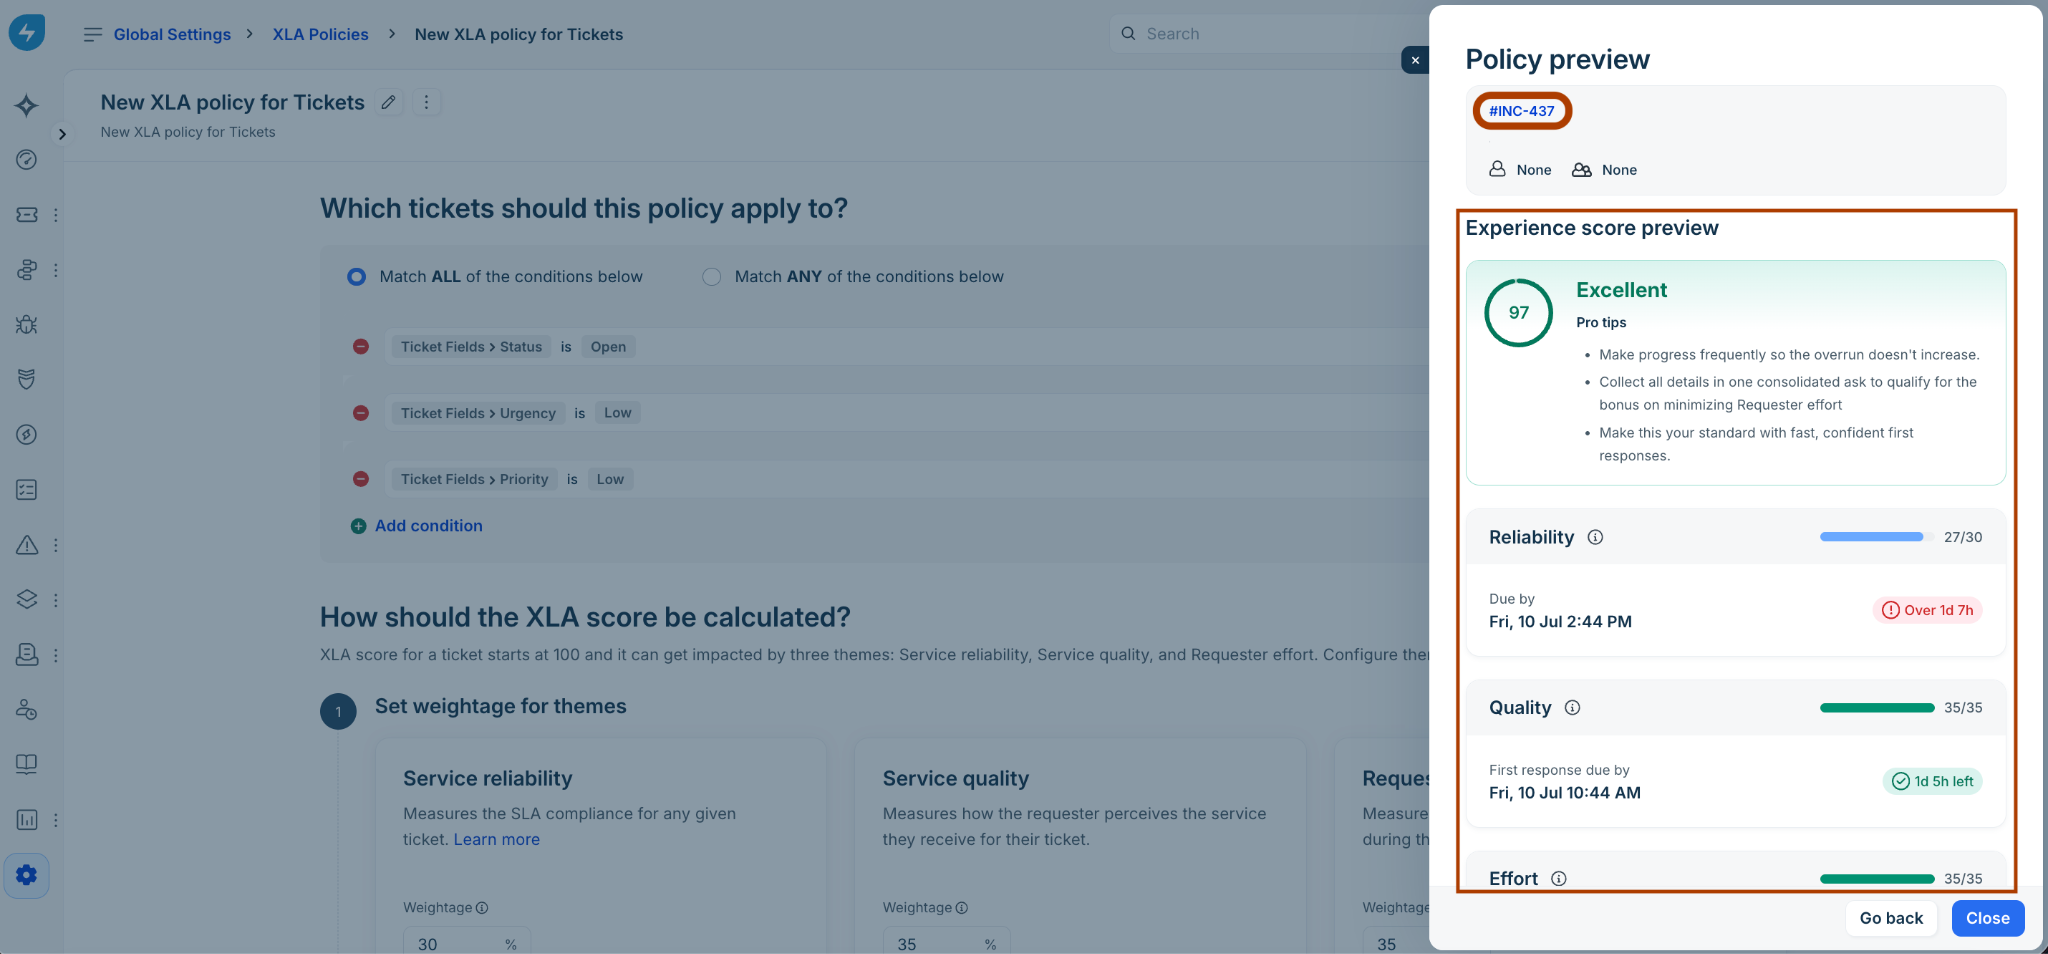
Note: Click any specific ticket link in the Policy preview slider to open the respective Ticket details page and view the experience score.
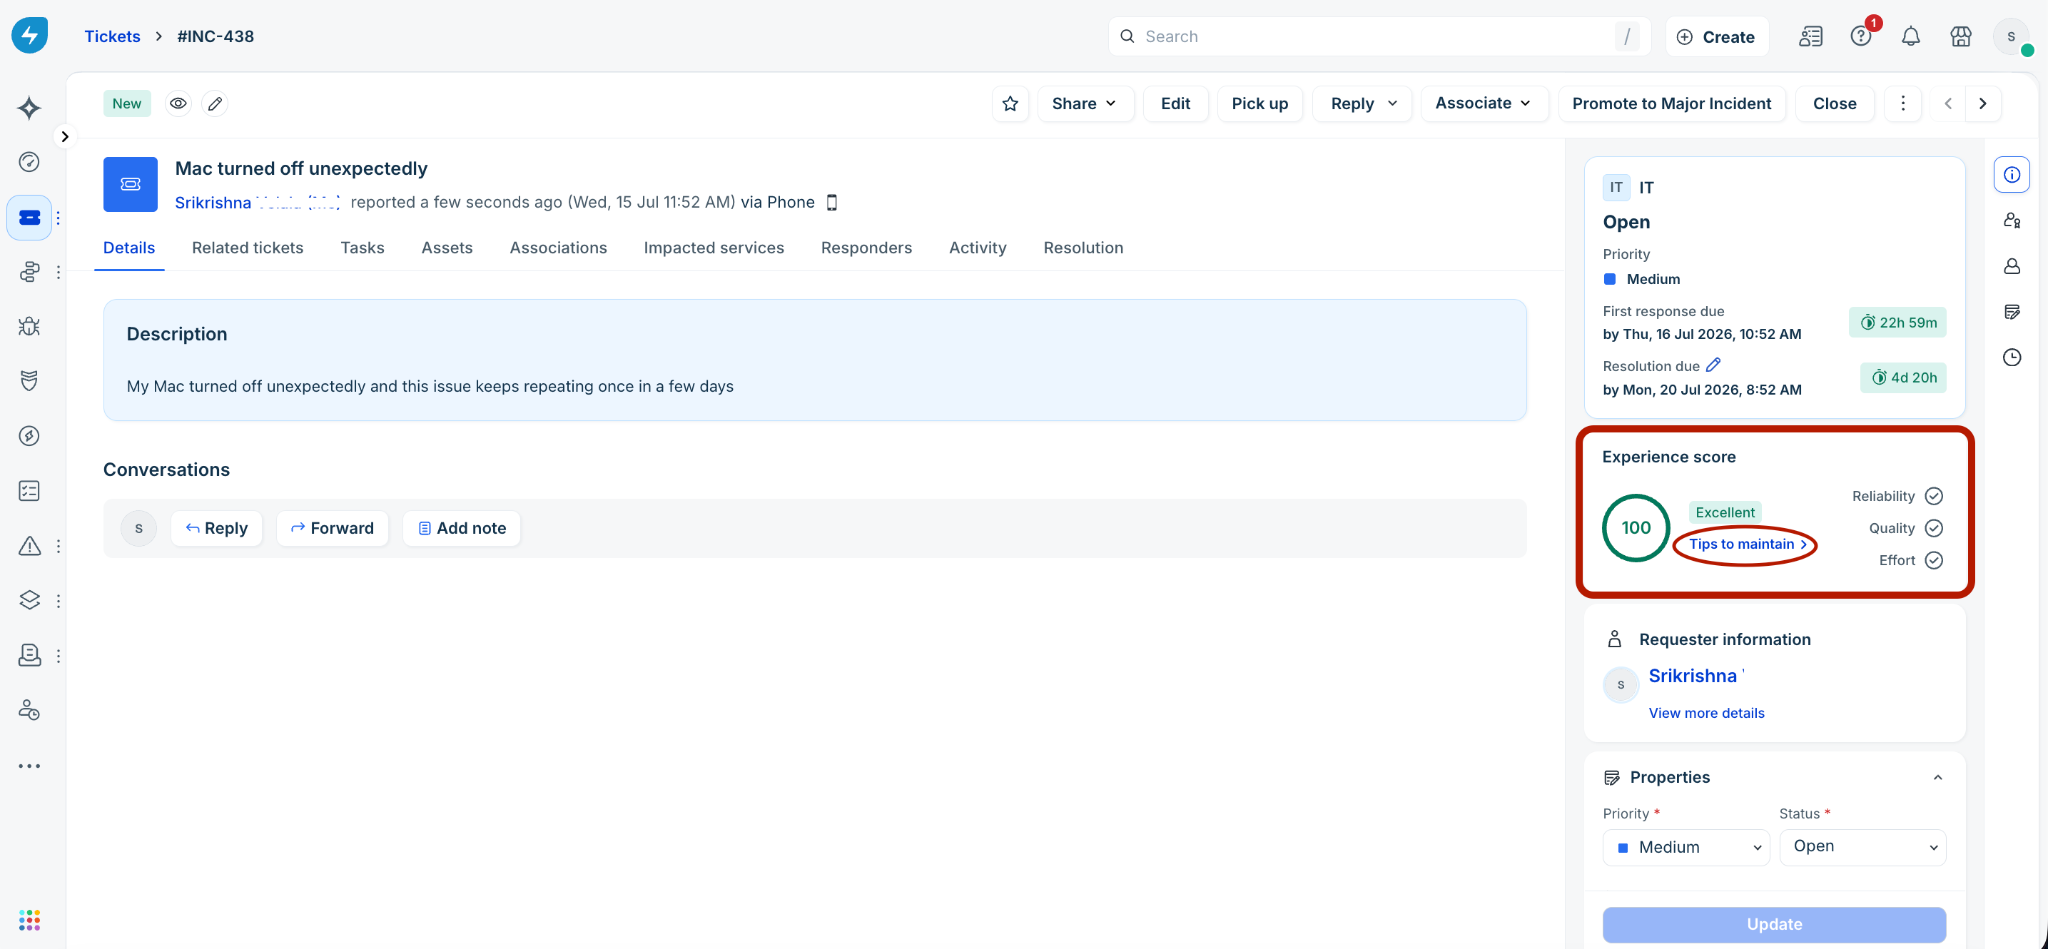
If the preview scores reflect actual outcomes, click Close and select Save (or Update) to deploy the policy. If there are calculation mismatches, click Go back to refine your point configurations.
Customize policy execution hierarchy
When multiple XLA policies are active, Freshservice evaluates incoming tickets against them using a top-down sequence. You must structure this order to ensure specialized policies process records before general rules apply.
On the XLA Policies page, click Reorder.
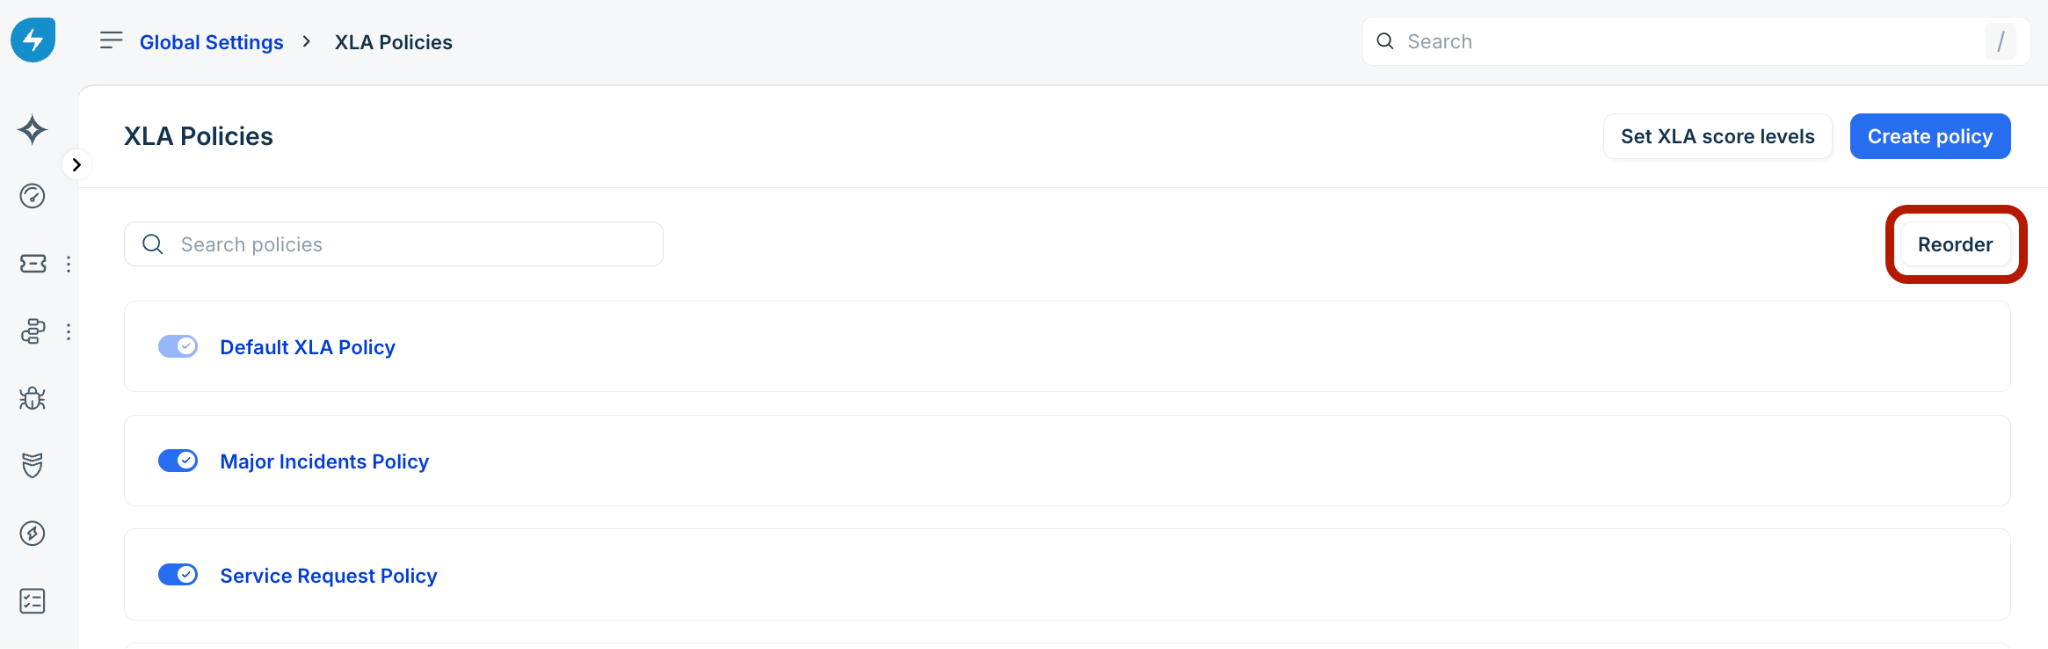
On the Reorder configuration page, position your policies using either of these alignment methods:
Click the drag-and-drop icon on the left of a policy row and move the item to its target priority position.
Or, click the numerical text input box next to a policy row and enter the desired priority rank number.
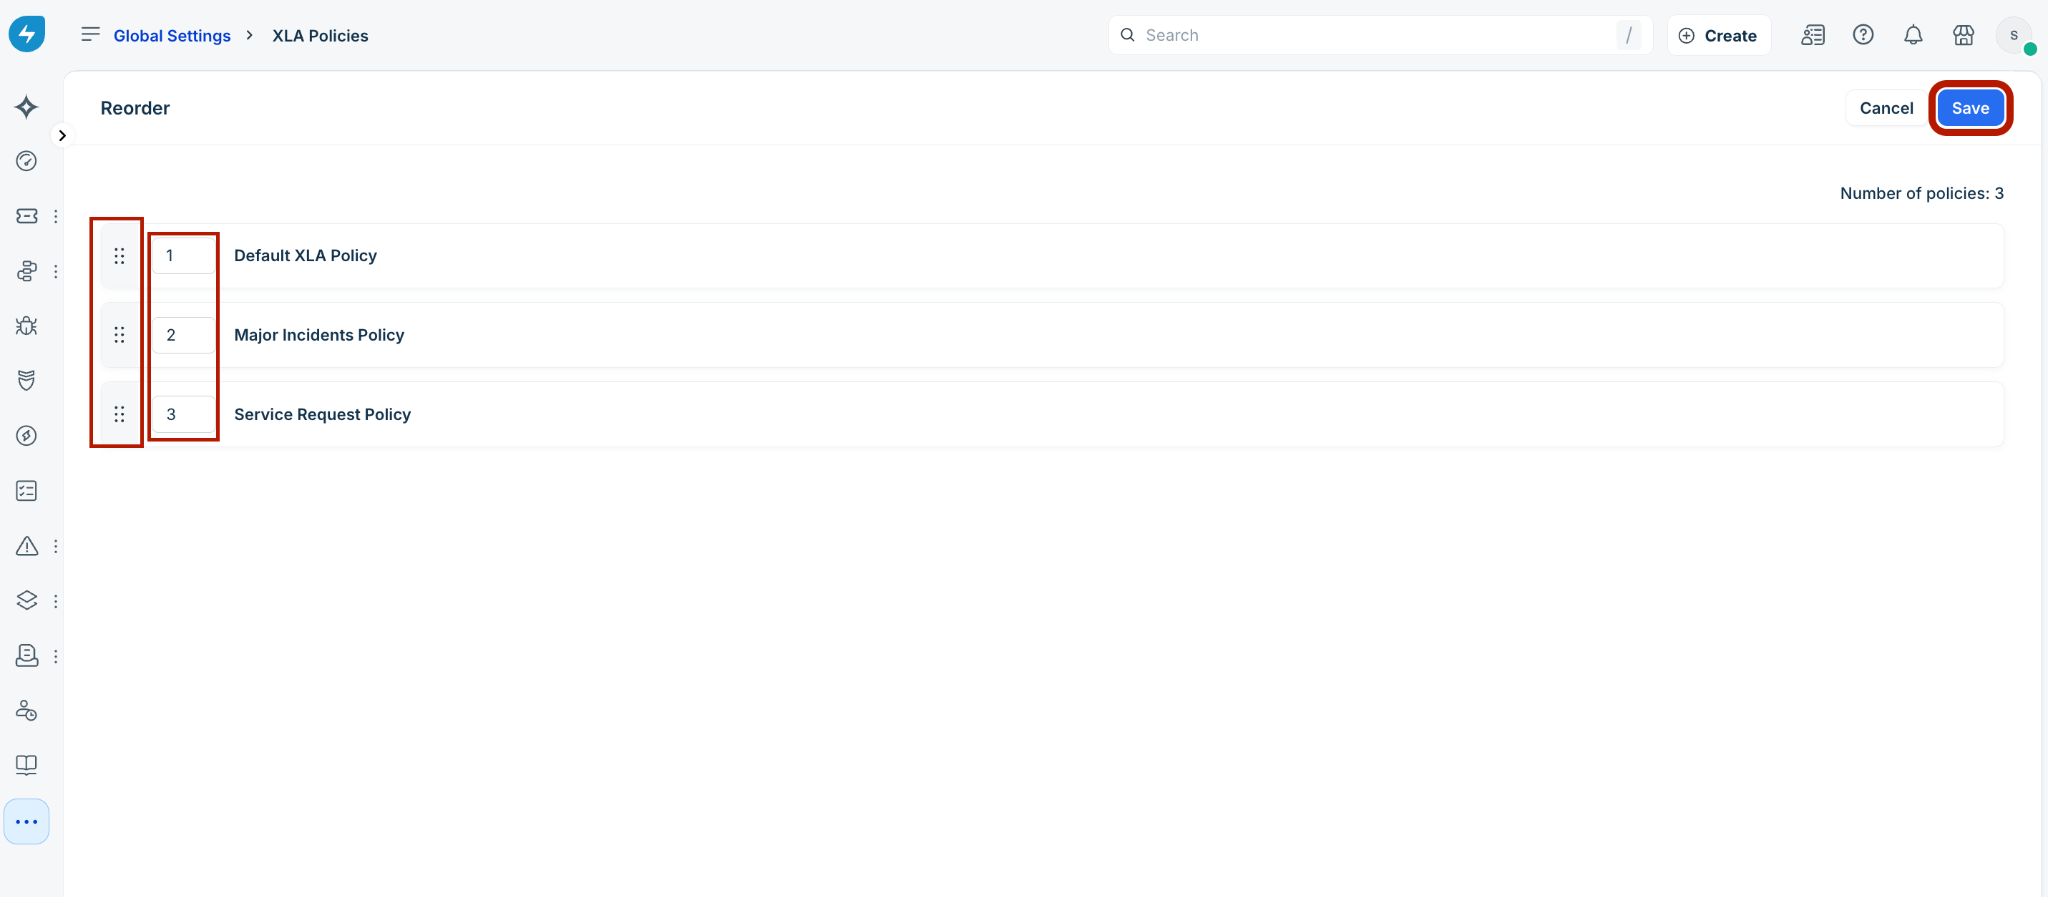
Click Save to apply the active policy execution order.