Business Services let you build custom maps of your business-critical functions. They can include any combination of devices, resources, application components, and other Business Services that you identify as critical to your operations.
Unlike Application Groups, which are automatically generated from discovered connections and updated dynamically, Business Services are static and designed entirely by you.
Building Business Services is typically the final step in the Application Dependency Mapping workflow: after discovery has populated your devices, services, and Application Groups, you assemble them into Business Services that represent how your organization delivers value.
Use Business Services to:
Create services from scratch or from existing Application Groups.
Relate Business Services to other Business Services, breaking large services into smaller, reusable components.
Add and remove devices, resources, and application components.
Customize the layout, connections, and labels on the visualization canvas.
Migrate Business Services to third-party platforms like Microsoft Azure.
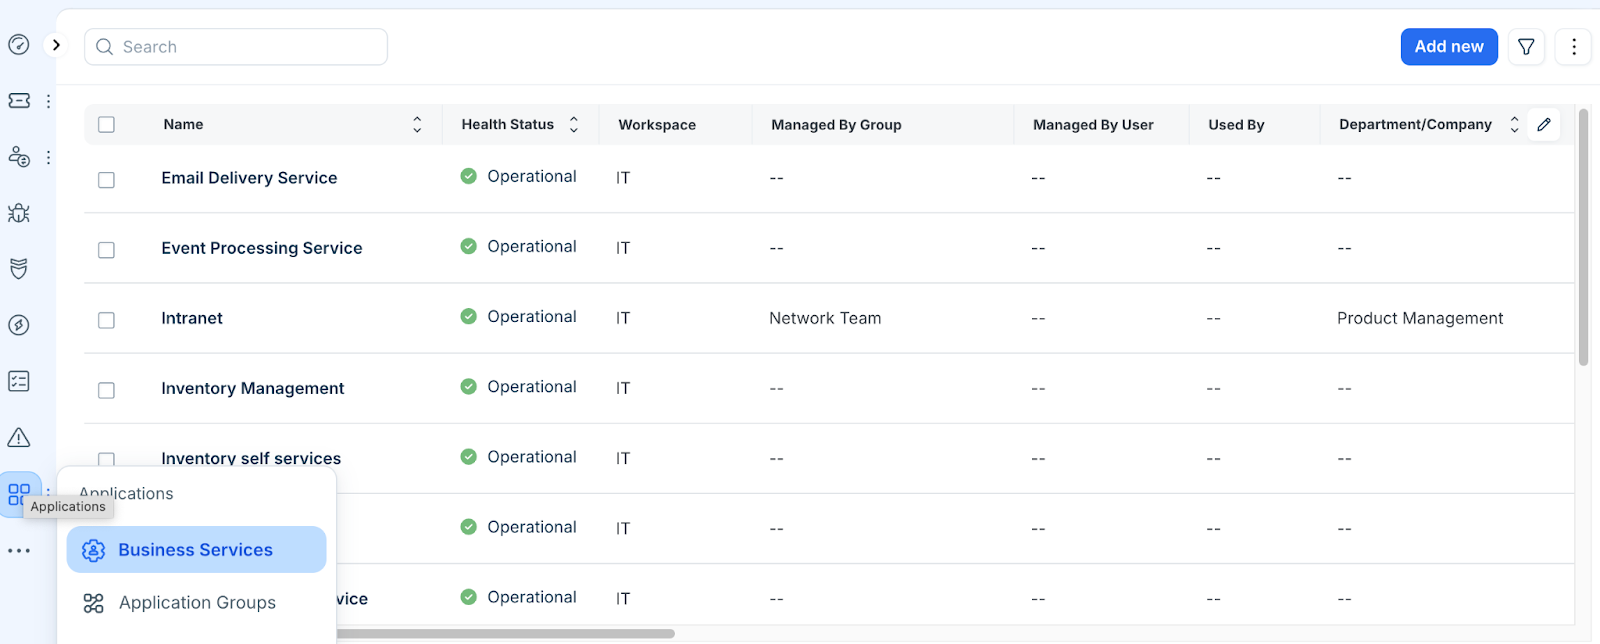
Explore existing Business Services
Navigate to Applications > Business Services to view the list page. It shows all your Business Services along with their associated Devices and Application Components. Freshservice automatically categorizes Application Components as Database, Application Layer, Web Server, Load Balancer, or Other.
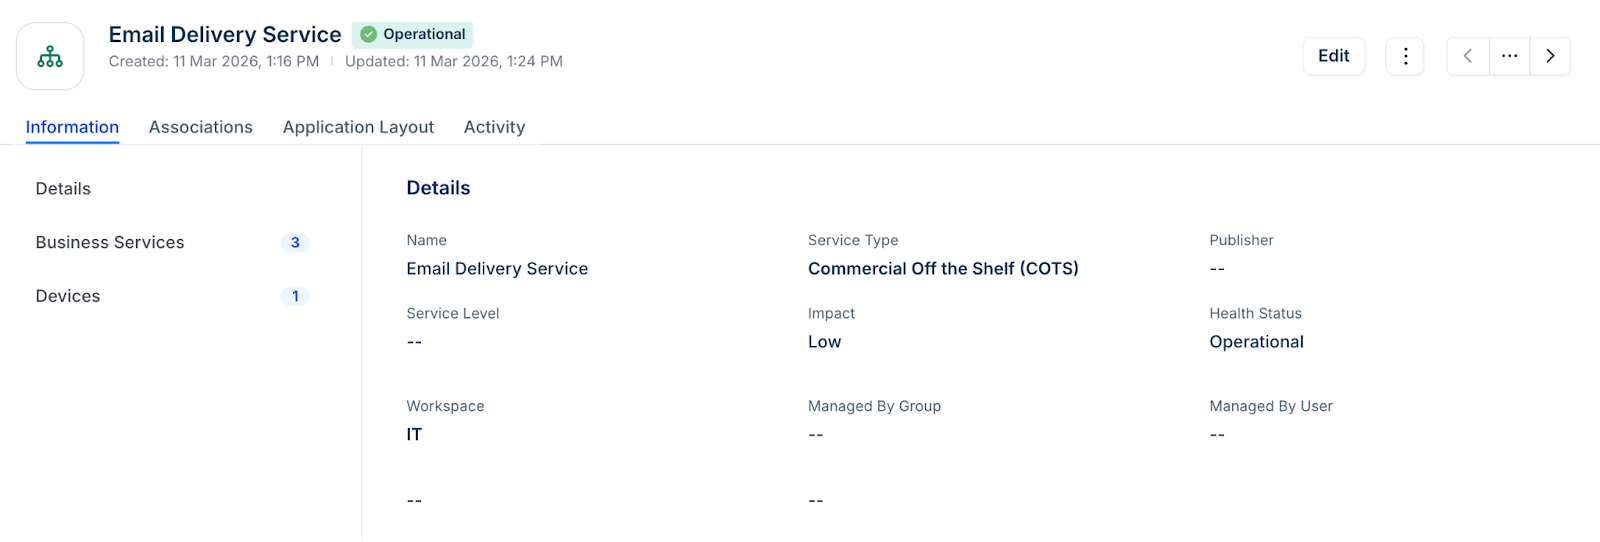
Click a Business Service to open its details page. Any associated Business Services, Application Groups, Application Components, Resources, Devices, and more are displayed.
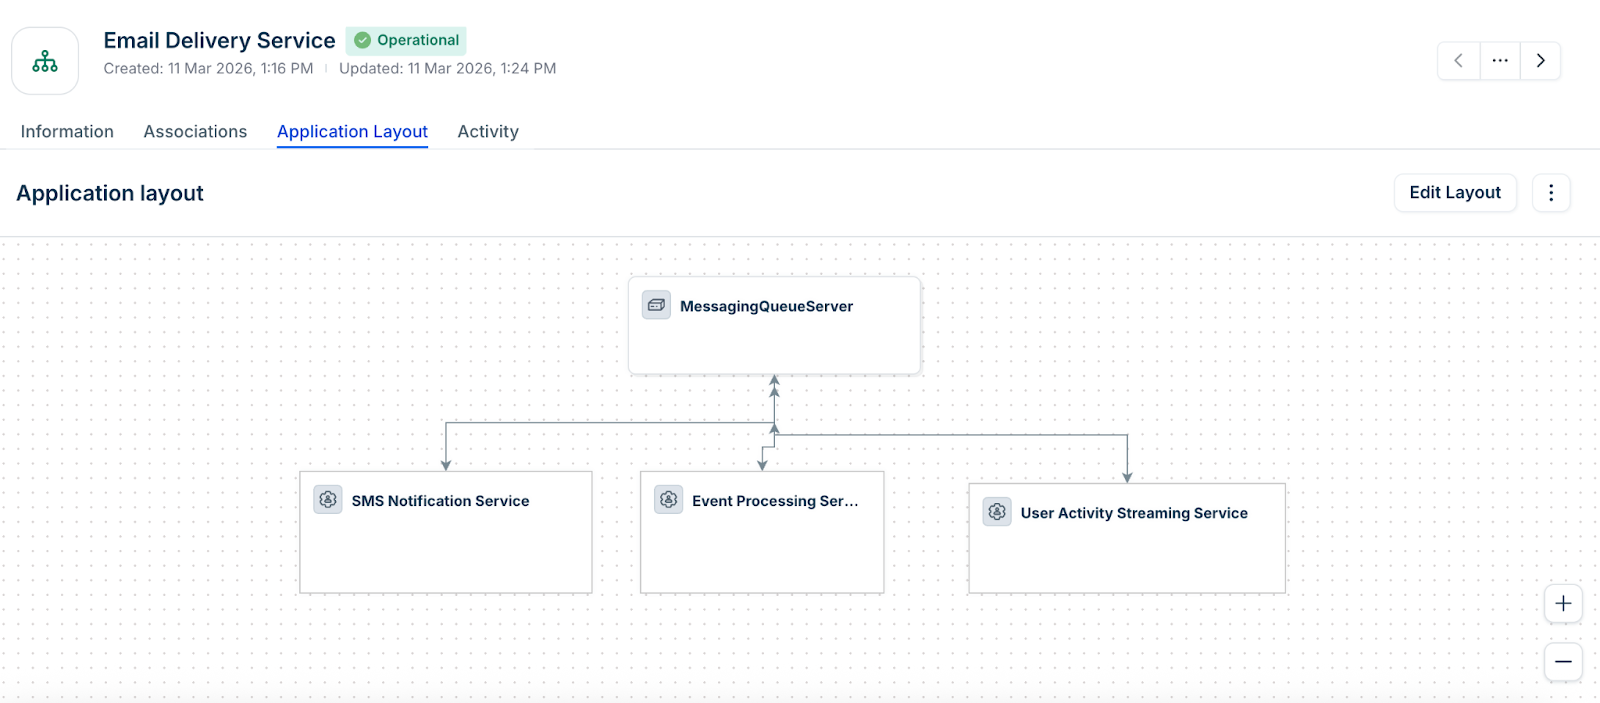
Click Application Layout to open the visualization canvas.
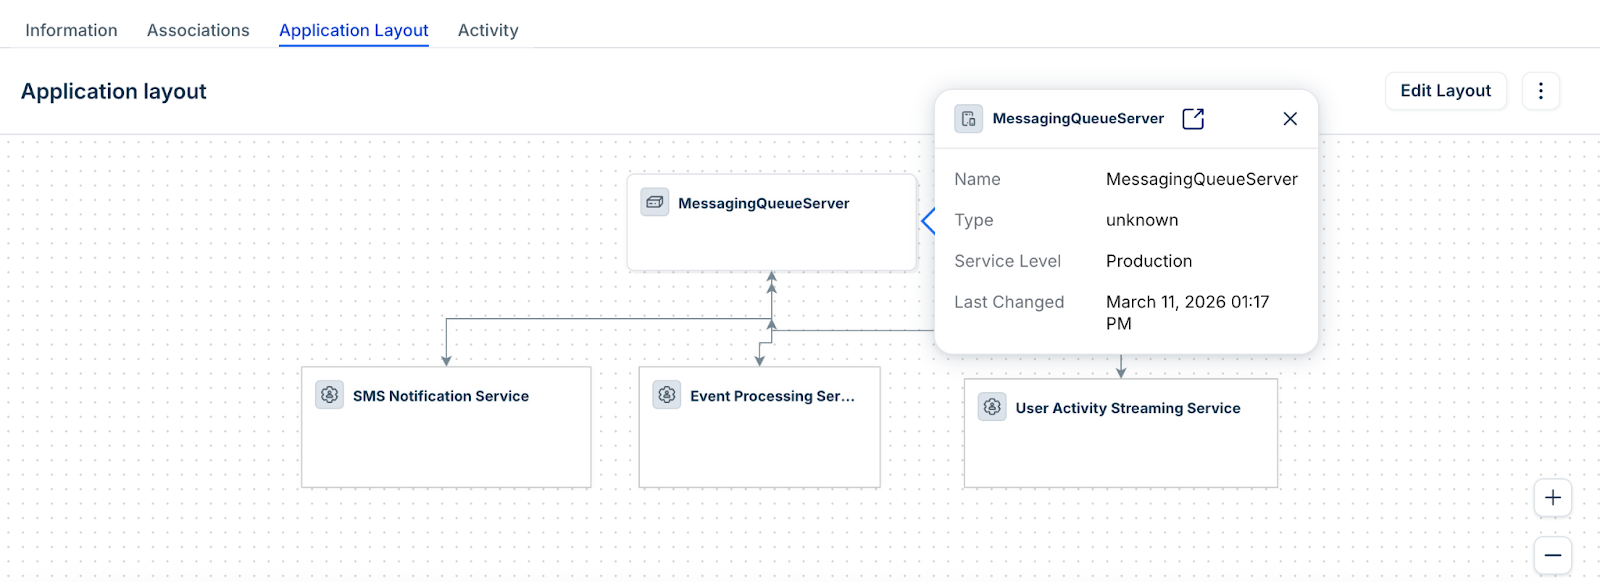
Click any object on the canvas to see its details. Links in the details panel take you to the full view page for that item.
Create a Business Service
From Applications > Business Services, click Add new to define a new Business Service.
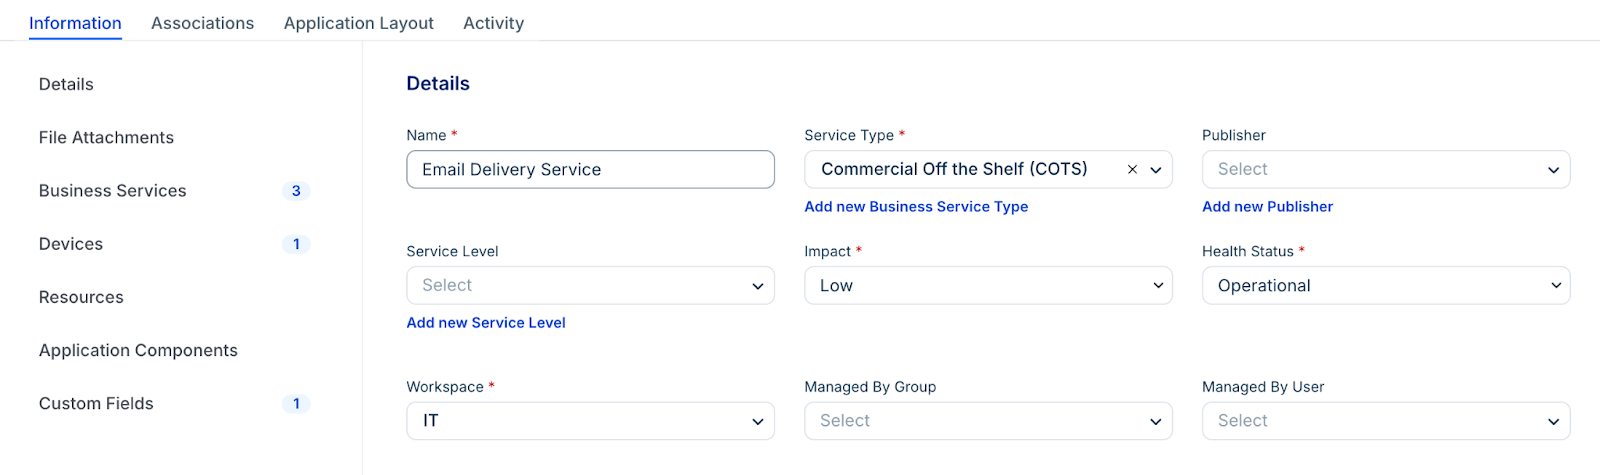
Step 1: Fill out the Business Service Form
To create a new Business Service, fill out the Info form with the following details. After saving, you'll have access to the Application Layout canvas to visualize dependencies and relationships between items.
Enter the application Name.
Select the Service Type (COTS, COTS with Customization, or Custom) or click Add new Business Service Type to create a new one.
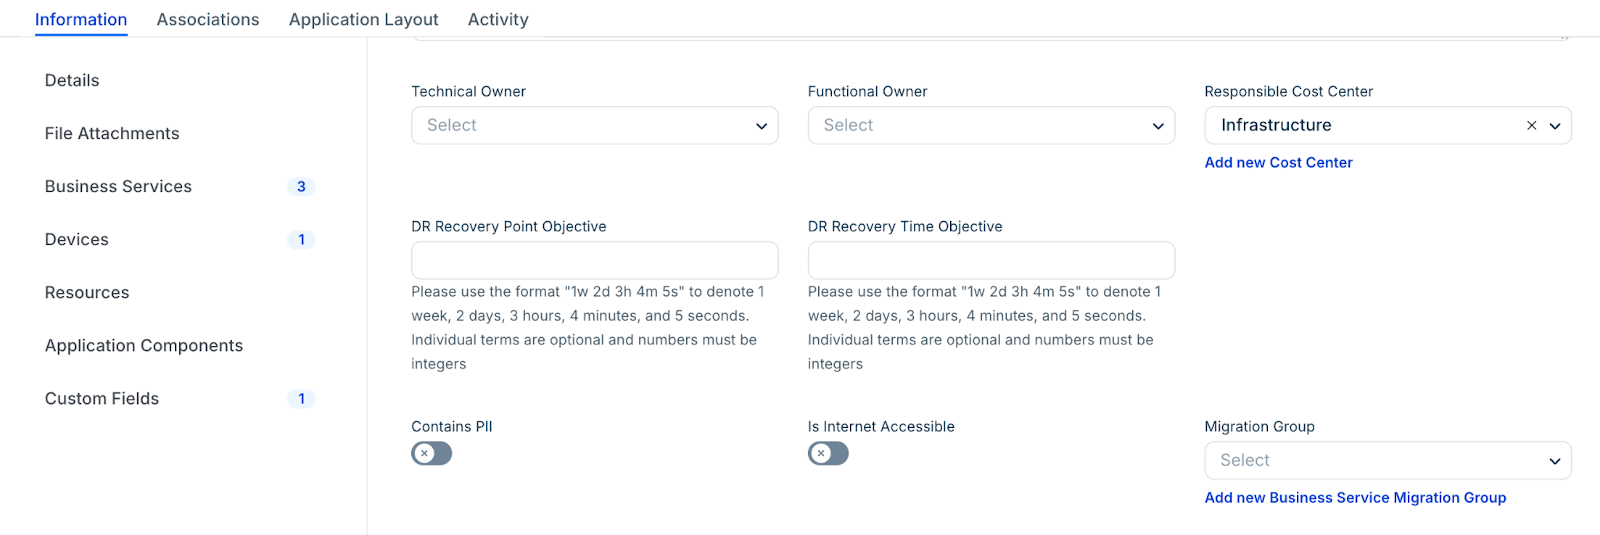
Select the Technical Application Owner, Business Service Owner, and Responsible Customer or Department.
For DR Recovery Point Objective and DR Recovery Time Objective, use the format 1w 2d 3h 4m 5s (1 week, 2 days, 3 hours, 4 minutes, and 5 seconds). Each term is optional, and all numbers must be integers. For example, enter 2d 6h for a period of two days and six hours.
Select the Migration Group and Criticality, and add any Notes or Tags.
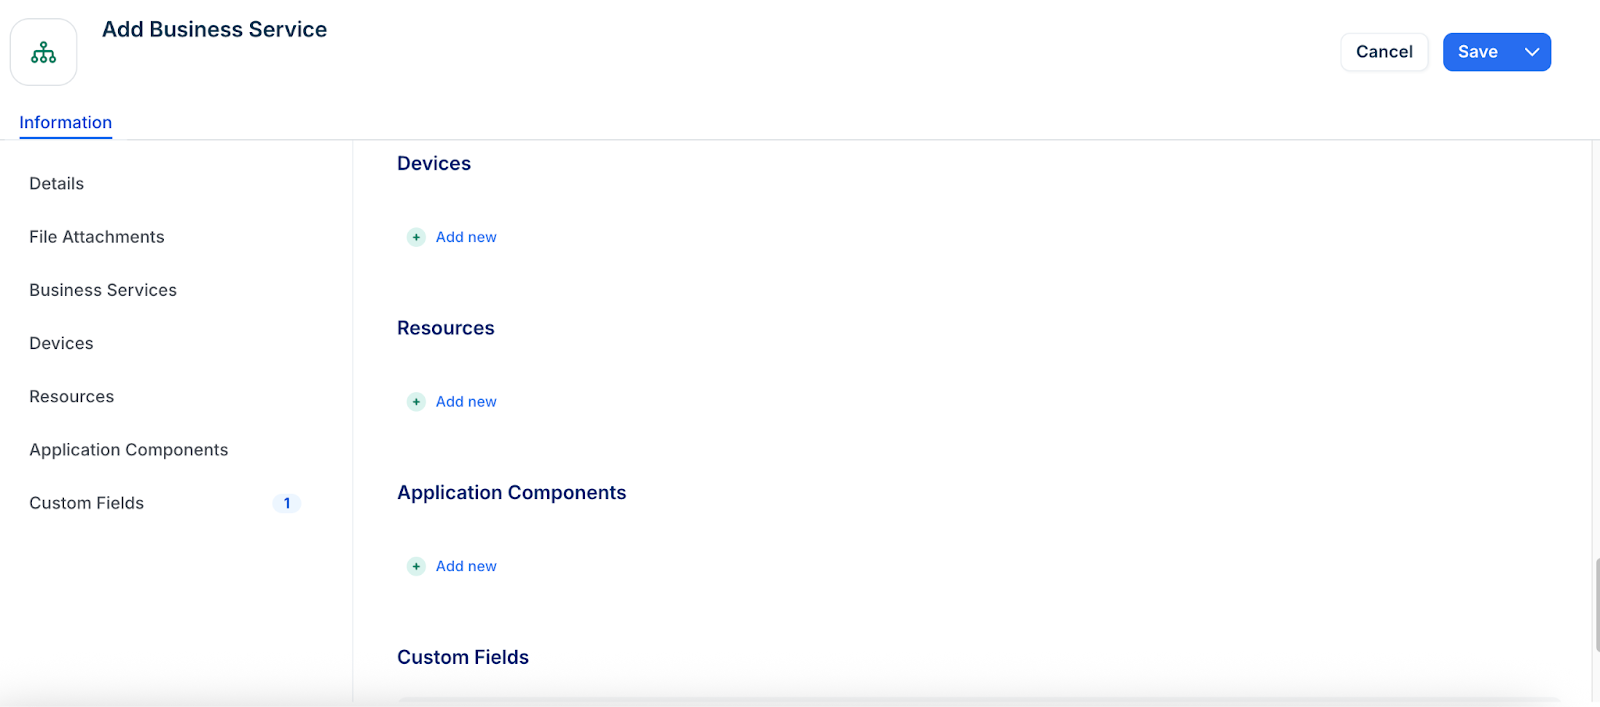
Add and remove form items
From the details page or the Application Layout canvas, you can associate the following items with your Business Service (in addition to File Attachments and Custom Fields):
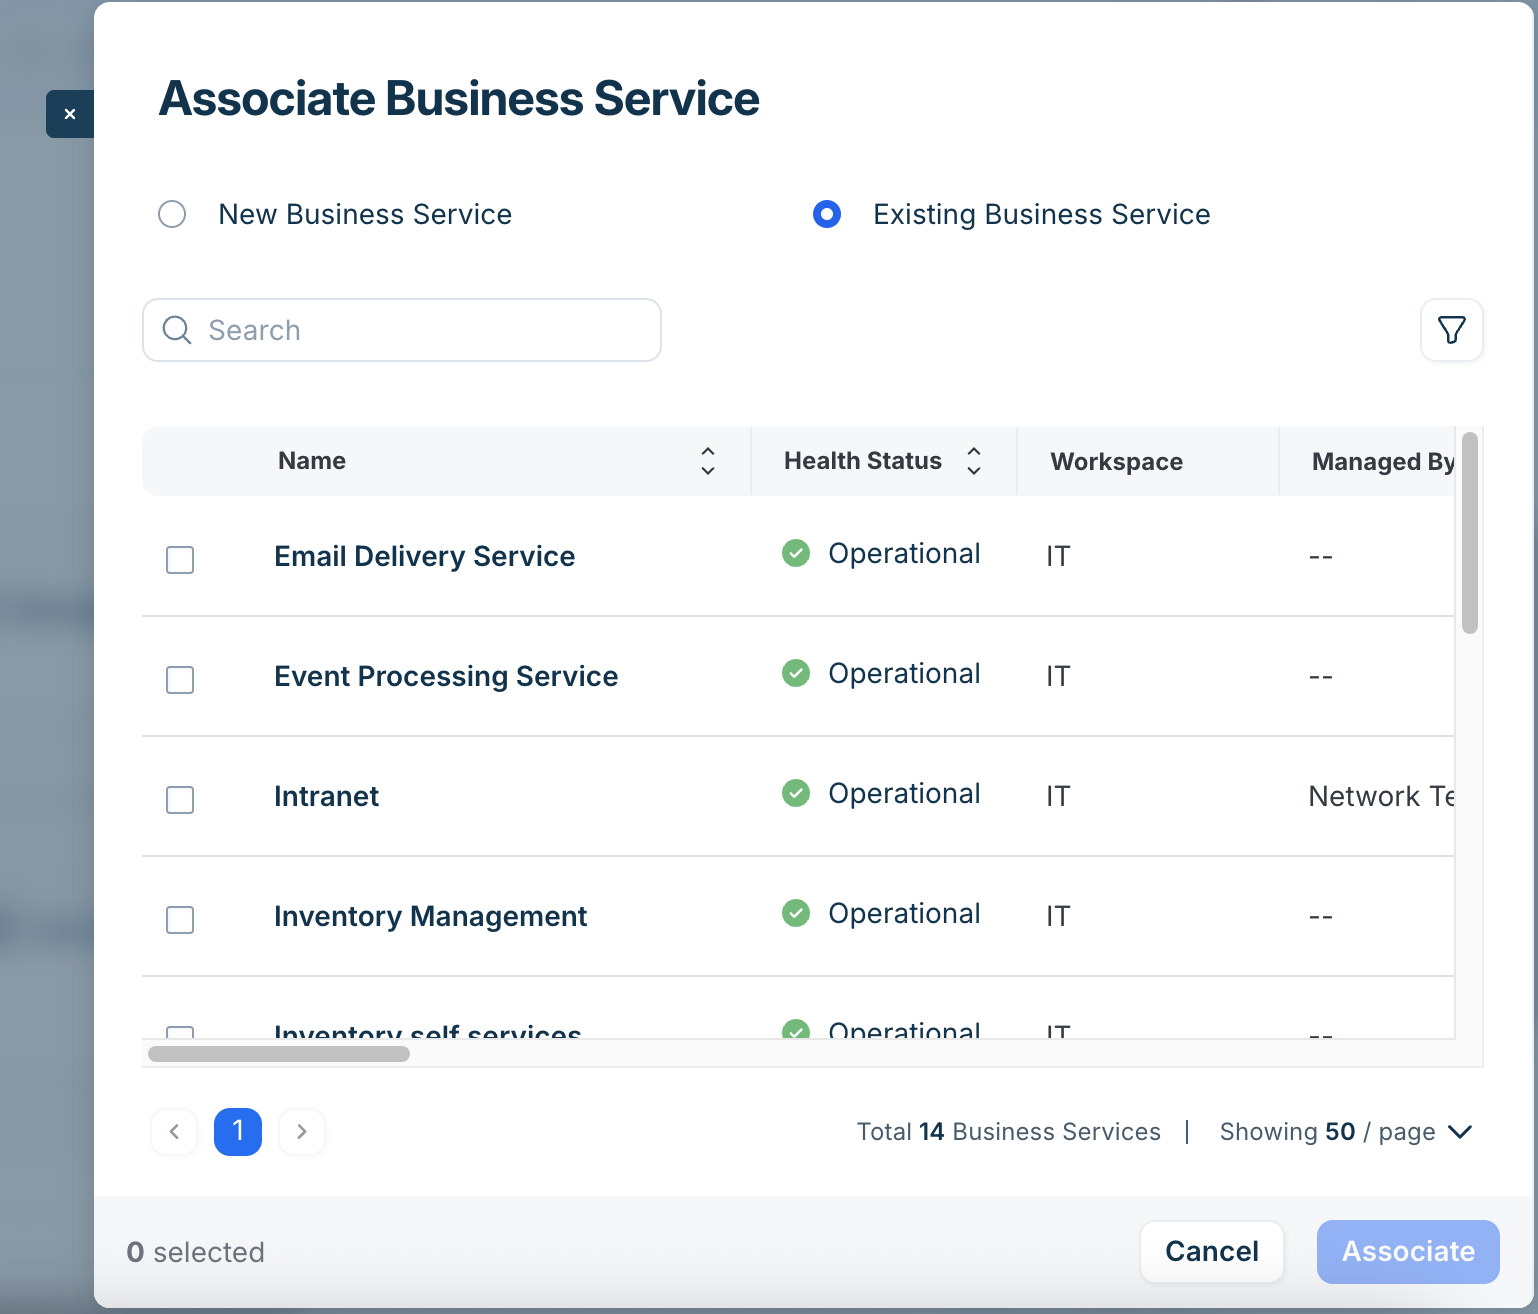
Business Services: Link other Business Services to model service-to-service relationships.
Devices: Add the physical or virtual machines that support the service.
Resources: Add cloud or infrastructure resources such as databases and storage.
Application Components: Add the application layers (web servers, databases, load balancers) that make up the service.
Application Groups can only be added from the canvas. See Add Application Groups below.
Remove inline items by clicking the trash can icon. If the item was previously saved, you can click Restore to undo the removal during the current session.
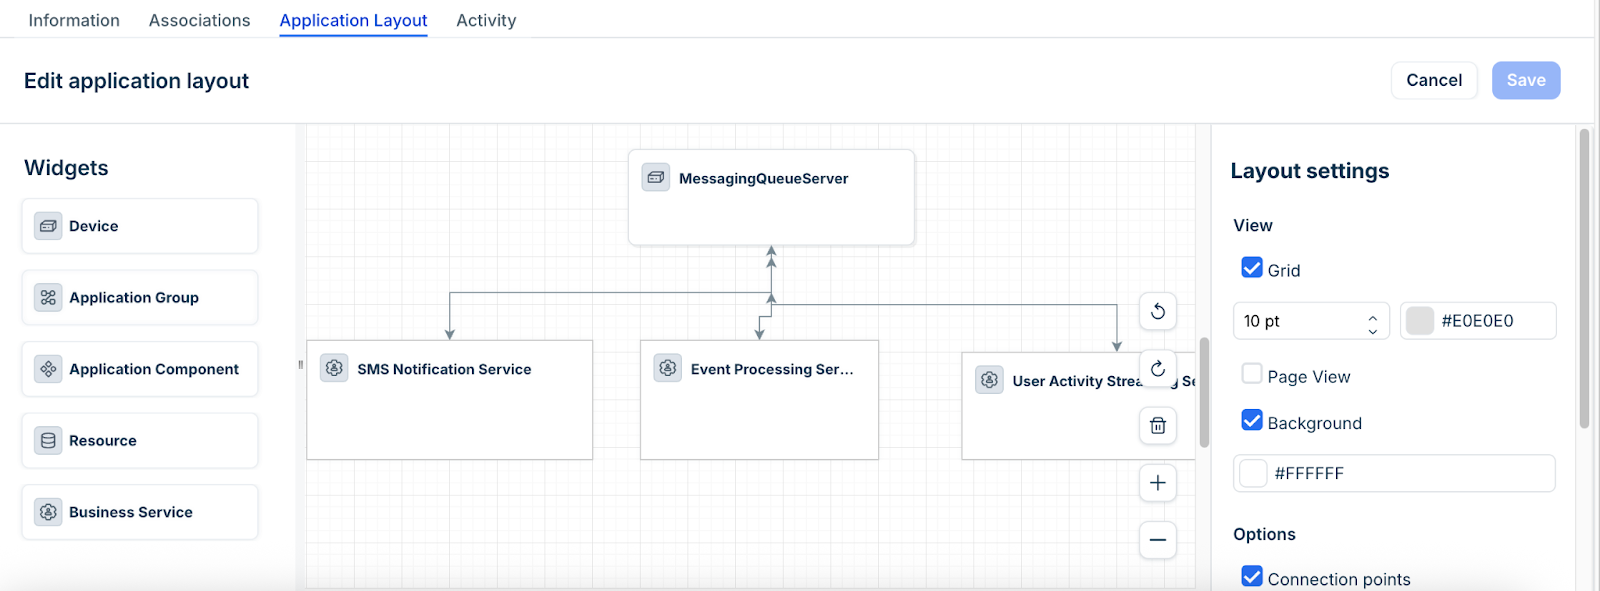
The Application Layout Canvas
After saving a Business Service, you can open its Application Layout to build and edit dependencies on the visualization canvas. Any items added through the form will already be visible on the canvas.
Click Edit on the top right of the canvas to activate edit mode.
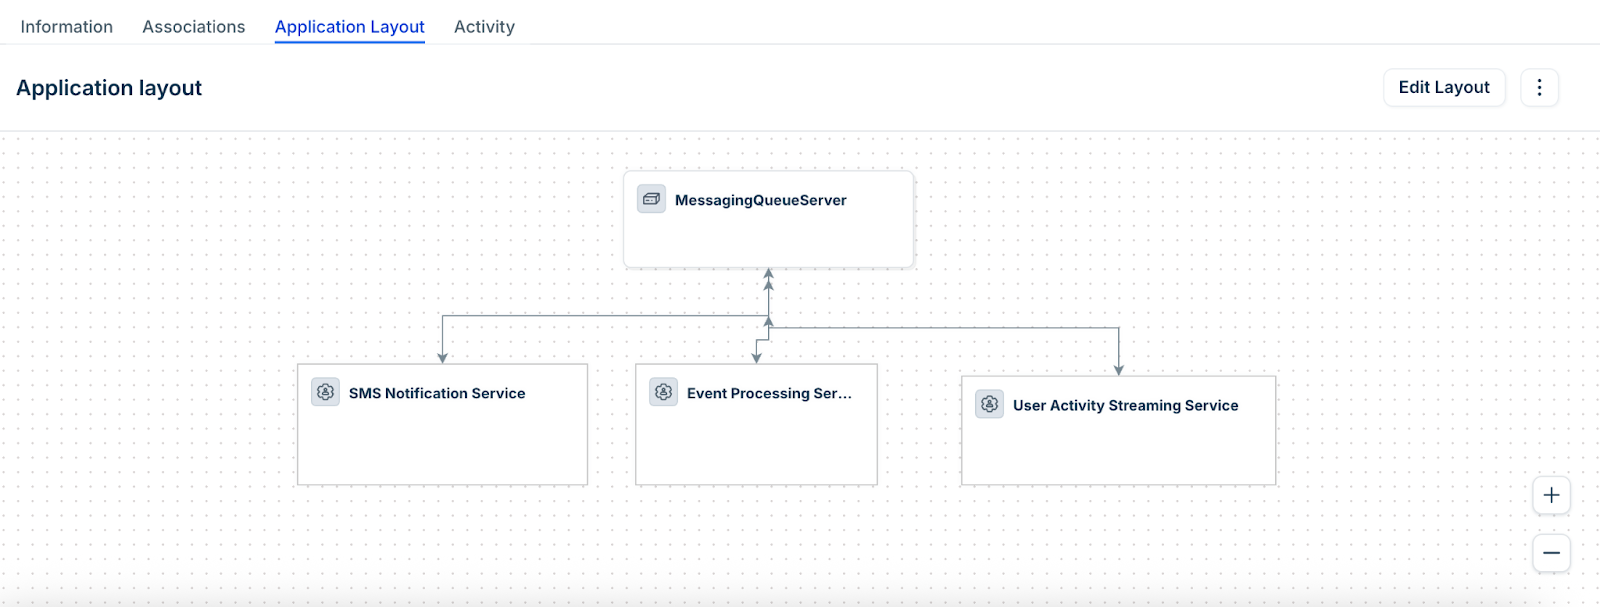
From the left panel, drag the Business Service, Device, Resource, Application Group, or Application Component blocks onto the canvas to open a window where you can search for and select items to add. You can add multiple items of each type at a time.
The following sections show examples of adding each item to the canvas.
Add Business Services
Add existing Business Services to model service-to-service relationships on the canvas. See Business Service Relationships for more on this feature.
Drag the Business Service block to the canvas to open the Add Business Service box. Search for a Business Service by name, or click New to create a new one.
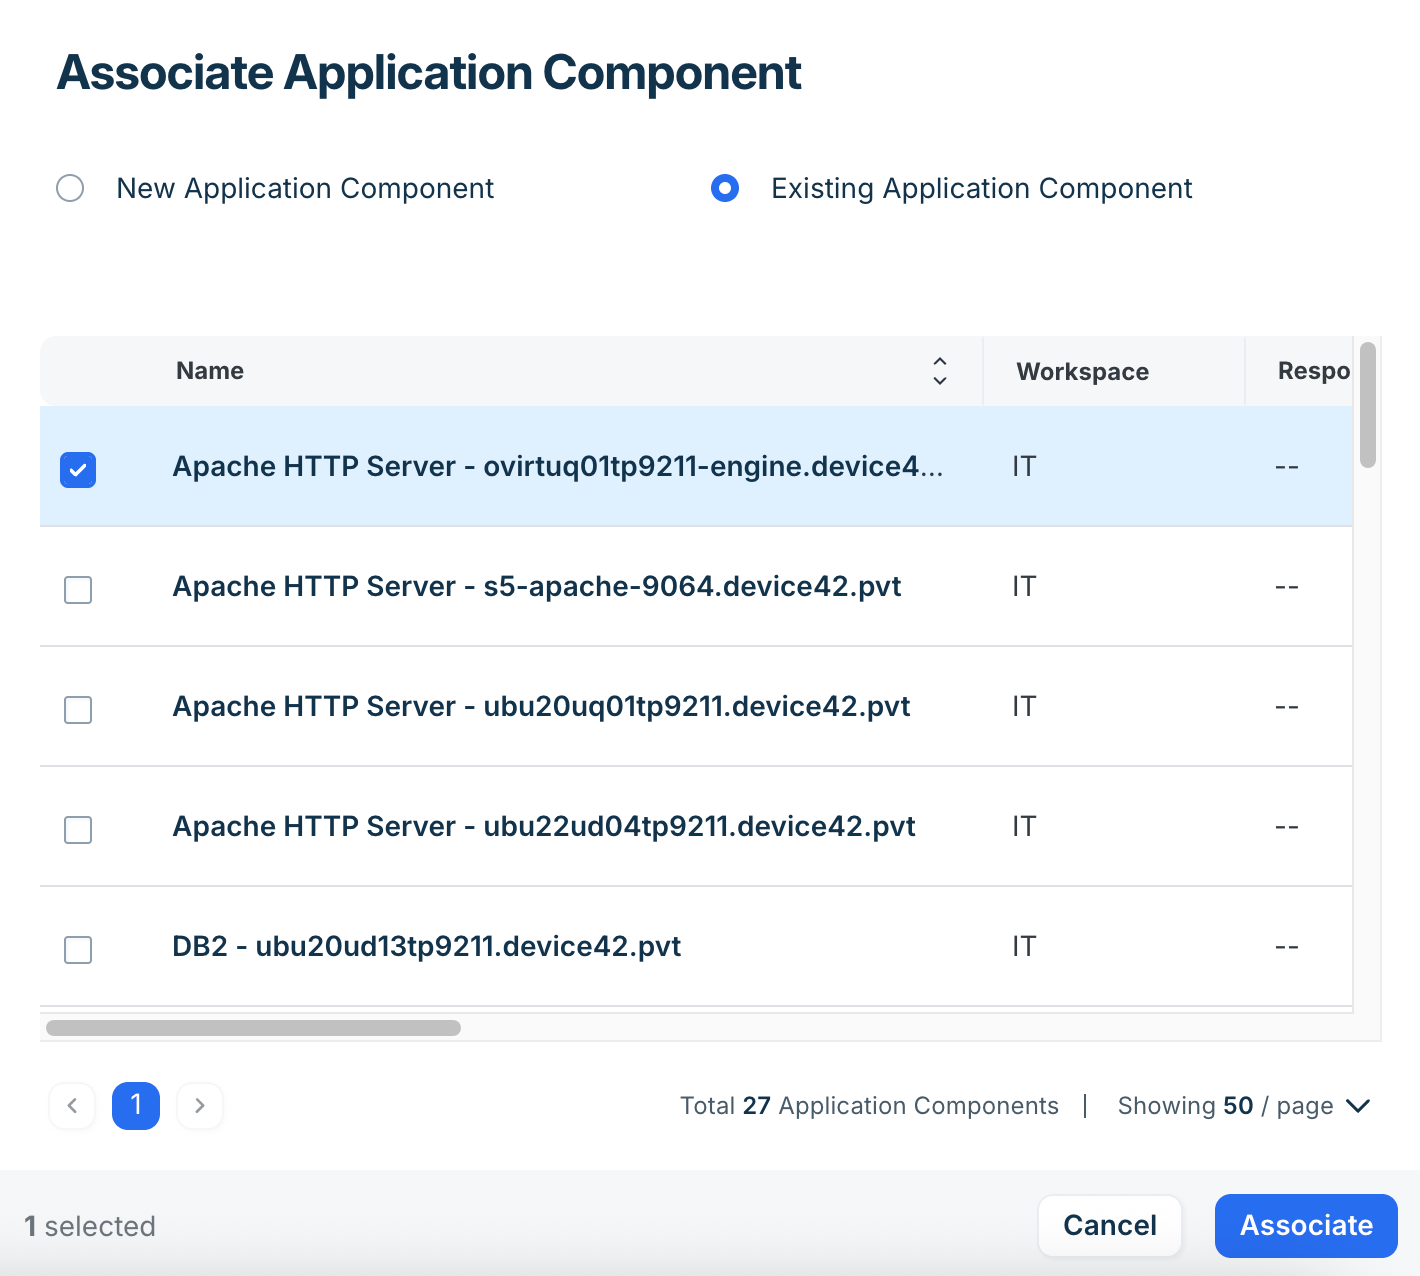
Add Application Components
Application Components represent the logical layers of your application, such as web servers, databases, application servers, and load balancers. Adding them to a Business Service maps out the software architecture behind the service, giving you visibility into which application layers support each business function.
Drag the Application Component block to the canvas to open the Add Application Component dialog. Search for a component by name, or click New Application Component to create a new one.
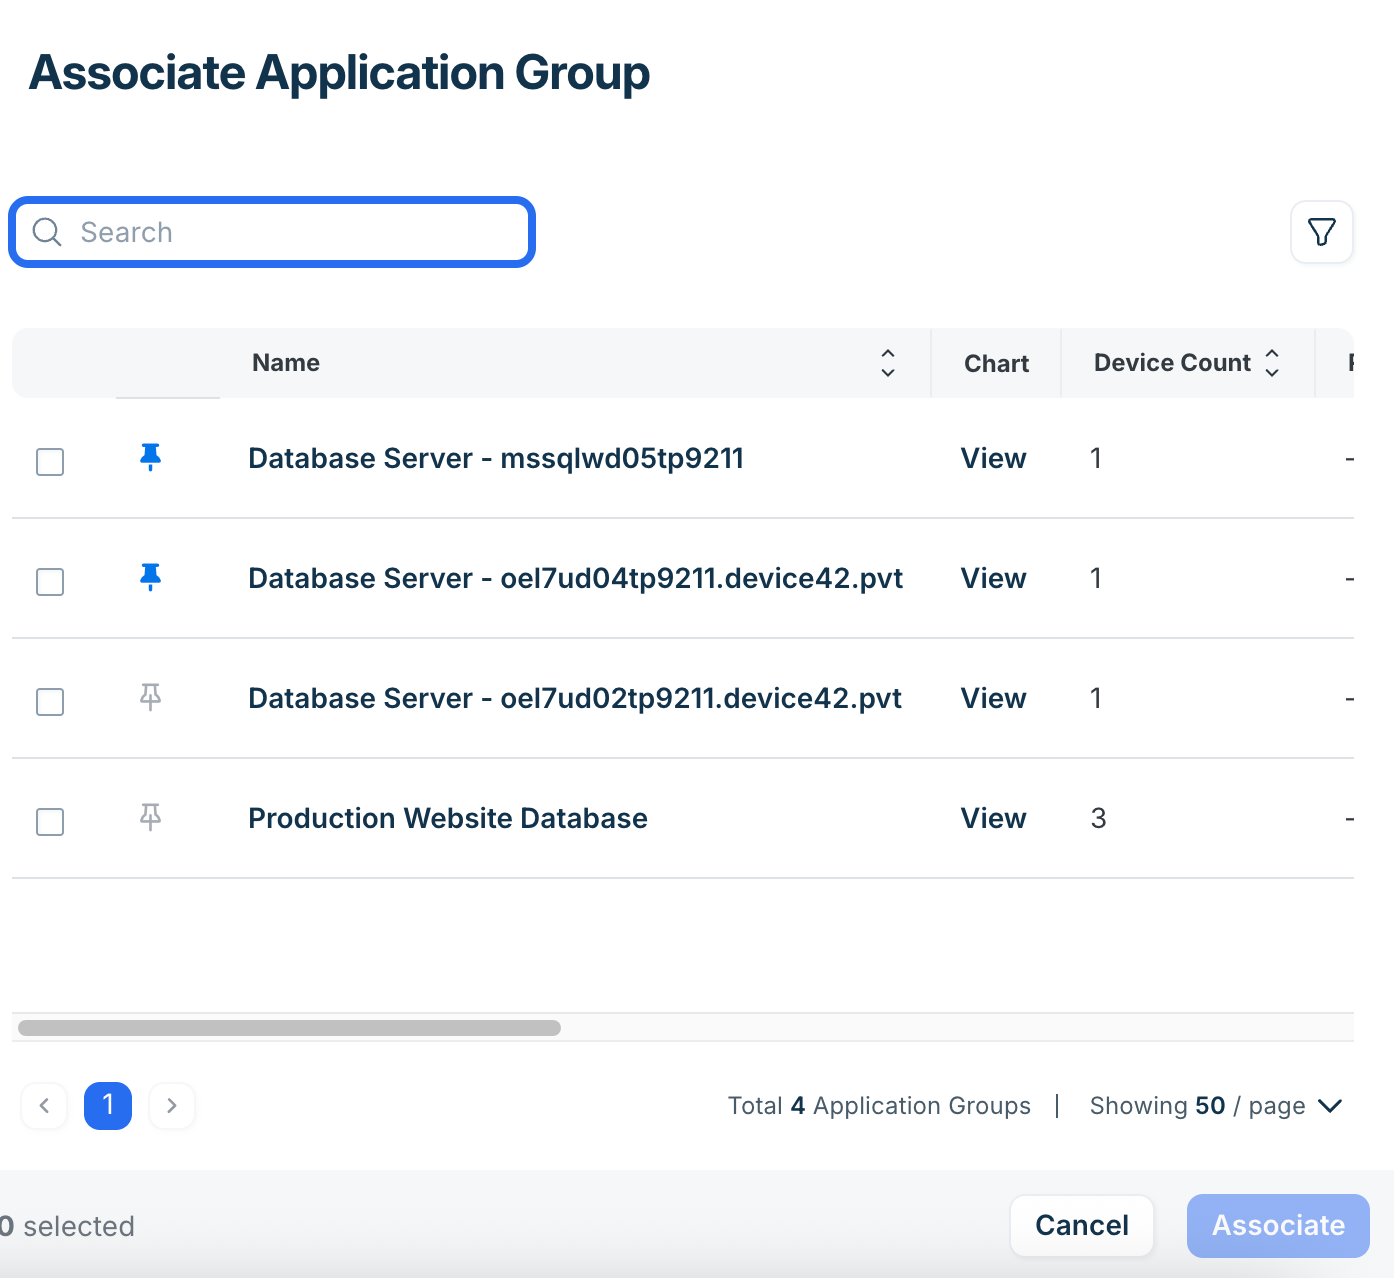
Add Application Groups
Application Groups are automatically generated sets of devices and services that share discovered communication dependencies. Adding an Application Group to a Business Service brings in its discovered infrastructure, so you don't need to manually add each device. As discovery finds new dependencies, the Application Group updates automatically.
You can also configure alerts to receive notifications when devices are added to or removed from an Application Group linked to your Business Service.
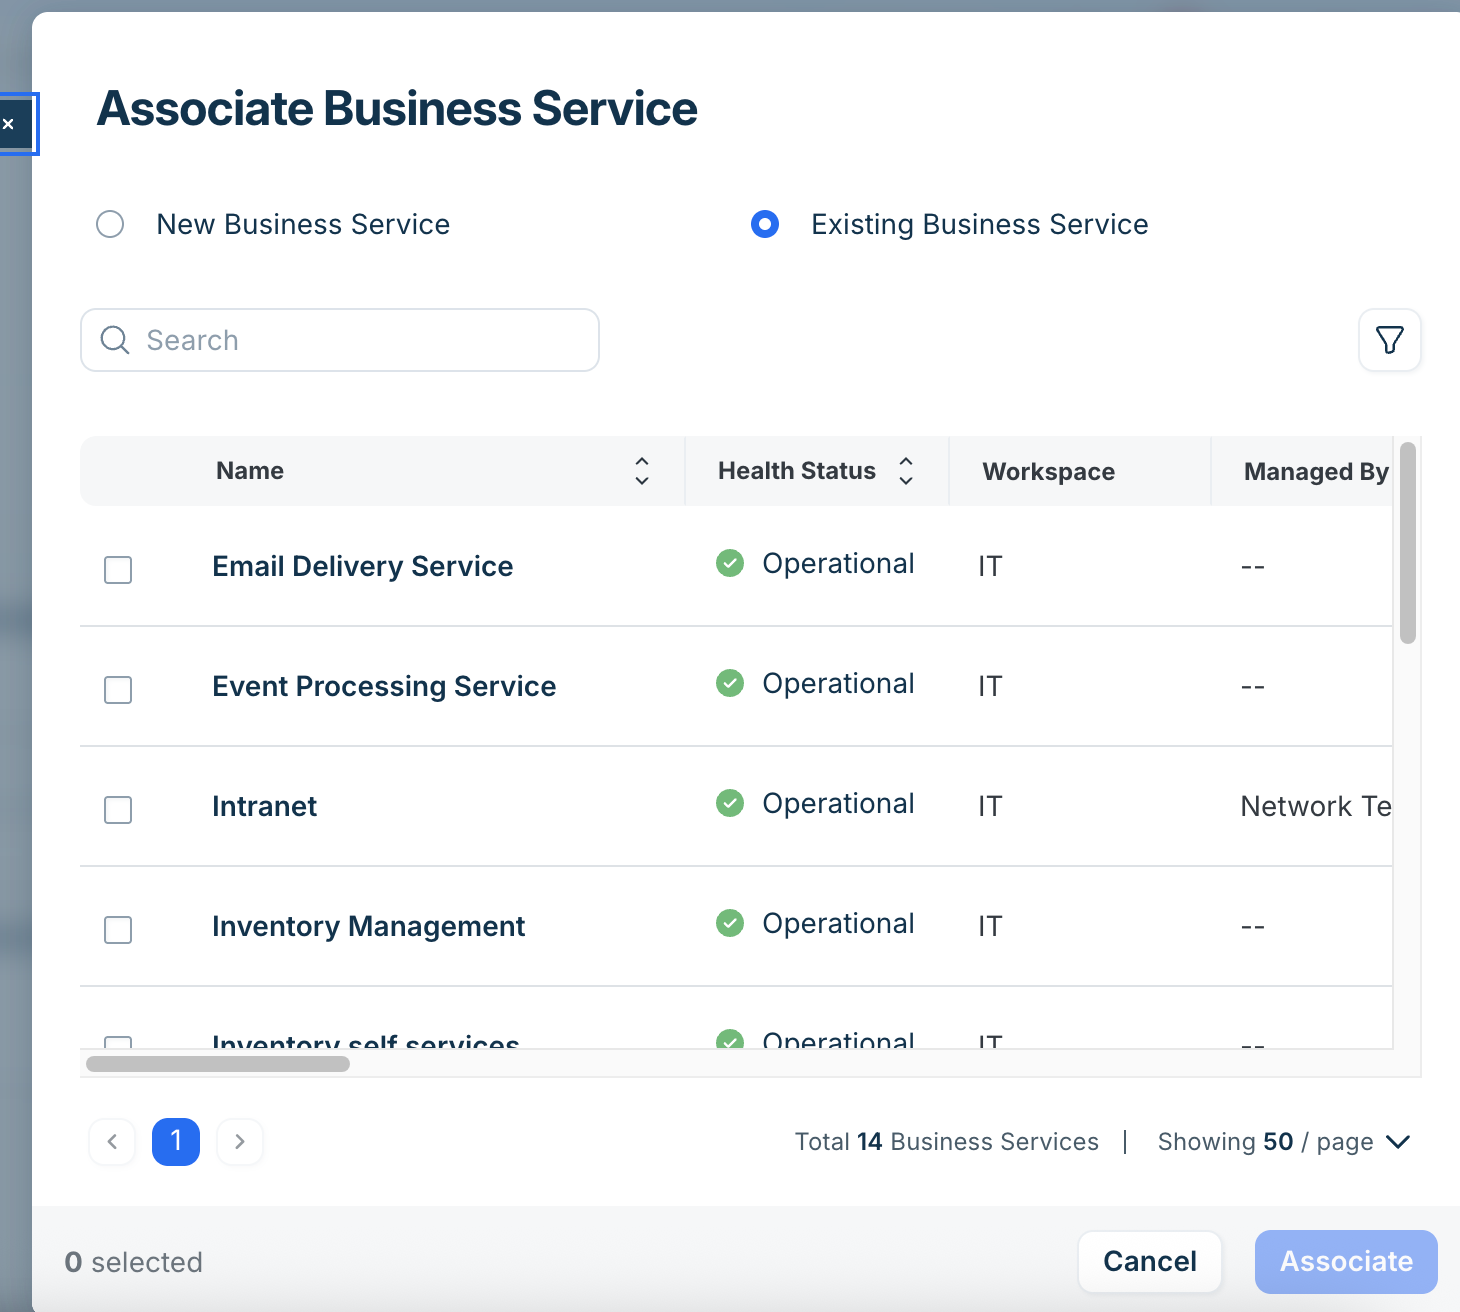
Drag an Application Group block to the canvas to open the Associate Application Group window. Search for a group by name and click Associate.
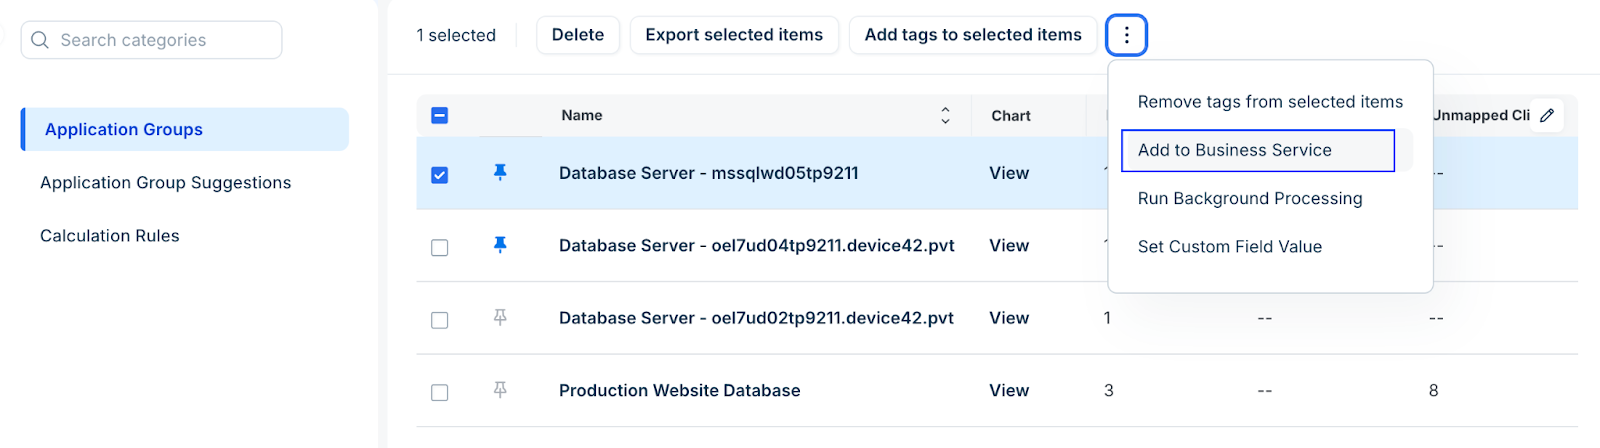
Alternatively, from the Applications > Application Groups list page, select an Application Group and use the Add to Business Service action to link it to an existing Business Service.
Add Devices
Add the physical or virtual machines that power the service to map the underlying infrastructure for capacity planning and impact analysis.
Drag a Device block to the canvas to open the Add Device dialog. Search for a device by name, select it from the list, and click Add. You can also click the + button to create a new device.
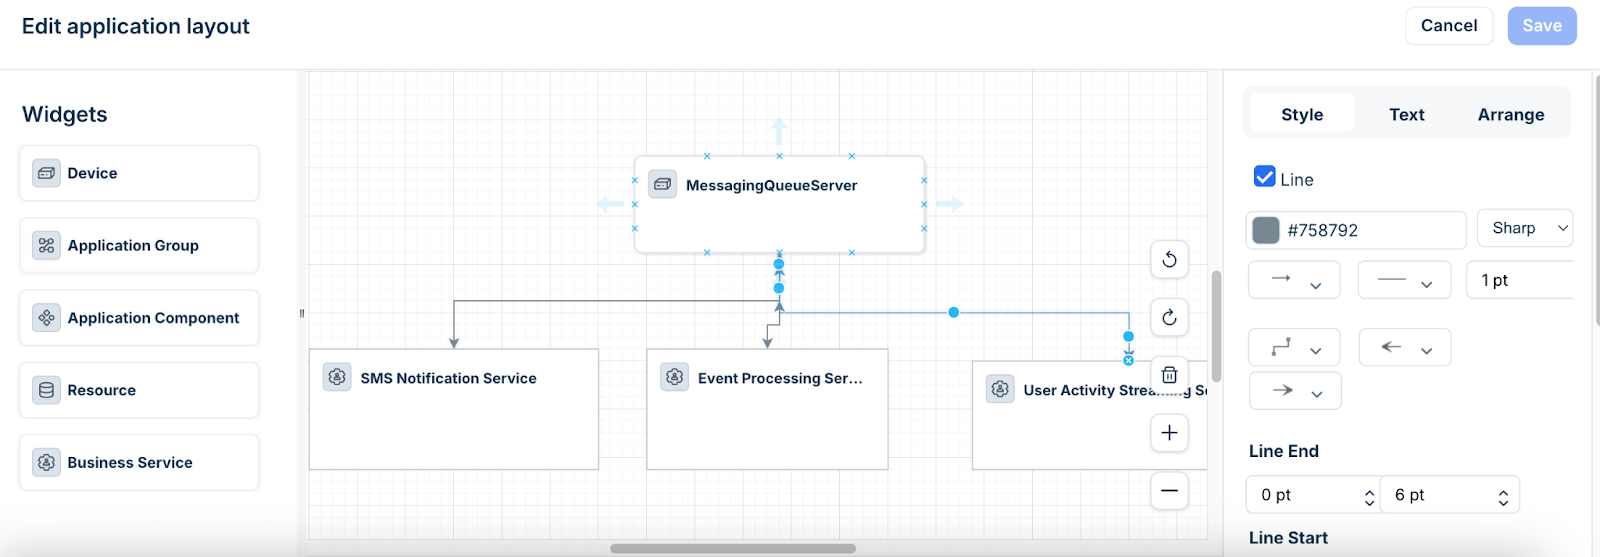
Draw Connections
Hover over an item to reveal a green connection point. Click the point and drag to another item to draw a connection line. You can change the line's appearance using the line options dropdown in the toolbar.
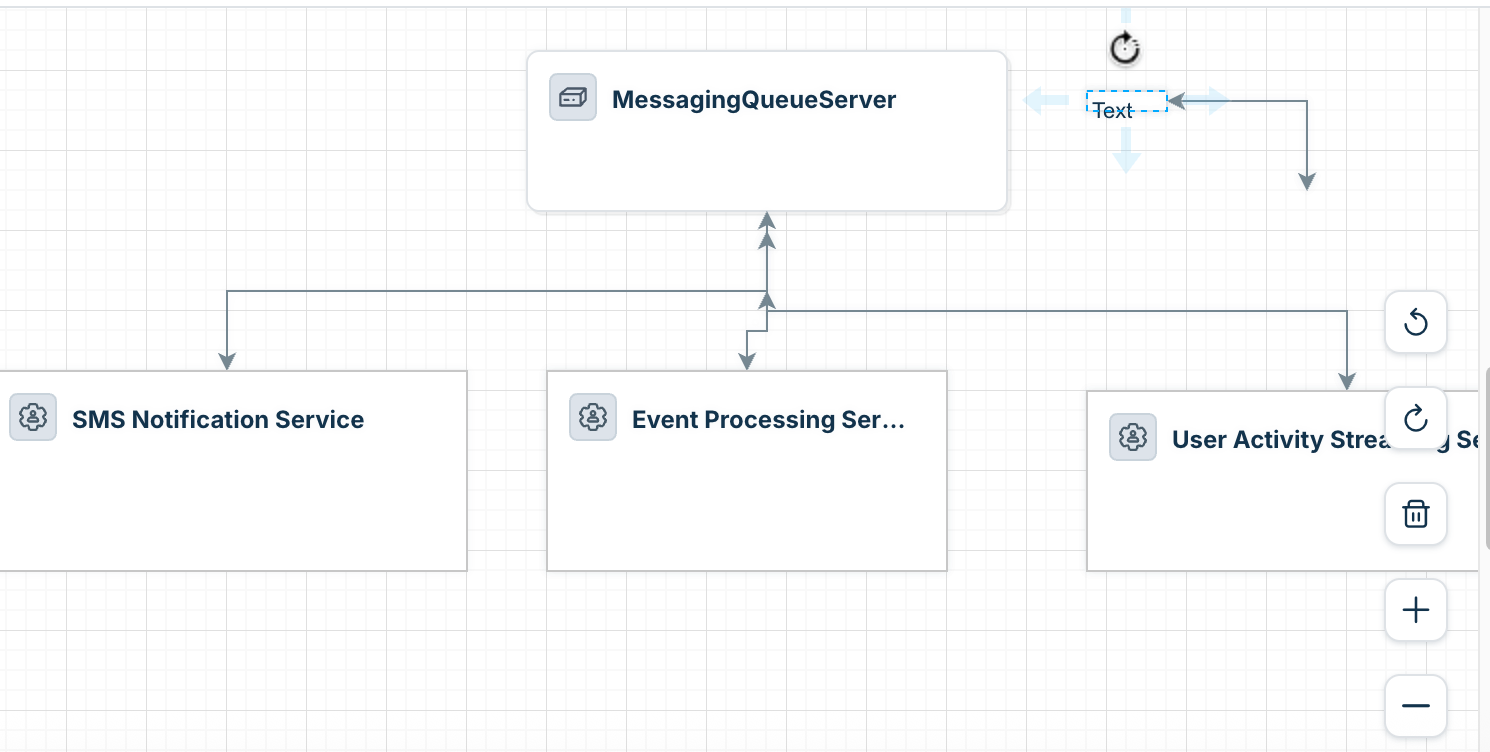
Include Text
Double-click anywhere on the canvas to create a text box with a background color. To label connection lines, click on a connection line and type the description or name of the connection it represents.
Save the Visualization
Click the File menu at the top of the canvas and select Save.
Edit the Visualization
You can modify objects and connections directly on the canvas.
Delete an object: Select it and press the Delete key, or right-click and select Delete from the context menu.
Rename an object: Select it, double-click the name, and type a new name. The renamed label is only for display in this visualization and does not change the underlying record.
Add or edit connections: Hover over an object to display its connection points (green dots). Click a green dot and drag to connect it to another object.
Note: Removing or deleting objects and connections on the canvas does not affect data stored in Application Groups.
Business Service Relationships
You can add one Business Service to another to model how higher-level services are composed of smaller, reusable services. This lets you build service hierarchies without duplicating infrastructure details across multiple Business Services.
For example, a "Human Resources" Business Service might contain "Payroll," "Benefits," and "PTO" as child services. A more complex hierarchy might have a "Customer Order Portal" that flows through a "Payment Processing" sub-parent to a "Payment Gateway Service.
Edit Business Service Values
To update a Business Service, click the Edit button on its view page, make your changes, and click Save.
Edit or Delete a Service Type
From a Business Service's view page, click the name of the Service Type to access its edit and delete options.
Click Edit to modify the Service Type.
Deleting a Service Type also deletes all Business Services that use it.
Clone a Business Service
Clone an existing Business Service to experiment without editing the original, use it as the base of a new service, or plan a future deployment or migration. Cloning also copies the Custom Field values.
From the Business Services list page, select the checkbox for the service you want to clone and click Clone Business Service.
Click the Business Services to clone magnifying glass to select or search for the service you want to clone.
Enter the # of Business Services to create and provide names as Comma separated names. Click Clone.
You can set up alerts to receive notifications when Application Group dependencies change within a Business Service. To create an alert, navigate to Analytics > Setup Alerts, click Create, and select Business Service as the Rule Type. The available triggers are:
New Application Group Dependency Found
Application Group Dependency Removed
Auto Apply Changes
Check the Auto Apply changes box to automatically add or remove connections when Application Group dependencies change. You will still receive a notification for each change.
When Auto Apply changes is disabled (the default), you receive a notification with the option to manually add or remove the connection.
For full details on configuring alert options, escalation profiles, and notification templates, see Alerts and Notifications.
Custom Fields
Custom fields let you store additional information about your Business Services beyond the default form fields.
To create a custom field, navigate to Tools > Custom Fields, select Business Services from the list, and click Create. Select one of the following field types:
Text
Number
Date
Yes/No
URL
Picklist
JSON
Markup
Related Field: Use this option to link the custom field to an existing CI type within Device42.
Cloud Accounts are available as a related field type, allowing you to link a Business Service to a Cloud Account.
Delete a Business Service
From the Applications > Business Services page, select the Business Service(s) you want to delete and choose one of the delete options from the Actions dropdown.