This article provides instructions for setting up and managing discovery for Workspace ONE Unified Endpoint Management (UEM), formerly known as AirWatch. By integrating with the Workspace ONE mobile device management (MDM) platform, the discovery engine ensures your inventory remains the central source of truth for all endpoint assets.
Prerequisites
Before creating a discovery job, you must gather the following information from your Workspace ONE UEM console:
API Key: Generate a REST API key for the service account you intend to use.
Account URL: The base URL for your Workspace ONE UEM instance. For example, https://asXXX.awmdm.com.
Service Account Credentials: A dedicated username and password with at least Read permissions for device and application data.
Workspace ONE UEM discovery items
The discovery process retrieves granular data for endpoints managed within the platform, including:
Computers: Laptops and desktops (Windows, macOS).
Mobile Devices: Tablets and smartphones (iOS, Android).
Network Details: IP addresses and MAC addresses for each discovered device.
Software Inventory: A full list of installed software and managed applications.
Add credentials to the vault
To ensure secure communication, store your Workspace ONE credentials as a Secret.
Navigate to Asset Management > Secret vault > All Secrets.
Click Create and enter your Workspace ONE username and password.
Label the secret clearly (e.g., WS1_Discovery_Admin) and save.
Create a Workspace ONE discovery job
Follow these steps to create the discovery:
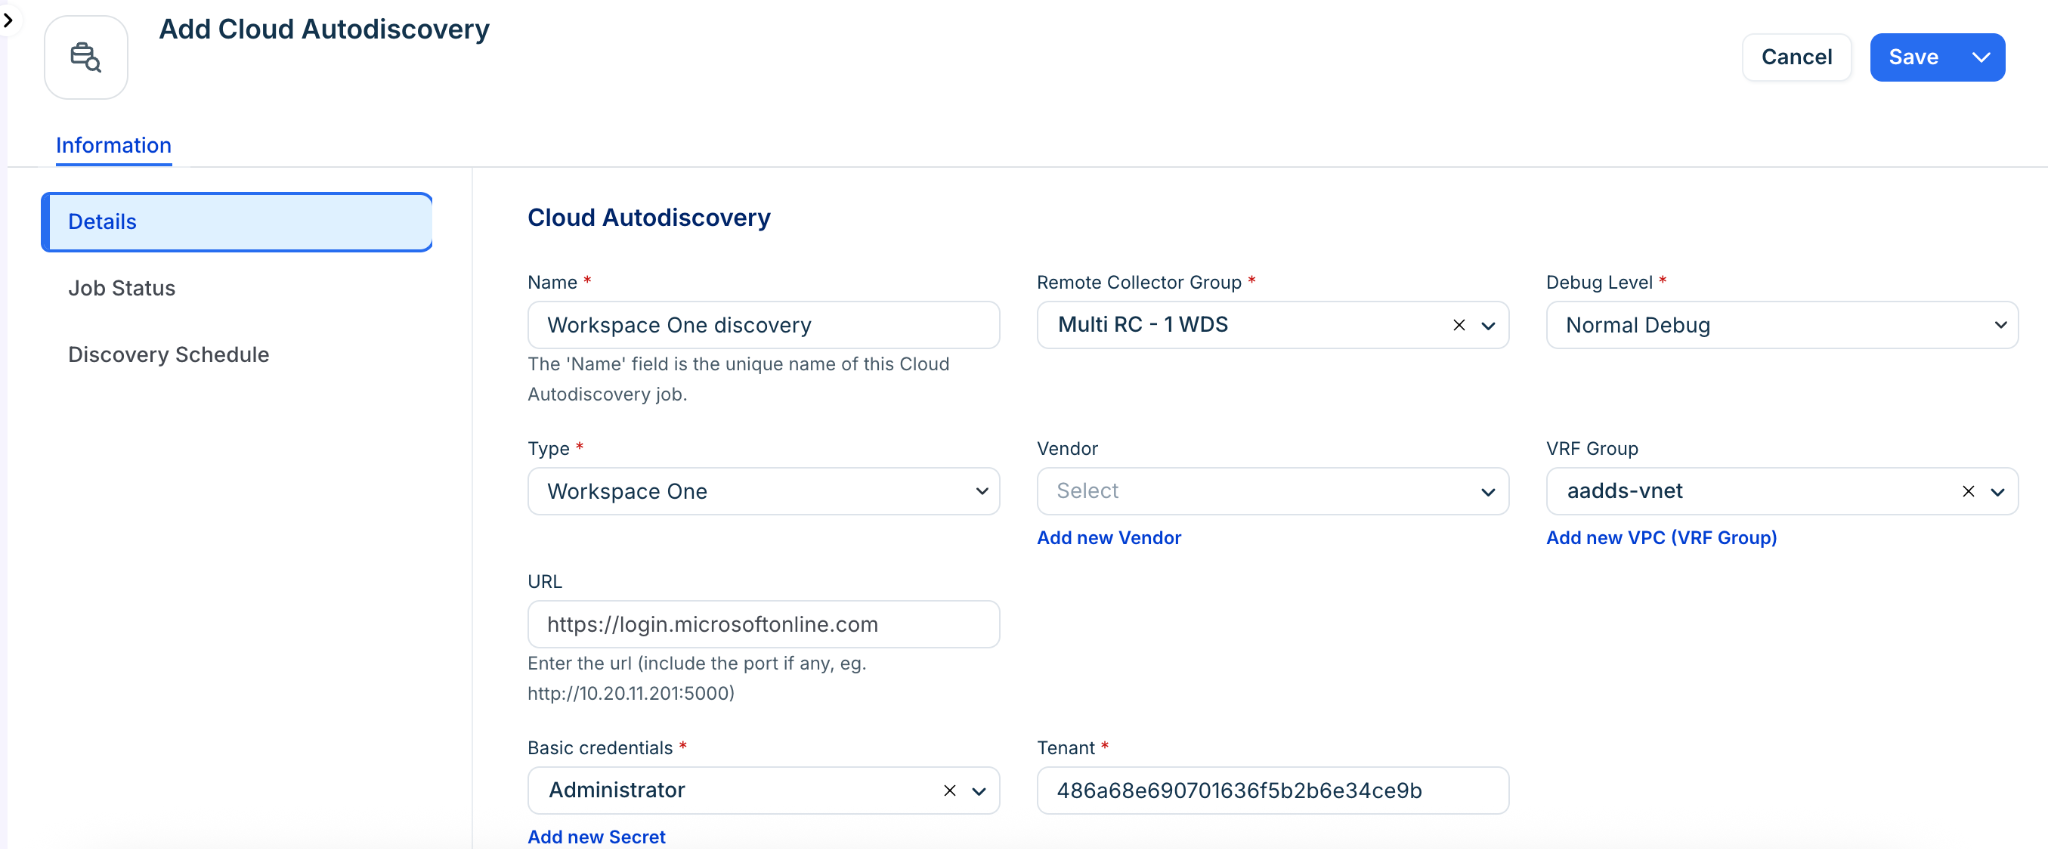
Step1: Add a new job and enter details
Go to Discovery > Cloud and click Create at the top right.
Select Workspace One from the Type dropdown menu.
Enter the following connection details:
URL: Enter your account URL.
Tenant: Paste your WS1 API Key into this field.
Basic Credentials: Click the search icon and select the Secret you created in the previous step.
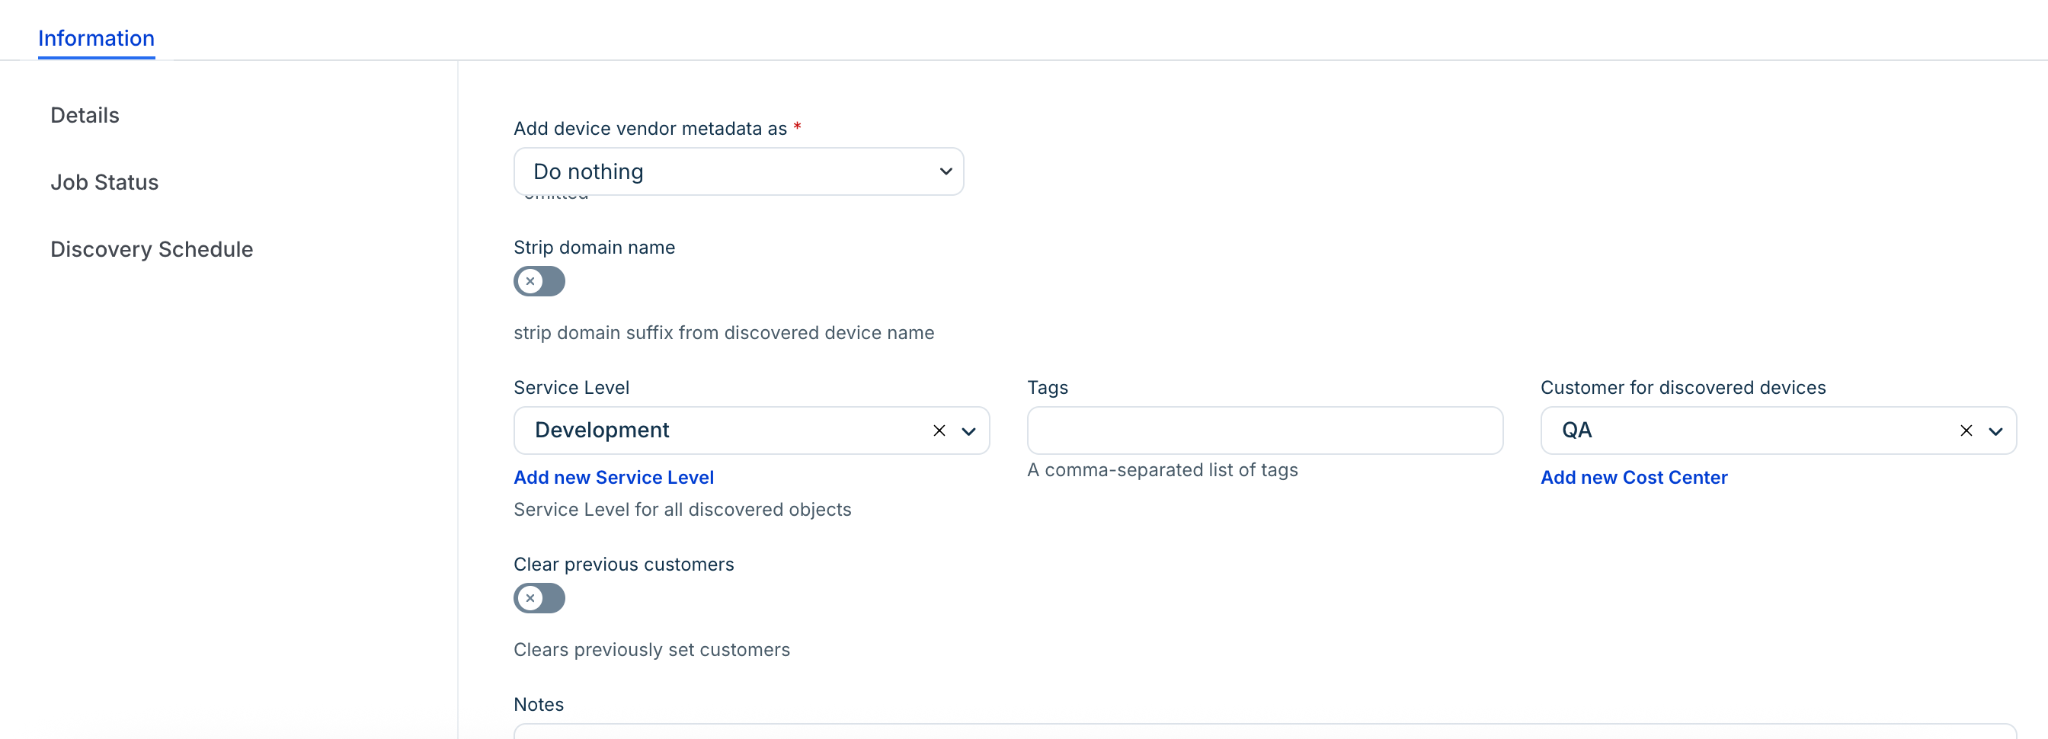
Step 2: Specify Job options:
Add device vendor metadata as: Select how to map Workspace ONE metadata. For example, Custom Fields, Tags, or Do Nothing.
Add specific tags to easily filter these devices in the inventory.
Assign a Service Level for cases for all discovered objects.
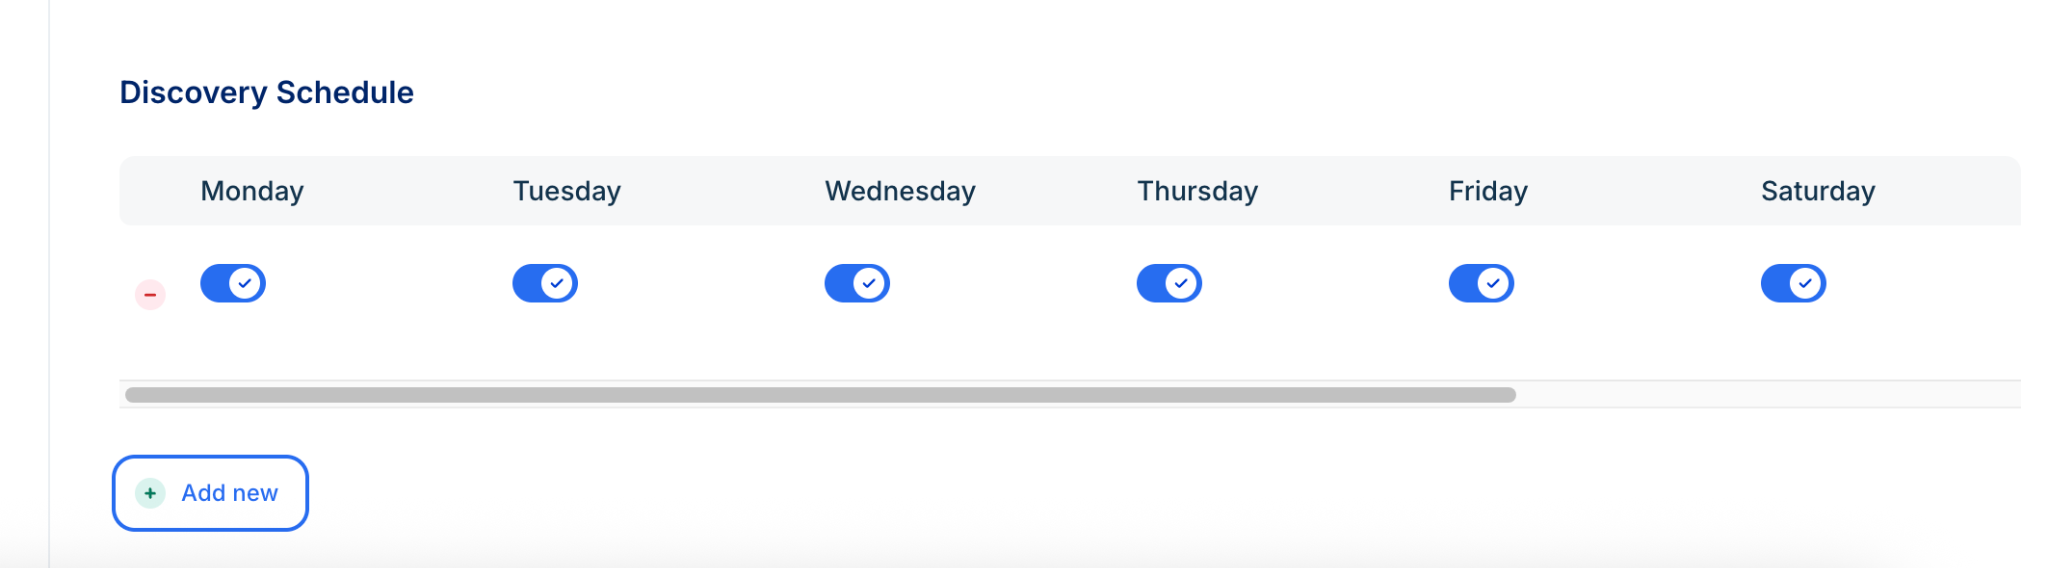
Step 3: Schedule and run the discovery
In the Autodiscovery Schedule section, click + Add another Autodiscovery Schedule to define the days and times the scan should repeat.
Click Save at the bottom of the page. To start the process immediately, navigate to the Cloud Autodiscovery list page and click Run Now next to your new Workspace ONE job.
Once the job completes, discovered software will be automatically linked to the corresponding device records, allowing for complete lifecycle management of your mobile and desktop applications.