
Ticket Assignment Policies in the Freshservice application optimize IT Service Management through an advanced Agent Routing Framework. It balances agent availability (work schedule) and workload. Agent availability is used as a strict filter, considering real-world work schedules and preventing end-of-shift assignments. Tickets are assigned by ranking available agents based on their current workload.
Administrators can configure ticket assignment rules at both the workspace and global levels.
Important note: Currently, Ticket Assignment Policies feature is in Private BETA release, which includes only the work schedule and workload based routing capabilities. In subsequent product releases, Skills based routing is also planned to be included in the Ticket Assignment Policies framework.
In this article:
- Create a new ticket assignment policy
- Manage a ticket assignment policy
- Preview a ticket assignment policy
Create a new ticket assignment policy
To create a new ticket assignment policy:
Go to Admin > Global Settings > Automation and Productivity > Policies and Rules.
Or, go to Admin > {Workspace Name} > Automation and Productivity > Policies and Rules. Then, select Ticket Assignment Policies.
Or, go to Admin > {Workspace Name} > Service Management > Ticket Assignment Policies.
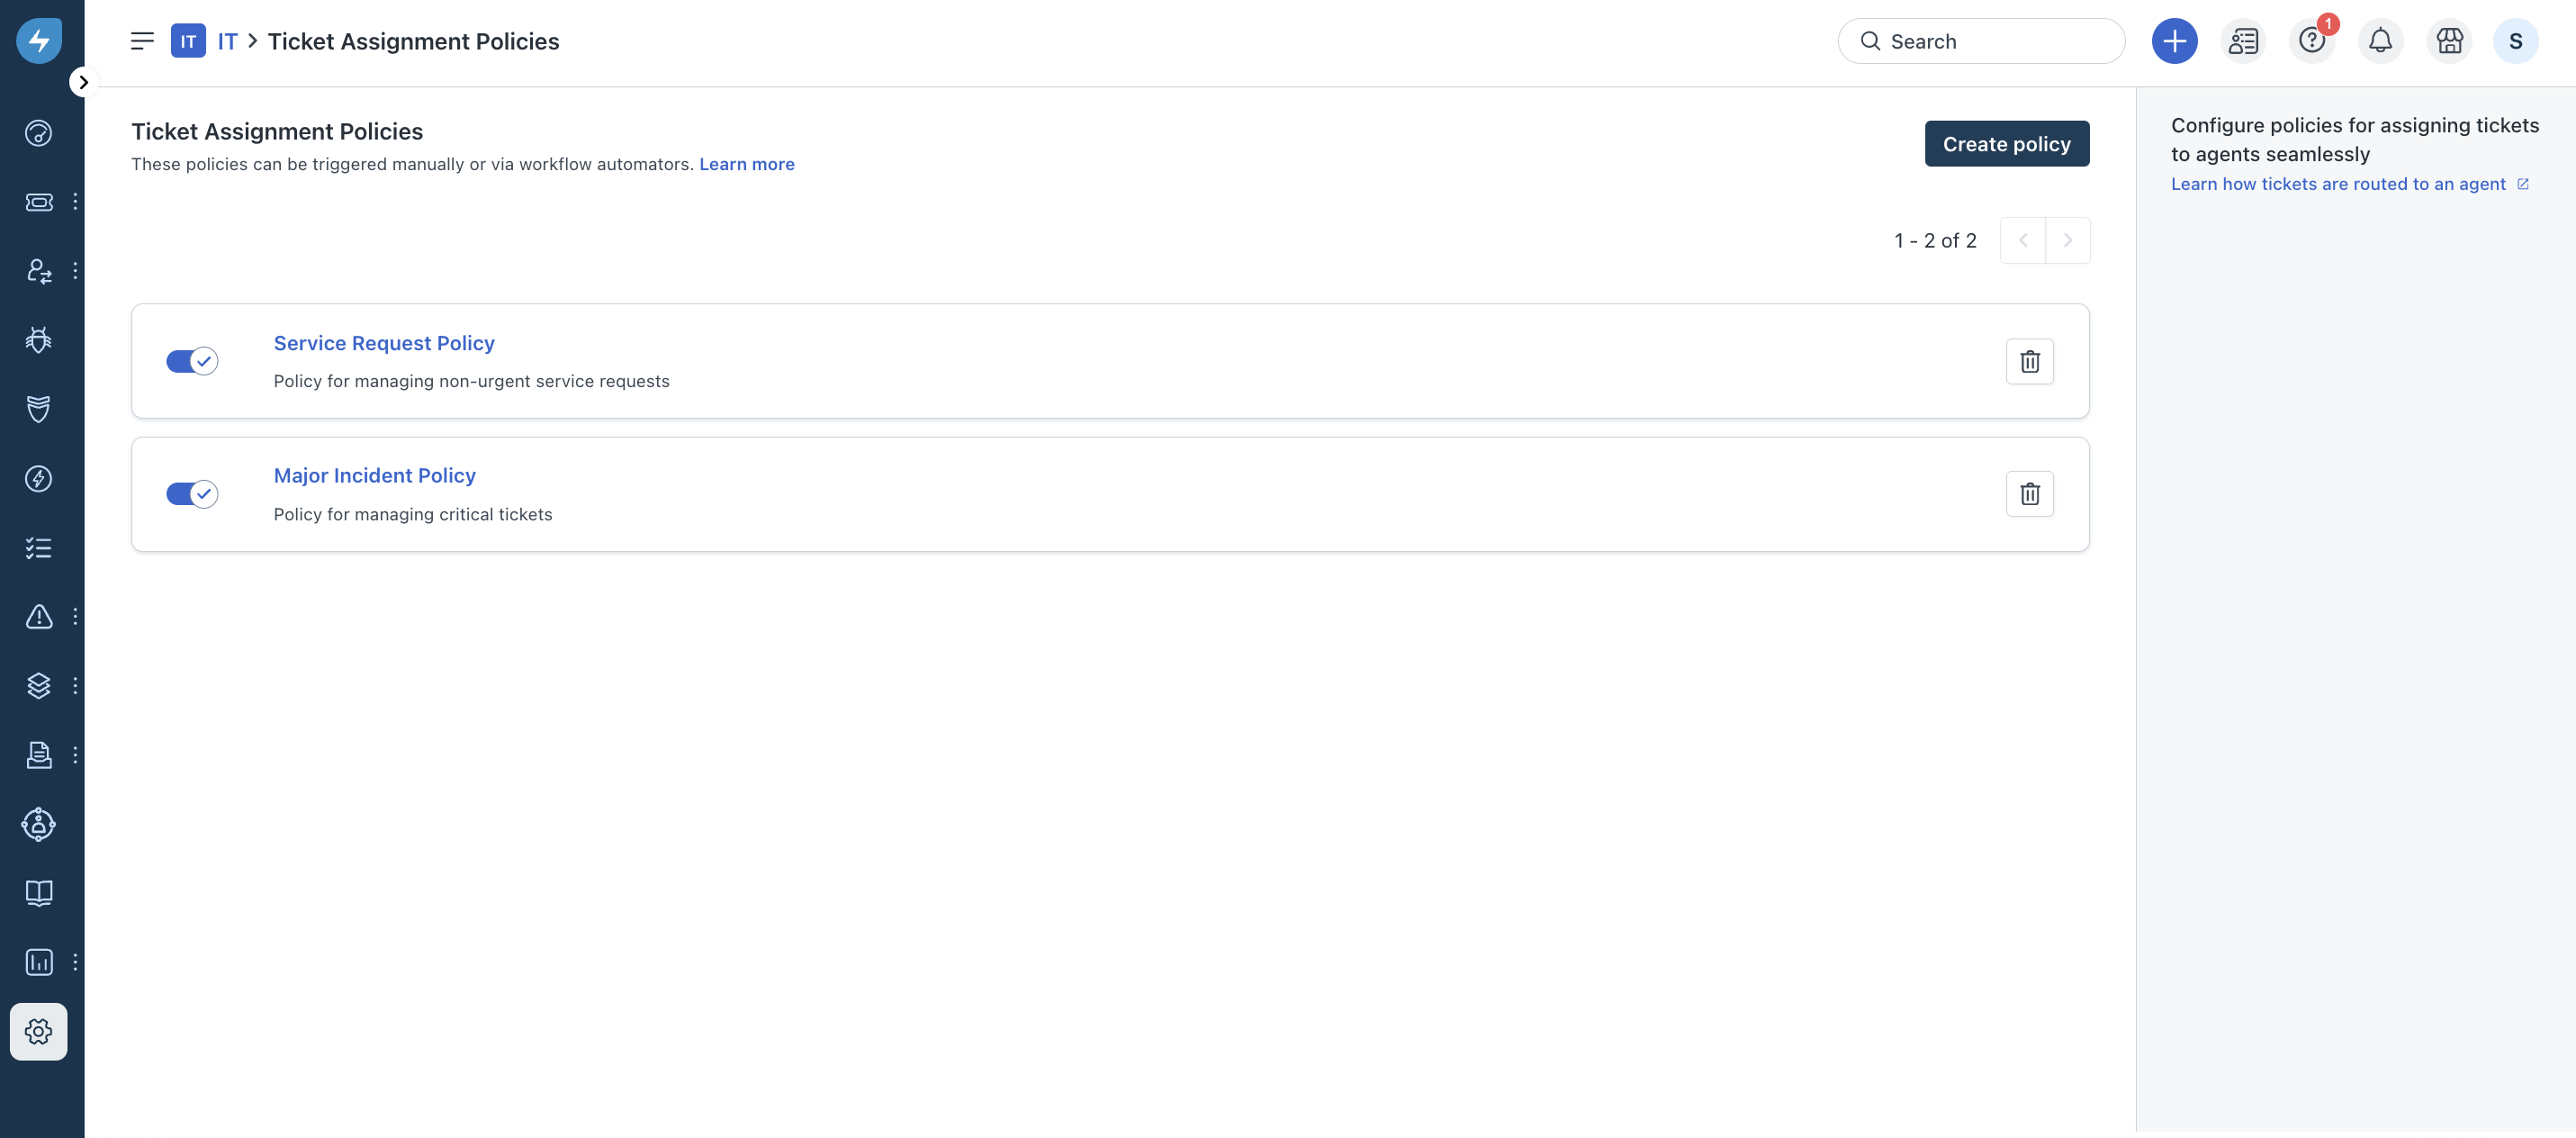
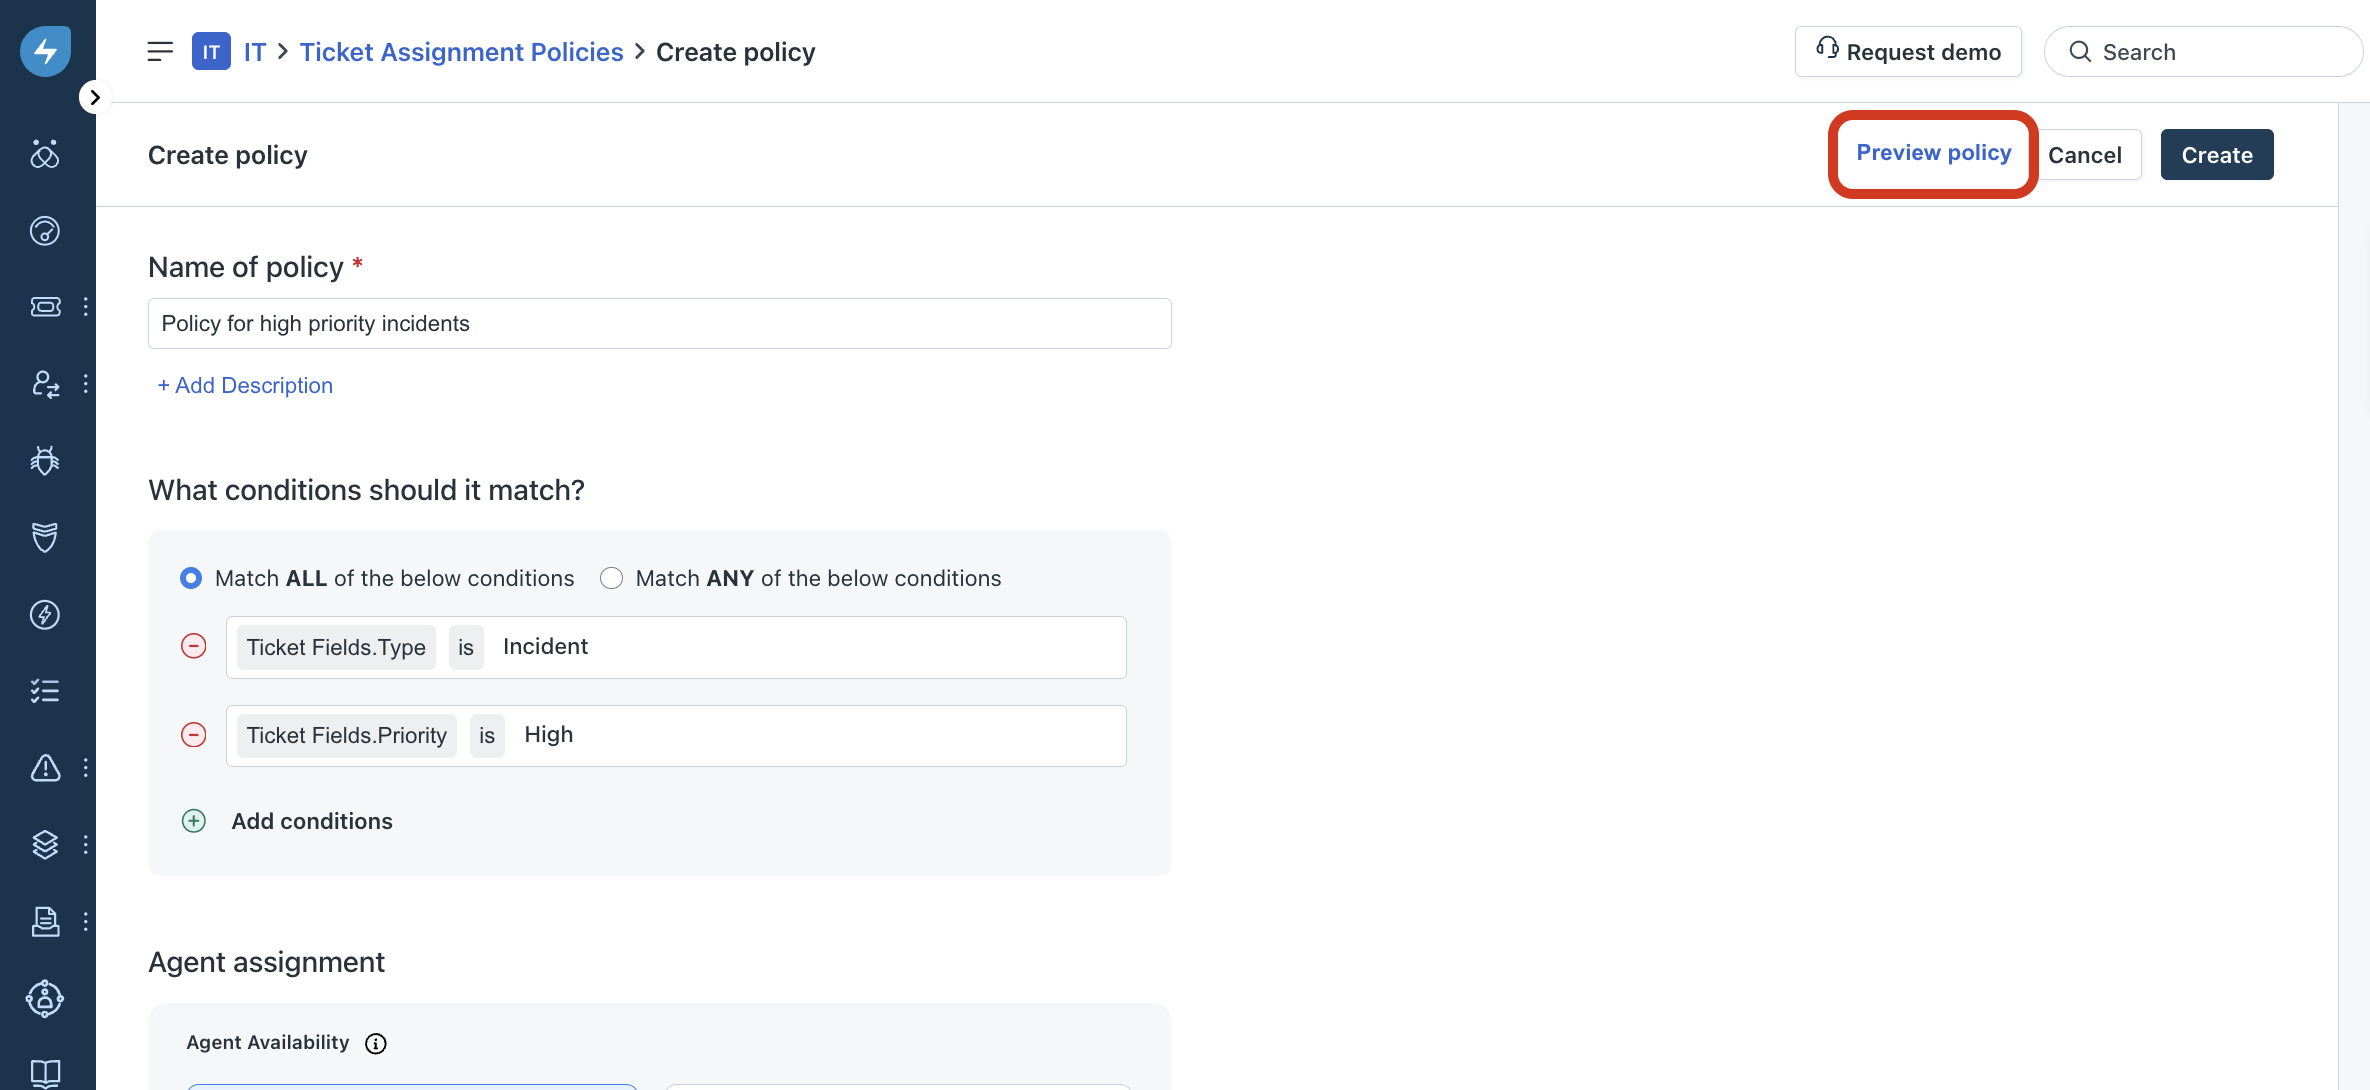
Click Create policy.
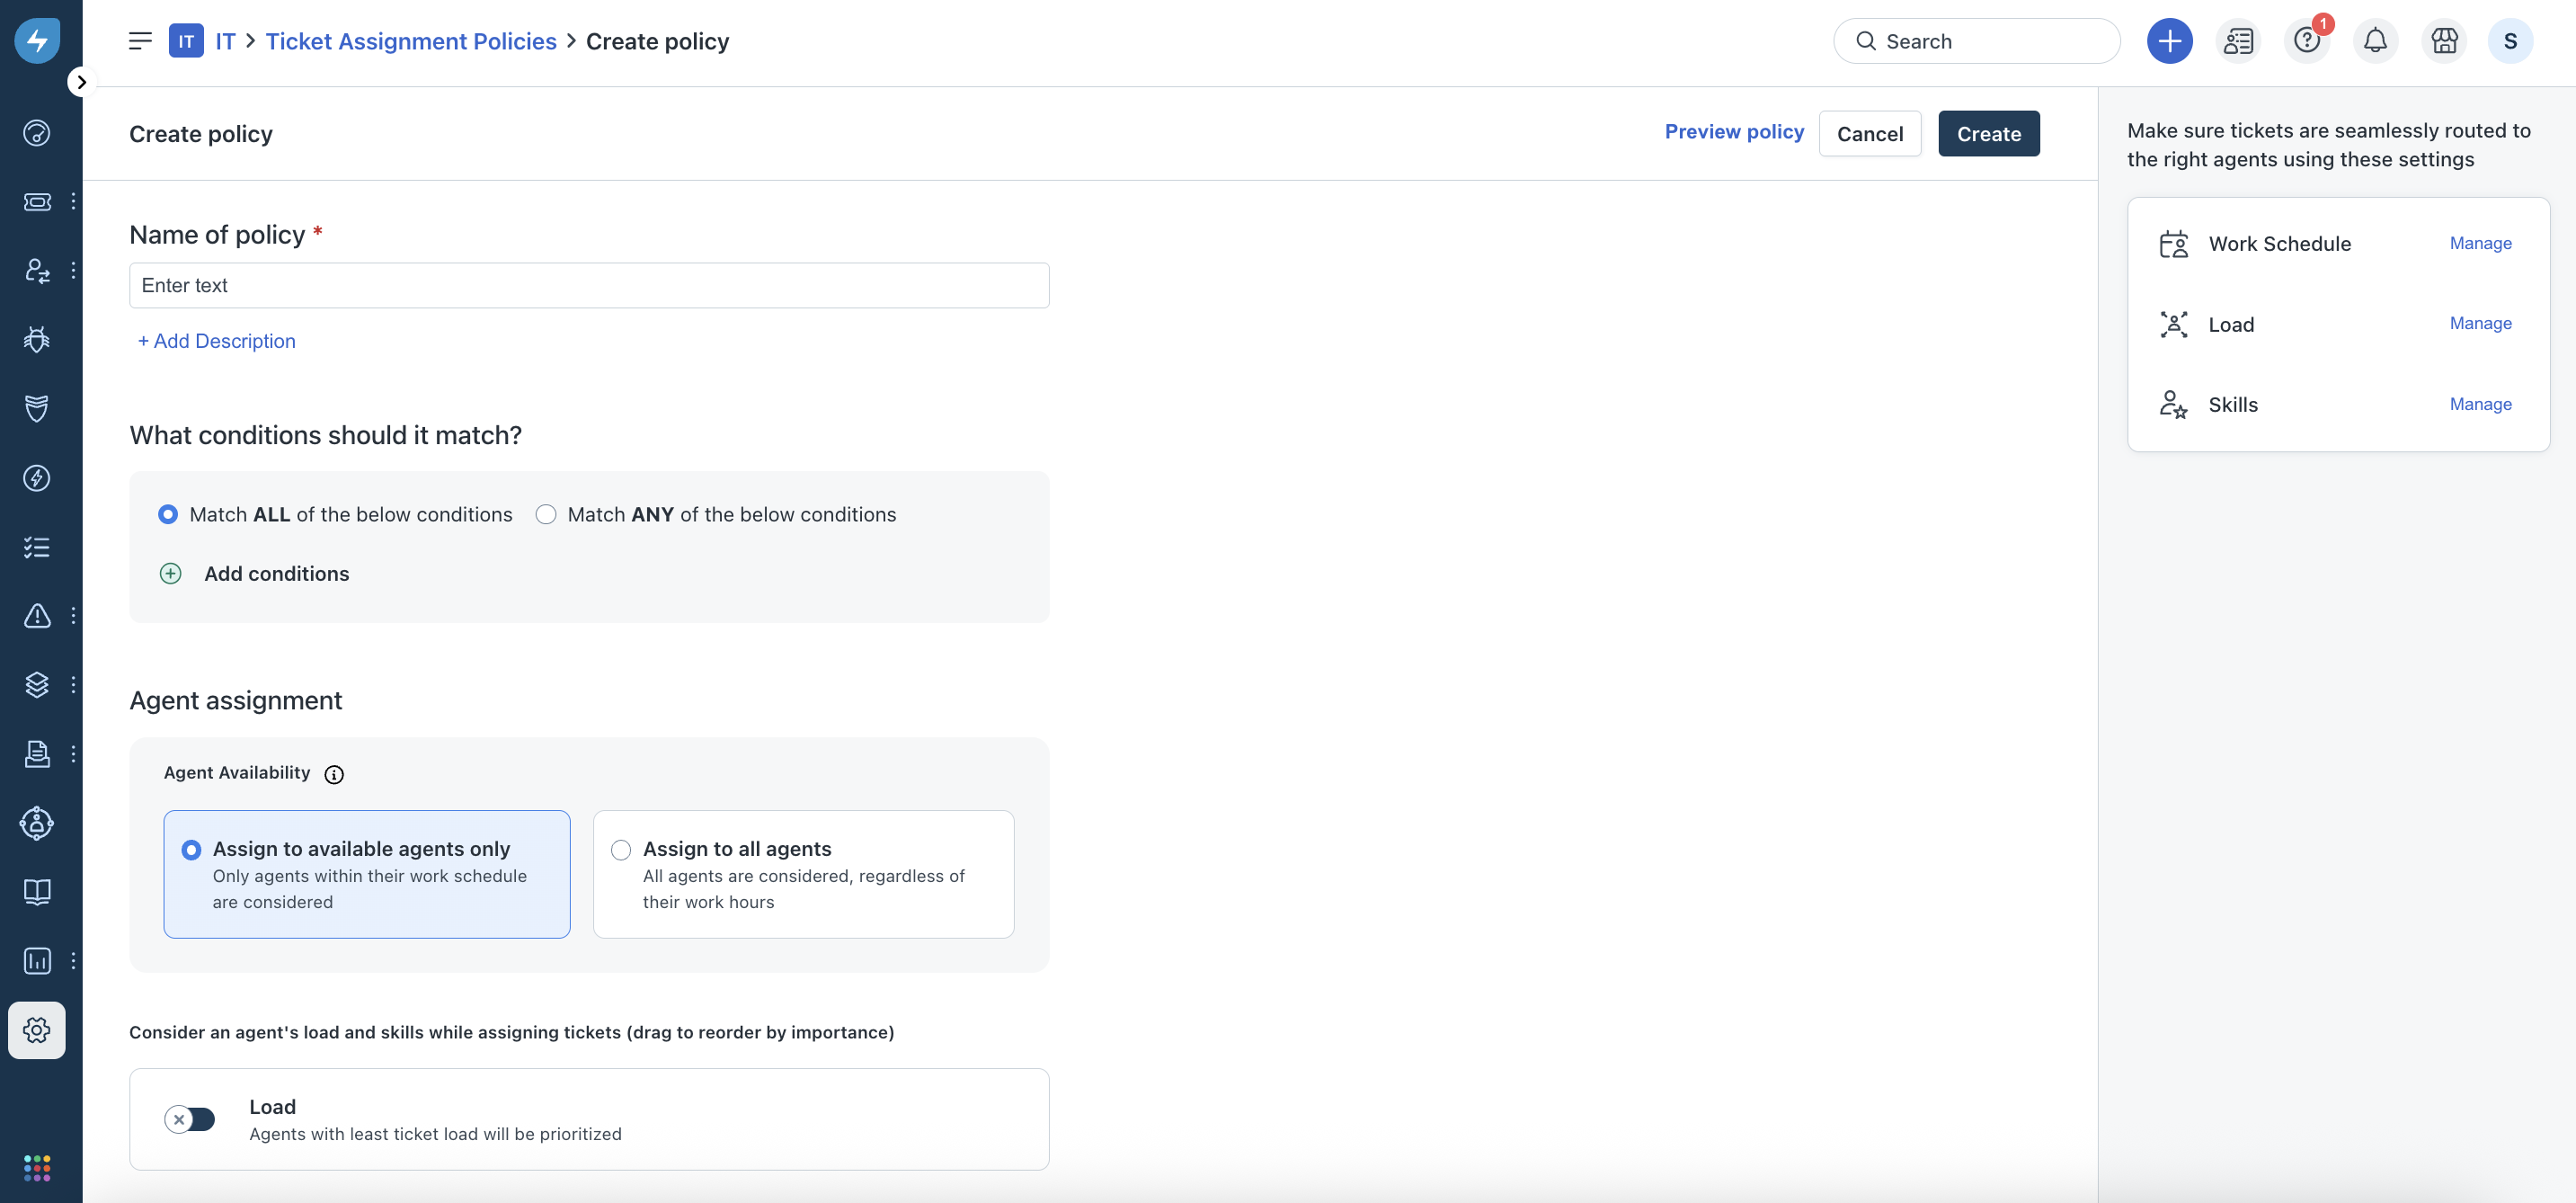
Enter a relevant name for the policy. If required, add a description about the policy.
Select a relevant option for matching conditions (Match All or Match Any).
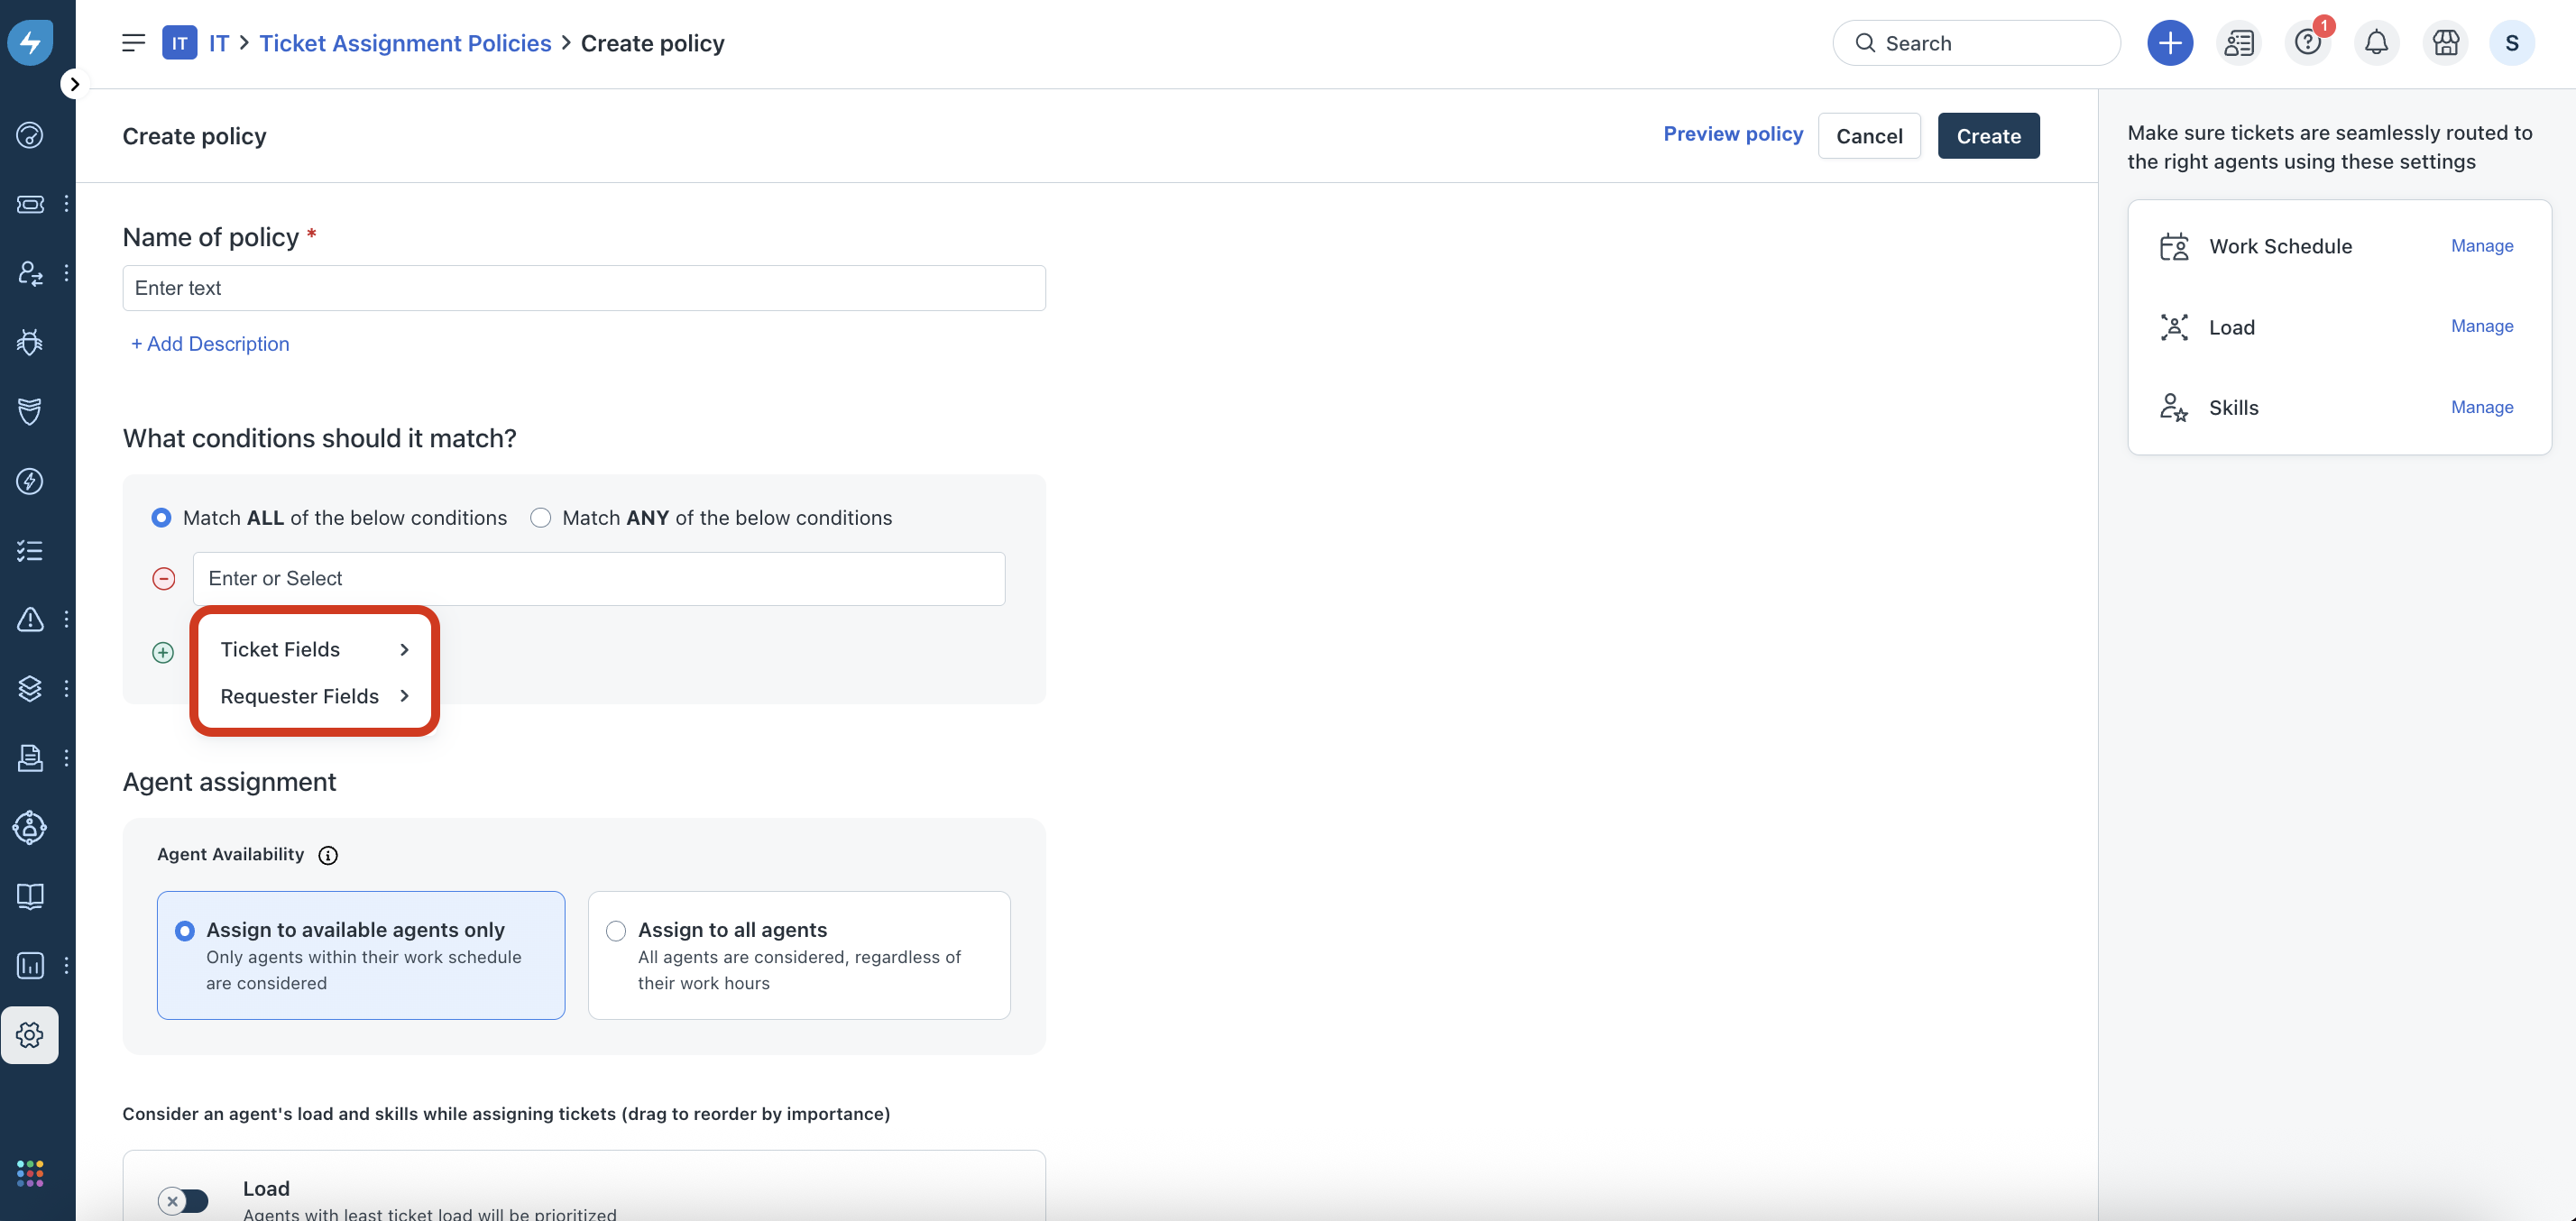
Click + Add conditions, and add the required conditions for Ticket Fields (such as, Subject, Status, Impact) and Requester Fields (such as, VIP User, Service Item, Department).
Under Agent assignment, select the relevant Agent Availability option (Assign to available agents only or Assign to all agents).
Under Consider an agent's load and skills while assigning tickets, enable the Load toggle option (if required).
Note: When the Load option is enabled, ticket assignments are prioritized based on agents with least ticket load.
To configure the Work Schedule and Load settings, see Manage a ticket assignment policy.
Click Create. The new ticket assignment policy is created.
Manage a ticket assignment policy
To manage the work schedule and load settings for a policy:
Go to the Ticket Assignment Policies page, and select a policy.

(To manage the work schedule settings) Click Manage next to Work Schedule on the right pane.

The Manage work schedules section opens on the right side.
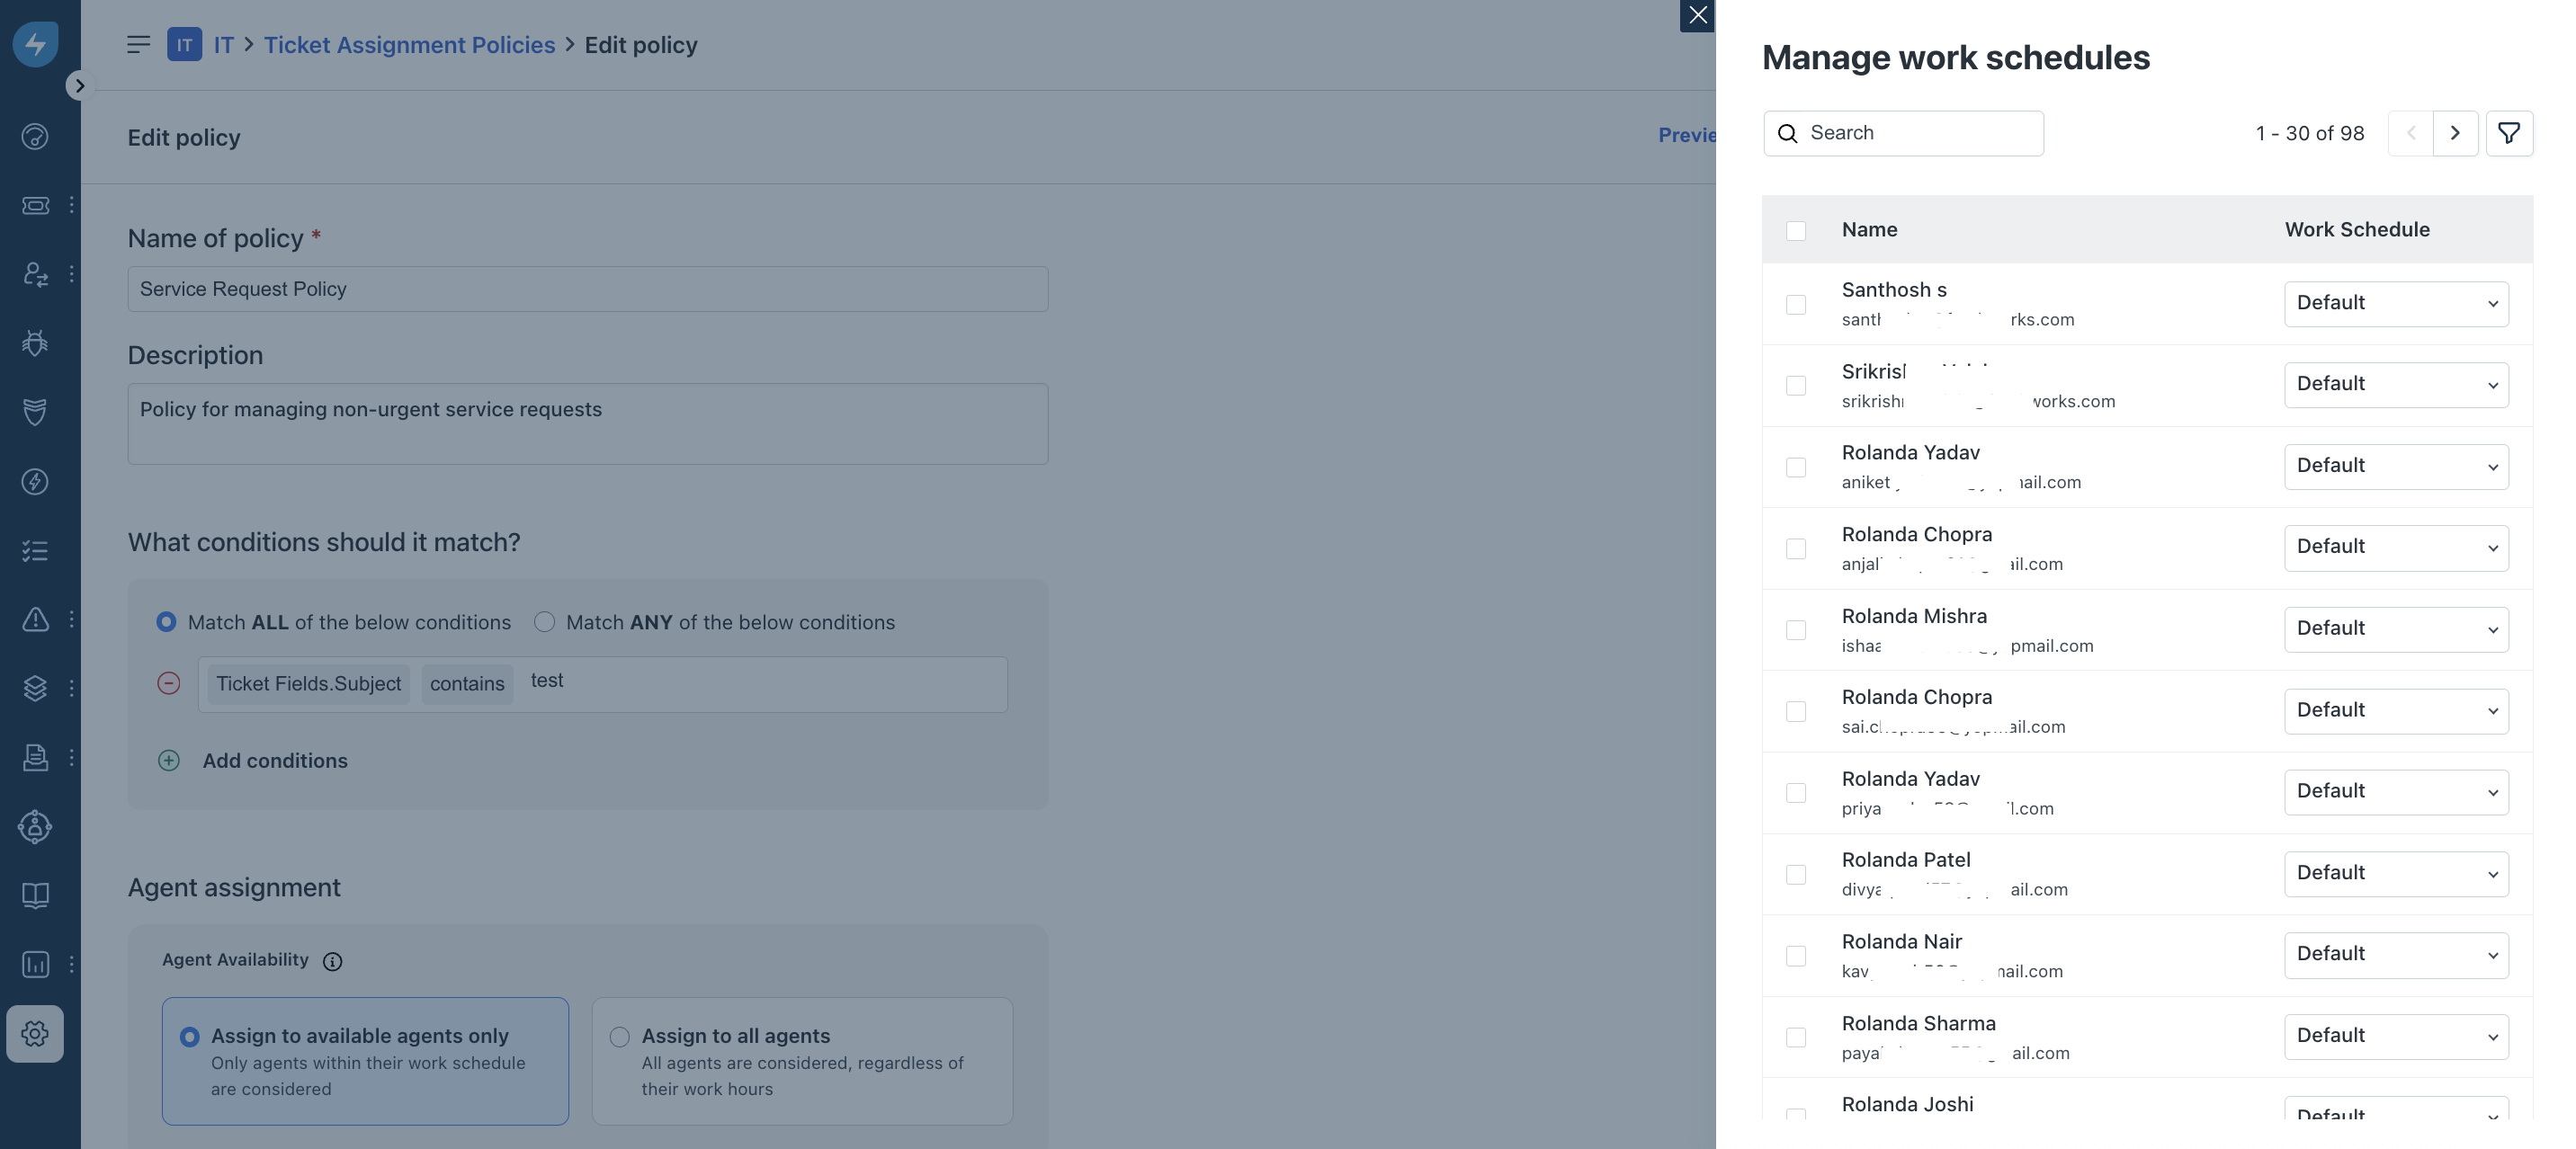
To update the work schedule for a single agent, select the relevant option from the Work Schedule dropdown next to the agent name.
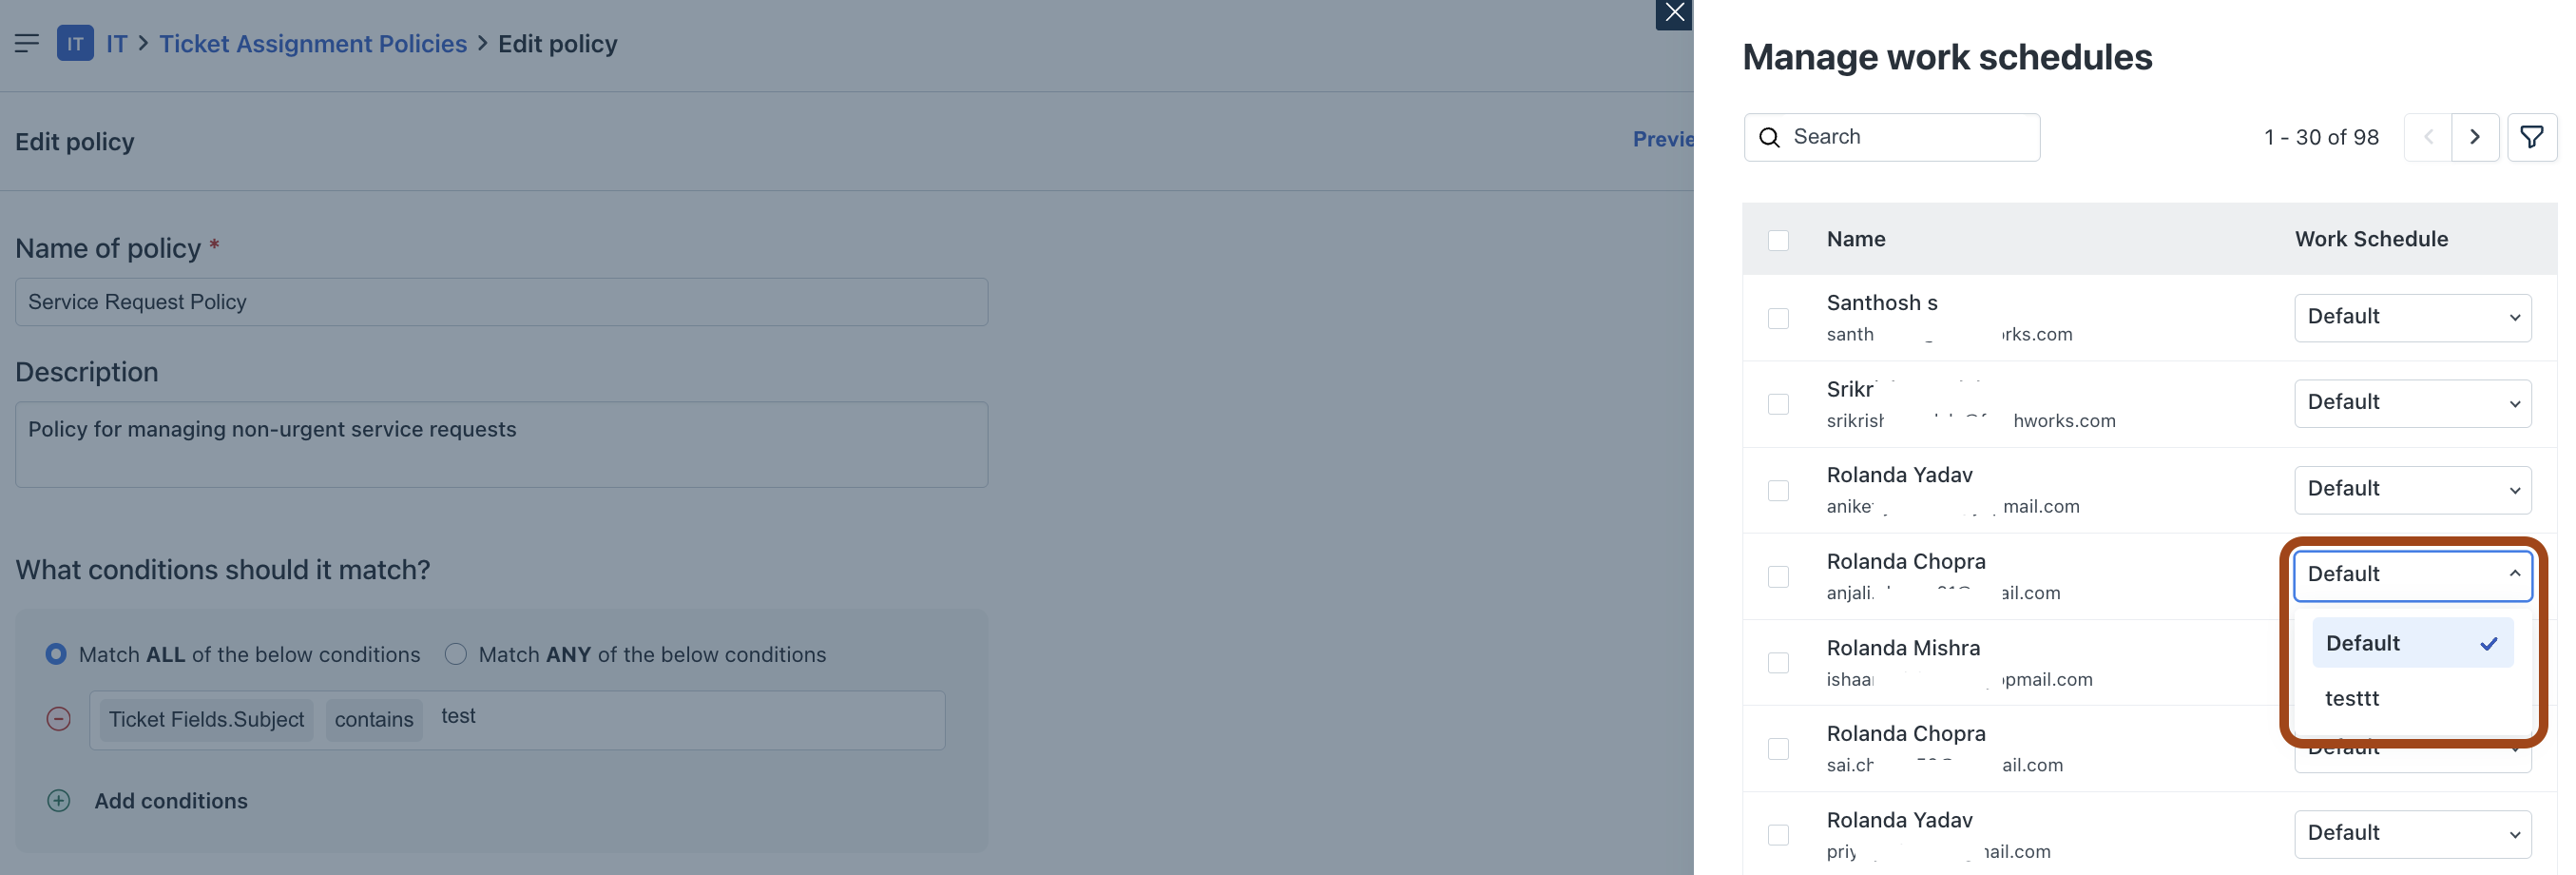
To update the work schedule for multiple agents, select the required agents, then click Update work schedules.

Note: You can also search for specific agents using the Search and Filter options.

(To manage the load settings) Click Manage next to Load on the right pane. The Manage load section opens on the right side.
Enter or change the numerical value in the Load text field next to an agent name, which you want to set for an agent. Then, click the ‘Tick’ icon to save the value. The ticket load will be updated for that particular agent.

Click Update to save all the changes made to the policy.
Preview a ticket assignment policy
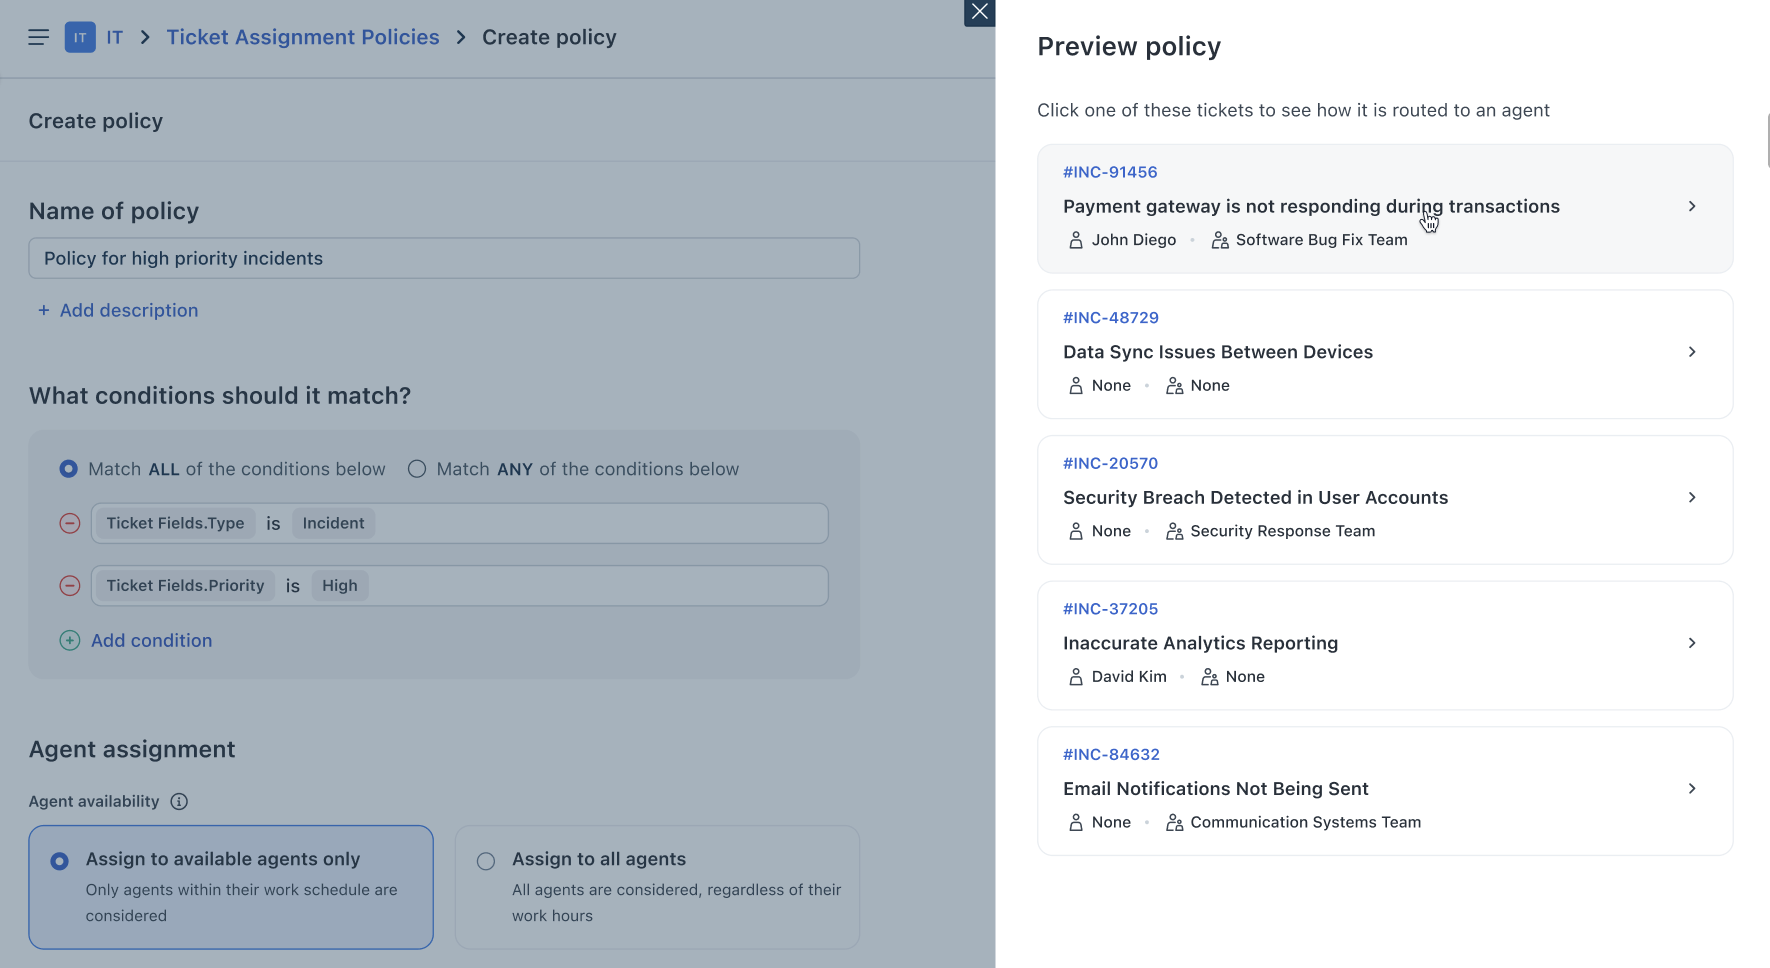
You can preview a ticket assignment policy to see how tickets are routed to an agent.
In the preview, you can view the list of tickets associated with the policy, and details for each associated ticket, such as agent and agent group.
To preview a ticket assignment policy:
Go to the Ticket Assignment Policies page, and select a policy.
Click Preview policy.
The Preview policy section opens on the right side, displaying the list of tickets associated with the policy.
Click any ticket name to view its details.
Note: If you click on the ‘Ticket Id’ link, the respective Ticket Details page will open in a new tab/window.
The preview section of the selected ticket opens.
Under Agents who fit this policy, you can see the system searches for available agents matching work schedules, then searches agents based on load.
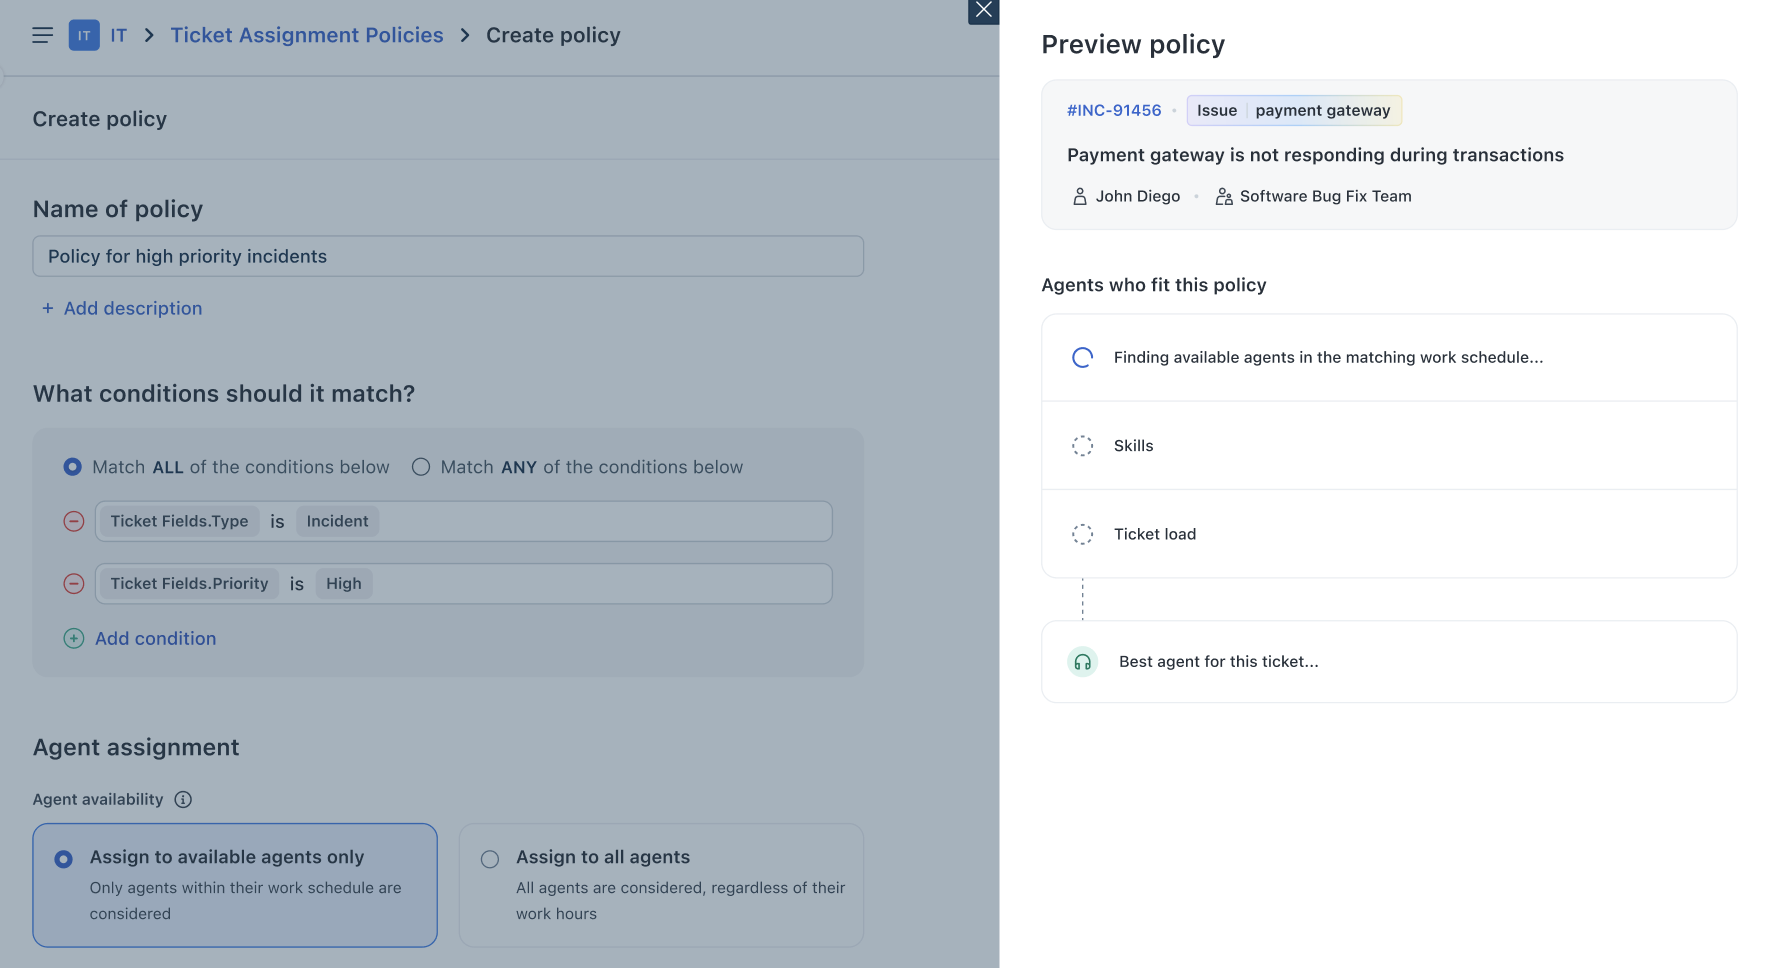
After the search is complete, you can view details of all the agents who fit the policy, and the best agent for the ticket.
Note: Click Show details to view more details of the agents with required bandwidth.
Click Go Back to go back to the Preview policy section. Or, click Got it to close the preview.

