
 Community
 Video Library
 Agent Training
 Freshservice
 Freshdesk
 Freshchat
 Freshcaller
 Freshsales
 Freshteam
 Freshworks Neo
 Freshsurvey
 Freshservice for MSP
 TABLE OF CONTENTS
- Create a root category
- Create a subcategory
- Create a service item
- Manage service categories, subcategories, and items
- Multi-level service catalog in support portal (For Requesters)
- Frequently asked questions
Note: This feature works the same across all Freshservice products. Some screenshots or articles may reflect older designs, but the functionality remains unchanged. If certain options do not appear in your account, they may not be included in your current plan.The Service Catalog is a centralized list of services offered by an organization. It gives users clear information about each service—including its purpose, availability, and how to request it. A well-structured catalog streamlines service delivery and makes it easier for users to find and access what they need.
Service Catalog now supports multi-level categories (up to three levels), improving organization and navigation for end-users. This hierarchy also reduces ticket misclassification and simplifies complex catalog management for administrators, meeting enterprise-grade industry standards.
Create a root category
Freshservice/FSBT's service categories organize and group related service items, classifying them by nature or purpose. This creates a structured catalog, simplifying navigation and service discovery for users. You can create a root category (parent category), which can contain up to two levels of subcategories.
Every workspace can maintain its own list of service categories, subcategories, and items. The order of workspace service categories displayed in the support portal follows the order in which workspaces are created. The order and sorting of service categories can be configured at the global level.
To create a root or parent service category:
Go to Admin > {Workspace Name} > Service Management > Service Catalog.
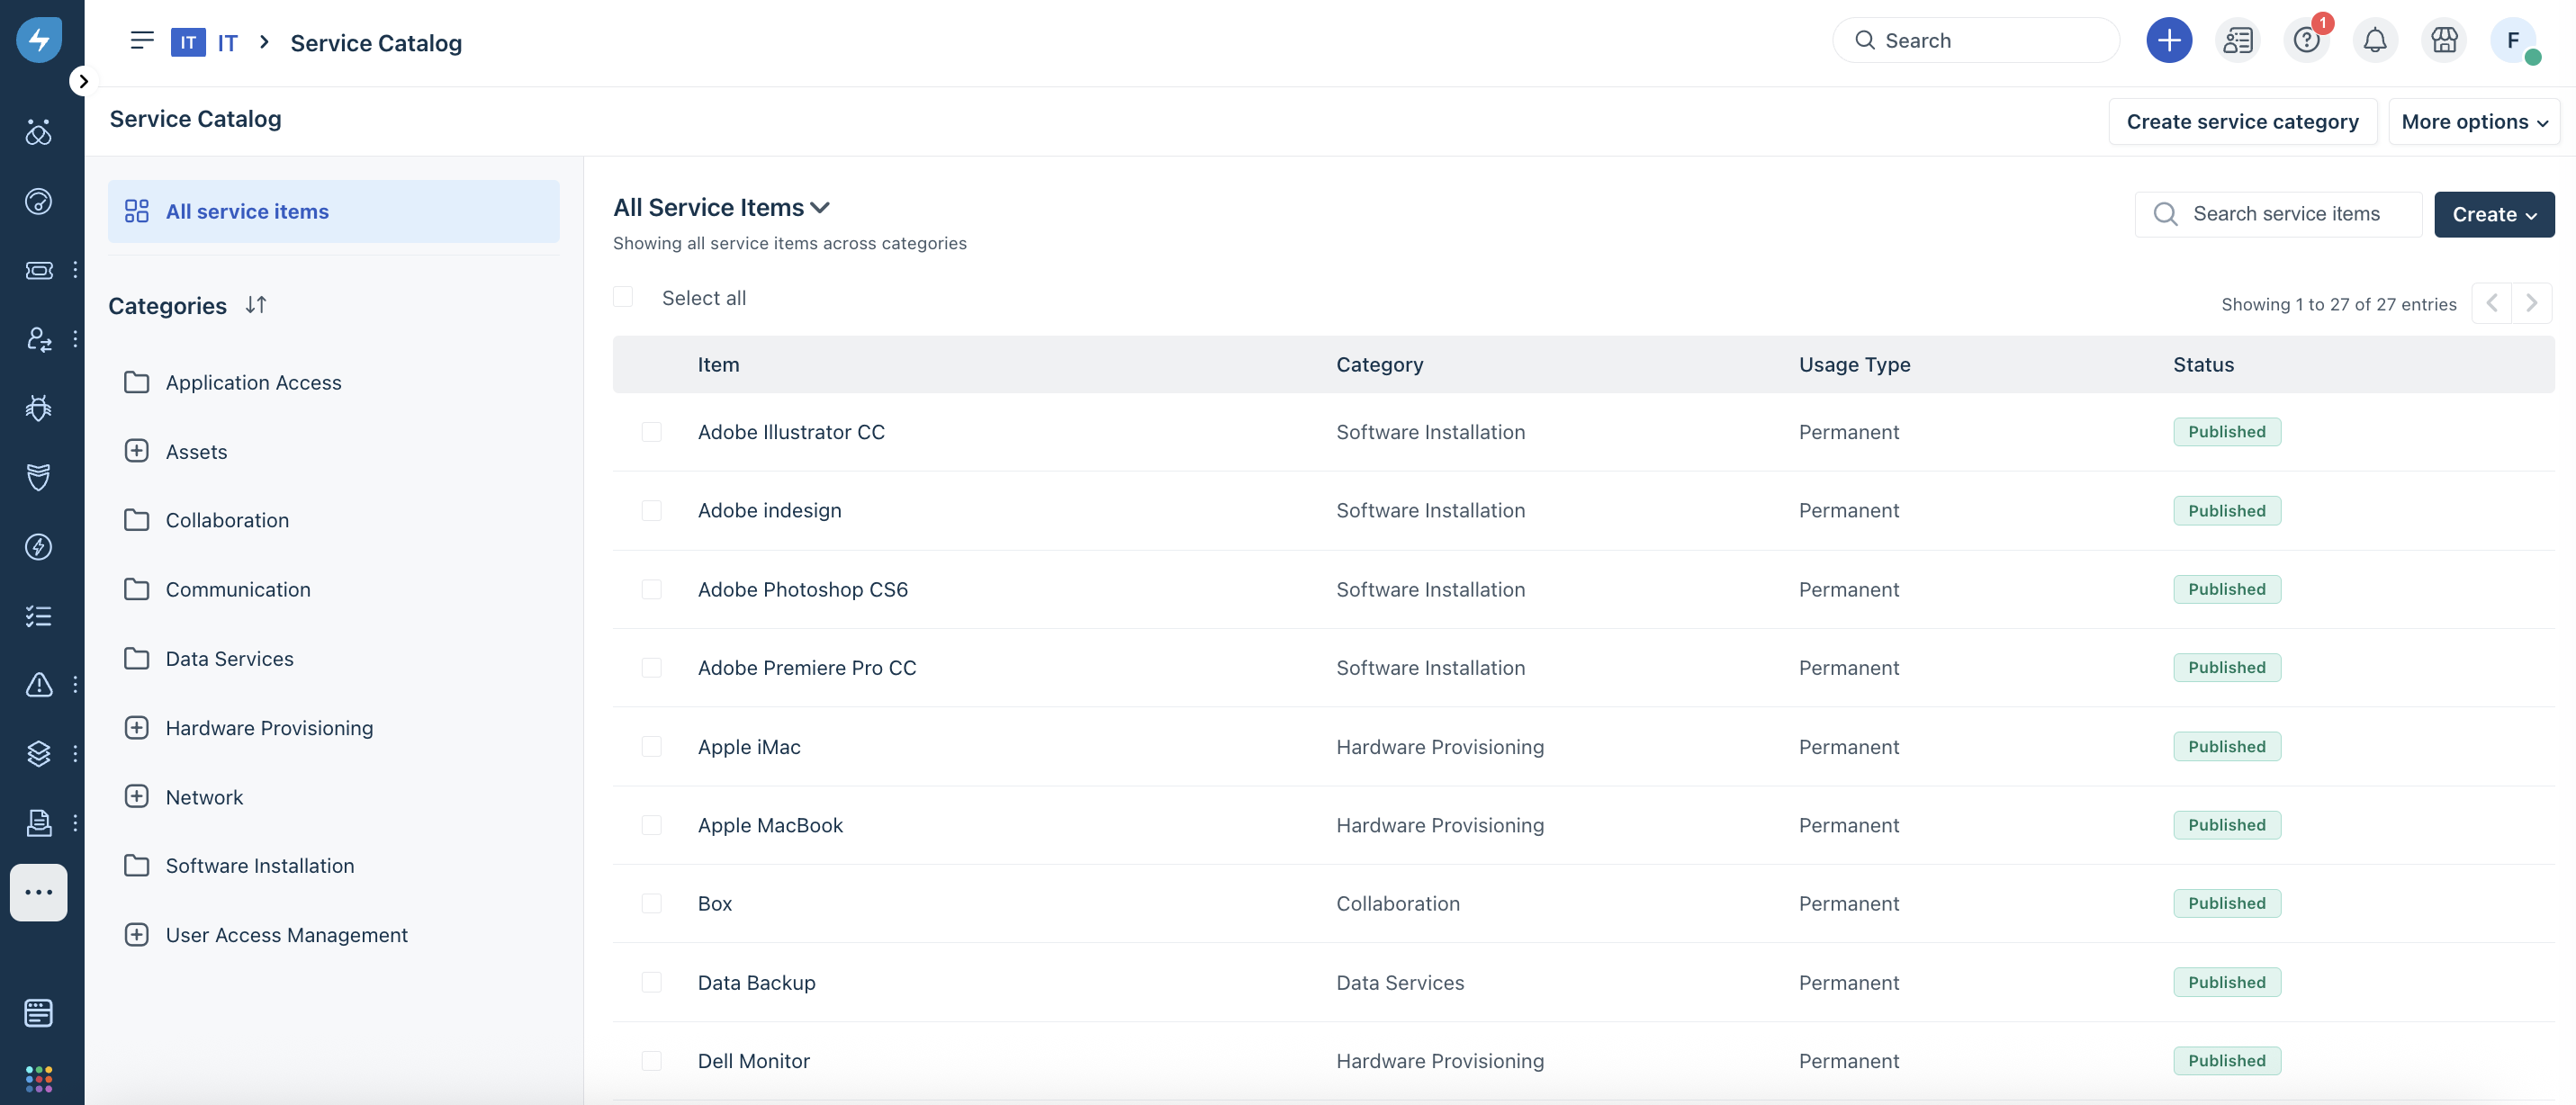
Click Create service category at the top-right corner. The Create service category dialog opens.
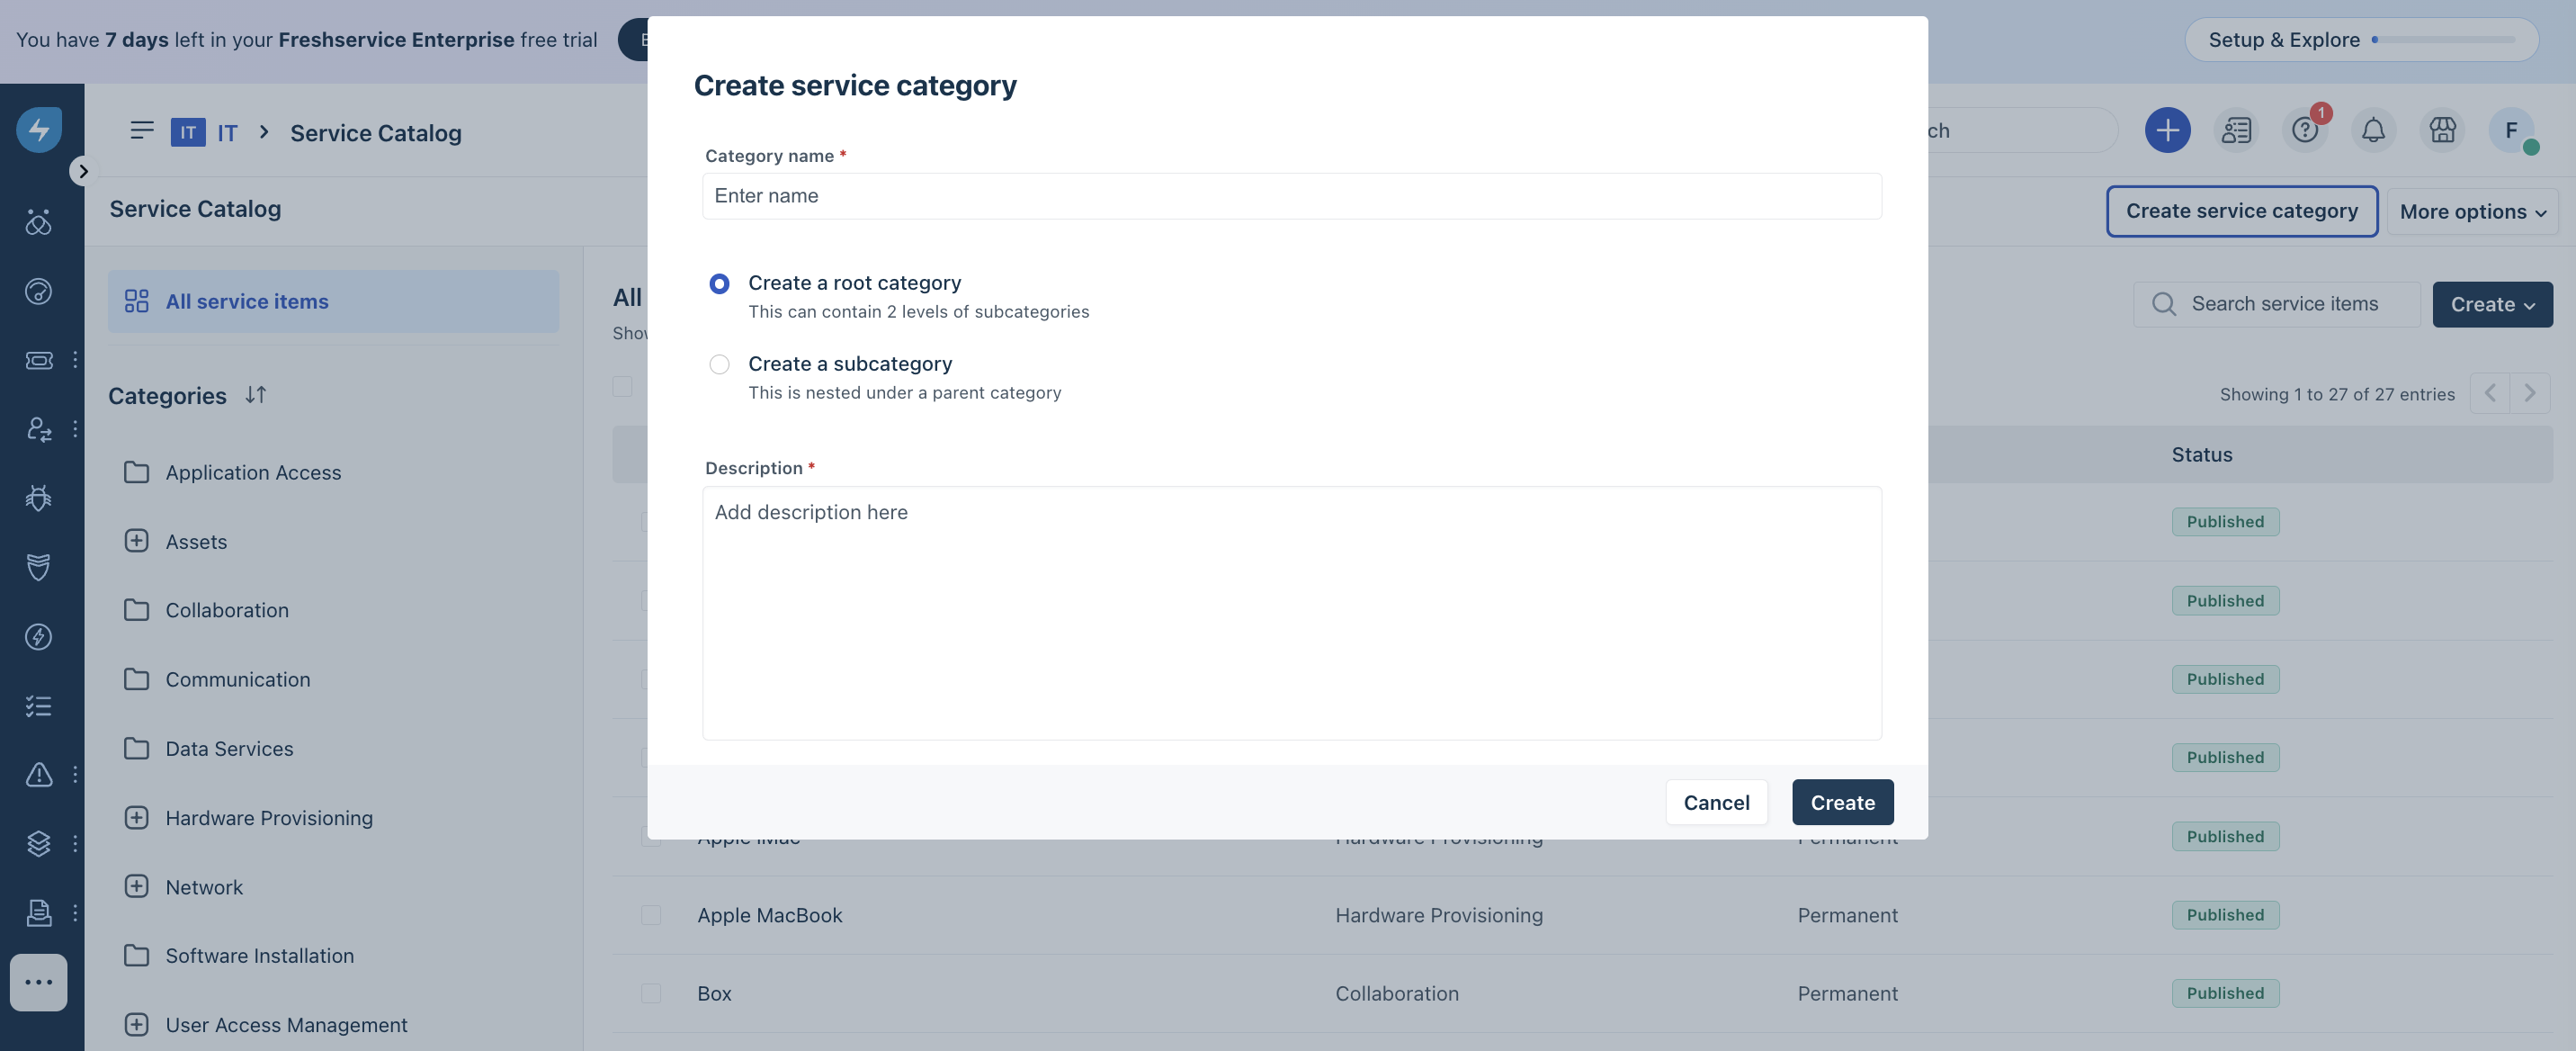
Enter the category name and description, and click Create.
Note: Ensure that the Create a root category option is selected.
Create a subcategory
You can create a subcategory under a root or parent category, which can contain one more level of subcategory (as service catalog supports up to three levels in the multi-level hierarchy).
To create a subcategory:
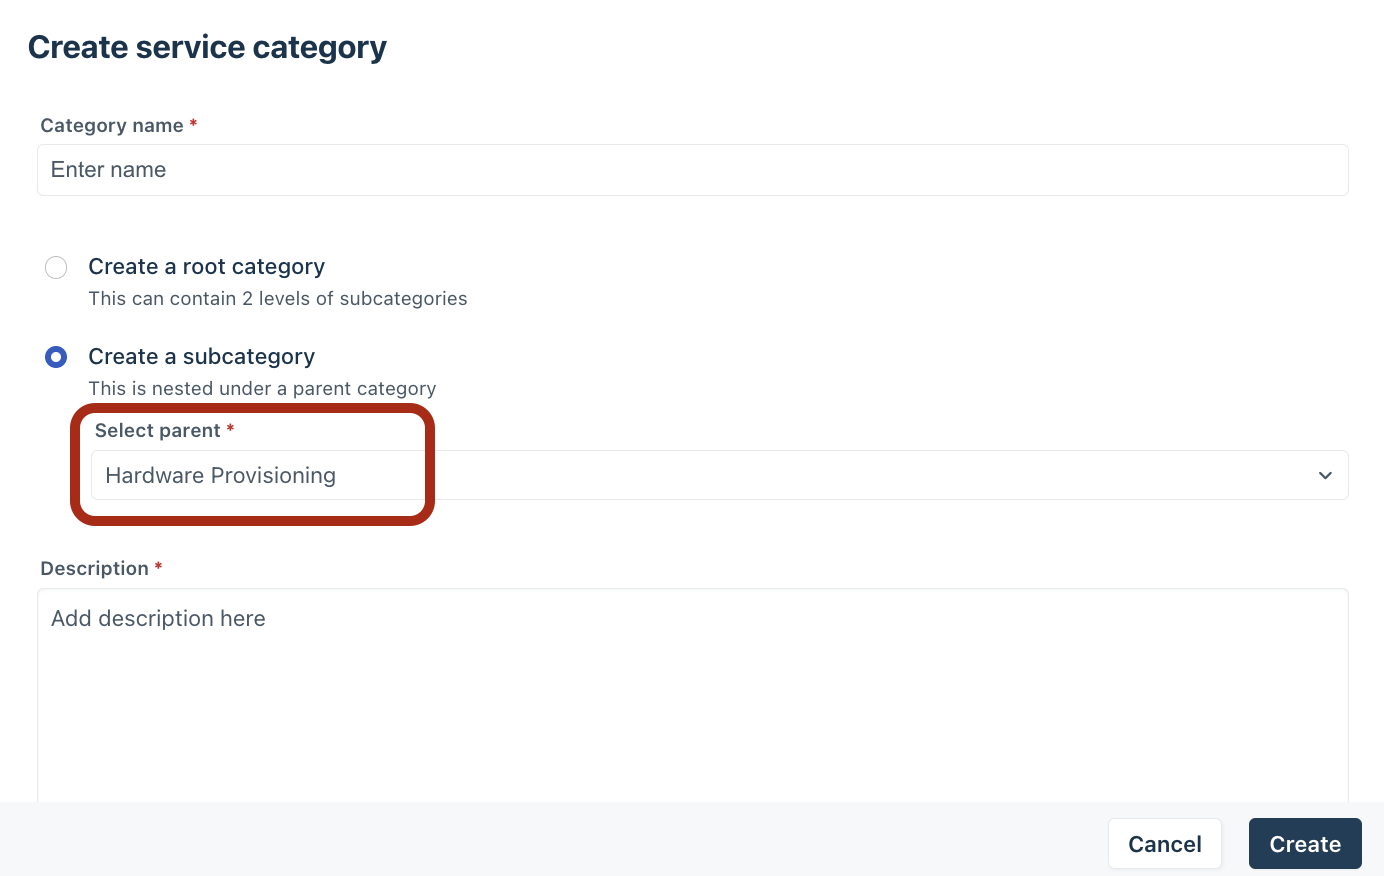
Go to Admin > {Workspace Name} > Service Management > Service Catalog > Create service category.
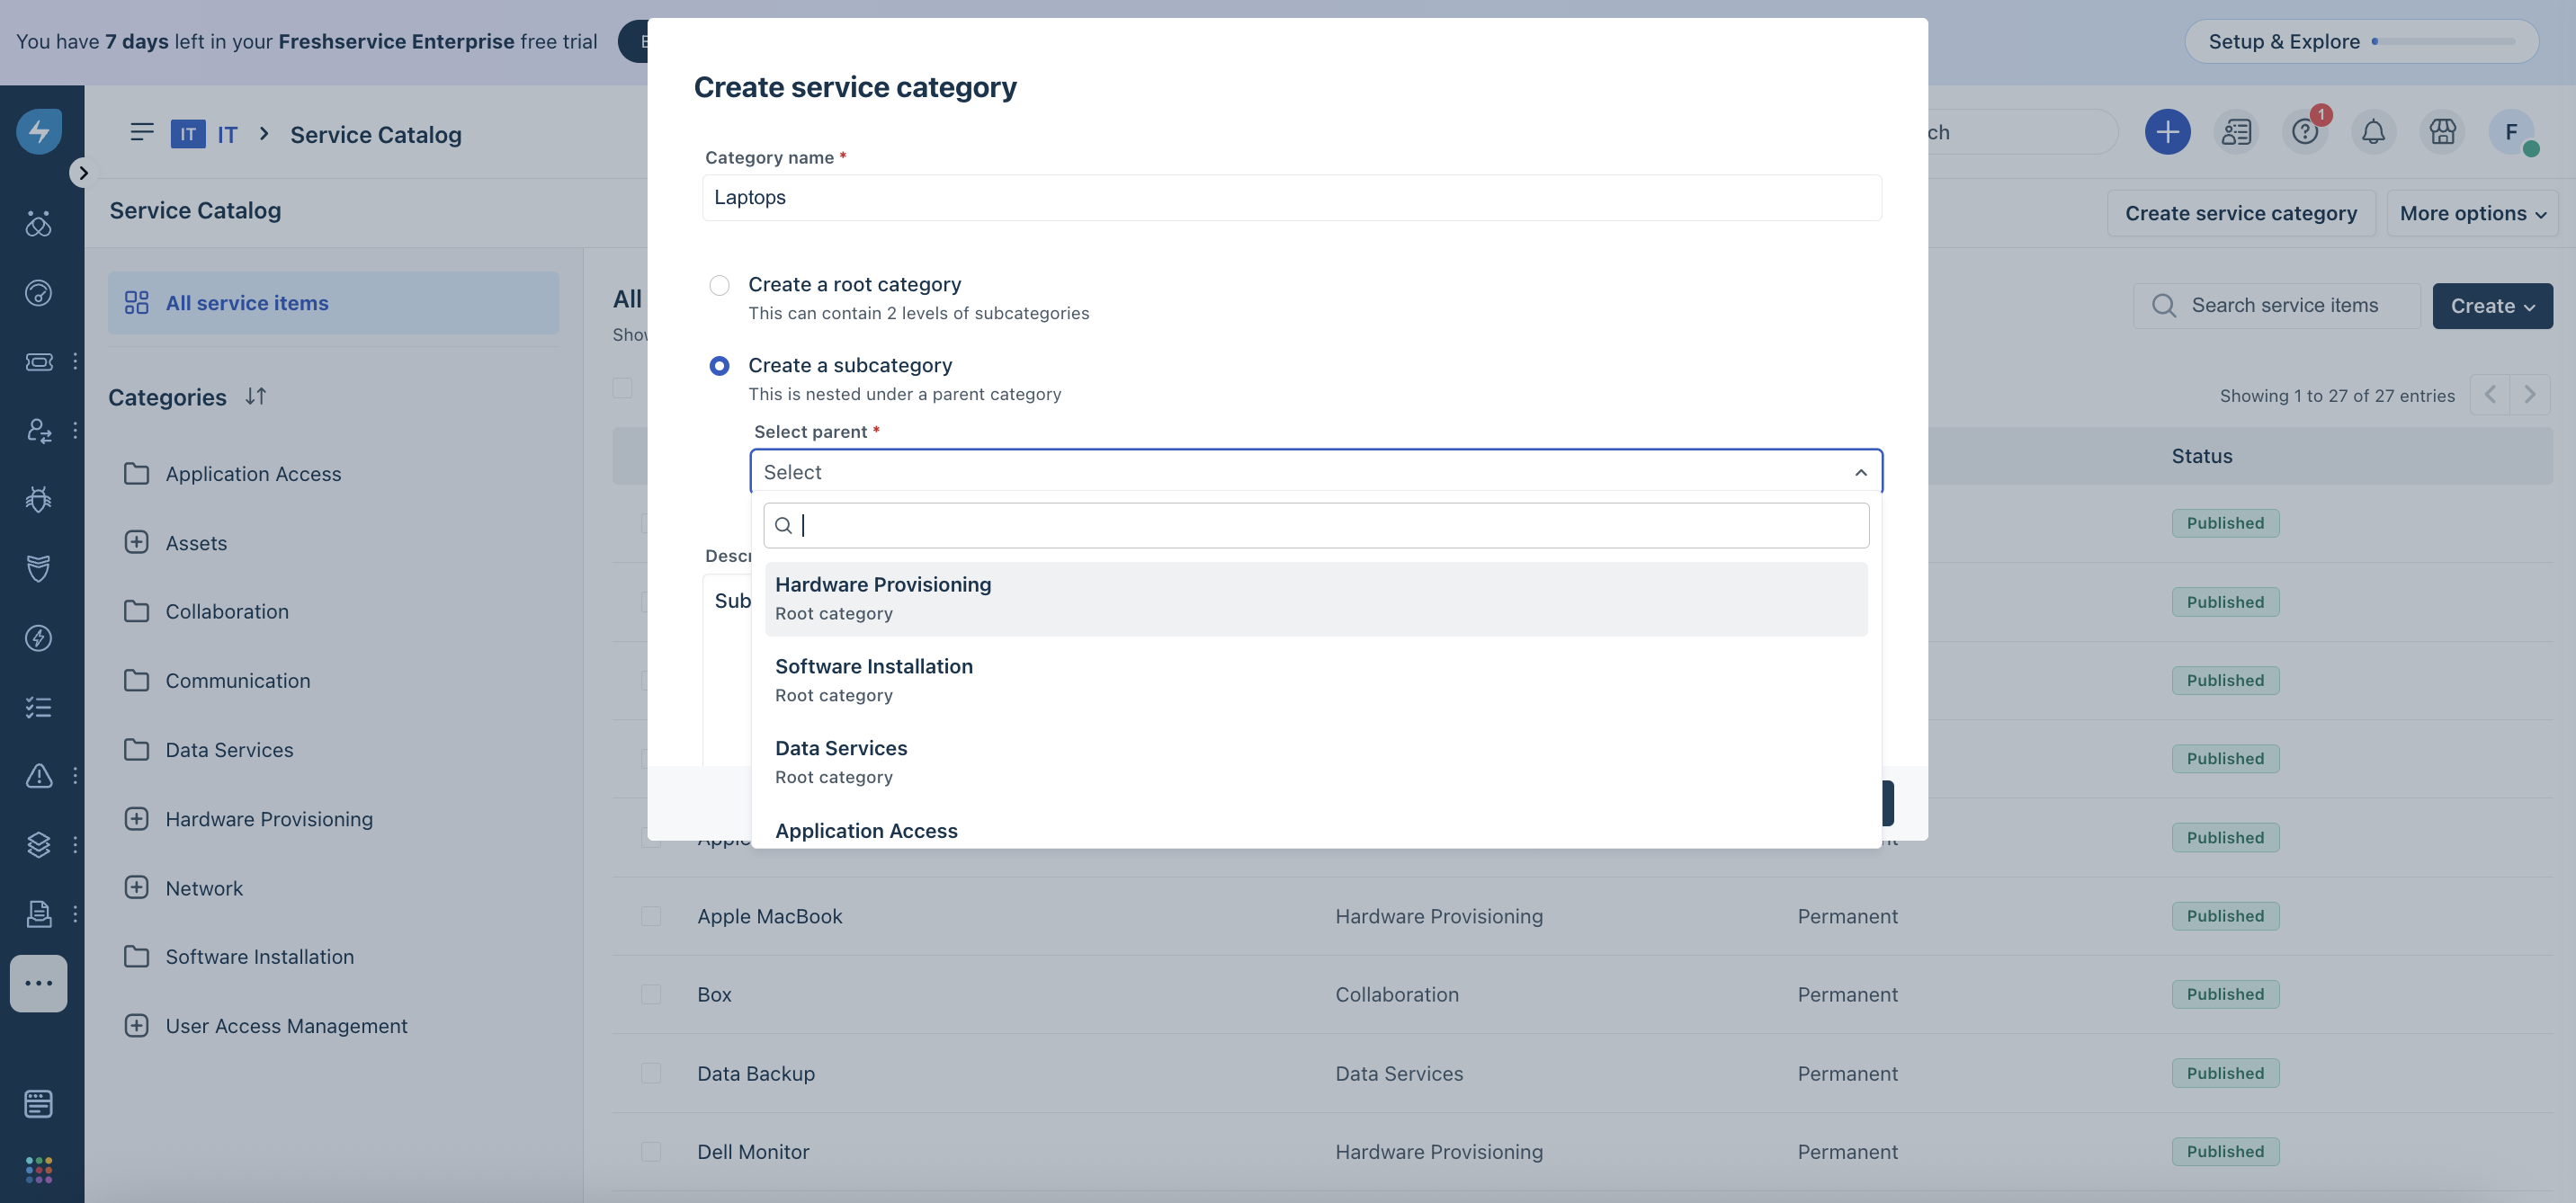
Select the Create a subcategory option. Then, select the relevant root category from the Select parent dropdown.
Or, hover over a category name under Categories on the left pane, and select the Create subcategory icon.
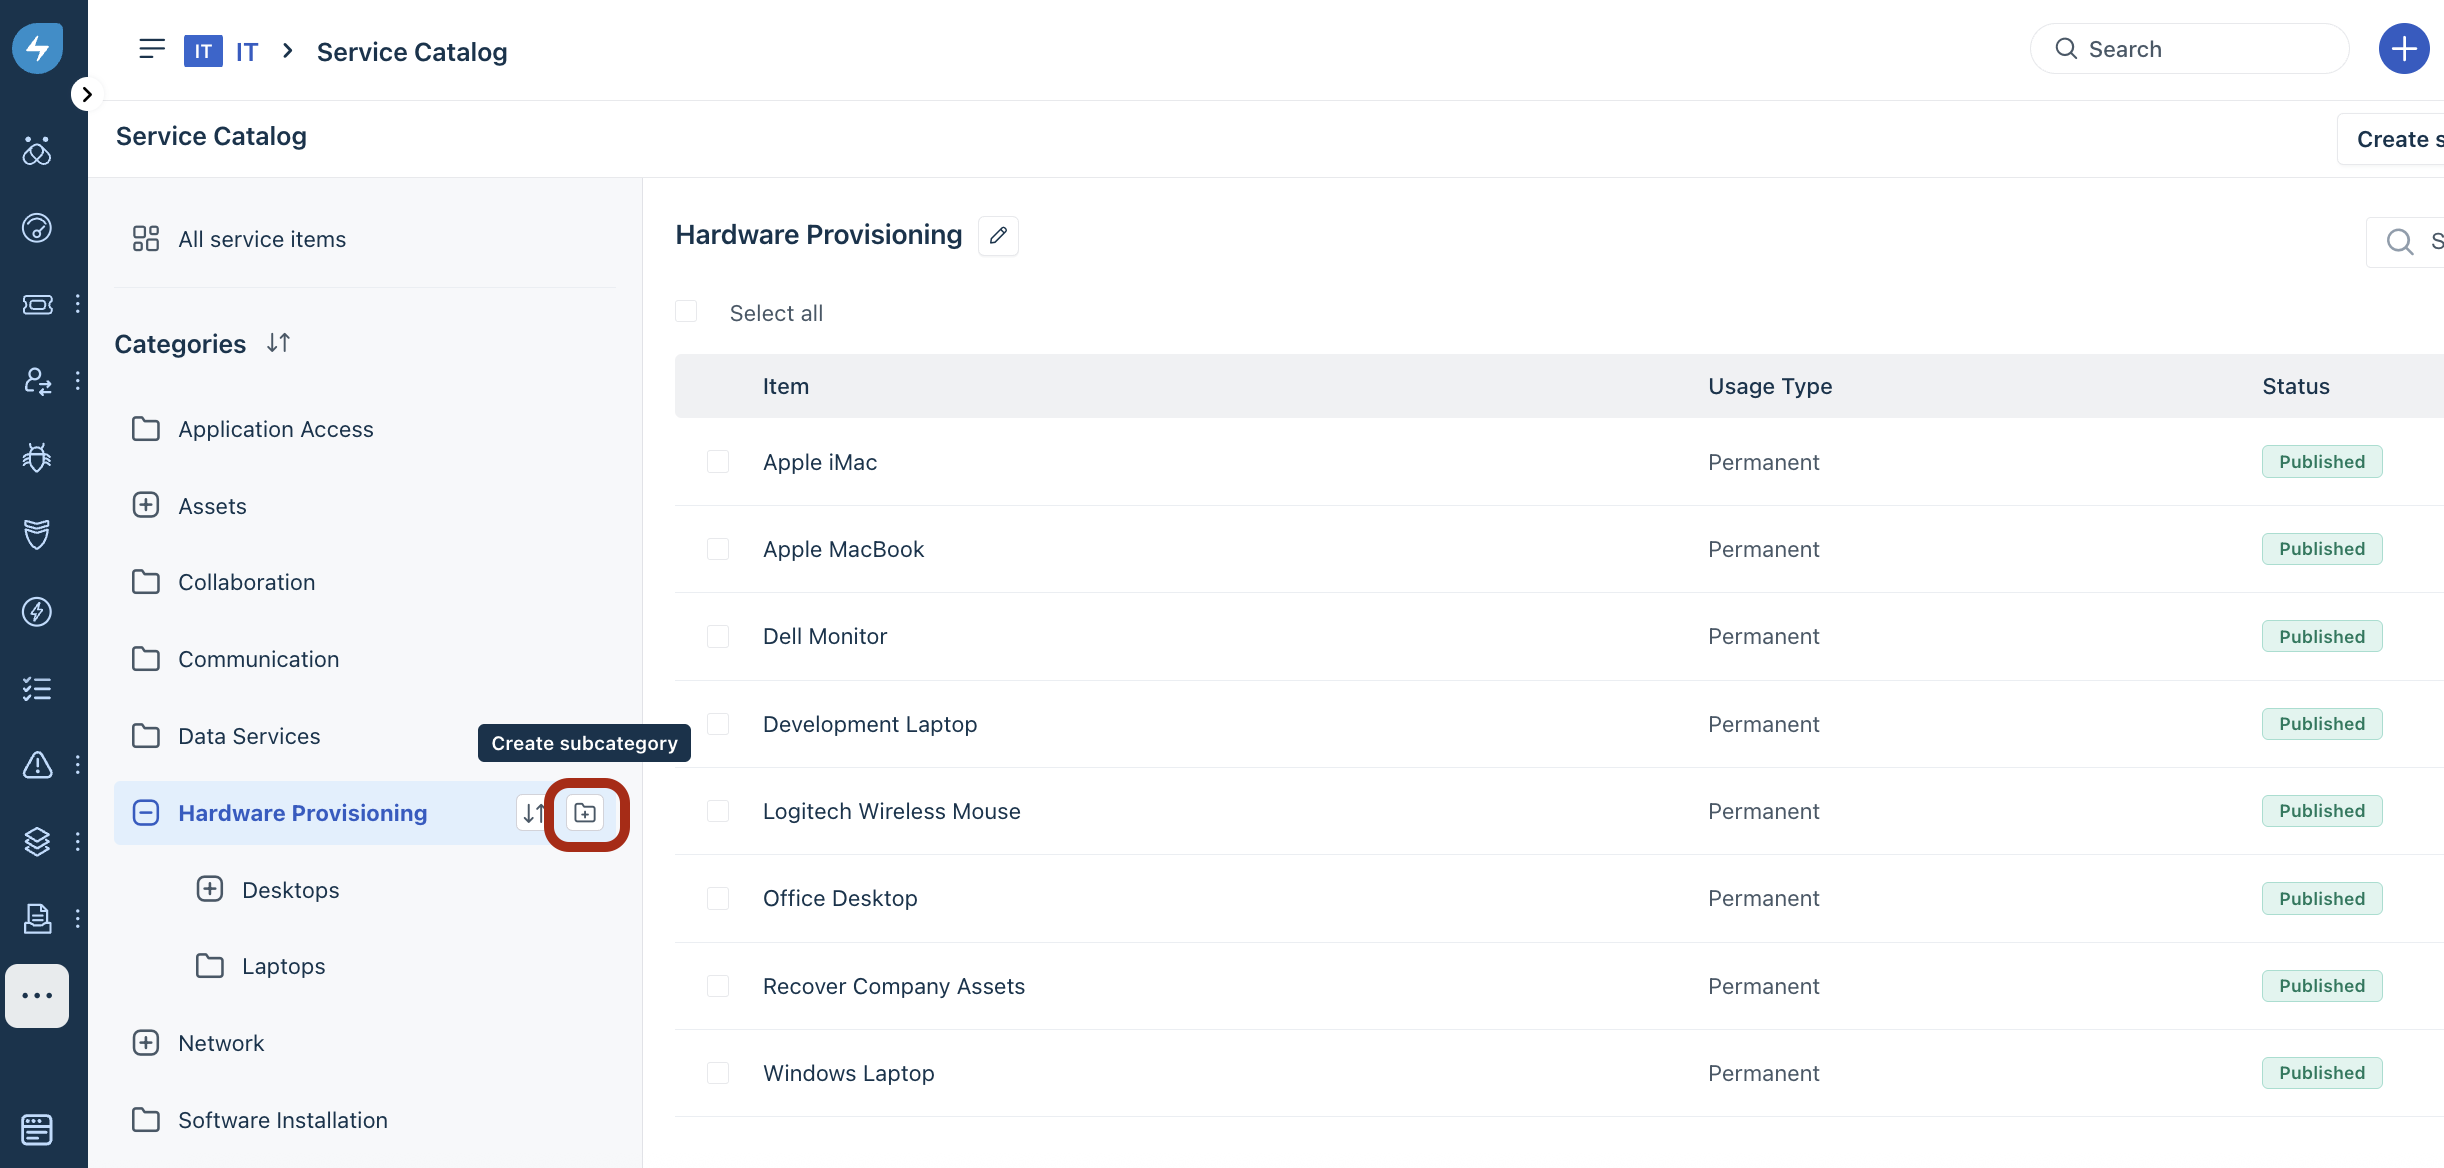
Note: The parent category is auto-selected.
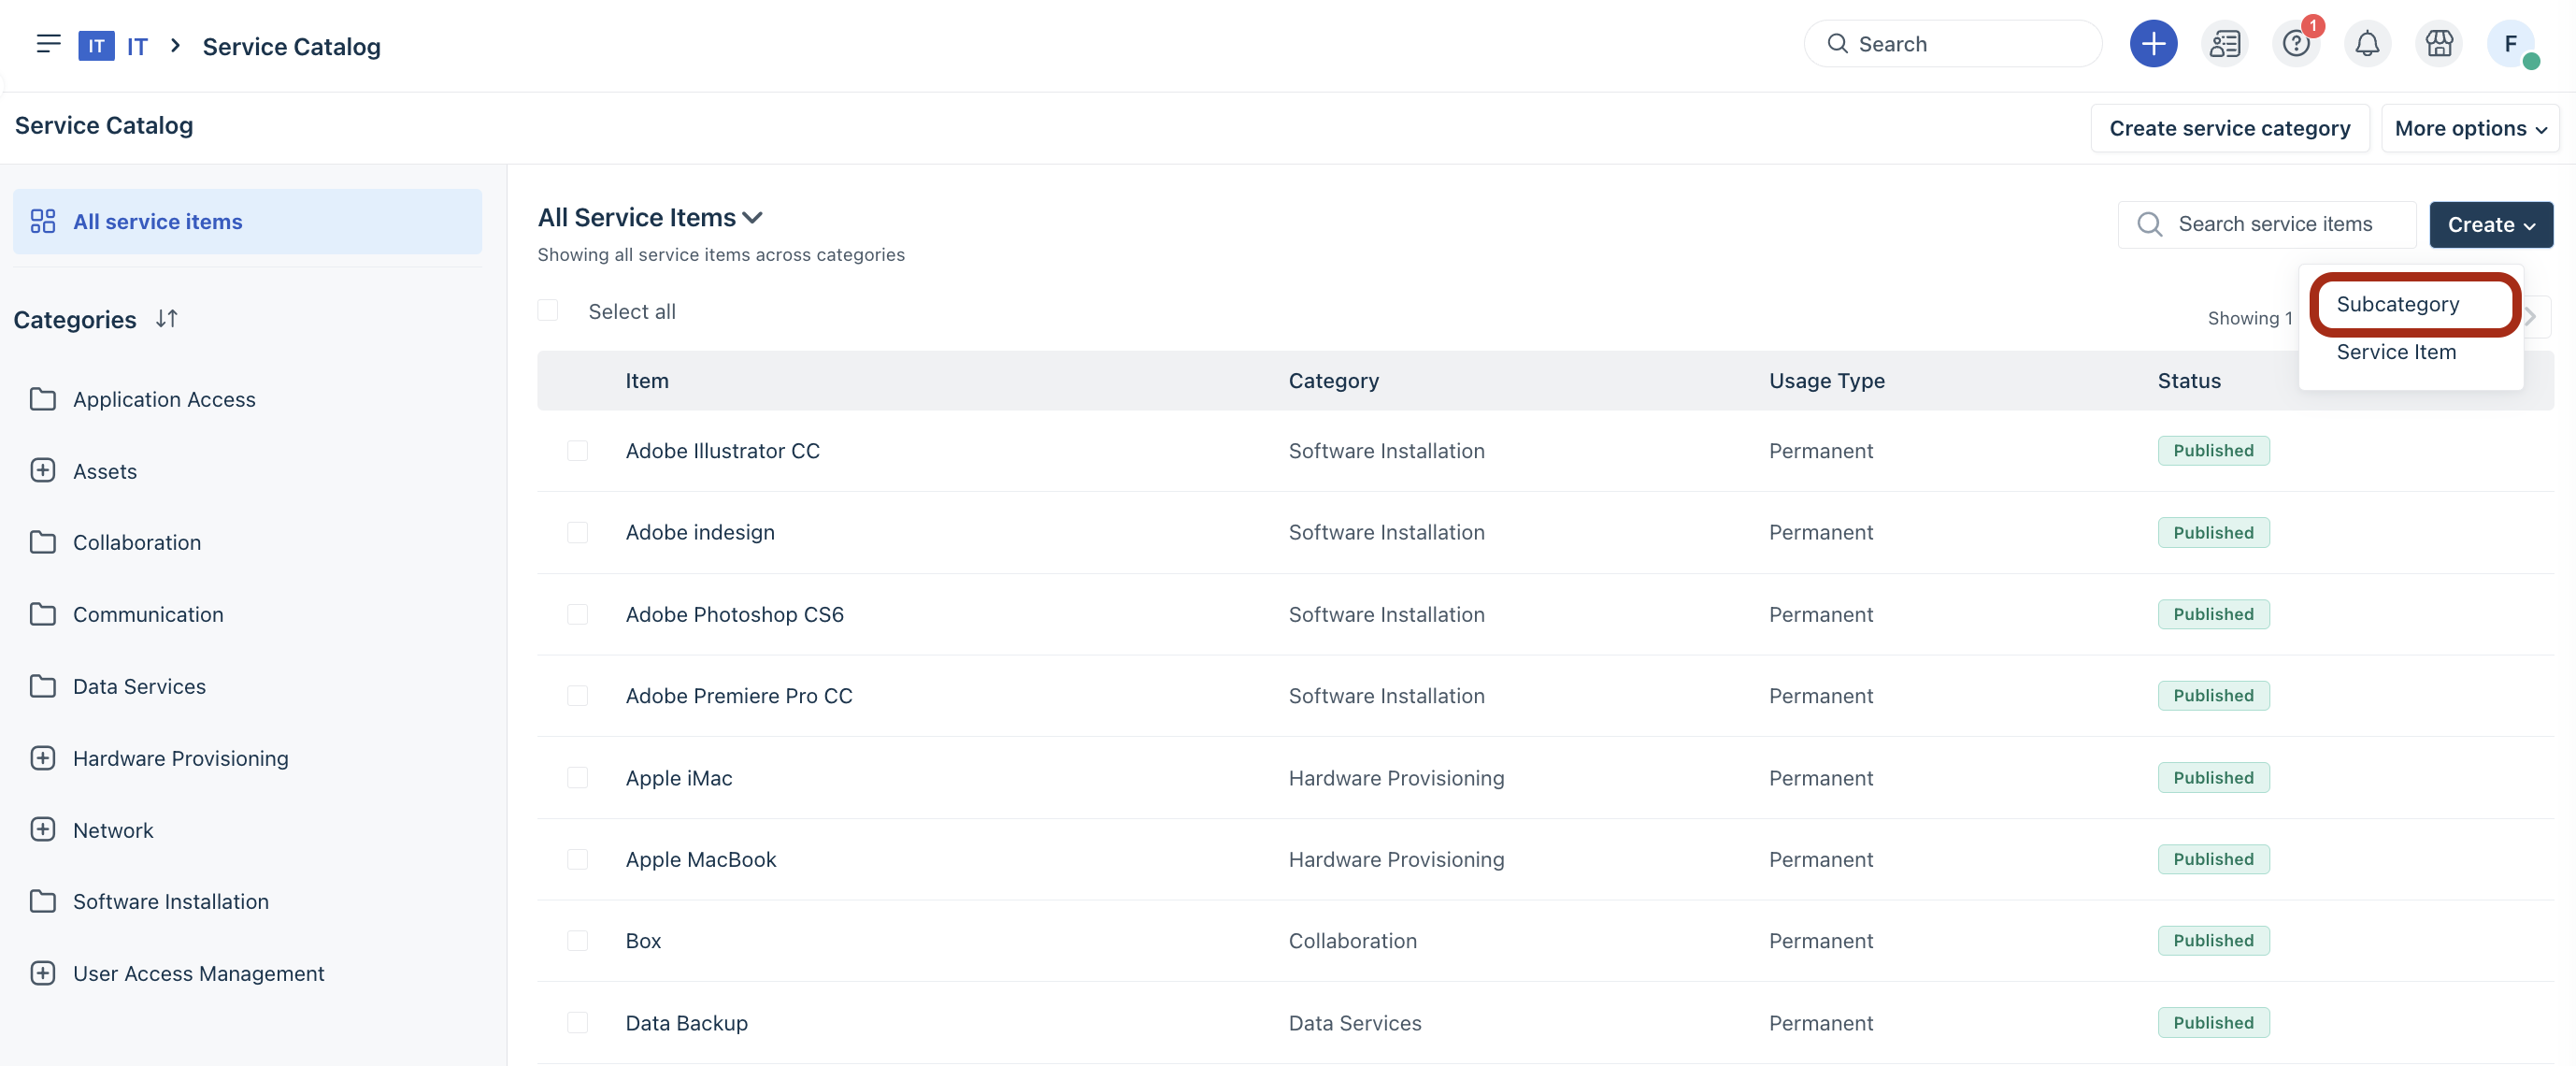
Or, select Subcategory from the Create dropdown at the top-right corner.
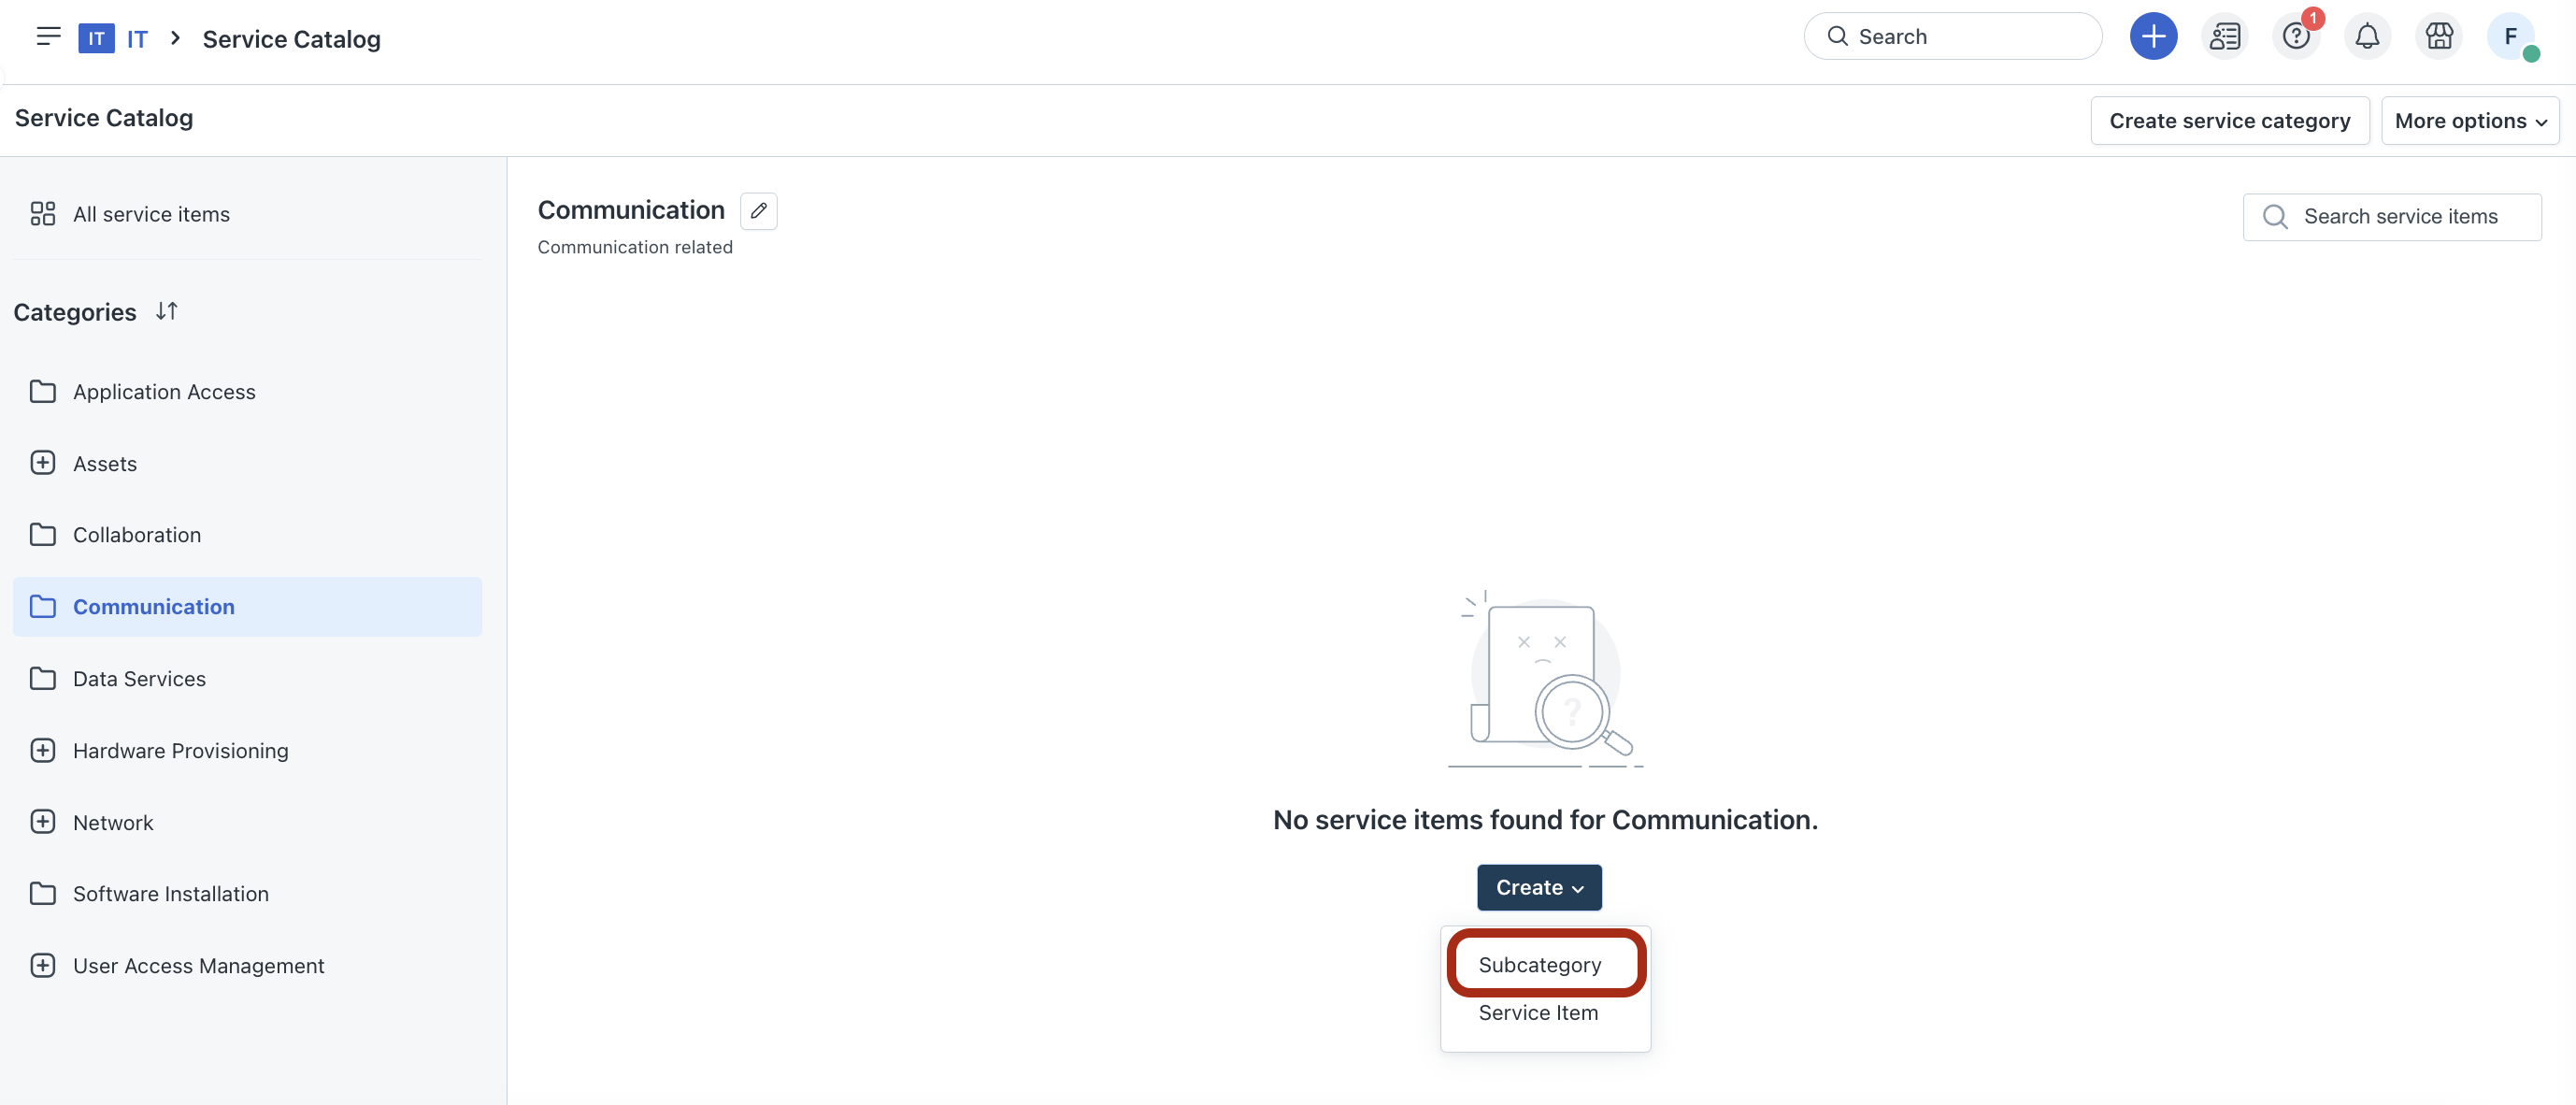
(If there are no subcategories created for a selected service category) Select Subcategory from the Create dropdown (as shown in the following figure).
The Create service category dialog opens.
Select the Create a subcategory option. Then, select the relevant root category from the Select parent dropdown.
Enter the category name and description, and click Create.
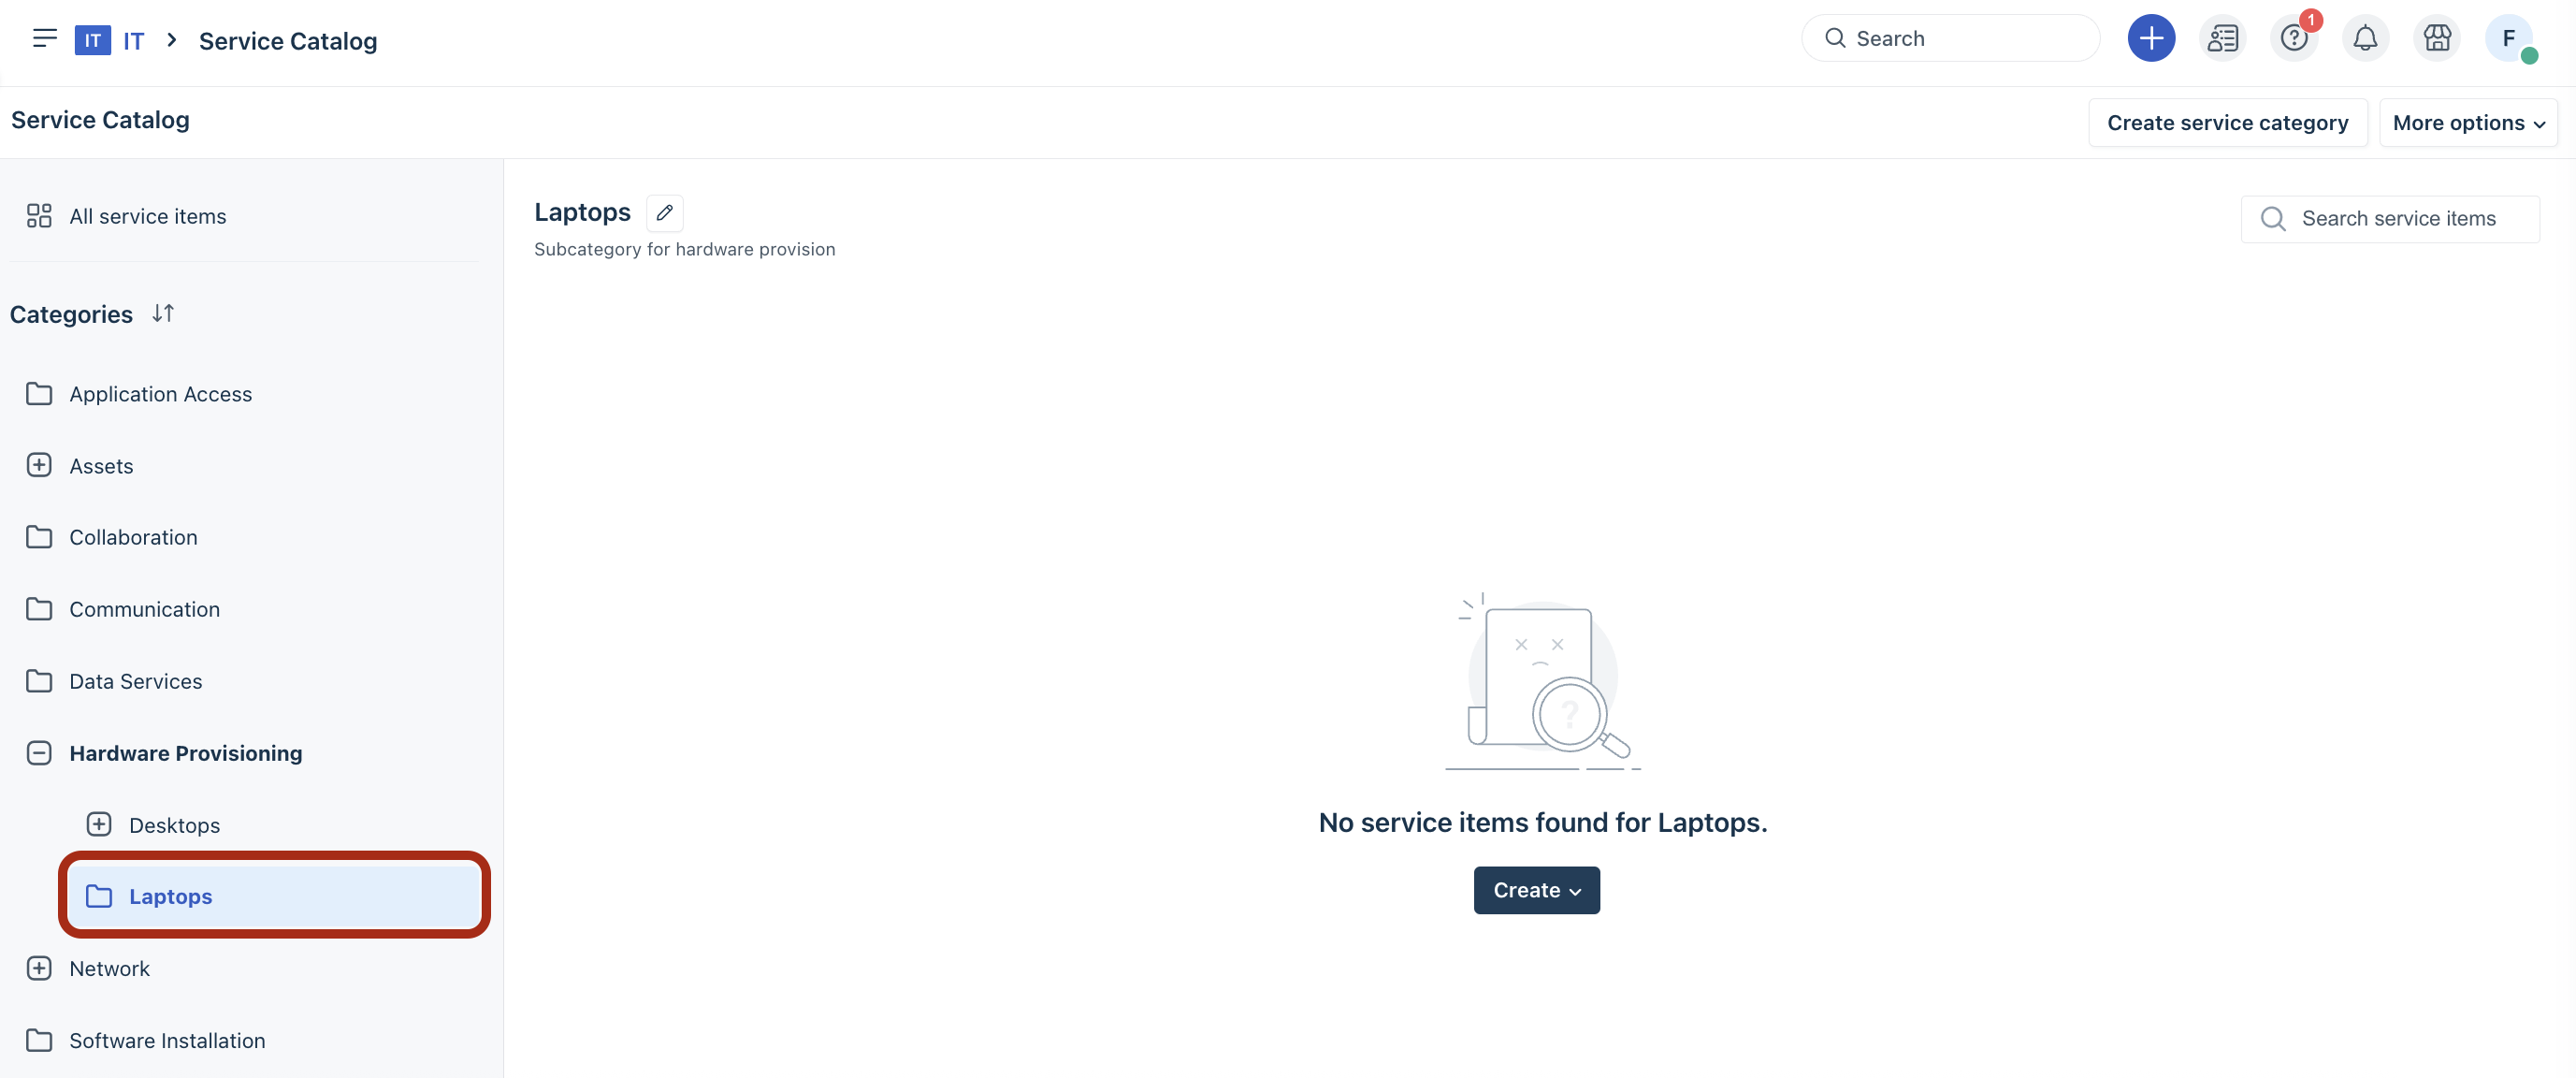
The new subcategory is created under the relevant root category.
Create a service item
You can create any number of service items under a root/parent category, or under a subcategory.
To create a service item:
Go to Admin > {Workspace Name} > Service Management > Service Catalog.
From the Create dropdown at the top-right corner, select Service Item.
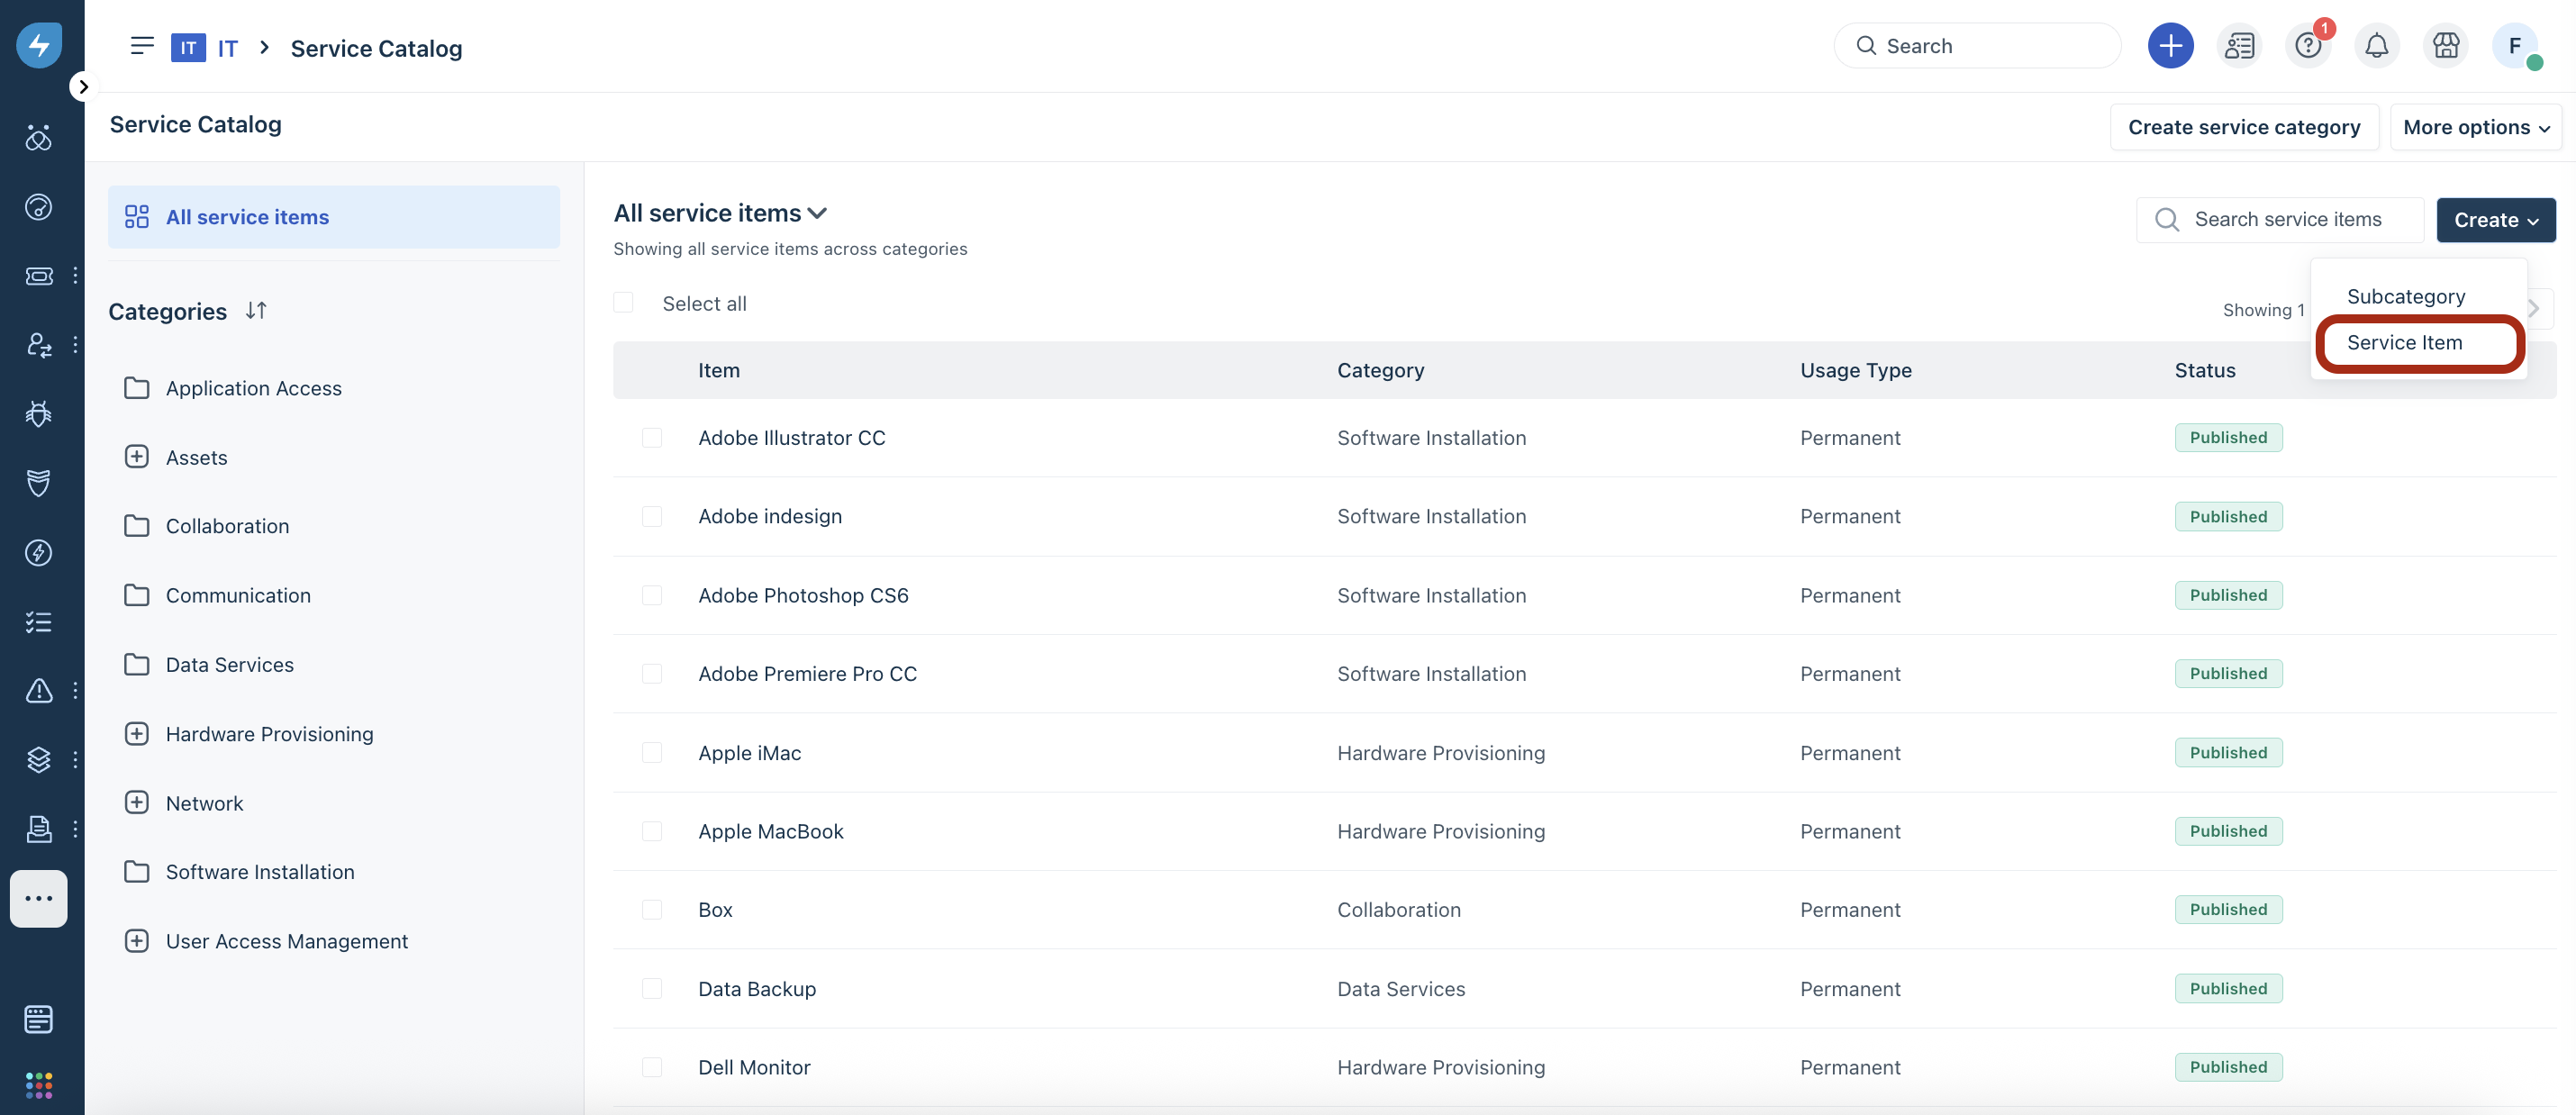
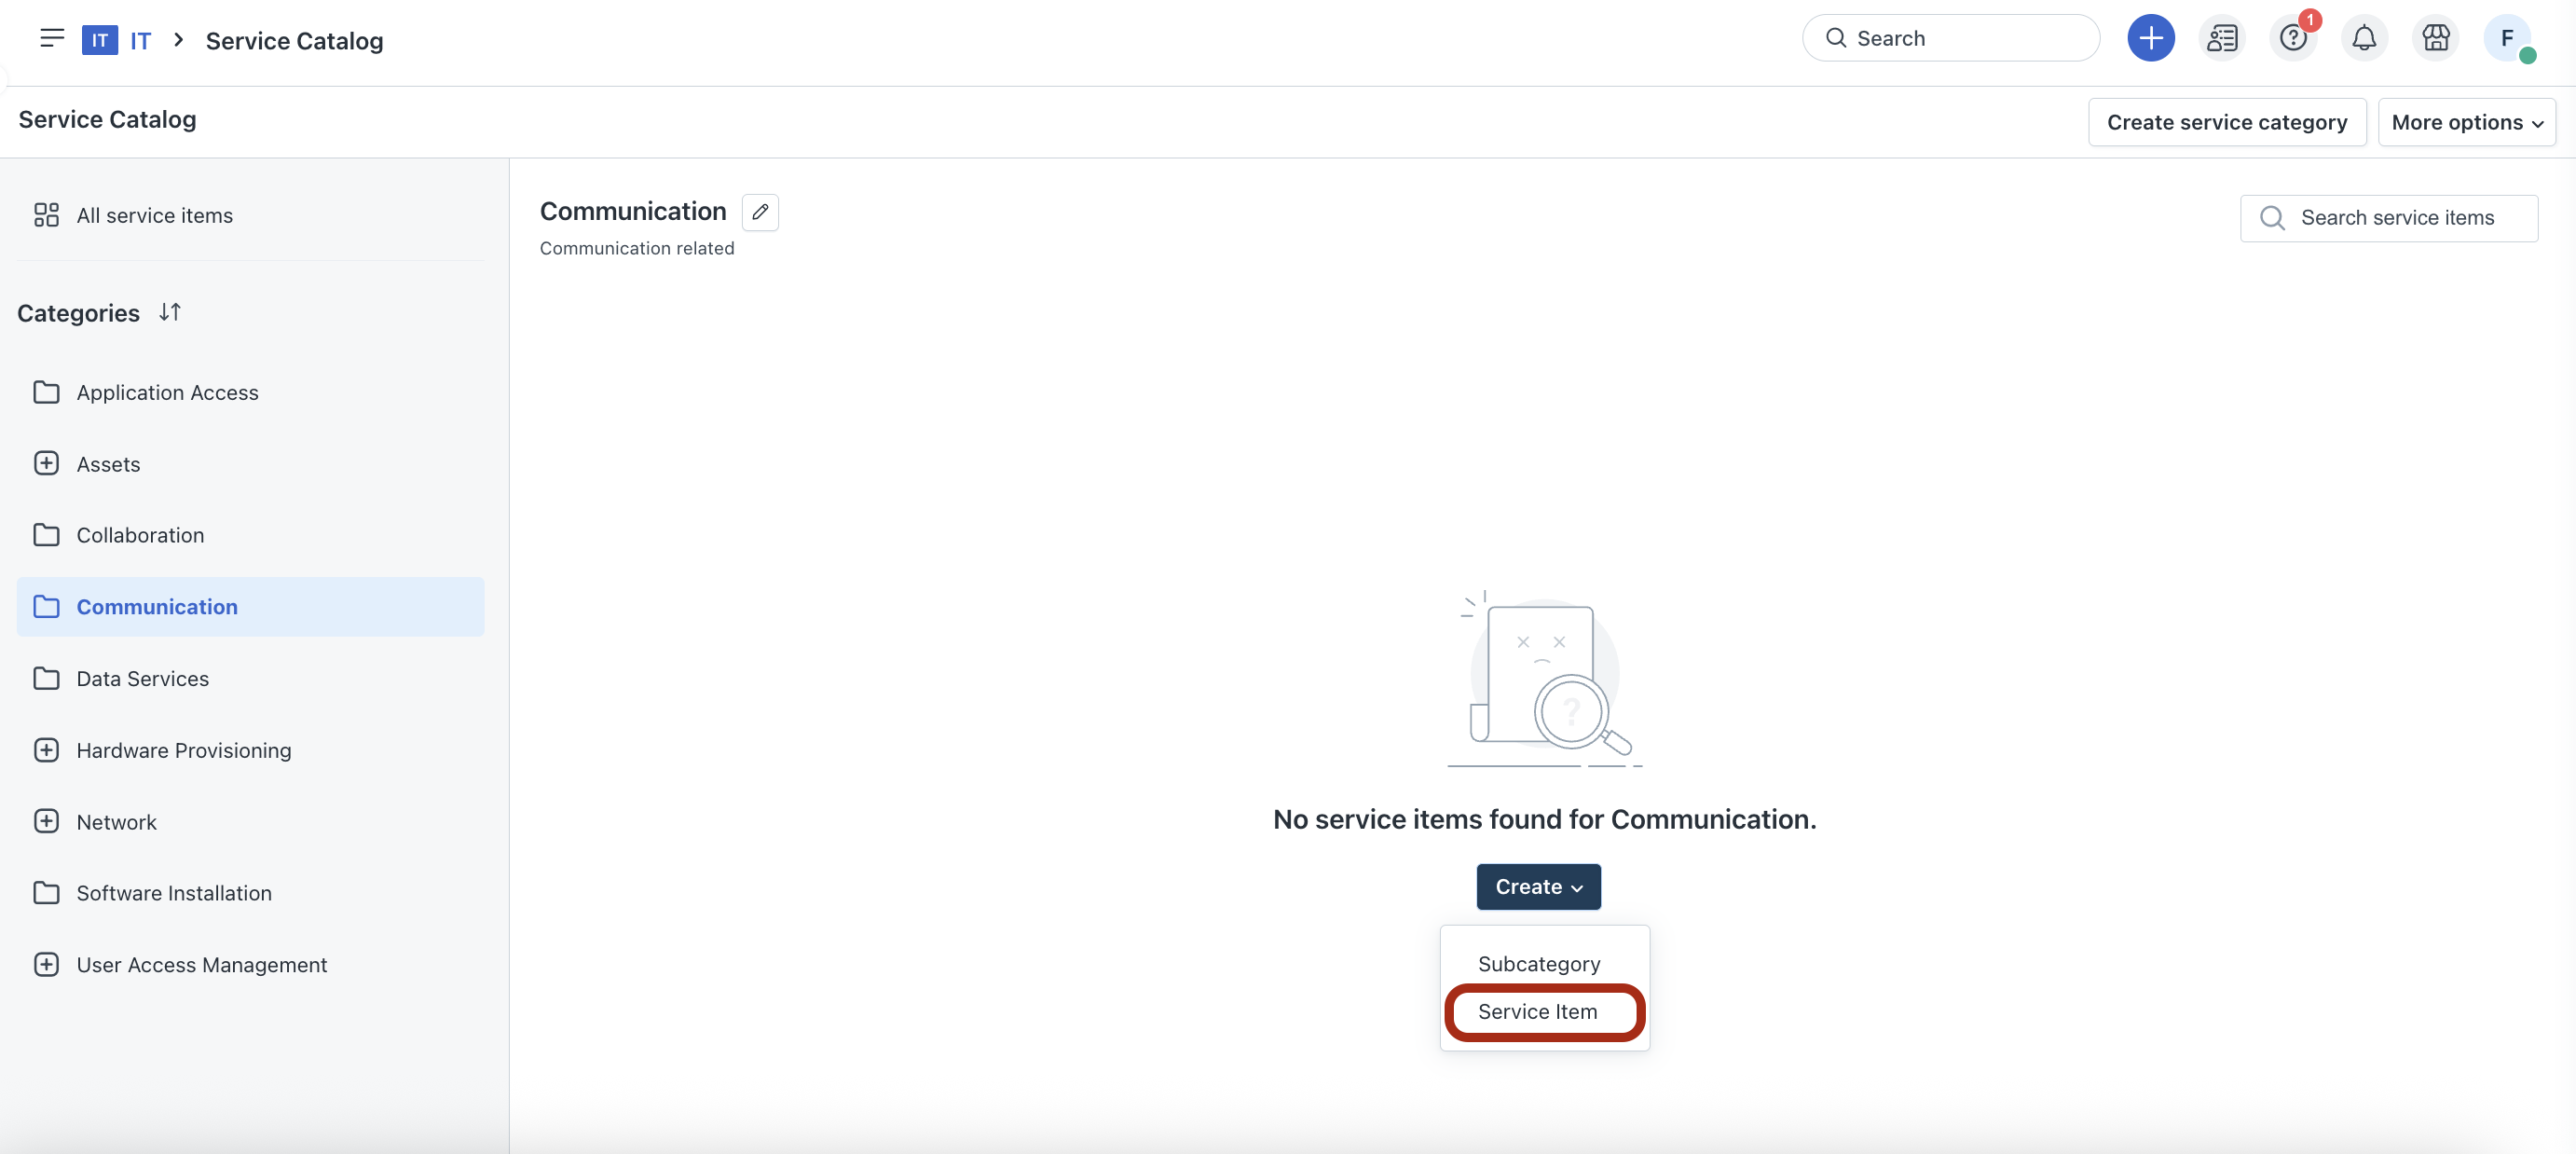
Or, select a service category under Categories on the left pane.
(If there are no service items created for the selected category) Select Service Item from the Create dropdown (as shown in the following figure).
The New Service Item page opens.
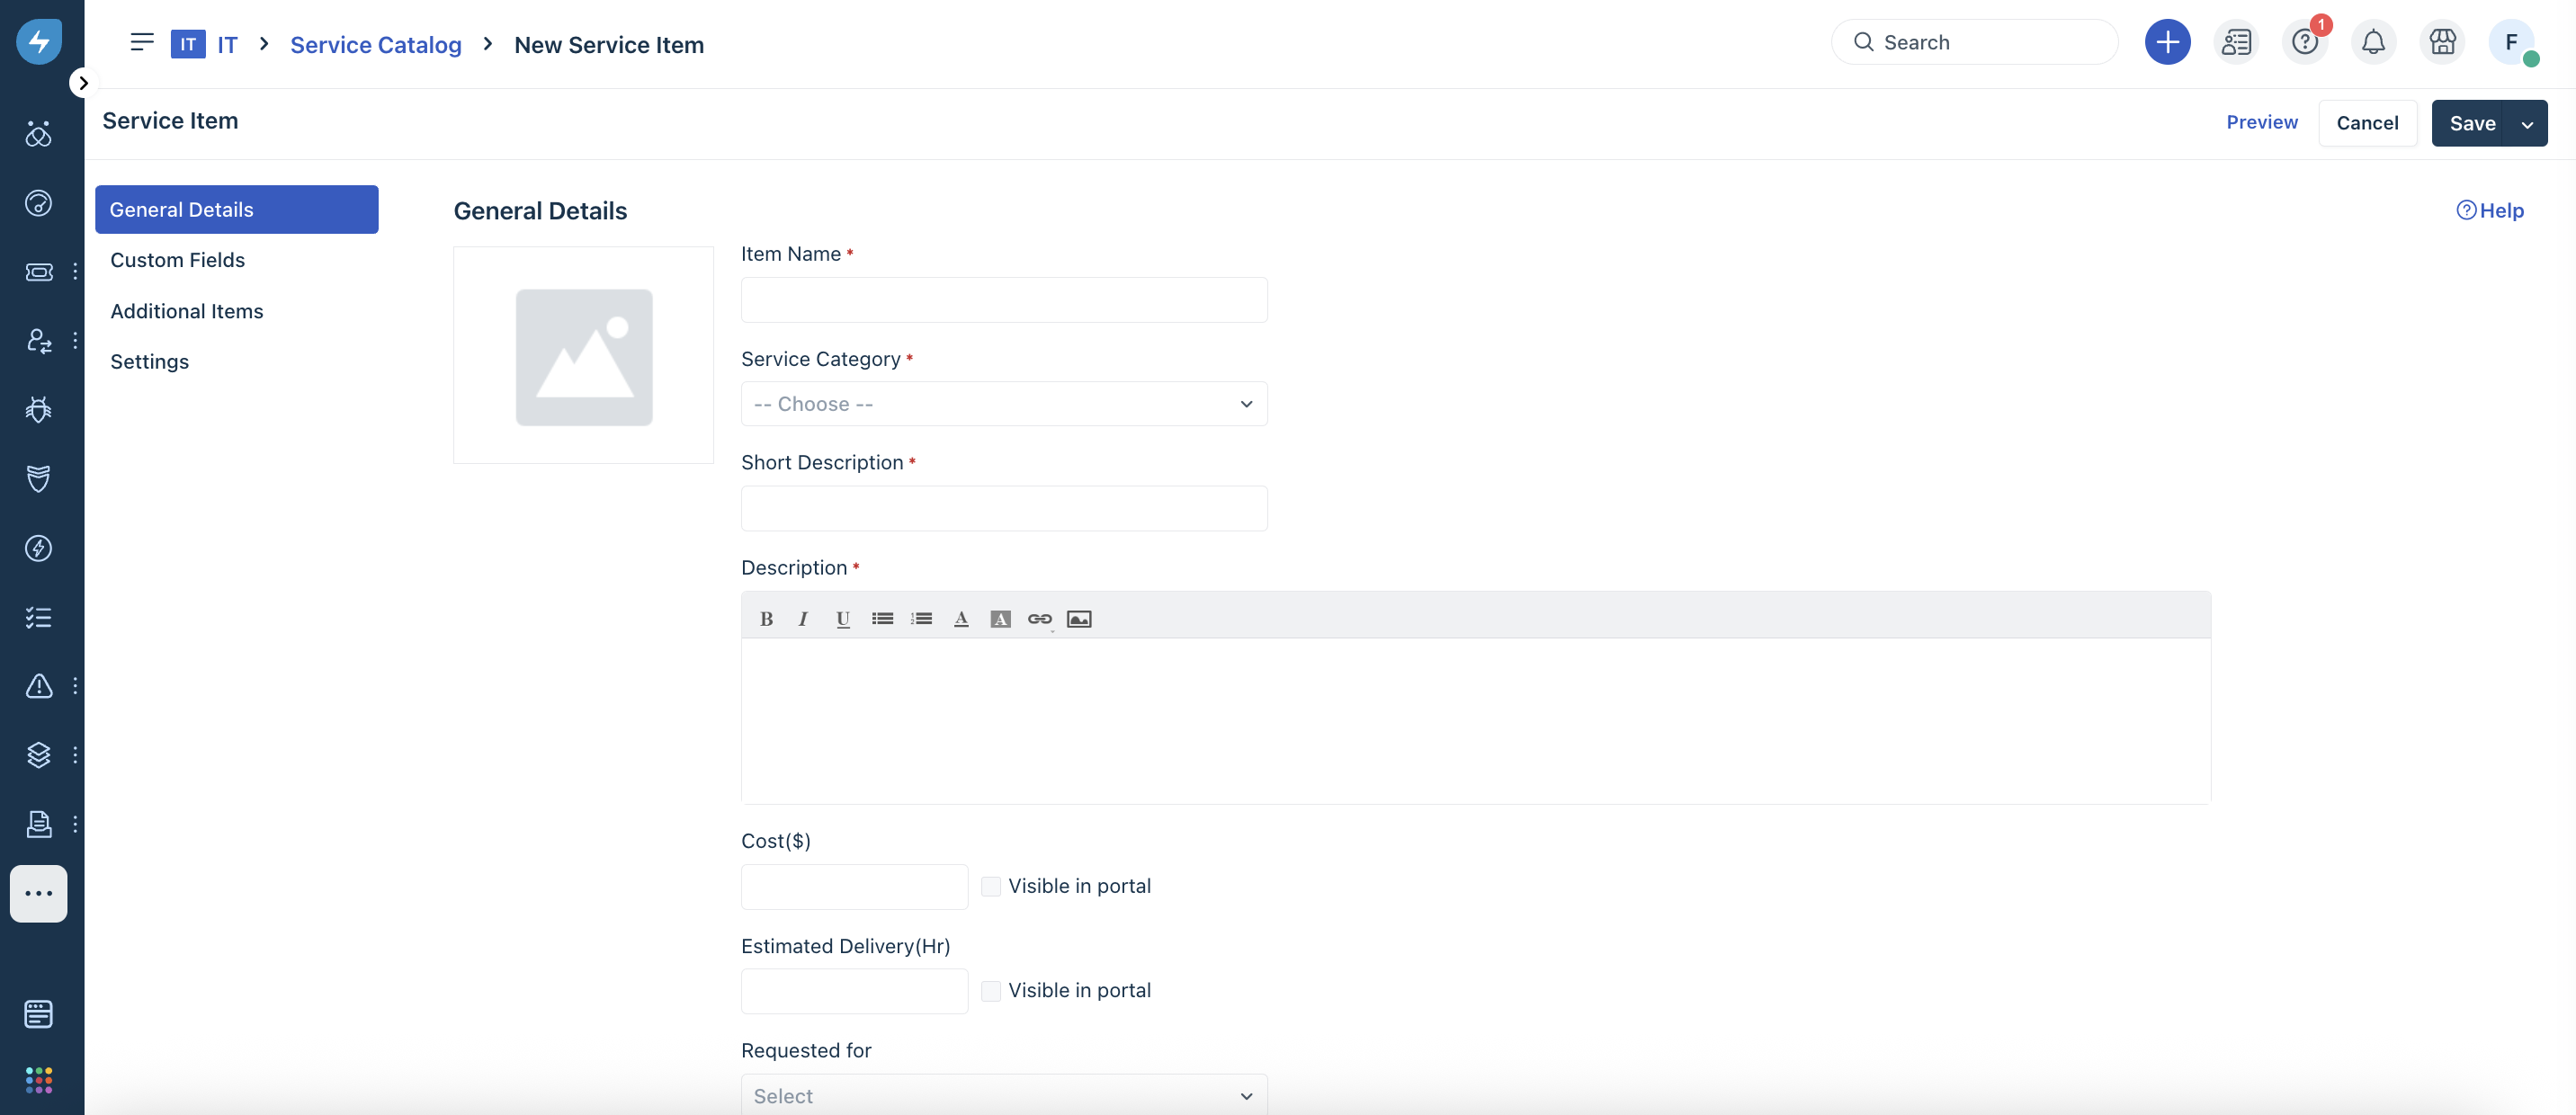
In the General Details section:
Enter a name in the Item Name field.
Select a relevant category from the Service Category dropdown.
Enter a short description and detailed description in the respective fields.
Enter the cost in USD in the Cost field. If required, select the Visible in portal checkbox.
Enter the estimated delivery in hours in the Estimated Delivery field. If required, select the Visible in portal checkbox.
Select a relevant option from the Requested for dropdown.
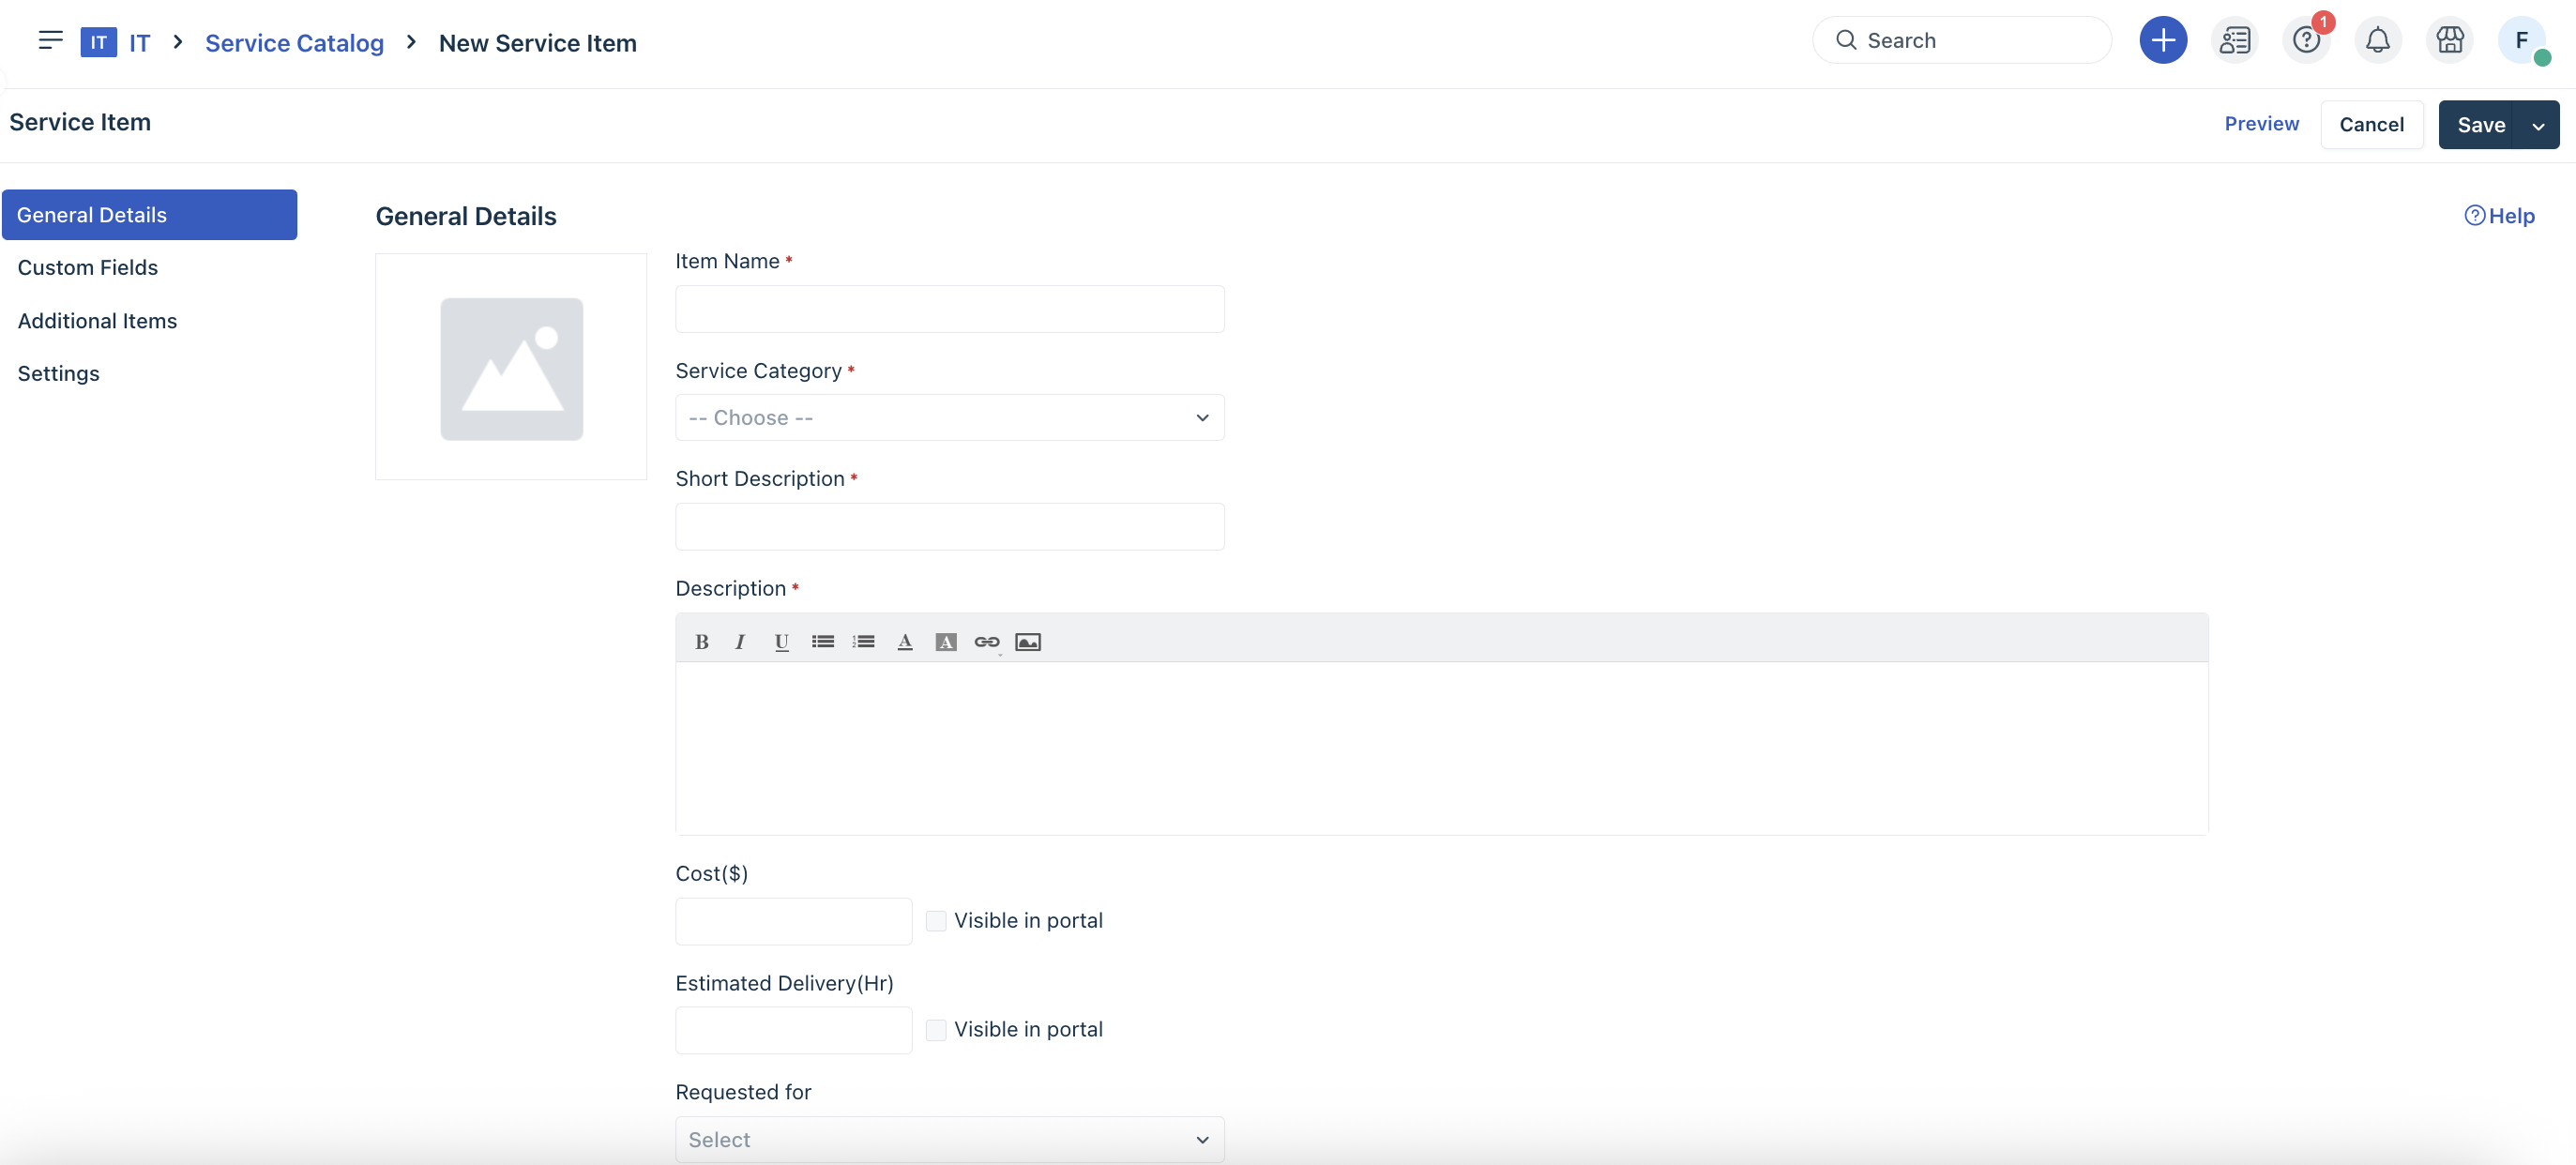
In the Custom Fields section, you can find a range of custom fields, such as text, paragraph text, checkbox, and so on.
Note: You can also add shared fields with the Add shared field option. See Manage Shared Fields for Service Categories and Items for more information.
Drag and drop the required custom fields on the Drag and drop fields here section. For example, select a text field and define the relevant field properties.
Select the access and behavior for custom fields.
Add lookup fields that will populate appropriate field properties and create relevant hierarchical relationships when your end-users fill out their forms. You can use dropdowns to navigate through the data and select different options you’ve configured. See Add a Lookup Field to a Service Item Form for more information.
Add content fields to all your incident and service item forms in Freshservice/FSBT. See Setting up rich-text sections with content fields for more information. You can create sections in your forms with content headers, and you can also add relevant links.
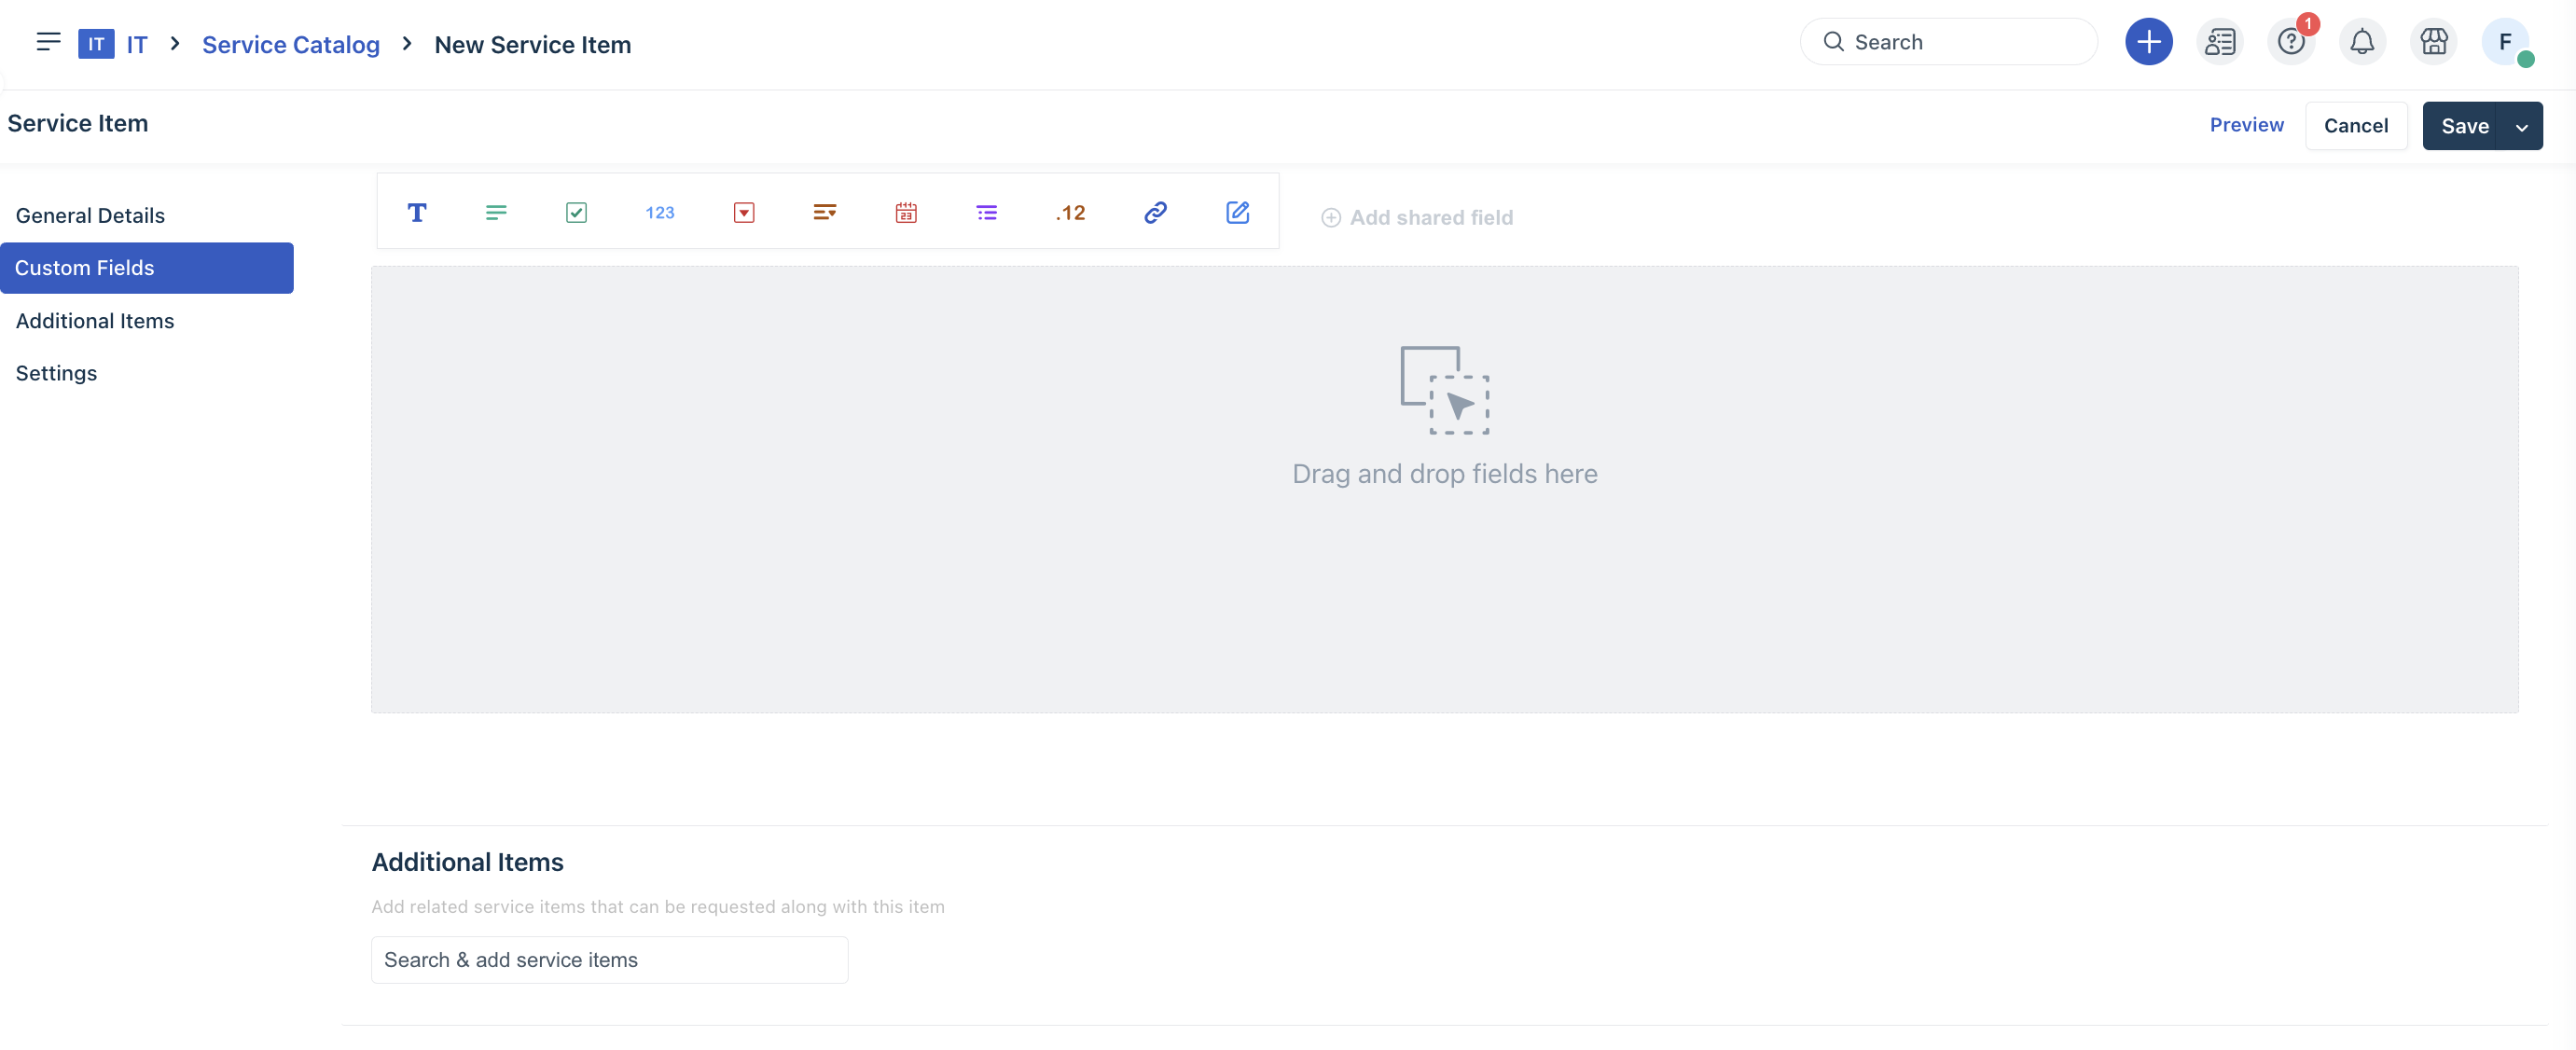
In the Additional Items section:
Search and include related service items that can be requested alongside the main service. This enhances the efficiency of service requests by providing the ability to select and request supplementary items. It also eliminates the need for your customers to create multiple requests for different service items. However, additional items must be added individually in the service catalog. This option is not available for loaner service items.
Mark certain additional items as mandatory.
Delete any item.
Select the Create Child Requests for each of the items above checkbox if you want individual child tickets to be created for each additional item. Enabling this option will link the added child tickets to the parent ticket. The child tickets will then be handled by agents in the respective departments, and the items must be delivered within the timeframe under the corresponding SLAs. If this checkbox is not selected, all the items fall under a single service request that can be assigned to just one agent. See Service Requests with Additional Items for more information.
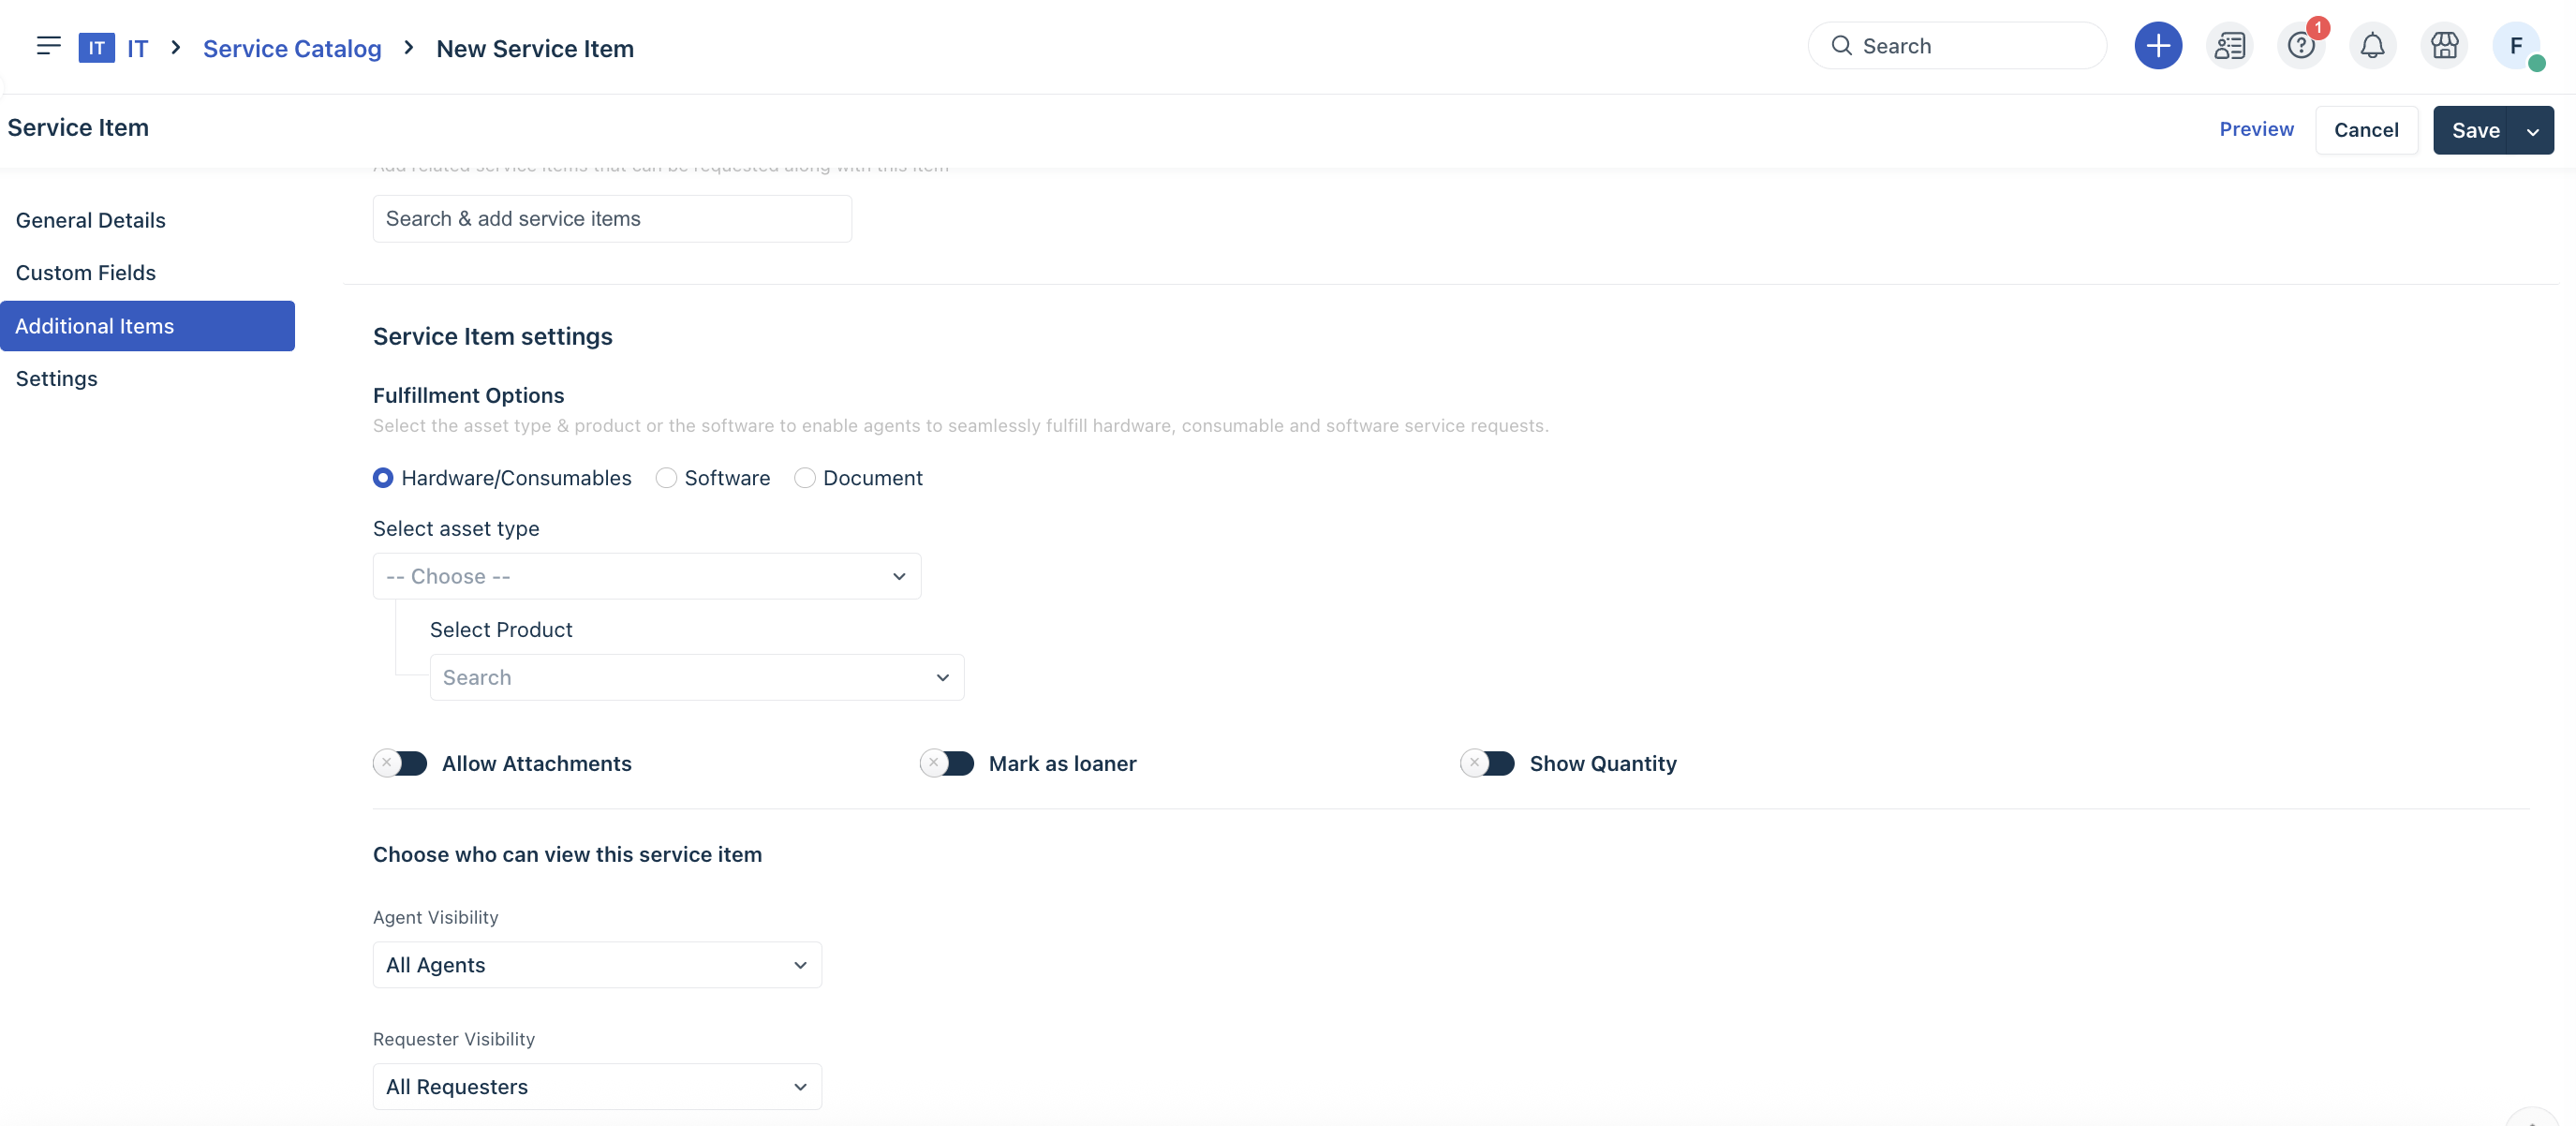
In the Service Item settings section, select the fulfilment options based on the service item.
Select the asset type and product from the respective dropdowns to enable agents to fulfil hardware, consumable, and software service requests seamlessly.
Note: For new signups after the 31 March, 2026 release, Hardware/Consumables has been replaced with Devices.Set up visibility options to restrict the visibility to specific requester groups.
Customize the subject of the service request raised for this item.
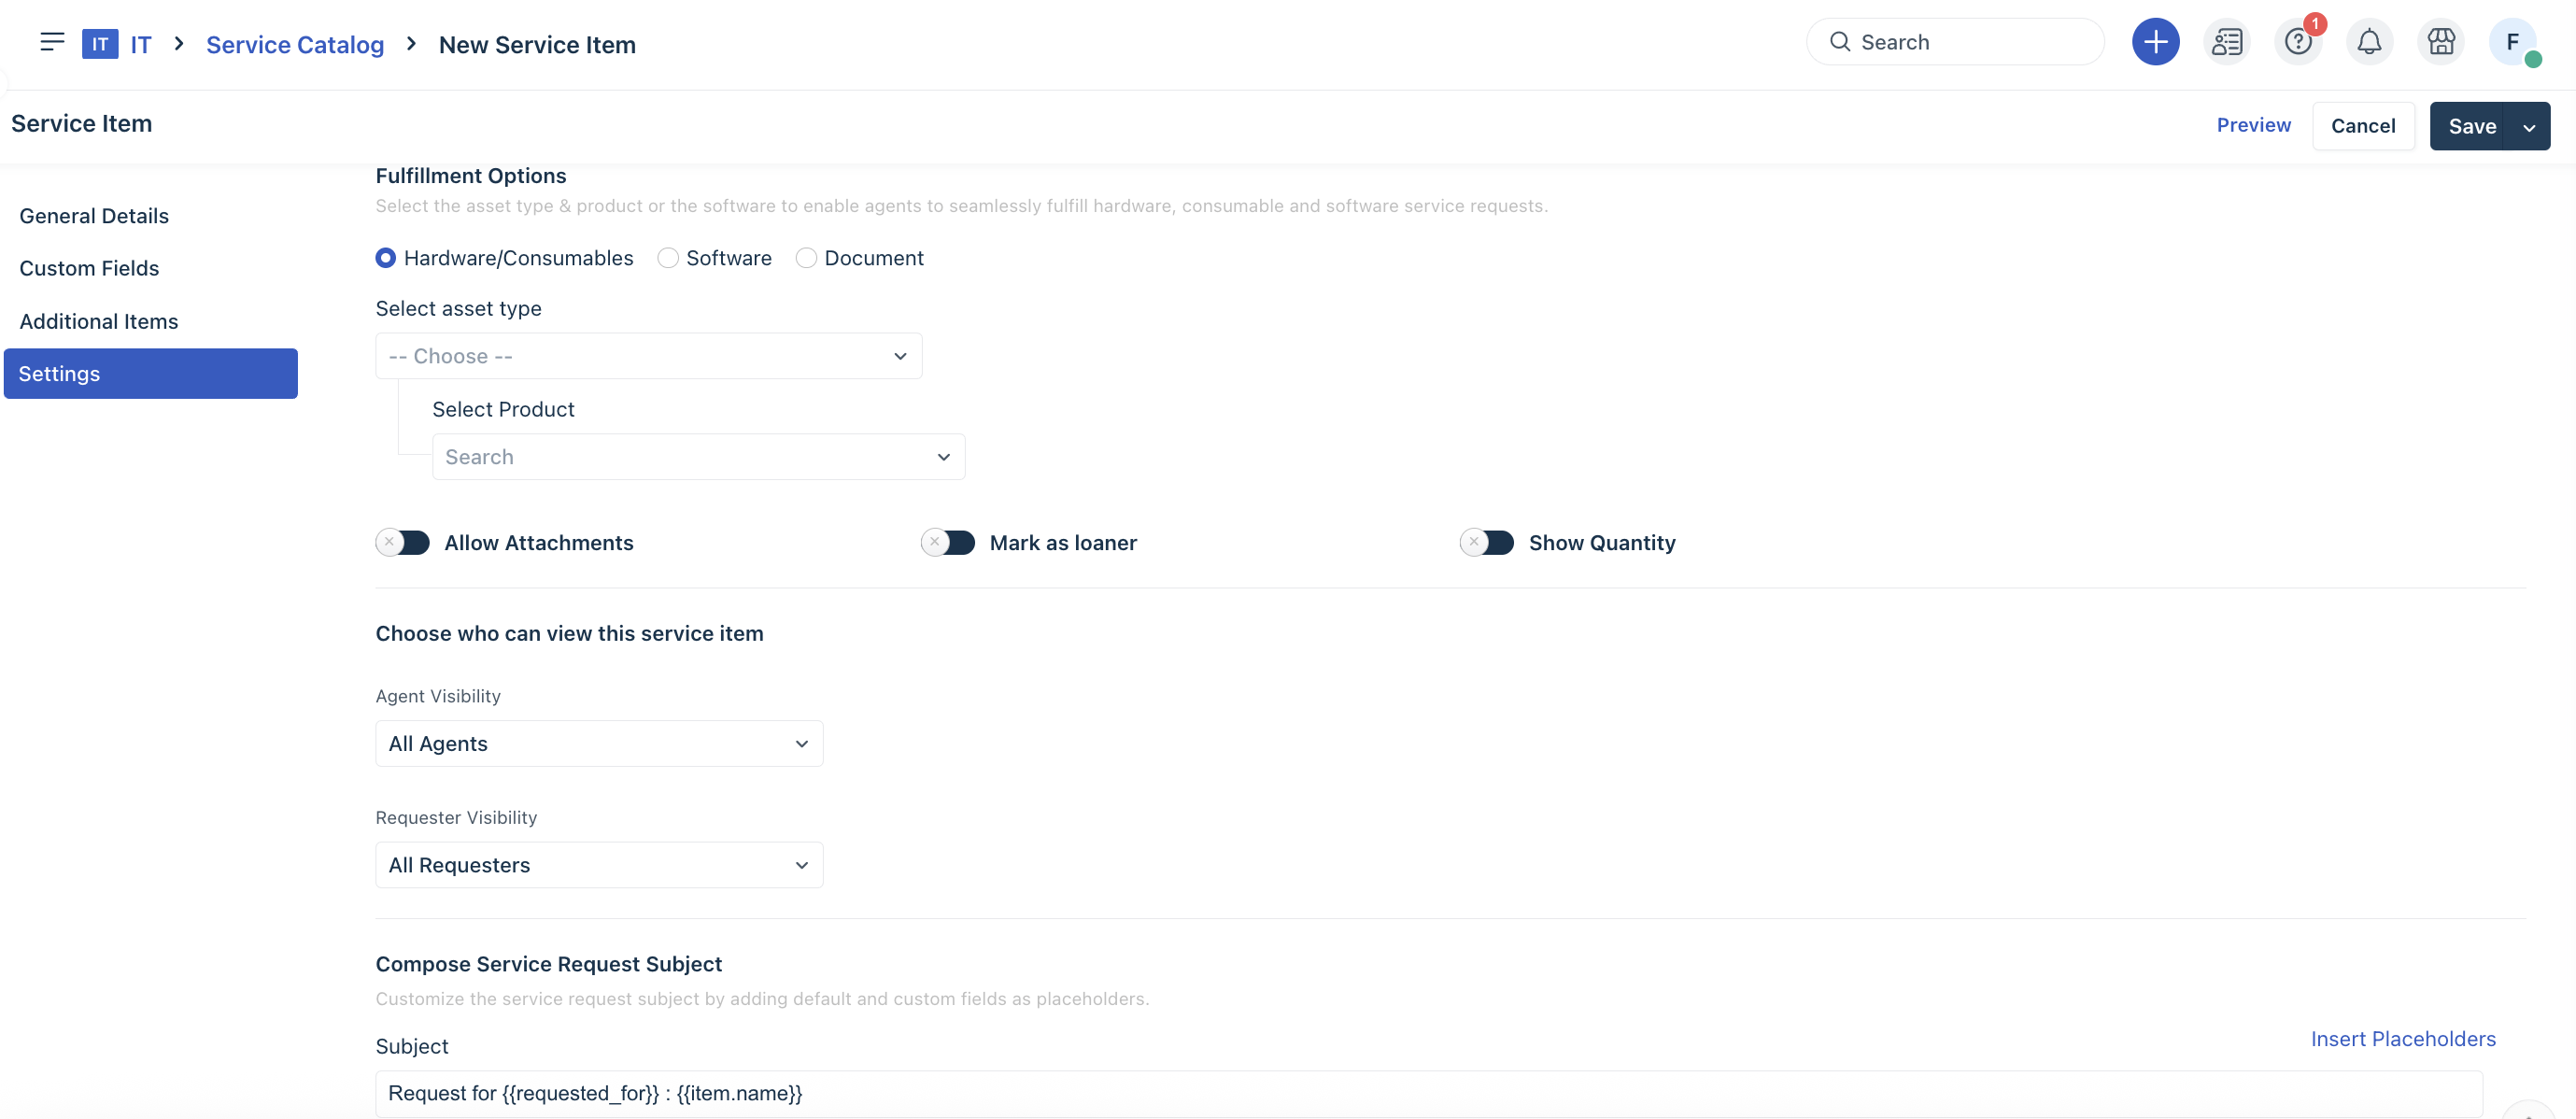
Select Save & Publish from the Save dropdown at the top-right corner to save the service item, or select Save as Draft to revisit later.
Manage service categories, subcategories, and items
You can manage various actions associated with service categories, subcategories, and items, such as updating the name or description, cloning, reordering, moving a category, changing the status, and so on.
Manage service categories and subcategories
Go to Admin > {Workspace Name} > Service Management > Service Catalog.
(To edit a service category or subcategory) Click the pen icon next to the category or subcategory name.
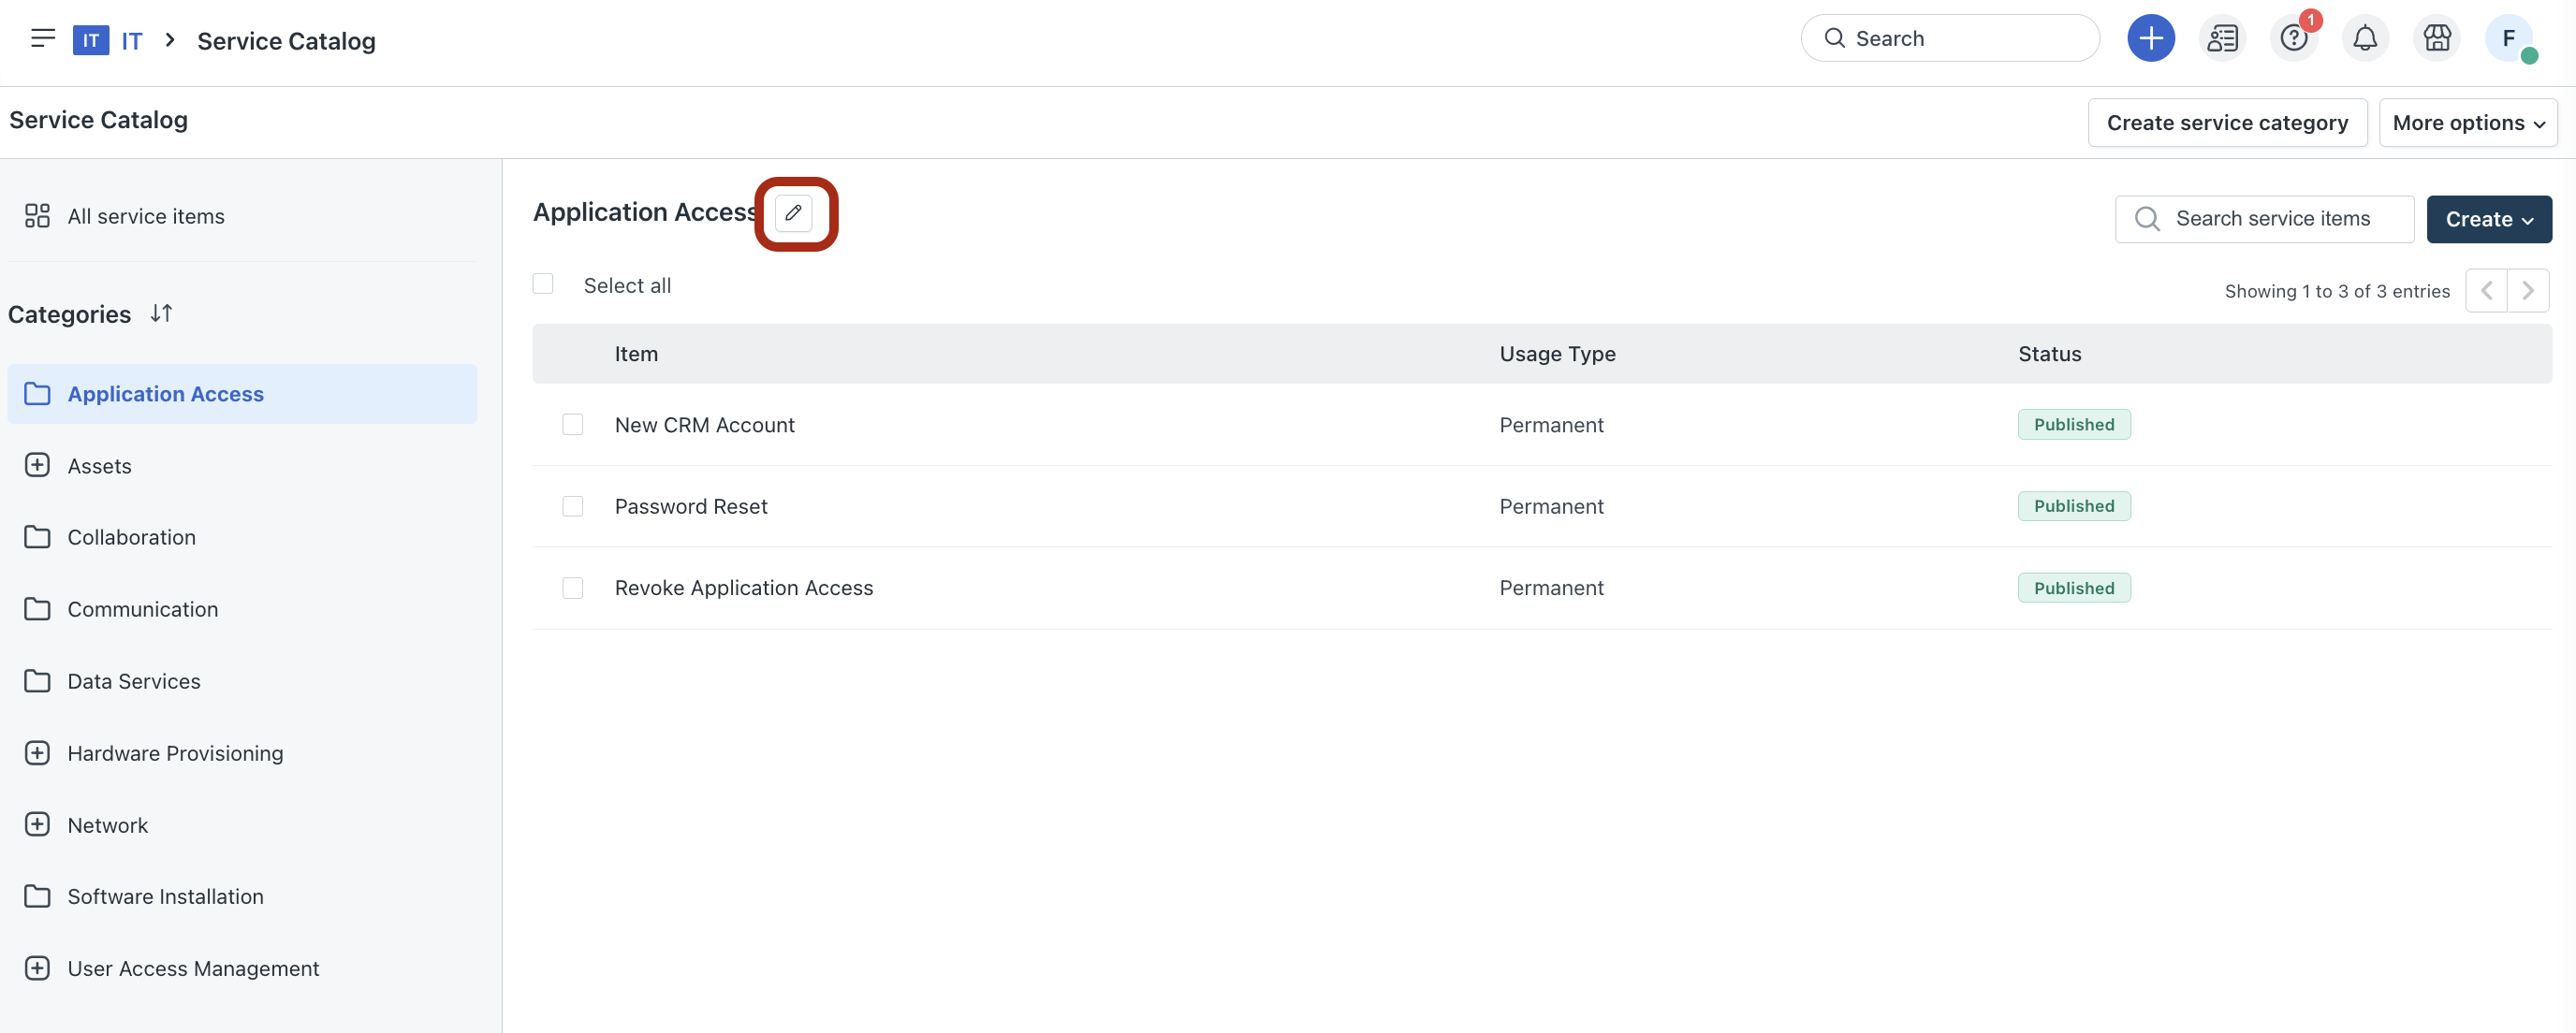
The Edit service category dialog opens.
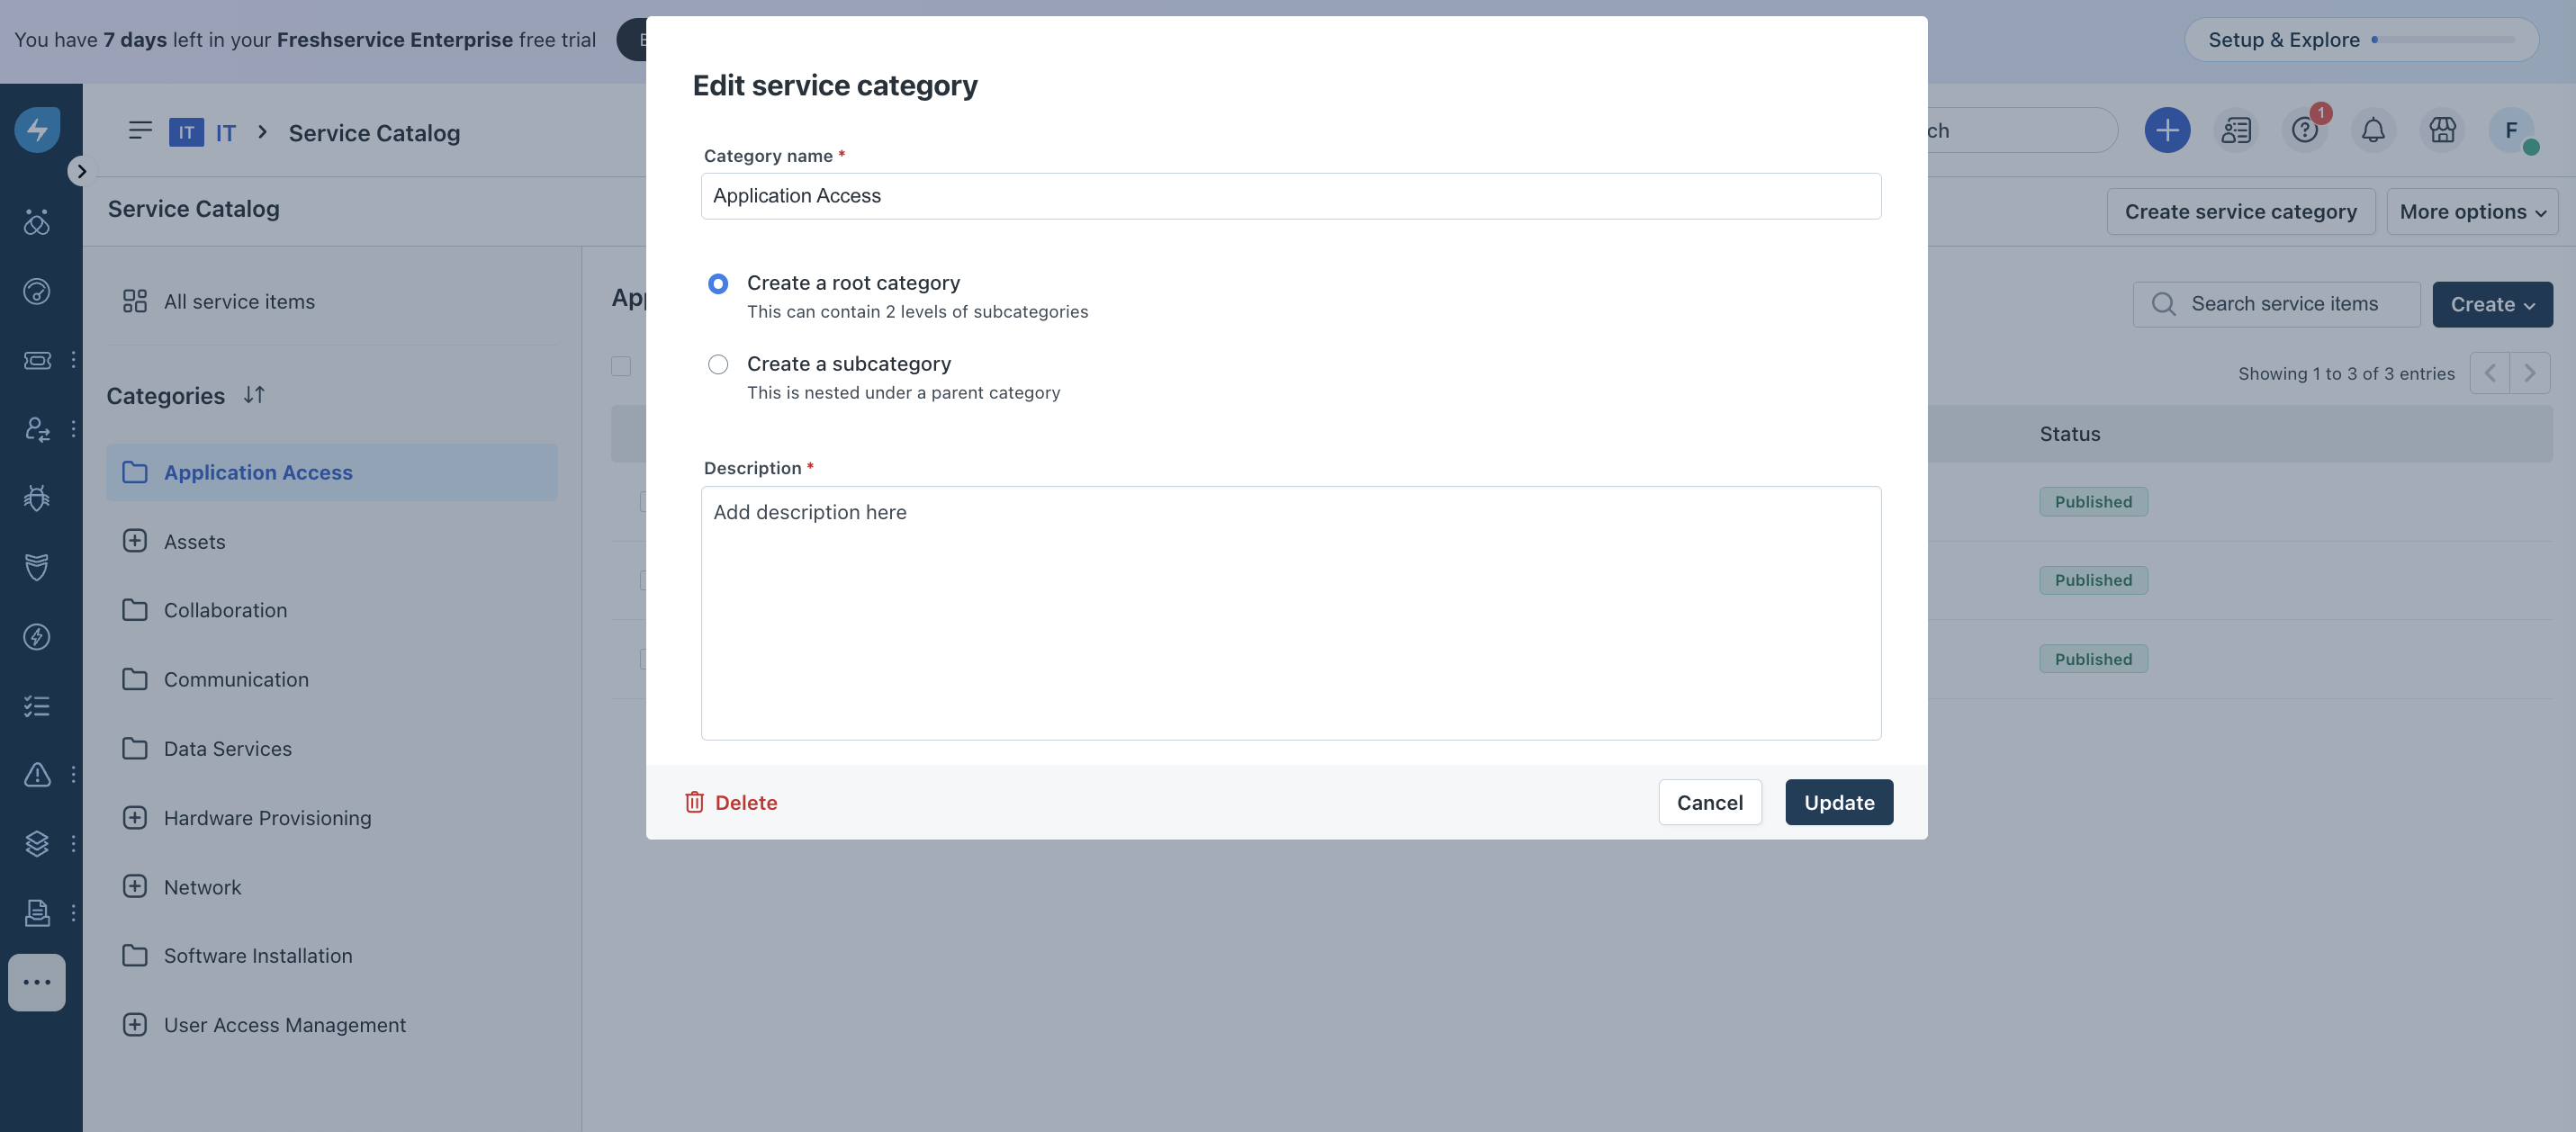
Make the necessary changes, and click Update.
(To reorder subcategories) Hover over a category name under Categories on the left pane, and select the Reorder subcategories icon.
Note: By default, A-Z order is selected.
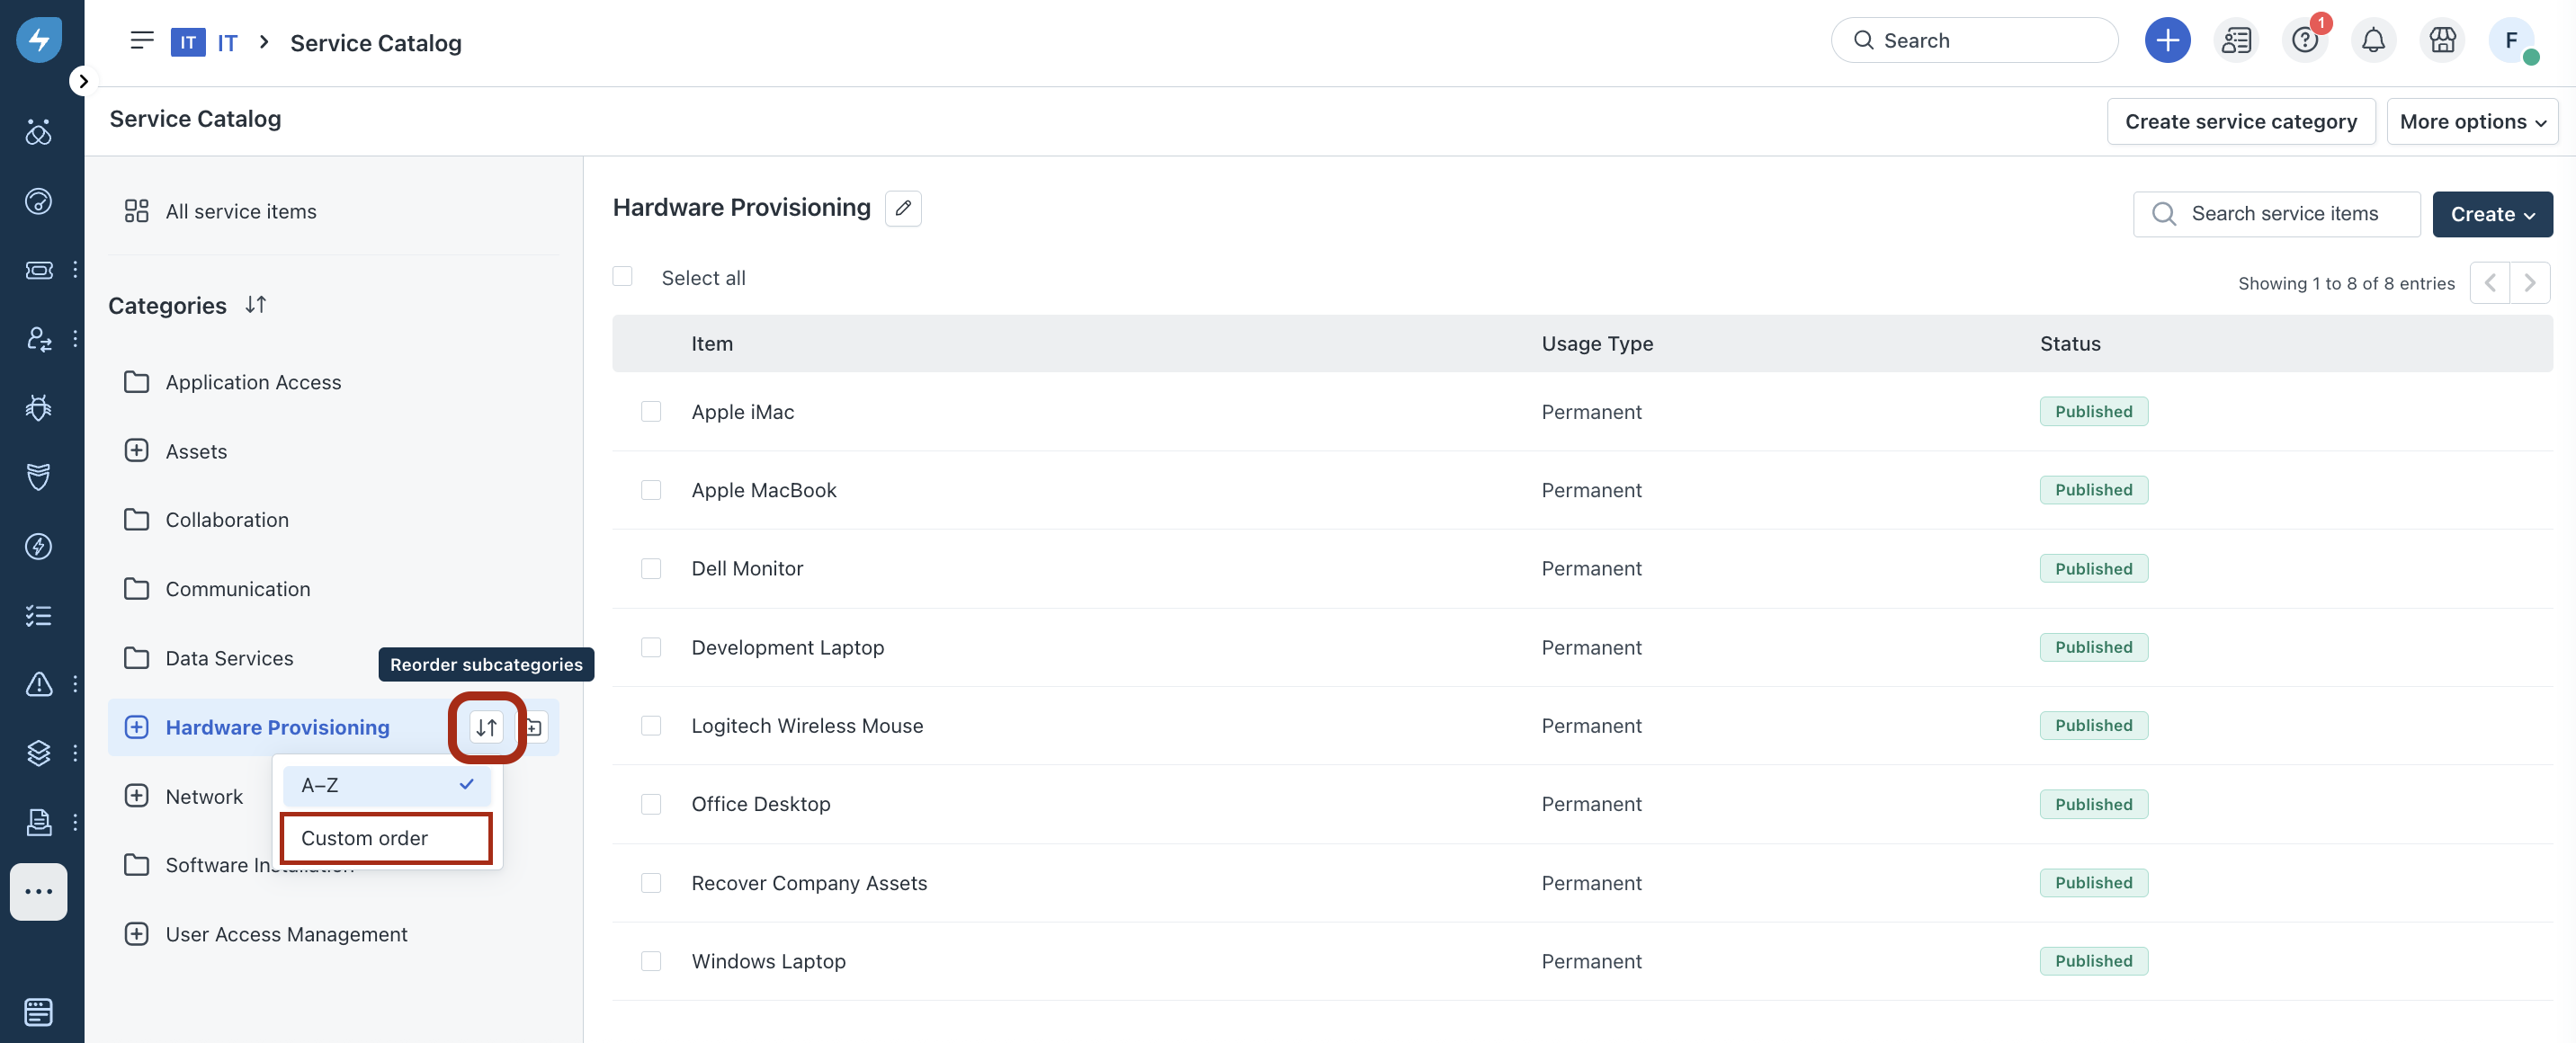
Click Custom order to reorder the subcategories. The Reorder subcategories pane opens on the right side of the page.
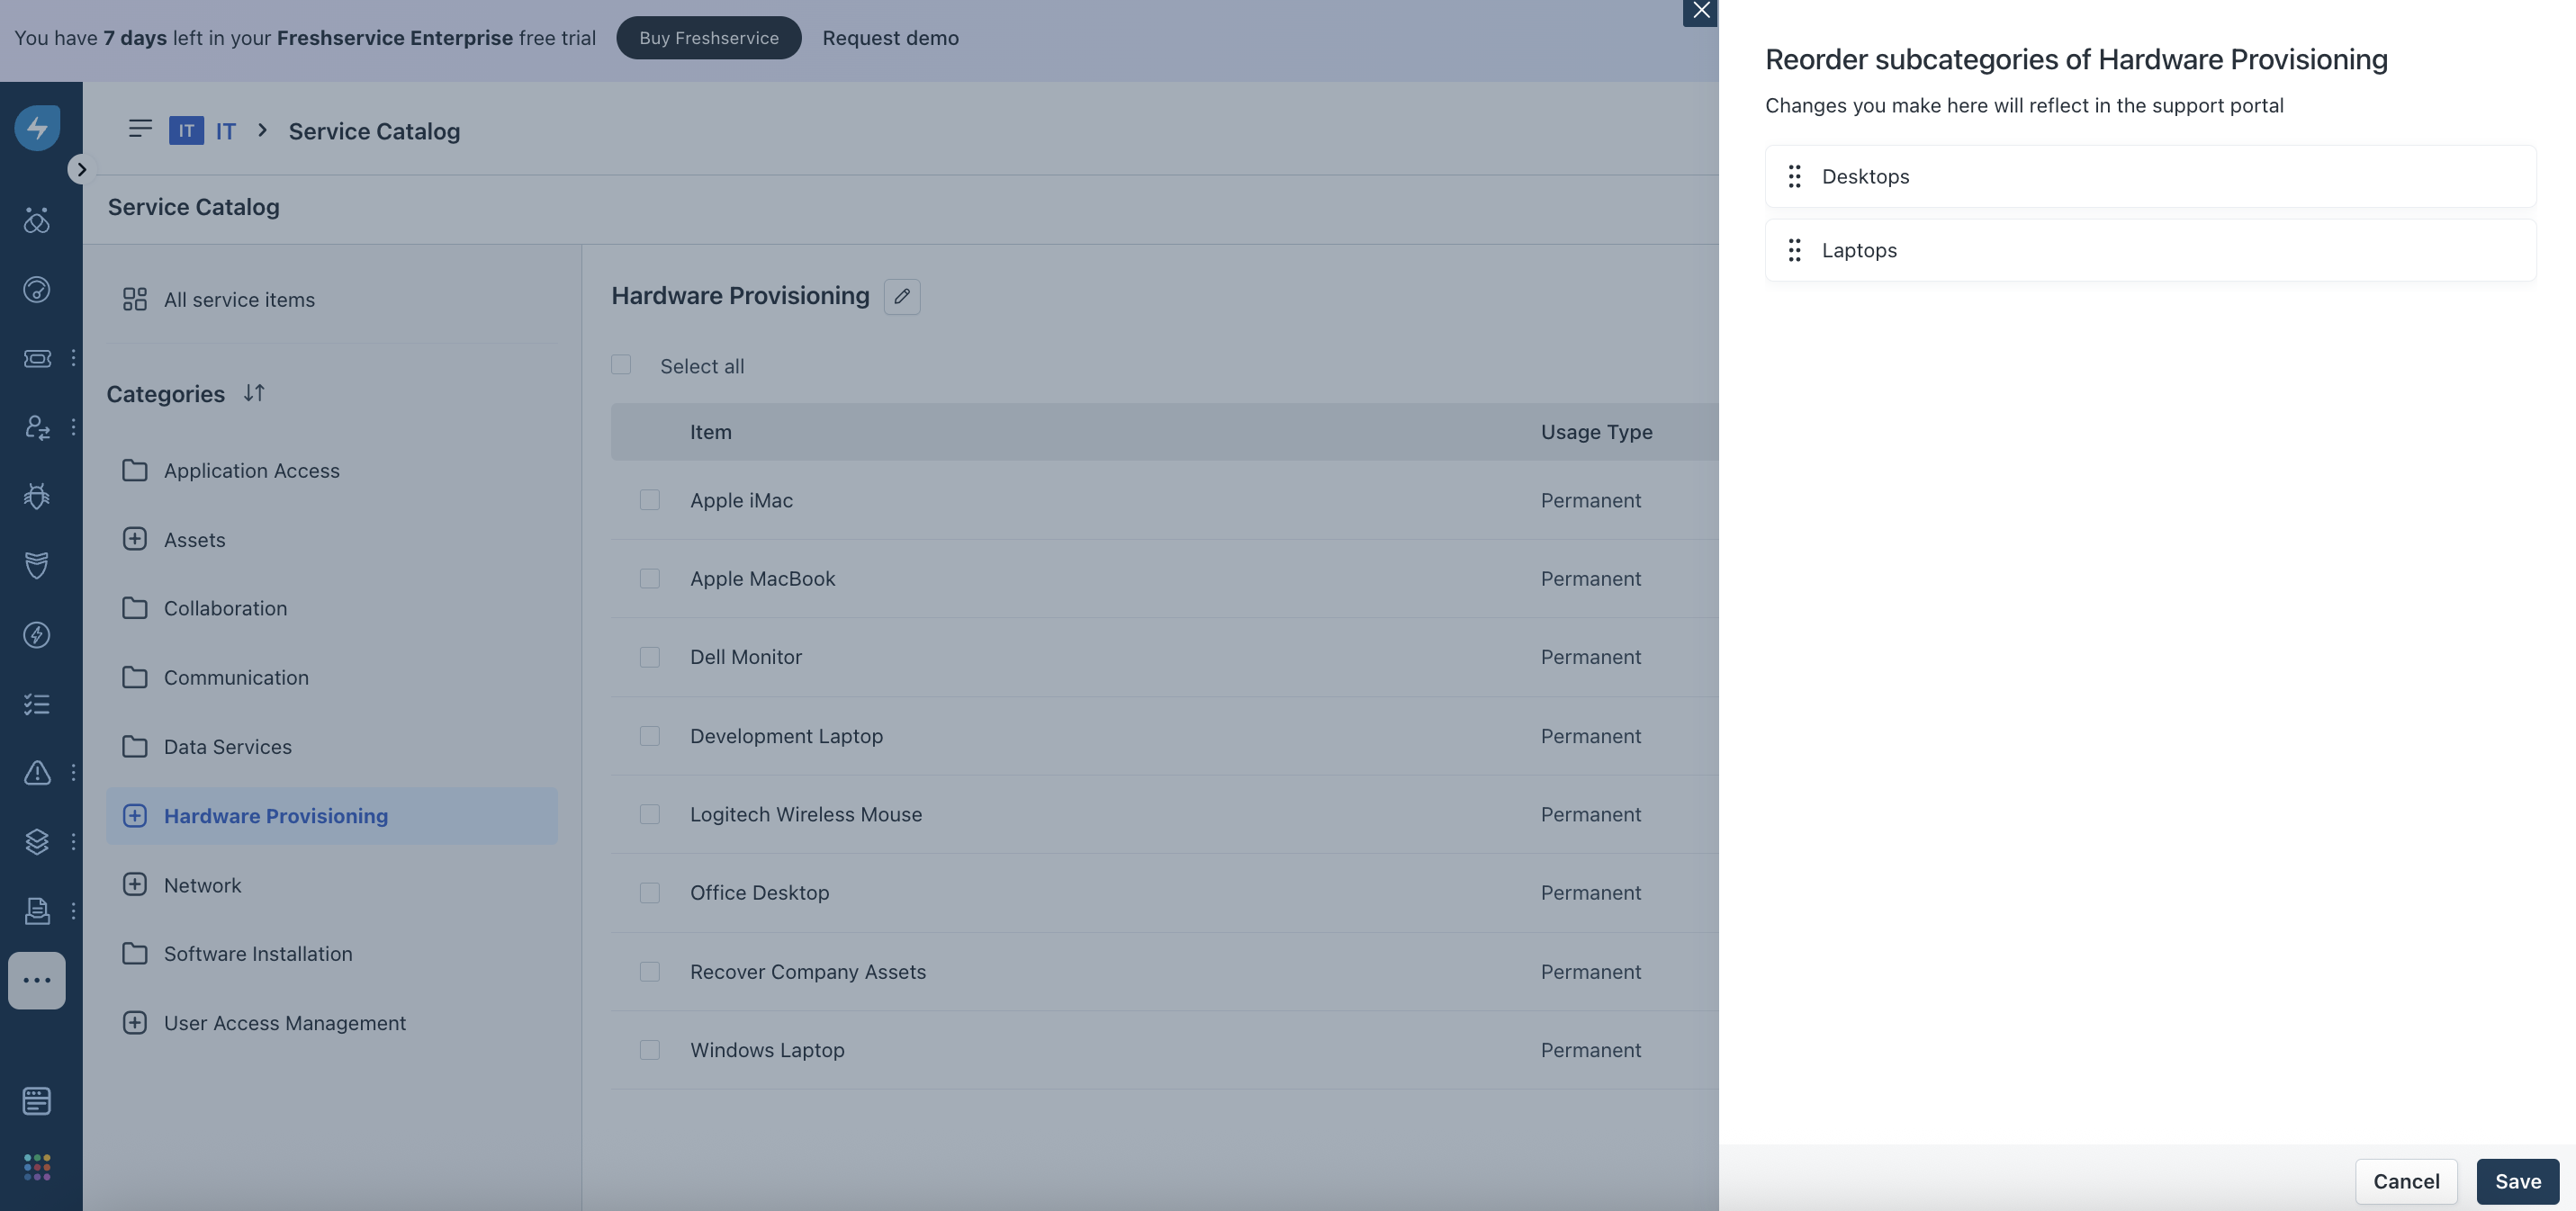
Reorder the subcategories (as required), and click Save.
(To delete a service category or subcategory) Click the pen icon next to the category or subcategory name.
Click Delete on the Edit service category dialog that opens.
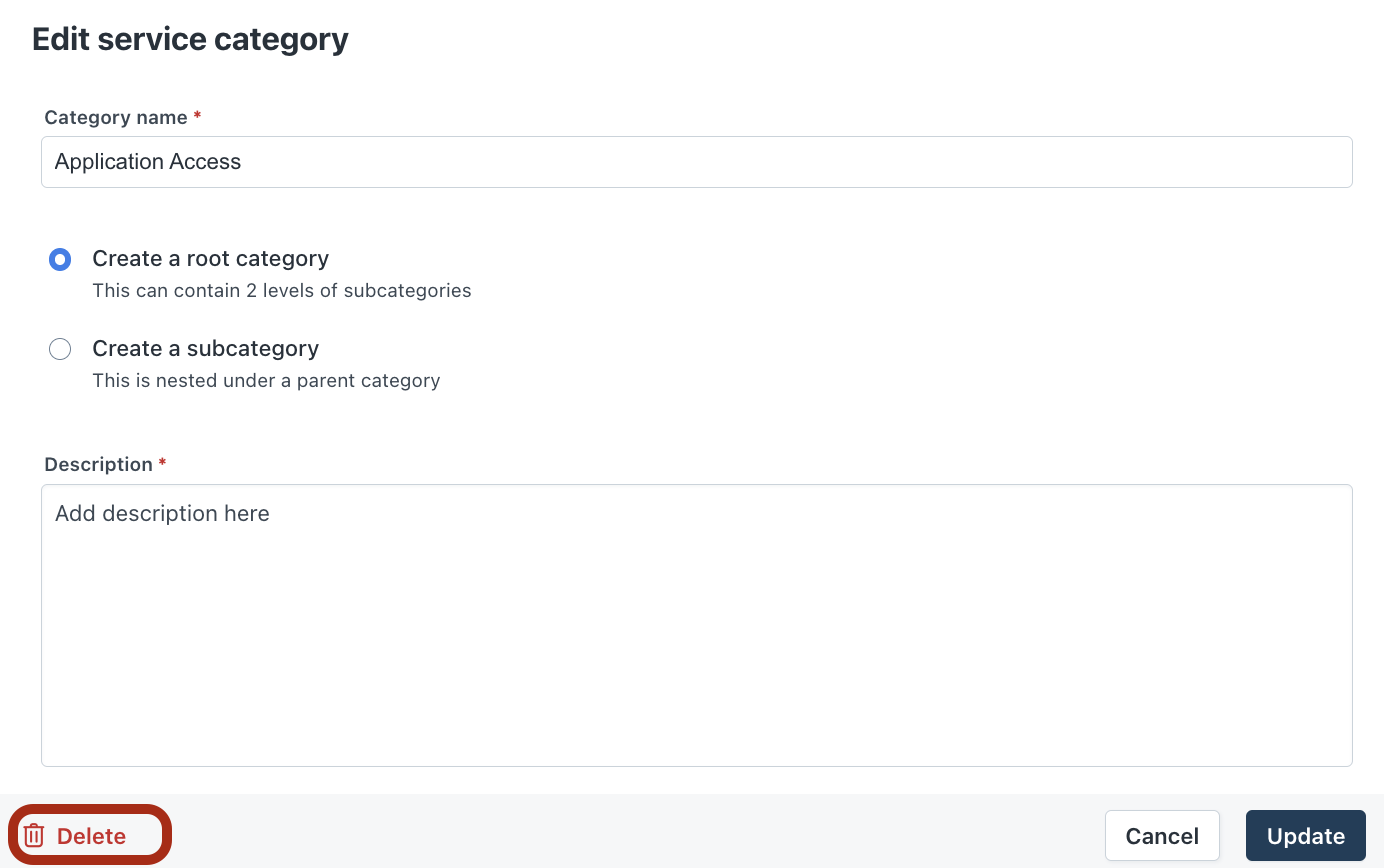
Then, click Delete on the Delete service category dialog that opens.
Note: Deleting a service category or subcategory will also delete the associated subcategories and service items (if any).
Manage service items
Go to Admin > {Workspace Name} > Service Management > Service Catalog.
(To clone a service item) Hover over a service item, and select the Clone icon.
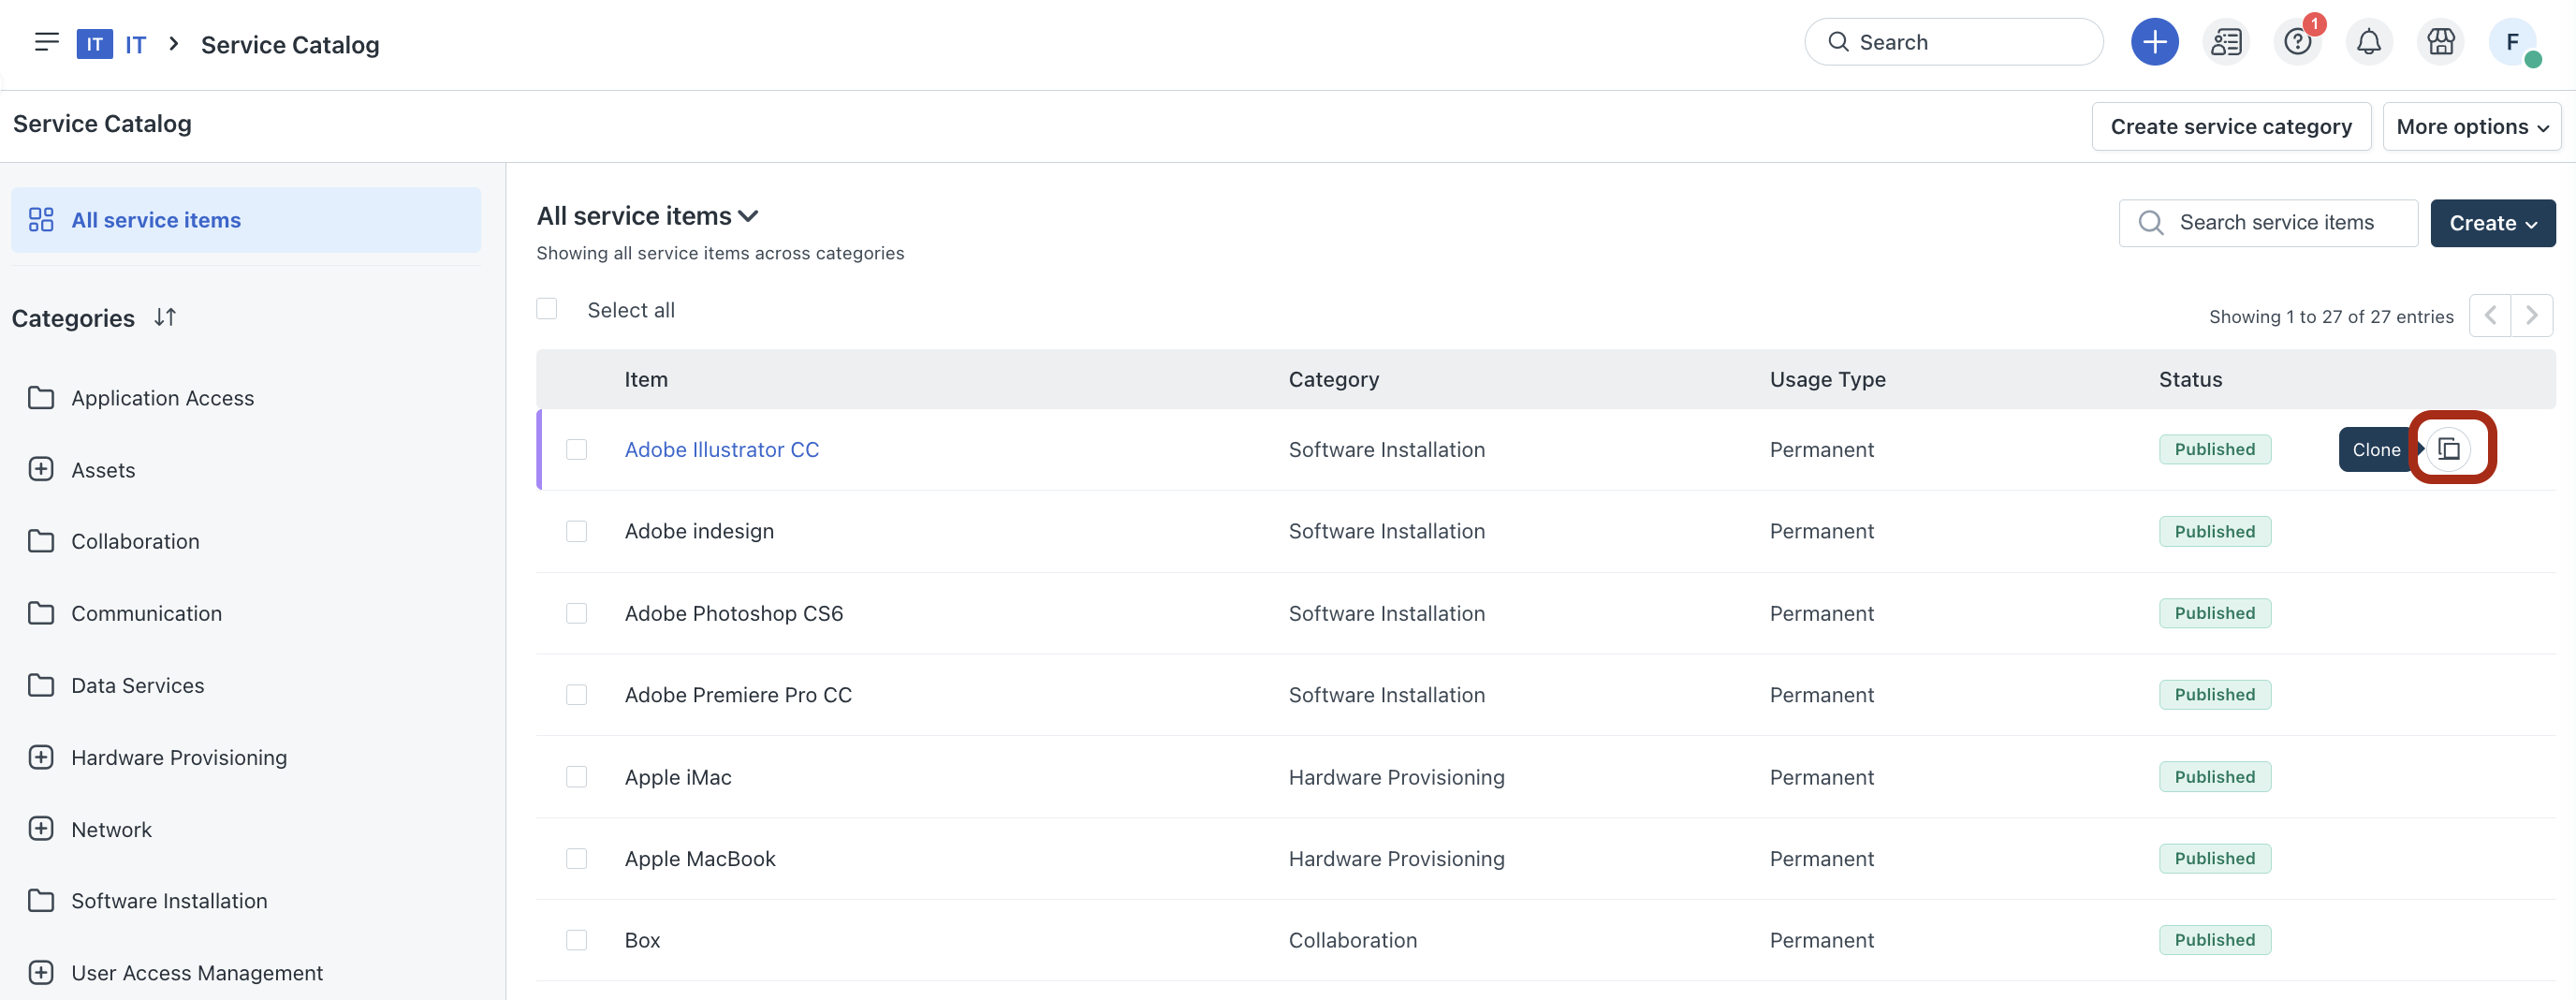
The Clone Service Item page opens.
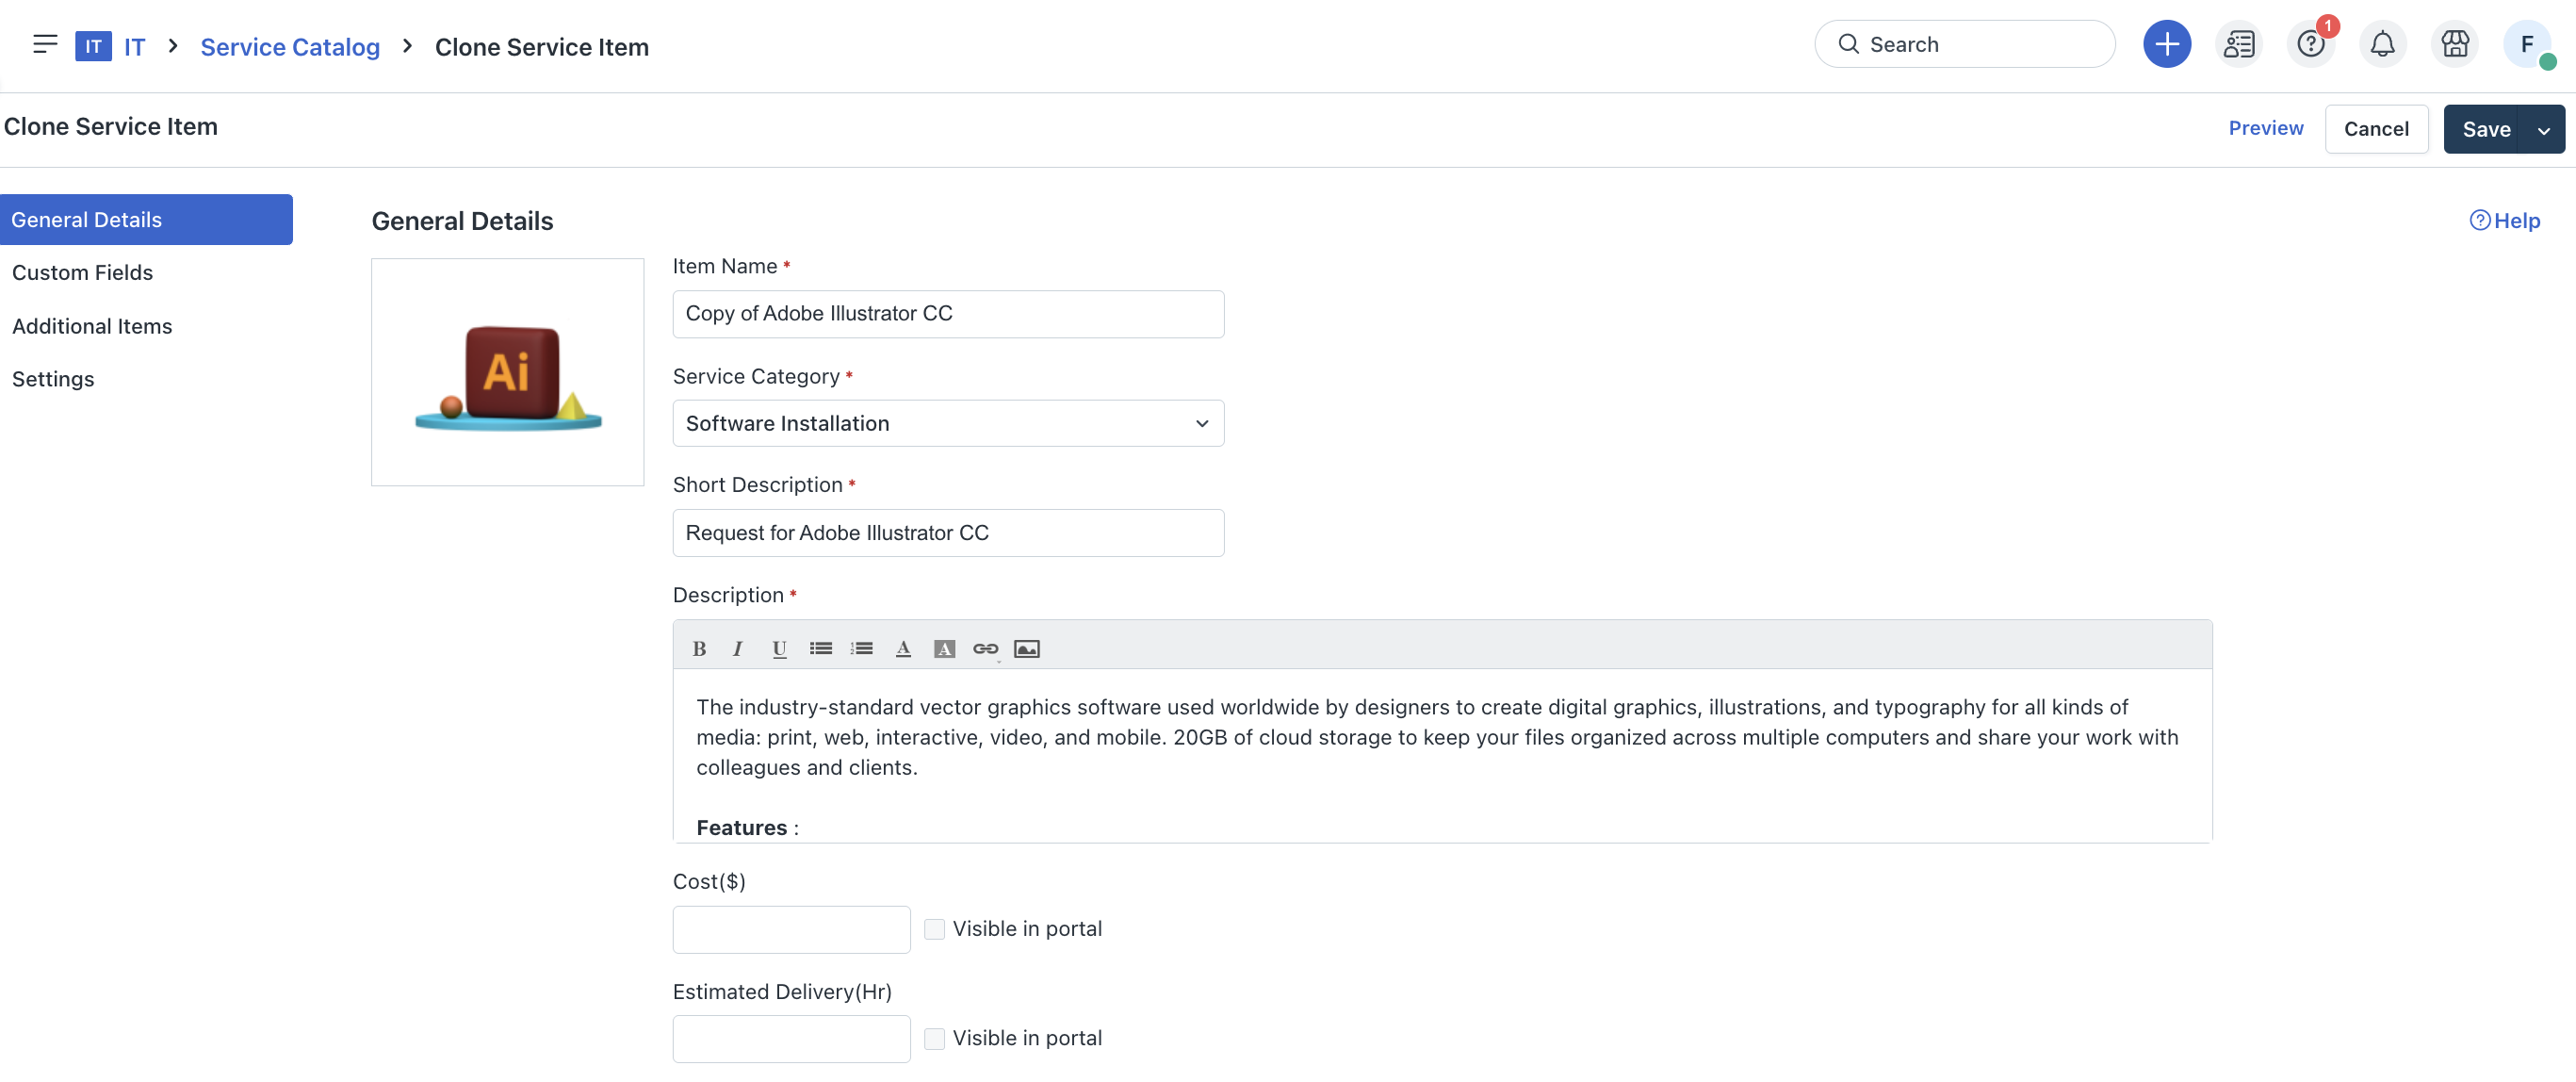
Follow the instructions under Create a service item to update the cloned service item’s general details, custom fields, and so on.
(To change the category of a service item) Select the required service item, and click Move to Category.
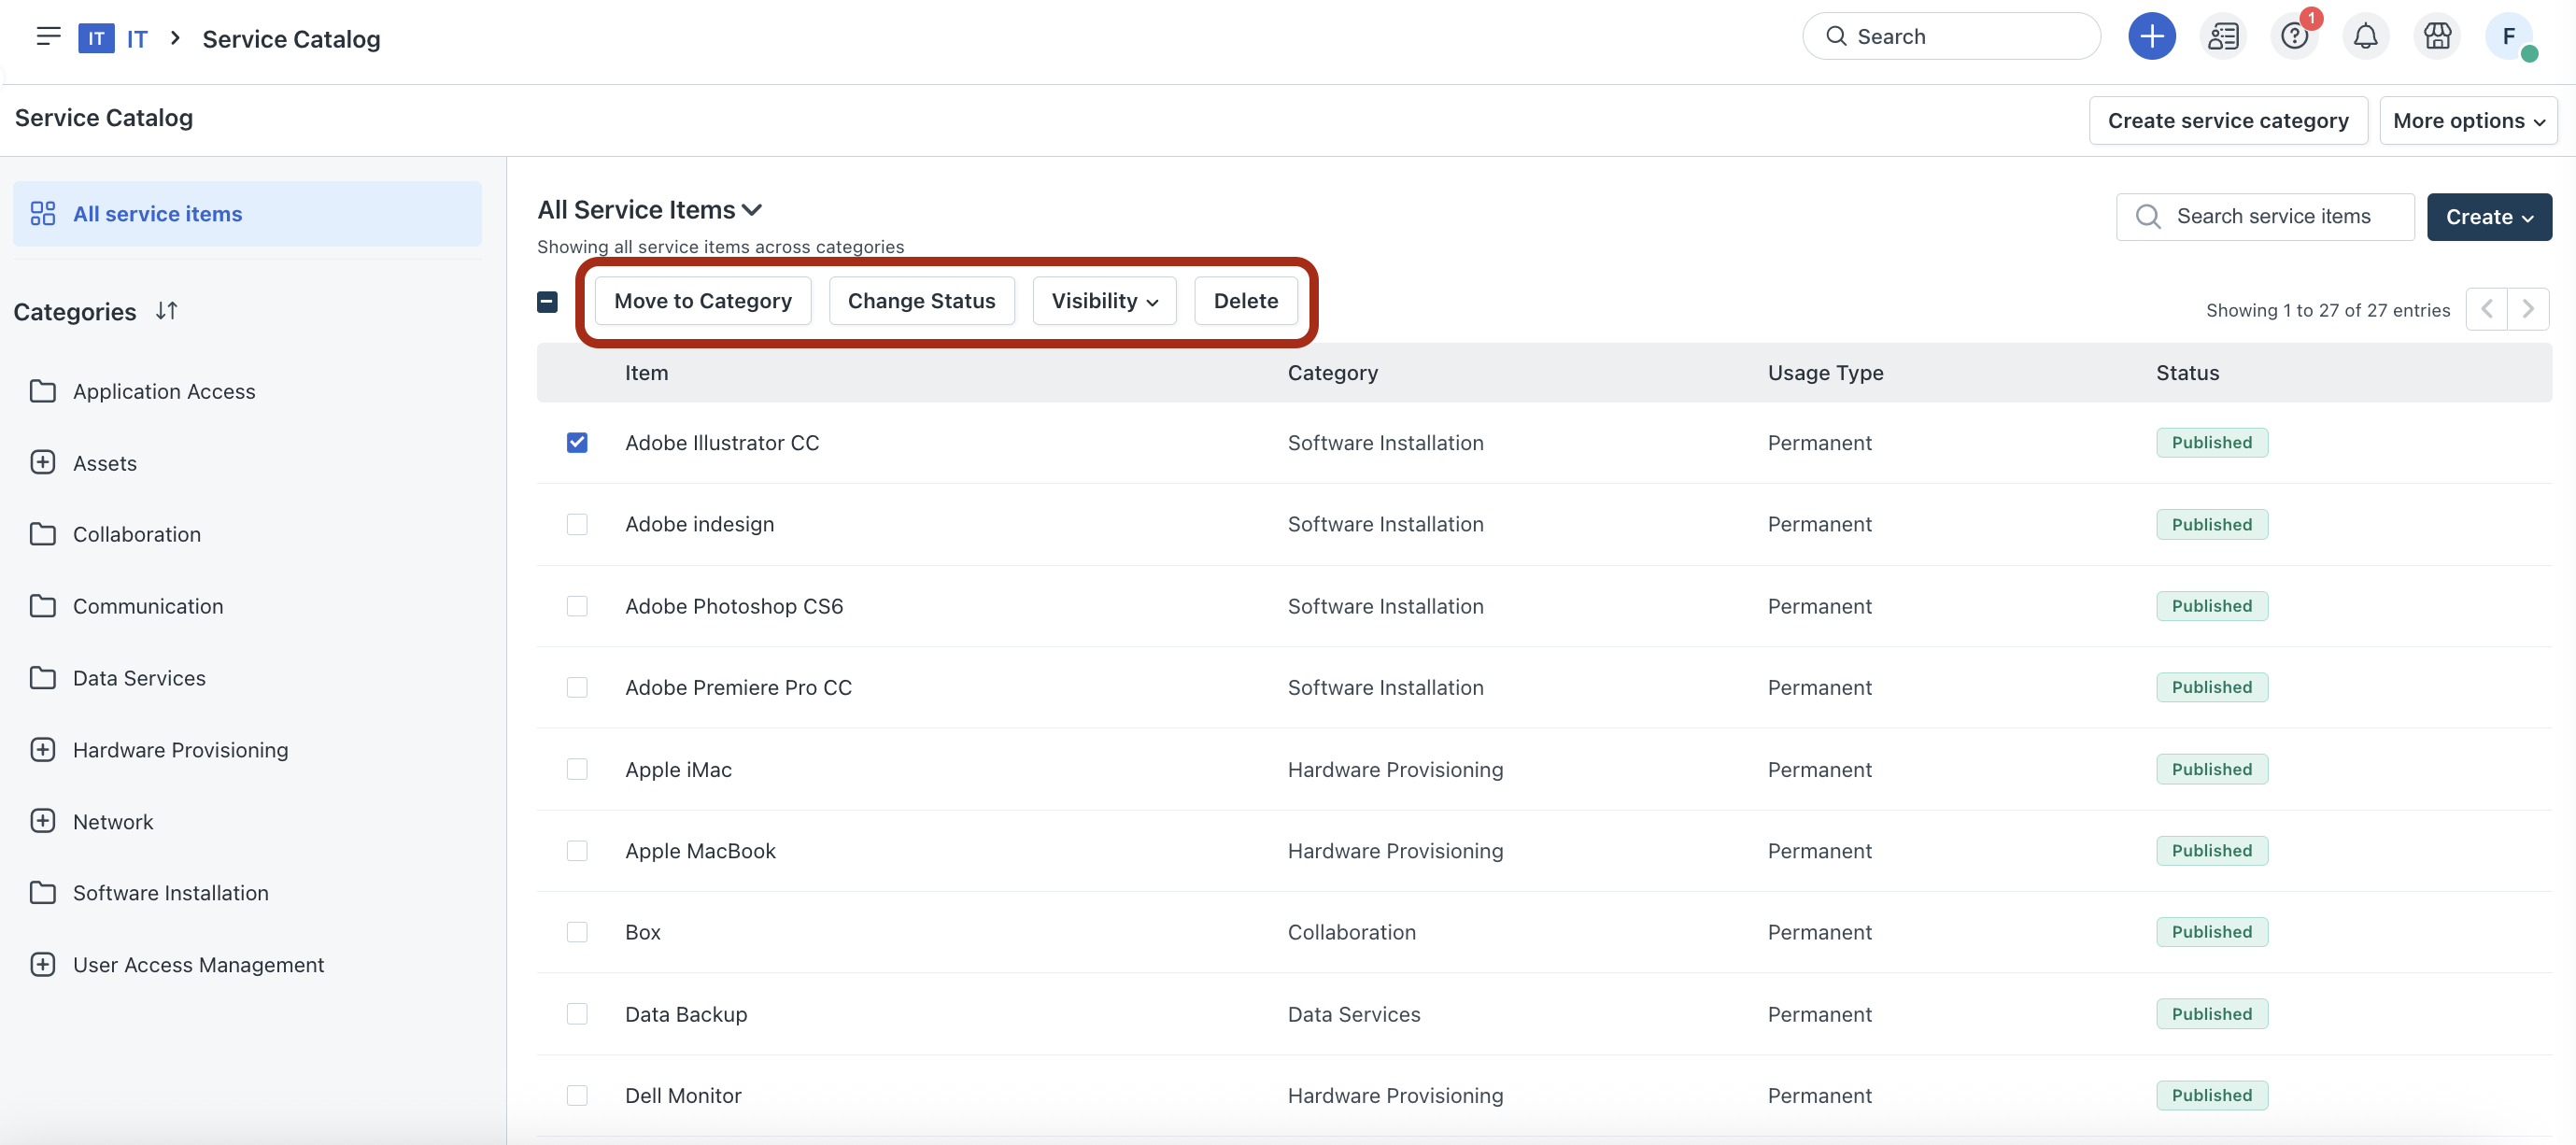
The Move to another category dialog opens.
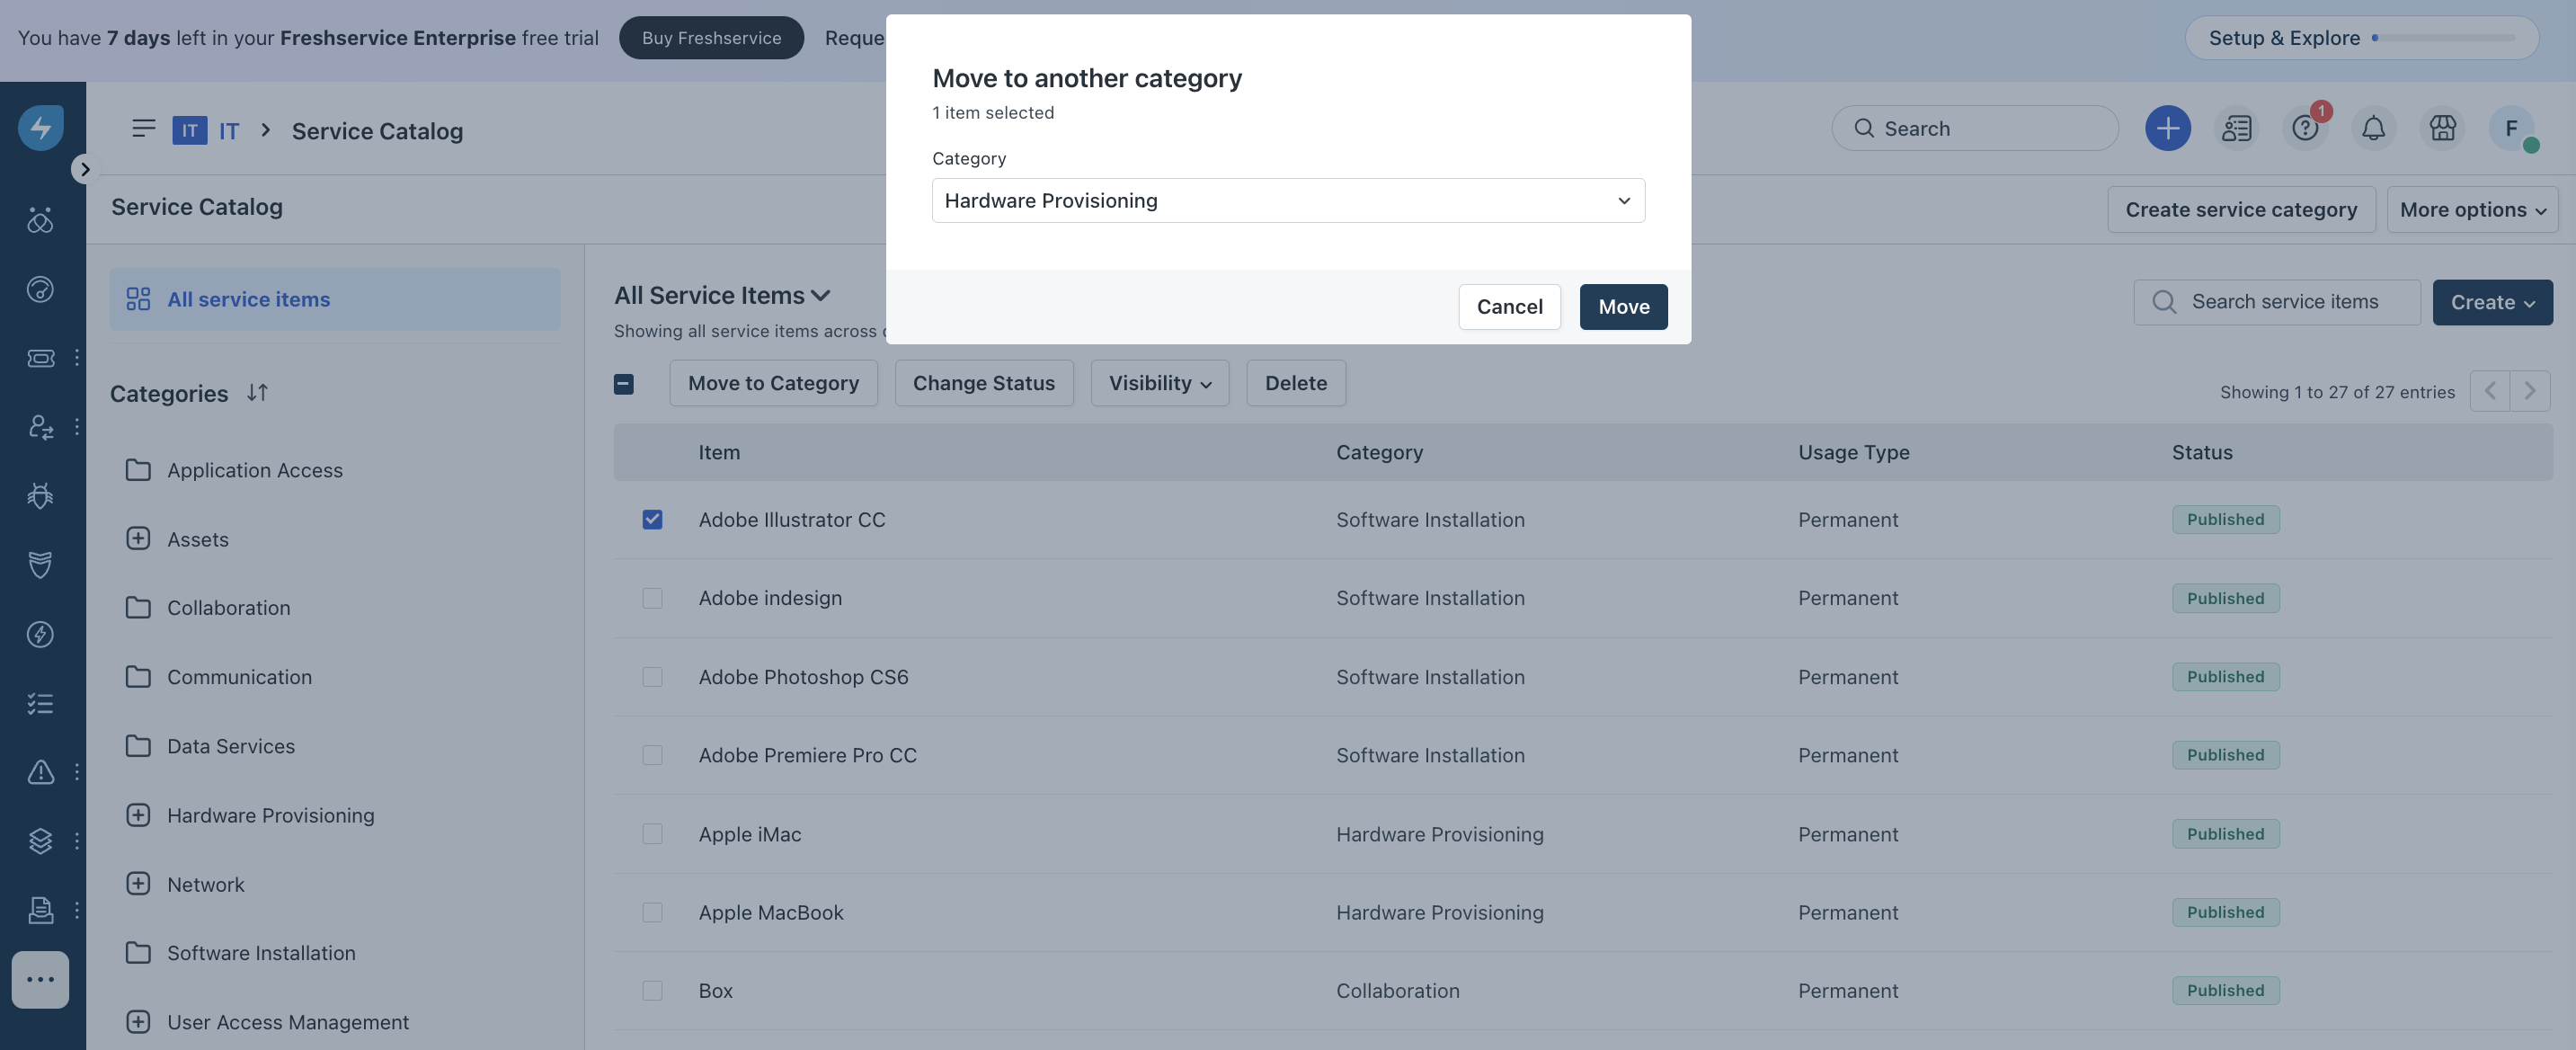
Select the required category from the dropdown, and click Move.
(To change the status of a service item) Select the required service item, and click Change Status. The Change Status dialog opens.
Select the required status, and click Save.
(To modify the visibility of a service item) Select the required service item, then select the required option from the Visibility dropdown.
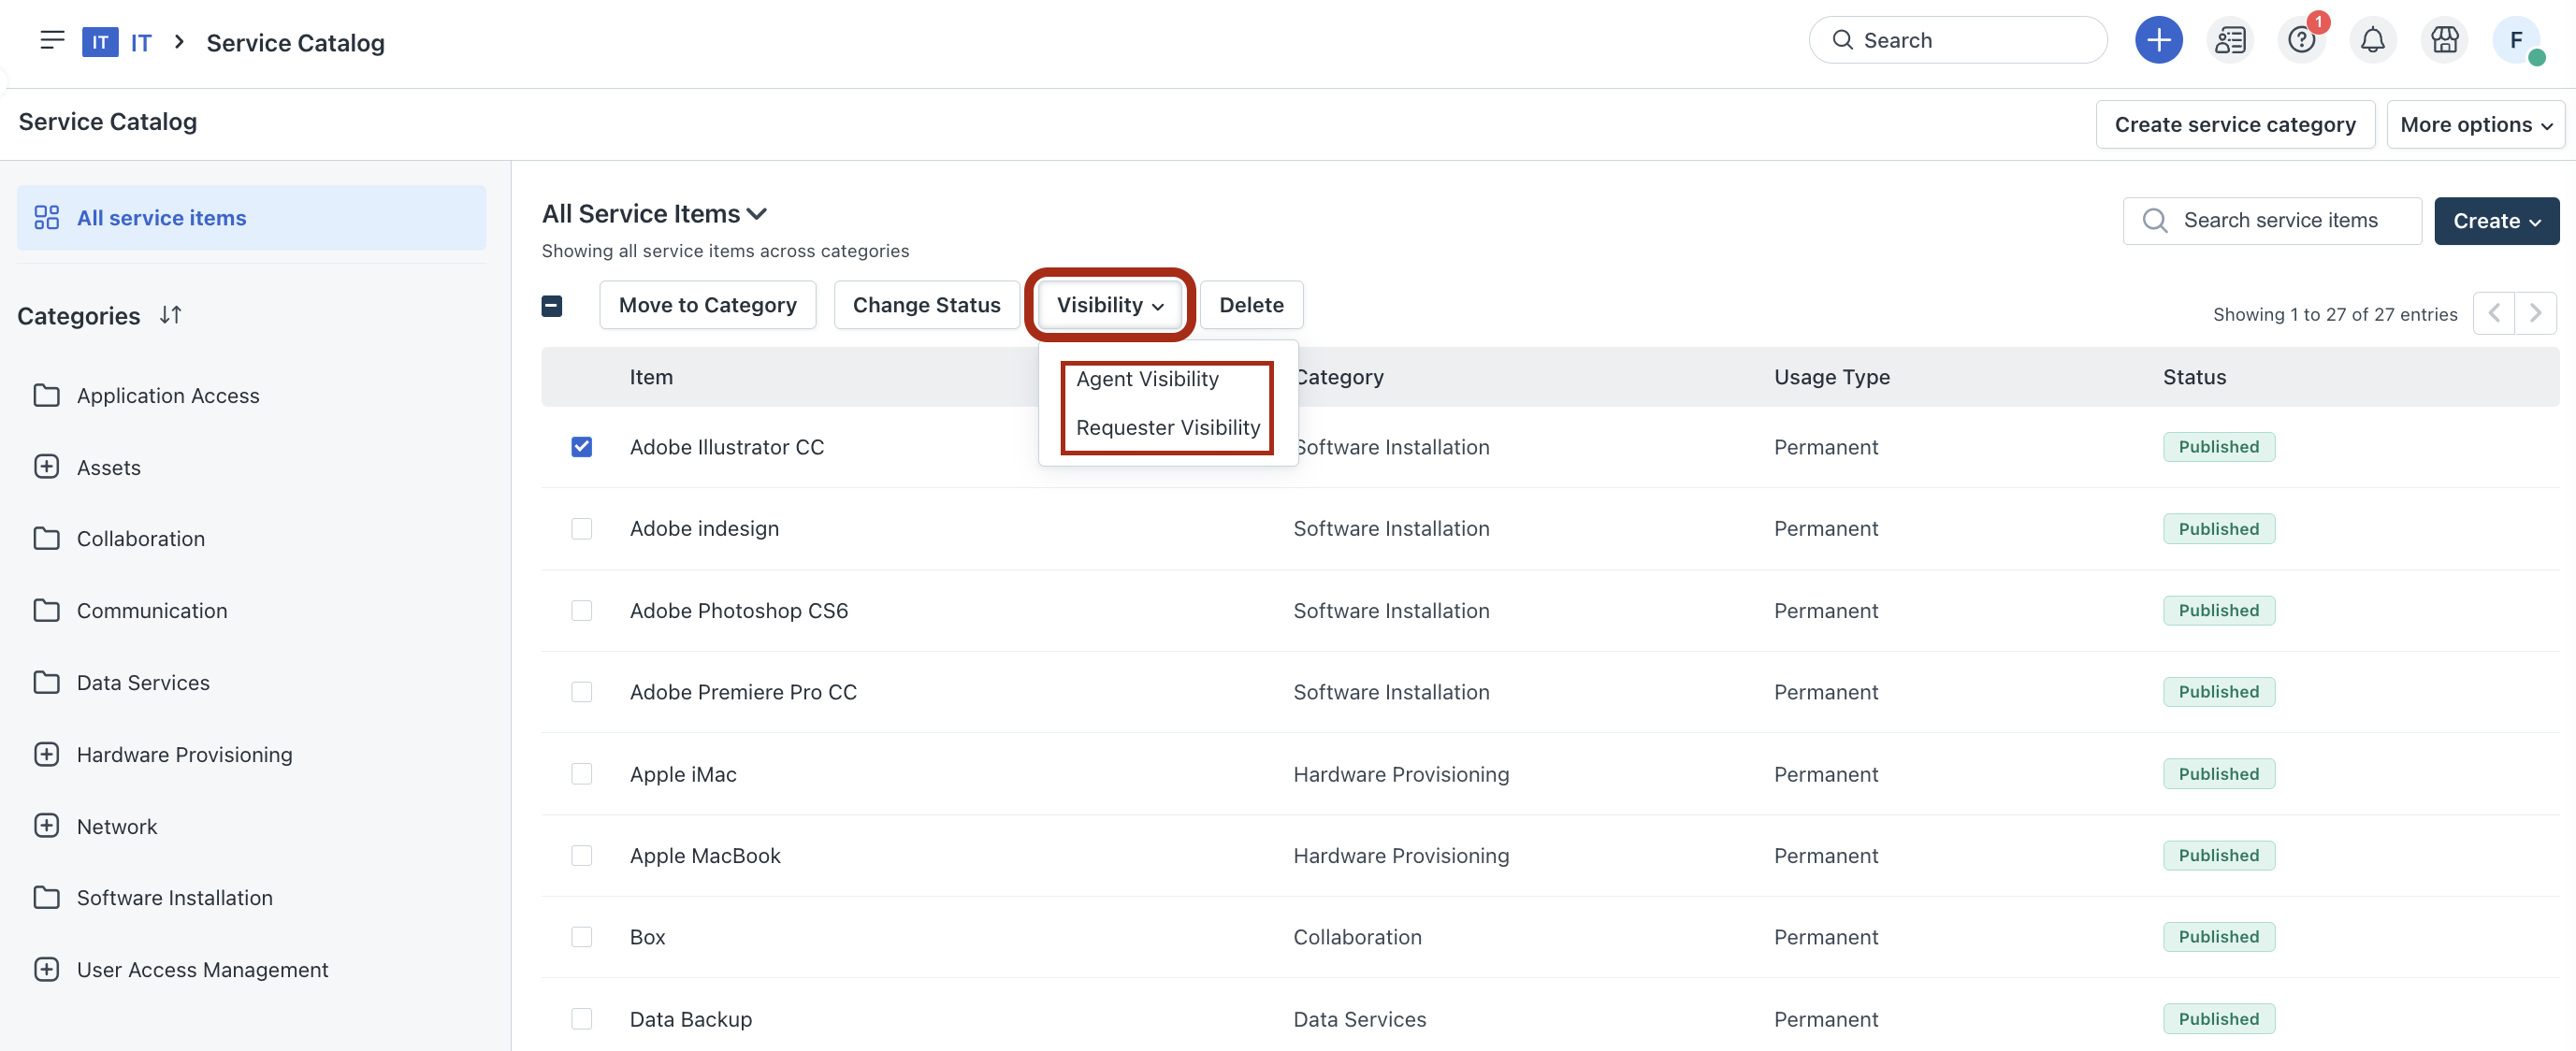
The Agent Visibility or Requester Visibility dialog opens.
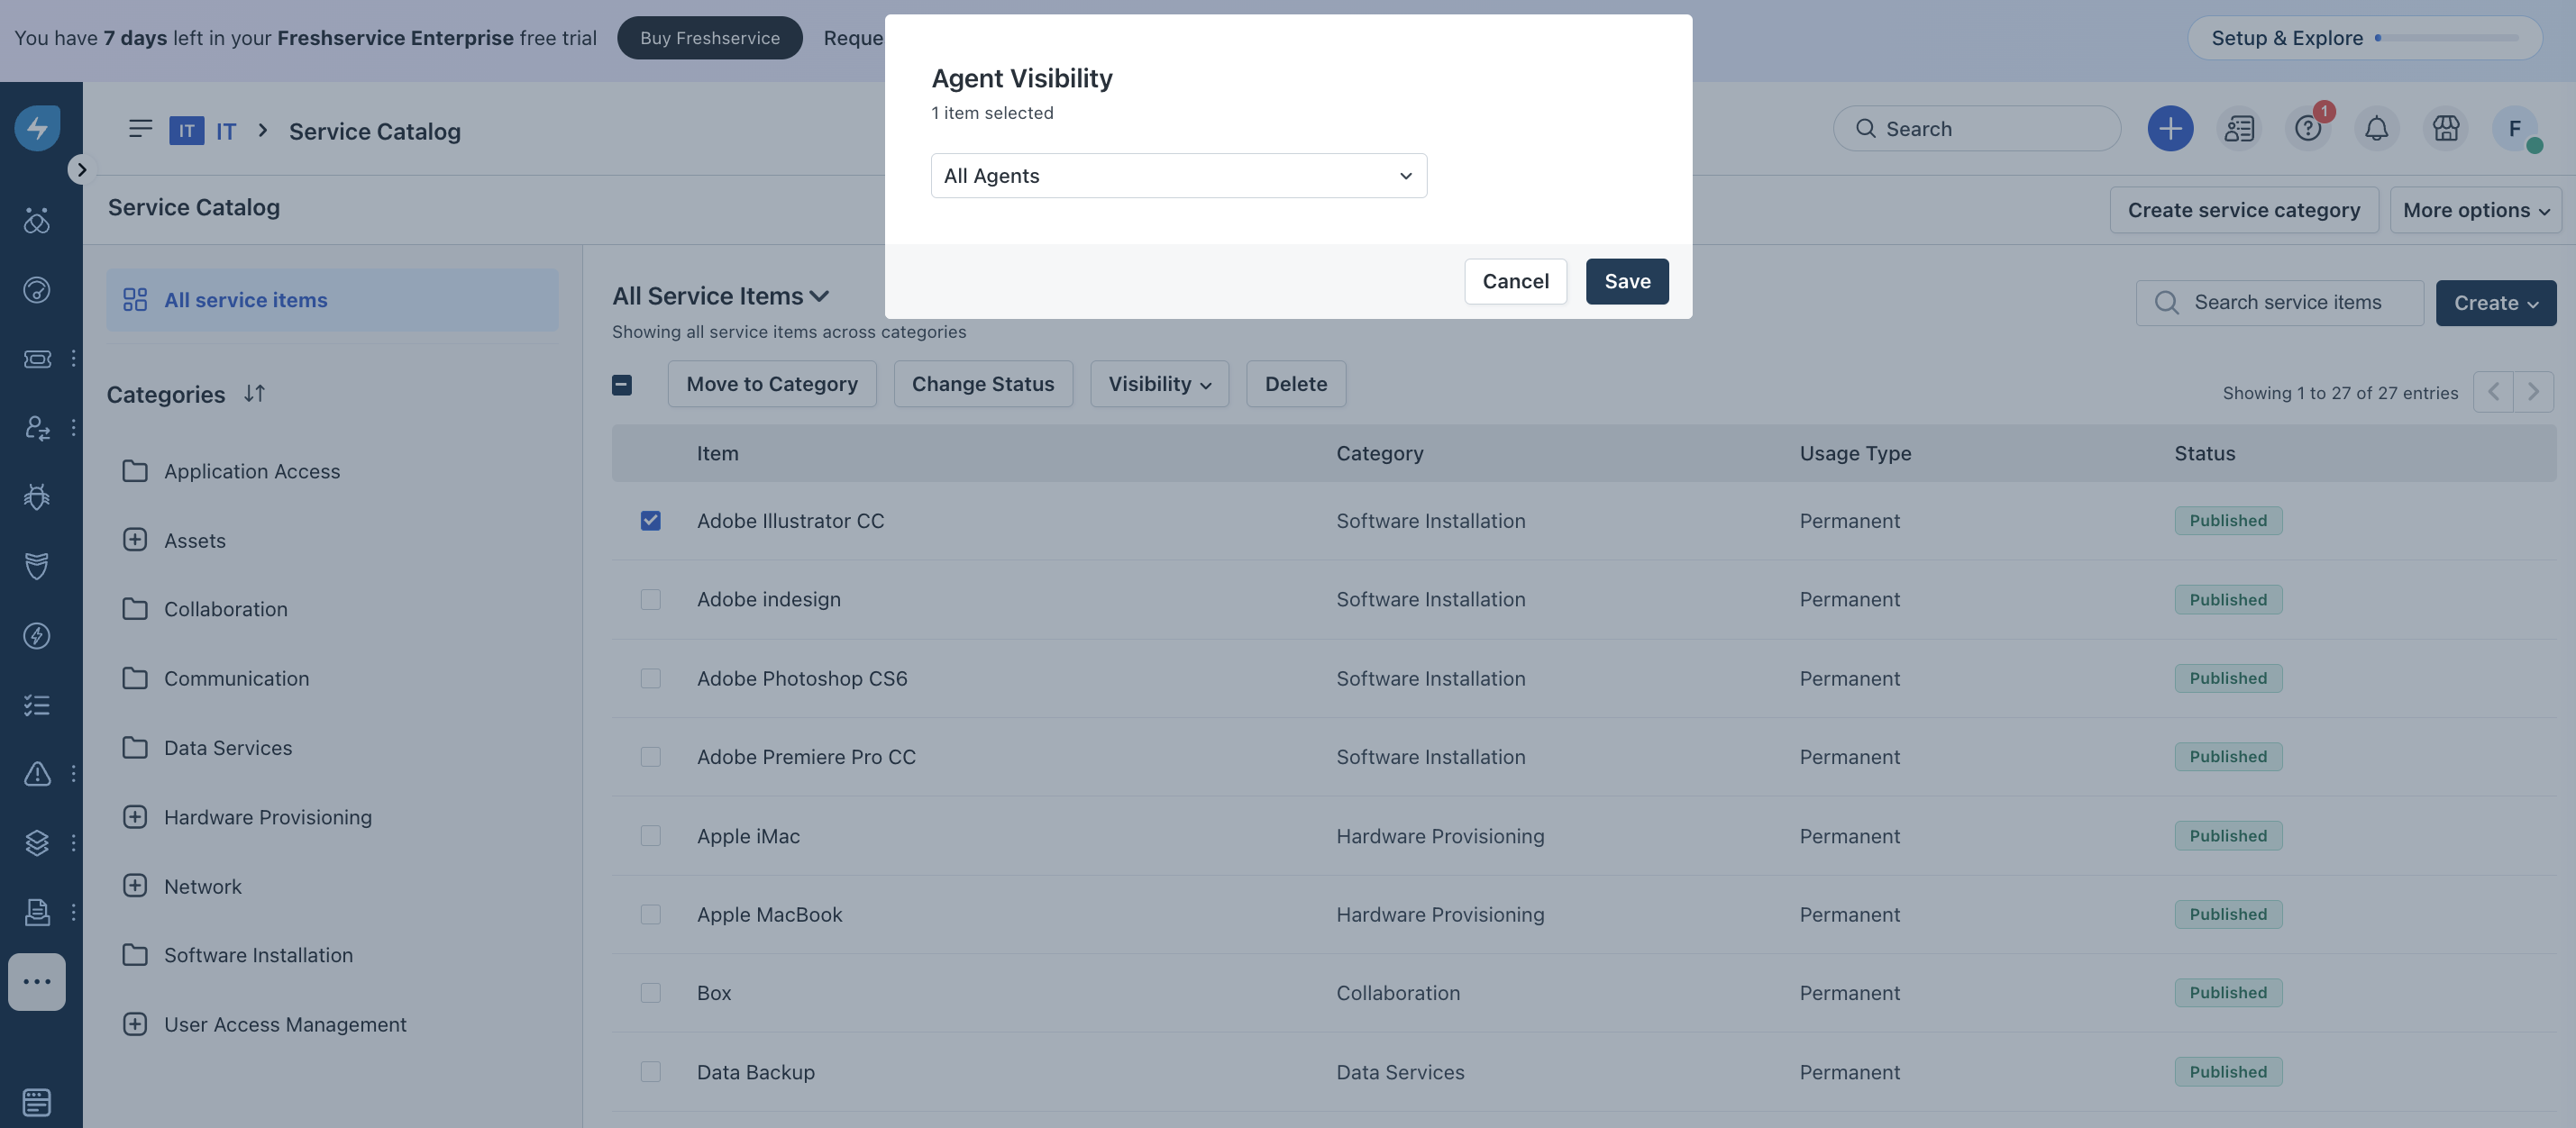
Select the required option from the dropdown, and click Save.
(To delete a service item) Select the required service item, and click Delete. The Delete Service Item dialog opens.
Click Delete.
Multi-level service catalog in support portal (For Requesters)
The images below illustrate the Multi-level Service Catalog as seen by requesters in the support portal.
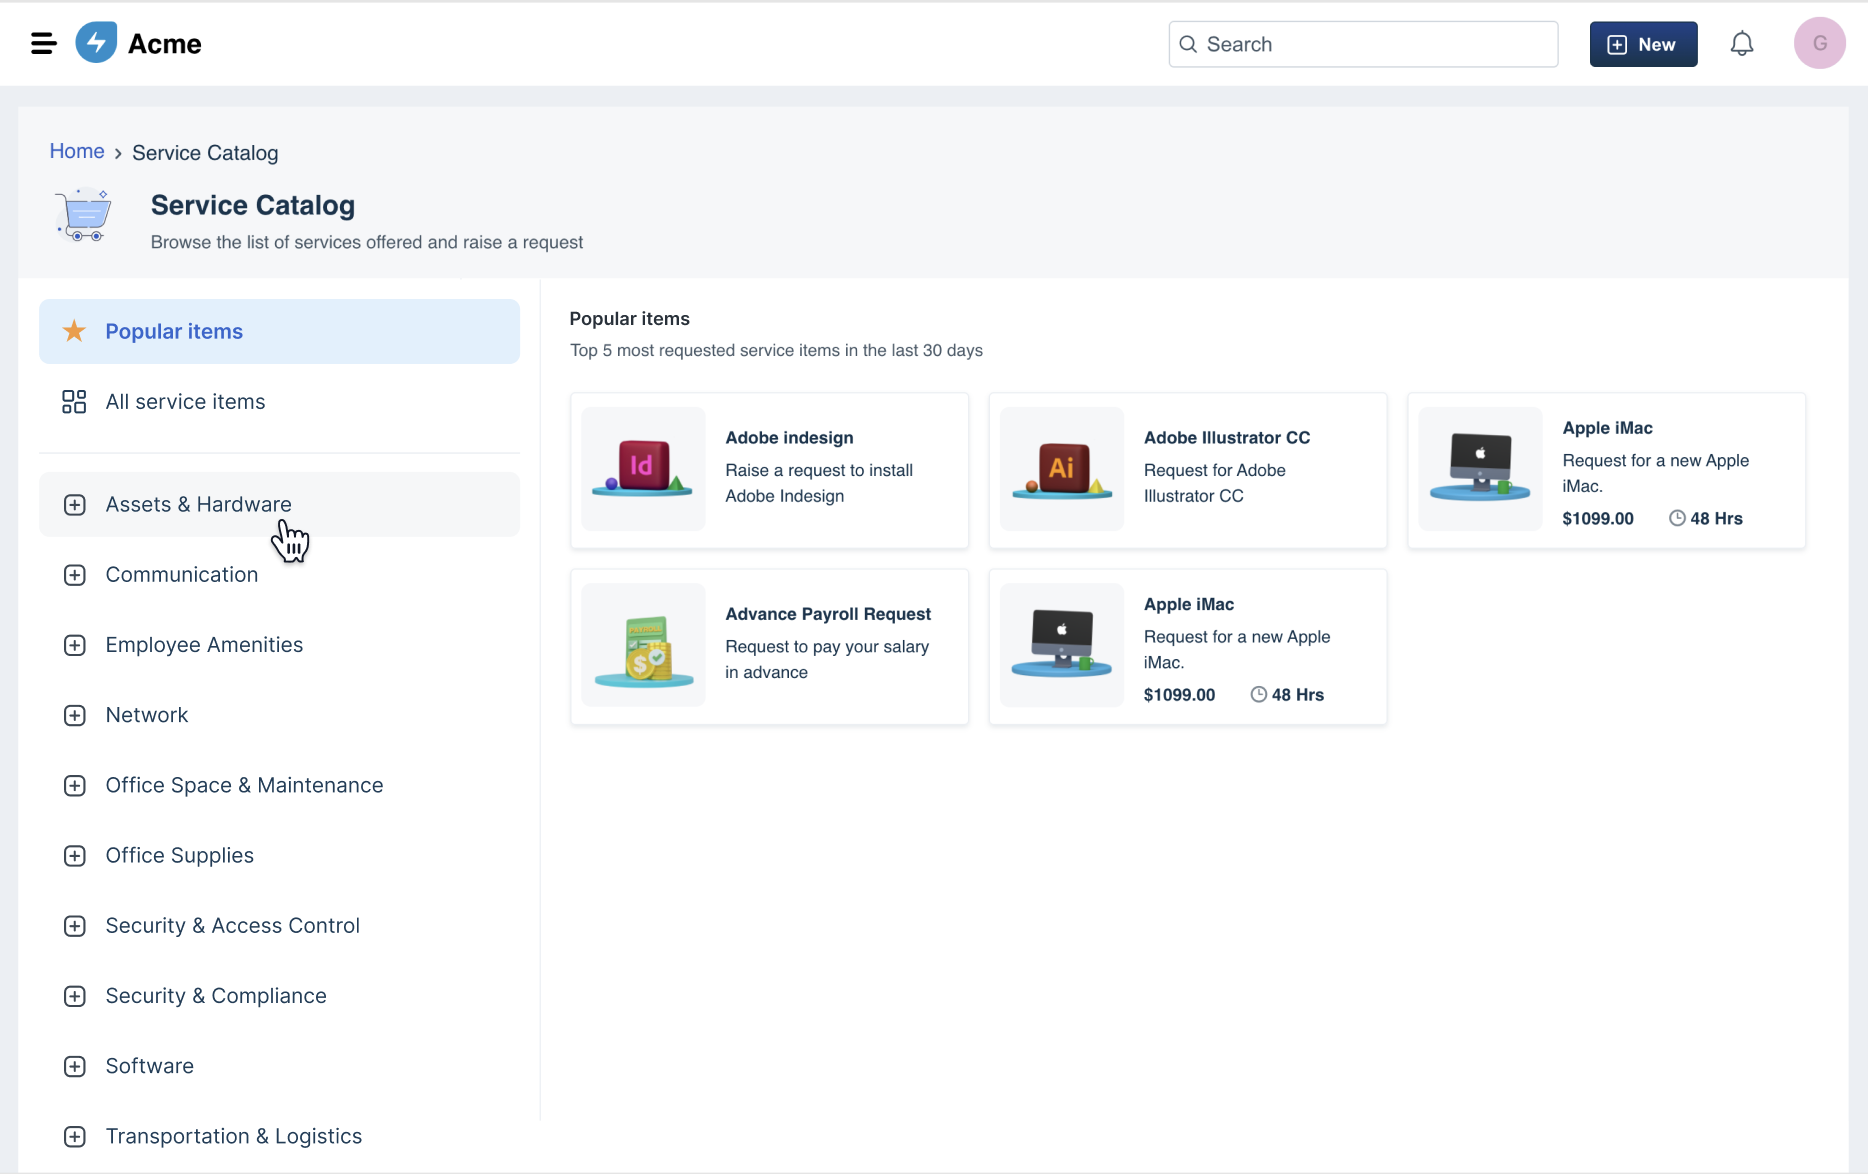
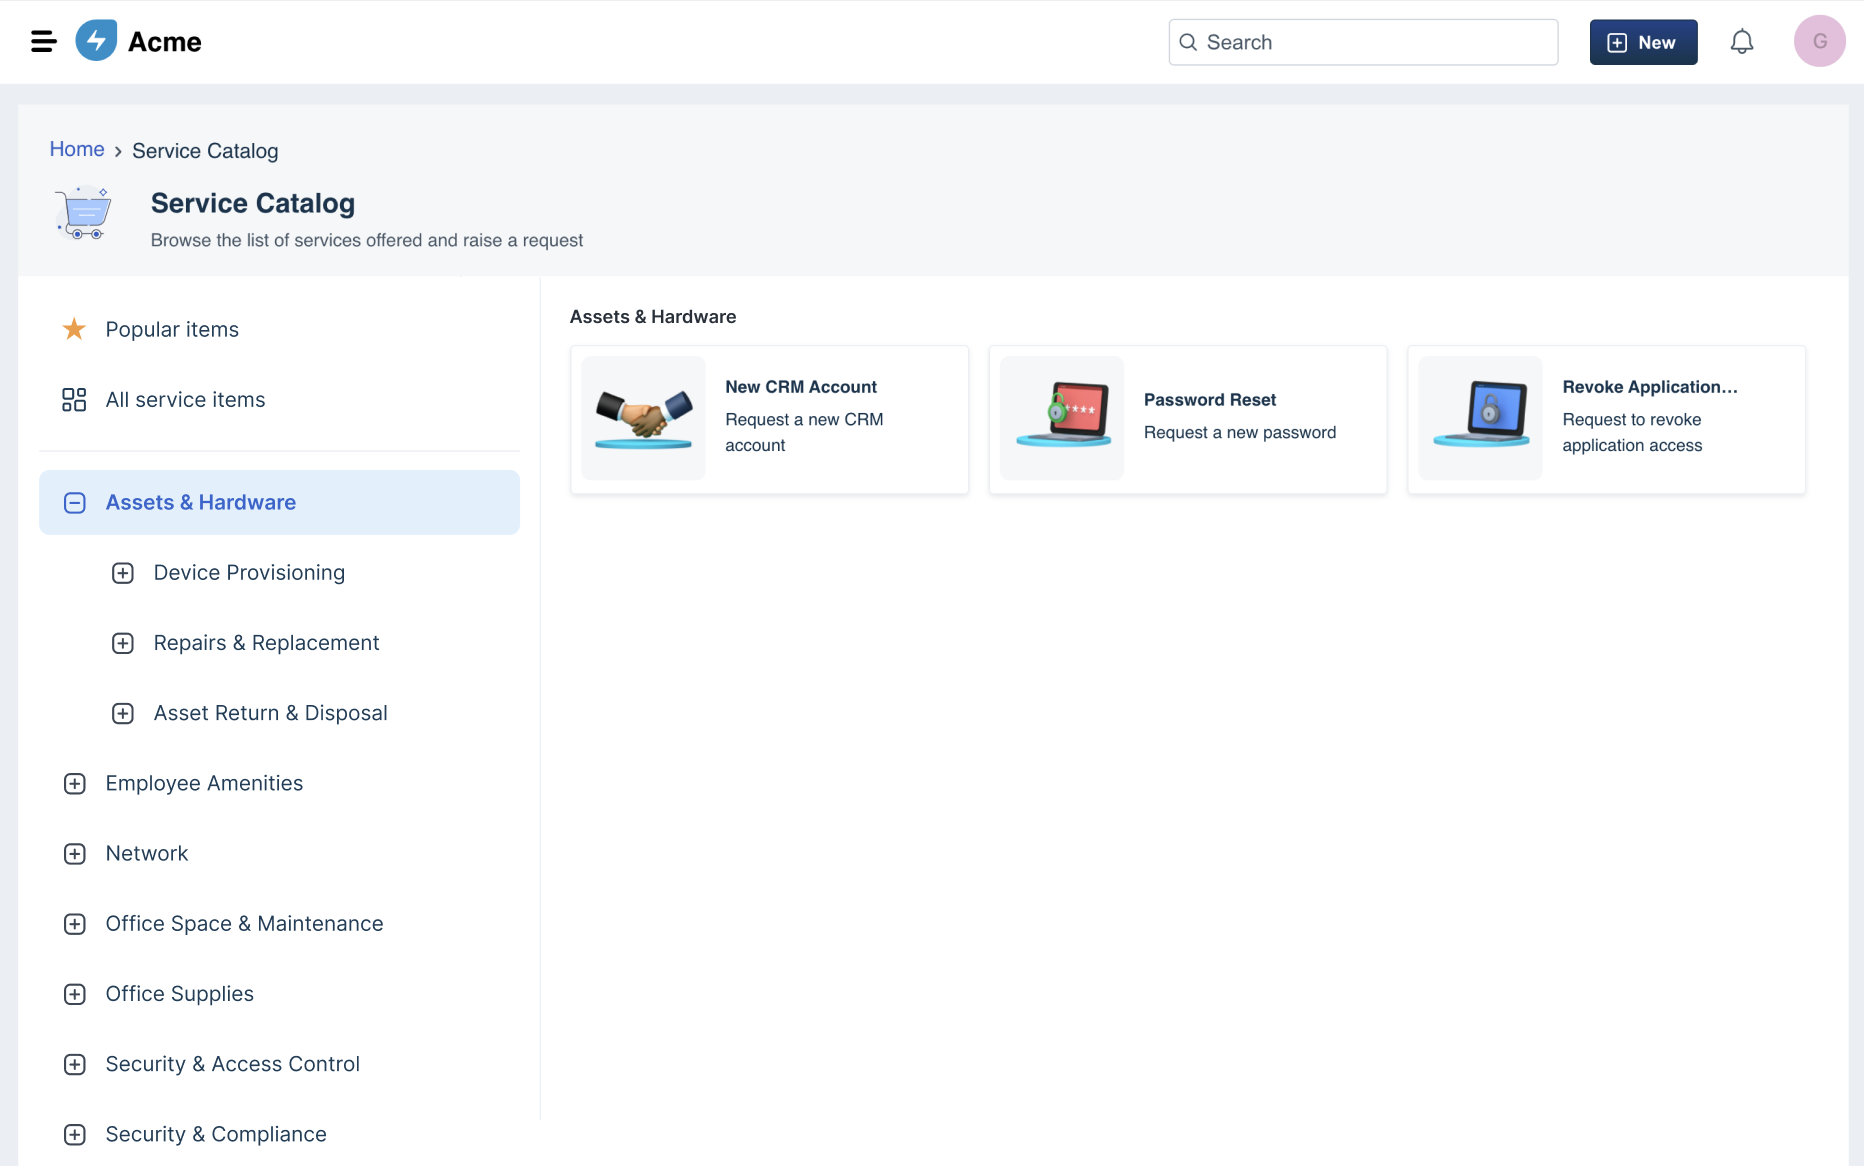
Frequently asked questions
1. How can a requester view the time information while raising a ticket for a service request?
You may face an issue if the "Request time information" option is not selected in the Catalog Item field. This configuration cannot be modified in the existing Catalog Item field, so you will have to create a new Date field.
Go to the respective Workspace Admin if you have more than one workspace > Select the Catalog Item > Create a new Date field with the "Request time information" option selected to make it visible to users.
2. Why is the Content field not visible in the Requested Item section after a ticket is created?
By default, the Content field is visible only while submitting a request, and not in the Requested Item section of the ticket.
3. How do I export Service Catalog for all the Workspaces?
The option to export Service Catalog items directly from the Service Catalog is not available. As a workaround, you can make an API call to retrieve the items. See the Service Catalog API documentation for more information.
4. How can you customize the ticket subject line for a specific Service Catalog item in Freshservice?
Go to Admin > Service Catalog and select the desired service item. Under the Compose Service Request Subject field settings, customize the subject structure using static text and dynamic placeholders (such as item fields or requester details). Click Save & Publish to apply the changes.
5. How do you identify and update the data source linked to a dropdown field in a Service Catalog request form so that it populates correctly?
Open the service item in Admin > Service Catalog, edit the dropdown field, and check the assigned source under Select from Data Source. Depending on the source type, go to Admin > Custom Objects (for custom data) or Admin > Locations (for standard system location data) to add or update the required entries so the dropdown menu populates correctly.
6. How can you locate and edit fields in the Employee Onboarding form?
Go to Admin > Service Management > Service Request Management > Employee Onboarding. Select the onboarding module, click Add Stakeholders, and select the specific stakeholder form you want to edit (for example, Hiring Manager form). Locate the required field under the form settings, edit its parameters or dropdown values, and save the form.
7. How can mandatory fields in a Service Catalog item be unticked or made optional?
Go to Admin > Service Catalog and edit the target service item. Click the edit (pencil) icon next to a field. In the field properties panel, uncheck the Mandatory box, click Done, and select Save & Publish to save the changes.
8. Why might the "Requester" or "Request for someone else" options be missing on a Service Catalog item, and how can this issue be resolved?
Freshservice is a web-based application and is not operating system-dependent, so the behavior is identical across Windows and Mac devices. To resolve missing requester options: 1) Verify that Allow requester to request for someone else is enabled in the service item configuration, 2) Confirm user role permissions permit requesting on behalf of others, and 3) Clear browser cache and cookies or test in an incognito window.
9. How can a time input in a Service Catalog item be prevented from changing to the agent's local machine time after ticket submission?
Standard Date/Time fields in Freshservice automatically convert values based on the viewing user's timezone settings by design. To prevent the input from shifting and ensure the time entered by the requester remains unchanged, use a Single Line Text field for time input instead of a Date/Time field.
10. How can missing fields such as quantity be made visible in the approval email for a service request, and is it possible to raise the same service request for multiple requesters at once?
To display custom service item fields (such as quantity) in approval emails, go to Admin > Email Notifications, select the Tickets tab, and edit the Ticket Approval template. Insert the {{ticket.service_item_fields}} (or {{ticket.request_summary}}) placeholder into the email body and save. Regarding bulk requests, Freshservice does not support creating a single service request for multiple requesters simultaneously; separate requests must be submitted for each individual requester.
11. How can a field in a service request form be made visible to the requester during form submission but kept read-only?
Enable Requester can edit in the field properties so the field displays on the request form during submission. Then, open Business Rules for Forms for that specific service item, create a new rule, and set the action to Disable or set the field state to Read-Only upon form load. This ensures the field remains visible to the requester without allowing edits.