
 Community
 Video Library
 Agent Training
 Freshservice
 Freshdesk
 Freshchat
 Freshcaller
 Freshsales
 Freshteam
 Freshworks Neo
 Freshsurvey
 Freshservice for MSP
 TABLE OF CONTENTS
- Overview
- Prerequisites
- View deleted items
- Restore an Item
- Permanently delete an item
- View restore history
- Upcoming enhancements
Overview
The Recovery center serves as a centralized repository, allowing administrators to review, restore, or permanently remove deleted rules and automations.
Availability: The Recovery center is available at both the Global and Workspace levels, and only on the Enterprise plan.
Module scope: Only modules available in Global Settings appear in the Global recovery center. Similarly, Workspace-level recovery centers display only the modules available at that specific workspace level.
Supported modules: Data restoration is supported for Scenario Automations, Supervisor Rules, and Business Rules across Global and Workspace scopes.
Note: Certain other features, including Workflow Automator and Knowledge Base, handle recovery directly within their respective modules. See Restore a deleted workflow and Knowledge base data recovery for more details.
Retention policy: Deleted items remain in the Recovery center for 14 days before they are automatically and permanently deleted.
Prerequisites
You must have Administrator privileges to access and manage the recovery center.
View deleted items
Log in to your Freshservice account.
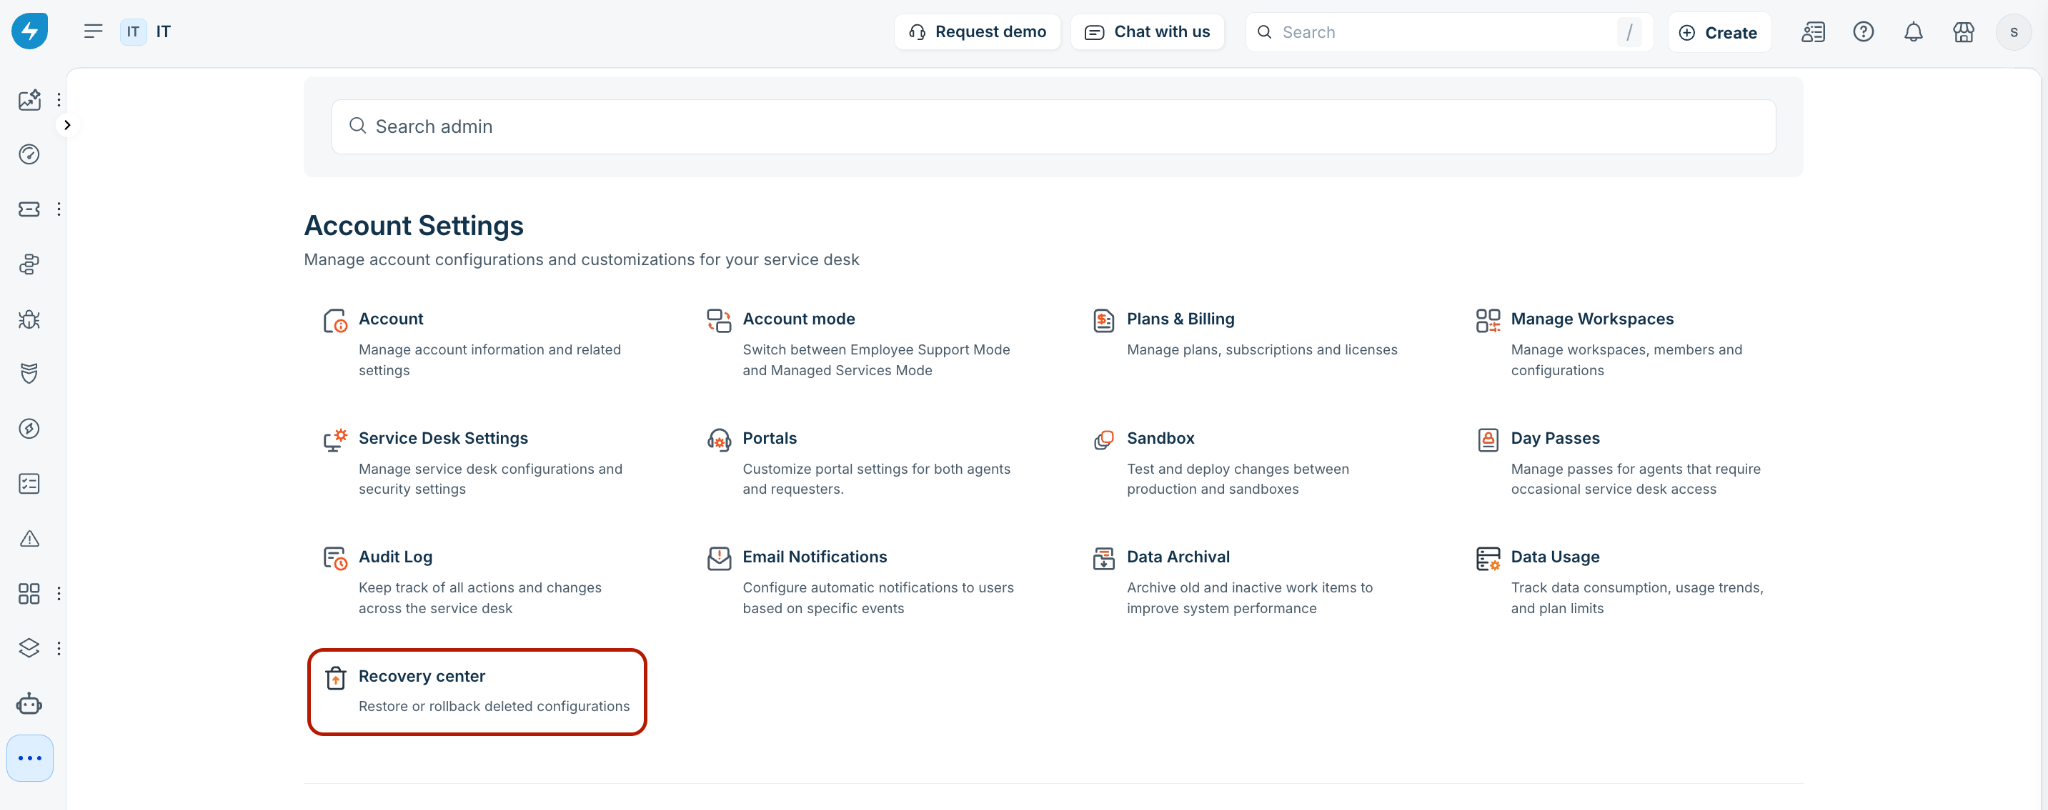
Go to Admin > Account Settings > Recovery center.
From the left sidebar, select the module you wish to inspect (for example, Scenario Automations, Supervisor Rules, or Business Rules for Forms).
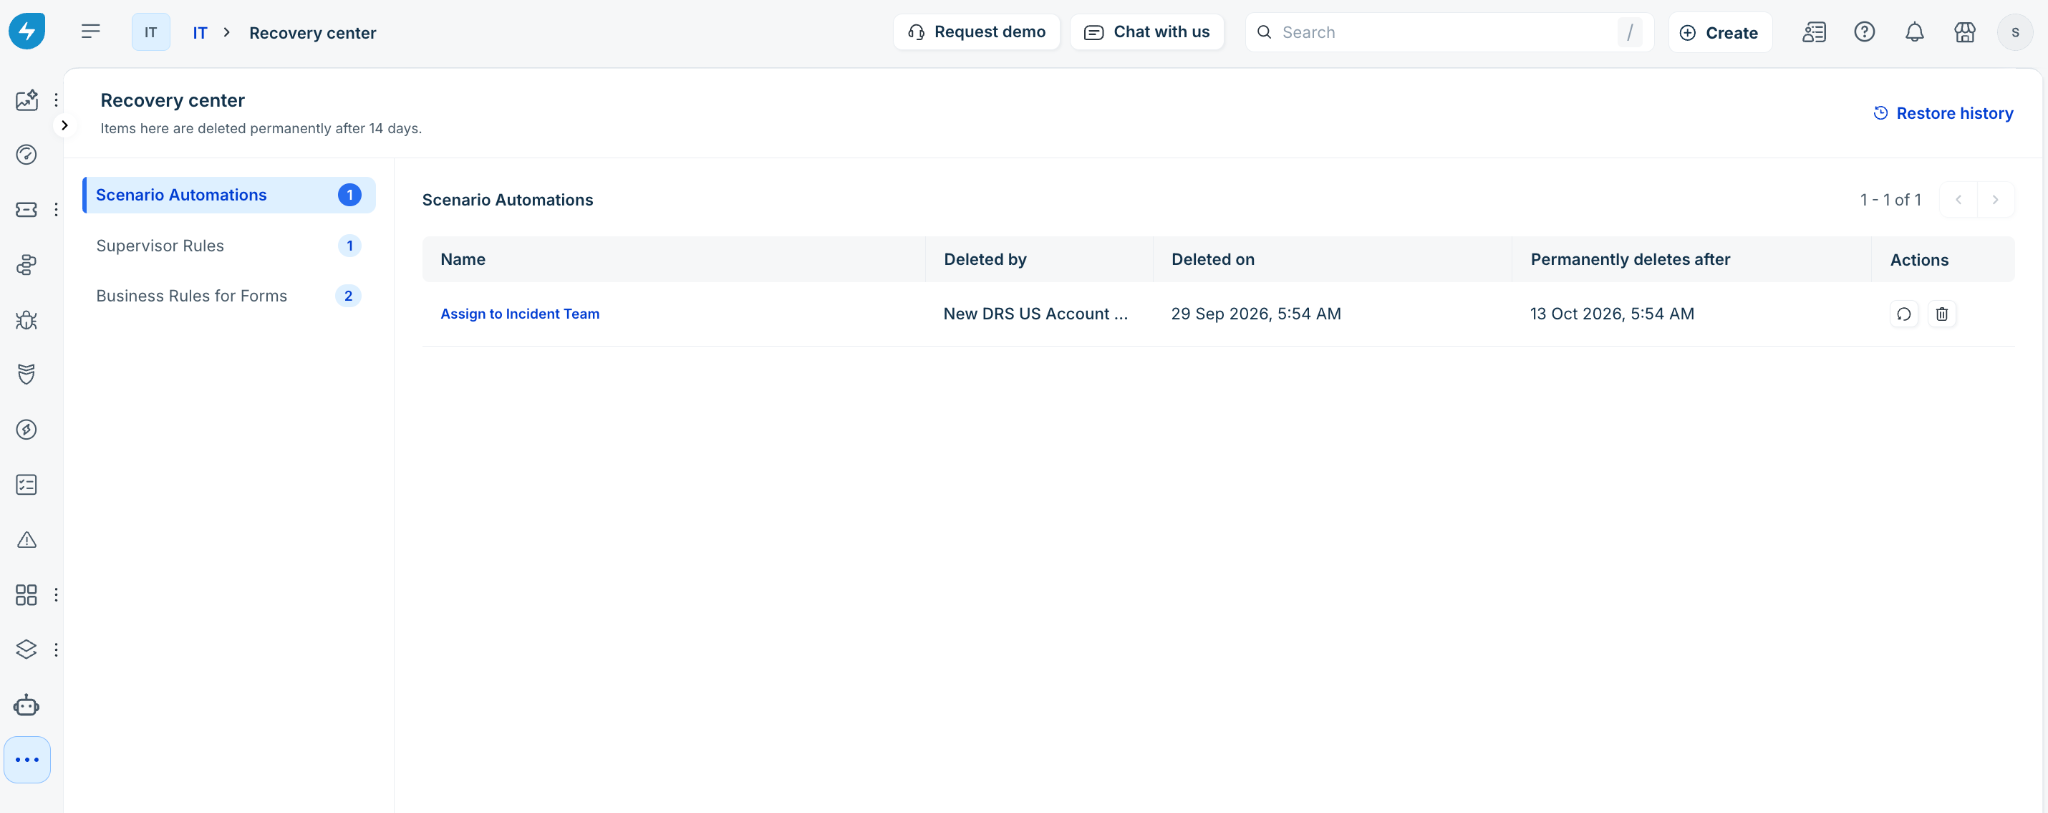
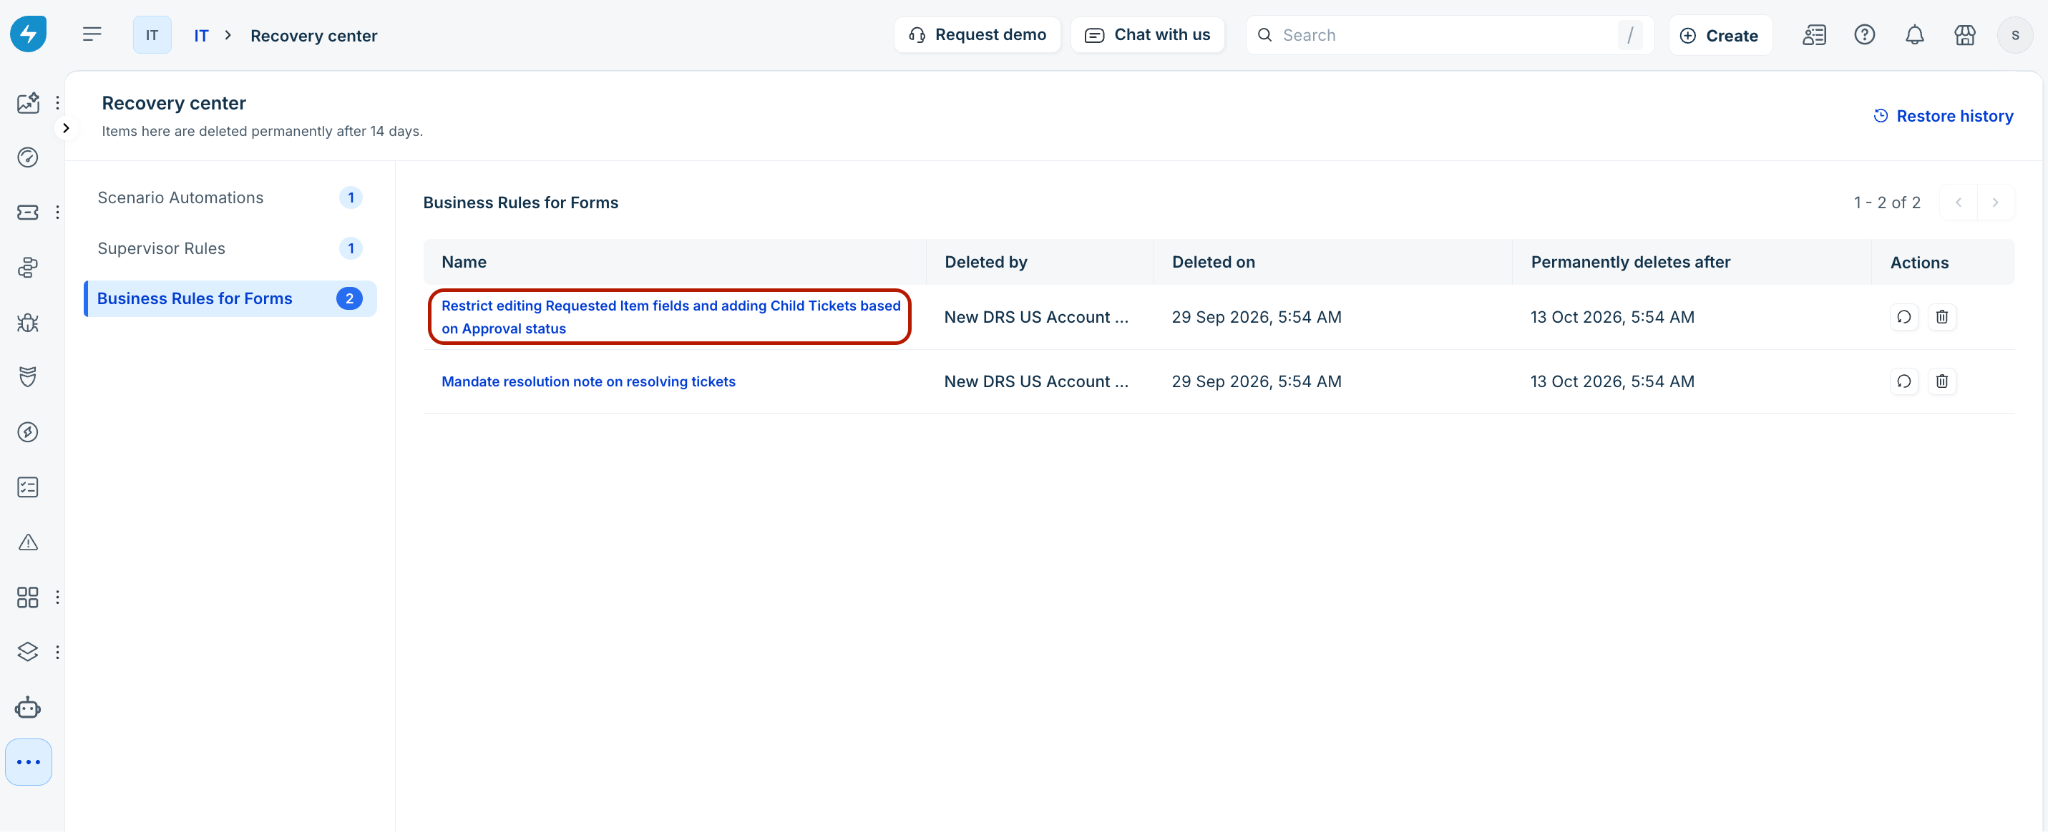
Review the details for each deleted item in the list:
Name: The title of the deleted item.
Deleted by: The account or user who deleted the item.
Deleted on: The timestamp when the item was moved to the Recovery center.
Permanently deletes after: The exact date and time when the system will automatically purge the item.
To inspect the item's settings or conditions, click the item's Name link.
Restore an Item
Restoring an item reinstates it to its original module in an active or configured state.
Go to Recovery center and select the appropriate module from the left menu.
Locate the row containing the item you want to restore.
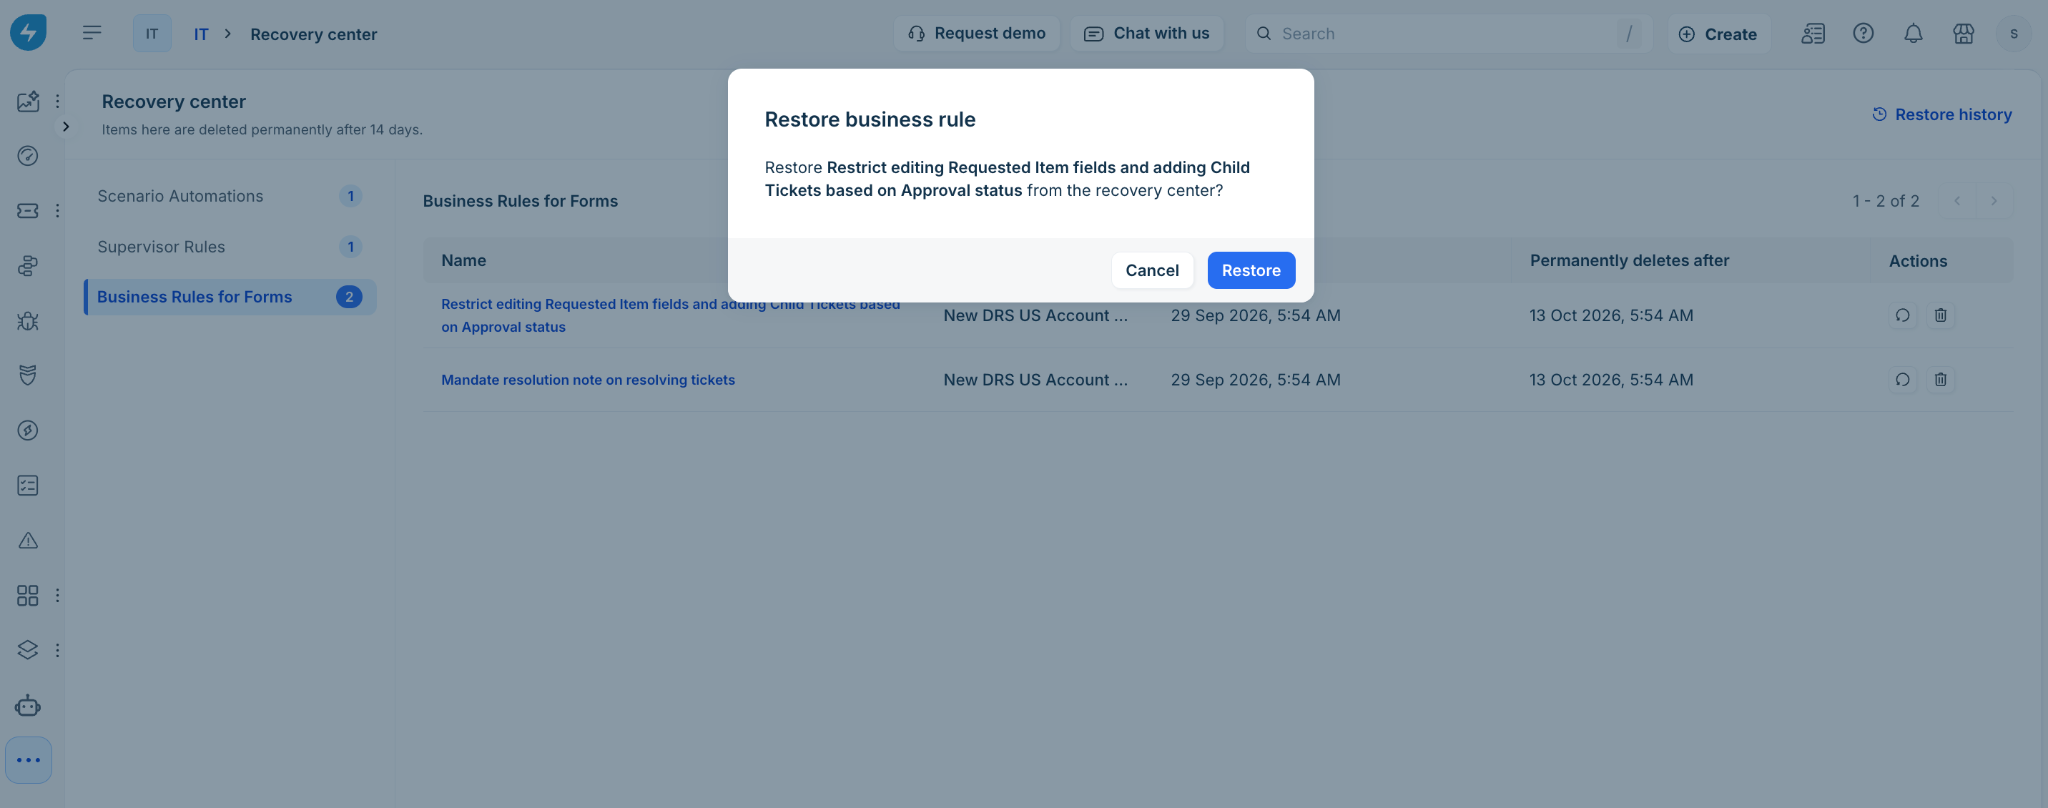
Under the Actions column, click the Restore icon.
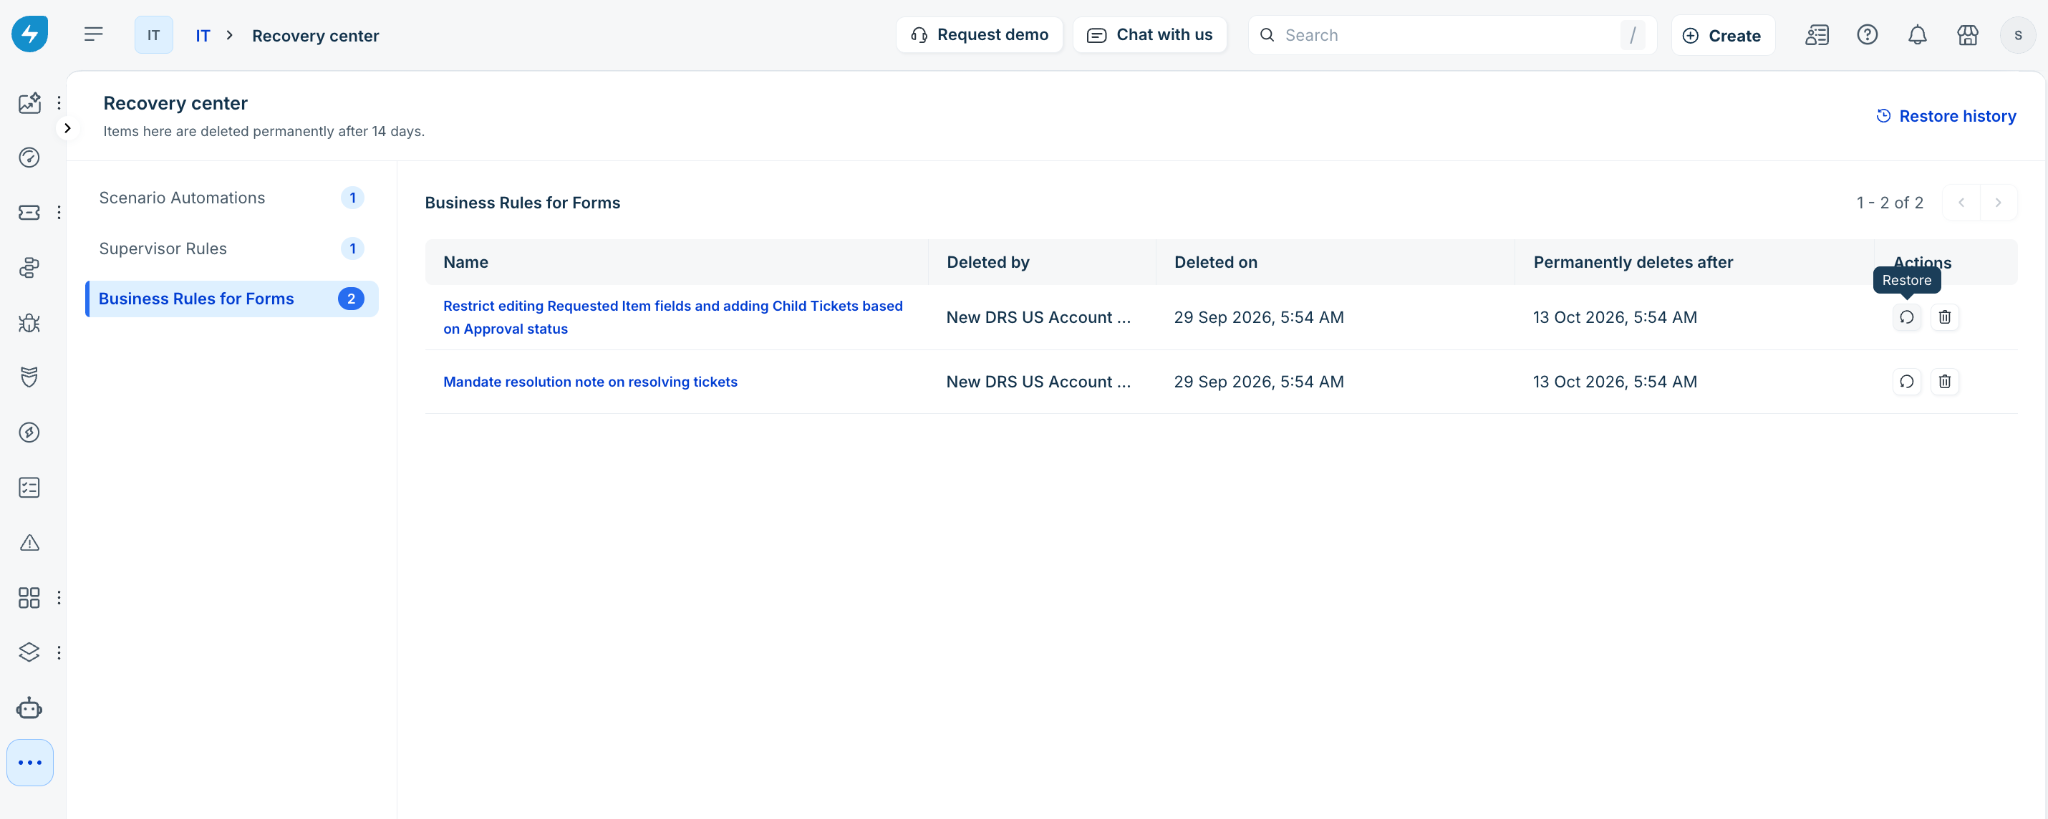
In the confirmation dialog, click Restore.
Permanently delete an item
If you need to remove an item immediately without waiting for the 14-day automatic deletion window, you can manually purge it.
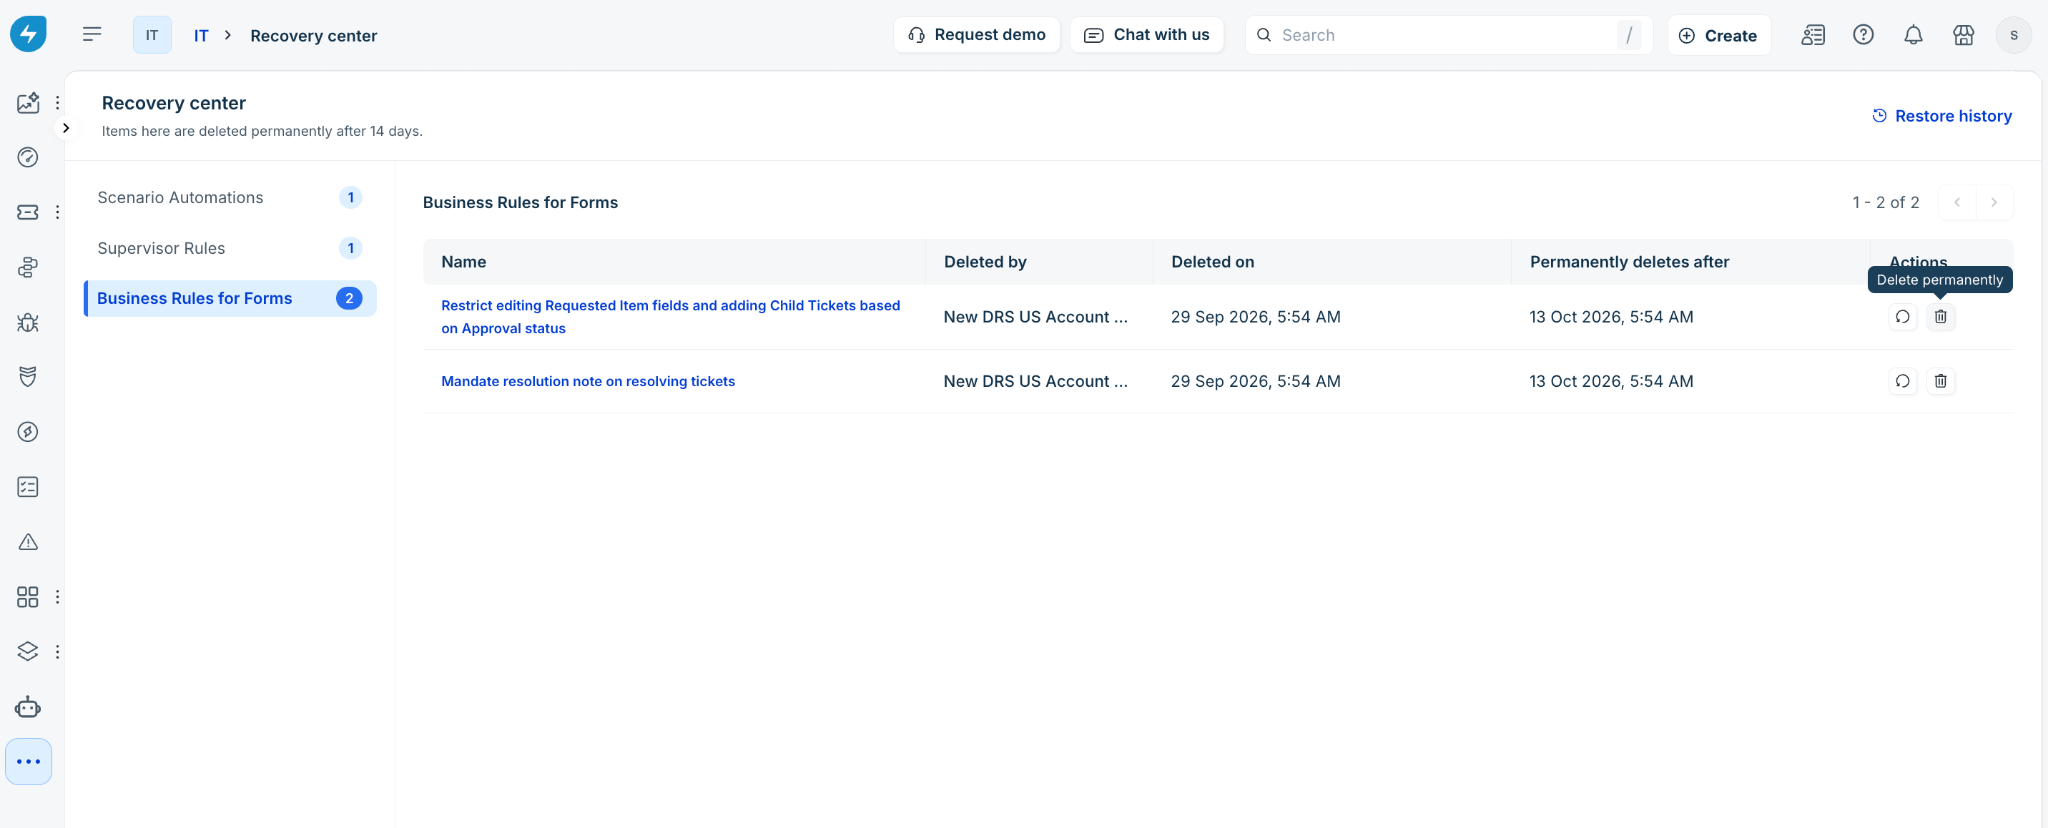
Locate the item in the module list under Recovery center.
Under the Actions column, click the Delete permanently icon (trash can).
In the Delete permanently dialog, type Delete into the text field.
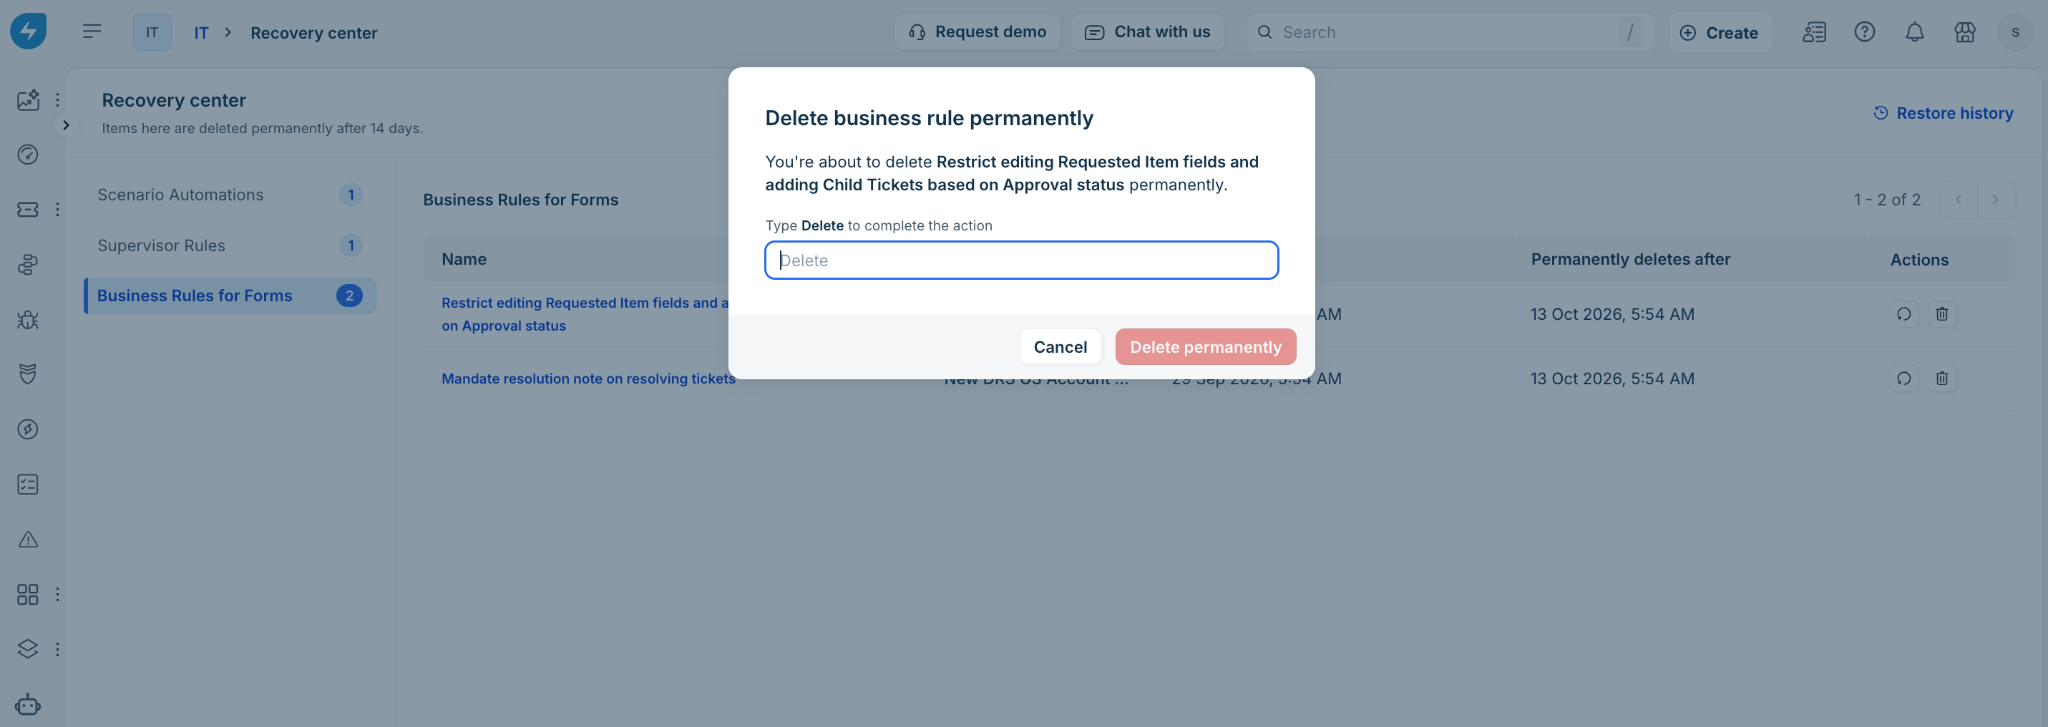
Click Delete permanently.
Note: Manually deleted items are removed immediately and cannot be recovered.
View restore history
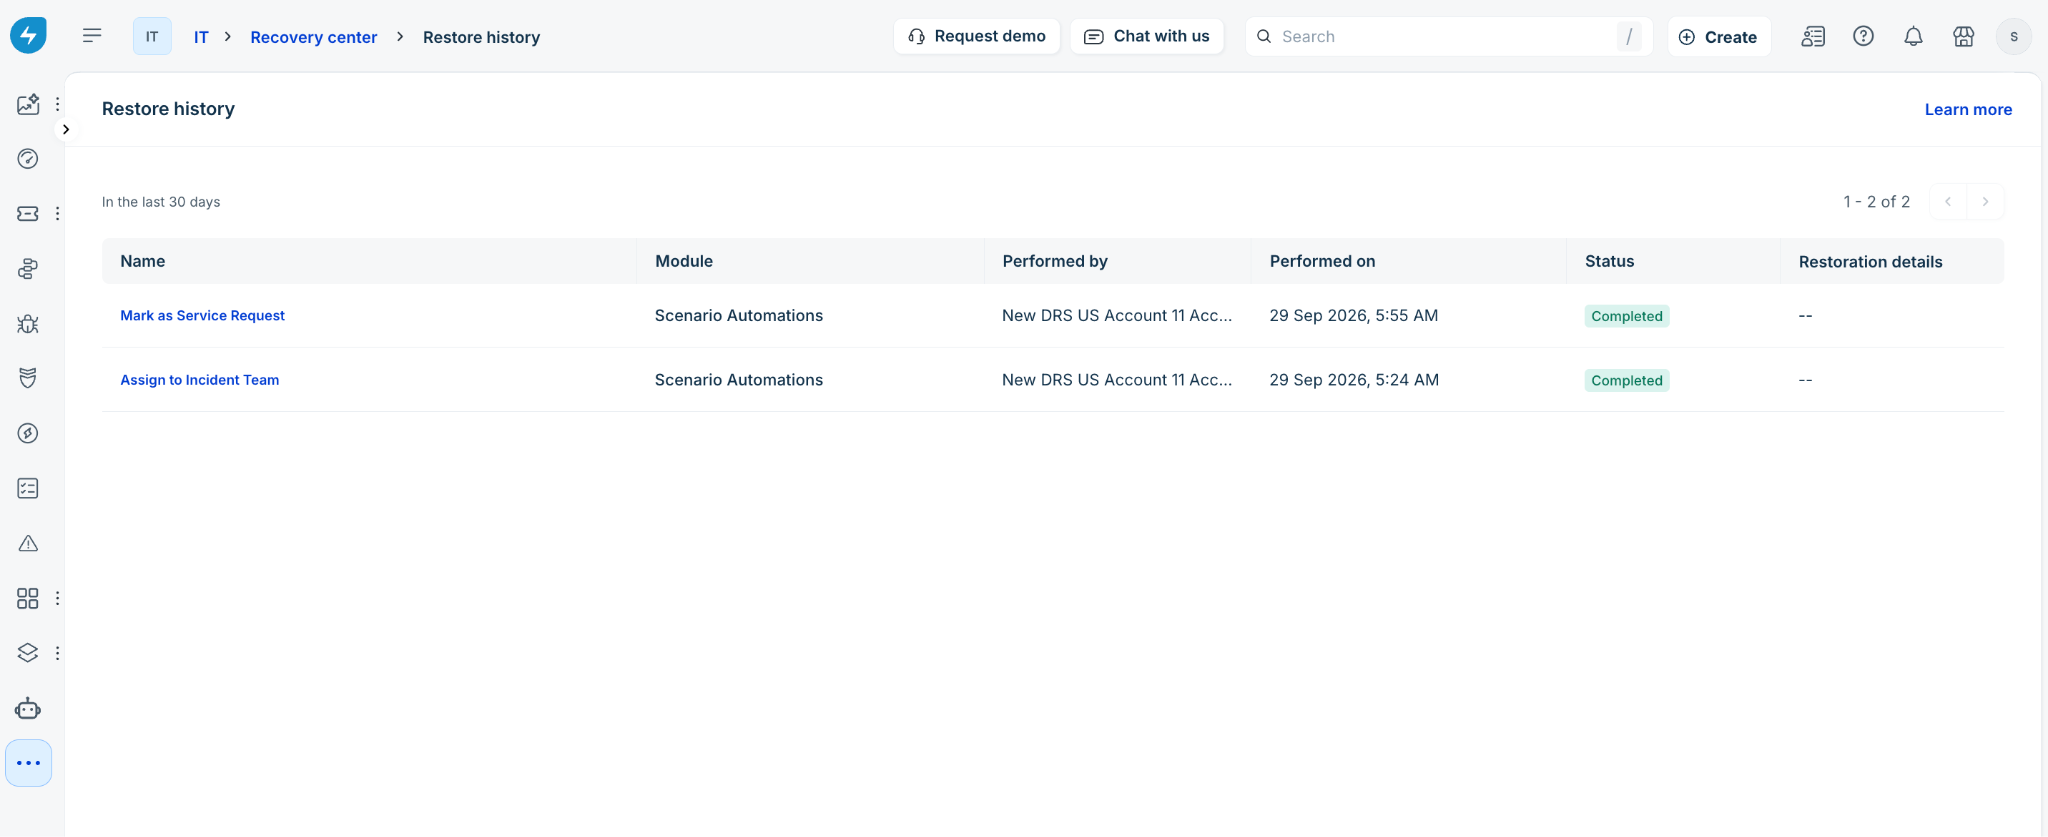
The Restore history page displays a complete log of all restore actions performed from the Recovery center page over the last 30 days.
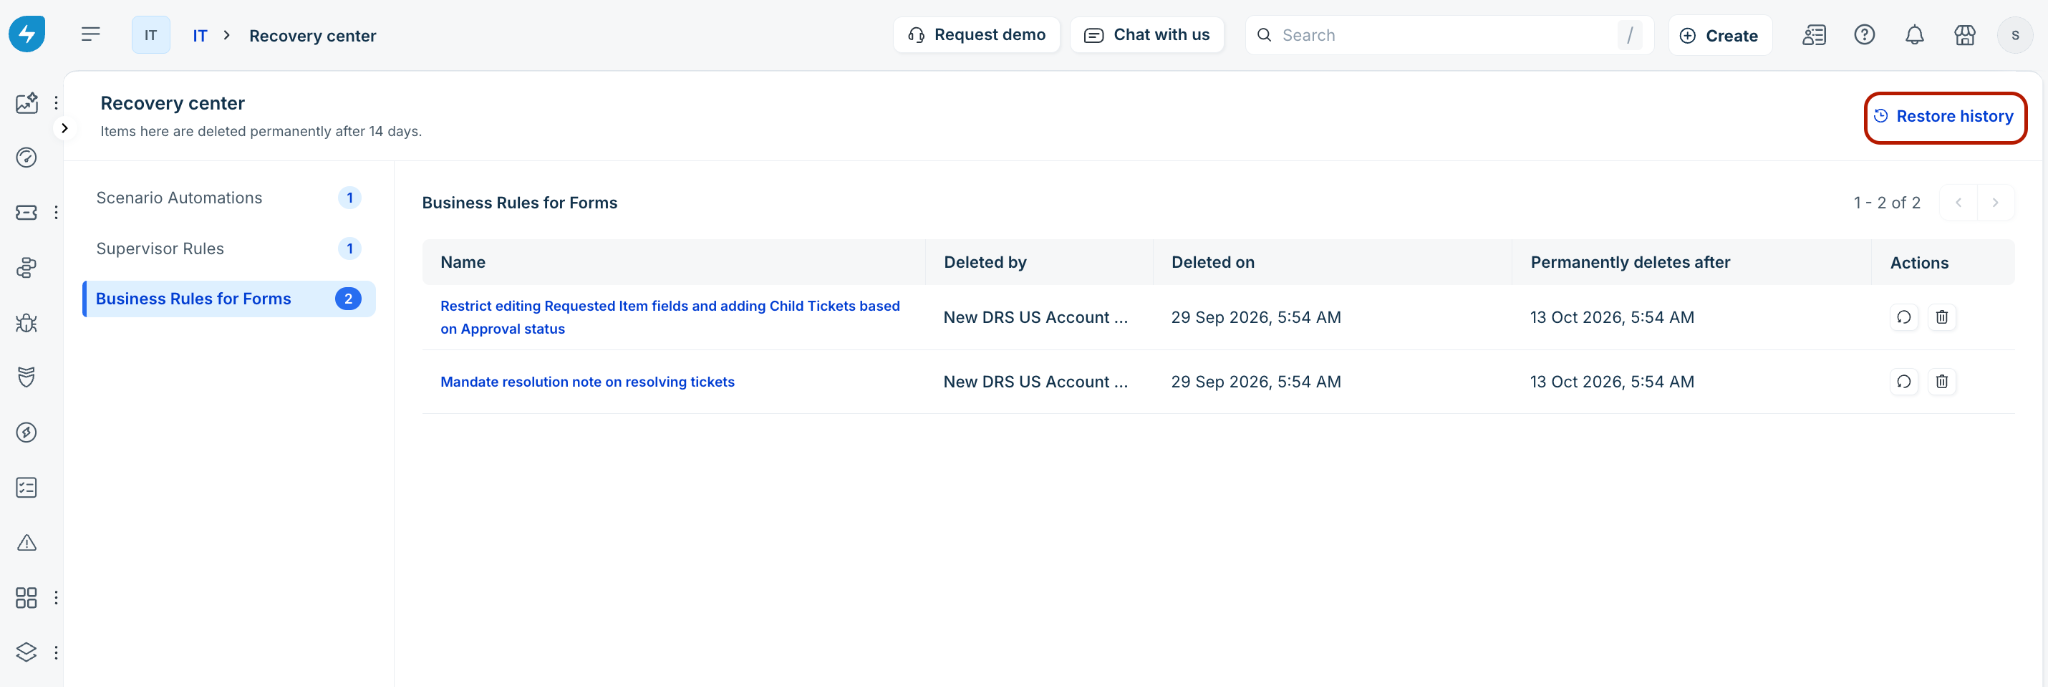
On the main Recovery center page, click Restore history in the top-right corner.
Review the restoration activity table:
Name: The title of the restored item.
Module: The functional module the item belongs to (for example, Scenario Automations).
Performed by: The user who initiated the restoration.
Performed on: The exact timestamp of the restoration.
Status: The completion state of the restore process (for example, Completed).
Restoration details: Additional logs or details associated with the restored action.
Upcoming enhancements
Support for additional key configurations—such as agent groups and custom ticket fields—will be gradually rolled out to the Recovery center.