TABLE OF CONTENTS
- Overview
- Prerequisites
- Update tickets by using bulk update
- Update tickets by using scenario automation
- Update tickets by using supervisor rules
- Update tickets by using scheduled workflows
- Update tickets by using the API
As your organization grows, updating the same field on individual tickets can become time-consuming and repetitive. Freshservice provides multiple ways to update a field across several tickets at once. This helps you save time and maintain consistent ticket data.
This article explains the available methods, when to use them, and the limitations to consider.
Overview
Freshservice offers the following methods to update ticket fields in bulk. Select the method that best fits your use case.
Prerequisites
Before you begin, ensure that the following requirements are met:
You have the required permissions to update tickets and configure automations.
You have access to the required feature, such as automations, supervisor rules, or scheduled workflows.
You have an API key and the required permissions if you plan to update tickets by using the Freshservice API.
Update tickets by using bulk update
Use bulk update to make a one-time update to a selected group of tickets, such as adding resolution notes and closing the tickets.
Before you begin, ensure that you understand the following:
You can update a maximum of 30 tickets at a time.
You cannot add public or private notes as part of a bulk update.
Bulk update settings are not saved. You must configure the update each time you perform a bulk update.
To update tickets in bulk, follow these steps:
Go to the ticket list view.
Select the tickets that you want to update, and then click Bulk update.
Specify the field and the value that you want to update.
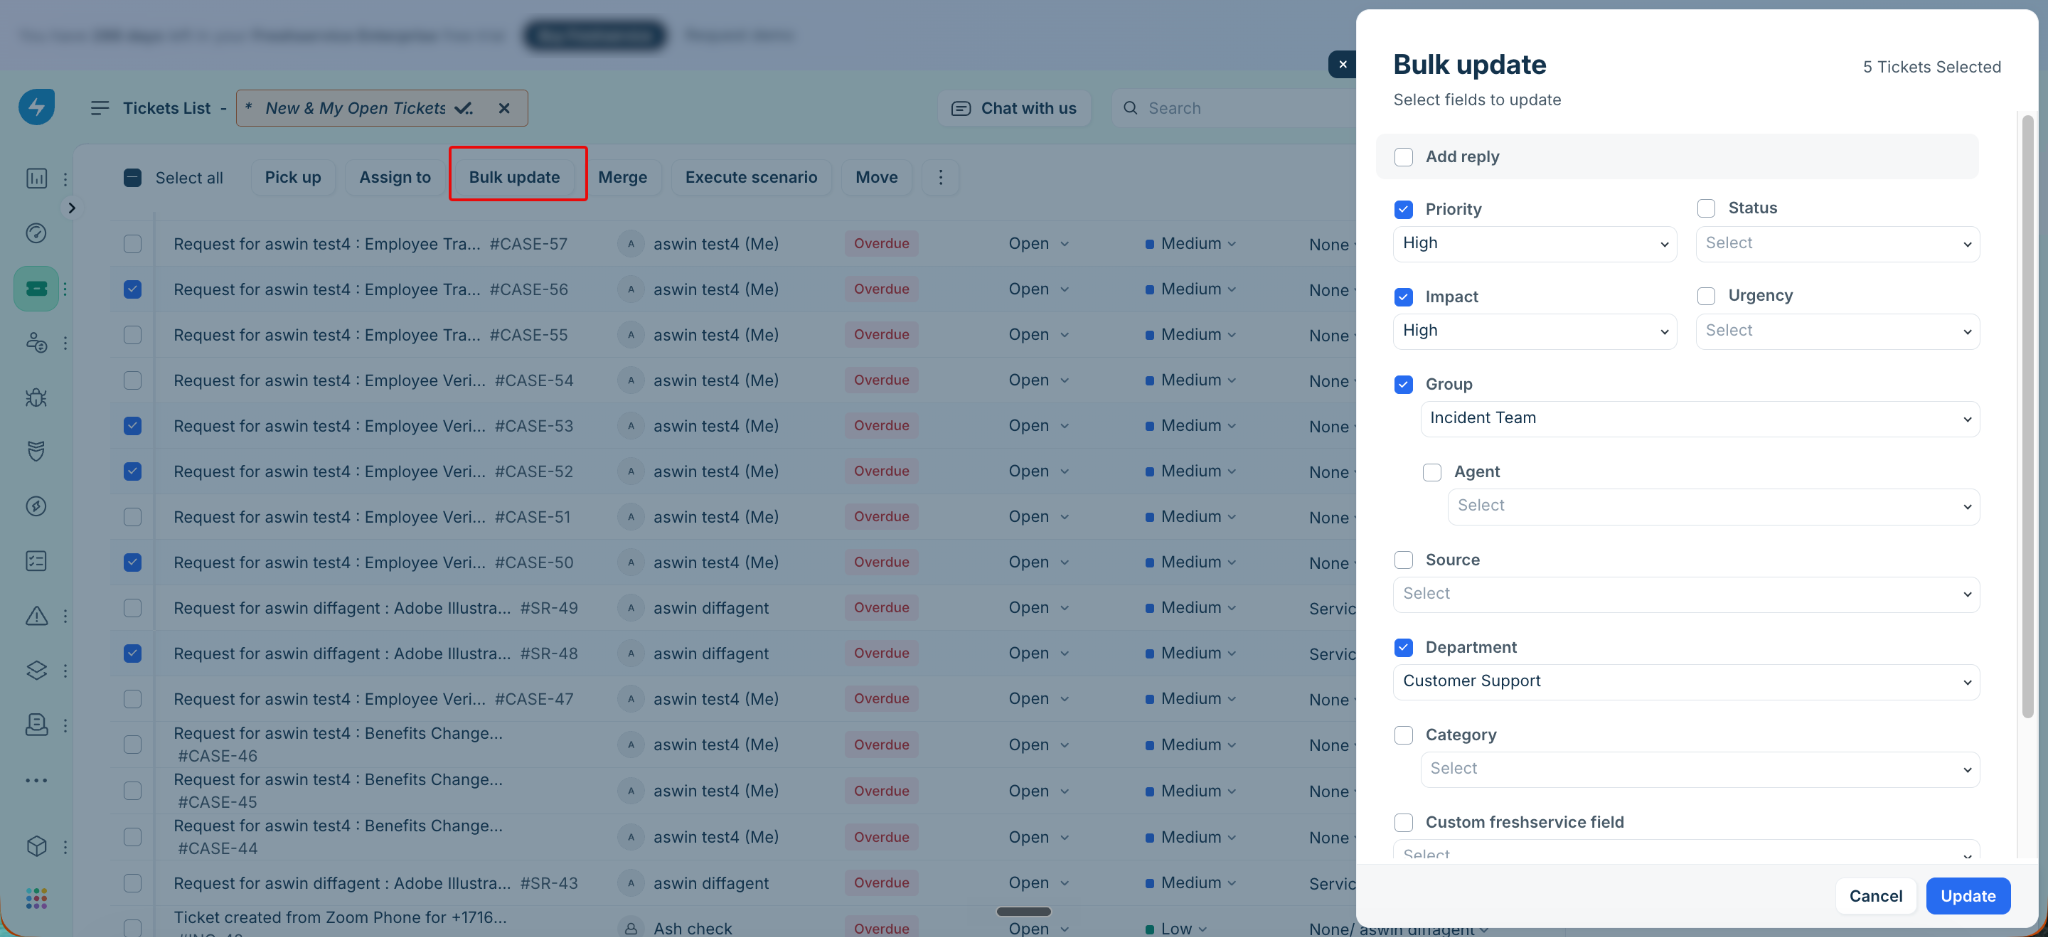
Click Update.
Update tickets by using scenario automation
Use scenario automation to save a set of ticket field updates that you perform frequently, such as assigning tickets to a group and updating their category. After you create a scenario automation with the required field updates, you can execute it on selected tickets to apply those changes.
To update the tickets using scenario automation, follow these steps:
You can update only up to 30 tickets at a time.Create a scenario automation that applies the desired ticket field updates. For instructions, see Create and run scenario automations.
Go to the ticket list view and select the tickets to update.
Click Execute scenario, then select the scenario automation to run.
Click Execute to apply the configured field updates to the selected tickets.

Update tickets by using supervisor rules
Use supervisor rules to automatically update tickets that meet specific time-based or event-based conditions, such as escalating overdue tickets or updating ticket fields after a specified period. Supervisor rules run every hour and apply the configured actions to tickets that match the defined conditions.
To update the tickets using supervisor rules, follow these steps:
The rule applies only to tickets created or updated within the last 30 days.Create a supervisor rule that defines the ticket field updates you want to apply. Start by going to Admin > Supervisor Rules > New Rule.
After giving a name and description for the rule, define the conditions that determine which tickets the rule applies to.

Configure the actions that update the required ticket fields.
Save the rule. The supervisor rule automatically runs every hour and updates matching tickets.
For detailed instructions on updating tickets using supervisor rules, refer here.
Update tickets by using scheduled workflows
Use scheduled workflows to automatically update tickets at a specified date and time or on a recurring schedule. Scheduled workflows run on the defined schedule and apply the configured actions to tickets that match the specified conditions.
To update the tickets using scheduled workflows, follow these steps:
Create a scheduled workflow that defines the ticket field updates you want to apply. Start by going to Admin > Workflow Automator > Problems > Scheduled workflows.
Click Create, and then select Workflow.

Provide a name and description for the workflow and click Create to proceed.

Configure the schedule that determines when the workflow runs.

Define the conditions that identify the tickets to be updated, and configure the required actions.

Activate the workflow. The scheduled workflow runs according to its configured schedule and automatically updates matching tickets.
For detailed instructions on updating tickets using scheduled workflows, refer here.
Some important notes when you use scheduled workflows:
The primary condition node does not support Match Any or Match All conditions.
You cannot configure an action for the No Condition path of the primary condition node.
When a scheduled workflow runs, the following records are excluded:
Assets in Trash
Tickets that were last updated more than six months ago
Closed or resolved tickets
Deleted or spam tickets
Tickets awaiting approval
Update tickets using the Freshservice API
Use the Freshservice API to update ticket fields programmatically across a large number of tickets.
Export the required tickets from your Freshservice account. Watch the following video for step-by-step instructions.
Use the Update a ticket API to update the required ticket fields. For instructions, see Freshservice API documentation.